Community Brag Posts

Farmhouse Bedside Table

Submitted by Anonymous (not verified) on Tue, 01/05/2016 - 07:51

Super easy project. Both tables matched almost identical. Buying wood from Home Cheapo/Nowes makes it a little tougher because they aren't as straight as they should be, but a little sanding never hurt. Plan on making a few more for the other rooms.

Estimated Cost
$50-$55 per table
Estimated Time Investment
Day Project (6-9 Hours)
Finish Used
Jacobean and polyurethane on top with antique white spray paint on bottom.
Recommended Skill Level
Intermediate

Comments

perrybarnett

Tue, 01/05/2016 - 09:17

I forgot to include in the description that the price is assuming you have the tools and screws, might be a little higher if you need to buy the hardware depending on what you buy.

Reclaimed wood - look Headboard and . modified platform bed.

Made wider for a king and modified platform bed. Used a weathered oak stain followed by a 50/50 whitewash.

Estimated Cost
$300 ish
Estimated Time Investment
Week Long Project (20 Hours or More)
Finish Used
Used a weathered oak stain followed by a 50/50 whitewash. Varythaned.
Recommended Skill Level
Intermediate

A little take on Ana's sink

Submitted by Anonymous (not verified) on Sun, 02/19/2023 - 21:55

This was a build to convince my wife that I should do the cabinets in our new house...now I have to do them all. I should have just said, Sure, go to Ikea!"

Comments

Reclaimed Wood Headboard (air quotes)

Submitted by AlexWS on Mon, 10/31/2011 - 11:07

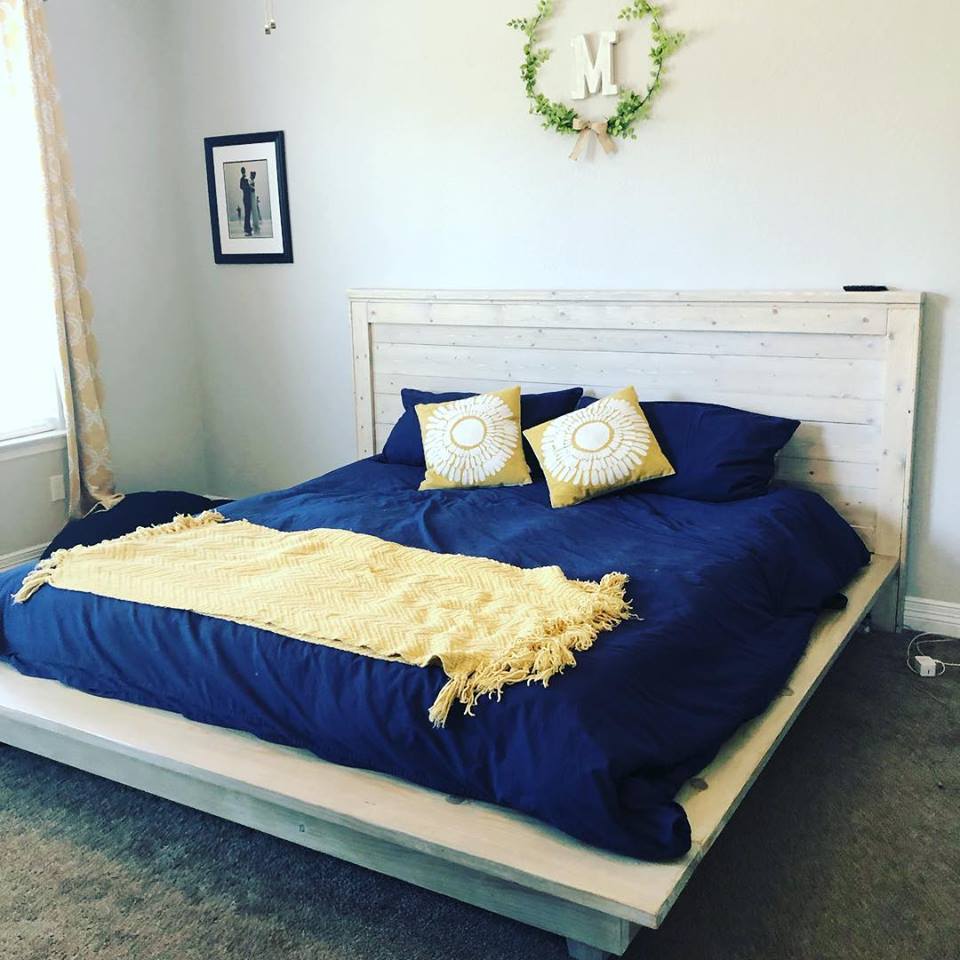
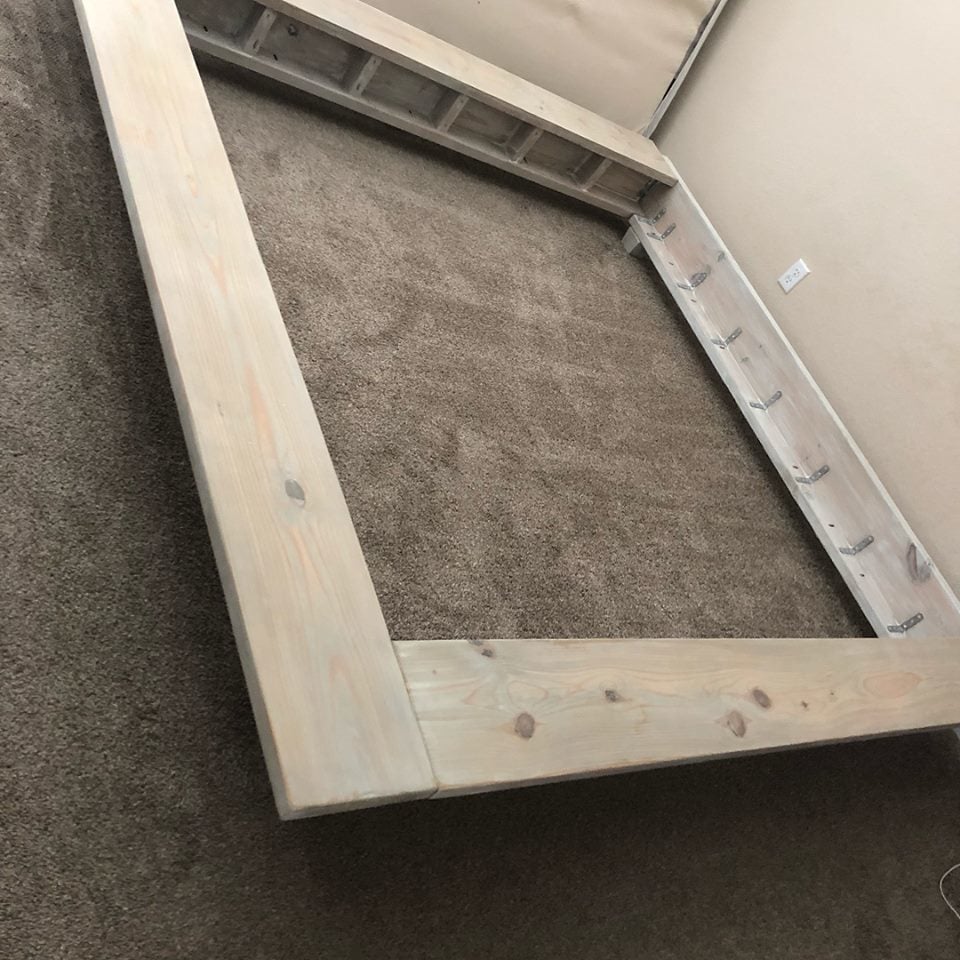
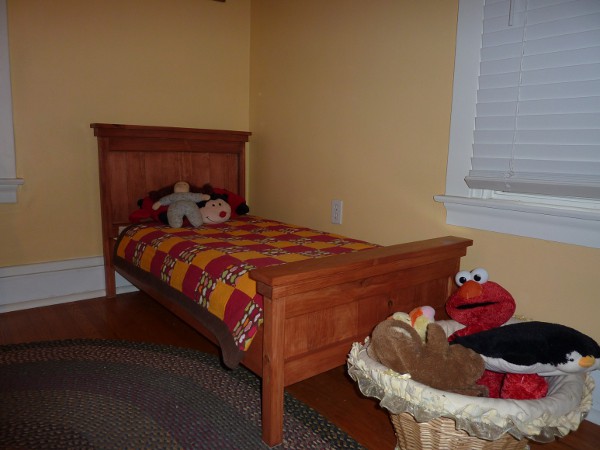
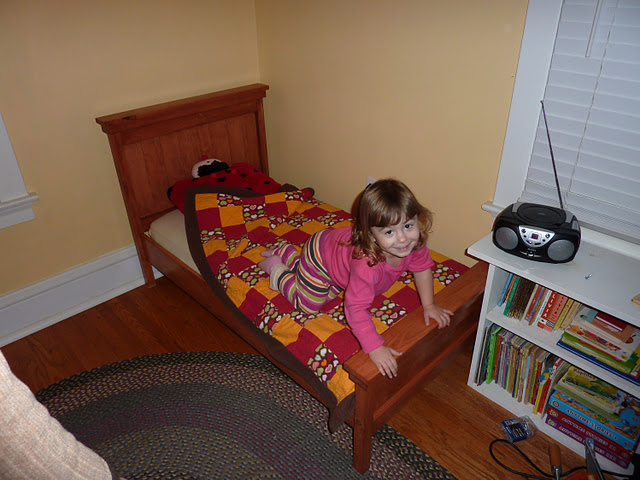
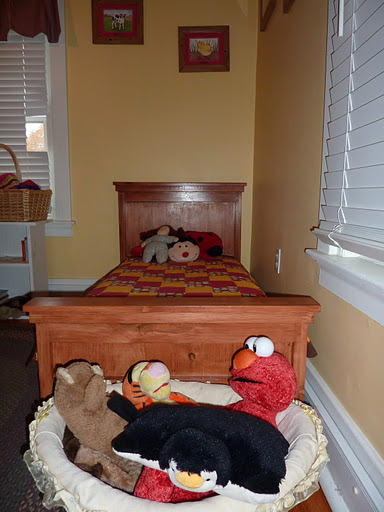
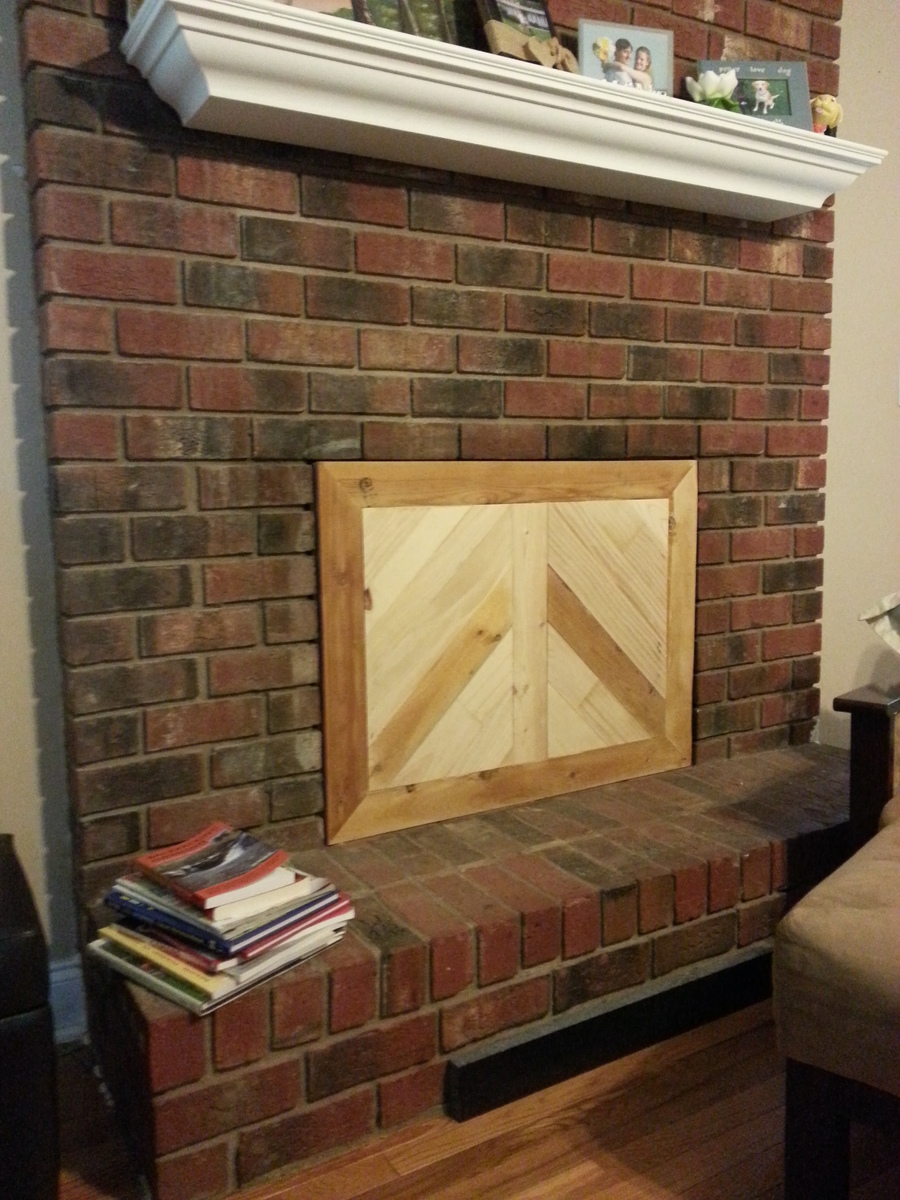
OK, first off this is not in any way, shape or form the Ana White plan for the Reclaimed Wood Headboard. However, I had to include a plan link and it IS a headboard made with reclaimed wood. So yea, air quotes. Second, I apologize for the poor quality photos of my recent brag posts. The digital camera is gone so these are iPhone specials. On with it now. This is my quick and dirty way of making a headboard, and kind of cheating. All you're looking at in these photos is some 2X3s and 2X4s around an old door to the root cellar in my basement. That's right, for once my main source of building material was not a pallet. As I took the door off the old rusty hinges and cleaned off the dust and cobwebs it occurred to me that this was probably original to the house from 1920. With that kind of history in mind the only thing I could do was take a saw to it and hack off 18 inches, oops. The 2X3 posts on the side were actually supports for a shelf that was made from a door(more on that to come). That shelf was actually found in the root cellar the door was for, this house has been pretty beneficial to me so far. The 2X4 top is from a pallet and aside from a 2X6 at the bottom to attach it to the bed, that's it. After that it was simply a matter of some oops paint on the trim(that would be the red) and a bit of sanding once it dried. The white is simply the condition the door was in.

Estimated Cost
Free
Estimated Time Investment
An Hour or Two (0-2 Hours)
Finish Used
Oops paint and a quick sanding for the trim, years of aging for the main portion.
Recommended Skill Level
Starter Project

Comments

debandtom25

Thu, 11/10/2011 - 06:53

Totally attaching this to my Pinterst acct. I love when items are re-purposed and you did a fab job here!

Small Table

I made this little table for my sister-in-law. She needed a specific size to fit in between some bookshelves. She is going to put a lovely fish bowl on top. It cost me about $10 for the wood and paint. I modified Ana's plans for the "simple, cheap and easy console table" to fit the space.

Estimated Cost
$5 for lumber, about $10 total with other materials.
Estimated Time Investment
Afternoon Project (3-6 Hours)
Finish Used
I used Rustoleum Gloss Black paint/primer in one. Then I used minwax polycrylic.
Recommended Skill Level
Beginner

AG doll couch

My very first Ana's project, I used the left over baseboards from our house remodel and the extra fabric from our tablecloth for the cushions. And first time using power tools and the kreg-jig I got for my birthday .

Estimated Cost
$0.00 all recycled materials
Finish Used
Semi-gloss white paint
Recommended Skill Level
Beginner

Comments

Modular Corner Office and Craft Desk

I started creating the furniture for my new craft room by making the Easy Three Cube Benches I found here.  I modified them so that my cats could lay on top and look out the windows.  The cube benches gave me the confidence to design a printer stand.  Using Ana White's technique of "build the box" and then add the rest, I designed a custom printer stand I am so very proud of!  After the printer stand, I moved on to the final piece that would complete my craft room, a modular desk with plenty of workspace to complete any craft I want.  I modified each module a little to keep with the theme design of the room.  I created three modules.  The last one being a bookcase that is a modification of the Modern Craft Table bases.  I used better quality Oak plywood for the desk top, and good pine and whiteboard plywood for the modules.

Estimated Cost
$500
Estimated Time Investment
Week Long Project (20 Hours or More)
Finish Used
For the modules I used Valspar Furniture Paint in ultra white. For the desk top I used Minwax Simply White stain and then Minwax Dark Walnut over that to create the "driftwood" style look. I sealed the desktop with about 5 coats of Minwax wipe-on poly.
Recommended Skill Level
Intermediate

Comments

melkaye

Wed, 02/19/2020 - 13:53

Could you tell me the measurements for the top? I absolutely love your table! 

sukheeso

Wed, 04/07/2021 - 14:07

Hi! This is very similar to what I'm hoping to make. I was wondering what the length of the left side of the desk was?
Thank you!

Rustic Desk

Submitted by Anonymous (not verified) on Fri, 02/24/2023 - 11:04

This was an easy project t to build. Decided to go out of my comfort zone and burn all of the wood before adding the finish. I loved the design of these plans and my aunt wants me to build one for her.

Built from Plan(s)

Comments

A Lovely Pair of Planters with Finials

Submitted by Shelly2215 on Fri, 10/25/2013 - 05:46

I wanted a fairly simple project to get started with, something I could make use of around my home and to help me get familiar with my new power tools - well, this project did the job nicely!
I'm extremely happy with the way the planters turned out and have already had other people asking me about them as they would like some too.
These planters worked out fairly expensive for me as the materials were extremely good quality and very heavy duty in size, I think I could get away with using slightly less robust materials to bring the costs down next time.
I had difficulty finding finials for the planters so I used some wooden turned eggs that I already had from my collection of pyrography blanks.
I can't wait for my next project now which will be a little more ambitious. I absolutely love Ana's website and can't wait to see what else I can make.

Built from Plan(s)
Estimated Cost
£80 a pair (UK)
Estimated Time Investment
Weekend Project (10-20 Hours)
Finish Used
Black Ash exterior wood paint from Culprinol.
Recommended Skill Level
Beginner

Entertainment Center

Submitted by Anonymous (not verified) on Thu, 01/07/2016 - 21:05

We had an oak armoire for our television and we needed to find something that fit our new 50" tv, an unexpected gift from my brother in law. This was perfect for the size we needed and the small space we had to put the tv.

Built from Plan(s)
Estimated Cost
$140
Estimated Time Investment
Weekend Project (10-20 Hours)
Finish Used
Stain and polyurethane
Recommended Skill Level
Intermediate

Helping "Foster" Care

Submitted by Anonymous (not verified) on Fri, 03/03/2023 - 06:45

We have started a 501 C-3 non-profit manufacturing company making furniture and giving all the proceeds to Foster Care Youths "aging"out" of Foster Care. Foster Care kids are trained on basic woodworking and carpentry skills and assist with the furniture manufacturing.

We are using Ana White's classic Adirondack chair design for our first project, and they are beautiful.

For more info see our website at www.fostercarefurniture.com

Thanks Ana for helping these kids!

Built from Plan(s)

Comments

Bella's bed

Submitted by EmuJane on Sun, 11/13/2011 - 15:25

Since my daughter loves to climb and was starting to get a gleam in her eye when it was time to get up from her naps, the time had come to give her a big girl bed. I'm not ready for her to be in the twin bed that we have because it's so high off the ground, so the toddler farmhouse bed is perfect for her. We did have to edit the plans for our crib mattress

Built from Plan(s)
Estimated Cost
$70.00
Estimated Time Investment
Weekend Project (10-20 Hours)
Finish Used
Minwax water-based stain in Vermont Maple, 2 coats Minwax Polycrylic, final coat of paste wax
Recommended Skill Level
Beginner

Comments

Ana White

Thu, 11/17/2011 - 01:02

So sorry for the tech problems. I can't wait to see your toddler farmhouse bed! If you send me images I will upload to the post. Thank you so much for taking your time to submit a brag post. Ana

Knockoffwood(at)gmail.com

Angie Overton

Sun, 04/14/2013 - 12:19

I've been looking to make a toddler bed for a friend and this is the perfect one. I like the headboard without the arch and I too need to be able to fit a crib mattress in it. Would you happen to have the dimensions that are needed for it to fit a crib mattress?

X-Large Dog Crate

Submitted by Sanna on Sat, 10/26/2013 - 21:19

Found these plans for the dog crate and decided to build one for my large Rottweiler. It's large and tall enough for him to stand in (29"W x 41"L x 32.5"H). It didn't take long to cut and put all the pieces together, the longest part was staining the top and putting the urethane coating on it. The cost was really reasonable, I purchased the wood, used paint and stain I already had from previous projects. I plan on building more projects soon.

Built from Plan(s)
Estimated Cost
$50
Estimated Time Investment
Weekend Project (10-20 Hours)
Finish Used
Black spray paint on body and Maroon latex paint for accent panels. Stained the top.
Recommended Skill Level
Beginner

Comments

AllegraYazz

Mon, 12/09/2013 - 03:22

I would like to build the X large kennel for my dog.
is it possible to have the measurements for the X large version.
the large version is not big enough for my sweetie.

thank you so much

AllegraYazz

Mon, 12/09/2013 - 03:22

I would like to build the X large kennel for my dog.
is it possible to have the measurements for the X large version.
the large version is not big enough for my sweetie.

thank you so much

Garage mushroom with hidden storage

Submitted by Anonymous (not verified) on Sun, 01/10/2016 - 19:33

this was my first project this big took me about 15hours and I'm extremely happy at how it turned out 

Estimated Cost
$150
Estimated Time Investment
Weekend Project (10-20 Hours)
Finish Used
Kona sealer ,min wax
Recommended Skill Level
Beginner

Farmhouse Table

Submitted by Anonymous (not verified) on Sat, 05/18/2019 - 15:40

First time major project. My wife wanted a kitchen table. Did tons of research to find the plans I wanted, which is a modified version of the plans on http://image.ana-white.com/2012/05/pottery-barn-benchwright-farmhouse-d… .

Breadbox ends was changed to a tounge and grove ends with wooden dowels as anchors to hold the ends.

Finished with Natural Danish oil, and polyurethane topcoat.
Thanks for Nathan1342 for the advise in getting started.

Estimated Time Investment
Week Long Project (20 Hours or More)
Finish Used
Natural Danish oil
Recommended Skill Level
Intermediate

Custom Blue Bleached Table

Submitted by Rickster on Fri, 03/10/2023 - 12:54

Here is a table I made for a friend. 27.5’’ wide x 78’’ long x 36’’ high. It was custom made for the dimensions he needed to fit in his condo. I used pine boards and legs from Lowes, and Bleached Blue stain. Then put 3 coats of lacquer on it.

Built from Plan(s)

Comments

Simple Play Kitchen

Submitted by kpcrash on Sun, 11/27/2011 - 15:36

This is based on the simple play kitchen plan from Ana. The burners are 'upcycled' from an old oven and the handles/'pan rack' are simply 3/4" dowel drilled out using a forstner bit and glued. The one thing I did do is use shellac as the finish. This is for my 2-year old who will of course still pick up a snack from wherever he left it and keep going. Shellac is non-toxic when dry (it's used on jelly beans after all), and polishes nicely. Was able to save quite a bit on this project (even though the plywood used was cabinet grade) by getting all of the hinges from the local ReStore - $1 a pound for hinges.

Estimated Cost
$60
Estimated Time Investment
Weekend Project (10-20 Hours)
Finish Used
Polished Shellac
Recommended Skill Level
Beginner

Comments

Margaret Kubiszyn (not verified)

Mon, 11/28/2011 - 13:57

Great job - love that you recycled the old stove elements!

claydowling

Mon, 11/28/2011 - 14:51

Like the kitchen, and glad to see a fellow lover of amber shellac on here. Just a bit of advice, you don't want shellac as your top coat for a child's item. It tends to pick up dirt, and it's damaged by water.

Either an oil based or water borne polyurethane would be an ideal sealer coat. The water borne has the advantage of drying very quickly, especially if you wipe it on. Both finishes are non-toxic once dry (as are nearly all finishes). I recently had excellent luck with Varathane's products, which are available at Home Depot. It's sold as a floor finish (at which it excels), but it's generally useful. The floor finish has Aluminum Oxide added in, which is the grit on sand paper. Tough stuff, and it will stand up to whatever your kids do.

kpcrash

Tue, 11/29/2011 - 14:22

I typically do finishes for guitars and have had great success with waterborne lacquers such as KTM-9 or EM Coatings products, and highly considered using one of those on here.

Fireplace Insert

Submitted by SaraLodise on Mon, 10/28/2013 - 14:41

I almost jumped for joy when I ran across this pin on Ana's Pinterest board. Our fireplace is stained black and smells awful during low pressure weather. This project was actually one of my October Scrap Projects, but I felt it deserved it's own post. I had the left over wood and peg board, so all I had to buy was the foam insulation and bumpers.

We are still deciding if it needs stained or not, so let me know if any of you have an opinion. The darker pieces are 2x4 studs we salvaged when we took down our kitchen wall so they have a nice 40 year age to them.

Here is the link to the instructions: http://www.prettyhandygirl.com/2013/10/build-fireplace-insert-draft-sto…

Estimated Cost
$20
Estimated Time Investment
Afternoon Project (3-6 Hours)
Finish Used
none
Recommended Skill Level
Beginner

Comments

Val Manchuk

Mon, 10/28/2013 - 22:54

Hi Brittany,

Nice work! I think a rich stain color similar to the darker bricks would really tie everything together so that the insert and the white shelf don't compete with one another.

Val
artsybuildinglady.blogspot.ca

Tryde Coffee Table

Wife showed me a picture and I found instructions from the projects already on here and did it less than a week. I had the wood part done in about 5 hours and with two coats of staining and a couple of the clear coat and me trying to find some time to do it while working a lot you could probably have this done in a weekend if you were free for the whole weekend. 

Built from Plan(s)
Estimated Cost
$75. This includes brushes and stain. Hardware. Wood. If you need to buy saws or tools, etc. this doesn't include that.
Estimated Time Investment
Weekend Project (10-20 Hours)
Finish Used
Mission Oak and Clear Satin Finish
Recommended Skill Level
Beginner

Square Dining Table with Storage

Submitted by mckittt09 on Mon, 05/27/2019 - 10:30

Square dining room table with storage. My wife wanted a square table and could not find one in stores that she liked. We ended up with this table. Briarsmoke is the stain on the table. Used various wood for the table. 2x4s, 4x4s, 4x8 sheet of 3/4" birch, 1x6 & 1x8 premium pine on the top. Chairs were bought at Living Spaces and match really well.

Estimated Time Investment
Weekend Project (10-20 Hours)
Finish Used
Briarsmoke
Recommended Skill Level
Intermediate