Community Brag Posts

rustic x sofa table

I love this site. We needed new furniture in are house and didn't want to spend a bunch of money. Finding the Rustic x plans was a life saver.

Built from Plan(s)
Estimated Cost
$100
Estimated Time Investment
Weekend Project (10-20 Hours)
Finish Used
White paint and kona stain.
Recommended Skill Level
Beginner

My First Fully Finished Project ! YAY Thanks Ana

Submitted by fariha ali on Wed, 01/13/2016 - 21:03

I am very excited to post this project .


I used the Schoolhouse Chair with Writing Pad Desk Plan exactly and did not stain the wood. Just gave it a coat of PU and there it is .

Its not a perfect project (since I used a Jigsaw ... Yes I did as no other tools were available :() but carefully cut them straight using guide.


As a  first-timer I am happy with the result... sort of... But Thanks for inspiring Ana & Jaime !!!

Estimated Time Investment
Weekend Project (10-20 Hours)
Finish Used
One PU coat and sanding ..
Recommended Skill Level
Starter Project

Farmhouse Entryway console

Submitted by Anonymous (not verified) on Fri, 03/17/2023 - 15:29

I saw these plans several months ago and finally got the time I wanted to make it. I chose oak because it’s the best and prettiest stained. I love the way it turned out!

Comments

Perfect!

Submitted by lbadger on Thu, 12/01/2011 - 06:59

I went round and round trying to figure out what type of shelving to install in our kitchen to go above a cabinet below that will be topped with a rough live edge pine slab (not yet completed). I stumbled across your industrial chic shelves post, found an old board laying around the yard and whalla! As always, thanks for this amazing site!!

Estimated Cost
n/a
Estimated Time Investment
An Hour or Two (0-2 Hours)
Finish Used
Cleaned up a bit, sanded down a bit and top coated with poly
Recommended Skill Level
Beginner

Comments

Young Mrs. (not verified)

Thu, 12/22/2011 - 12:44

Hi! Love how your shelves turned out. I was just wondering how much weight these shelves would hold. Looking at yours with plates on them, it seems like they hold quite a lot!

Did you use larger L-brackets or the same size that Ana used?

Thanks for posting your shelves!

Patrick's Jelly Cupboard

Submitted by tamicaleb on Thu, 10/31/2013 - 16:30

I am built two of these cupboards for my dining room. I am calling them pie safes though. Making two added twice the work but I only had to think through the steps once.

Estimated Cost
$250 to build two. That included paint, hinges, hardware etc.
Estimated Time Investment
Weekend Project (10-20 Hours)
Finish Used
Interior painted butterscotch. Exterior spray painted black then painted over with a muted red. Distress sanded and then wiped down with dark walnut stain.
Recommended Skill Level
Intermediate

Customized Entry Console

I changed the size and style of the Pottery Barn plan to fit our space and match the Fancy Hall Tree that we recently completed. We think it came out great so wanted to share.

Estimated Cost
$240
Estimated Time Investment
Week Long Project (20 Hours or More)
Finish Used
Min wax aged oak gel stain and tung oil
Recommended Skill Level
Advanced

First bed frame.

Submitted by msucharski on Tue, 06/04/2019 - 02:46

I work at a lumber yard, and this was built with "garbage" door jambs. 

Built from Plan(s)
Estimated Cost
$70.00
Estimated Time Investment
Week Long Project (20 Hours or More)
Finish Used
Rustolium wood stain. Kona.
Recommended Skill Level
Intermediate

Shanty Side Board and Hutch

Submitted by Anonymous (not verified) on Fri, 03/24/2023 - 09:05

This is the Shanty Chick Side Board and Hutch that some of my high school students chose to build. It is going to the Texas state contest in Corpus Christi next week.

Built from Plan(s)

Comments

Farmhouse Coffee Table

This was my first project and while I prepared to build it I had to endure some real negative forces coming from people who knew my building skills. But I was heart set on doing this and proving people wrong.

As you can see from the pictures I made some adjustments to the table as I did not want a square table rather a rectangle to fit perfectly in front of my sectional, LOL.

I could not believe how well it came out and how easy it was to build. Thank you Ana for this site as I know I would never have taken on this project without finding this site. Furniture building is something I always wanted to do and have as a hobby. I will NEVER purchase another piece of furniture from a store again!

I have included a few pics to show the progress.

Estimated Time Investment
An Hour or Two (0-2 Hours)
Finish Used
Initially stained using Ebony minwax then painted over with Pottery Barn Blue (Van Courtland Blue). Then scuffed with sandpaper to give some distressing.
Recommended Skill Level
Beginner

Comments

Loft bed with stairs

Submitted by Rory1976 on Mon, 11/04/2013 - 11:38

I've made three of these loft beds. The plans are very easy to follow, and once assembled, they form extremely solid structures. Thank you very much Ana, what you are doing us very much appreciated.

Estimated Cost
£150
Estimated Time Investment
Week Long Project (20 Hours or More)
Finish Used
Redwood wood stain three coats
Recommended Skill Level
Beginner

Comments

Wood pallet wine rack

Submitted by Anonymous (not verified) on Tue, 01/19/2016 - 20:15

My wife showed me this wine rack on a you tube video so I checked it out. She really wanted one so I made her two of them. I also made a longer one for liquor bottles as well, ill post it as soon as I hang it on the wall.

Estimated Cost
$10 for the stain
Estimated Time Investment
Afternoon Project (3-6 Hours)
Finish Used
The stain was English chestnut
Recommended Skill Level
Intermediate

Modern Cubby Shelf with hairpin legs

I built this modern cubby storage shelf by making a few modifications to the Rolling Cubby Bench plan. It's a quick project with extra bright paint to add a bit of fun. Check out all of my tips for building this fun storage bench at https://mamaneedsaproject.com/modern-toy-storage-project/ . 

Built from Plan(s)
Estimated Time Investment
Afternoon Project (3-6 Hours)
Finish Used
White paint, Minwax Polyshade - Mission Oak, Pink paint - Cerise by Sherwin Williams (SW6580)
Recommended Skill Level
Beginner

An adaptation of the Rustic Bookshelf!

Submitted by Anonymous (not verified) on Tue, 03/28/2023 - 16:44

During Covid, my husband and I renovated our mountain house. After taking down a wall enclosing a staircase, we were left with awkwardly long pony wall. Originally we planned to do built in bookshelves, but then I decided the x bookshelves would look good and be a lot easier. So we customized the measurements and built them. Then I decided we really needed a bar space, so we built another x bookshelf around the measurements of an inexpensive bar fridge and voila! They look great and we get lots of compliments on both!

Built from Plan(s)

Comments

Easiest Chalkboard Shelf from Scraps

Submitted by jlamorey on Wed, 12/14/2011 - 10:19

I loved this when I saw it posted the other day, it really doesn't take long to make and adds character to our kitchen! I added a dowel that i sanded a little on one side to the long end of the 1x4 so that the chalk won't slide off, just something that I can see happening here.

Estimated Cost
$6 - can of chalkboard paint and hooks
Estimated Time Investment
An Hour or Two (0-2 Hours)
Finish Used
primed and then spray chalkboard paint. I sanded the corners and edges a bit.
Recommended Skill Level
Starter Project

Factory Cart Coffee Table with Storage

I have been longing to make a factory cart coffee table for years after seeing one in a local antique store in Jacksonville Florida. I started by following the dimensions from Ana Whites table and then decided to make the table top with the ability to open up into storage. I followed the plans and updated with hardware that I (painstakingly) pieced together from various sites online. I love the industrial feel the cast iron hardware brings to this adaptation and cannot wait to start building matching end tables. Thank you Ana for the inspiration!

Built from Plan(s)
Estimated Cost
$200
Estimated Time Investment
Week Long Project (20 Hours or More)
Finish Used
Minwax provincial stain for the primary and minwax espresso to detail the distressing and edges. Finished with 4 coats of minwax water based polyurethane
Recommended Skill Level
Intermediate

Comments

jahnkekong

Wed, 11/06/2013 - 17:11

Could you share any details about how you finished the wheels? I have a cart I am trying to refinish but stalling out on the cast iron parts. I really don't want to paint them, and I don't want them to rust.

Just noticed the Kupo Nut reference! I love it!

In reply to by jahnkekong

TongueAndTeak

Wed, 11/06/2013 - 19:16

Thank you so much for catching the Kupo nut reference! Haha I only felt it was fitting to add a little nerd flair :) rust oleum has a hammered black paint that also doubles as a rust inhibitor so it worked perfectly to touch up the cast iron parts and keep that rustic feel to the hardware. I finished with a clear top coat as I'm sure that I will end up constantly kicking the wheels by accident haha.

Cyber Sapp

Wed, 12/04/2013 - 18:45

I know you mentioned it was painstaking to find all of hardware, but can you share where you found the front casters? Also how did you put your stamp on it? I'm knew to woodworking so please excuse my ignorance.

In reply to by Cyber Sapp

TongueAndTeak

Wed, 12/04/2013 - 19:18

Hi cyber sapp! I was able to piece them together from eBay and etsy items. I searched for key words: "antique cast iron caster" or "factory/industrial cart wheel" and you should be able to find ones that work. I held out for the best deals I could. Be prepared to search quite a lot if you want to find the best deal.
As far as the decal is concerned, I created the template on illustrator and used it as a template to paint the decal on. I checked online and saw a few examples of transferring images on to wood that will probably be easier than hand painting. Hope this helps!!

Cyber Sapp

Wed, 12/04/2013 - 22:25

Thanks for the update. I made one similar to your modifications. I'm using storage too, I will share once I get the soft close installed. I'm looking for something that want slam fingers when it is closed. I also used Walnut to build it. It is solid like a tank with the hardwood, but came out pretty good. I made a few minor mistakes and now want to make one closer to yours.

Mandymoochops

Mon, 12/16/2013 - 23:30

What an amazing job you did, I'm still holding out for my end wheels too and you are so right about search search search. It doesn't help being in Canada with shipping costing so much for these too.

Love love love, well done

TongueAndTeak

Tue, 12/17/2013 - 21:23

Thank you very much!! I do not envy you right now as the search took me forever to find the right wheel that matched one I already had. I have had good luck in the past asking eBay sellers about changing to flat rate shipping options. Not sure if they have that option for shipping internationally but it never hurts to try! Keep up the good fight as the wheels REALLY pay off in the end.

Full Open Kitchen cart

Submitted by 914934 on Thu, 01/21/2016 - 10:27

Mom wanted an island for her new large kitchen but something that could be moved out of the way. With all her cabinets and drawers, we omitted the shelves and drawer from the original plan. We also wanted it full across the inside, not just half way. This allows her to put her stool on the shelf out of the way if needed. However, after getting all her furniture into her new home, she decided that she had enough in her new kitchen so she scoots it under the breakfast bar for now. 
This was made on a tight budget. We only had to purchase the 2x4s and casters.
We also used tongue and grove blue pine left over from our house for the bottom shelf and staggered scrap pine 1x4 & 1x6 boards for the top and then routered it to give it smooth rounded edges on top. 

Estimated Time Investment
Afternoon Project (3-6 Hours)
Finish Used
Unfinished. Mom hasn't decided if she wants to paint it or not.
Recommended Skill Level
Beginner

Indoor Picnic table for grandchildren

Submitted by tcm9966 on Thu, 06/27/2019 - 08:09

Easy build- used Coated boards for top and seating to reduce finishing work and potential splinters . It can go outside but shouldn’t LIVE outside.

I’m a little in love.

Estimated Time Investment
Afternoon Project (3-6 Hours)
Recommended Skill Level
Intermediate

Modern clock

Submitted by Anonymous (not verified) on Fri, 04/07/2023 - 13:51

From a picture I found on Pinterest

Comments

Kids' Playhouse (under stairs)

Submitted by kdins31 on Sun, 12/18/2011 - 09:22

Had the perfect space for a little playhouse under the stairs in the basement and it's been our plan for 4 years to do something. Finally, we did something. Wanted depth so I added the roof and portico. Also added cedar shingles that I picked up for $7 at HD. Inside I had extra laminate flooring so I put that down and added beadboard, chair rail and crown molding. There's also a small transom window above the small kitchen area. The kids love the barnhouse doors with old fashioned doorbell, mailslot and window. The bookshelf under the stairs was the final touch. I didn't use any plans from this awesome site but did, as always, get a bunch of tips and inspiration!

Pin for Later!

Kids' Playhouse (under stairs)

Estimated Time Investment
Week Long Project (20 Hours or More)
Finish Used
Dark walnut stain on cedar shingles.
Recommended Skill Level
Intermediate

Comments

Cindy from Indiana (not verified)

Sun, 12/18/2011 - 19:00

Wow! That is awesome!

You really did a great job on that! So imaginative, too. WTG!

Guest (not verified)

Sun, 12/18/2011 - 19:58

That is so stinkin' adorable! Fantastic job. I love everything about it. Your kids (and grandkids) will remember the playhouse under that stairs forever!

spiceylg

Mon, 12/19/2011 - 06:54

Wow, this is too cool! They are going to love love love this! Can't wait to see the kitchen reveal!

bhoppy

Mon, 12/19/2011 - 08:43

LOVE LOVE LOVE this!!!! It looks amazing! Makes me want to buy a new house with stairs. LOL

birdsandsoap

Sat, 12/31/2011 - 18:26

You did an amazing job on this. I'm planning a bunkbed with a similar facade. I love how cozy it looks without having to make an actual pitched roof. The shingles are such a nice touch that I may have to copy you! And it's wired for lights; you've really outdone yourself.

Guest (not verified)

Mon, 02/27/2012 - 21:14

I love this playroom you created. We are currently in the process of building a playroom under the stairs for our girls. Where did you find the door...it is exactly what I am looking for! What a wonderful job you did!!!

kdins31

Mon, 03/19/2012 - 14:26

Thanks to all of you for the nice comments! Re: the door, I just cut a plain 18x80 door slab ($21 from orange) and trimmed it out. I still need to put the window grille over the open space, and was hoping to find a cool 'speak easy' grille that fits the space.

Thanks again!

megan_m

Fri, 04/27/2012 - 09:07

this is such an amazing little space! great work!

MicheleInAlabama (not verified)

Thu, 05/03/2012 - 23:38

This has to be one of the most adorable things I've ever seen! What an awesome idea......how cool is that for the kids??! Love the lighting and the laminate (or is it hardwood) flooring inside. Even the stove is gorgeous! Such fond memories will be made there and remembered forever. Kudos!!

Amanda Rhoads (not verified)

Wed, 12/05/2012 - 15:34

Oh my goodness this is such an inspiration! However, as a beginning tool user, I don't think I could get my finishes so nice. How much experience had you had at this kind of stuff before? Was the area closed in before this project or did you do that too? I've got an open stairway into our basement and would be starting from scratch with ceiling, walls, etc. and have no experience hanging drywall or anything. I think it would take me a year. Great job, and thanks for sharing!

maggieasselin

Sat, 06/21/2014 - 12:51

Hi there!

I was just wondering how you made the door for your play house? We're basically stuck at this level in ours right now... ;) Thanks for any tips!!!

Gift crate (aka man crate)

Submitted by JoanneS on Sat, 11/09/2013 - 13:31

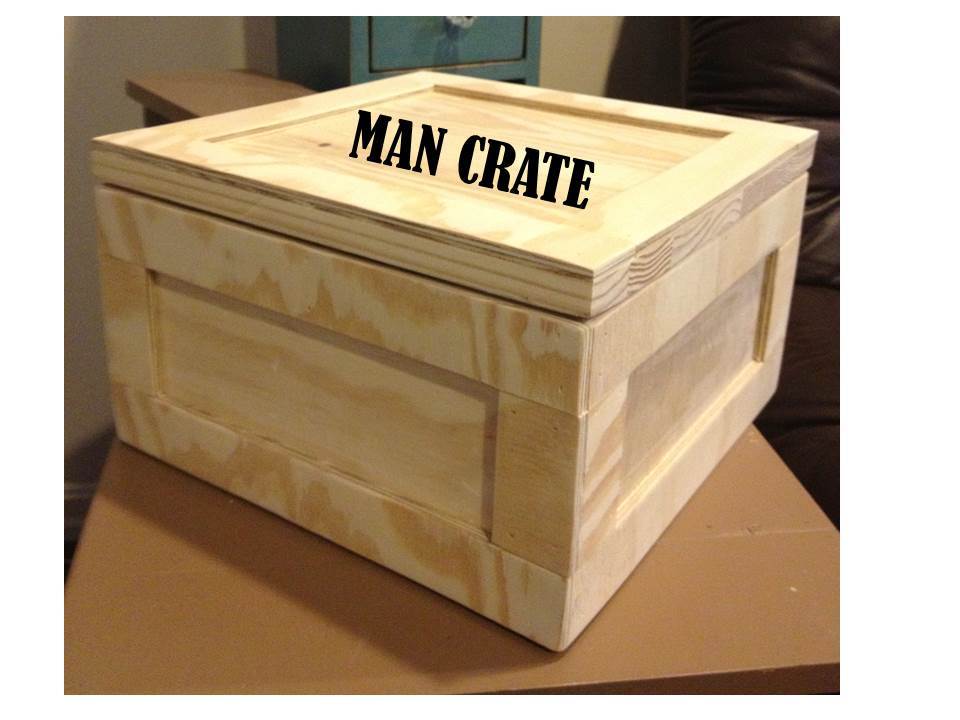
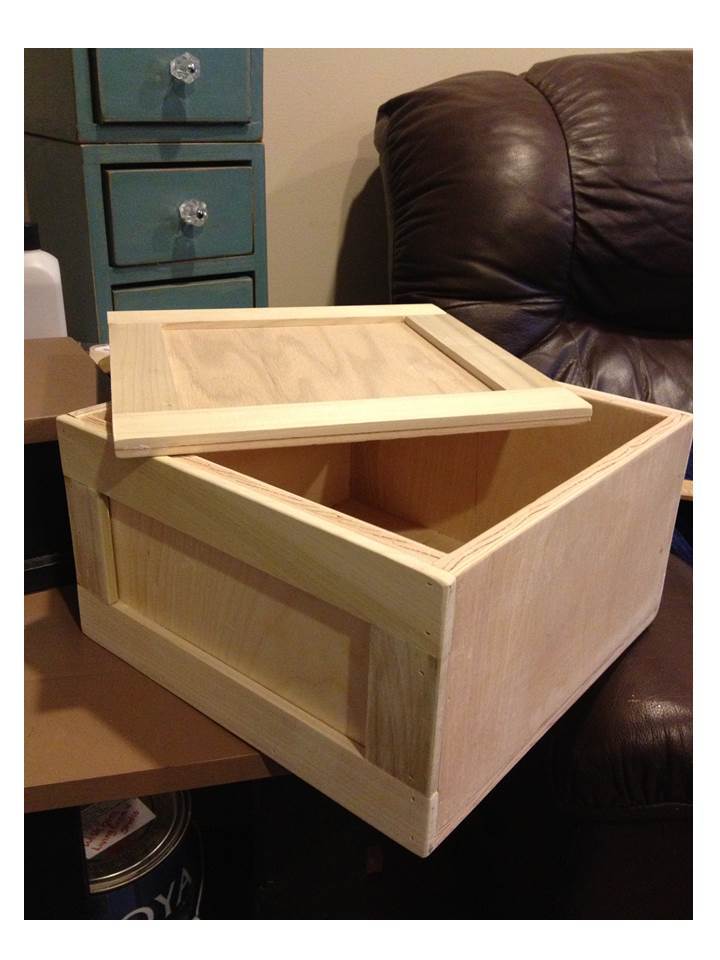
This is the prototype builds for the Plywood Gift Crate (man crate) plan. I had a great time developing and building this plan! I read a forum post about these and was inspired to do up a plan and build. When you give these as a gift, present it with the top nailed shut, and a crowbar for getting it open!

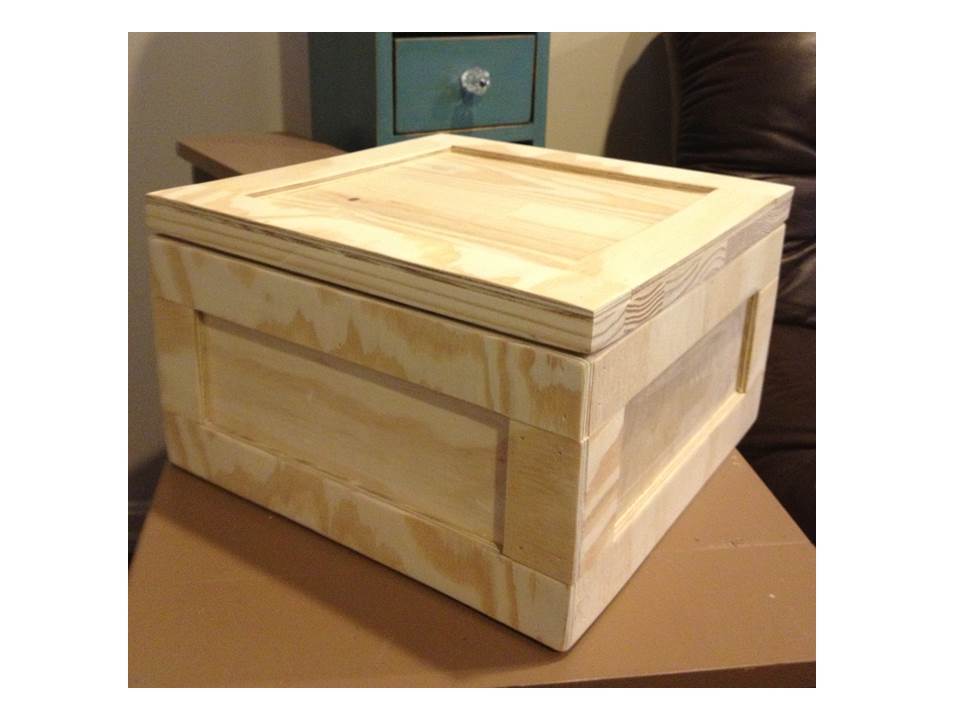
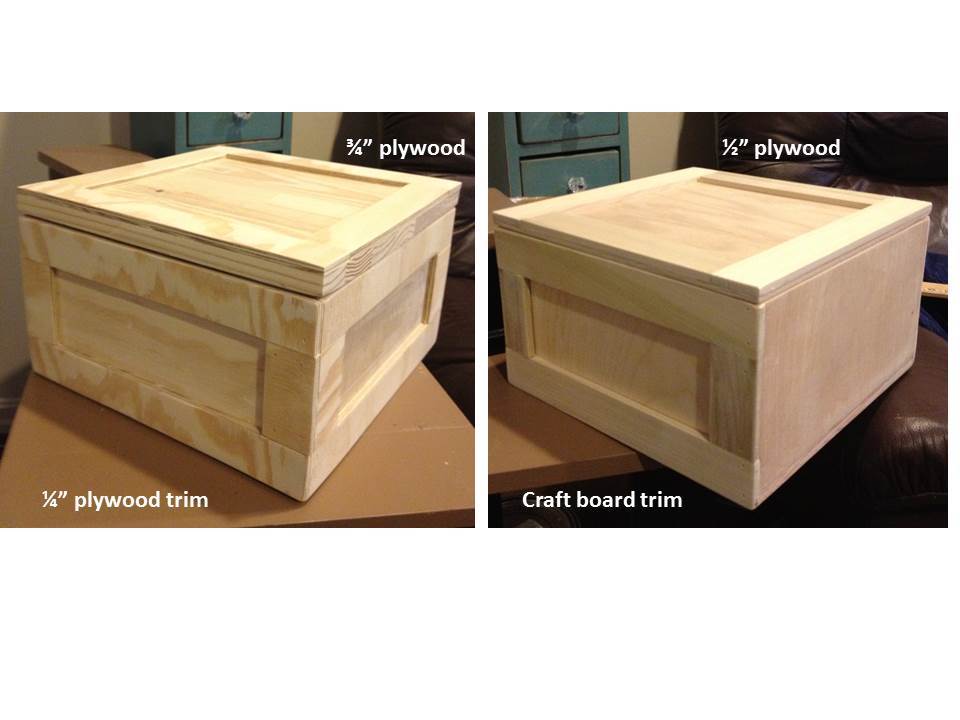
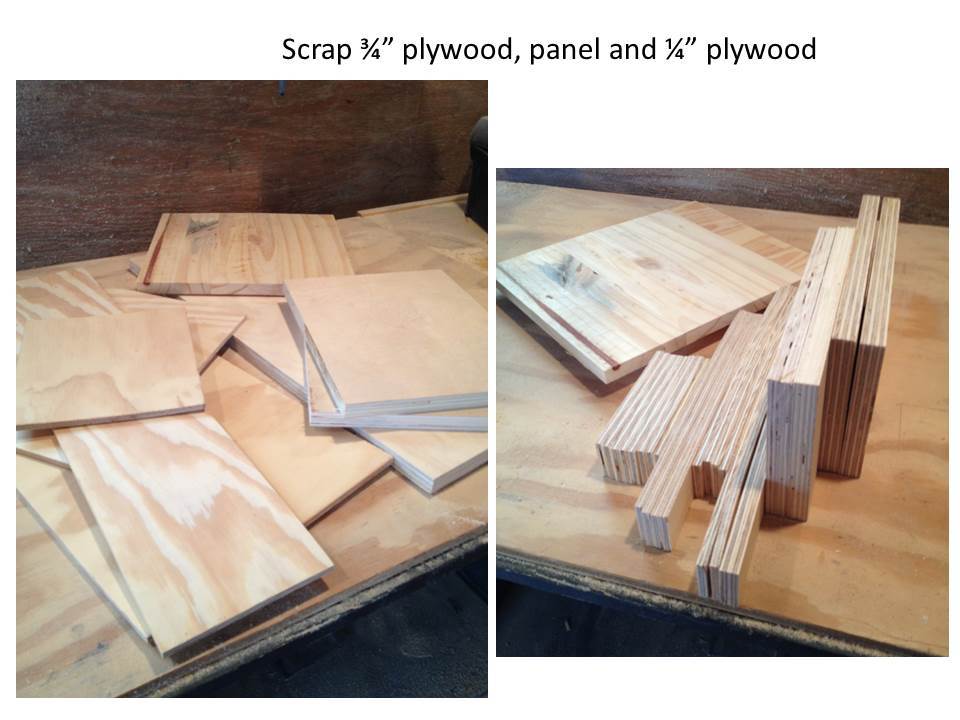
Two crates are shown. These each took a little over an hour to build. The 3/4" plywood one was entirely from scraps, and I purchased the poplar craft boards ($2 each) for the 1/2" plywood one. New wood would cost about $15. I left them unfinished like the inspiration. The picture just has the text added to it as a graphic. I do plan to stencil "man crate" on them though. The first prototype with 1/2" plywood scraps was made with a 1/4" scrap plywood top and poplar trim boards. My scrap top wasn't wide enough to cover trims on the sides, which is why the sides on that one are plain. The 2nd prototype was with 3/4" plywood scraps and uses strips of 1/4" thick scrap plywood for the trim boards.

If anyone is interested in different size crates, I've created a project calculator in Excel, that you can key in the desired dimensions and sizes of wood you plan to use, and the spreadsheet will give you the sizes for the pieces and a cut list. I couldn't figure out a way to attach that to the plan, but if you would like one, just send me a note through the contact form, and I'll email it to you.

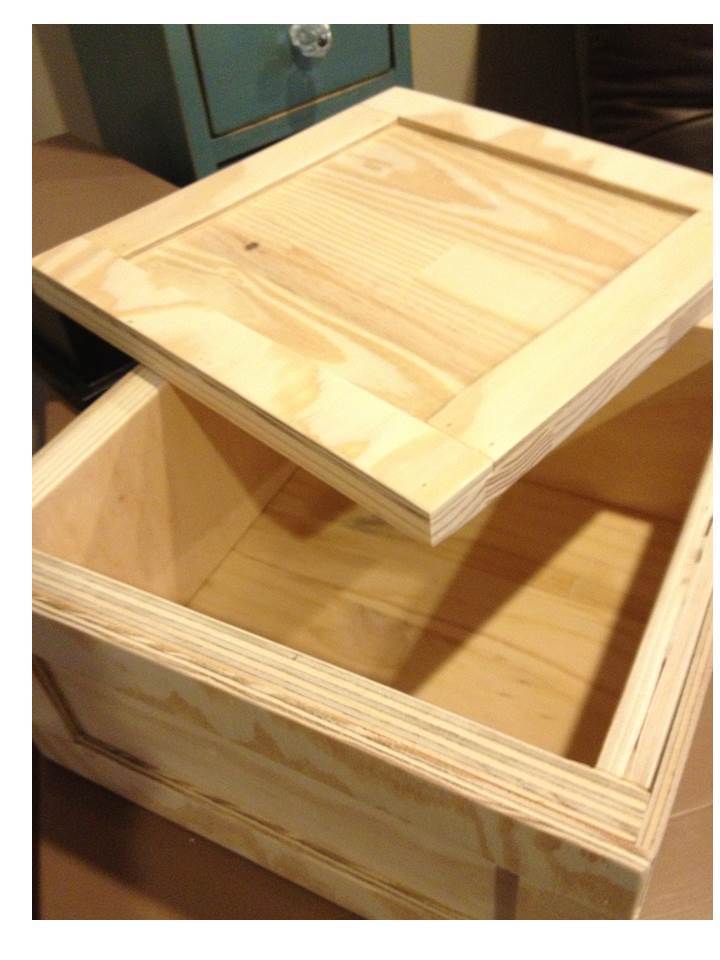
I hope you build these, it was a fun and easy build!

Built from Plan(s)
Estimated Cost
$8
Estimated Time Investment
An Hour or Two (0-2 Hours)
Finish Used
These are both unfinished, just sanded smooth. I'm planning to stencil "man crate" on them in black.
Recommended Skill Level
Starter Project

King Farmhouse Bed Frame

Submitted by Anonymous (not verified) on Sun, 01/24/2016 - 13:26

I spent 3 weekends building this for a friend. It was alot of work but it came out great!! He got the plans from Shanty-2-chic. We modified the plans alot to make it a truly unique piece. 

Built from Plan(s)
Estimated Cost
$400
Estimated Time Investment
Week Long Project (20 Hours or More)
Finish Used
varathane ash
Recommended Skill Level
Advanced