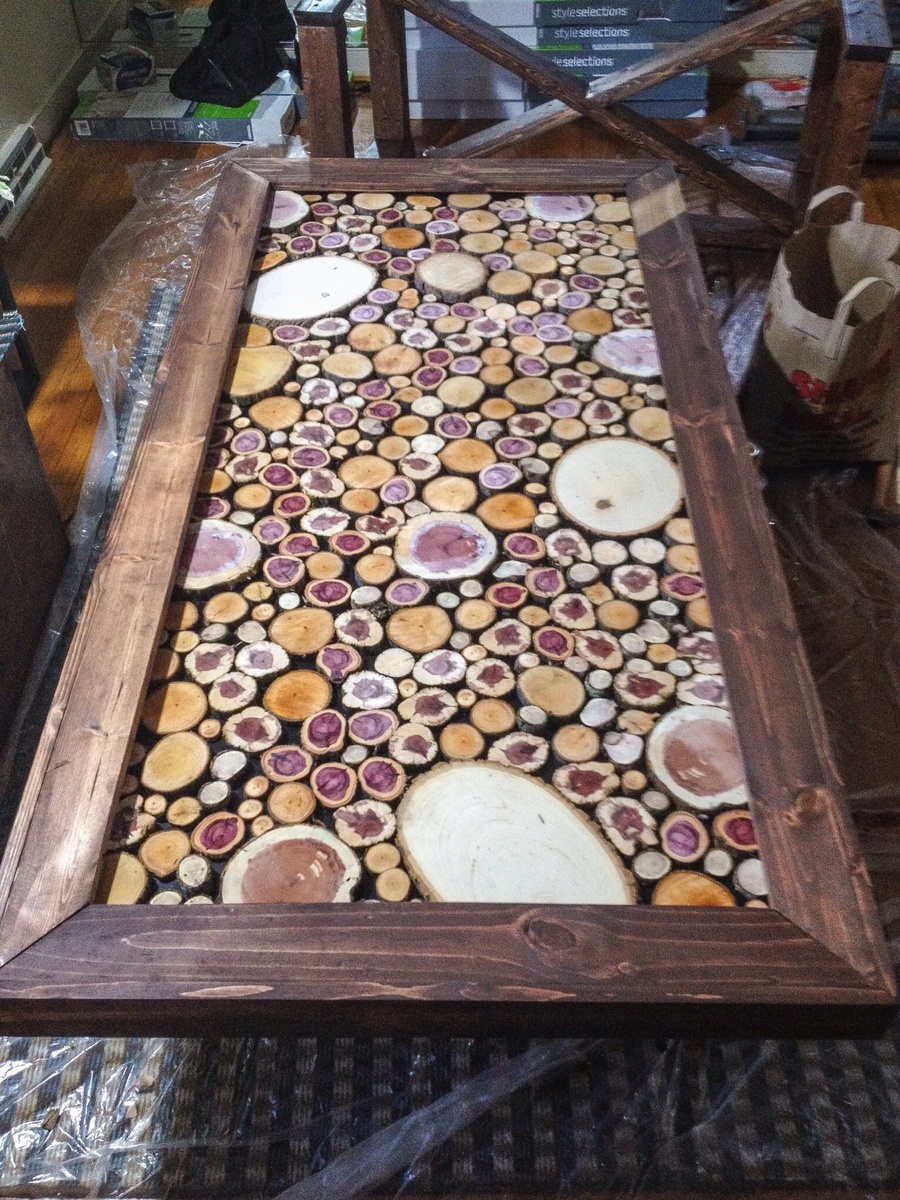
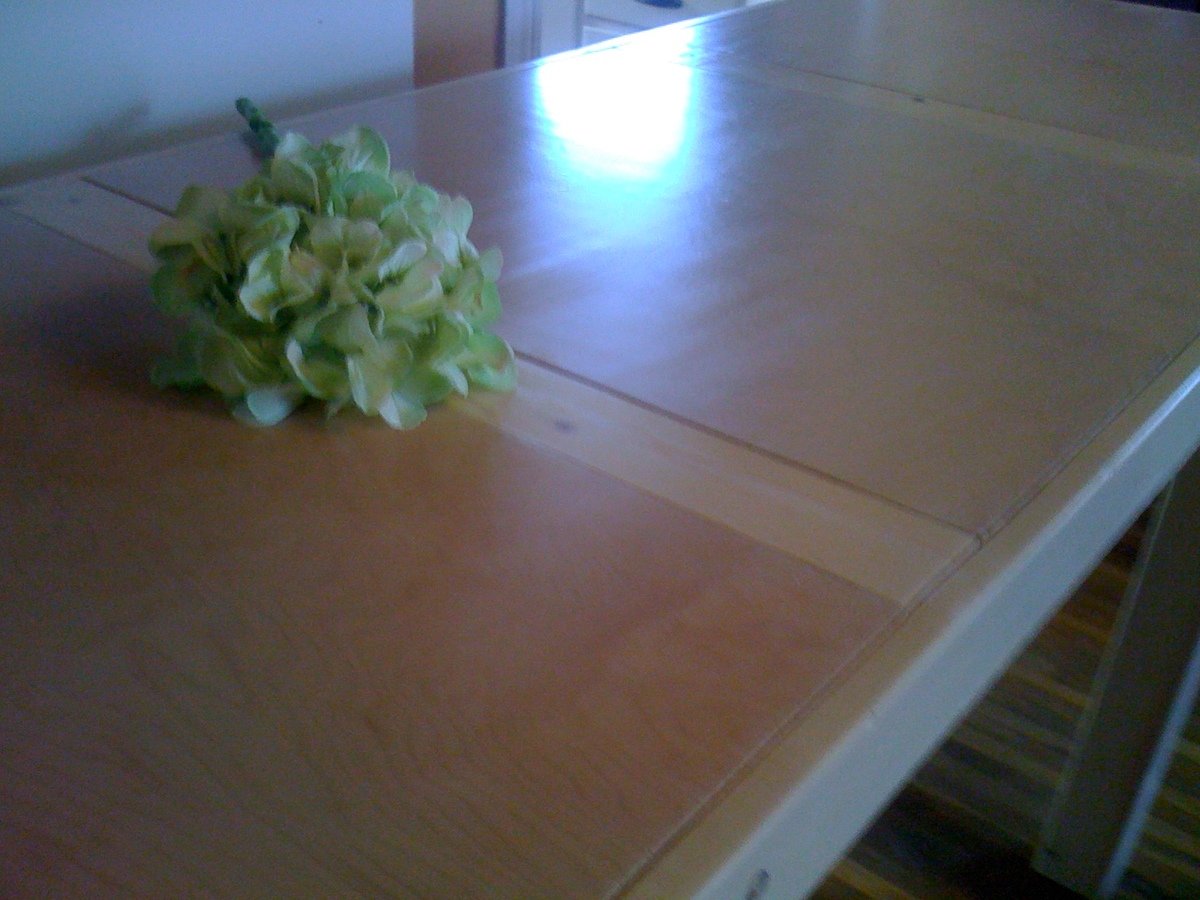
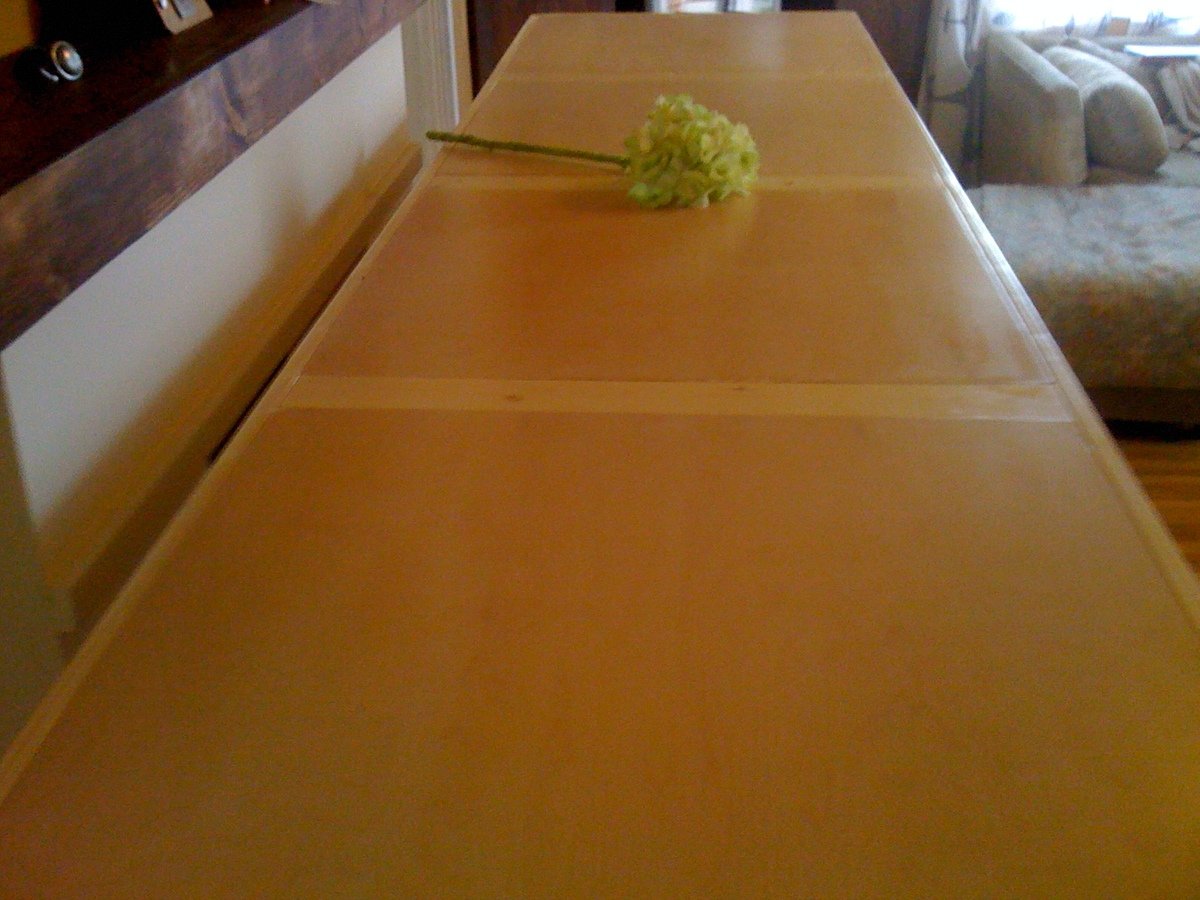
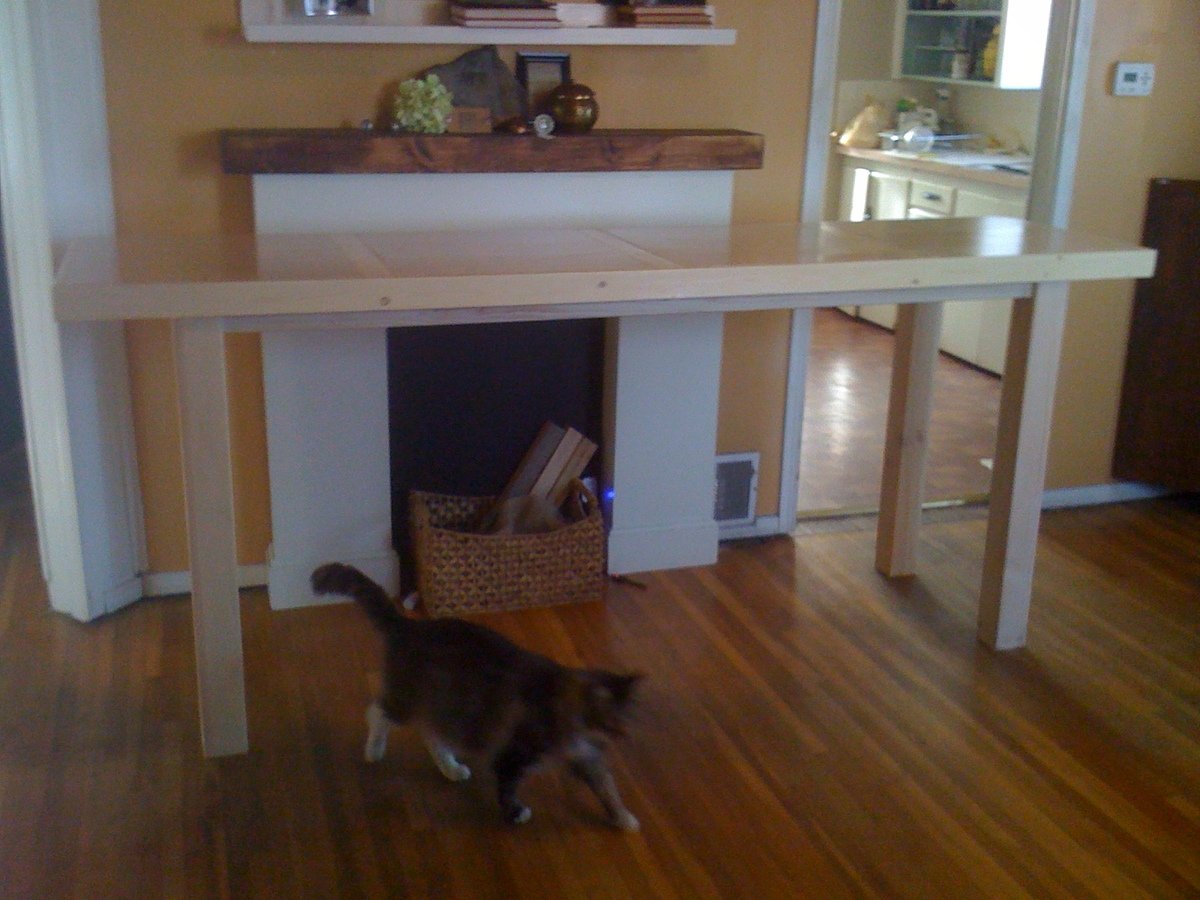
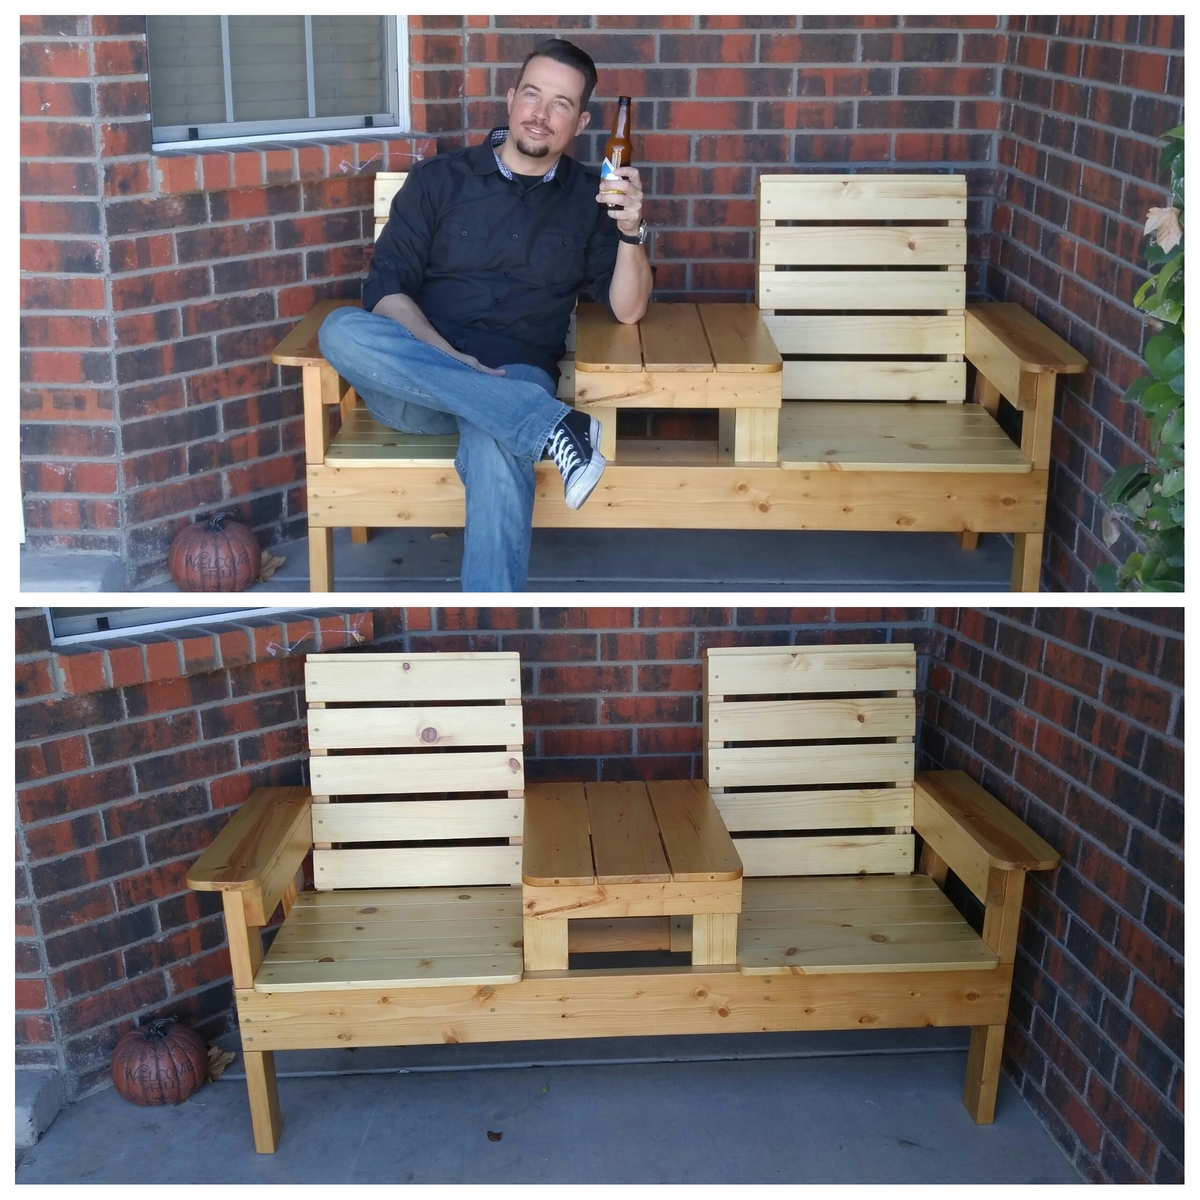
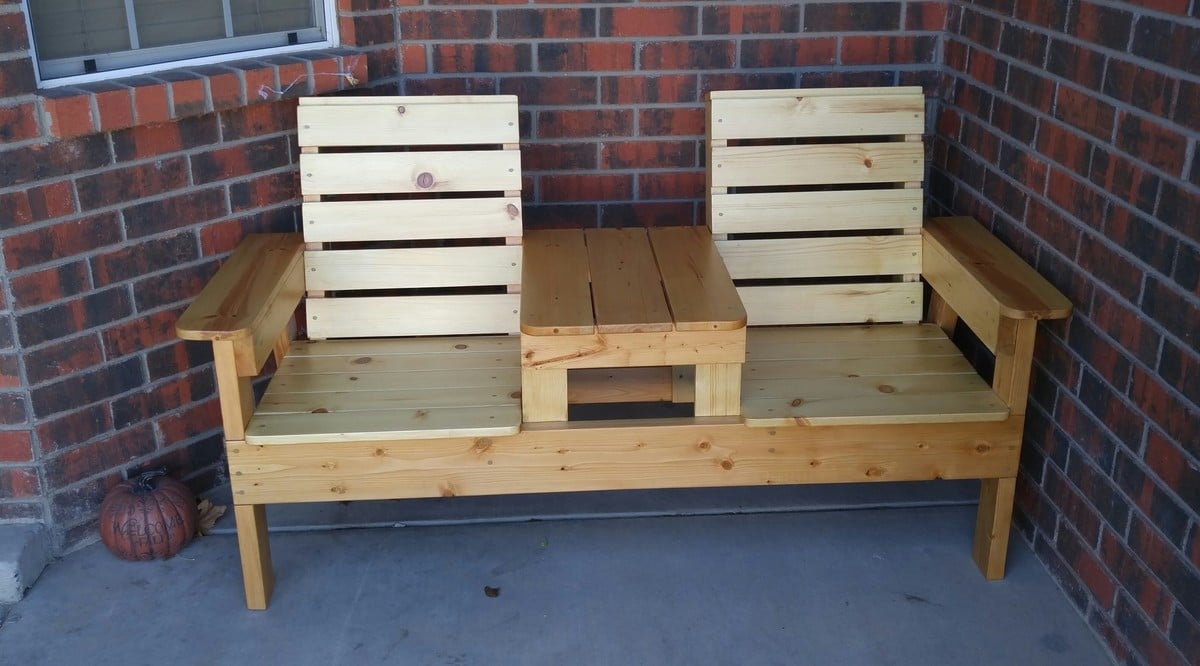
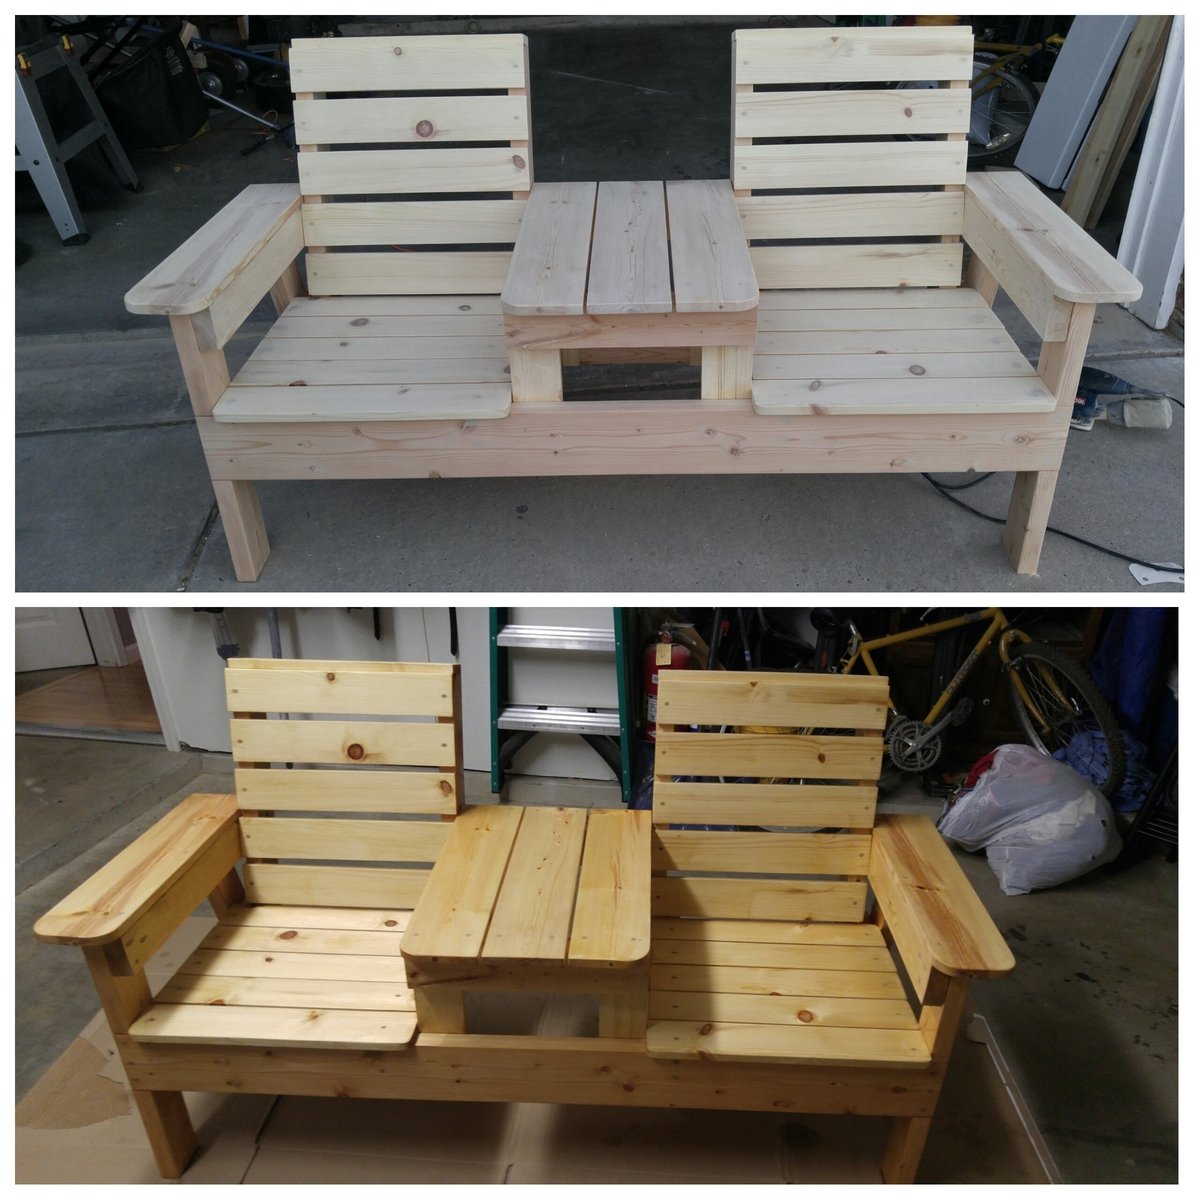
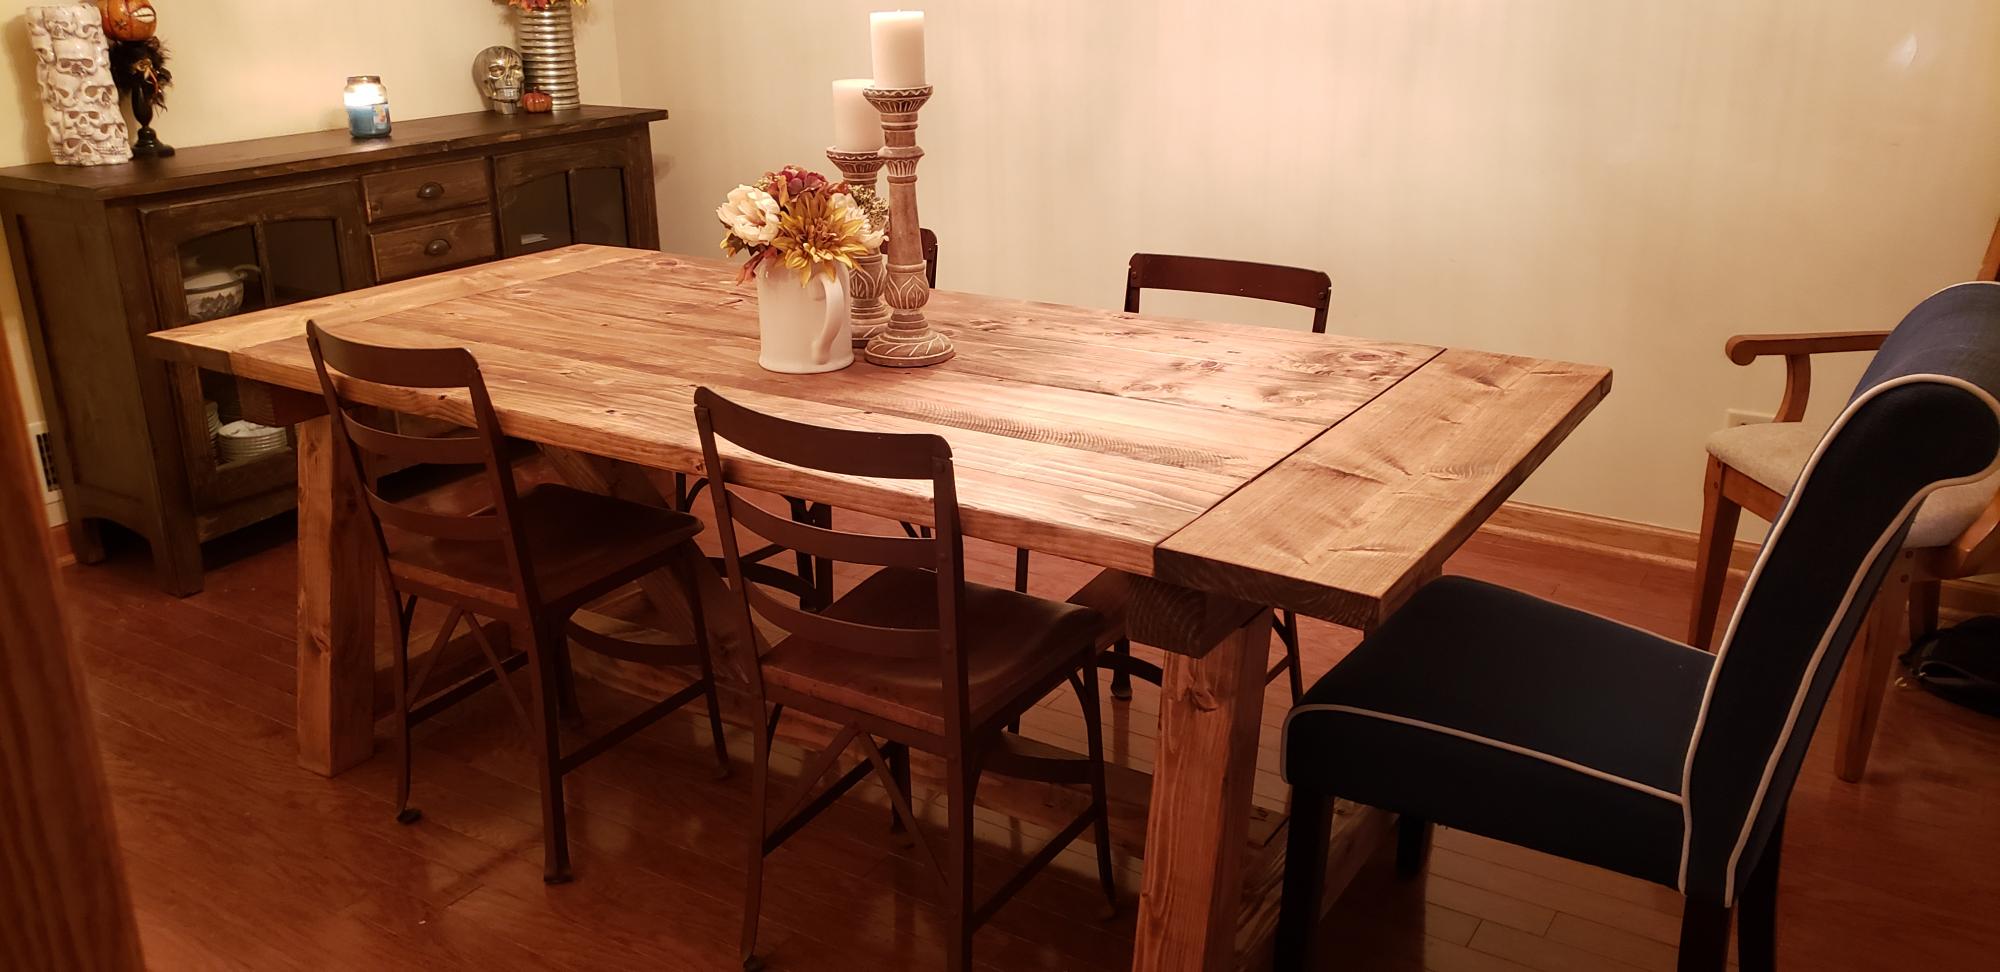
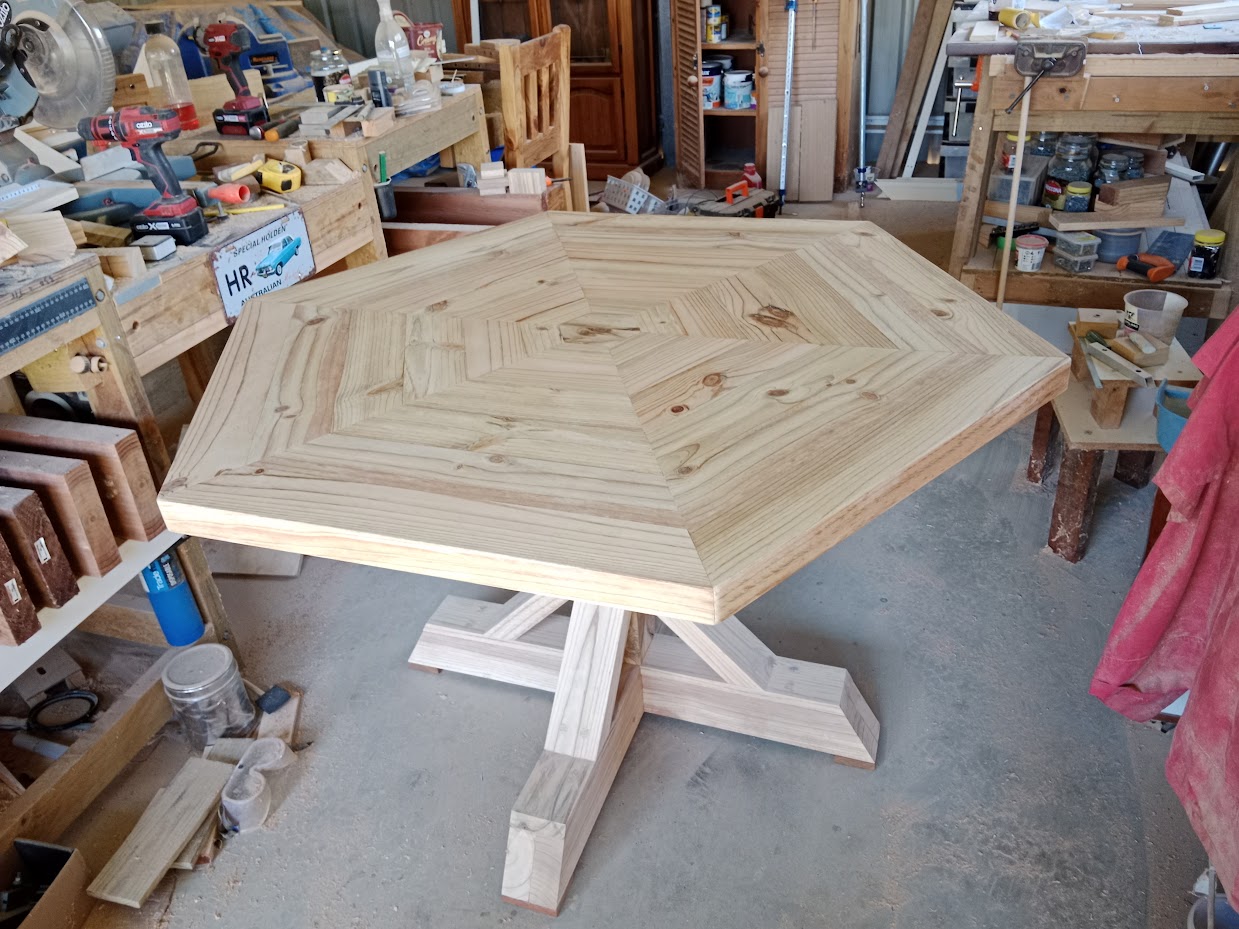
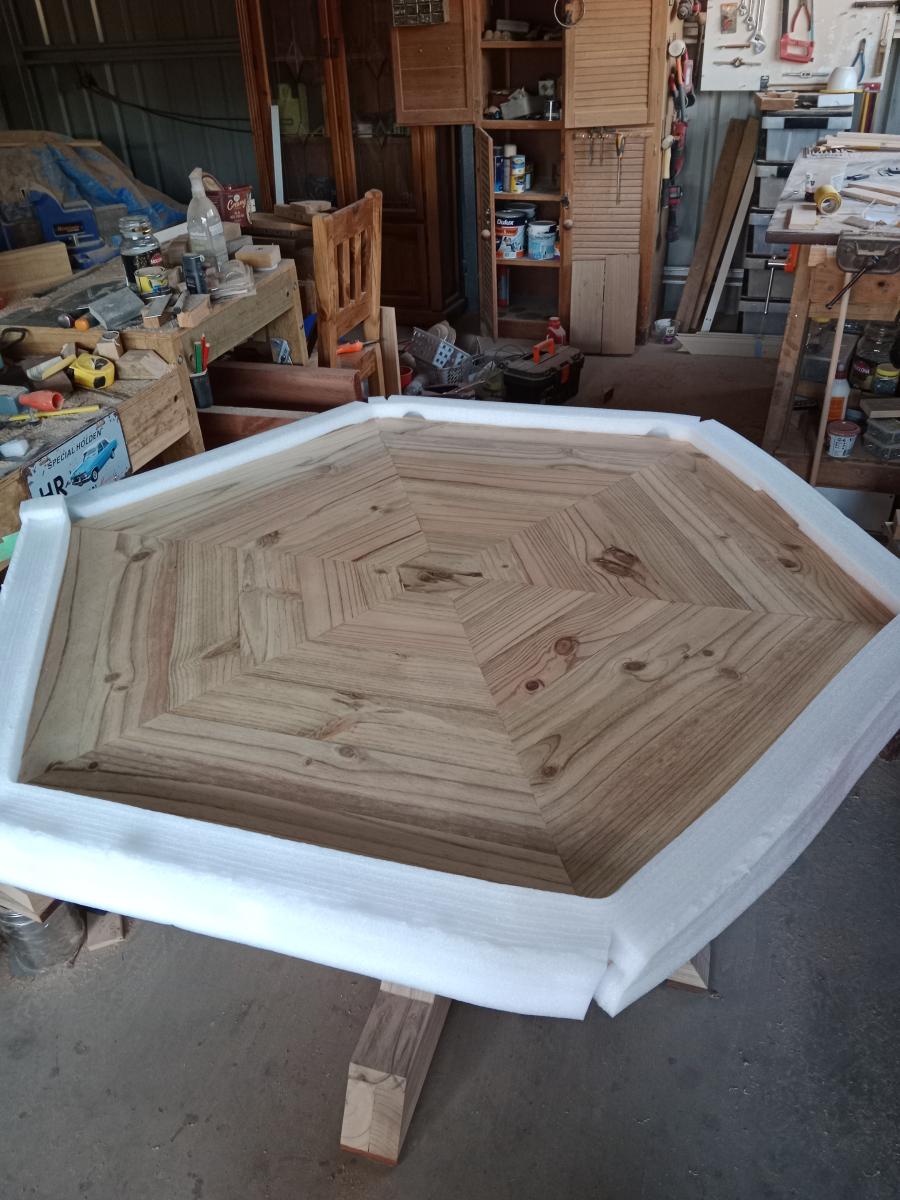
Dinning room table
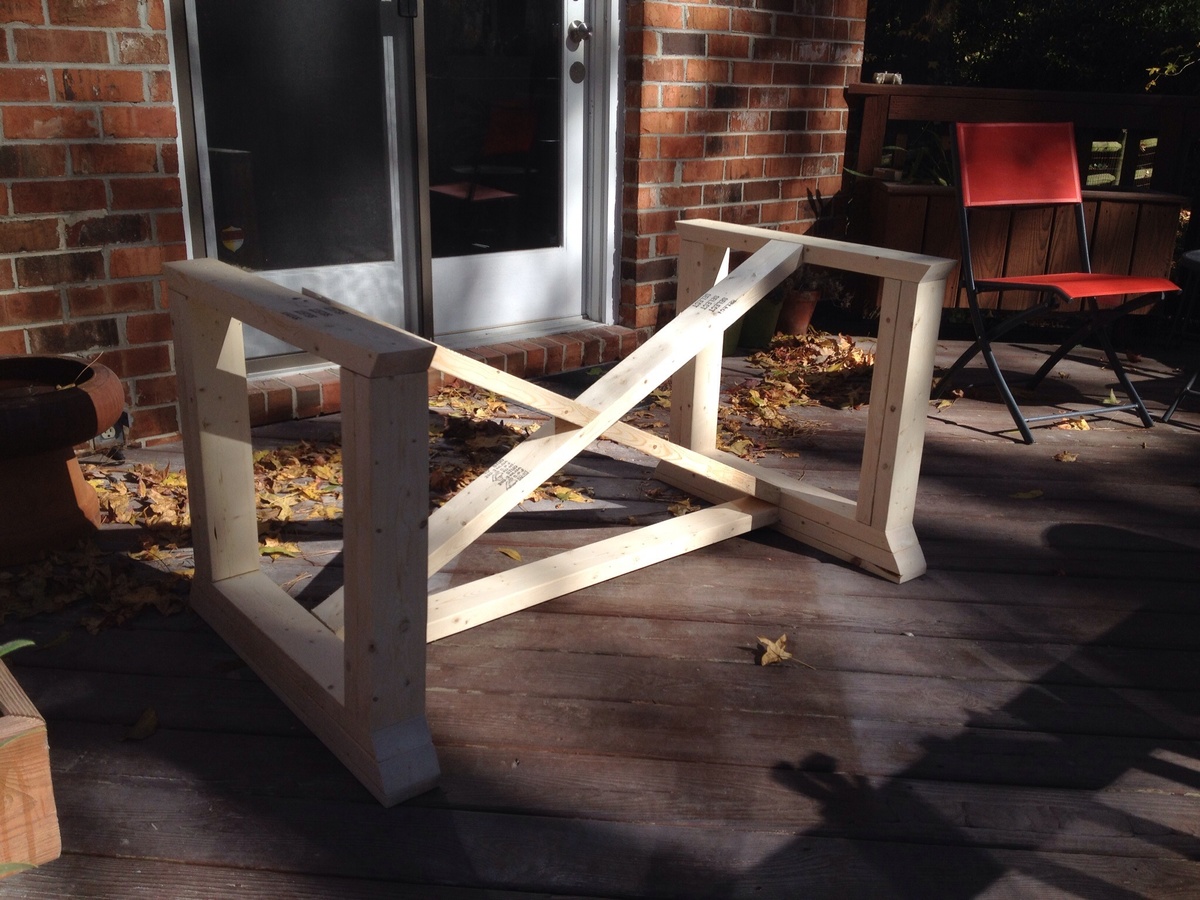
Needed something I could put together between work in a few weeks to serve thanksgiving on. The base of the table is modified from Ana's build and the table top is a frame I built and filled with log slices and clear epoxy resin
My husband and I bought our first house back in October and wanted to build a table so we could host Thanksgiving dinner at our new place. With the help of my dad and his collection of tools, we were able to use the farmhouse table plans from Ana-White which turned out nicely. We used a dark walnut stain and a couple coats of MInwax Helmsman Spur Urethane.
First thing my husband has ever attempted to build and I love it! Thanks Ana!!
Sat, 08/31/2019 - 11:20
What a beautiful first project. I love the dark stain or paint? It's gorgeous!
Can't wait to see more projects from you!
I saw a stand like this in a catalog for over $250 and knew I could build it instead for way less! I used the hinges so it collapses and both my daughter and I LOVE this stand :-) It is sturdy enough that my 4 yr old daughter and her 7 old brother can both be on it at the same time, wiggling and giggling.
Fri, 06/29/2012 - 00:24
I LOVE the idea! It's really beautiful Helper Tower :)!!
In reply to I LOVE the idea! It's really by Eve (not verified)
Sat, 09/15/2012 - 13:07
My daughter is almost 5 and she still uses it all the time. She just loves it! Even her 8 year old brother likes to get on it sometimes :-)
We built this 8 foot long standing work table in trade for a friend. It turned out great! We had some scrap 2'x2' pieces of white maple plywood that we used for the top and framed them out with 1x3's. Then we made a simple base of 4x4s and 2x4s. It is a super simple table but it's so pretty!
I've been eyeing Rustoleum's new wood stain called "Willow" so I decided to give it a try for this project. It is sooo pretty. It lightens the wood almost like a white wash but it has this pearlescent quality to it and I'm swooning for it! Then we put 2 coats of satin poly over the top and legs. I prefer to use wax but he is using the table as a work surface and needed something a little stronger.
This was a fun project for me and my son. Total time was probably a weekend, including finish. I used Douglas Fur, and spent around $100 including finish and nails ect.
I used the overall dimensions from the plan for the beds. Some differences:
Tips:
I made two. Somehow one turned out just a tad larger than the other. It works though, my kids are 2 and 9. Love all your plans. Thanks.
Wed, 05/17/2023 - 13:28
I bet your children love having their very own chair! Thanks for sharing.
I wanted my kids to have more space in their shared room, but I did not want to pay a ton of money for a new bunk bed. My husband and I found a plan for this bunk on Ana-White and fell in love with the design. It turned out so great that we will still be using it in our next home whether it's needed or not. We did change a couple of things on the plan that we didn't care for. The first is that we added a side rail for safety. Secondly we also traded the 1x6 boards on the head and foot boards for 1x4s on the top but kept the 1x6s on the bottom.
Mon, 01/09/2012 - 17:39
With pocket screws on the bottom and then one screw through the 1x4s into the post before the 2x4 on the top goes on. And then the 2x4 is screwed onto the 1x4 and post with trim screws.
Wed, 03/28/2012 - 13:02
Cost us about $300 and over an entire weekend of time spent on this project.
It's not for beginners. My husband has had many many years of experience in carpentry and woodmaking.
Good luck to you.
Also, he changed a few things in the plans we found in order to make it look better.
Thank you
Jillian
Wed, 03/28/2012 - 12:59
Cost us $300.00 to make and almost non-stop making it for the whole weekend. And then stained for hours.
This is with many years of experience in construction and woodmaking.
This is not a beginners project and then expect it to look amazing.
My husband changed these plans a bit to make it look better than the other ppls that we've seen on here.
But, good luck to you and make sure to have plenty of room and time.
Also, we had to make this bed in 10-15 different pieces and put together in the bedroom we wanted it in. There is absolutely no way it will fit otherwise.
Jillian
Sat, 10/25/2014 - 22:25
I don't see how you could put the fill/twin over a queen since the queen is longer. Obviously you could spin the queen around and make it an L-shape but then you are looking at a different build.
Sat, 10/25/2014 - 22:28
I really like the look of this ... I'm going to try to replicate!
What does the bottom of the guard-rail look like? Did you space out your slats a little more than the original design? I like the 2x4 topper instead of the 1x6.
Sat, 02/28/2015 - 16:46
We made this bed over the course of a week, both of us have extensive experience in woodworking and building. Ours is very wobbly on the long axis. We had a friend who is a structural engineer come in and take a look. He offered suggestions to shore it up and nothing really worked. The 3/4" overlap is not enough to secure the side rails, imo, and we used a variety of brackets to make it not wobble, to no avail.
This bed is coming apart in a few weeks and will be stored. If it is ever used again, it will be as two separate beds. I spent about $400 on this. My son never felt safe sleeping on the top bunk and has slept on the bottom exclusively.
Just my $0.02.
Modified by making 18" deep, right side is 20" wide (inside dimension) to accommodate cable box. I also trimmed out the side panels with 1x2 not just the front.
I used a rail and stile router set to make the doors. To do it again, I would have selected maple, as it routes better than the poplar. I would also consider overlay doors, made from 1x3. The inset doors leave little room for error - the frame must be square!!! You also have more hinge options with overlay hinges.
I also used 3x3 for the legs, I think their weight adds to the piece. The original base looked too small and fragile for the rustic upper half.
Some work still remains, staining as well as placing the veneer step on the shelf edges to give it a nice edge to stain, but I needed the space back for Thanksgiving dinner tomorrow!
My husband and I built this for our first furniture project. I have the bug! Now I must make night stands . I got the look by staining first with min wax dark walnut, followed by rustoleum weathered gray. This was my first time to ever stain anything, so this does not take much experience to do. Love it! We followed the advice to measure our mattress first, which was good because it turned out to be narrower than many kings. We built the bed custom to our mattress . We also made the height a few inches taller to have a nice tall bed. The footboard is lengthened also. I wanted it to come up above the end of our mattress. This project is easy once you get going. It is also addictive!
Put this baby together in 3 days and I just LOVE it! I cannot wait to pick my next project. Thank you, Ana White, for your inspiration!
I really liked your design so I decided to make one for my mom for Mother’s Day and she loves it. Just painted it white before adding the 2x6’s and stained them a walnut Thank you ..!!!!
Tue, 05/23/2023 - 21:00
I bet your mother loves it! Thank you for sharing, love the finish and x detail.
About a year ago, I stumbled across your site, I was a lurker for awhile, finally joined, and can finally post the projects I have done so far. This was my second build from your site. It works perfectly on the front porch.
Fri, 01/13/2012 - 15:44
Thank you very much, I can't wait to start my next project, new night stands to match the bed. Yep, I'm hooked :)
Tue, 02/21/2012 - 14:09
you should really show the plans for the projects.
Thu, 02/23/2012 - 15:36
I'm not sure why the link is not working for you above where is shows: "From Plan." It is working for me.
Thu, 04/26/2012 - 14:55
Looks like you added additional leg supports?
Looks great!
Thu, 05/31/2012 - 14:59
I really like this plan - re the wood choices and finish: How is the wood, especially the white wood, holding up against the elements? Great job on this btw.
Thanks
Paul
This was my second Ana White project (first was a sandbox). I made a few changes to Ana's plan so that it would better fit my porch. First, I basically flip flopped the plans so that the end table was on part 1. I also altered the length to better fit the cushions I found. Ana's plans were 24" between the 2x2. Mine ended up being 26.5". I also used 2x8's for the base instead of the 2x4 for added height.
The price of outdoor cushions was a big surprise!! We looked into buying outdoor high density foam and making our own cushions, but that seamed to be just as expensive as buying cushions. We also really had a hard time finding large cushions that actually fit this plan. Most cushions are REALLY small for this couch. we found some Pottery Barn cushions online that were on clearance.
It was a fun project and we love the couch!
Top 22.5" x 24.5" Base 21"x21" Total height 24"
Ana, you saved us! Thanks to you, Santa’s Elf “Ralph,” whipped this up literally the day before Christmas. We have three little girls and wanted to make Christmas magical again after having survived some significant personal tragedy. Christmas has been rather difficult after loss and grief but your doll house was the perfect remedy. Not only do our girls still play with it daily over 9 months later (this has never actually happened with any other toy), but we are thrilled to use it to store all of their dolly clothes and accessories. No mess in our house and it’s super cute! People ask us all the time where we bought it. We tell them it came from Ralph the elf and his bestie Ana White.❤️
Wed, 10/02/2019 - 09:55
This is a gorgeous dollhouse! I especially love the stained roof. And the smiles!
After completing all the pieces for myself based on 4x4 pedestal dining table with planked wood top, I thought I would build a table for my daughter.
The pedestal base is the same as the plan.
Now all i have to do is get it transported 400km down the road
The table was made from 200mm x 50mm pine sleepers
The top was finished with 2 coats of British paints 1 coat finish
Tue, 05/30/2023 - 12:52
Wow, this is gorgeous, thank you so much for sharing! Your daughter will be thrilled.:)
I made the barn wood frame for less than $30 (the plexiglass alone was $23!). It's better than the $80 they were going to charge me at the frame shop for the same style! I used an opaque black stain to both hide my not so accurate miter cuts and give it a modern feel. I'm very satisfied with the results!
Sat, 02/18/2012 - 09:24
I need a large frame for a family photo. I cant spend the money right now. This has been very helpful. Great job
We've built over 100 of these farmhouse beds - we've tweaked the design ever so slightly.
Our first Farmhouse Bed took roughly a day to complete. We sanded the entire bed, applied stain & then applied two coats of matte varnish. At least apply one. Stain can leak for weeks, and smell bad for longer.
We use 2x3's for our slats and find them extra strong!
Love this bed so much, we plan to build another 3. Used local white cedar milled just down the road from our cottage.
http://www.ana-white.com/woodworking-projects/modern-farmhouse-bed-frame
Comments
kennonr79
Thu, 11/21/2013 - 10:14
top
Awesome idea for the top. Would love to see a pic of the finished product!
kennonr79
Thu, 11/21/2013 - 10:14
top
Awesome idea for the top. Would love to see a pic of the finished product!
spiceylg
Thu, 11/21/2013 - 12:15
Wow
Love it and I agree with kennonr79, would love to see a pic of the finished product! So unique!