Community Brag Posts

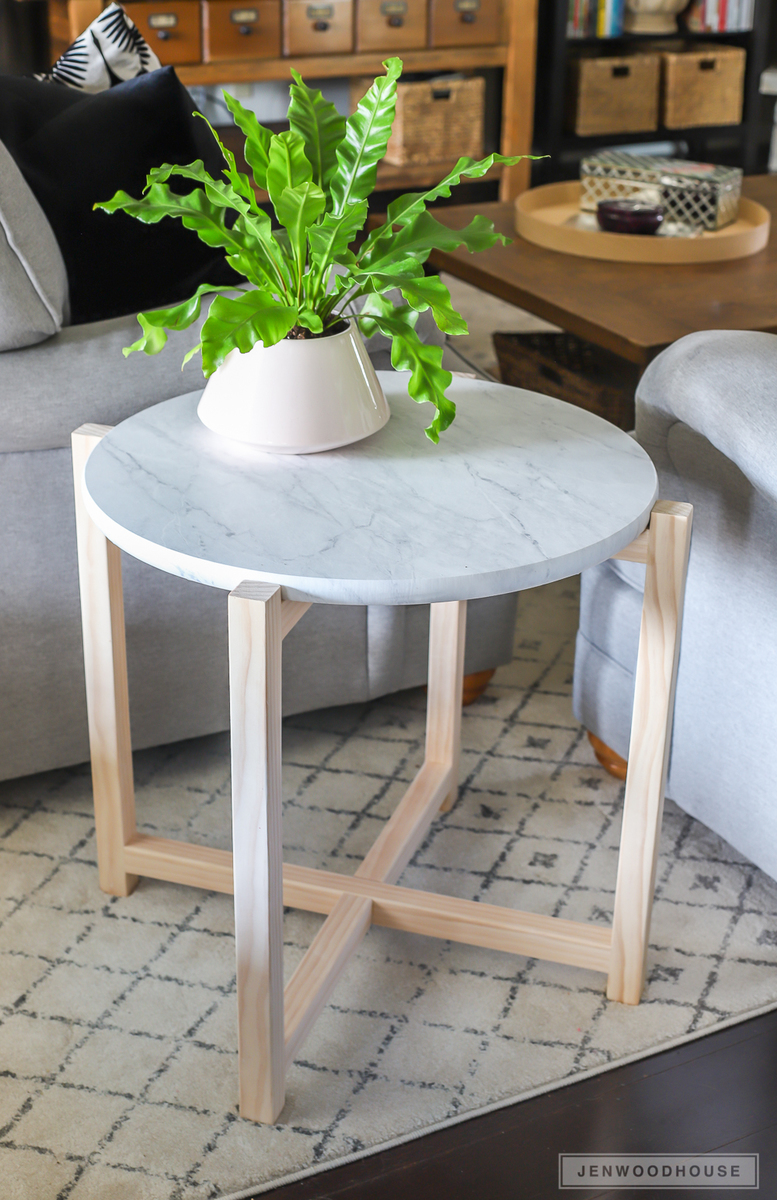
DIY Faux Marble Round Table

Hi friends!

Jen Woodhouse here from The House of Wood. 

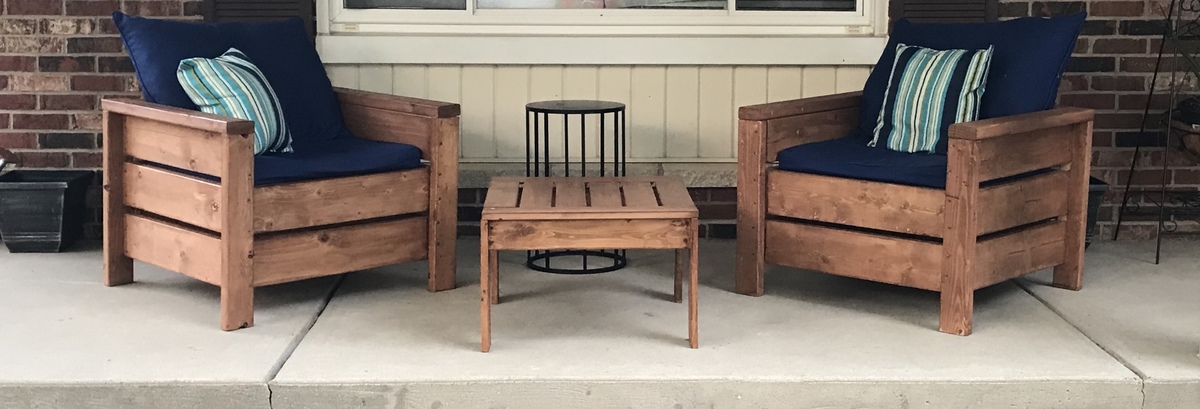
Take a good look at this round marble side table. Would you guess that isn’t real marble? It’s contact paper! Yep. It’s true.  We’ve been wanting to put a table here between our sofas for months now, so I’m thrilled to have this project finally crossed off the list. This sleek side table cost about $50 to make!


I built this table in about 3 hours – the super simple yet sleek, modern design is beginner-friendly so if you’re wanting to tackle your first project, this is a great one for you. 

Be sure to tag me @jenwoodhouse if you share photos of your build on social media. I'd love to see it!

You can get all the details for this build on my website jenwoodhouse.com.

Estimated Cost
$50
Estimated Time Investment
Afternoon Project (3-6 Hours)
Recommended Skill Level
Beginner

Comments

Greenhouse

Submitted by Zhang on Fri, 05/06/2022 - 22:55

Greenhouse is nominal 10X20. Internal square footage 192.6 sq-ft so no permit required (< 200 sq-ft). Modifications planned:

1. No metal on vertical walls since sun light is desired at all levels. Planting will be directly in the ground as well as in cedar boxes an on shelves.
2. Let in (mortised) 1x4 diagonal bracing to provide strength since no metal will be used on the verticals.
3. Two windows in the back wall (truss). Not sure yet where to source these - suggestions please? Might build them from scratch.
4. Dutch door on the front wall so that the top half of the door can be opened in combination with the back windows to allow air flow the length of the greenhouse.
5. Metal flashing on the exterior corners just for a nice finished look.
6. Has a 6 x 6 preassure treated (rated for ground contact) perimeter foundation. All other wood ,except the diagonal bracing is pressure treated rated for above ground. Finding 1 inch pressure treated wood seems impossible.
7. Ridge poles will be 2x6 so that sloping joist hangers can be used to attach the rafter legs to the ridge poles.
8. Will have a middle truss so that two 10 ft ridge poles can be used. I believe finding a nice straight 20' pressure treated 2 x 6 would be difficult or impossible.

Will add more photos as the build progresses.

Comments

Doll Farmhouse bed

Submitted by kylihoot on Sat, 07/09/2011 - 16:48

I built this bed for my new doll I got from my mother-in-law. All the girls in her family got one as a child, so she got me one, too. This is such a cute bed! Matches my own Farmhouse bed:)

I'm sure this would have been easier with a nail gun, but it is was pretty simple with the drill too.

LOVE IT!

Estimated Cost
>$10.00
Estimated Time Investment
An Hour or Two (0-2 Hours)
Finish Used
Sanded with 120 grit, then primed and spray pianted purple. I filled the holes prior to painin with a putty.
Recommended Skill Level
Starter Project

My new Table inspired by Big Ur, Farmhouse and iTable plans

Submitted by BryanP on Mon, 08/12/2013 - 11:38

We needed a Dining table to fit our growing family and our friends. Combined ideas from the iTable, Farmhouse and Big Ur table plans. Used 8ft boards so with the breadboards it measures roughly 8ft 7in long. Rustoleum Kona stain. Only took the weekend to build. Thanks Ana!

Estimated Cost
$250
Estimated Time Investment
Weekend Project (10-20 Hours)
Finish Used
Rustoleum Kona
Recommended Skill Level
Beginner

Board and Batten Fireplace

Our fireplace wall was quite plain to say the least. We thought about stone, tile but then ended up doing a simple and inexpensive board and batten wall.  This is a simple DIY project, we kinda made up the pattern as we went.


More details on my blog - http://www.woodworkingfourdummies.com/blog/board-and-batten-fireplace


Cheers,

Ian

Estimated Cost
$100 - I ran out of white paint, the rest was for mdf boards
Estimated Time Investment
Weekend Project (10-20 Hours)
Finish Used
satin white paint
Recommended Skill Level
Starter Project

Potting bench

Submitted by Anonymous (not verified) on Sat, 05/14/2022 - 18:53

Thanks to Ana White for the inspiration, plans, and instructions to make our own Potters Bench. We had a little help from grandchildren for the final steps. We used cedar and made it 60” long rather than 48” just for a little more useable space. After purchasing the wood, we got busy and completed the whole project in a Saturday afternoon, with just the finish coat left to apply.

This was a very satisfying project to work on and complete. We will always look at it with pride and be able to say “we built that”!

Pat & Lawrence
Calgary, Alberta, Canada

Built from Plan(s)

Comments

Our first project, EVER!

Submitted by RyansMama on Wed, 07/13/2011 - 18:30

I had never built anything before. I also hadn't had a headboard in years, so I figured two birds with one stone. The biggest lesson we learned was how important it is to find the best wood. One of our pieces was not straight and we ended up having to make another trip out to the store. Otherwise, it was a pretty easy build!

Estimated Time Investment
Weekend Project (10-20 Hours)
Recommended Skill Level
Beginner

Media Console

Submitted by kaileelev on Sun, 09/13/2015 - 19:15

I based this off of the farmhouse media console plans, but made a lot of changes with dimensions, doors, etc. Originally we wanted the doors to slide sideways instead of opening outwards... but we couldn't figure out how to do that and still make it look nice! Very easy to build. I am happy with the end product!

Estimated Cost
$60
Estimated Time Investment
Weekend Project (10-20 Hours)
Finish Used
Minwax Provincial stain. Polyurethane coat over the stain.

An off white paint I found in the basement. Polyacrylic over the shelves for protection.
Recommended Skill Level
Beginner

Ryhan Console Table

Submitted by tssroo on Sat, 08/11/2018 - 18:45

We really wanted a narrow console tabtabltabtable for this space. This was perfect! Modified the original plans to add to the width and height so it is counter height. We added a butcher block top to match our existing kitchen cabinets. I used aluminum decor inserts from Home Depot for the doors. Thank you Ana for your amazing plans!

Built from Plan(s)
Estimated Time Investment
Weekend Project (10-20 Hours)
Finish Used
General Finishes Flat Finish, Sherwin William's Intellectual gray
Recommended Skill Level
Beginner

2x4 Sectional & Handmade cushions - LOVE!

Submitted by Anonymous (not verified) on Thu, 05/26/2022 - 21:46

Building this project and sewing the cushions was like a love letter to my family. I made them a year ago while on a high dose of Prednisone for my asthma and chronic pain (so helpful!). I finally felt capable of doing something that would bring our family together outside. A year later it continues to serve us well.

The instructions for the sectional were very well done. Super friendly and made me want to keep going! I used black analin dye to stain the wood. Swoon!

For making the cushions:
- I relied heavily on Sailrite's resourceful web site & tutorials for their thorough and detailed instructions on making cushions, cutting foam and sewing piping.
- Home Depot has the best pricing on foam.
- Used the brand 'Cushion Qwik' Silk Film (Amazon) to wrap the foam so they can withstand PNW rain.

Comments

Doll Highchairs

Submitted by canesa on Fri, 07/15/2011 - 01:38

I built 11 doll highchairs for my daughters 5th "Adopt A Baby" birthday party! These chairs were fast and easy to build and I had a BLAST painting them! The girls loved, loved, loved them! A little extreme for a 5 year old birthday party? Maybe. But definitely worth it!

Estimated Cost
Under $10
Estimated Time Investment
Week Long Project (20 Hours or More)
Finish Used
Paint, scrapbook paper, modge podge and duct tape!
Recommended Skill Level
Beginner

Comments

glennj

Sun, 07/17/2011 - 08:17

I agree. WOW! I have a question about the painting. Did you do that all by hand or is some of the more detailed areas paper that you glued on with modge podge or some other crafting adhesive? I really love these little chairs.

momofour09

Thu, 12/29/2011 - 12:29

That idea is really sweet! My girls would love to have a party and this is a good theme. You did a great job :)

Rustic X Coffee Table with Bread Boards

In need of a new coffee table and having a budget lower than what would allow for similar looking store bought tables, I decided to build a variation of the Rustic X coffee table. I used the modified plans by Pete Sveen which included the bread boards on the table top. We used a solution of white vinegar and steel wool to age the wood and used a clear furniture wax to finish it.

Estimated Time Investment
Weekend Project (10-20 Hours)
Finish Used
Vinegar/Steel Wool for Age. Clear furniture wax for finish.
Recommended Skill Level
Beginner

Comments

Slim Trus Console Table by Drew Cameron

Submitted by deaconcam on Thu, 09/13/2018 - 09:30

This project was a great learning experience and turned out fantastic. The mitered/beveled cuts were a bit tricky for me, It took me a while to understand how to use my miter saw to make the cuts correctly. Other than that, the building plans were clear and easy to follow. Cara, an author at Inspired Workshop, posted the plans at the following link: https://theinspiredworkshop.com/diy-slim-truss-console-table/ 


-Drew Cameron

Built from Plan(s)
Estimated Cost
$100
Estimated Time Investment
Weekend Project (10-20 Hours)
Finish Used
Minwax PolyShades Espresso Oil-based Interior Stain
Recommended Skill Level
Intermediate

Comments

Organizing My Little Boys!

Submitted by MamaPepper on Sun, 07/17/2011 - 15:05

I really needed an entry way system that was easy to corral all of my 3 boys shoes/coats/crap, etc. . . and I LOVED this plan! I messed up on the frame, so just left it off, and decided that I didn't need the back either. I painted little chalkboards on the side of each boys cubby.

I'm fairly certain that this isn't made perfectly, but it's perfect for us! This was my 2nd project and I'm really super psyched about it!

Built from Plan(s)
Estimated Cost
$60ish or so?
Estimated Time Investment
Weekend Project (10-20 Hours)
Recommended Skill Level
Beginner

King Size Farmhouse Bed

Submitted by krochelle on Tue, 08/20/2013 - 08:12

This bed was made as a Christmas present for my parents. At the time, there were no plans for a king-sized bed so I modified the queen plans to fit their mattress. I added a 5th leg to support the center of the bed and also added some plywood sheets underneath to better support the mattress.

Estimated Cost
$150
Estimated Time Investment
Weekend Project (10-20 Hours)
Finish Used
"A Day at the Jeweller" by Valspar with a red mahogany stain over (used almost as a glaze)
Recommended Skill Level
Intermediate

Counter Height Craft Desk

Submitted by Stockweb on Mon, 09/28/2015 - 07:39

This was pretty easy for my first build!  Don't look too closely though....  I raised thedesk to counter height to adjust for working while standing and add a bar stool.  The hardest part was adjusting the angle of the diagonal braces.  For the desktop I found a 2' X 6' piece of aspen at the blue big box store.  Sanded well, grey "whitewashed" it and sealed with paste wax. 

Built from Plan(s)
Finish Used
Base painted with satin interior in revere pewter. Made my own grey wash for the desktop and sealed with paste wax.
Recommended Skill Level
Starter Project

Comments

DIY outdoor chairs for our firepit

Here is one of the new chairs I'm building for our new fire pit.  They are made out of four pressure treated 2x6s (and one 2x4), and have a comfortable 18" seat depth, 19" seat width, and 110 degree angle for the backrest.  

More information, and a link to our plans are located on our blog, FamousArtisan.com

Estimated Cost
$50
Estimated Time Investment
Day Project (6-9 Hours)
Finish Used
None yet.
Recommended Skill Level
Intermediate

Comments

Patio Living

Submitted by Anonymous (not verified) on Mon, 06/20/2022 - 11:44

We had a new backyard patio installed this spring and after a tree fell last year and crushed most of our mix-matched furniture I knew it was time to build a new set. We opted for the chair and loveseat from the outdoor seating set. We did make one small adjustment which was to tilt the back so that the back of the seat was 8” from the back base - super small adjustment but we find the angle to be more comfortable. It only require recurring the seat slats and we secured the back to the frame through one screw in the back rest of the pieces. We get a ton of compliments on this and while super heavy and durable, we can move it easily on the patio stone to sweep and clean.

Comments