Community Brag Posts

Shou Sugi Ban (Yakisugi) Cornhole Boards

Submitted by Anonymous (not verified) on Sun, 12/26/2021 - 14:48

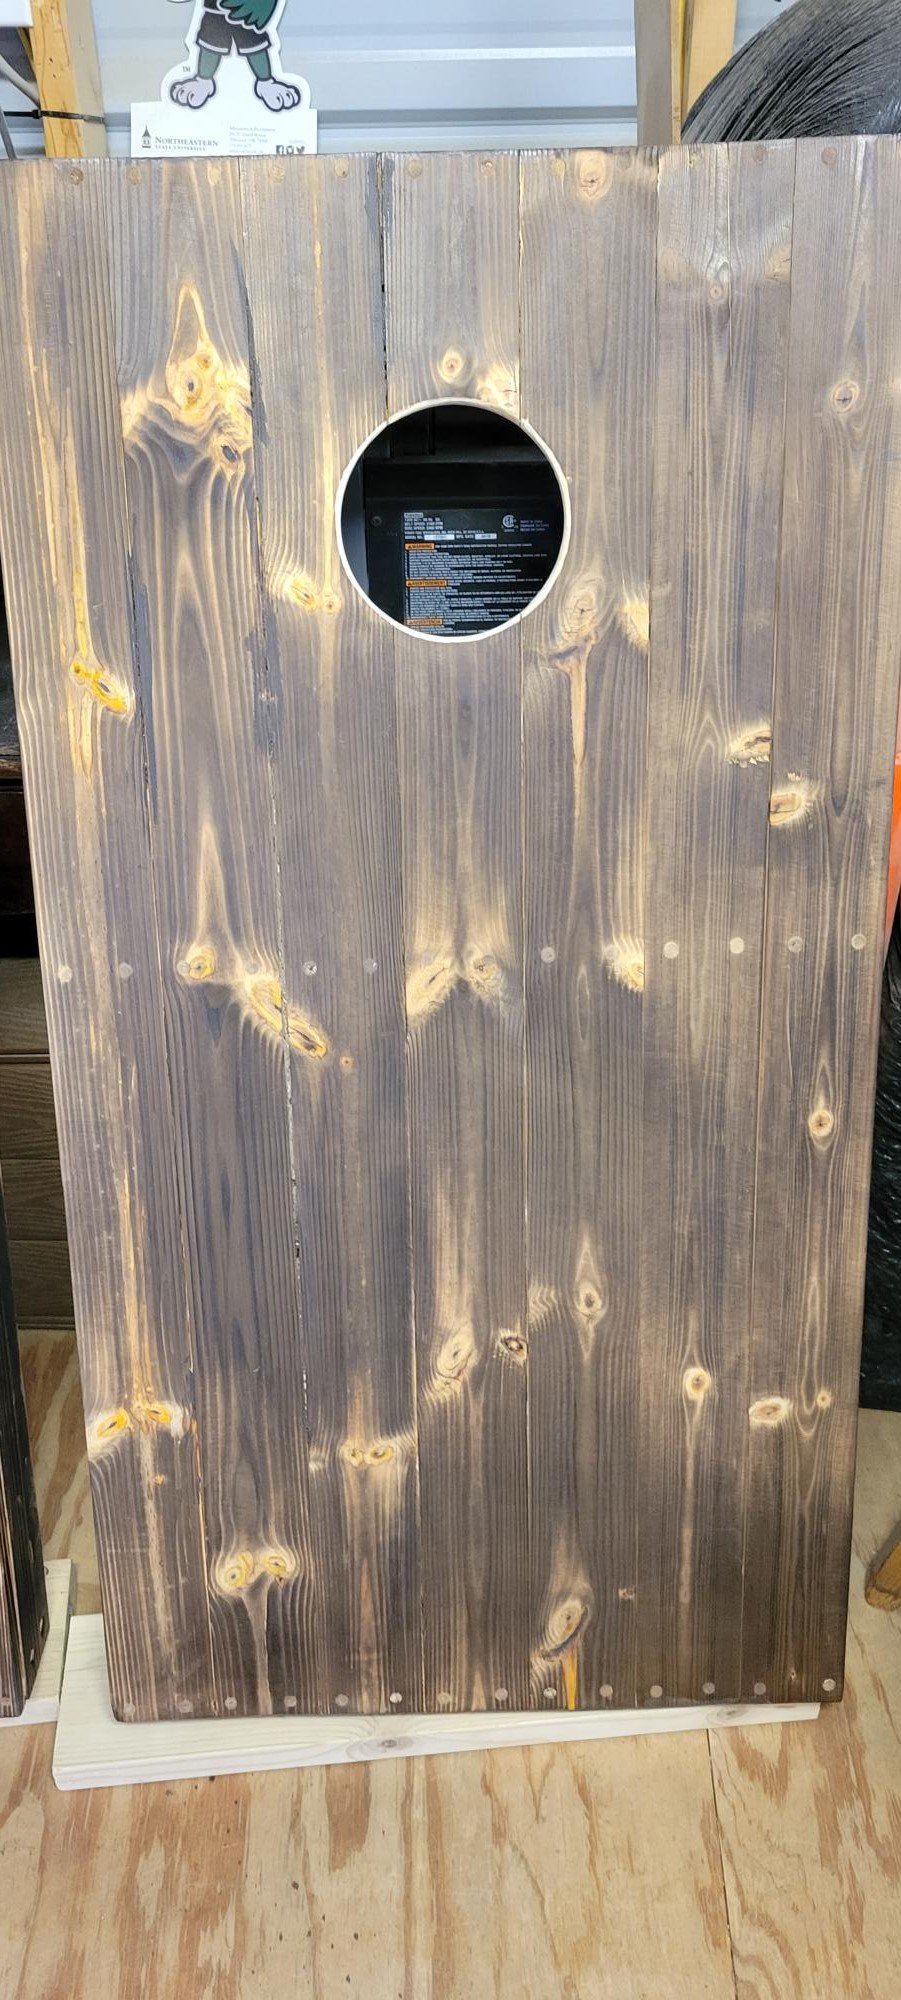
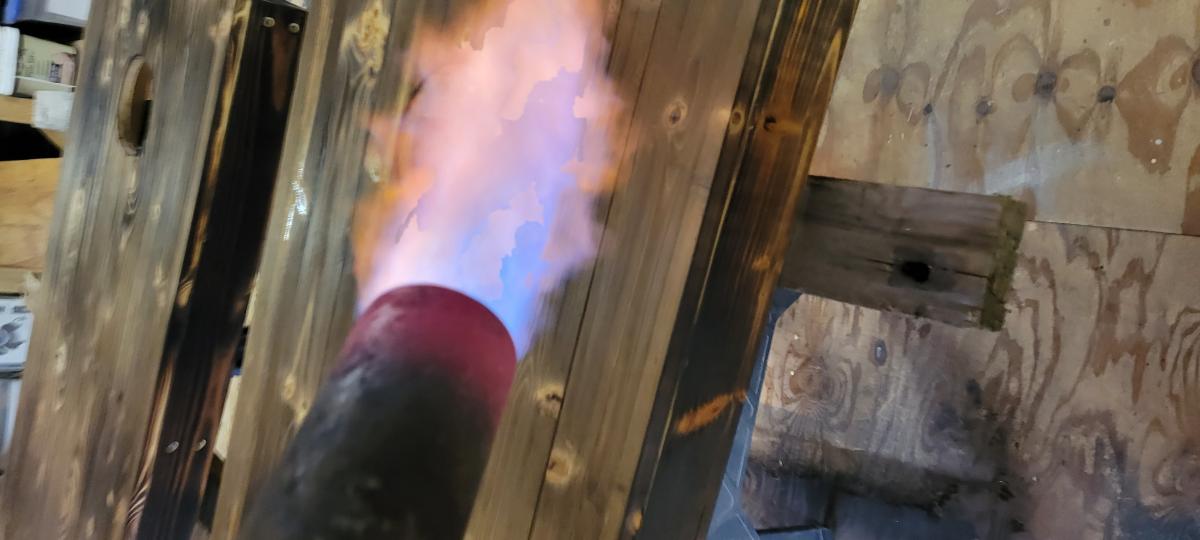
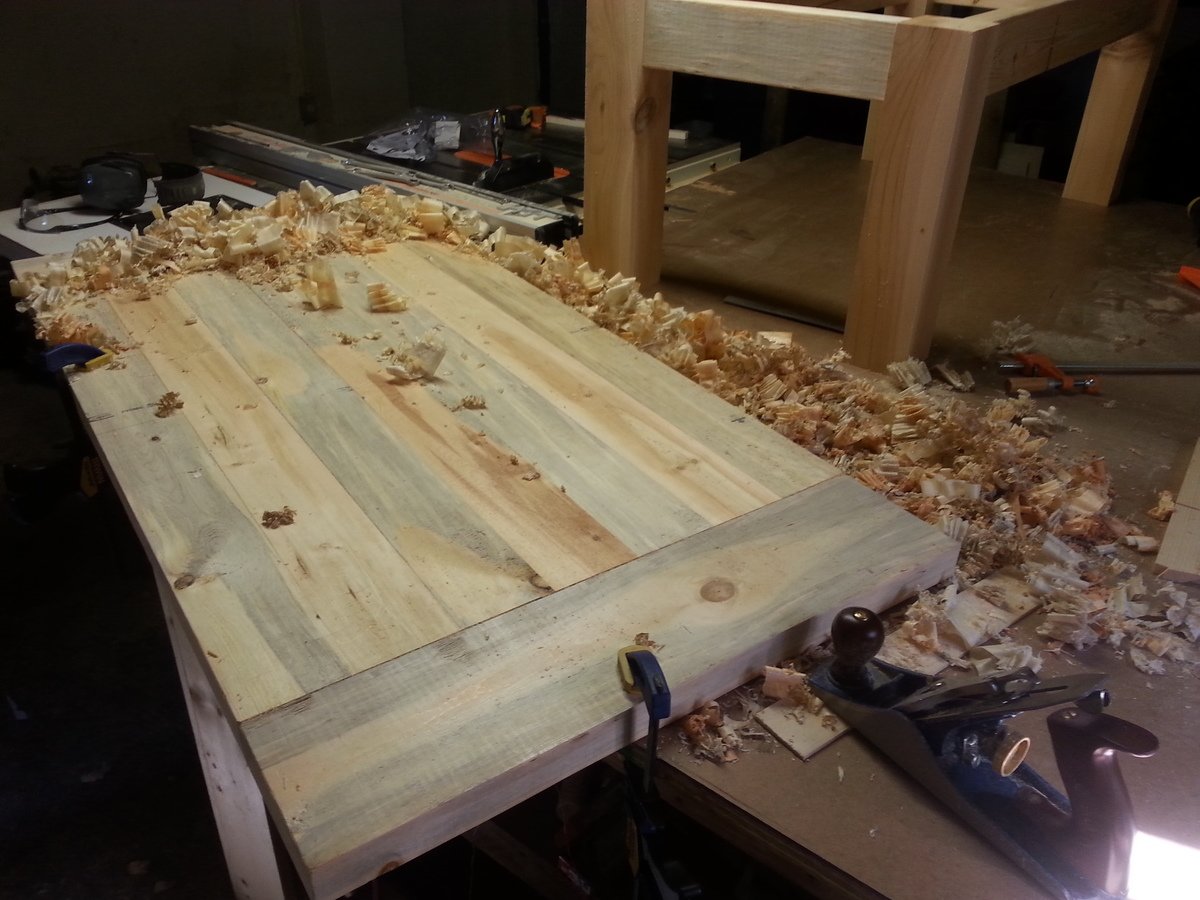
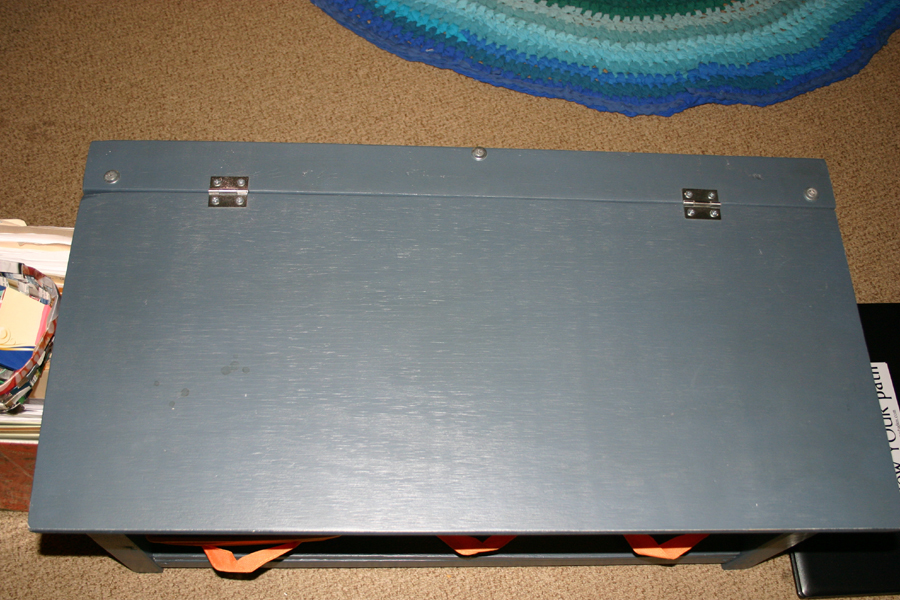
I'm James Farquhar, designer, and fabricator. This is the second set of cornhole boards I built this year. This set is the regulation size of 48" x 24" according to the American Cornhole Association. It is made from fir 2 x 4 s and pine 1 x 4 s (6 per board). Each board is glued with Titebond II and countersunk Torx top screws (#8 1-1/2 inches). It is coated with Minwax polyacrylic (8 layers sprayed on) and Howard's bee's wax (3 layers). The boards are secured with 3-inch toggle latches in pairs. Kayak carrying handles with four screw ports; I used the same Torx Screws I used to put the boards together, extra for strength. The total weight of the boards is 60 pounds. I used a Texas Flame Thrower to Shou Sugi Ban (Yakisugi), as a finish.

Comments

Library Cart - First Build

This is my first build from ana-white.com and it was a success. I am glad that I started out with a beginner project as my carpentry skills were a bit rusty but eventually everything came back to me, the step by step plans certainly helped! According to my daughter, I am the best mom ever!

The dragonfly/butterflies I found at Hobby Lobby for 67 cents a piece, what a steal!

Built from Plan(s)
Estimated Cost
$30.00
Estimated Time Investment
Afternoon Project (3-6 Hours)
Finish Used
Ultra White Satin Finish
Recommended Skill Level
Starter Project

Farmhouse Table

Submitted by JeremiahT on Tue, 06/25/2013 - 18:55

Table was built using refinished tops from an old table/bench set. Cedar was used for the base of the table and benches. Also created two half-size benches that can be used to add seating at the table, or moved to the living room when additional seating is needed there. Finished with mahogany stain and several coats of clear gloss polyurethane.

Estimated Time Investment
Week Long Project (20 Hours or More)
Finish Used
Minwax in " Mahogany" and clear gloss poly also by Minwax
Recommended Skill Level
Intermediate

Comments

Art cart

Submitted by Ericagrace on Mon, 01/01/2018 - 14:36

Art cart!

i used furniture glide feet instead of wheels. I put the plexi on hinges. All scrap materials except for hinges. 

Built from Plan(s)
Estimated Time Investment
Afternoon Project (3-6 Hours)
Recommended Skill Level
Beginner

Turntable Console

Submitted by Anonymous (not verified) on Sun, 12/26/2021 - 16:00

Hi Ana and family,
A couple of months ago I contacted you to see if you had a video on how to build a Turntable/media console out of 2x4s with a picture for inspiration. I did get feedback and it really helped. Thank you so much for always being available to help.

Comments

My new yellow cubby shelf

Submitted by kylihoot on Sun, 05/01/2011 - 11:59

Totally lovin' my new cubby shelf. I painted it bright yellow, but I may paint it a more nuetral color after noticing it does not math anything haha! This is a super sturdy shelf...LOVE IT! Thanks ANA!

Built from Plan(s)
Estimated Cost
$30
Estimated Time Investment
Afternoon Project (3-6 Hours)
Finish Used
Primer and Satin Paint. I sanded it with 120 grit, then primed and painted with two coats each.
Recommended Skill Level
Beginner

Adirondack Table/Stool

Submitted by Geoffrey on Thu, 06/27/2013 - 12:16

I built this using scrap 2x2s and 1x4s that I ripped down to the appropriate sizes. Also instead of using pocket holes I counter sunk the screws and filled with wood filler.

Built from Plan(s)
Estimated Time Investment
Afternoon Project (3-6 Hours)
Finish Used
Painter's Choice key lime
Recommended Skill Level
Beginner

Comments

Tryde Coffee Table Variation

Upgraded the original to fit the style of our living room. Just a few dollars more in wood. Changed the frame setup as well.

Very busy so I only have time to do a little bit at a time so I have no real idea how long it really took to build. All I know is the finishing took the longest: 2 coats black painted lower with 2 coats stain on the (custom color) and 2 coats polyurethane on the top piece.

Built from Plan(s)
Estimated Cost
$103
Estimated Time Investment
Week Long Project (20 Hours or More)
Finish Used
Min wax Jacobean and red stain mix. Polyurethane topped.
Black paint on lower.
Recommended Skill Level
Intermediate

Rustic Kitchen Island

Submitted by Knathu121 on Fri, 01/05/2018 - 19:59

I used the Rustic Kitchen Island plans to build this. I made my own modifications making the draw and the shelves the entire width of the unit. I also used 1x2’s behind the X’s to give it more of a barn look.

Estimated Cost
$100
Estimated Time Investment
Weekend Project (10-20 Hours)
Finish Used
I used a white satin enamel from Lowe’s on the body and the top I used Minwax weathered gray and then rubbed ebony in lighty over it.
Recommended Skill Level
Advanced

Comments

Barn door cabinet

Submitted by Anonymous (not verified) on Sun, 12/26/2021 - 18:55

Was able to customize this to fit my wine fridge!

Built from Plan(s)

Comments

Office makeover

It was time for an office makeover(at home). Sitting on the floor makes for a strong back and works those core muscles, so it was time to change things up. About a year ago or so I modified Ana's Flip Top Storage Bench / Coffee Table for my husband to use as a desk, as he needed to sit on the floor due to a back injury. Now it was time for mine. I instead modified Ana's Scrap Lap Desk. and it was truly built of scraps, with the exception of the hinges(which is odd, because I always have hinges lying around!)
I made the desk larger, and adjusted the height to fit me. I also omitted the side boxes and instead added a shelf on the bottom. Construction was simple and straightforward. Primed with whatever primer I had around, and even painted with a can of oops paint. The edges were lightly distressed, and will naturally distress even more, I am sure.
I had a green bookcase already, and the orange bins with I got on clearance at blue some time ago, and suddenly my color scheme was set--in the 70s. But I like it, as I need more color in my life. The printer stand I cobbled together out of scraps as well--essentially a box. A few boxes covered in paper, a rug from old tshirts, and two light fixtures-one a polyhedron from milk jugs, and the other a flower pot from the bullseye store, and I am set. Oh, and I finally got around to making my corkboard from all of the wine corks I've collected throughout the years. Or some of them, anyway.

Built from Plan(s)
Estimated Cost
free
Estimated Time Investment
Afternoon Project (3-6 Hours)
Recommended Skill Level
Beginner

Raised Cedar Bed

Submitted by NitePagan on Sun, 06/30/2013 - 08:27

I built cedar raised beds out of cedar decking, 3 pieces 5/4" x 6" x 8', actual dimensions were 1" x 5.5" x 8', plus 1 - 2 x 4 cedar. I made 48" x 96" boxes. I cut 1 of the cedar deck pieces into 2 - 48" long pieces. For the corners, I cut the 2 x 4 into 8 - 5.5" long pieces. I then screwed 2 of the 2 x 4 pieces together to form a 4 x 4 block. I used these as the inside corner to screw the decking to. The total cost was $60 to build 2 cedar beds. The other option would have been to make them double height, by cutting the 2 x 4's 11 inches long. This is more expensive then the boxes Ana did, but I could not find cedar fence slats, they appeared to be Northern White Pine which would have deteriorated quickly. I obtained the lumber from Lowes.

Estimated Cost
$60.
Estimated Time Investment
An Hour or Two (0-2 Hours)
Finish Used
No Finish.
Recommended Skill Level
Beginner

Modified Twin - Kentwood Headboard ONLY

Submitted by Shellz on Mon, 06/22/2015 - 00:43

I omitted some of what was called for in the original plans at ana-white.com. I wanted only a headboard. I then opted to go without the plywood backing when I found out that my local Home Depot's cutting area was not cutting due to the machines needing to be repaired. I added an extra piece of wood to the legs to accommodate attaching the bed frame. The finish is Varthane Red Oak and sealed with Minwax Polycrylic in Satin.

My mom is very happy to be getting these two headboards for her spare room. (The other one is still on my work table in the garage awaiting assembly and final finish!) Thanks for great plans to work from Ana!

Built from Plan(s)
Estimated Cost
$45 each headboard
Estimated Time Investment
An Hour or Two (0-2 Hours)
Finish Used
Varthane: Red Oak stain
Minwax: Polycrylic in Satin
Recommended Skill Level
Beginner

Sliding barn door buffet/console

Submitted by Fatkatone on Sun, 01/07/2018 - 11:20

I used my CNC machine do add custom details to this build , this thing is huge ! The hardware was a bit tricky to track down the parts but not hard to assemble at all. 

Built from Plan(s)
Estimated Cost
350$-450$ I used project panels for doors and 2x6” top boards, cost a bit extra.
Estimated Time Investment
Week Long Project (20 Hours or More)
Finish Used
Faux finish rustic, walnut stain

Satin finish latex top coat
Flat black spray paint base coat
Stain and linseed oil over top.
Recommended Skill Level
Intermediate

ALEXIA BENCH

Submitted by Anonymous (not verified) on Mon, 12/27/2021 - 09:28

At the beginning I was not sure to succeed in the drawers so I did no regret it .
I decided to doing another one .
My brother was happy to take my fist one.

Thank Ana White

Built from Plan(s)

Comments

Step Stool

I love this step stool!! My daughter uses it EVERYDAY! This was the first thing I built and I think it turned out pretty good. I did a different design on the bottom sides to make it a little girly since I was painting it blue (girls can have blue stuff too!)

Built from Plan(s)
Estimated Cost
$10
Estimated Time Investment
An Hour or Two (0-2 Hours)
Finish Used
I dont know what color of blue this was because it was a "mis-tint" that I got for $3, then I sanded to distress it.
Recommended Skill Level
Starter Project

Patriotic Silverware and Napkin Caddy

This fun patriotic caddy was created with some small modifications to the plans that inspired this project : Ana White's Soda Caddy . I added a space for napkins to my version.

Built from Plan(s)
Estimated Time Investment
An Hour or Two (0-2 Hours)
Recommended Skill Level
Beginner

Comments

1st time project!

Submitted by The_big_al on Wed, 06/24/2015 - 19:10

This was a pretty easy build. This was my first project and this looked like a pretty straightforward plan. I read over it several times before deciding what to do. I didn't like that it was held together using only screws. I anticipated that these beds will be moved several times over their lifetime and I did want to hassle with the screws stripping out the wood. Instead I used a 3/8 bolt and washer/nut set up so I could take the bed apart without worrying about stripping out the wood with screws. This necessitated drilling several large unsightly holes at the connection points. To help disguise this I trimmed it out using door casing and finished it out by staining the whole bed. The result was a classic look that will last my daughter's lifetime.

I will note that I changed a few parameters. I routed and the edges including the slats with a rounded corner edge. I used a 2x6 for the top cap of the head/footboards. With the addition of the trim work and bolt hardware, this did change the overall cost of the project. Total cost was probably close to $200. Had I stuck strictly to the plans I would have been closer to $100.

Built from Plan(s)
Estimated Cost
Because I changed a few parameters total cost was a bit higher. I think it was about $200 including hardware and stain.
Estimated Time Investment
Weekend Project (10-20 Hours)
Finish Used
The Simple Bed plans work great. They were easy to follow. They were also simple enough I could make modifications without too much issue.

To make the bed I made, I made two headboards (in anticipation of making a bunk bed). Instead of using screws to hold the bed together I used a 3/8 4" bolt and nut combo. 4 bolts to hold the 4x4 posts to the head/footboard and 8 (2 on each end) to hold the side rails. I countersunk the bolts into the posts to hide the bolt head. I drilled 1 1/2 inch holes on the inside of the side rails and headboards to access the bolts and attache a washer and nut. Once tightened,the bolts holding the posts to the headboard will never have to come apart. Only the bolts for the rails have to be left accessible to take the bed apart for moving. However I was then left with huge unsightly holes in the outsides of the side rails and the insides of the head/footboards. I was going to leave it thinking it wouldn't look that bad but after assembling the bed I realized how unfinished it would look. That is when I decided to add the trim work which not only really made the bed look finished it hid all holes I had to drill. I did leave the holes in the backs of the posts uncovered since access to them is needed for assembly and dis-assembly.

Dimensions for the holes were calculated based on using the 1x6's in the headboard and the 2x6's in the side rails. If you want exact dimensions I can give you those. Just email me, however it was simple enough to figure out where to place them. The trickiest part is getting the holes drilled in the posts to line up with the headboards and rails.
Recommended Skill Level
Intermediate

Our mantle moulding headboard

Submitted by ehrobson13 on Thu, 01/11/2018 - 11:20

We went with the mission style headboard and used 1x2 posts instead of a solid or upholstered backboard.  We also converted the designs to accomodate our California king mattress.  


The designs on the site are for a queen sized bed, which is 60"X80".  The "H" frame of the headboard is 66" wide (two vertical 2x6's and a 54" horizontal piece).  Our California king mattress is 72"x84".  So that's 12 inches wider than a queen.  As such, we simply adjusted everything up by 12".  So, insead of a 66" wide H frame, we made it a 78" H frame and so on.


It took just one day to build.  But we used an entire container of woodfiller to conceal the joins, nail/screw holes and knots, lol. Then we used 2 coats of primer and sanded between coats.  Then used 3 coats of latex semi-gloss paint, sanding in between each coat.  The wood filler, paint, sanding and drying time is what caused the project to be more than just a weekend thing.

Built from Plan(s)
Estimated Cost
$100
Estimated Time Investment
Week Long Project (20 Hours or More)
Finish Used
We did 2 coats of primer and sanded between coats. Then did 3 coats of latex semi-gloss, sanding in between each coat.
Recommended Skill Level
Intermediate

Narrow Console Table - Modern Farmhouse Collection

Submitted by DPM on Tue, 12/28/2021 - 10:34

Hi Ana,

I live in the UK and really enjoy the range of projets you show on your website. Only been doing DIY woodworking for about a year and you have helped enormously.

I built this console table in time for Xmas and really pleased with the result. The plans you provide are perfect, simple, easy to follow and give just the right amount of detail. It means only wood needed for the project is bought and little is wasted. The videos you produce to accompany the plans are exactly what is needed. It is so helpful to see the suggested order of building the project and also as a check to see what each stage should look like.

Thanks again for all your efforts, they really are appreciated and best if luck for the new year and hopefully, many more projects.

Comments