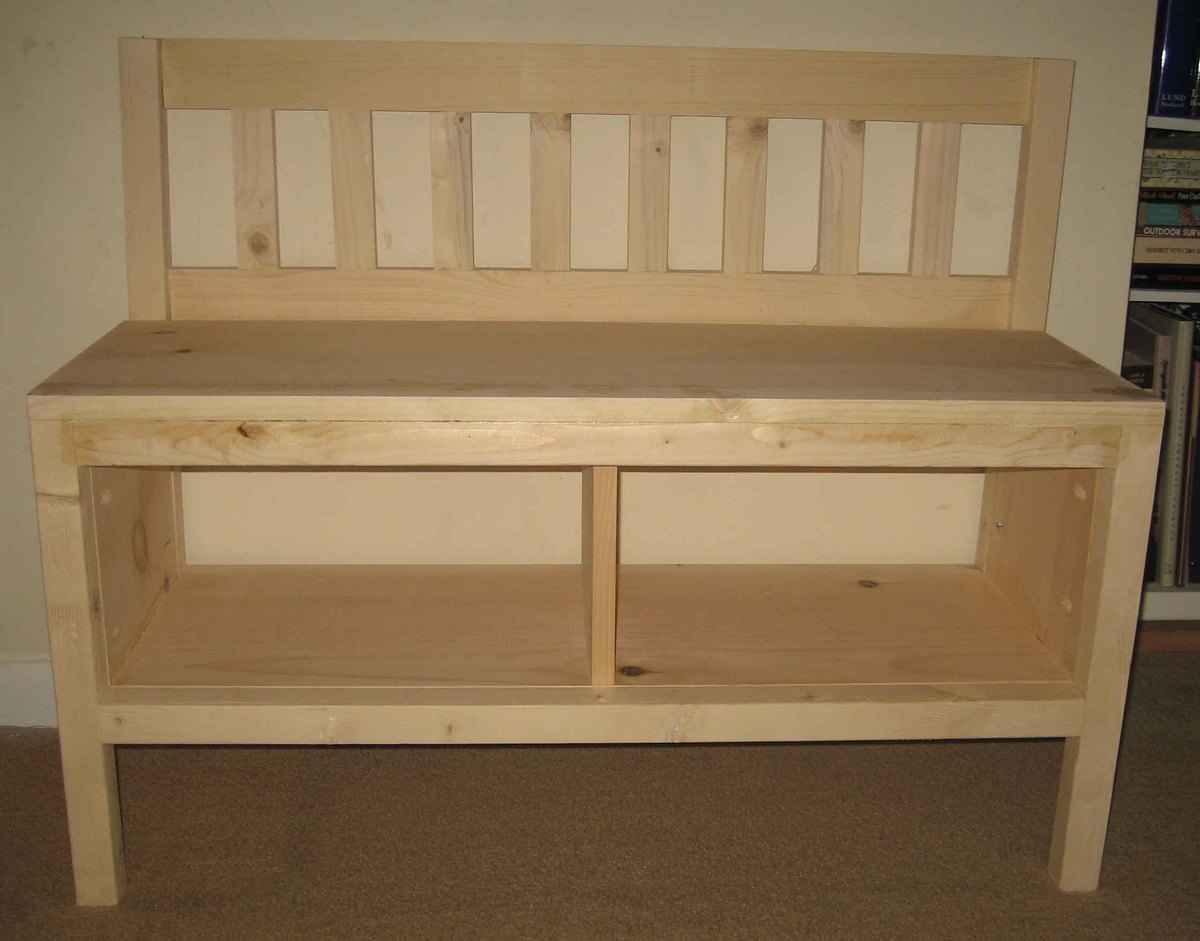
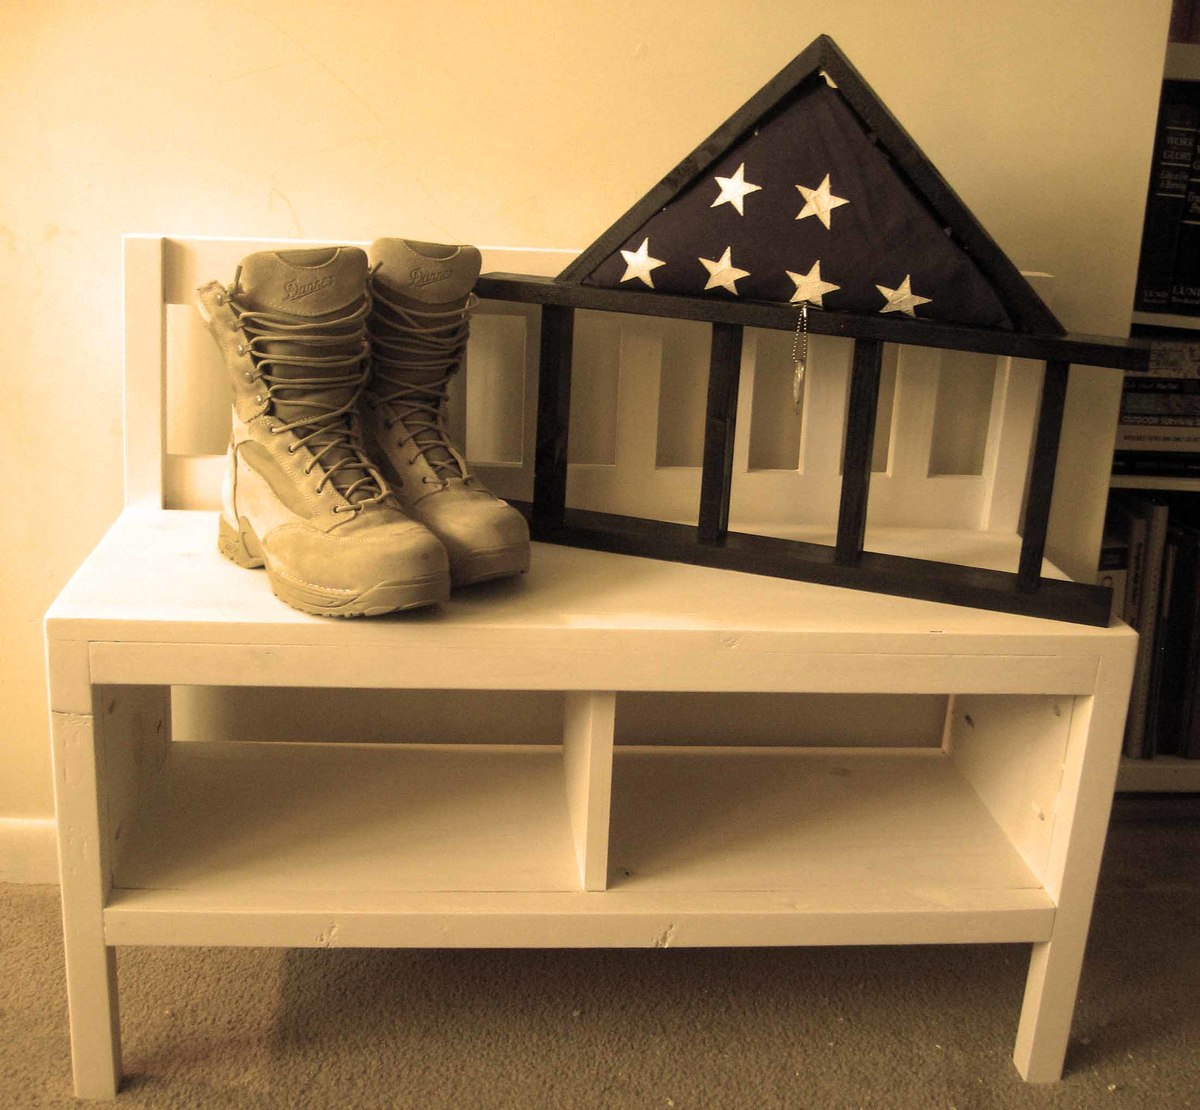
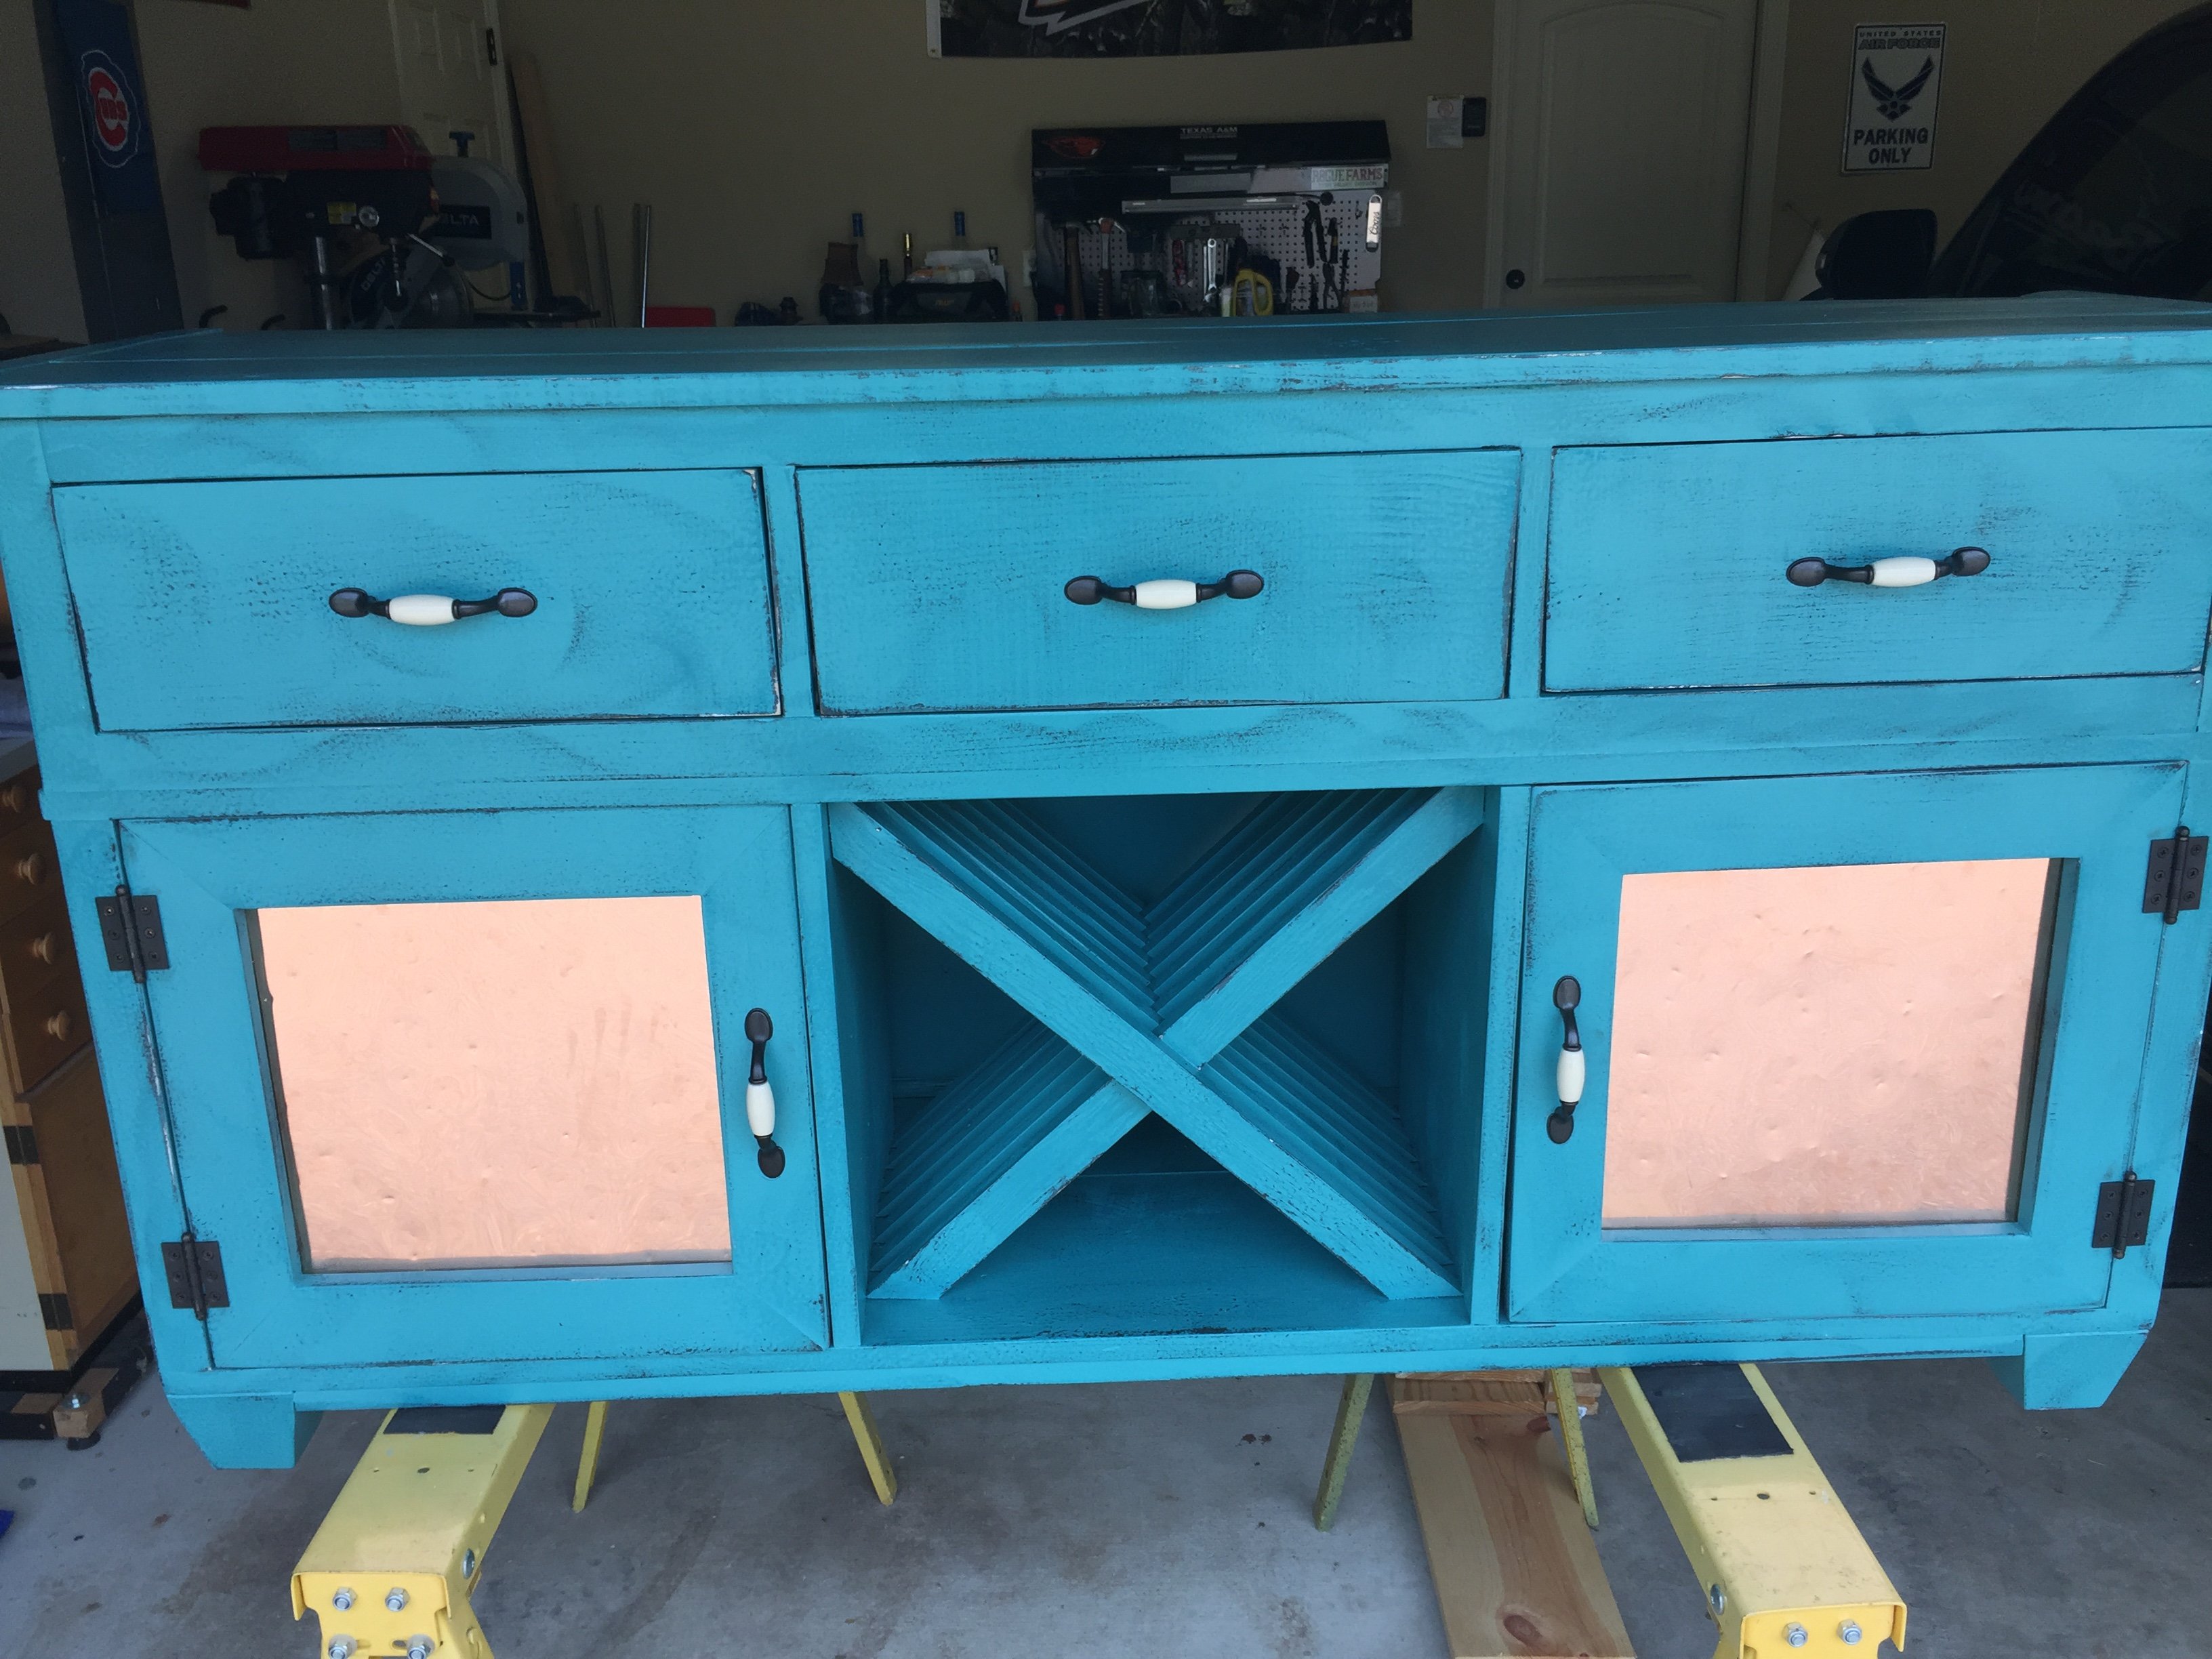
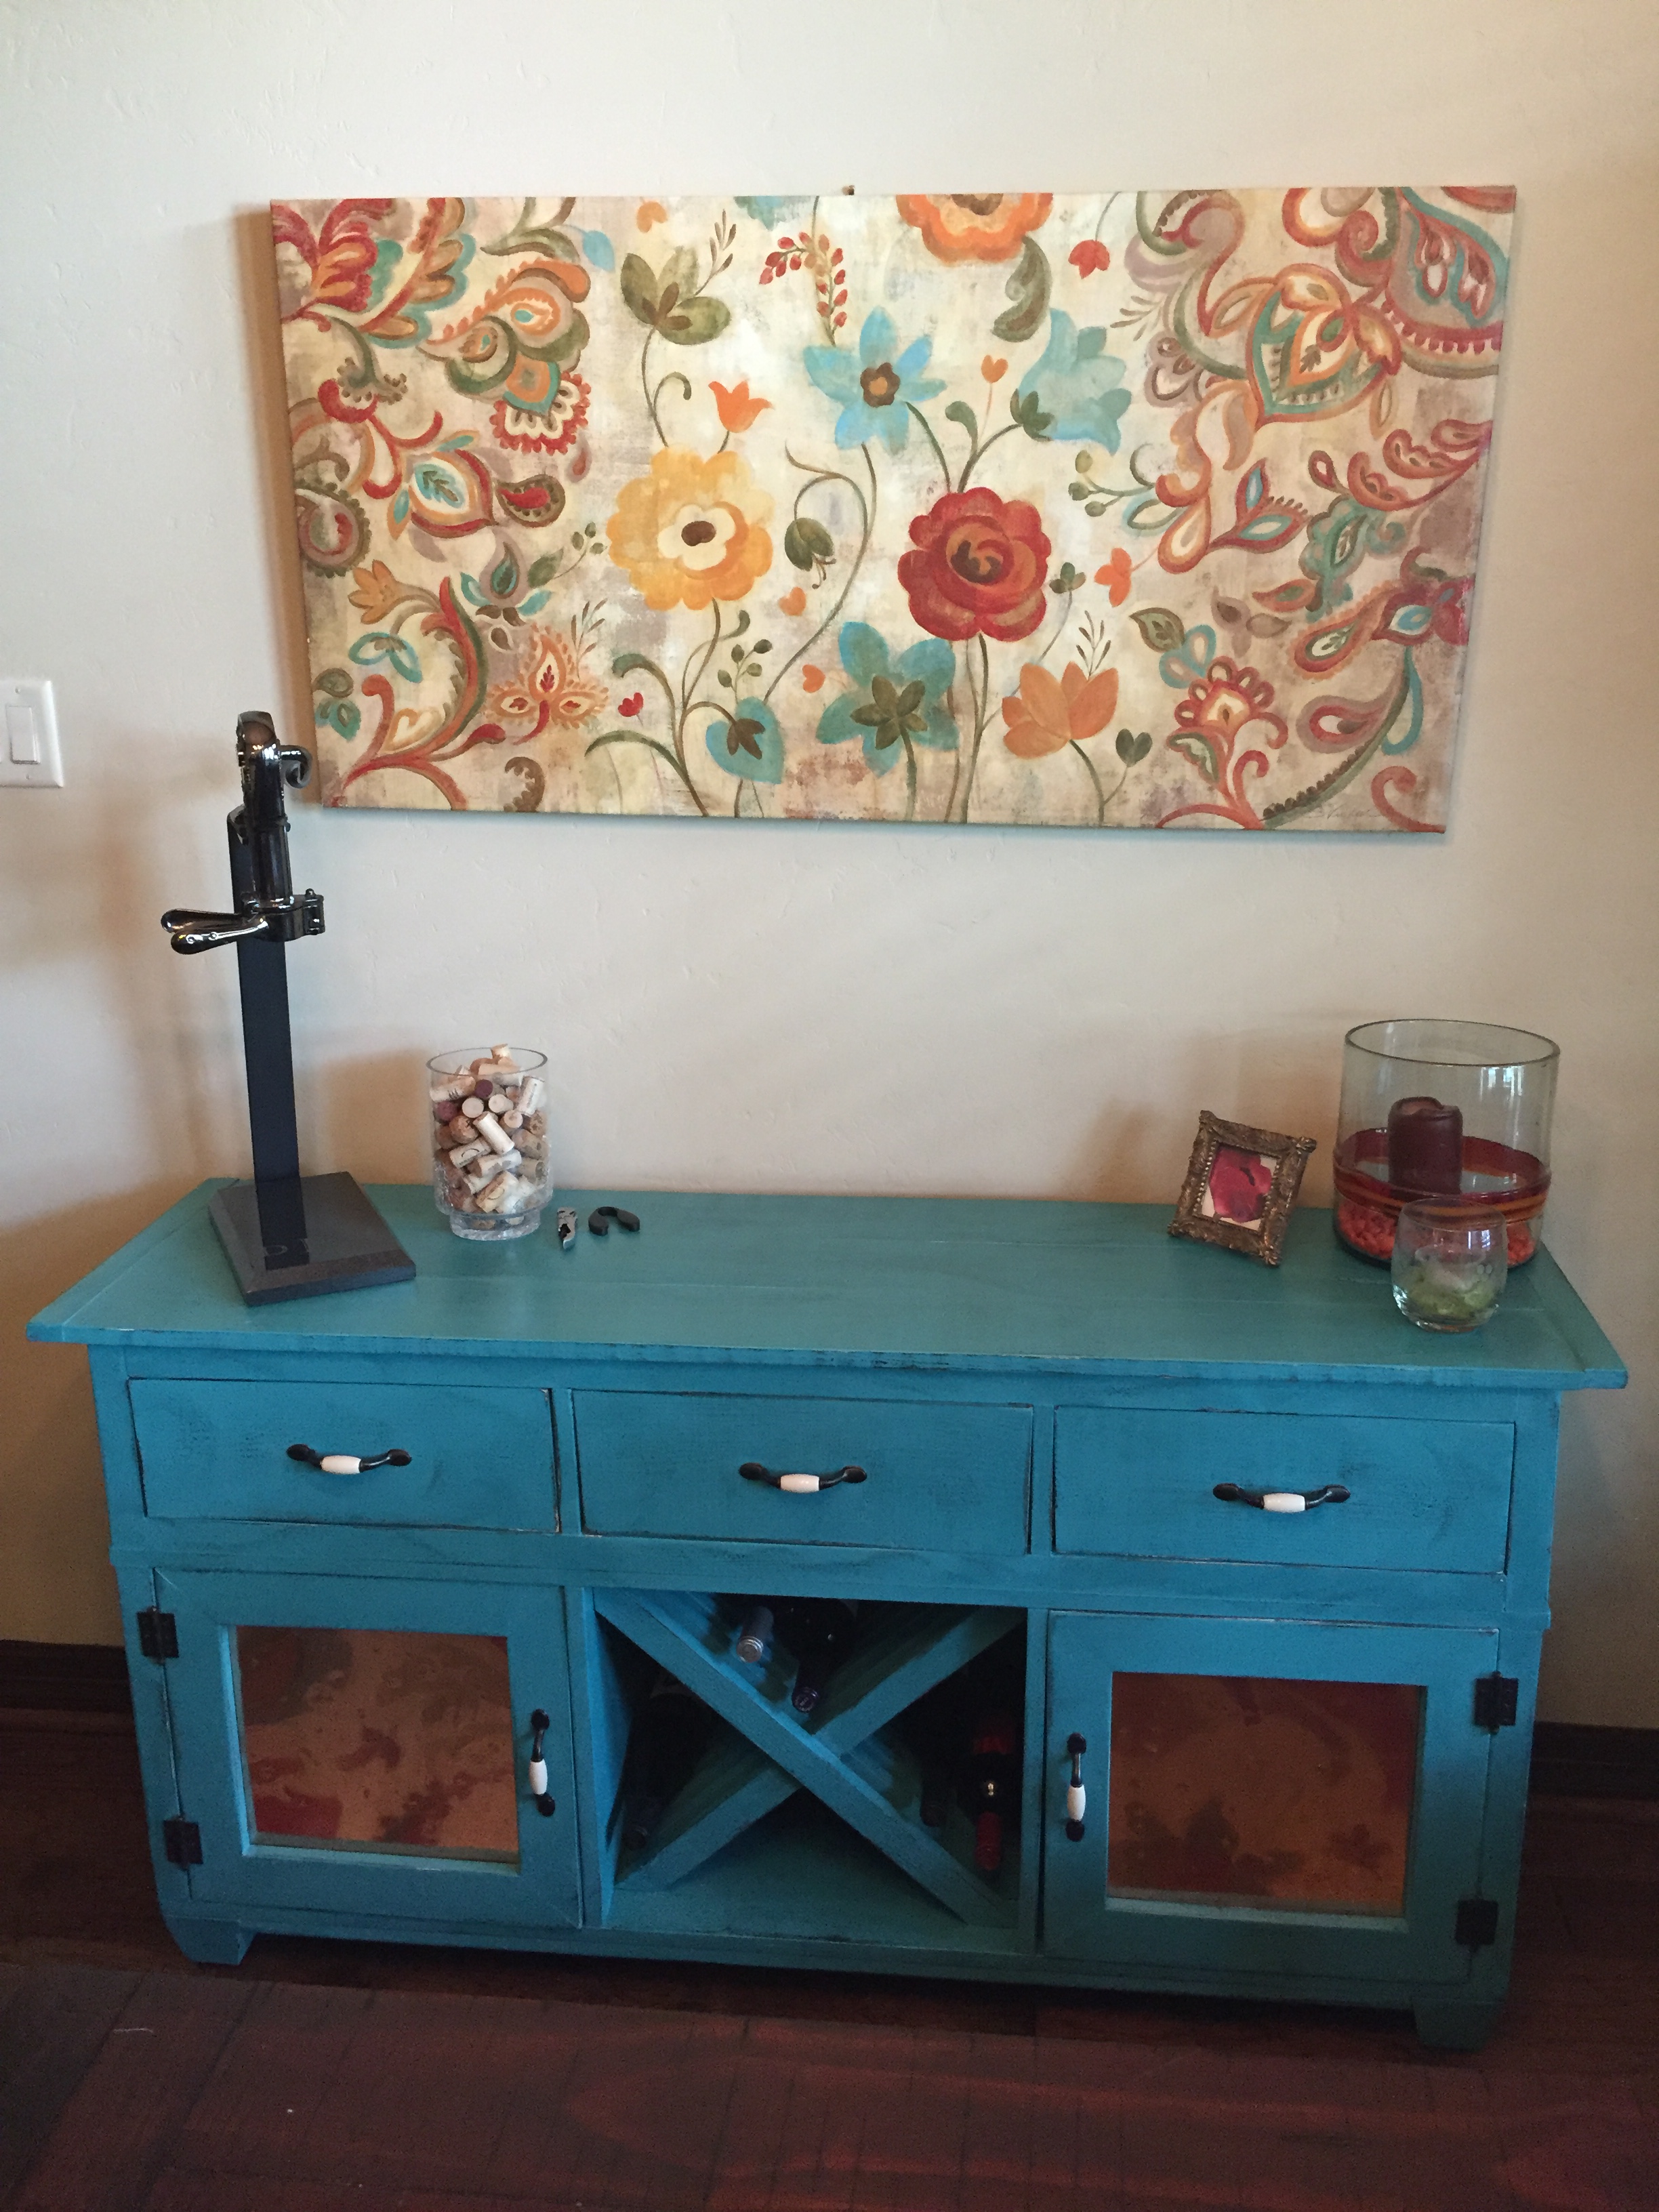
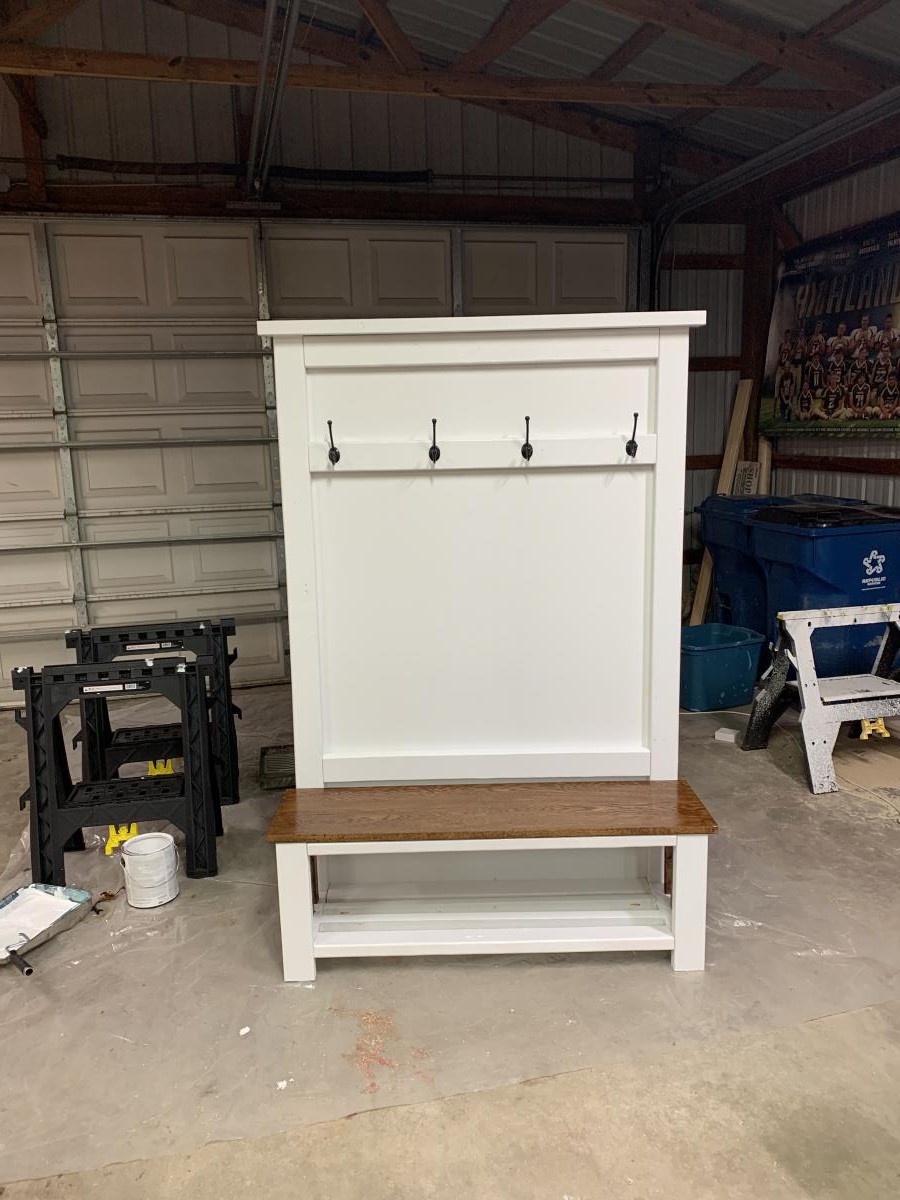
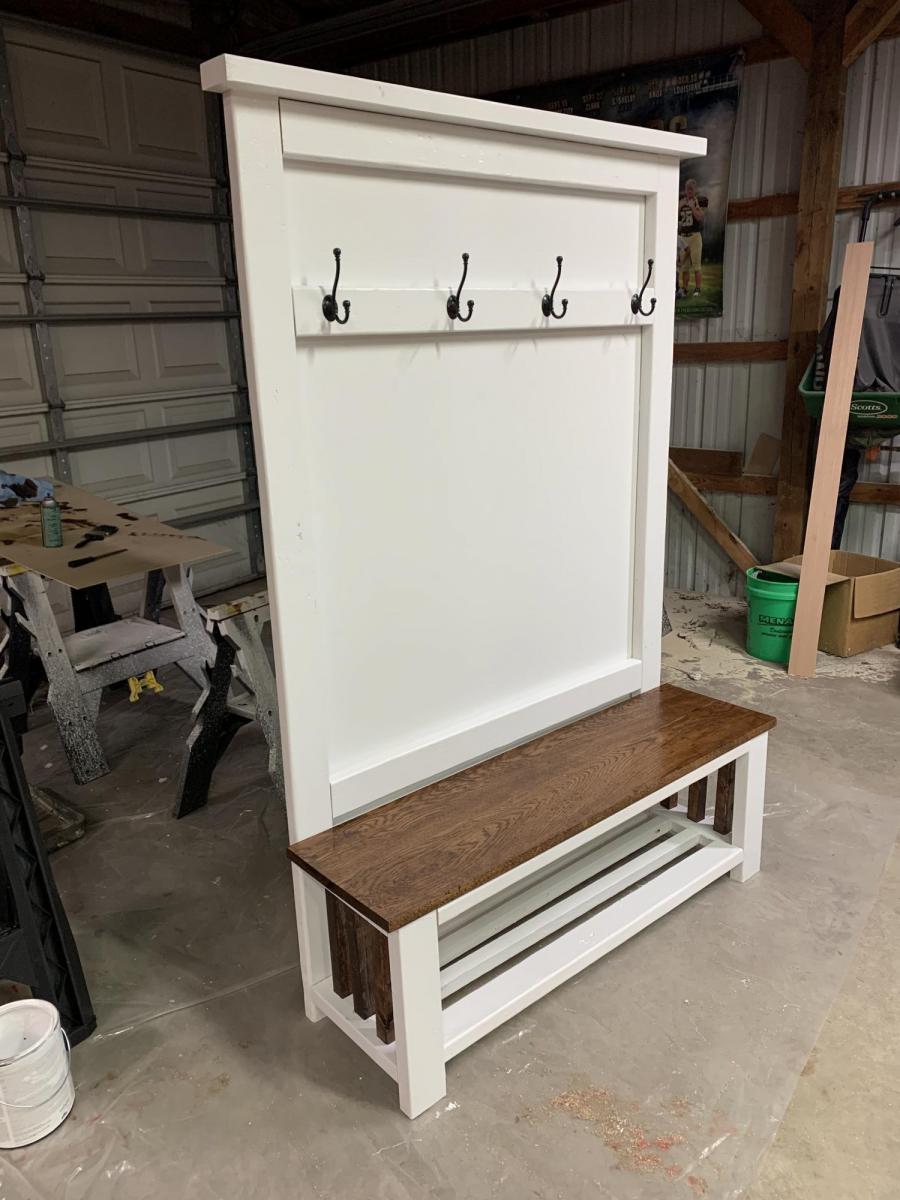
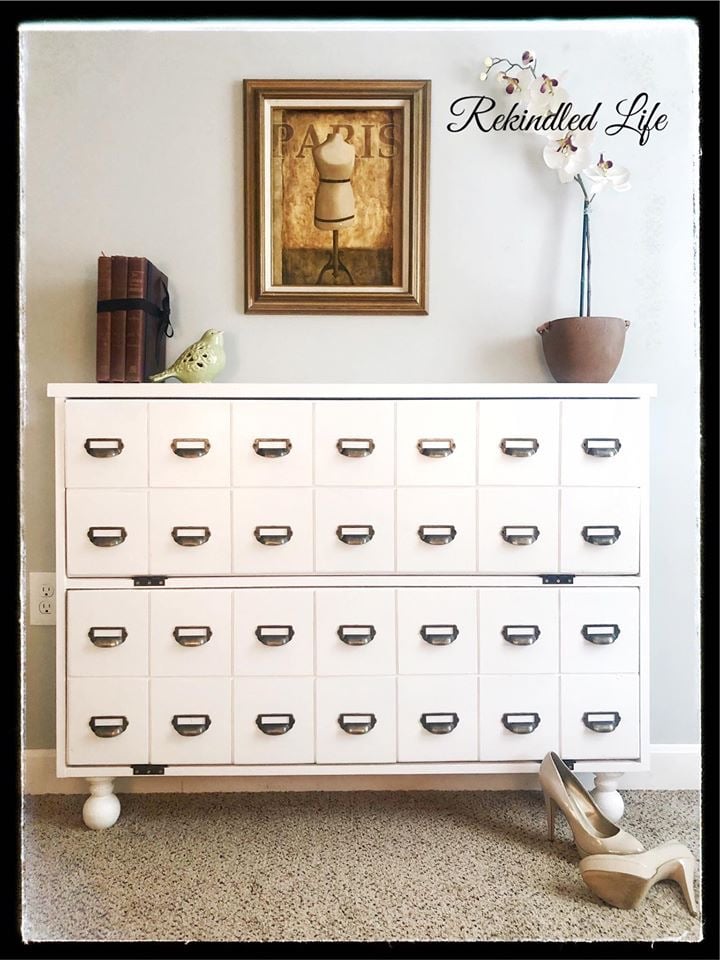
Card catalog shoe cabinet
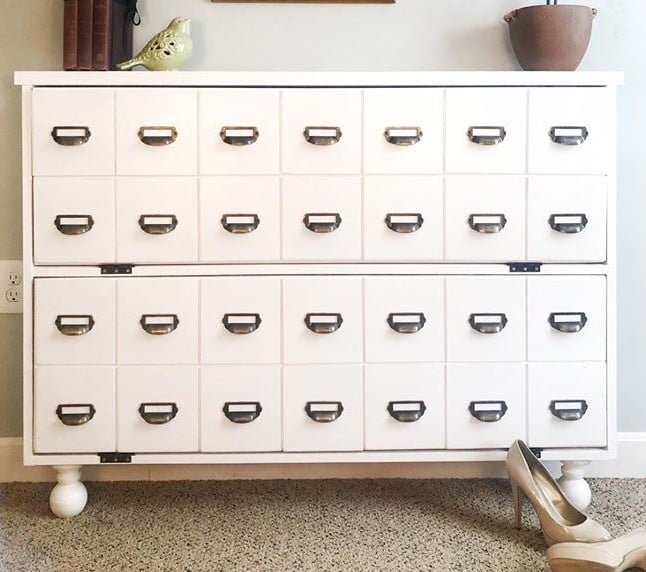
I built the shoe cabinet but added card catalog handles. Also used deck railing toppers for the feet
Chicken coop I made to look like a little red barn complete with a working barn door. We have seven girls and they love their lovely barn home.
Sue Laidacker
All the wood is from pallets, which you can find for free at local big box stores.
I added the shelf with the same support system used for the table top.
Made with as little cost as possible so materials are not too much.
Material:
A few pallets
Wood screws
Tools:
Table Saw
Miter Saw
Drill
Sander
Measuring Tape
Square
Pencil and Paper
Stain
Brush
Shop Cloth
This is my first Project :)
We recently created a Dr. Seuss themed reading nook on our upper level. We have one large book shelf near it, but have also wanted a way to display children's books. These ledge shelves make the books easy to access while also creating a beautiful piece artwork at the top of our stairs. Now, instead of have a long blank wall in the hallway between doors on the little landing we have a beautiful library. I have loved how they have turned out and wanted to share with others!
Wed, 03/05/2014 - 20:18
My children love these bookshelves and reach for the books easier and more often. Come see some of the other things we've made at http://myhomedonemyway.blogspot.com/
My husband and I built a house doing all the work that we could. When we started the project, I told the men in my life they were going to build the kitchen cabinets. They were pretty adamant they weren't. I started visiting with experienced cabinet makers. One kept repeating, "It's just a box. It's not that hard to build a box." With that encouragement, I found Ana's website and set about learning woodworking. First I built a step stool for my grandson, next I built some shelves for the shop, then I built this vanity. After I finally got it finished, I called an experienced woodworker to build my kitchen cabinets. Ha! I will say though, when the appraiser came out, he commented on what a nice vanity it was! Thank you, Ana, for opening up a new world to me!!
While I found the plans a little difficult to follow as there were steps left out, missing measurements, and misinformation, it was an easy project and I'm so glad I made it. Even at 21 weeks pregnant it was totally doable alone. The only thing I needed my husband for was to hold the side rails at the correct height.
Barn door console I turned into a coffee bar. Great storage space. Love the way it turned out.
Dee
Thu, 11/09/2023 - 11:47
Fabulous build, so much storage and beautiful too!
Since I had little space in my floor I took to logs from the field.
I first polished them with sandpaper and steelwool. 1st time dry, 2nd time wet. After drying I paintetd one with white stain. The other one with nutchest stain and clear coat.
The white log was once more polished with steelwool after painting.
Therefore it has an used/bleached look.
I added warderobe hooks to each log and screwed them to the wall.
Price 30 €
About 10 € for 20 € for the hooks and screws.
Sorry, my english is not so good - I'm not a native speaker.
I converted the plans to king size and used oak for the headboard and the platform edge on the bed. The oak added to the cost as it is almost 10x the cost as construction lumber.
I made the headboard frame with pocket holes and attached it to the plywood with screws from behind. I also used pocket screws to assemble the bed frame.
Chairs for grandkids. They picked it their colors.
My family was all coming over for Christmas and we were going to have about 30 people at my house. I only had my mudroom hooks but no other place to store people's keys, coats, etc. When I saw these plans they looked quick enough to build in one night (the night before the party lol). So I did! And man did it get use. I wish I would've taken a picture with all the coats and purses and keys on it.
I have built several furniture pieces in my home several coming from you.
I have done quite a bit of wood working never being great at any of them . But I truly love furniture building.
Saw this bench and loved it. Since its Memorial weekend I thought I would add some personal belongings to it.
There is 1x10 on the shopping list! This was the first cut to make and I realized no where does it say to grab a 1x10 board. Other than that, the plans were great. Definitely made some mistakes along the way but overall I am very pleased. Thanks for the plans!
I created a sofa table and also one for the loveseat but I don't have it pictured. I used a 2" x 10" for the top and 2" x 6" boards for the legs as well as braces. Added a two outlet and two USB port socket to the table top which was wired to plug into the outlet that would be covered up. Made it so that the legs we're up against the wall allowing for the top to extend just over the back of the couch, and it allowed the two legs to keep the pets from going behind the couch.
I made this for some friends who are fellow dog lovers. I used the Mimi’s hall tee and storage bench plans. They were very happy with it. This is the second time I’ve used these plans. It’s a very fun project to build.
M. Wold
Sat, 11/18/2023 - 12:48
Love this, such a great storage solution for a pet walking station!
I started with the simple white outdoor sofa, then the factory cart table, adirondack stool, and 2 simple outdoor lounge chairs. Wow! This was my first adventure making furniture. All in all it took me about a month to make everything in my spare time. I made a few mistakes along the way, all part of the learning curve. But definitely learned so much from this site. I am forever grateful to you, Ana.
Thu, 05/31/2012 - 05:53
You did an amazing job and I just love the happy colors you chose:-)
Thu, 05/31/2012 - 06:00
Thank you bhoppy! I wanted colors that contrasted with all the blue-grey on the deck. It was so much fun.
Mon, 06/04/2012 - 07:10
Yes, for the factory cart I painted angle brackets black. I also painted the caster wheels that I got from Tractor Supply.
Sat, 05/25/2013 - 10:22
What width foam did you use for your cushions? I've been wanting to make some outdoor furniture, but the price of foam is holding me back. I've found 3" for a reasonable price, I just don't know if that will be thick enough.
Sat, 05/25/2013 - 12:17
I used a 4" foam, but I think you could easily use 3". I know foam is not cheap. I shopped online for foam suppliers and found a pretty good deal... much cheaper than local fabric stores.
Sat, 07/13/2013 - 16:19
This is beautiful! I'm planning to make the chairs and I'm wondering if you changed the plans at all, especially any dimensions? Maybe it is just the angle, but the arms look a little lower, which I love. If you can let us know what you did, I would really appreciate it!
Thanks!
My Dad and I built this for my daughter's third birthday. It's been a big hit! I'm really happy with how it turned out.
I followed plan but added 20 extra inches and an extra woven insert plus an extra brace in center of seat.
I followed the Rustic X Hall Tree plans almost entirely. I chose to replace the “X” with vertical posts, though I may use the X in a future project. The bench top is two 1” thick oak boards milled at my farm. Love the contrast of the white and stained oak. The plans were perfect!
Used Ana's doll high chair plans. Modified the tray with a curved hinged tray. Painted in her favorited color!