Community Brag Posts

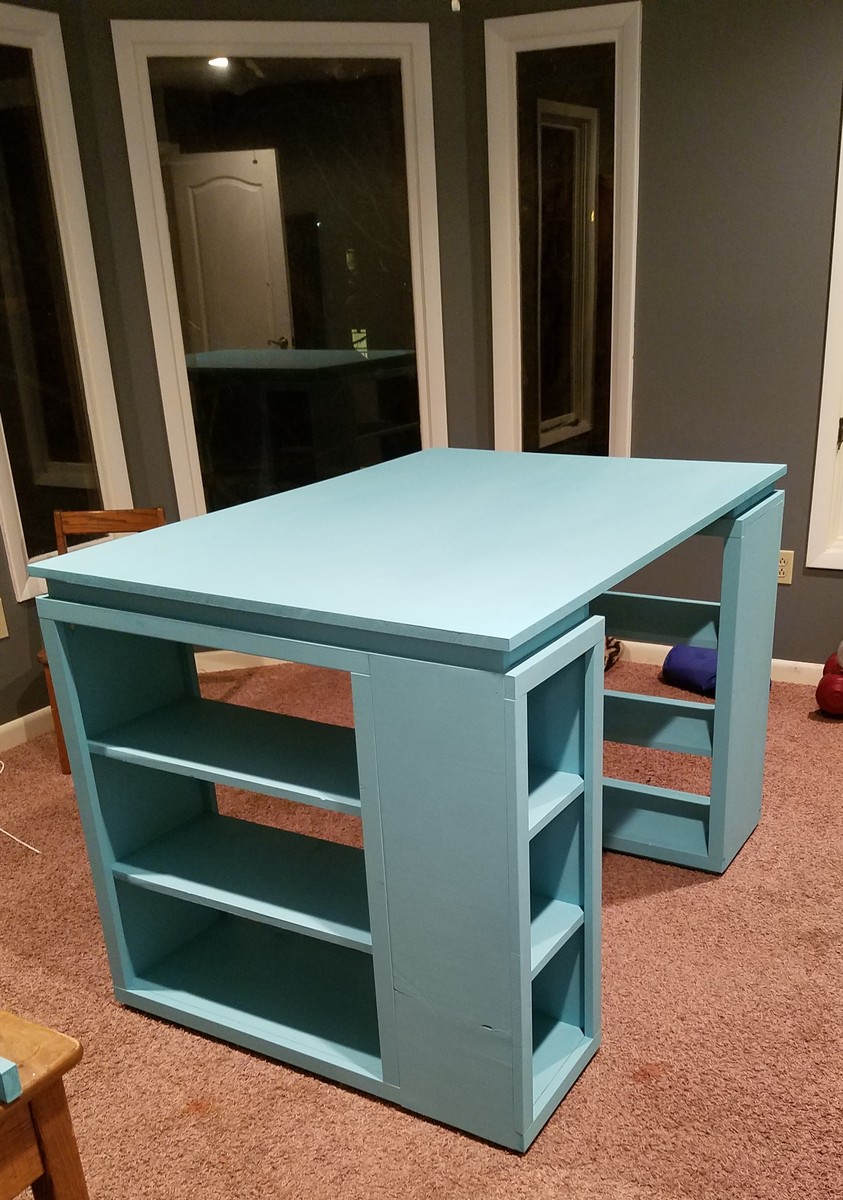
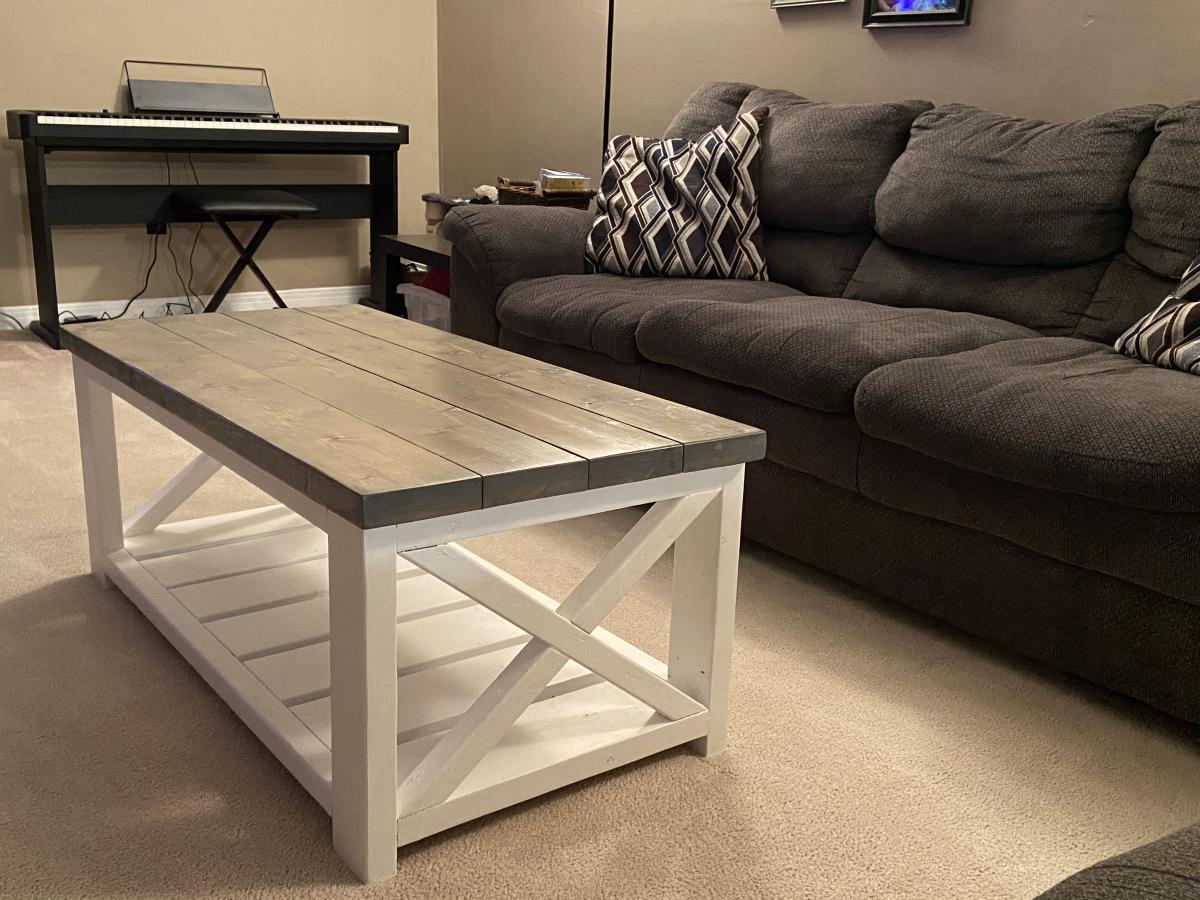
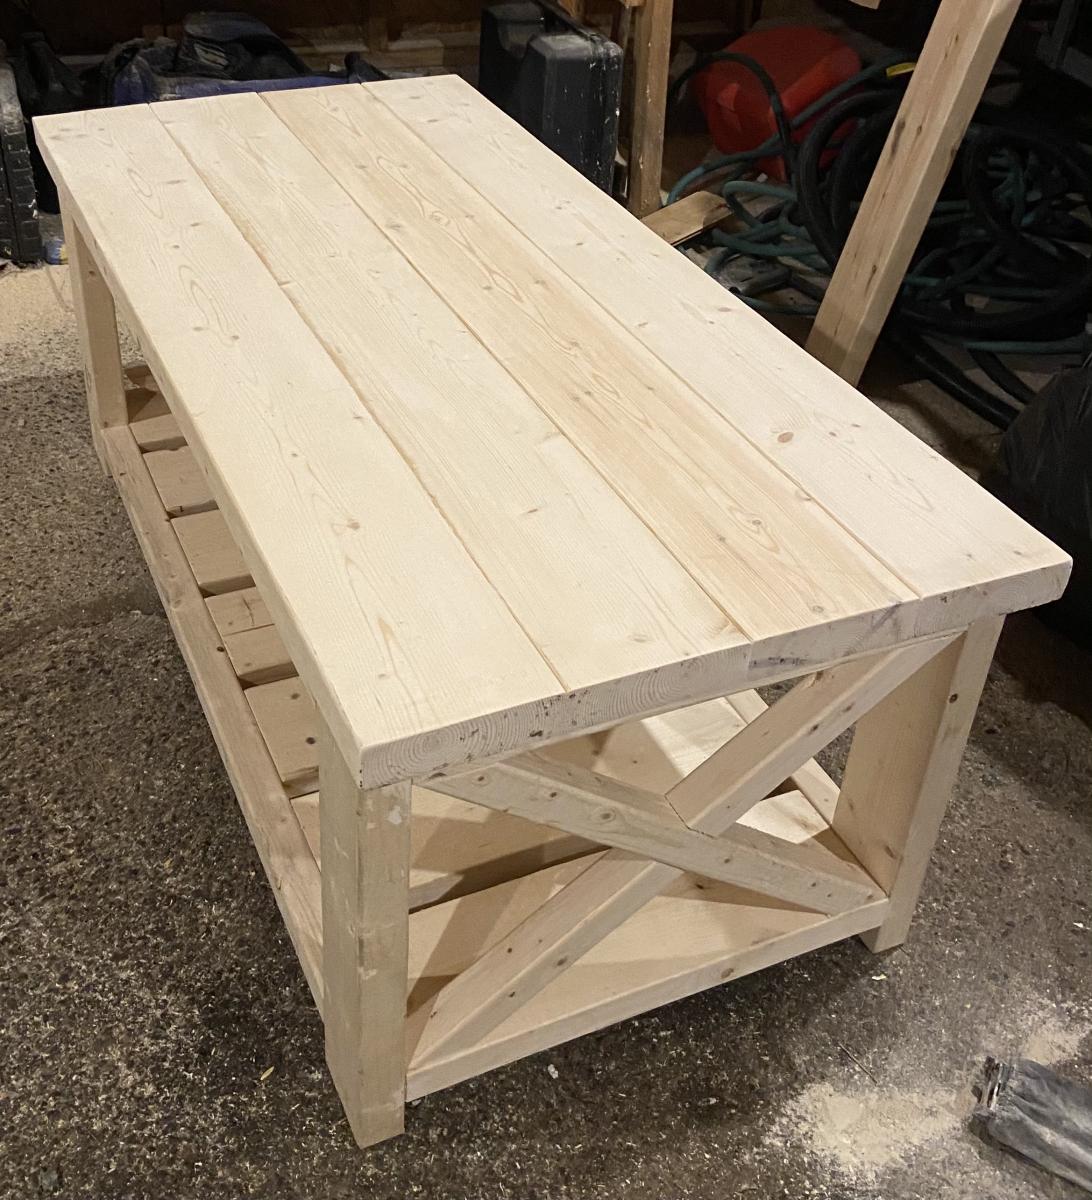
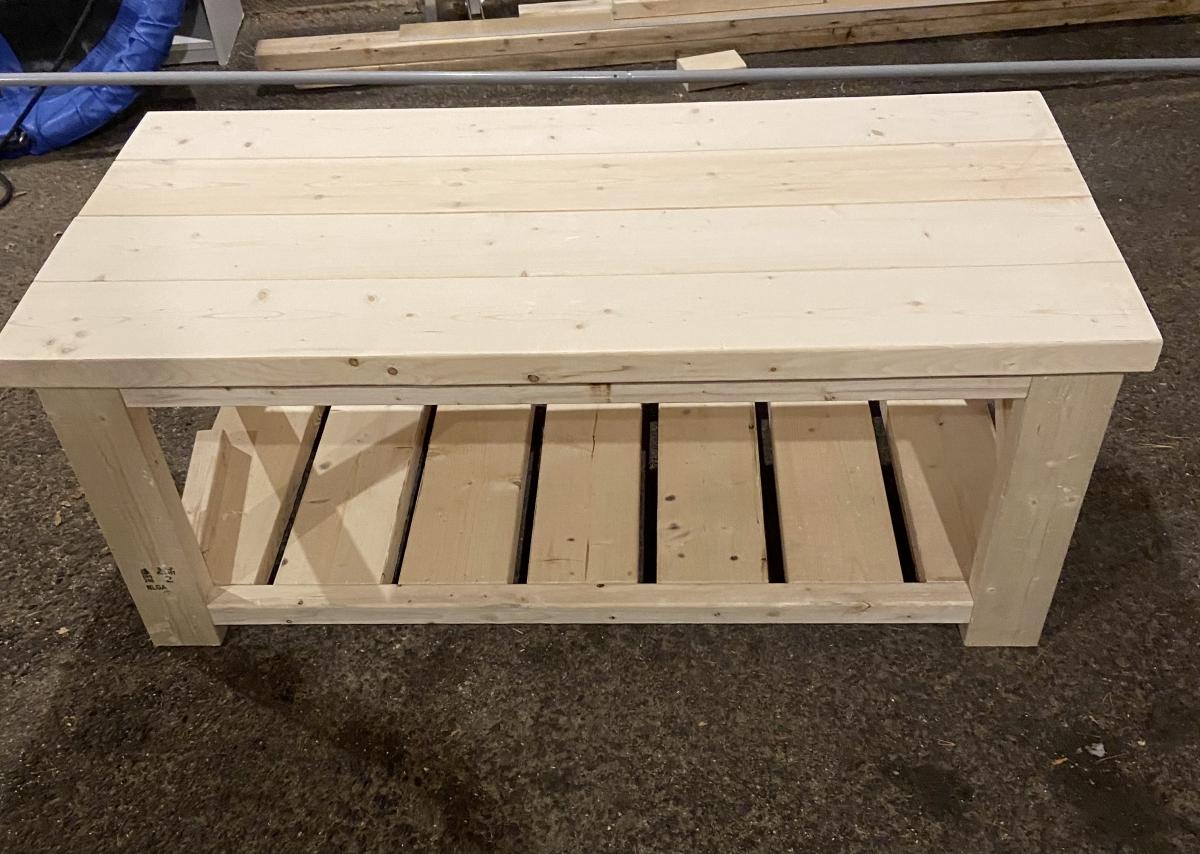
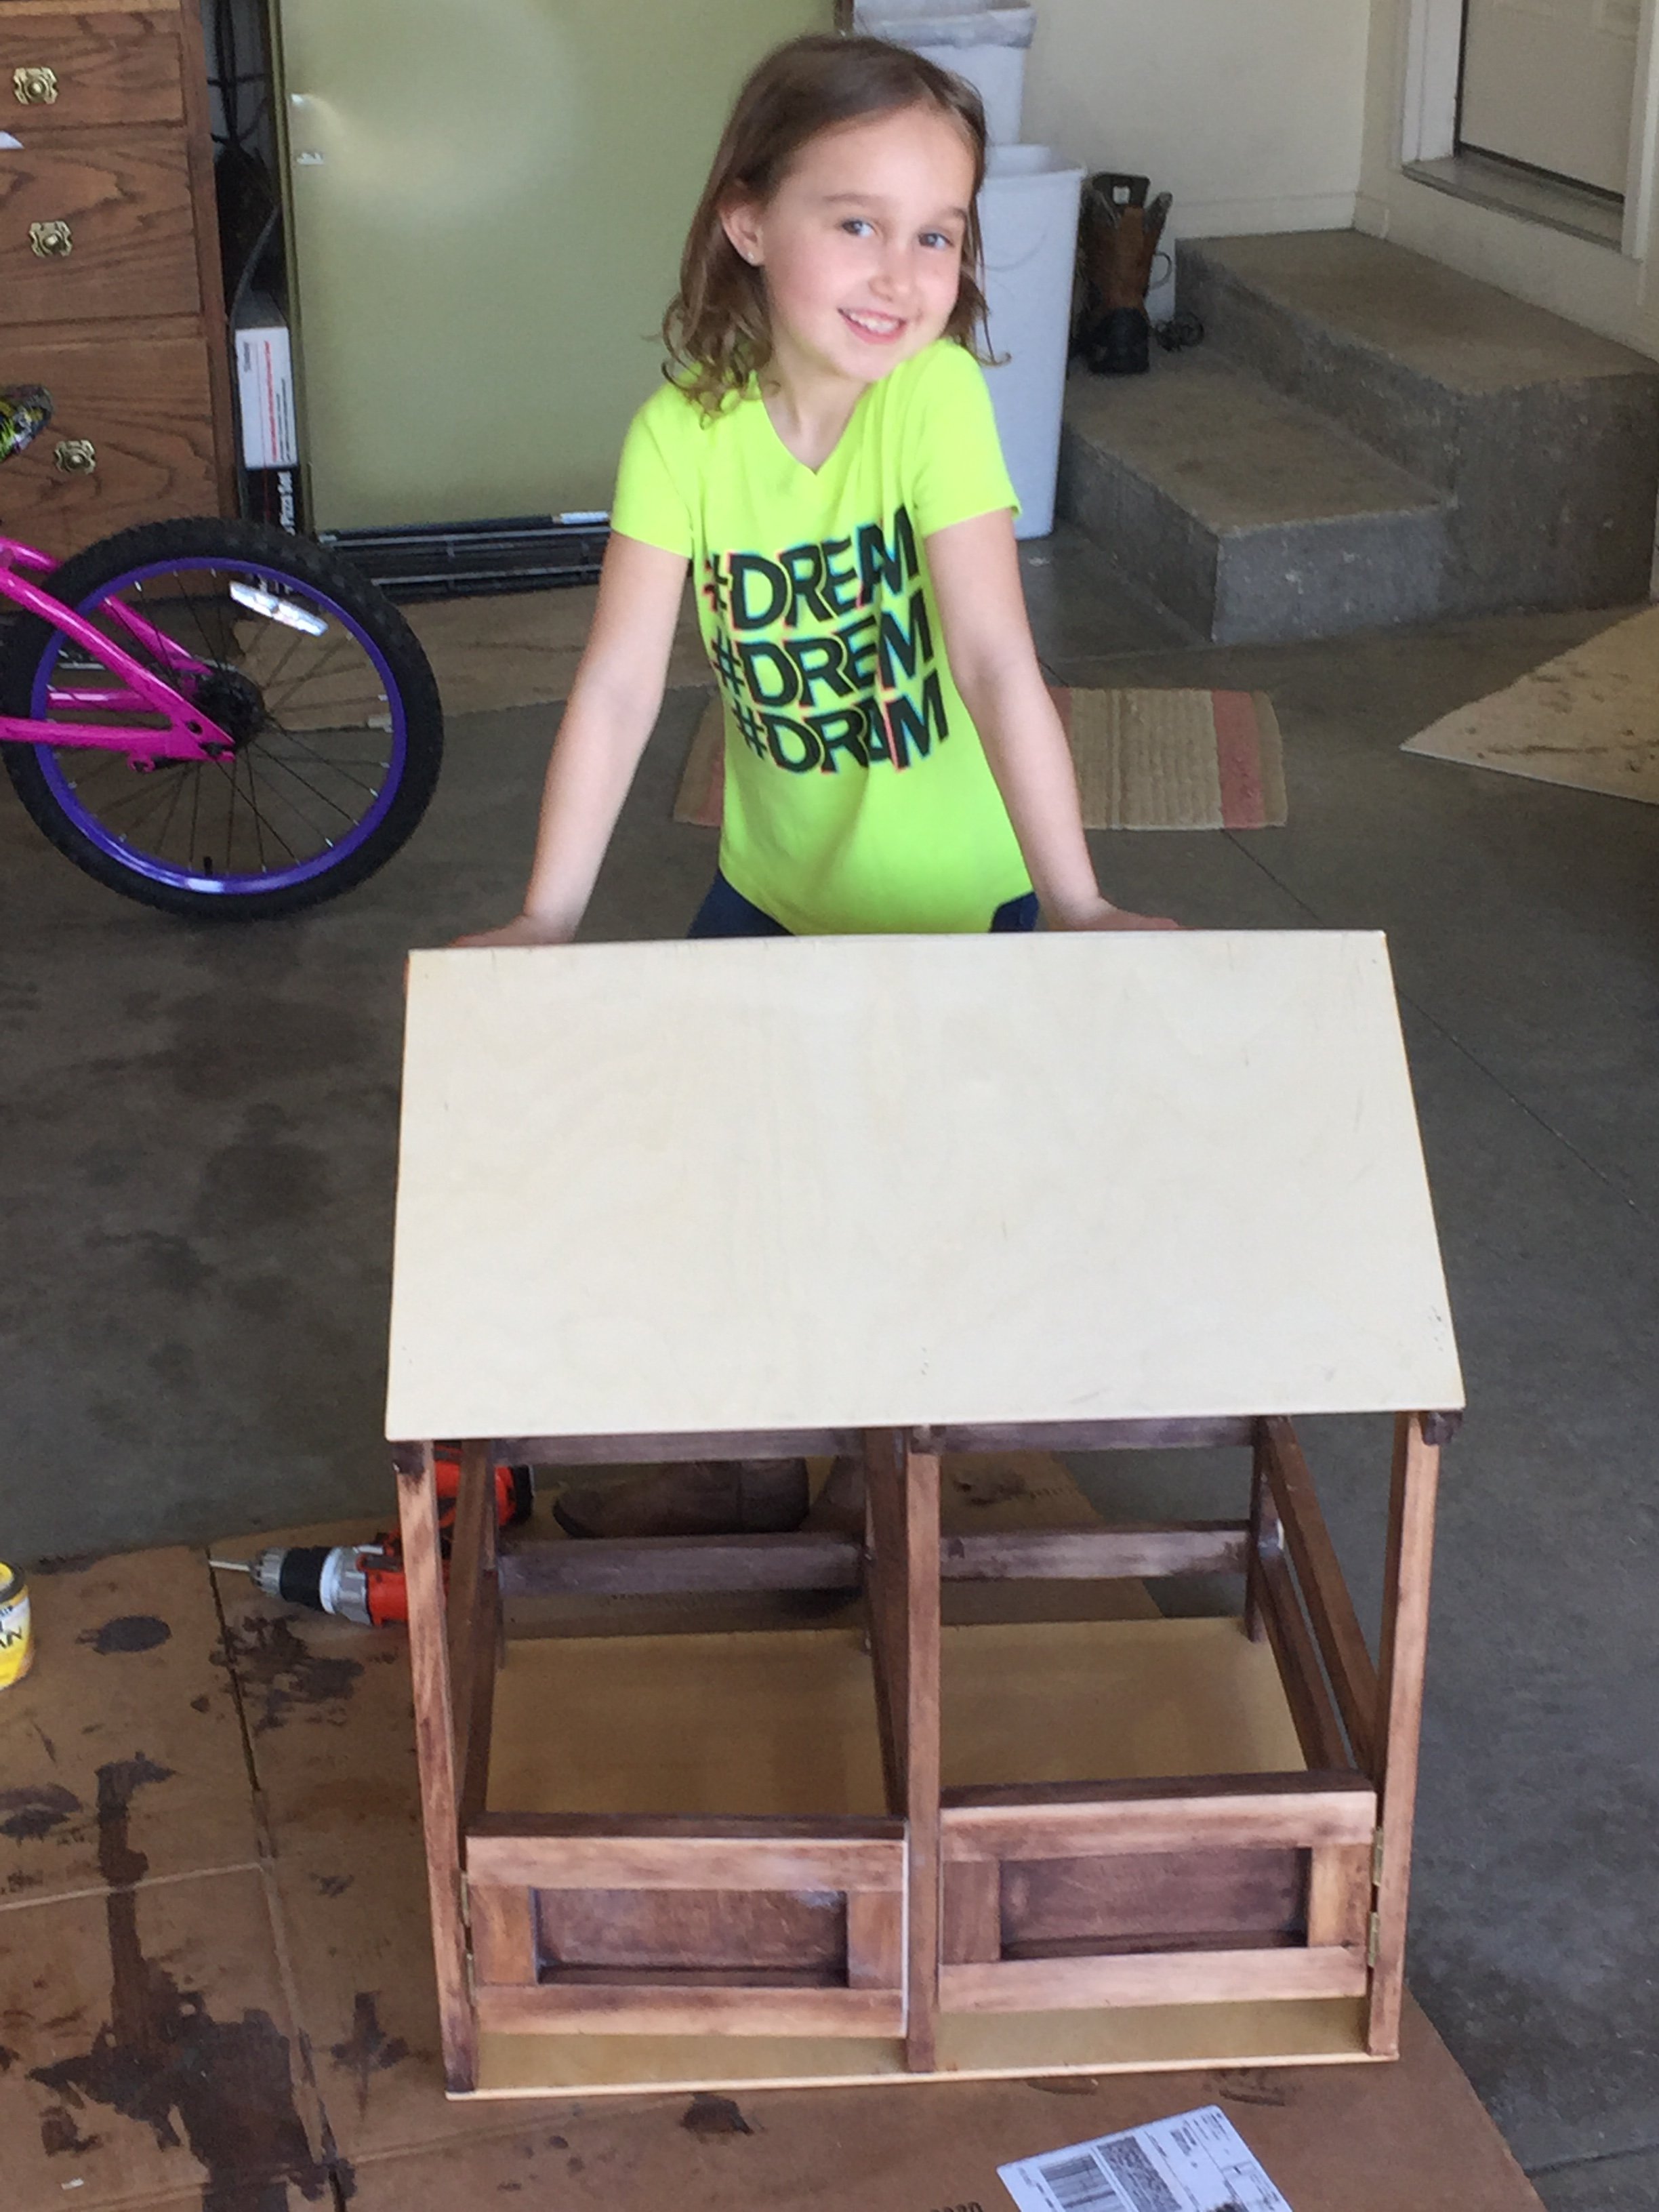
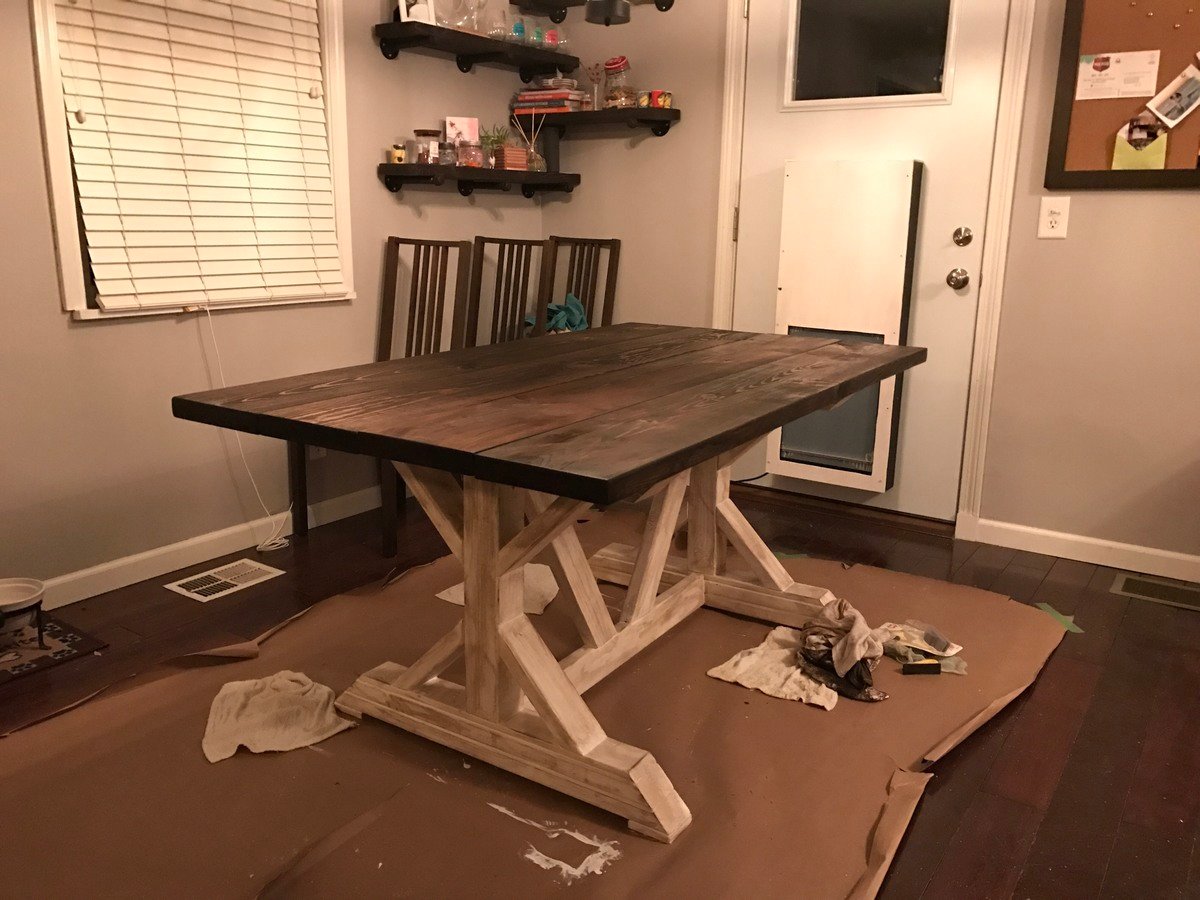
Modified Kitchen Island

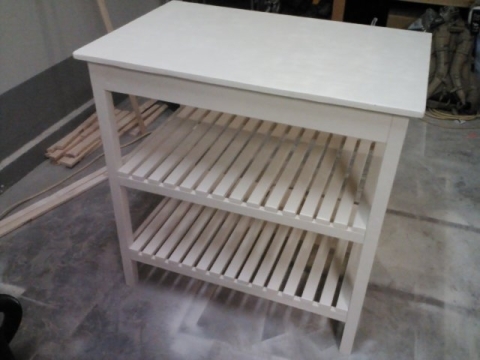
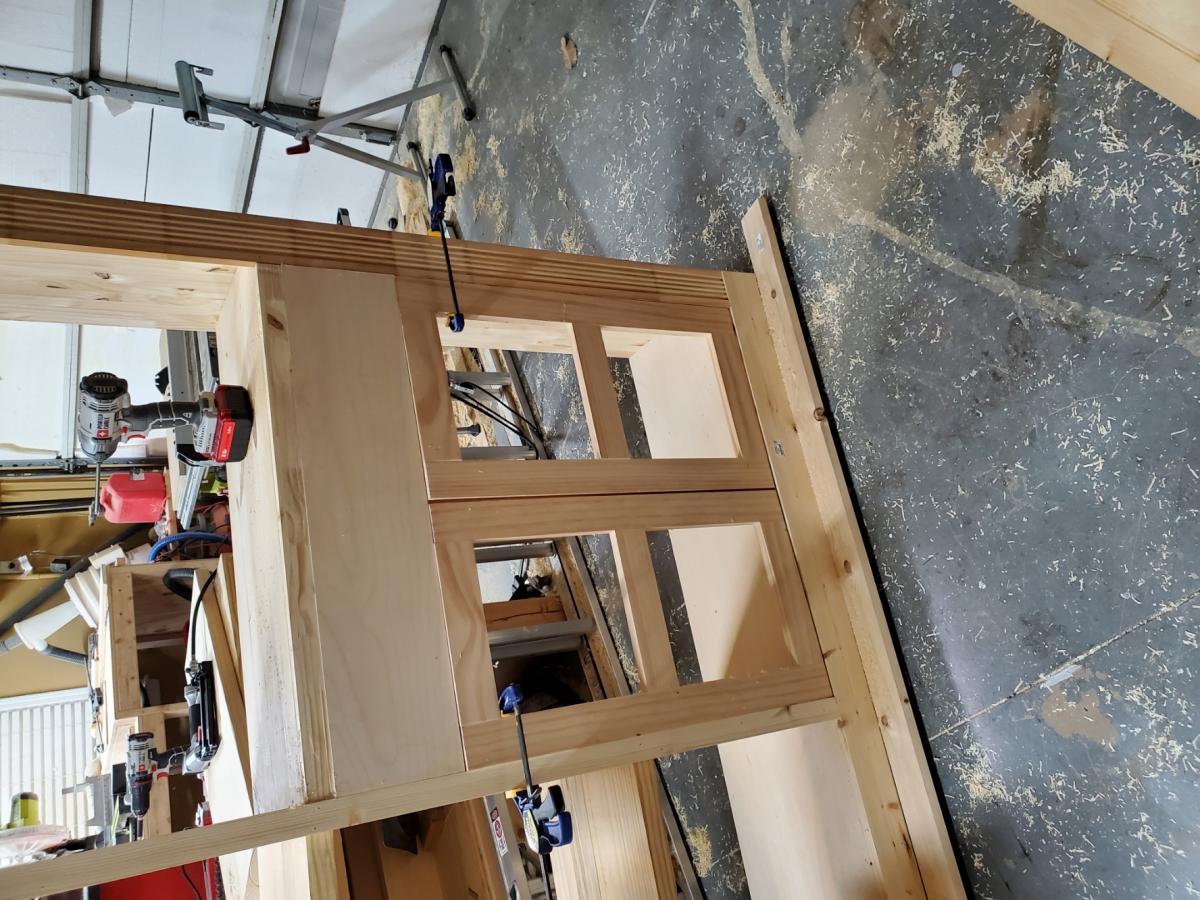
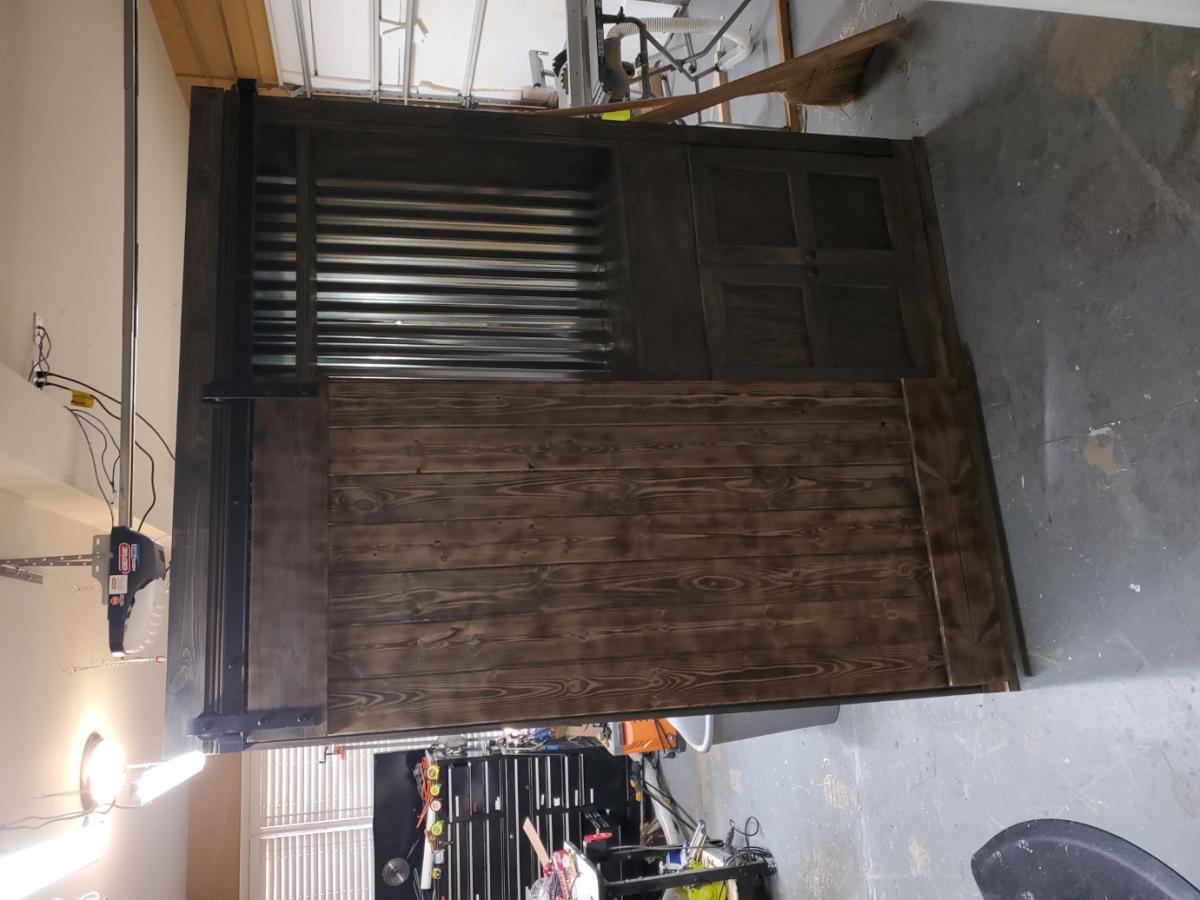
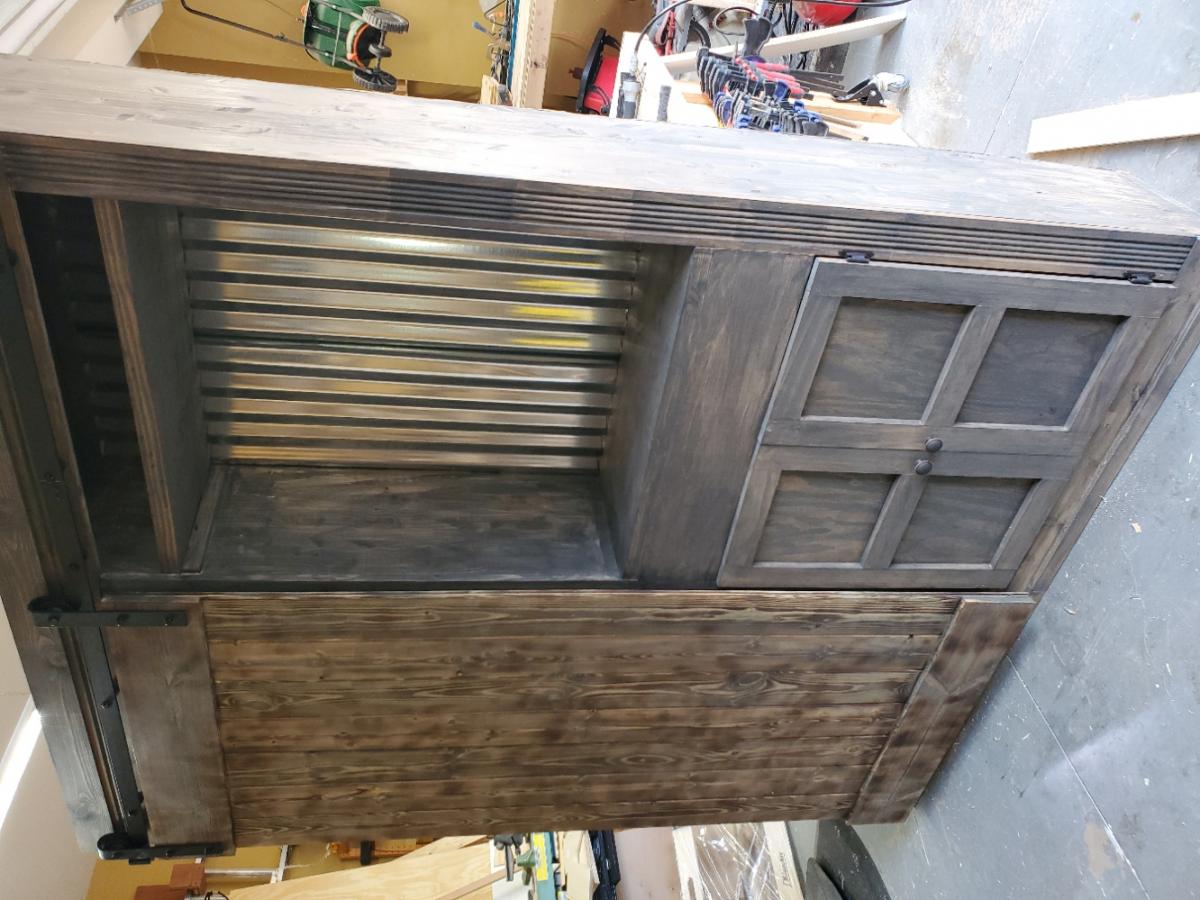
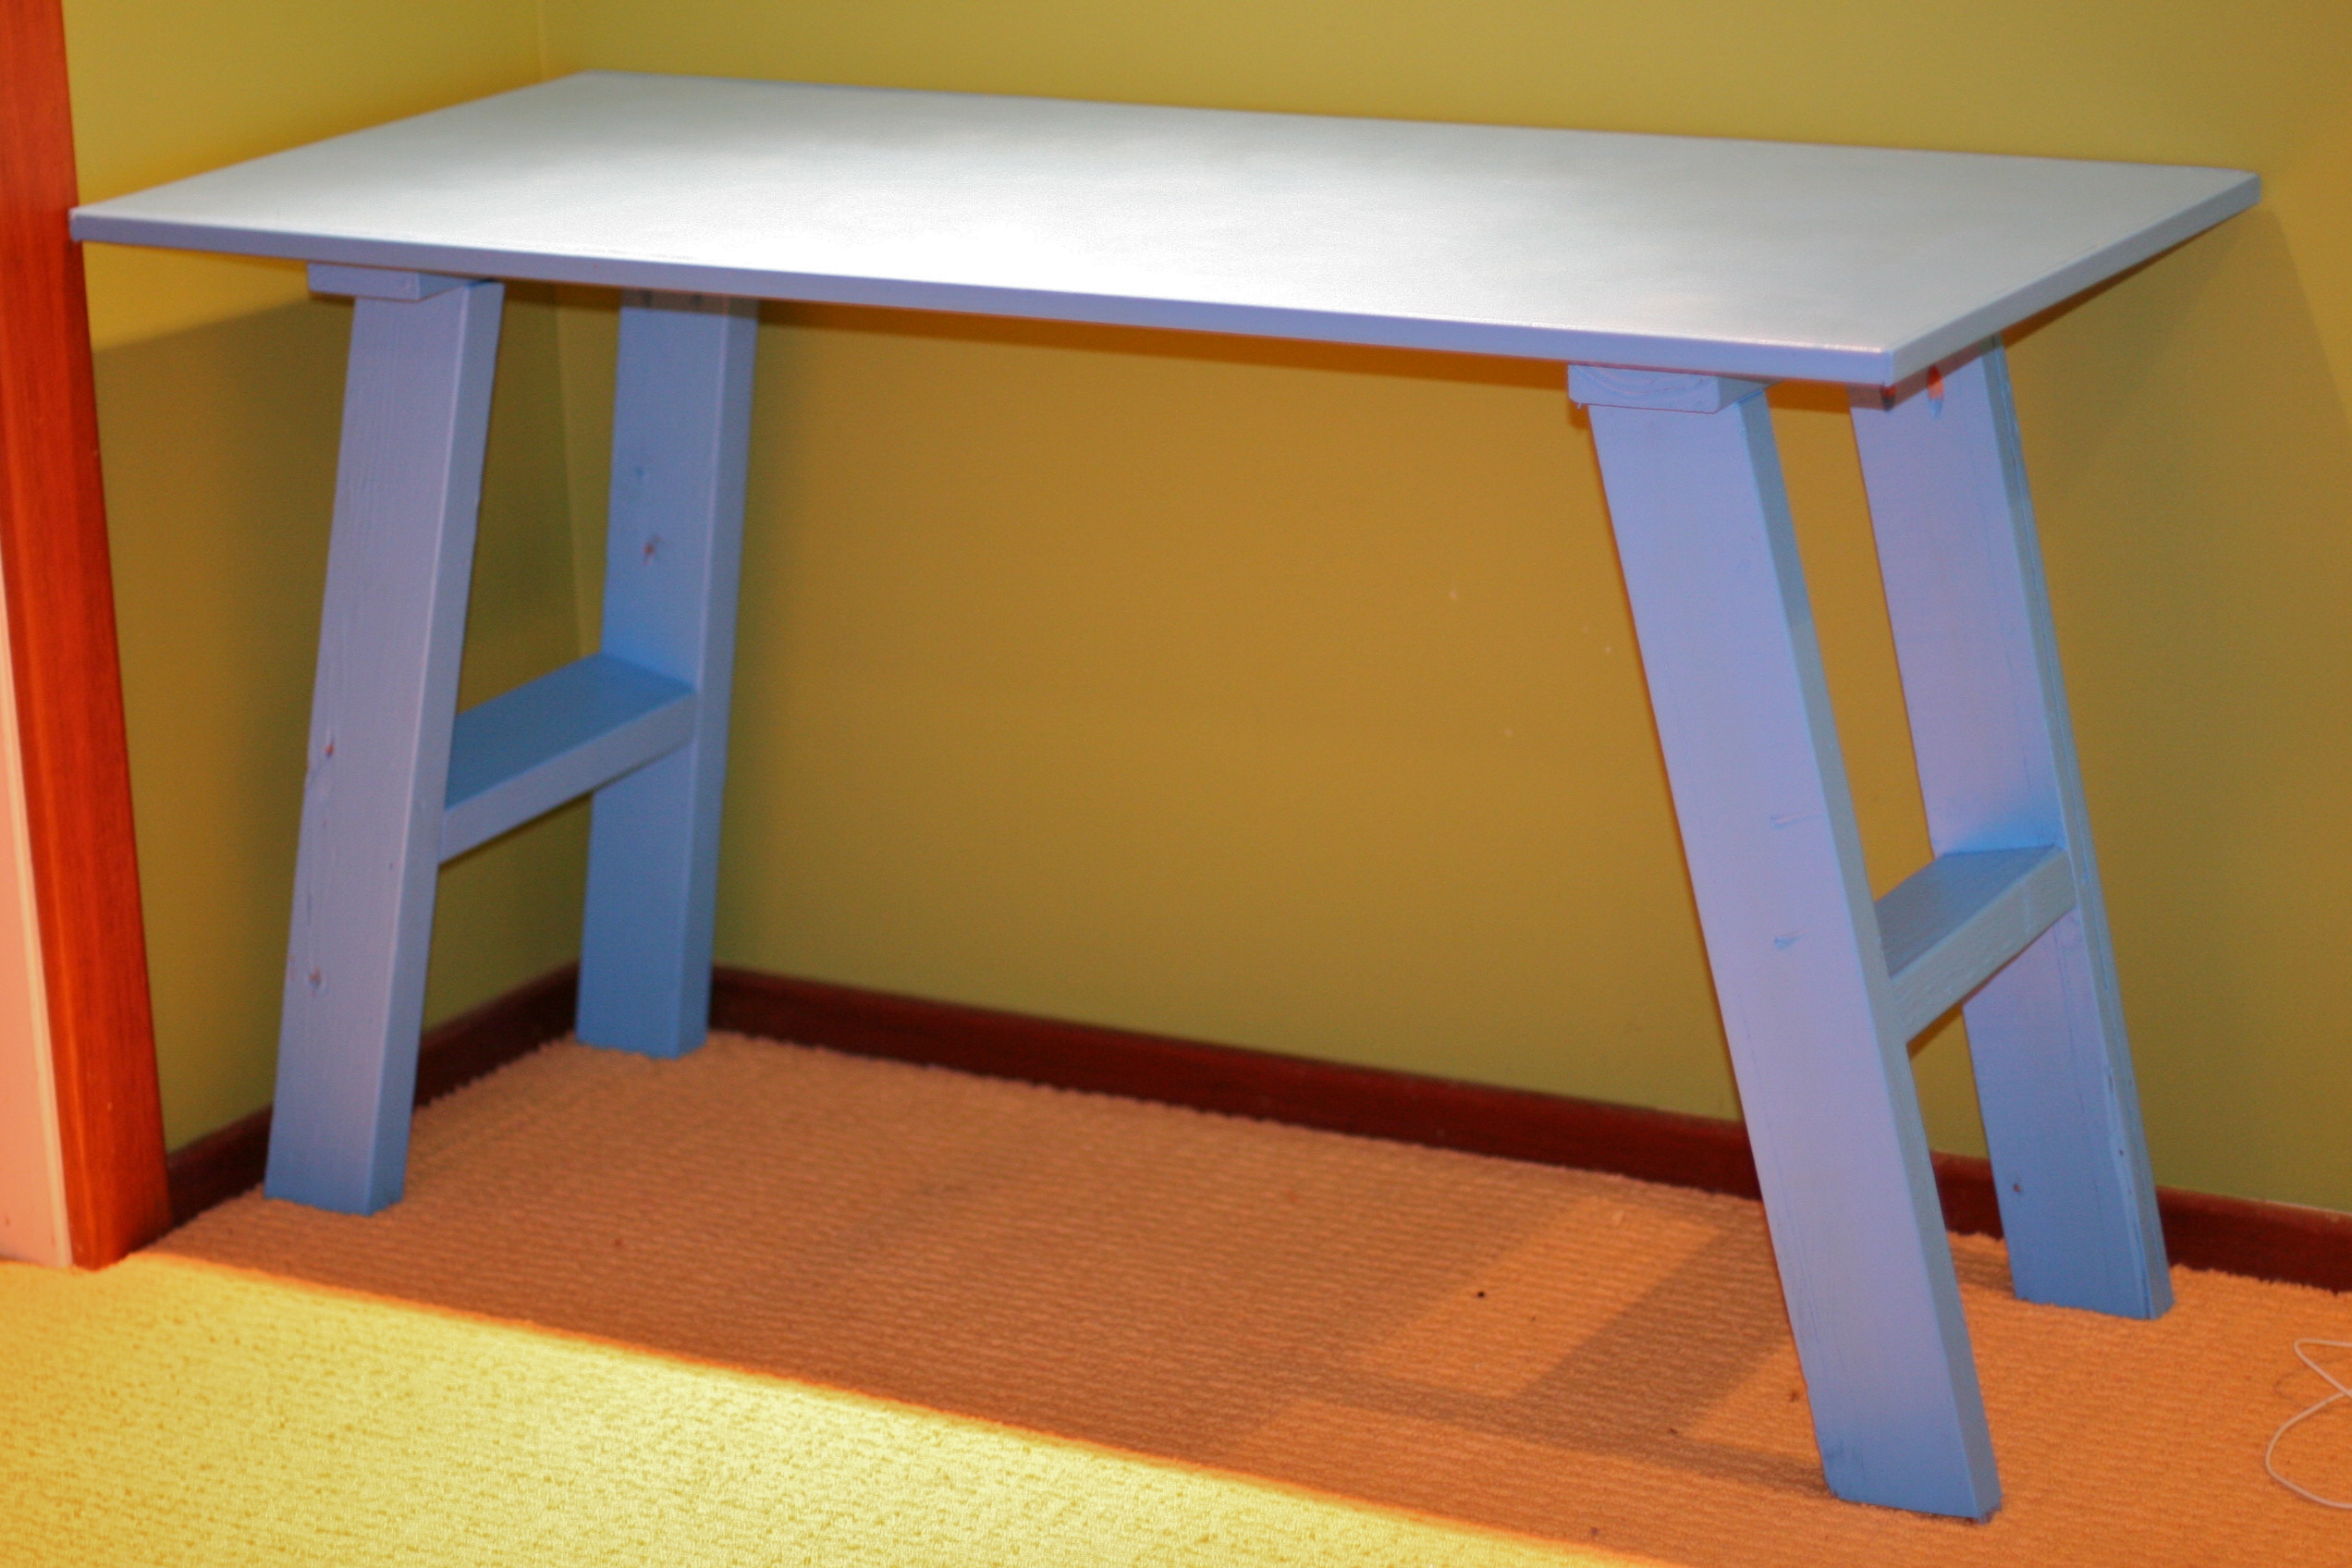
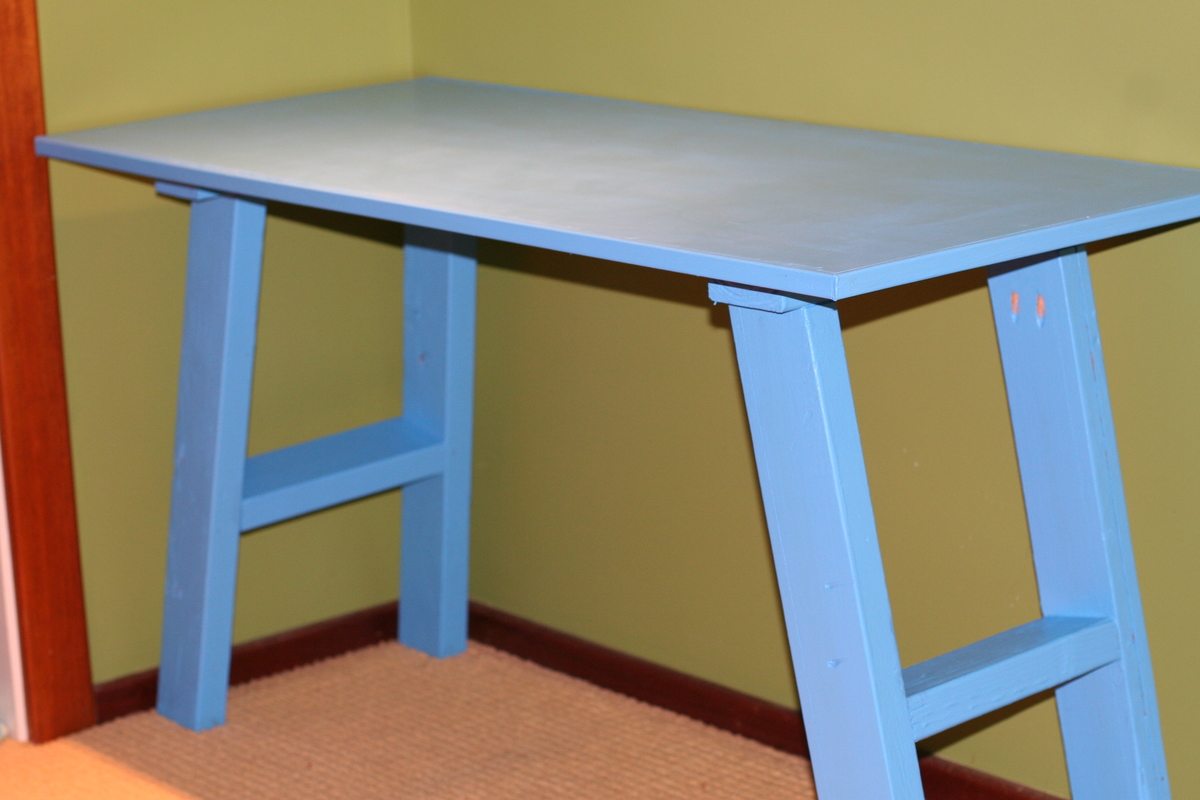
I have been wanting to build this island for years! Seriously. But we finally got to the point that we had some extra time, and no other projects were screaming at us! We decided to make our island 24in x 36 in. So 12in shorter than the original plan. This was an easy adjustment. We also added another shelf, which we love.

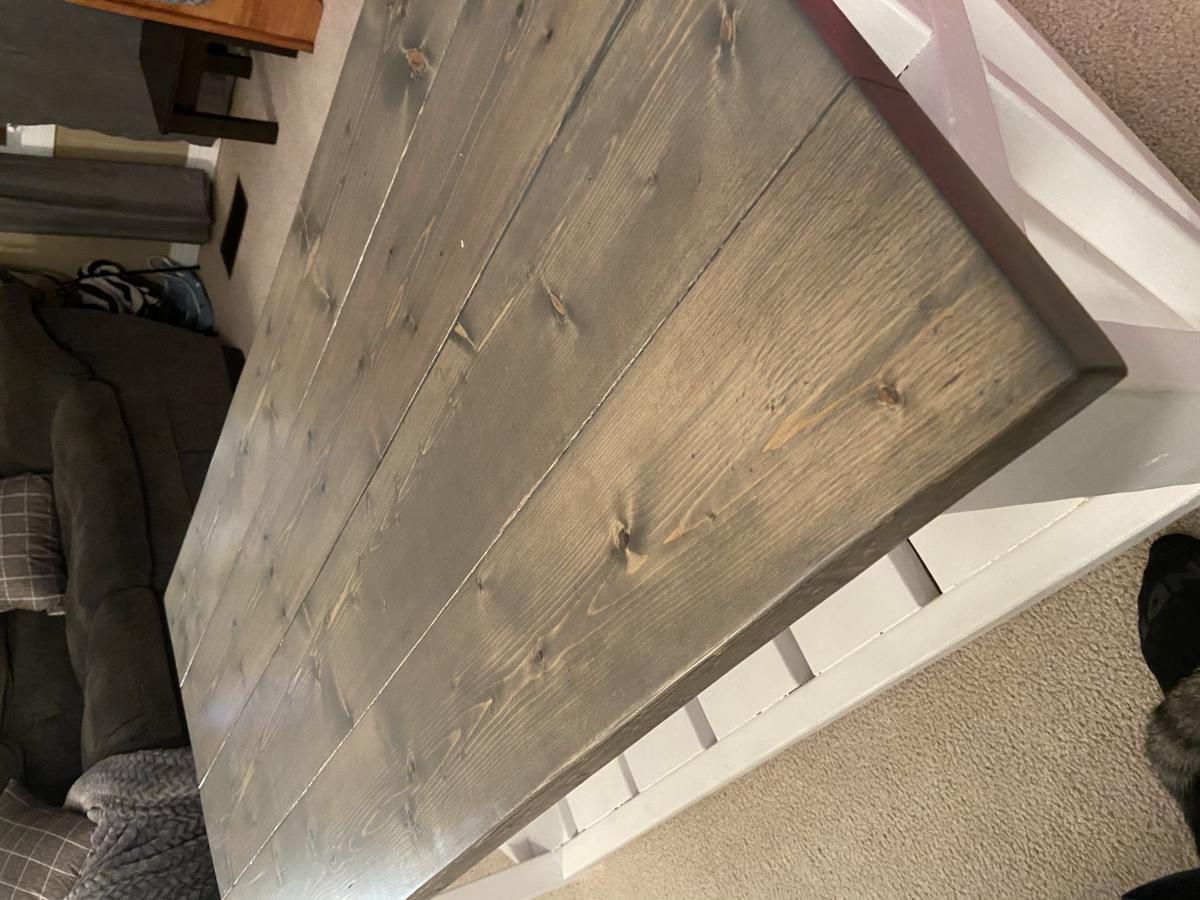
The only issue we had was the slat length. Almost all of the pictures I looked at showed that the aprons, and side supports weren't exactly lined up with the front or back of the 2x2 legs. I'm guessing they were put in the middle, but I couldn't find that info in the plan. So we decided to make our aprons and sides flush with the front of the 2x2 leg. This added about an 1in to the slat length. Sadly, I didn't figure this out till after we cut the slats. After re-cutting, things went smoothly! It was my first time using a Kreg Jig, and it was great. We had to use A LOT of spray paint to cover it, but I am so happy with the final result! It's not perfect, but it's homemade, sturdy, and I hope Ana-White would be proud!

Built from Plan(s)
Estimated Cost
$75
Estimated Time Investment
Afternoon Project (3-6 Hours)
Finish Used
Rust-Oleum Heirloom White Spray Paint (2-3 coats), and Rust-Oleum Clear Coat )2-3 coats).
Recommended Skill Level
Beginner

Comments

superchou

Wed, 02/20/2013 - 13:53

I am about to do the same project... love seeing what others are doing with it :) nicely done.

Desk & Hutch

Submitted by Wildlife26 on Mon, 12/29/2014 - 08:04

I was not able to get to this desk last year and thought my 15 year old teenage daughter had forgotten about it and was getting too old. Around Thanksgiving she made a comment with a sigh that it would never happen and she understood. I immediately went to work in the garage to have this ready on Christmas morning. She had no idea and was very surprised to find it near the Christmas tree!

Desk included a power strip with USB ports, an under the hutch light, magnet board & dry erase board w/ magnet markers to stick on the magnet board.

Thank you so much for putting these plans on-line.

Estimated Time Investment
Weekend Project (10-20 Hours)
Recommended Skill Level
Intermediate

Comments

Nitzan

Submitted by Anonymous (not verified) on Mon, 03/27/2017 - 14:04

I love this plan, it was easy to follow. 

I live in Israel, so had to translate to centimeters. 

I made the X from 2 full pieces, cutting a half width dado. Found it easier to assemble. 

Few minutes after placing it in the house front, a friend suggested buying it....

Thanks


Estimated Cost
300 NIS, it's about 83$
Estimated Time Investment
Week Long Project (20 Hours or More)
Finish Used
Chalked rustoleum,
With Yacht Varnish Matt top.
It made the bench a bit too yellow, but the result is still nice
Recommended Skill Level
Advanced

Truss Beam Dining Room Table

Submitted by td_tx on Wed, 02/03/2021 - 08:57

We built this table for our dining room. The project followed the plans for cuts and dimensions except for the top. Instead of using 2x10, we used 2x12 and ripped an inch off each side to have flatter top with out needing to plane.

We used pine for the top and douglas fir for the 4x4 base. Before staining we used a pre-stain conditioner. The table was stained using Minwax Early American and then finished with a clear satin polyurethane.

Built from Plan(s)
Estimated Cost
200
Estimated Time Investment
Weekend Project (10-20 Hours)
Finish Used
Minwax Early America and clear satin polyurethane
Recommended Skill Level
Beginner

Comments

Farmhouse bedside table

Submitted by JimmyE3 on Sat, 02/23/2013 - 09:19

Another project for the wife, though there will be a matching one for my side of the bed in the near future! This was the first plan I constructed from this site.

Built from Plan(s)
Estimated Cost
$60
Estimated Time Investment
Day Project (6-9 Hours)
Finish Used
Hand wiped Minwax Early American 230 - which is why it is not quite as dark as my other projects.
Recommended Skill Level
Starter Project

RH Inspired Shanty Sideboard & Hutch

Submitted by jhavinga on Wed, 12/31/2014 - 14:34

Have been wanting to build this for 6 months now and just havnt had the time. Finally completed it!
I made some small changes to the design, different trim layouts, different dimensions, and went with a plank look for the back of the hutch instead of a solid peice of 1/4" plywood.

Built from Plan(s)
Estimated Cost
$500.00. This price includes wood, stain, and hardware.
Estimated Time Investment
Weekend Project (10-20 Hours)
Finish Used
1 coat of Minwax Weathered Oak, then 1 coat of Minwax Special Walnut.
Recommended Skill Level
Beginner

Comments

In reply to by ehays216

jhavinga

Thu, 01/01/2015 - 22:48

Thank you ehays216! Ive looked at your Farmhouse Storage Bed a few times.. Have always wanted to try the Steel wool/Vinegar trick.

Cheers,
Justin

timberandsoul

Sat, 01/03/2015 - 07:40

Great job! The love how the color turned out. May I ask where you purchased your backdrop from? And what size it is?

Thanks!

In reply to by timberandsoul

jhavinga

Sun, 01/04/2015 - 16:09

Thanks a lot timberandsoul!
Photo was taken on an empty wall in my living room, Which is currently a light gray wall. thought it looked boring so I did a quick switch of backdrops in PS. I just typed in brick wall in google.

Cheers,
Justin

Singhs

Sun, 01/04/2015 - 16:27

What type of wood did you use, home depot/lowes regular pine or some specialty wood ?

jhavinga

Sat, 01/24/2015 - 13:08

Sure! the plans call for 2 solid sheets of 1/4 plywood for the backing.. I simply just ran the plywood through a table saw at 5.5" wide and brad nailed it the back. =)
The stain is weathered oak and let sit for 15min. Then right away special walnut and let sit for 15 min.
repeat until desired colour. let me know if you have any more questions!

Cheers,
Justin

Sschoono

Sun, 01/08/2017 - 07:33

How many coats did you have to do to achieve this look?  The weathered oak looks so light...and gray.


Thanks!

Painterlyrhett

Sun, 05/17/2015 - 19:40

What was your strategy on attaching the sideboard to the Hutch. I haven't seen where there is any instructions or conversation around this. What and how did you accomplish this and/or is there anywhere to go that discussed this that helped you.

Thanks,

My girlfriend loves it!

Submitted by Anonymous (not verified) on Wed, 03/29/2017 - 12:38

Very easy to build!! Looks great!

Estimated Time Investment
Weekend Project (10-20 Hours)
Recommended Skill Level
Beginner

Free standing pantry with coffe bar

Submitted by Keldani5 on Wed, 02/10/2021 - 06:14

I loved doing this project, I did a burn treatment on the door and I made the shelves adjustable. It took me a weekend to build and 2 days to stain and do a matte poly finish.

Estimated Cost
300.00
Estimated Time Investment
Week Long Project (20 Hours or More)
Finish Used
smoke grey stain with a matte poly finish
Recommended Skill Level
Intermediate

Brina Bedside table

Submitted by jlouki01 on Mon, 02/25/2013 - 07:59

Heavy modification to the original plan to accommodate extra drawers and trim. Finished with Min-Wax custom mixed color or Gunstock and English Chestnut.

Estimated Time Investment
Week Long Project (20 Hours or More)
Finish Used
Min Wax Oil Stain
Recommended Skill Level
Intermediate

Comments

Entry Table

Well after completing the console table I decided to change the sizes a little and create an entry table and stain it to match my great great grandmothers mirror that we have. That mirror has to weigh 50lbs. It turned out great and I did sanding and staining before putting it together which saved a lot of time trying to get into all of the corners. Then just had to ploy and stain the edges of the top once finished.  

This is approximately half the width of the console table so calculations were fairly easy to figure out. 

Built from Plan(s)
Estimated Cost
$50
Finish Used
Used dark Walnut with a satin polyurethane
Recommended Skill Level
Beginner

Comments

Heavy duty log peeling stations

Submitted by Anonymous (not verified) on Sat, 04/01/2017 - 18:03

I modified Anna's plans to make these heavy duty saw horses.

Estimated Cost
$120
Estimated Time Investment
Day Project (6-9 Hours)
Finish Used
2 of these sawhorses can support 2 1500lb logs, I can peel the bark off then rotate the logs. I added vertical removable supports to support the logs when they are on the sawhorses. Thanks for the ideas.
Recommended Skill Level
Beginner

Farmhouse coffee table under 40 - ( 65 dollars Canadian)

Submitted by Anonymous (not verified) on Wed, 02/17/2021 - 15:50

This was my first project and had tons of fun building it. Can’t wait to build to end tables to match.
The plans are so easy to understand. The only change I made was instead of exposed screws I used the pocket hole method

Estimated Cost
65 dollars ( Canadian)
Estimated Time Investment
Weekend Project (10-20 Hours)
Finish Used
Minwax pre- stain wood conditioner, minwax classic grey ( 2 coats) minwax clear satin poly urethane.
Recommended Skill Level
Beginner

Comments

mh6558

Fri, 01/12/2024 - 08:33

This is beautiful and just the look I'm going for with the color scheme. I am wondering if it would be easier to paint the wood before constructing it? Also, what is the pocket hole technique? I think I would like the screws hidden too.

Small Scrap Wood End Tables

We had shortened our kitchen windows in our above garbage apartment remodel and had 1x2 framing wood left. I did not want to put this wood to waste, so I made two identical end tables in a similar style as the Ikea Besta Burs desk plan, but without drawers. These were the first two pieces of standing furniture that I built for our apartment and was technically free for me to build. The end tables are truly small, being only 8" wide, 2' long, and about 18" high, which is a great size to place beside our low modular sofas. The top is made of 1/2"x8"x4' plywood leftover from a floating shelving project (worth about $2.50). I cut the plank in half and glued the halves to make it thicker. These end tables are strong enough to function also as little benches for me and my daughter. :)

Estimated Cost
$5.00 each, but free using scrap wood
Estimated Time Investment
An Hour or Two (0-2 Hours)
Finish Used
Olympic Semi-Gloss white (straight off shelf) and water-thinned Royal Indigo Olympic Semi-Gloss to act as a "purple wash" or "purple stain" on the plywood.
Recommended Skill Level
Starter Project

Comments

yurra-bazain

Fri, 03/01/2013 - 00:24

Thank you! I actually hadn't seen the Ikea Besta Burs plan until after I built them. It just worked out that the scraps were about the size I needed to build them in that design. I don't think I can take credit for creativity when it was more like serendipity. :)

coffee table

Salvaged from an old dock cart. The wood is rough hewn oak.


Estimated Cost
$150
Estimated Time Investment
Week Long Project (20 Hours or More)
Finish Used
Briwax dark brown
Recommended Skill Level
Intermediate

American Girl Doll Horse Stable

Submitted by jmhawk1 on Mon, 04/03/2017 - 20:33

This was my first project with my daughter. After a divorce, I wanted something fun to do with my daughter-something where she would learn, have fun, and see a project from start to finish.

I did a lot of pre-cutting and prepping, but she did some cutting with a handsaw and mitre box, drilled holes with the Kreg jig, stained, used the nail gun, and glued. I installed the shingles, and touch up staining, but she did a lot of work for this project!

Since then, we have built a collapsible corral (fence) for her three horses, and next is the farmhouse bed for her doll!

Thank you for the great instructions, my daughter thinks I'm the greatest person on earth because of these projects!

Estimated Cost
I bought the Kreg jig, so my cost was a lot higher, but less than $75 prior to the purchase of Kreg jig (additional $40 with clamp).
Estimated Time Investment
Weekend Project (10-20 Hours)
Finish Used
Honey maple and dark maple
Recommended Skill Level
Beginner

Floating bench for entryway alcove

Submitted by msantos116 on Tue, 02/23/2021 - 11:20

I was looking for some inspiration to clean up our small entryway room in our Cape Cod style home in Worcester, Massachusetts that was typically used for recycling and dirty shoes. These plans were very easy to follow and really spruced up the room quite a bit.

I used standard pine 2x4's for the frame and 1 inch boards for the bench platform and upper shelf features. The platform consists of four boards (3 1x6 boards and 1 1x5 board) that were glued together and sanded down. This was finished with Minwax Colonial Maple stain (a few coats), a couple coats of satin polyurethane, and then sanded down for a nice smooth finish.

I used a couple of 2x4's behind the vertical face below the shelf, giving it some depth and better stability.

Cast iron hooks were found on etsy, ebay, and Amazon.

Estimated Cost
$75-$100
Estimated Time Investment
Weekend Project (10-20 Hours)
Finish Used
Minwax Colonial Maple stain
Minwax satin polyurethane
Automotive turtle wax for a smooth shine
Recommended Skill Level
Beginner

Kentwood Queen Bed

Submitted by c-e-fogus on Fri, 03/01/2013 - 15:04

This is my first wood working project, ever. I think it was a little ambitious but I was inspired by the design and the simplicity of the directions. I was actually trembling when I used the circular saw for the first time. But now that the project is finished, I am inspired to do more. I have a list of other things I want to make.

Built from Plan(s)
Estimated Cost
$80 wood, plus materials
Estimated Time Investment
Weekend Project (10-20 Hours)
Finish Used
Minwax color Early American stain
Recommended Skill Level
Beginner

Comments

Pet Kennel

Submitted by mabivens on Tue, 01/06/2015 - 14:30

This is my first post. I have used a few of the plans off of here before but I thought this one turned out really well and wanted to share. I used dowel rods to give it a more open feel and think it looks good. My dog loves it! Thanks. 

Built from Plan(s)
Estimated Time Investment
Day Project (6-9 Hours)
Finish Used
Minwax special walnut stain and polyurethane
Recommended Skill Level
Beginner

My X Farmhouse Table

I had to alter some of the measurements to a smaller size for our dining room.  66" long 2x10's on the top. & 39" 2x4's across the base.

Built from Plan(s)
Estimated Cost
~ $70
Estimated Time Investment
Weekend Project (10-20 Hours)
Recommended Skill Level
Intermediate

Chestwick Platform Bed - King Size

Submitted by Anonymous (not verified) on Tue, 03/02/2021 - 15:42

Wanted to build a simple platform bed to match our existing set that only had a queen. So I built a modified version of the Chestwick Platform Bed. Modified the plans to allow for a king size. I used rope molding at the bottom to match with our existing side tables. I wanted to be able to take it apart when needed, so I used knockdown hardware to be able to move it around in pieces if I ever needed.

Estimated Time Investment
Week Long Project (20 Hours or More)
Finish Used
Minwax Provincial
Recommended Skill Level
Intermediate

Comments

Tria

Tue, 10/26/2021 - 10:46

Can you please provide the measurements for the king? Your bed turned out amazing! I love the details.

Simple Blue Desk

Submitted by hawaiitara on Mon, 03/04/2013 - 09:51

My daughter needed a simple desk for her room. I had leftover purebond plywood from another project and a bunch of 2x4 scraps from the Reuse Hawaii store. This made for an inexpensive desk. I based my desk off the simple trestle desk but made changes as needed to accommodate my materials. I used the plywood as the desk top and added some 3/4 flat trim around the edge. I used a 2x4 instead of a 2x6 to attach the legs to the table.

This was a quick project and my daughter loves the fun color!

Built from Plan(s)
Estimated Cost
$10 - leftover project wood and wood from a reuse store.
Estimated Time Investment
An Hour or Two (0-2 Hours)
Finish Used
Valspar signature paint in Splish Splash. Finishing wax on top.
Recommended Skill Level
Beginner

Comments

tmagin

Sat, 12/31/2016 - 16:23

Did you use just 2X4s for everything except the top which is plywood?