Community Brag Posts

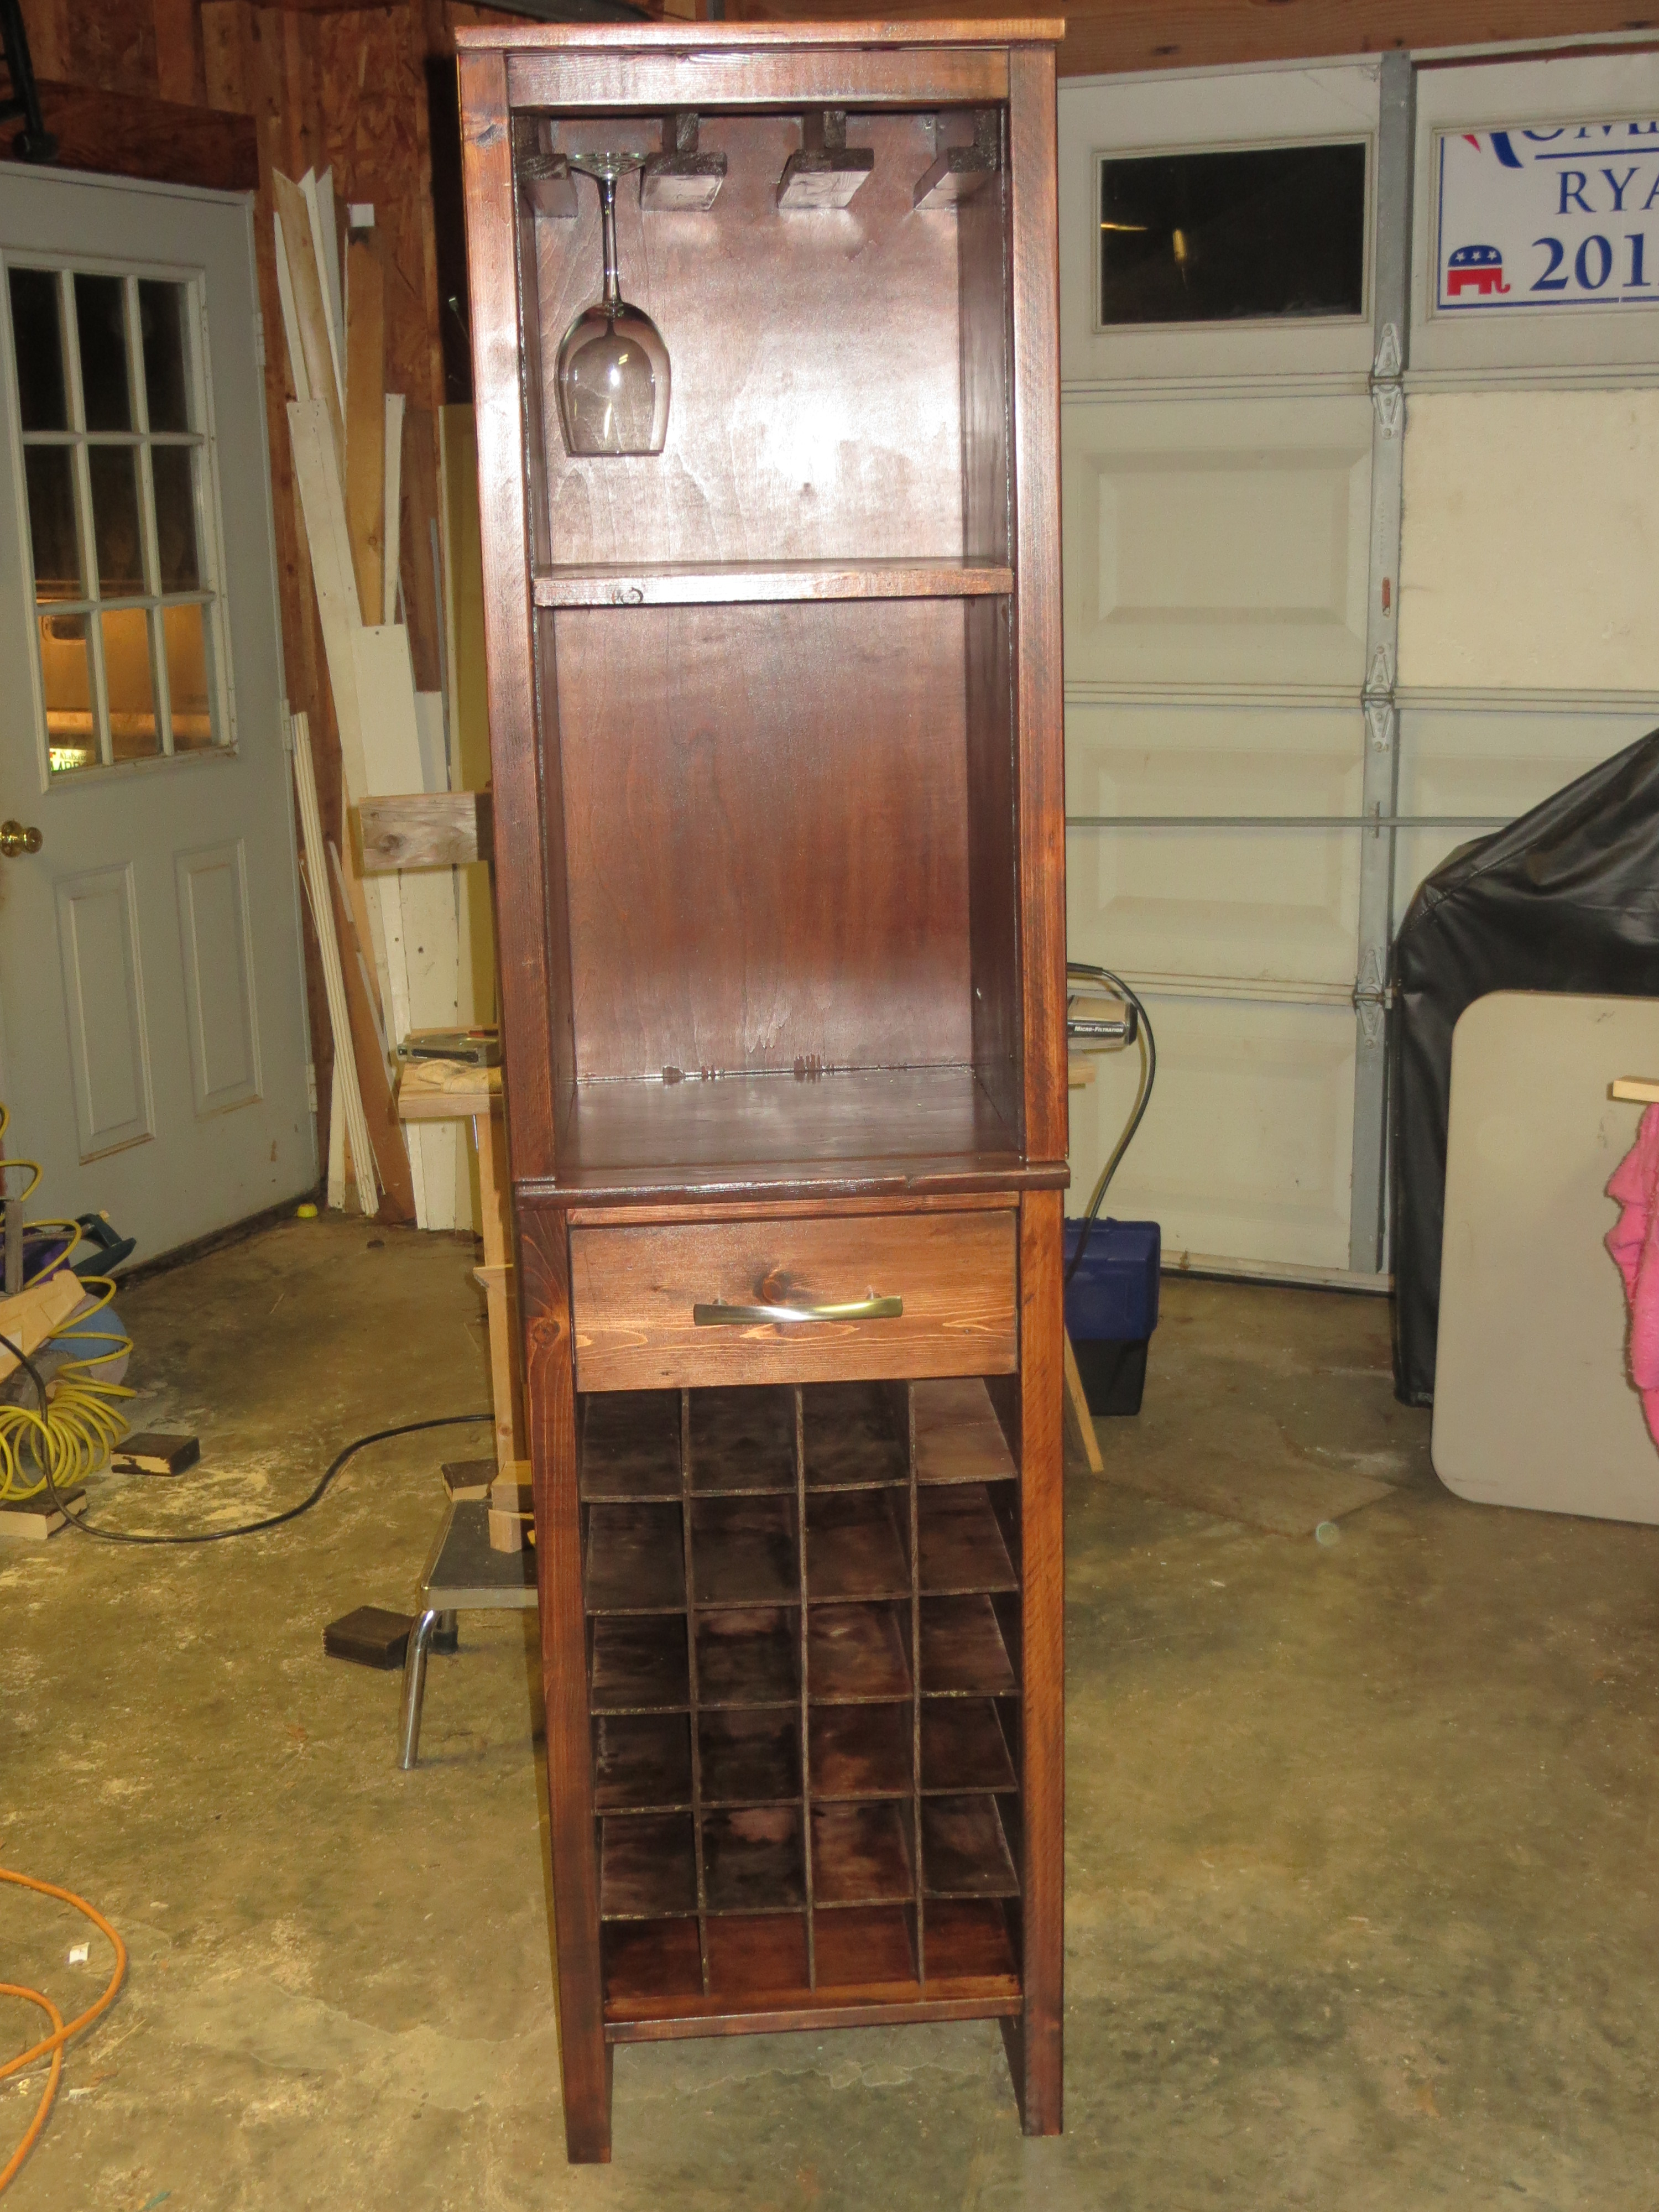
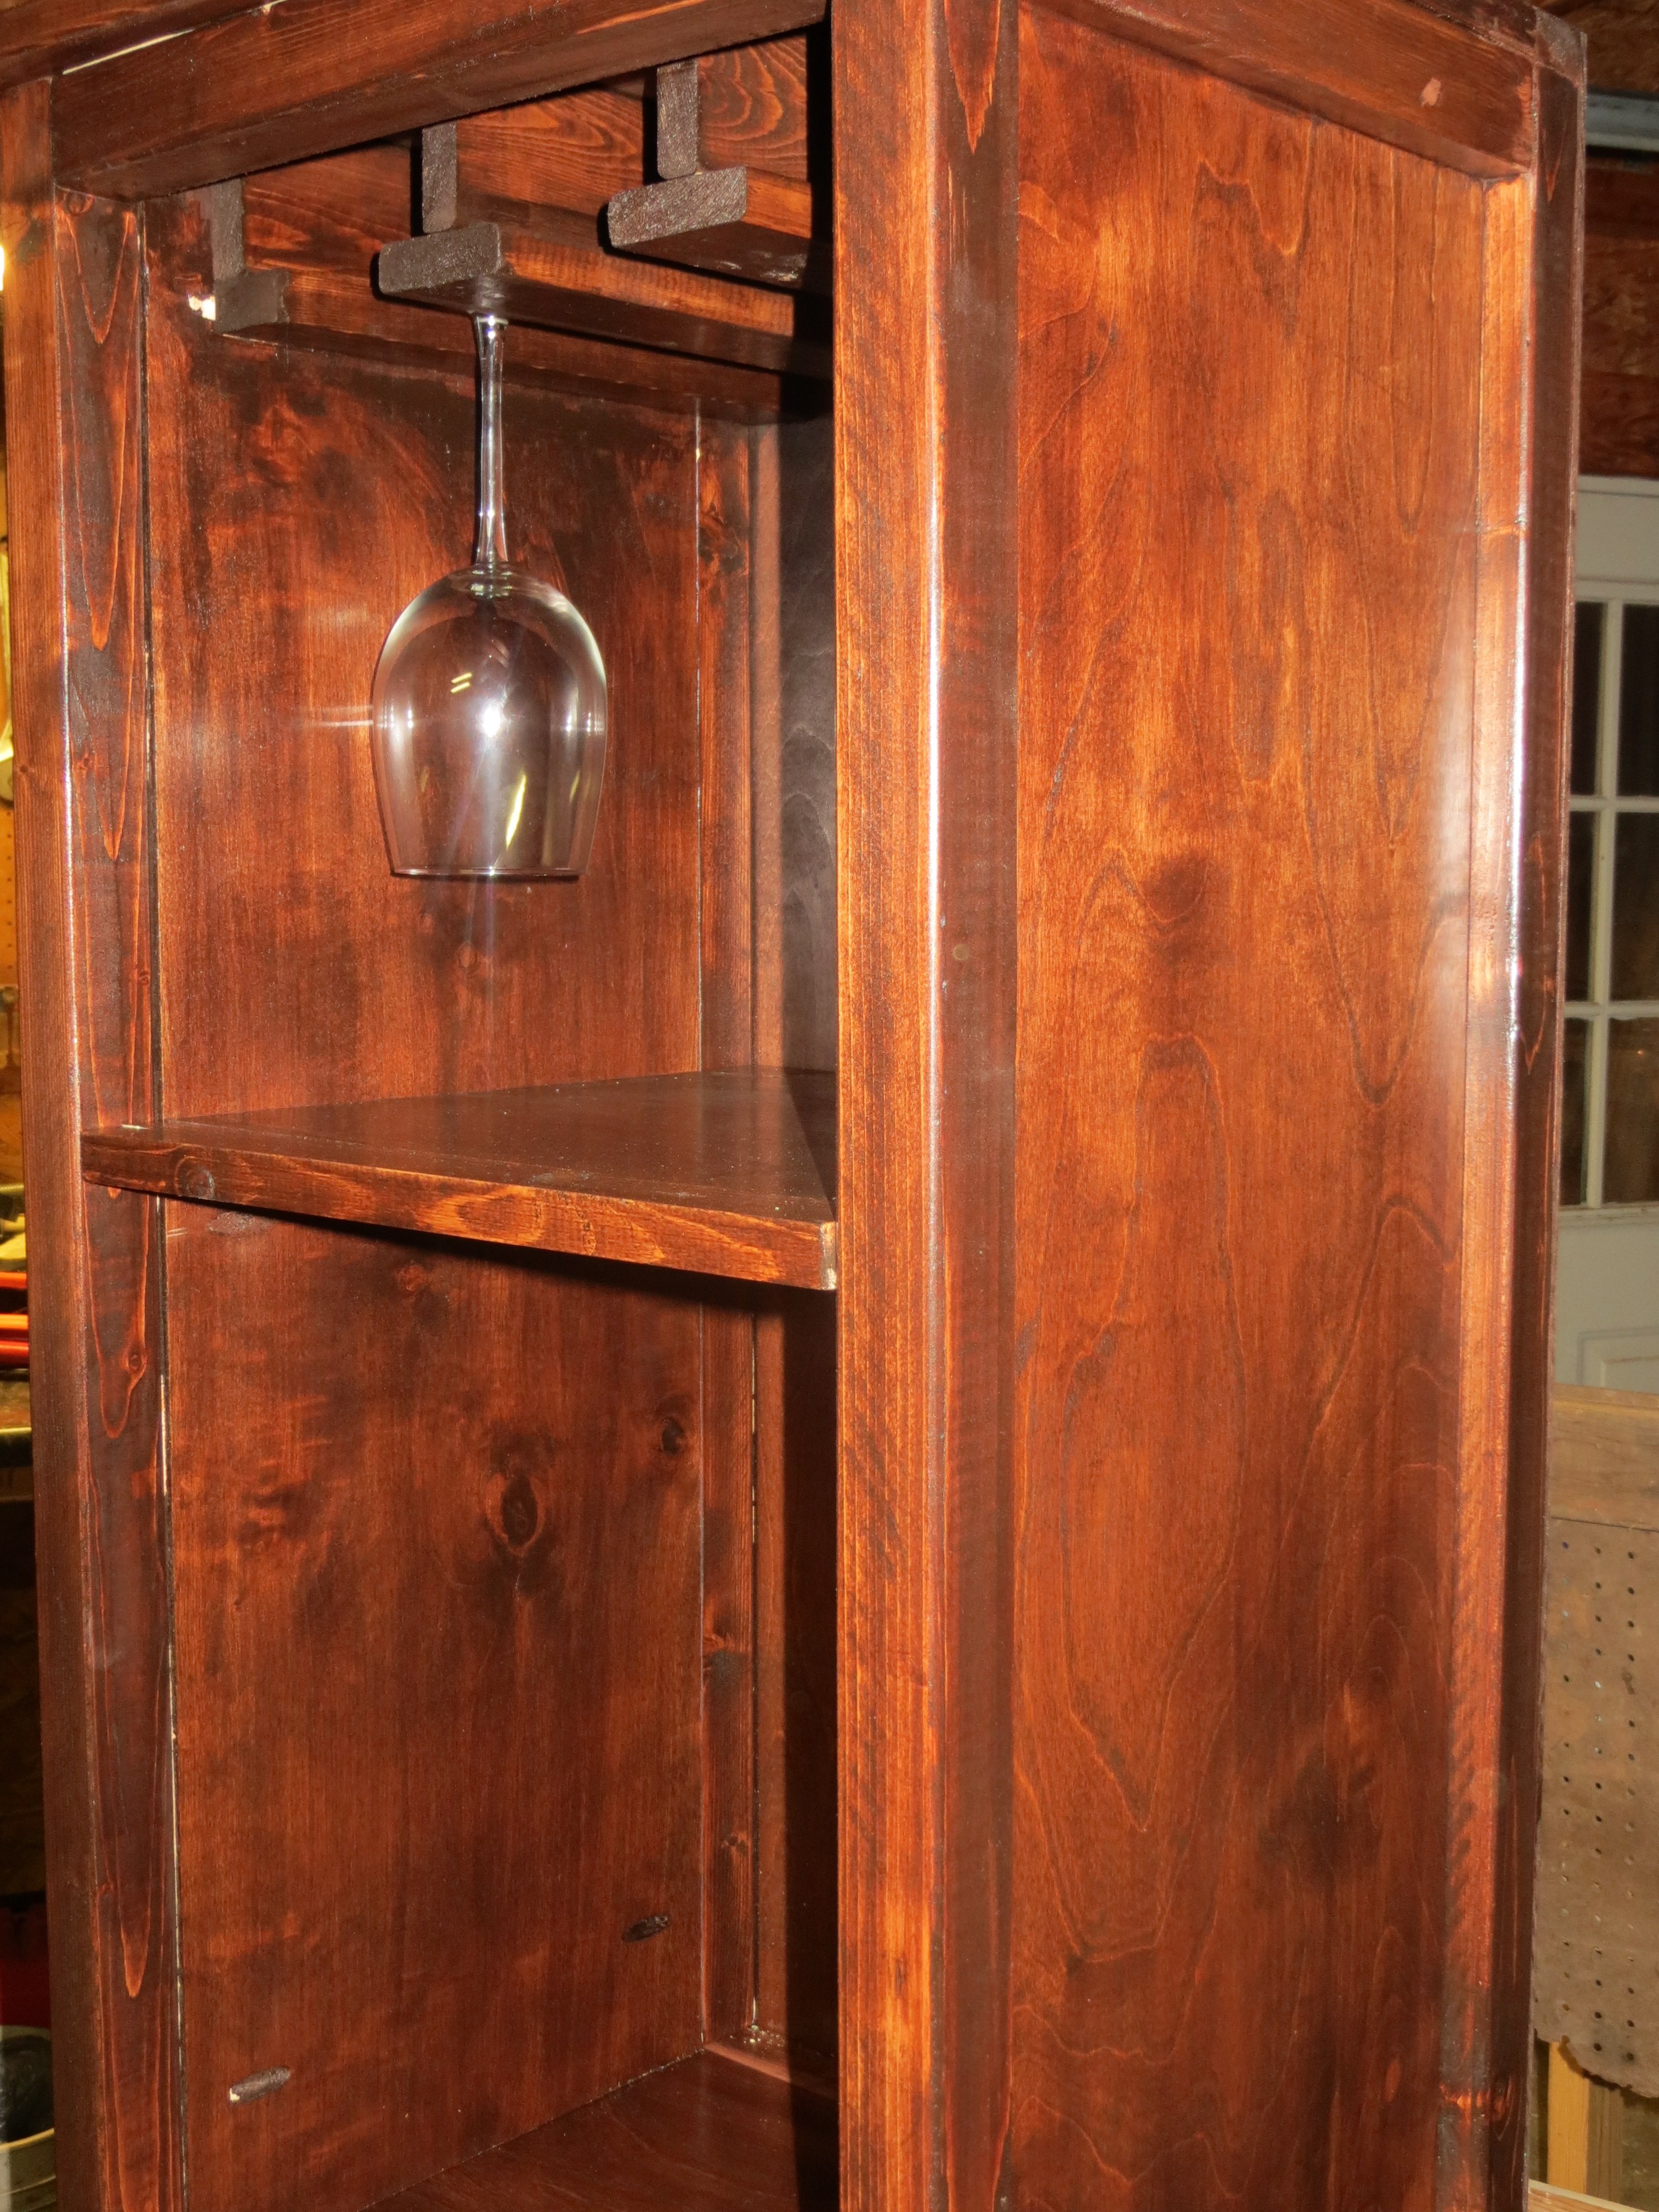
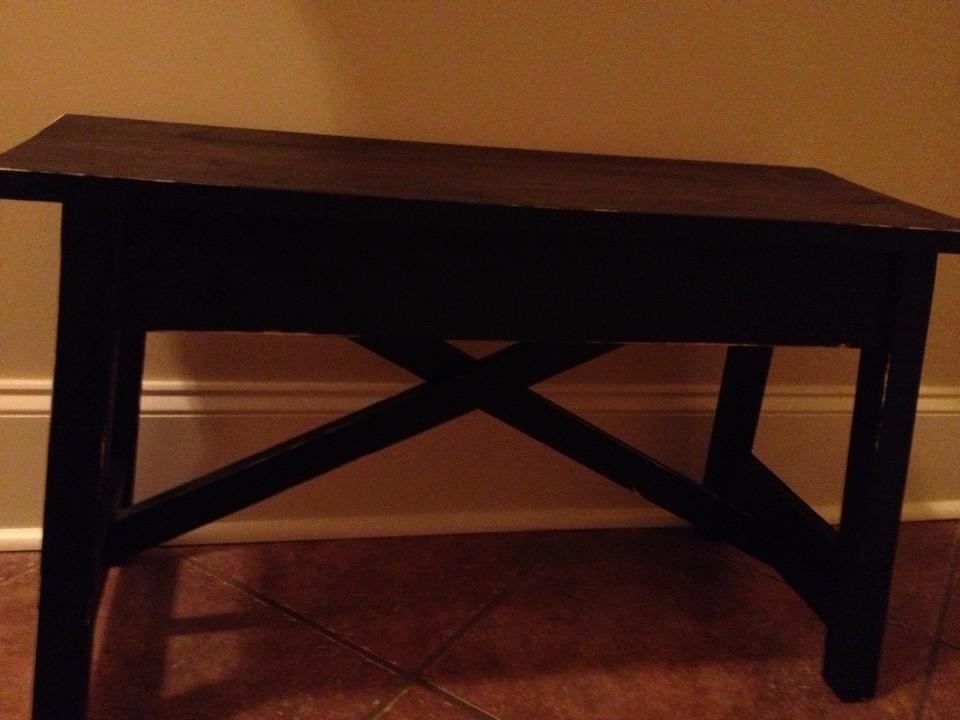
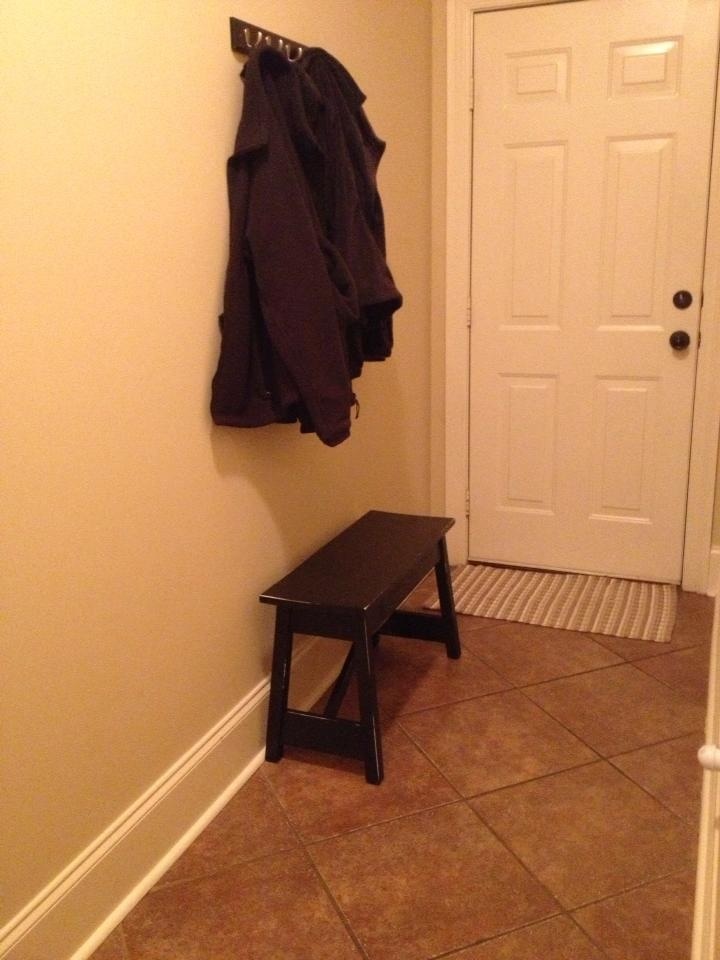
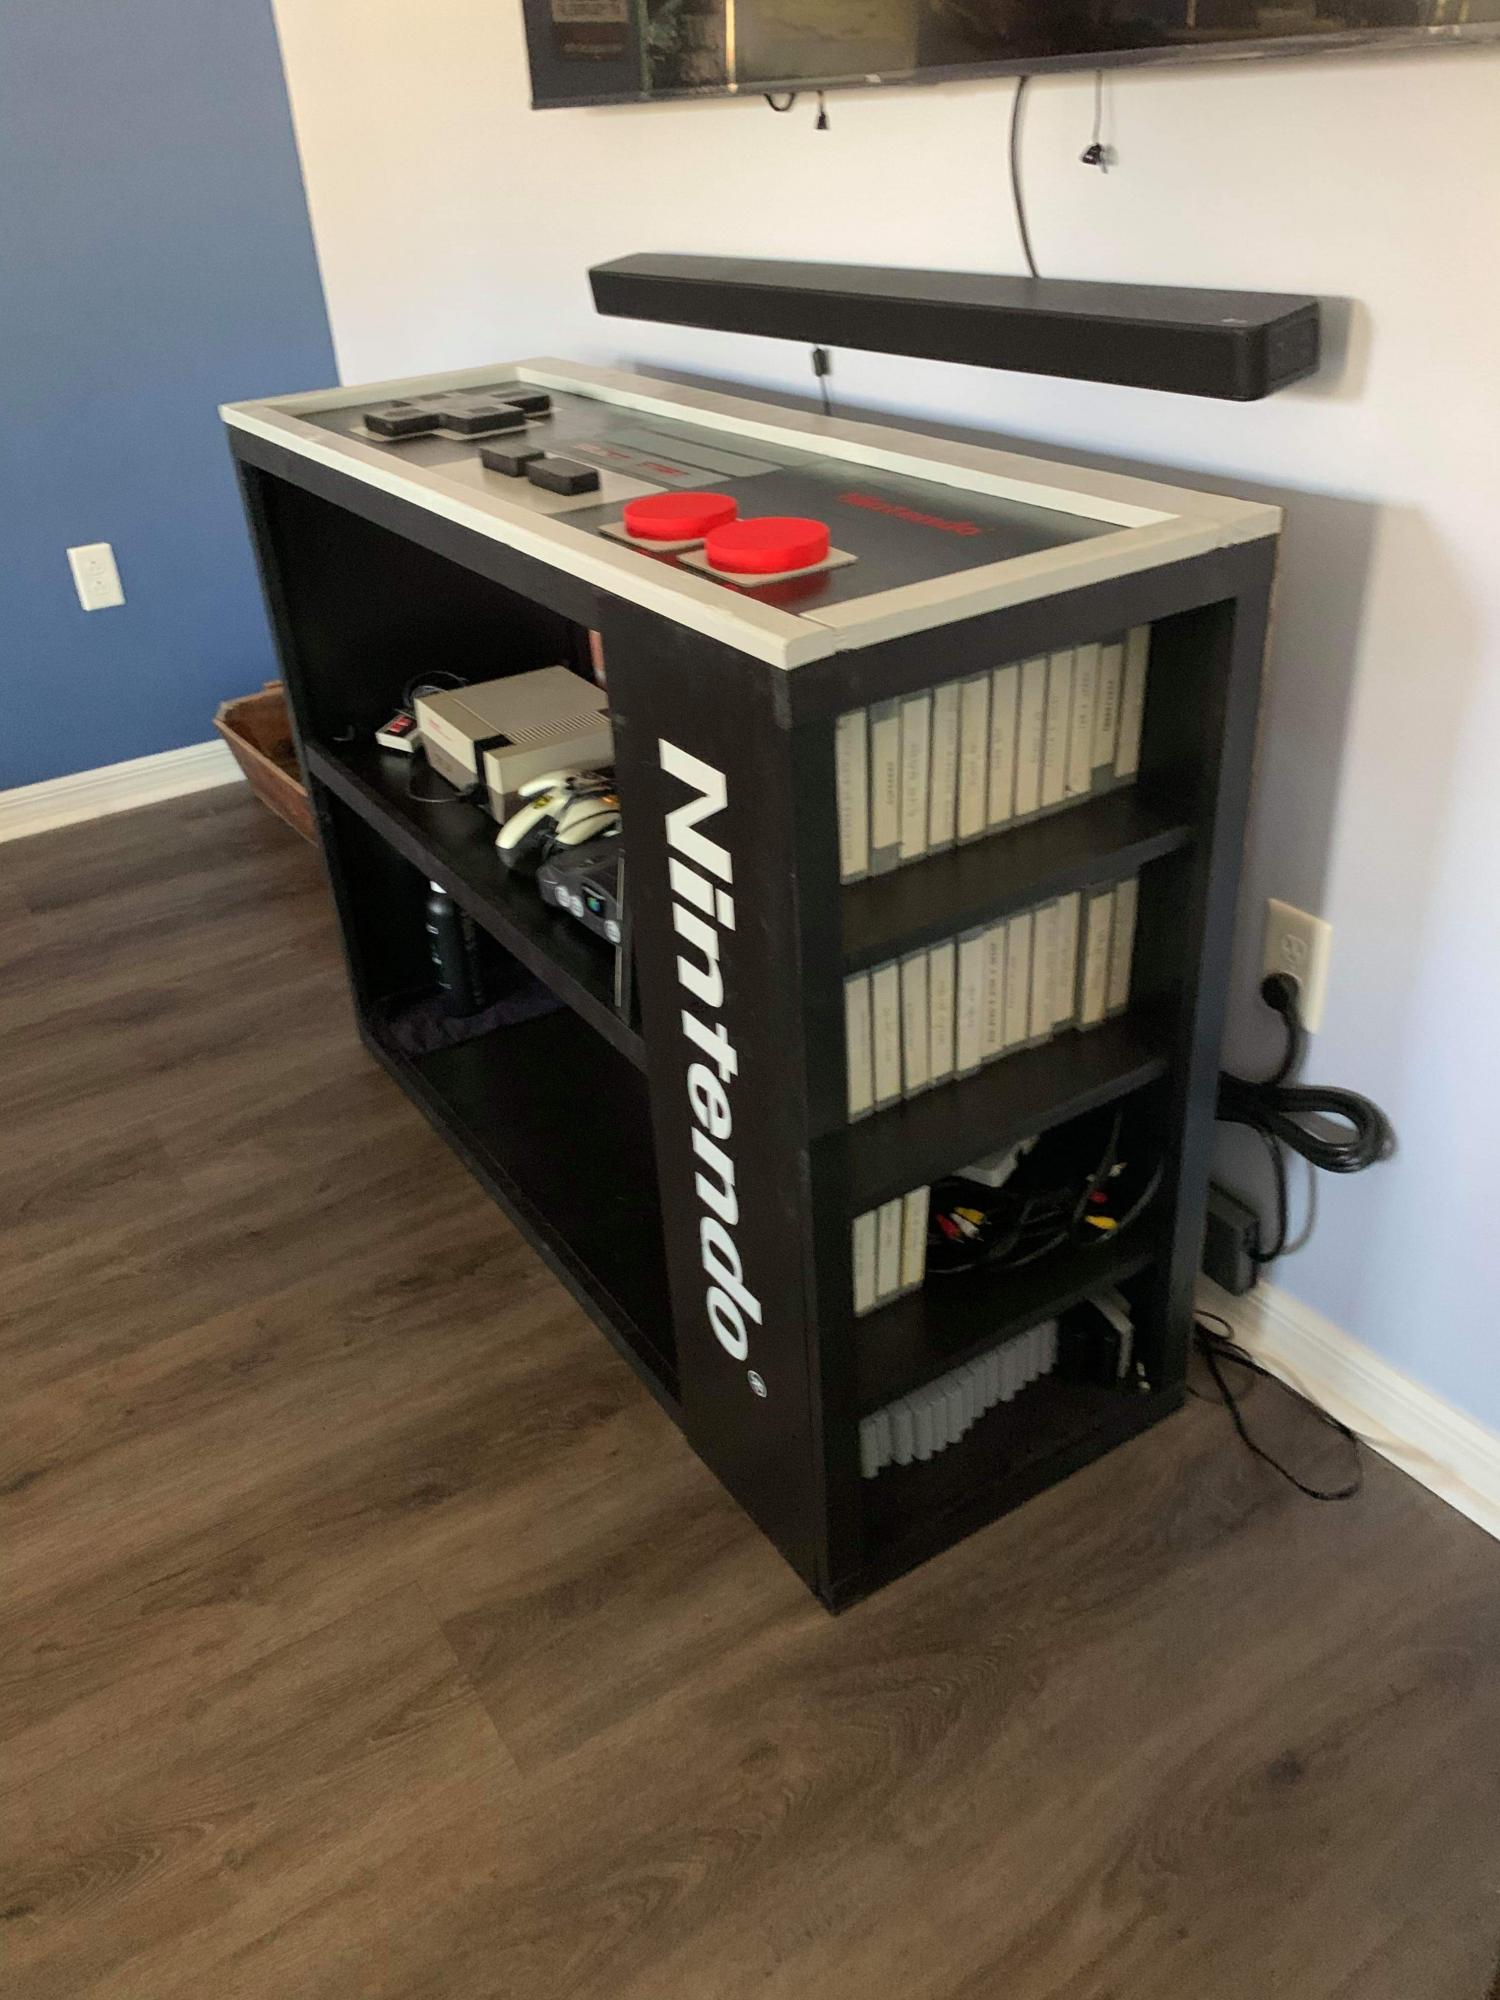
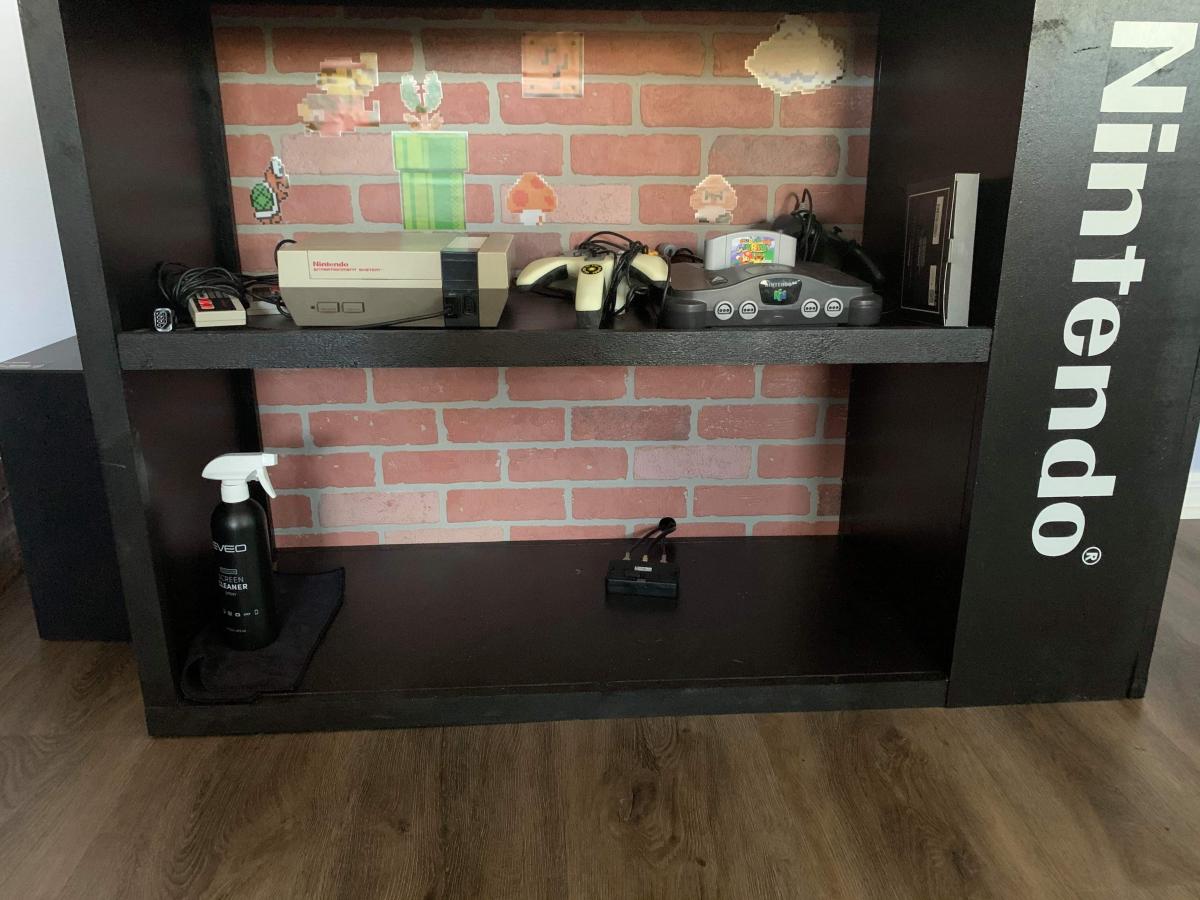
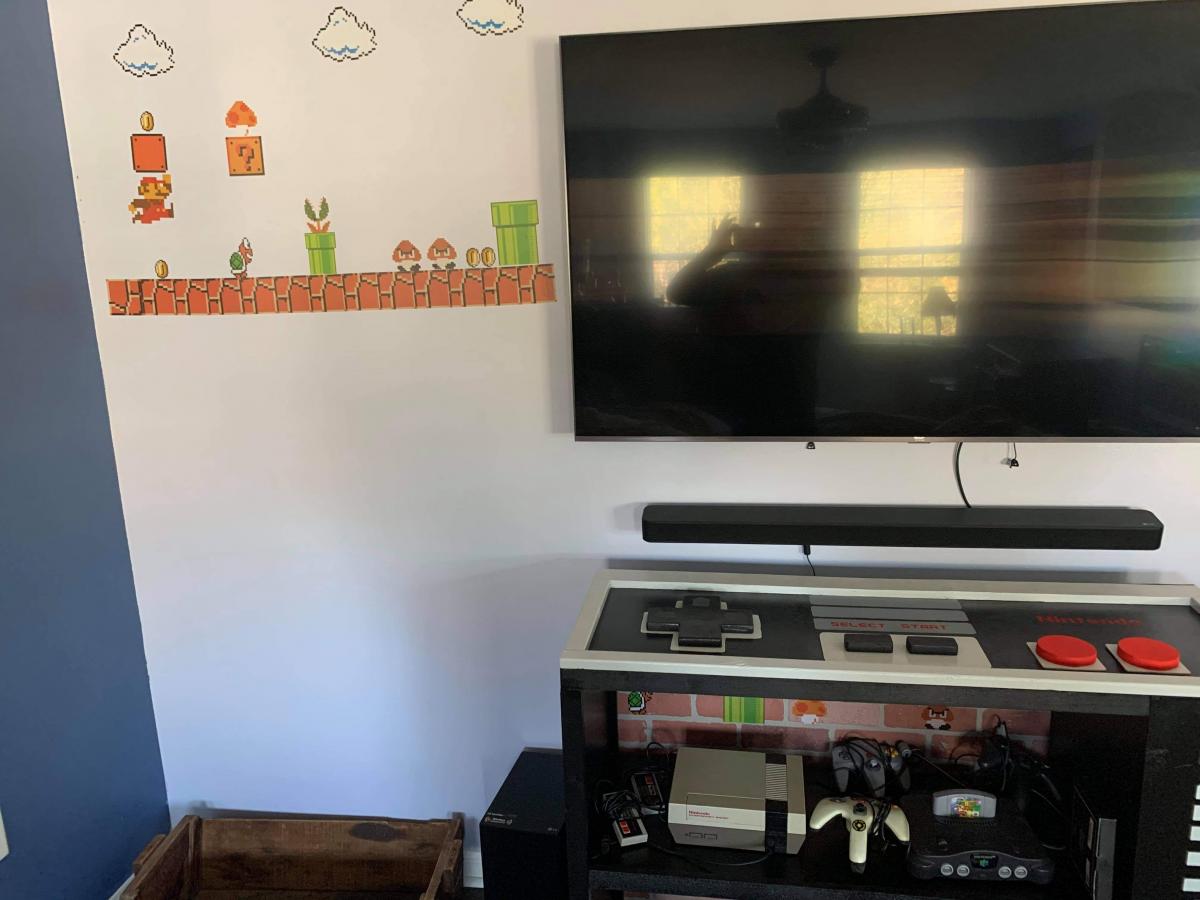
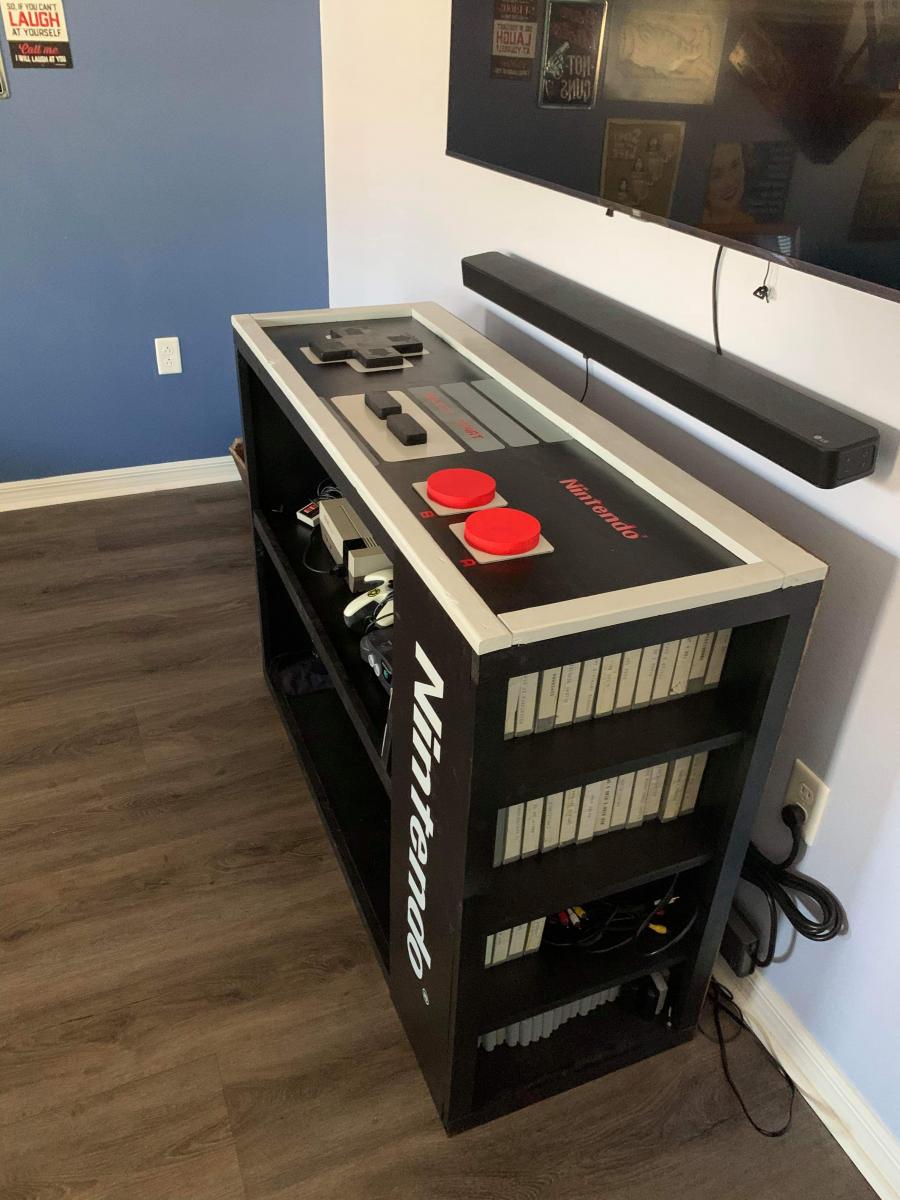
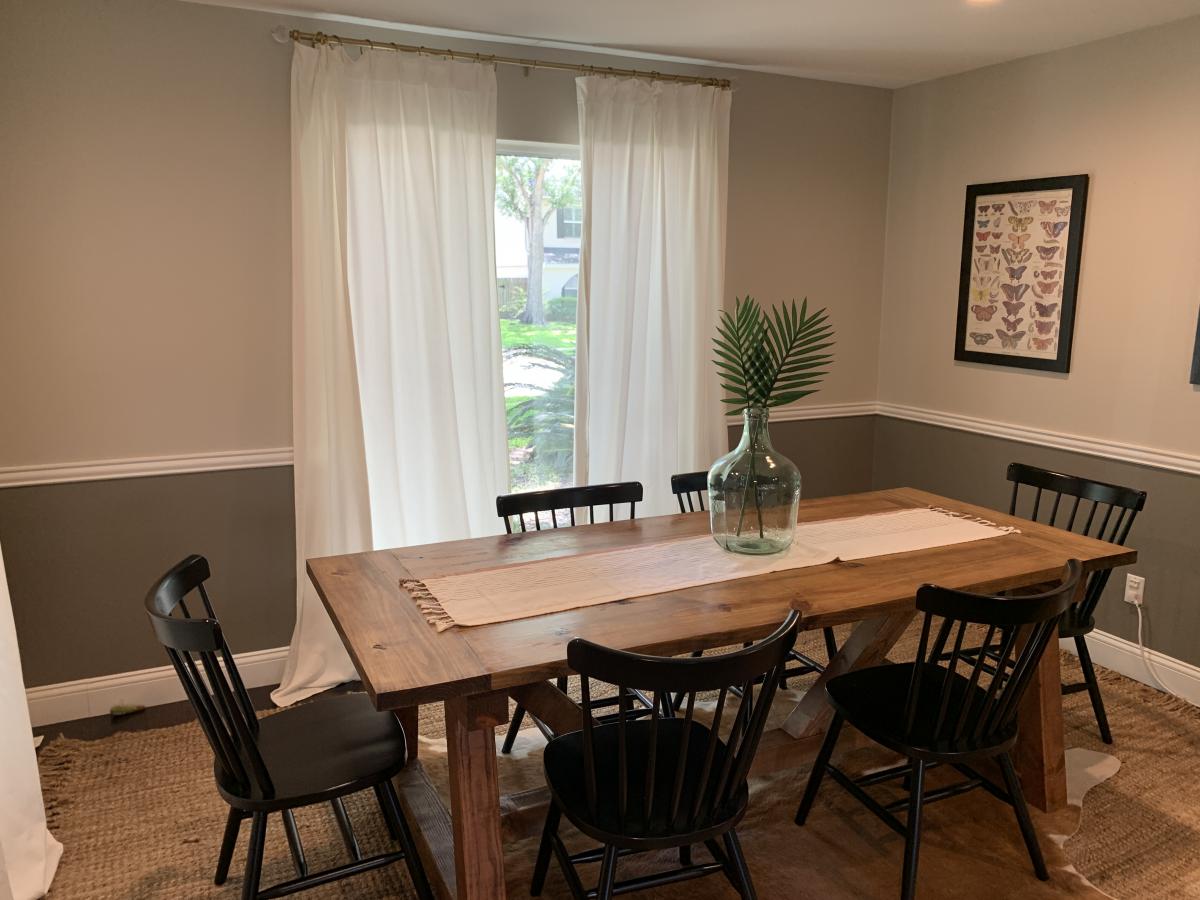
My Rustic Console Table!

Submitted by Anonymous (not verified) on Sat, 03/18/2017 - 13:25

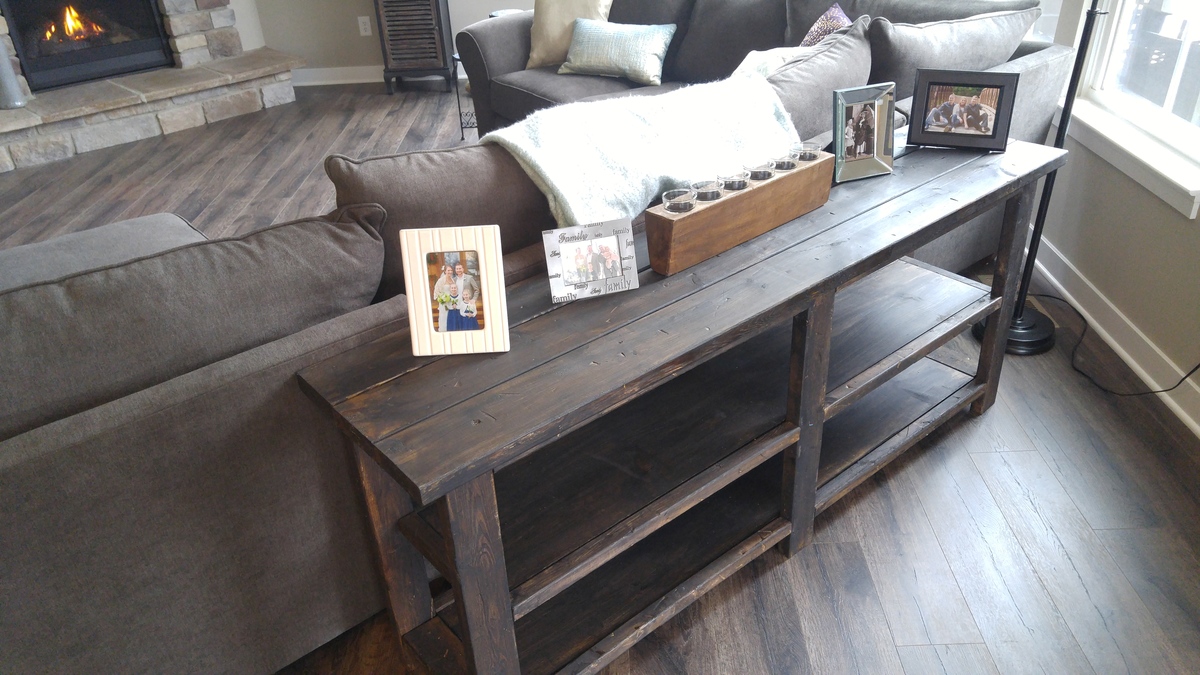
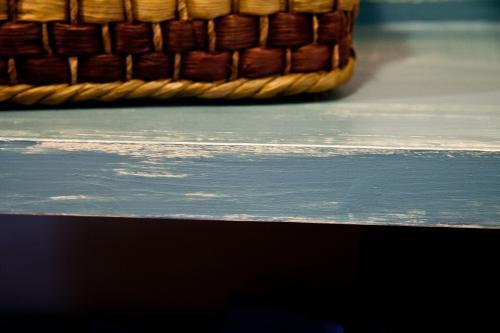
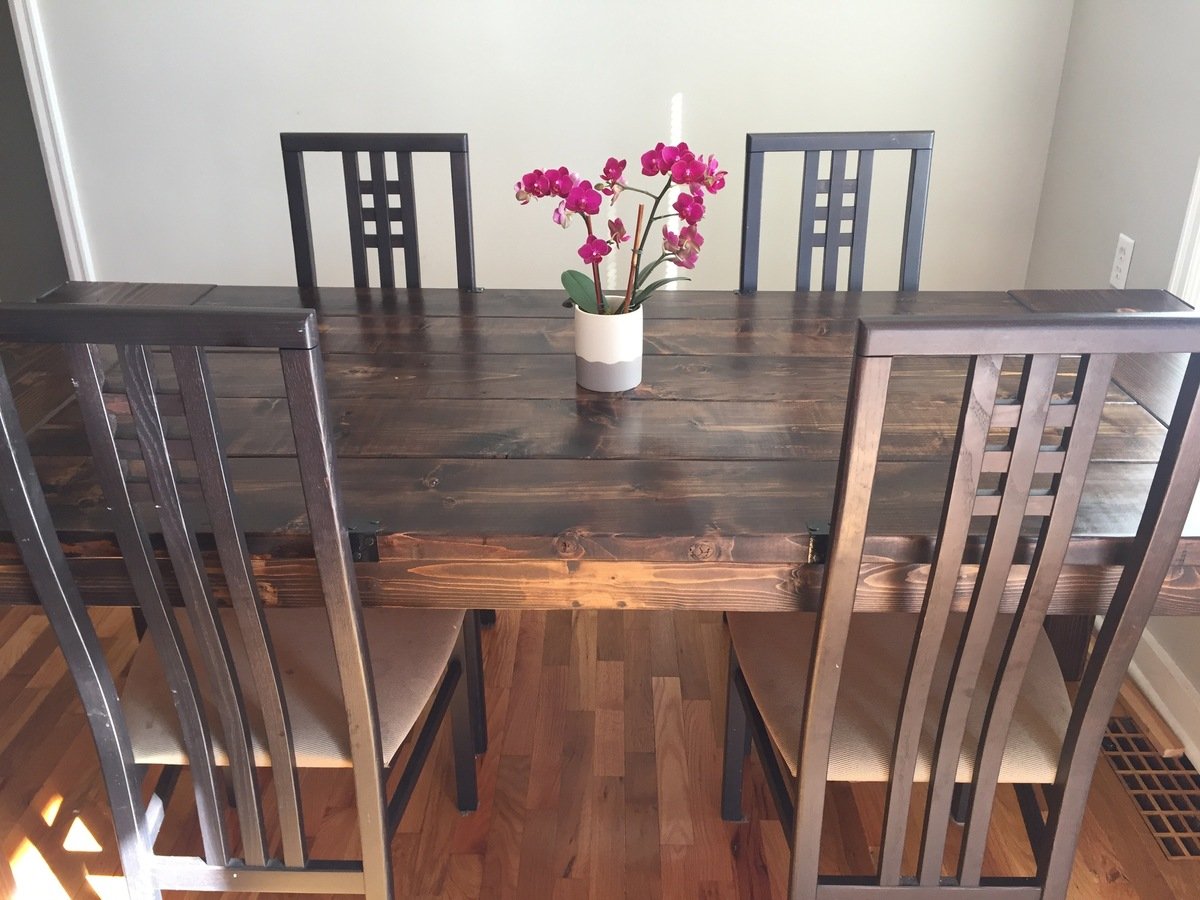
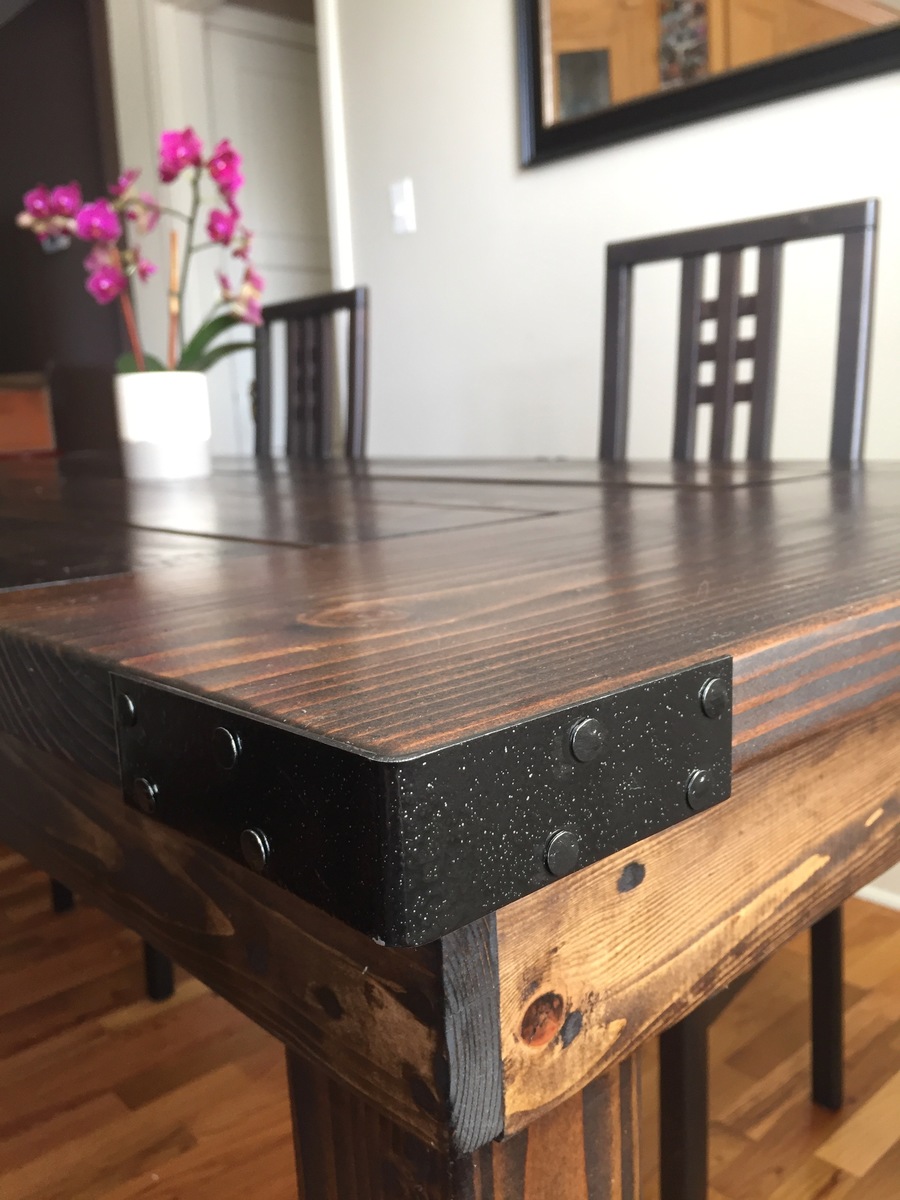
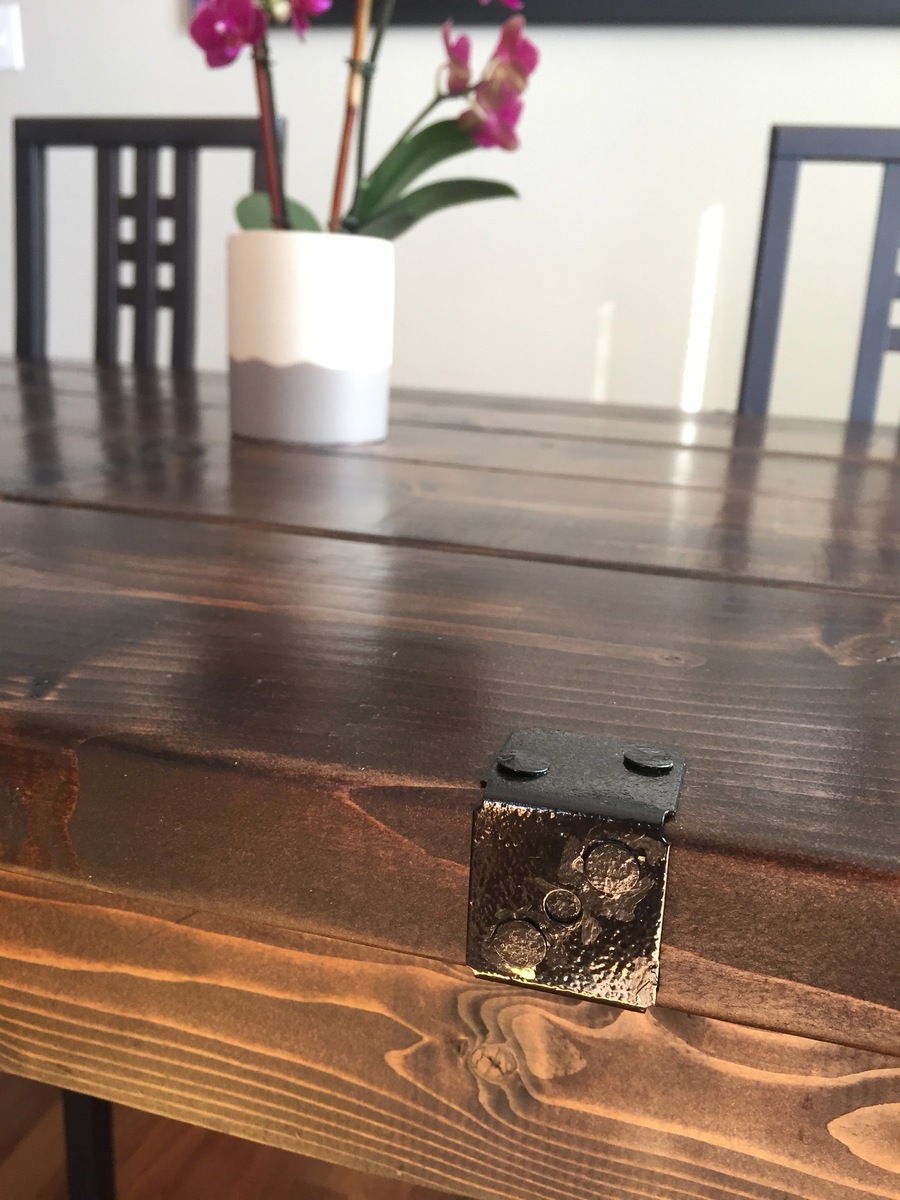
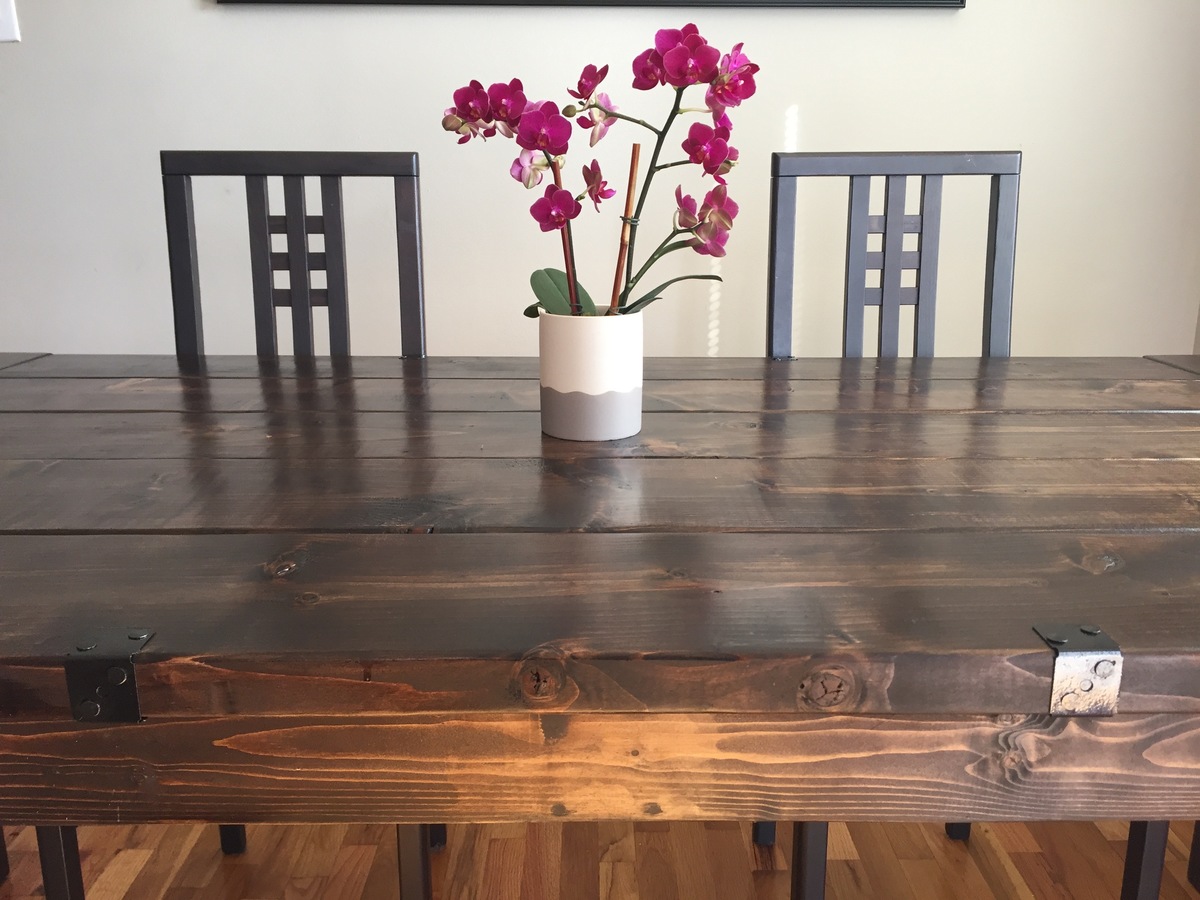
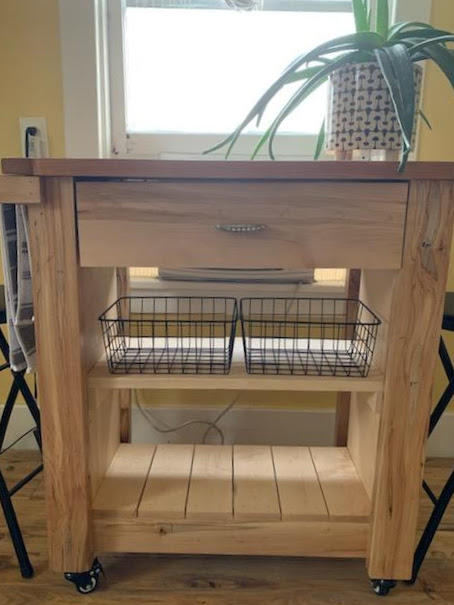
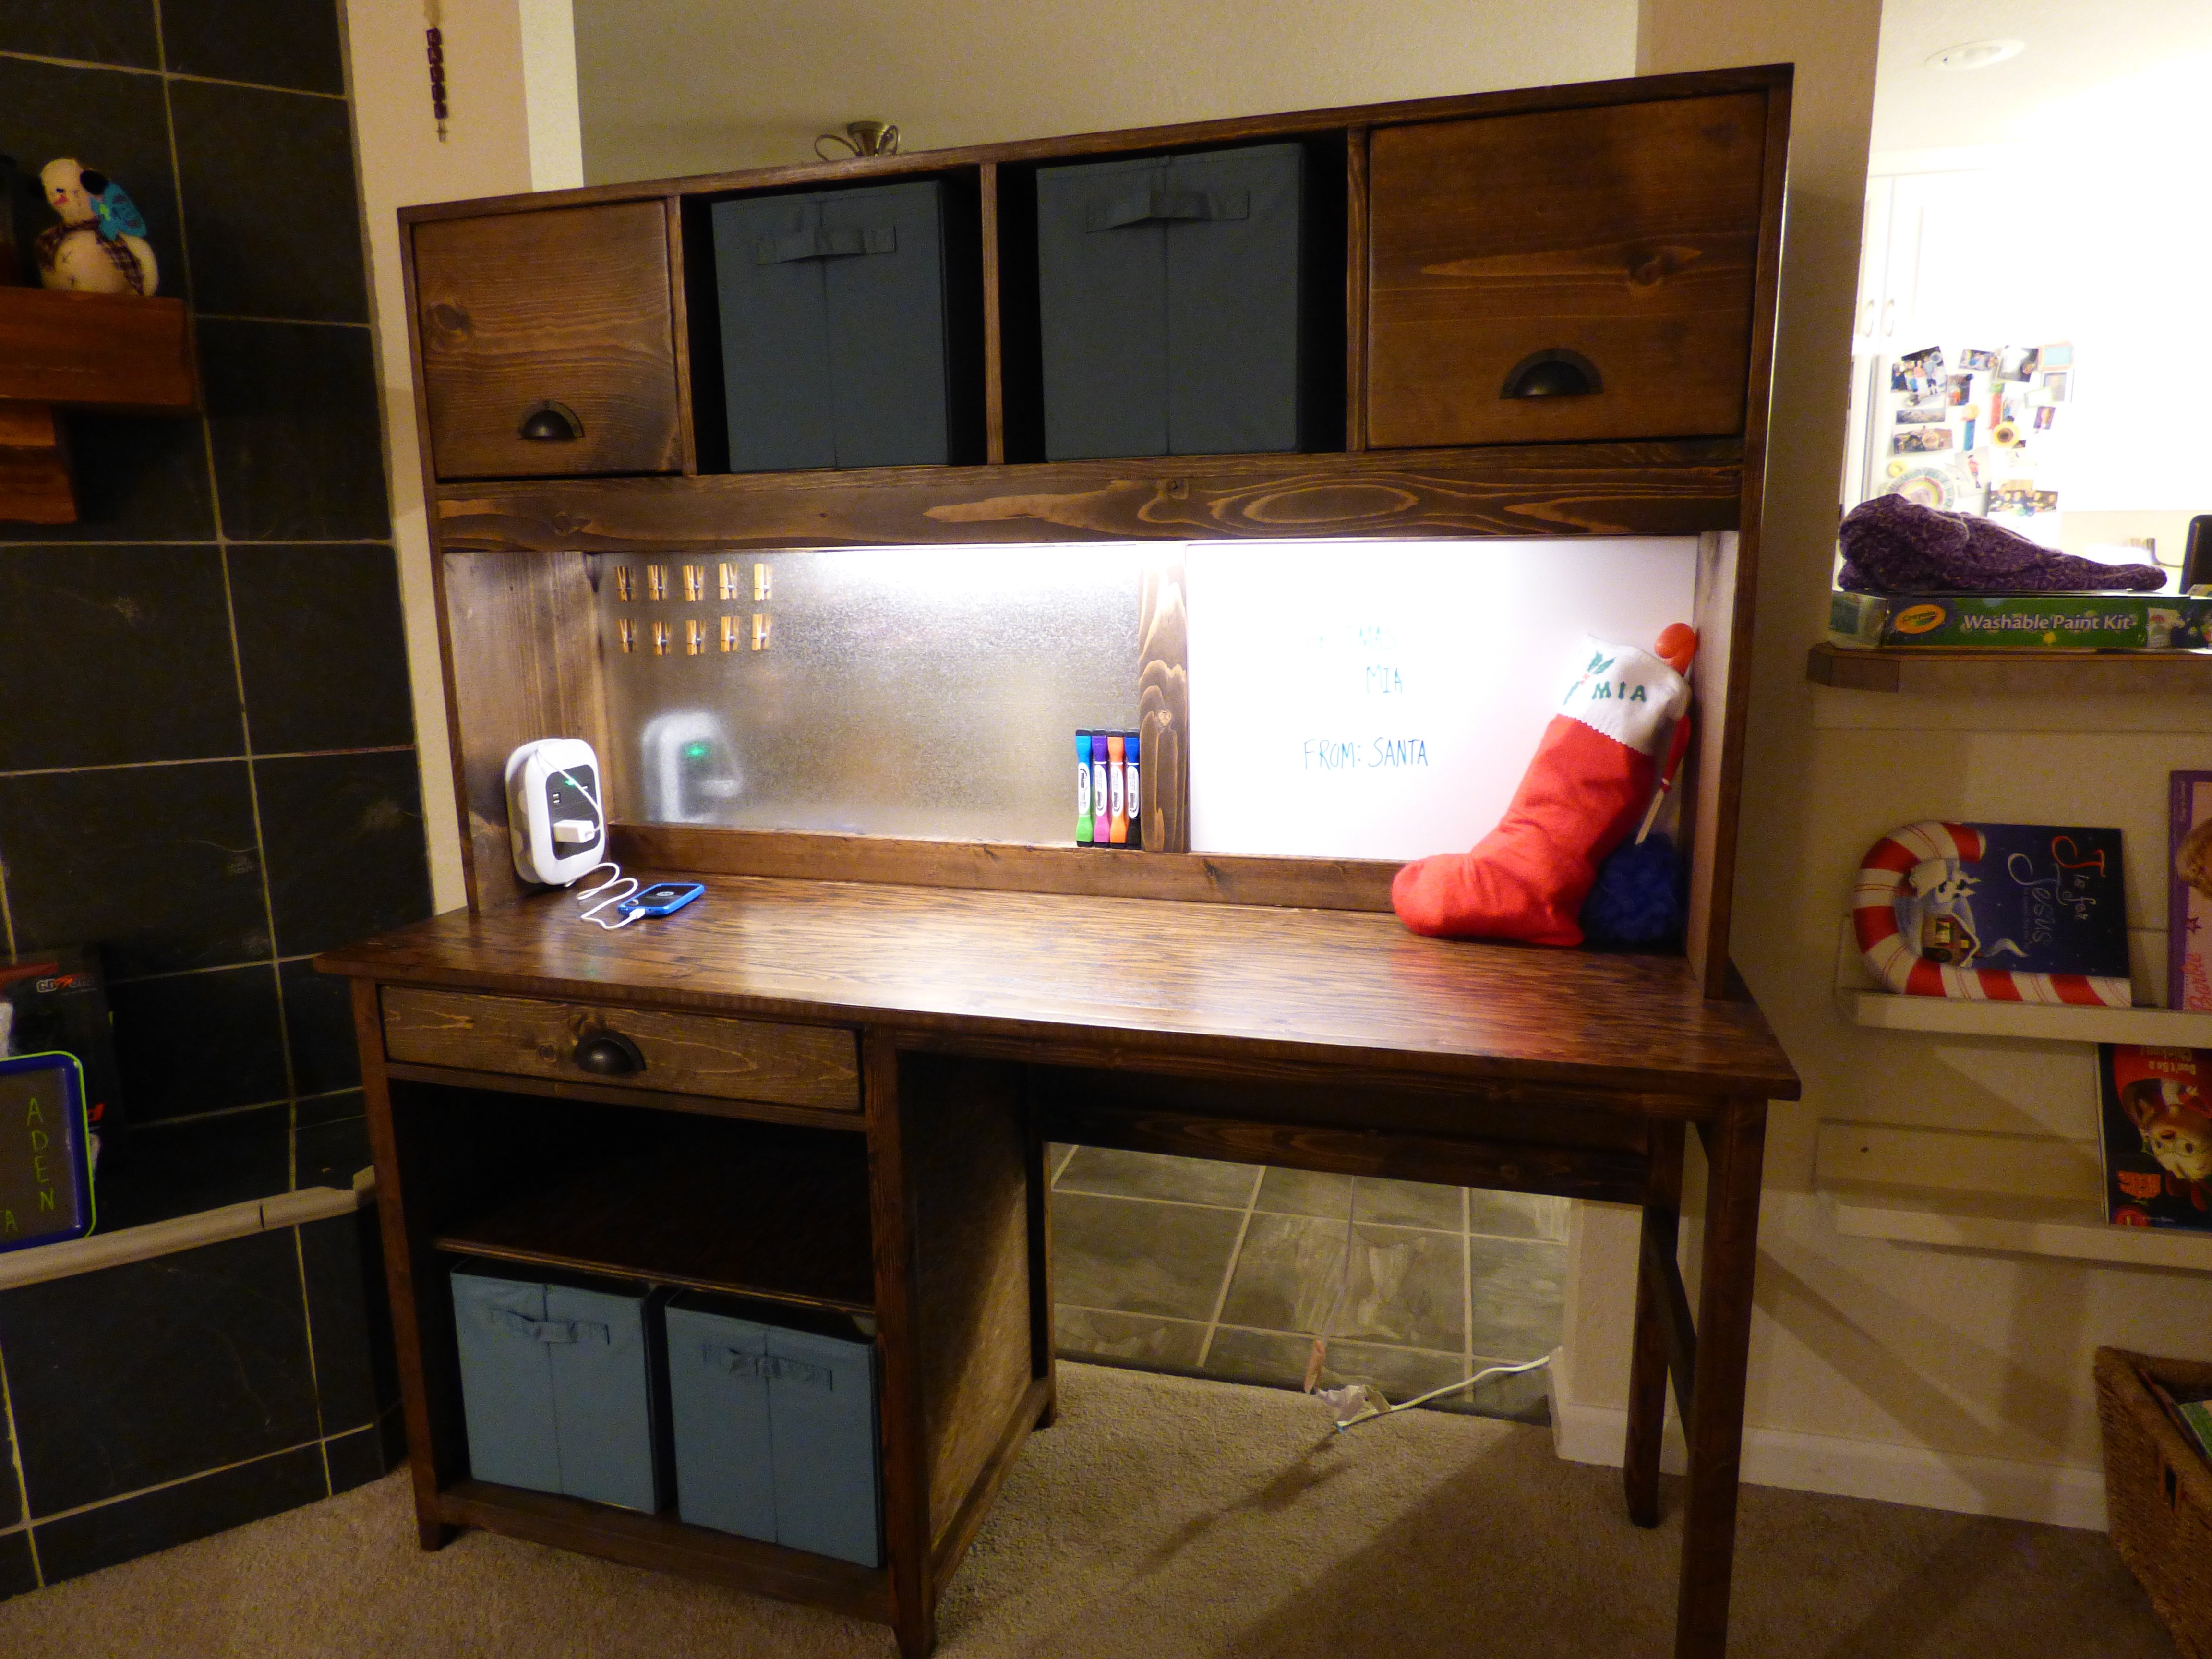
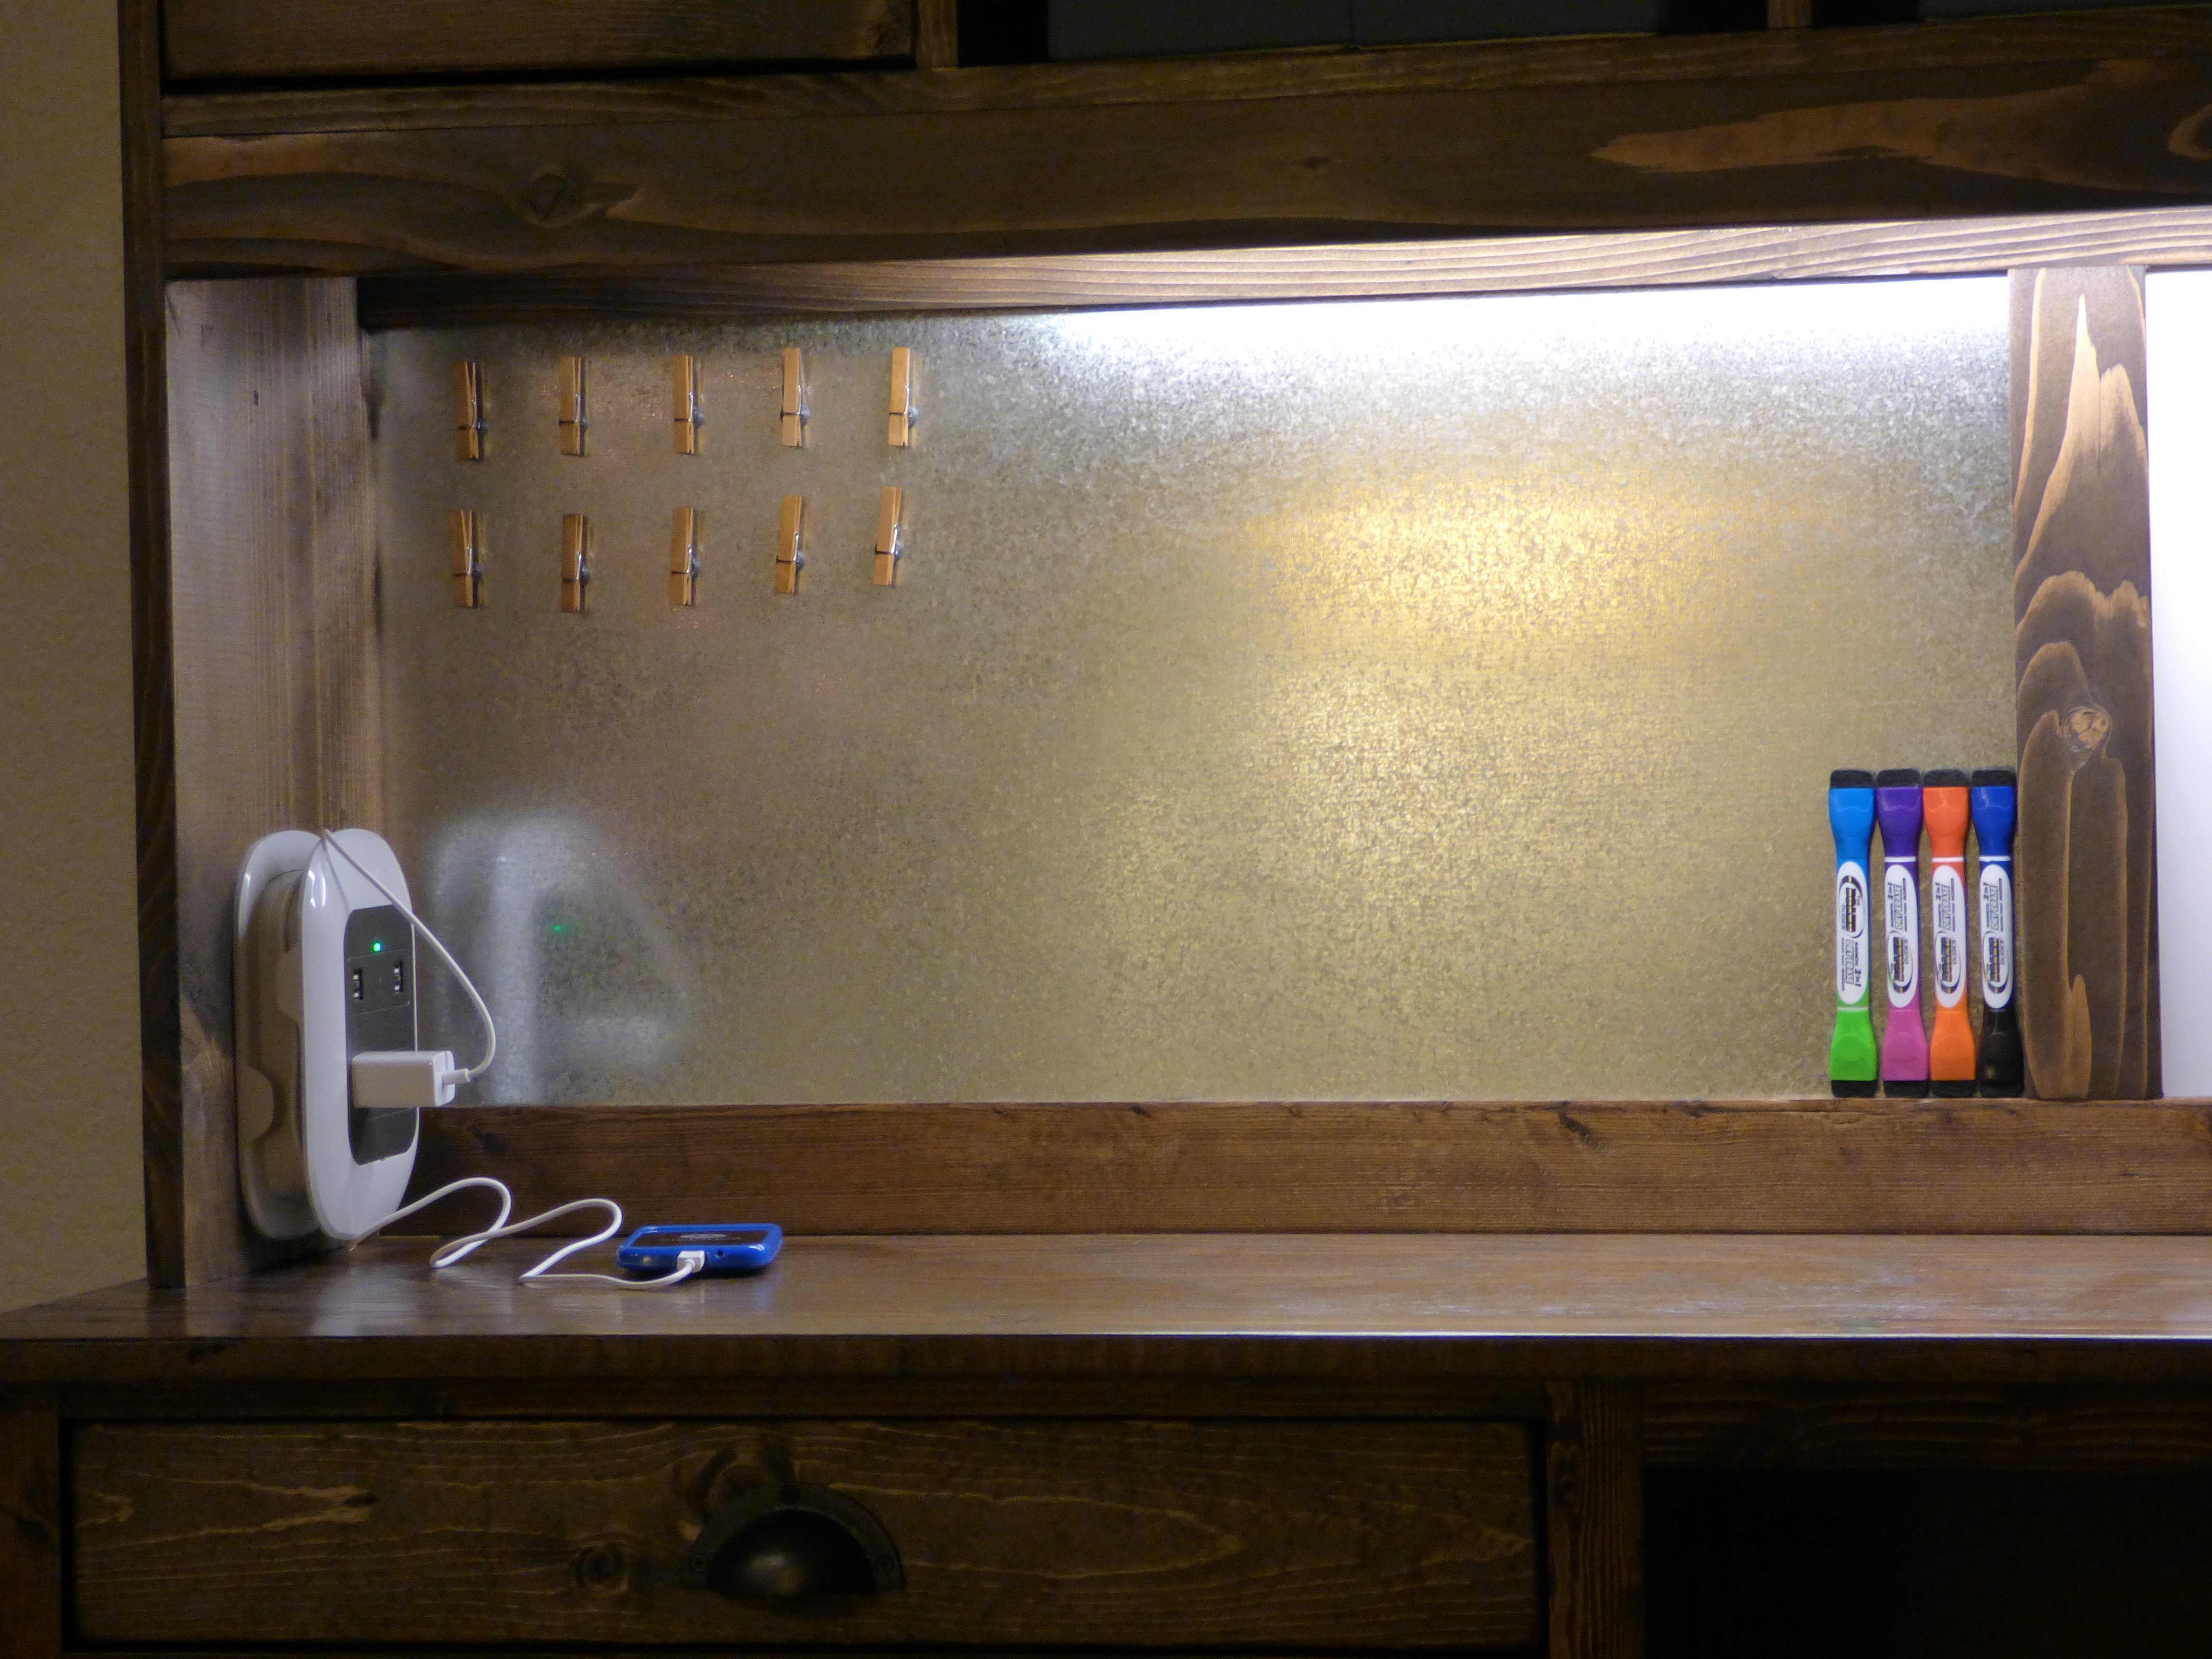
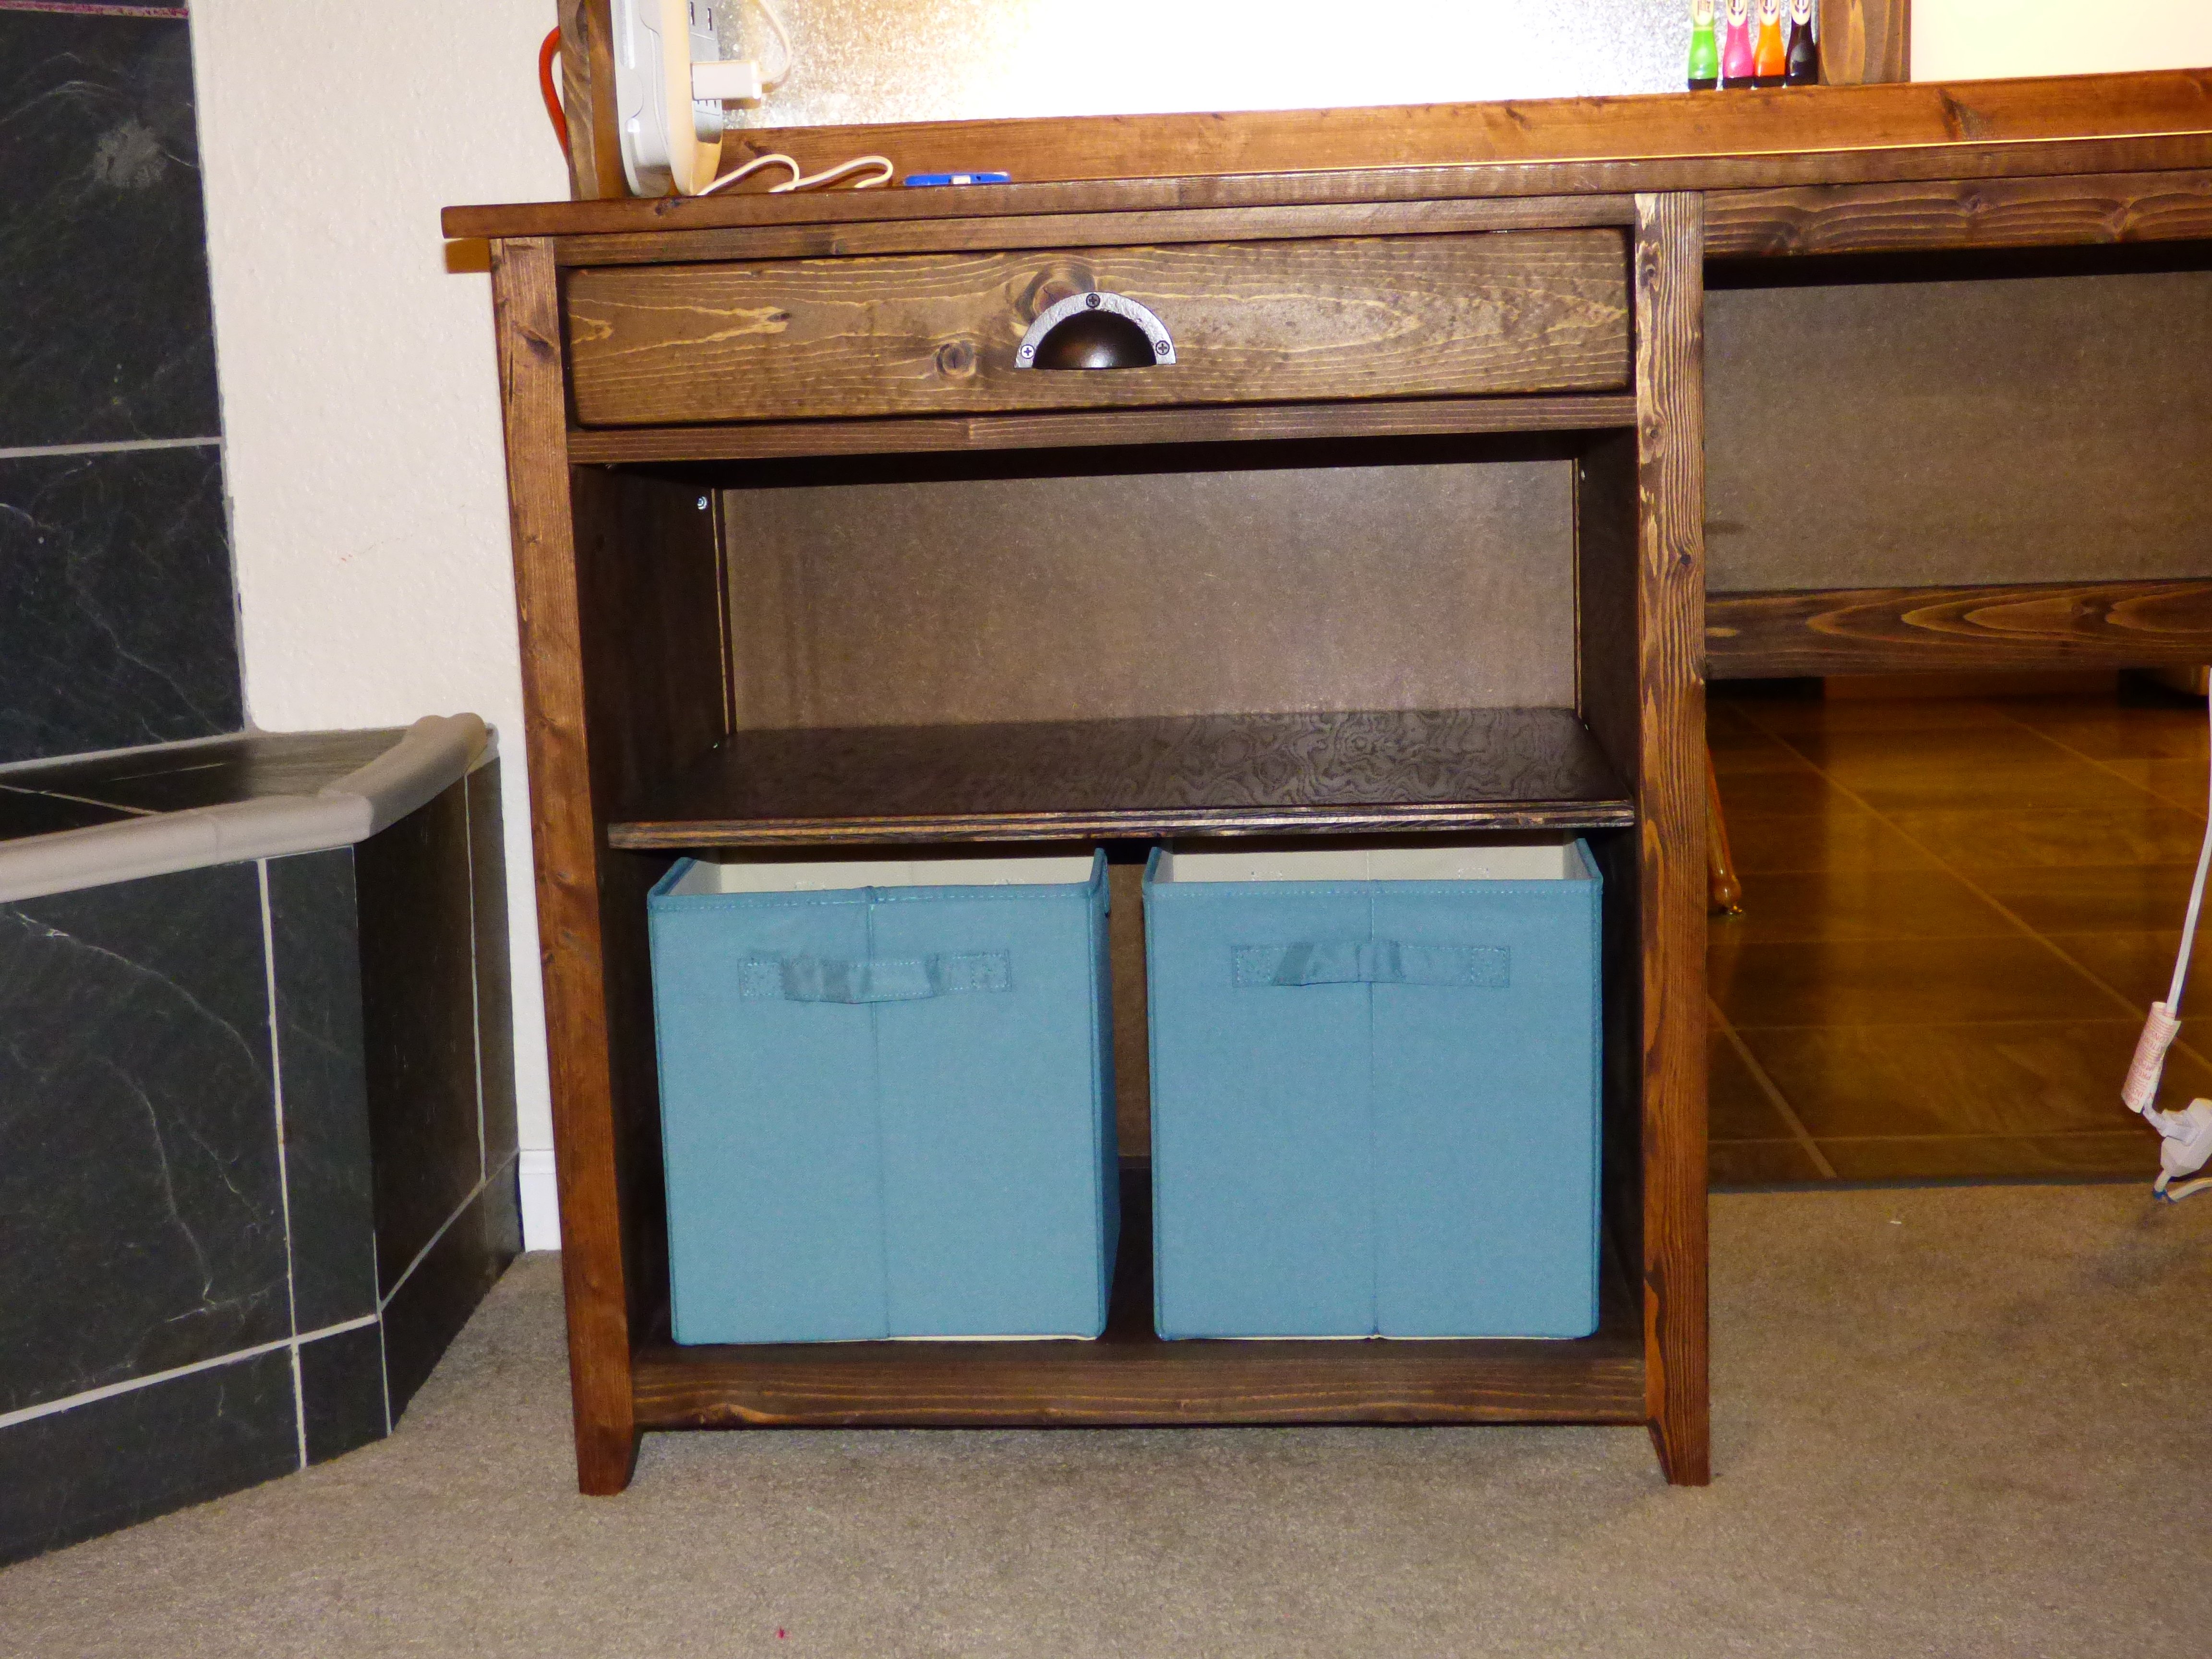
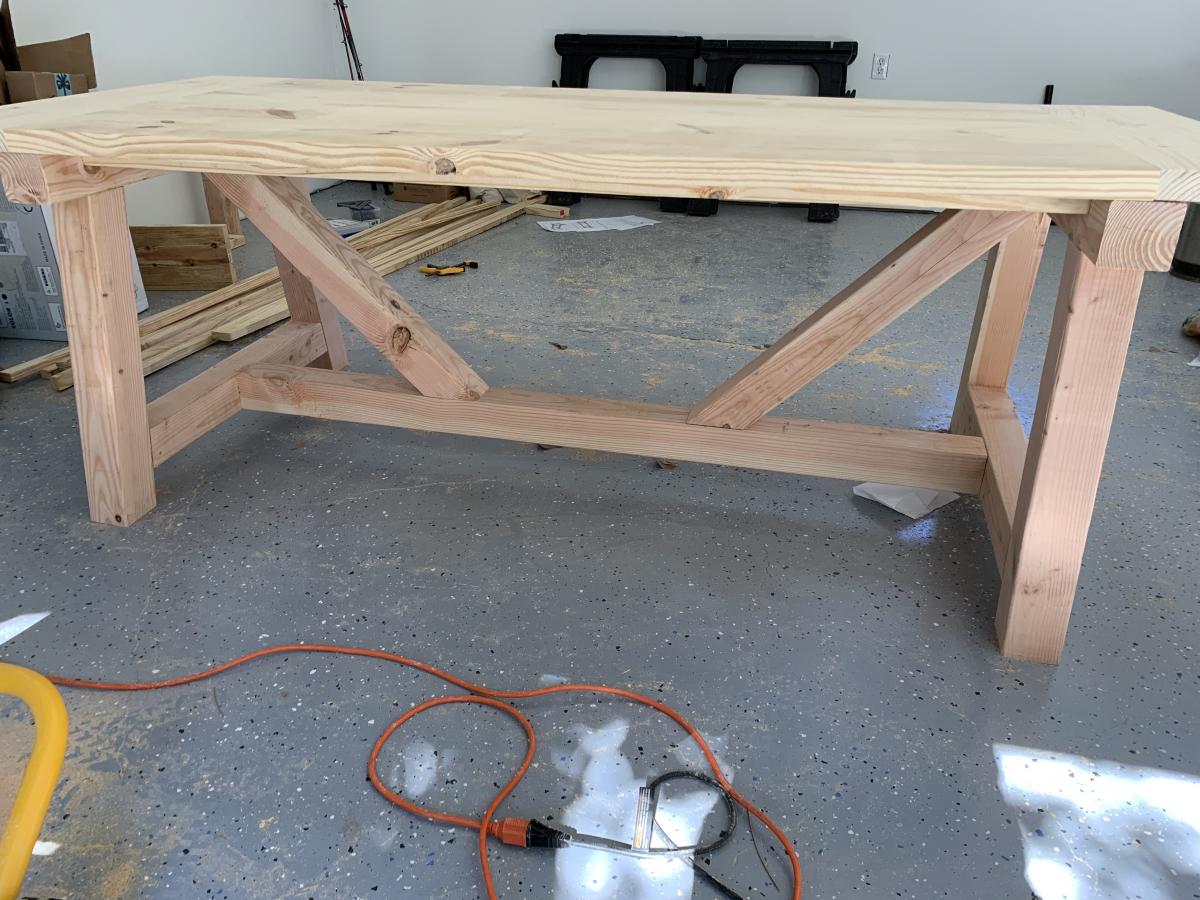
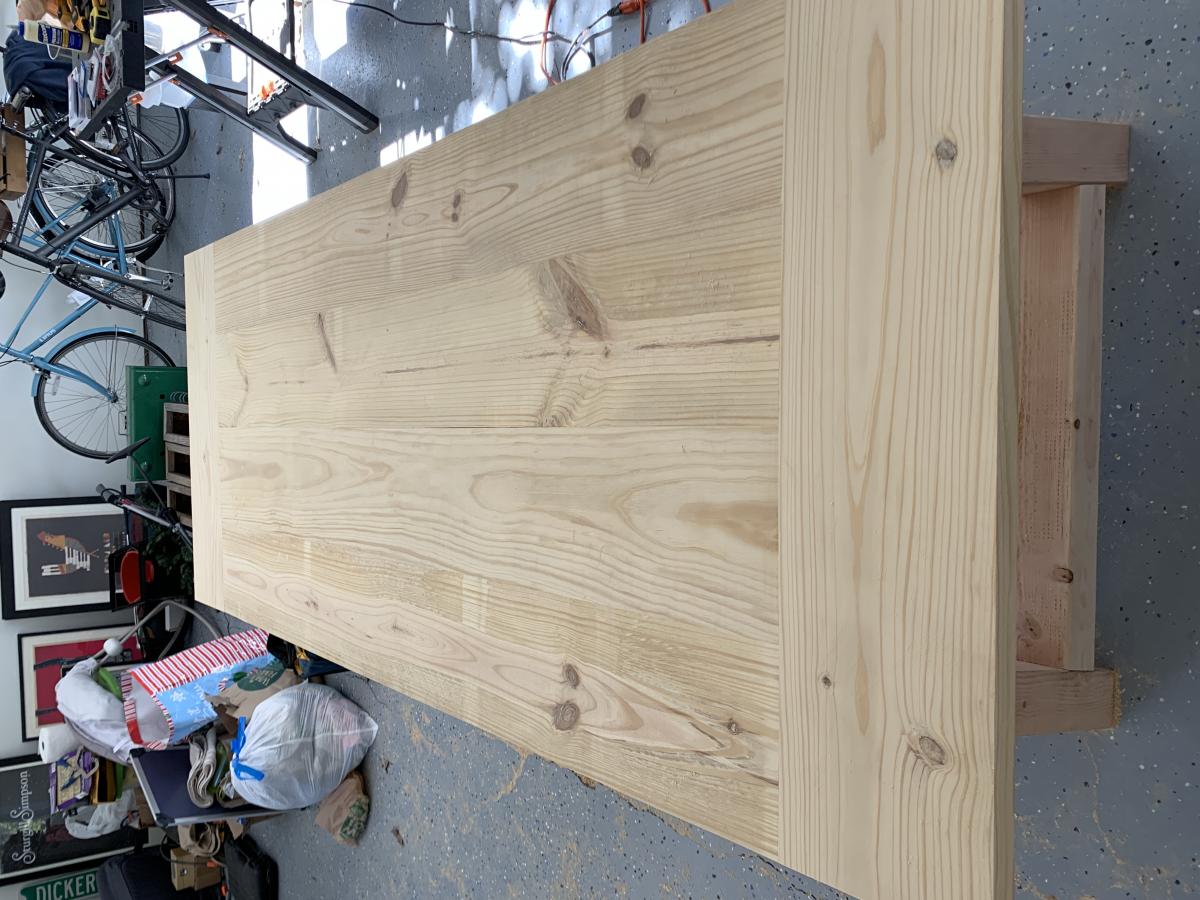
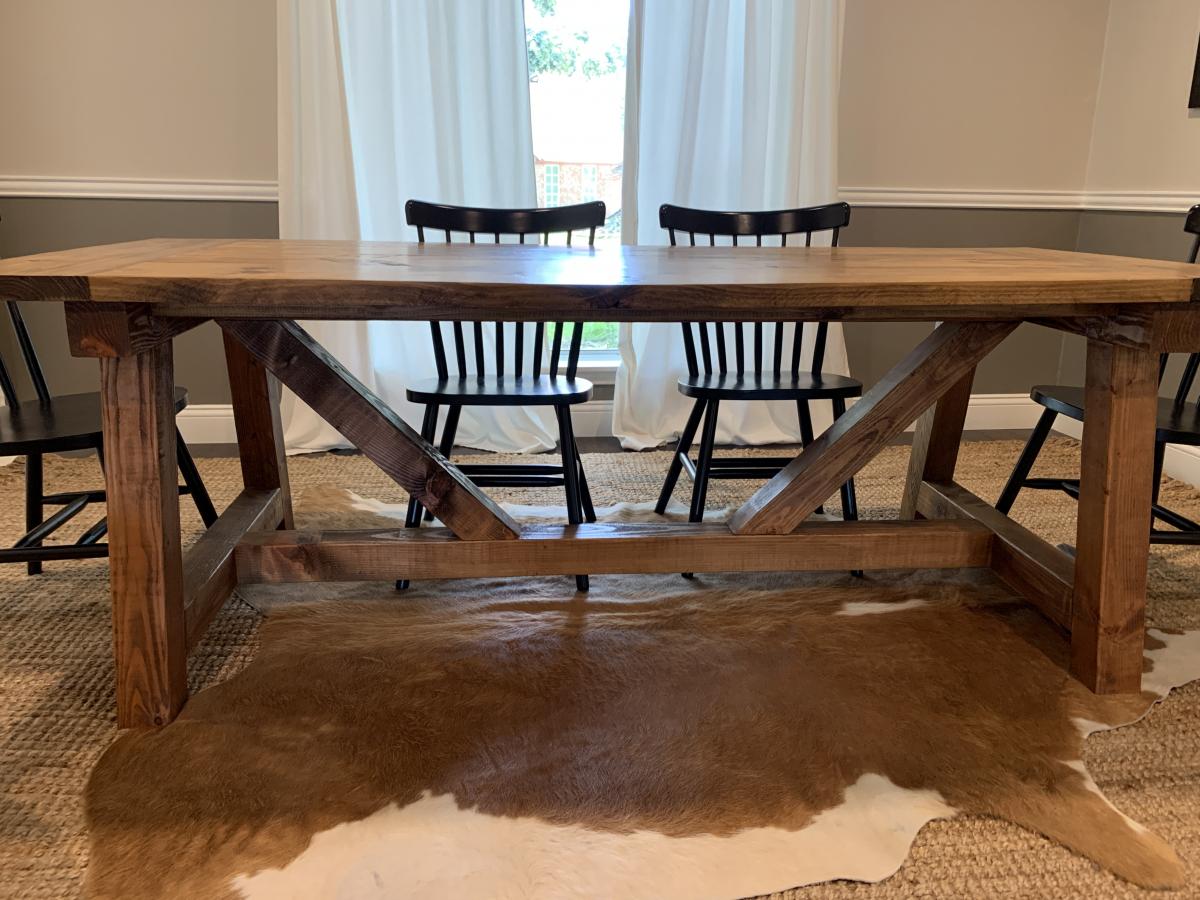
Couldn't be happier with how this turned out! I was going for a rustic look so I beat up and scratched up all my boards before staining. I built with pine. I used walnut stain, then rubbed on a thin layer of black paint to achieve the color.

I tried a few combinations of paint and stain with scrap, then let my wife choose which color combo she loved best!

Built from Plan(s)
Estimated Cost
$150
Estimated Time Investment
Weekend Project (10-20 Hours)
Finish Used
I used walnut stain, then rubbed on a thin layer of black paint with a rag to achieve the color.
Recommended Skill Level
Intermediate

Adirondack chairs

Submitted by Anonymous (not verified) on Sun, 01/17/2021 - 18:39

Thanks for the awesome plans Anna! God bless.

Eddie Jimenez

Comments

Seasonal And Holiday

Liv's new toddler bed

Our baby's turning 3 and is ready for a twin bed, having slept in a toddler version since 18mo... but we just HAD to build this adorable canopy toddler bed for her while she can still use it. We added a small window box that had been above her previous bed to the footboard, she stores her stuffed animals/bedtime books in there. Just need to pick out new sheets and fabric for the canopy :) Both she and the puppy love it, Thanks Ana!!

Built from Plan(s)
Estimated Cost
$53
Estimated Time Investment
Day Project (6-9 Hours)
Recommended Skill Level
Beginner

Comments

ACM

Wed, 02/13/2013 - 16:52

Just saw your kitchen and thought that was wonderful and now have to say how amazing this bed looks!

Wine Bar Christmas Gift

Submitted by Amanda R on Fri, 12/19/2014 - 19:21

I built this in my spare time over a couple weeks.  I am really happy with the results.  It was easier to build than I expected, considering this was my first builf that has a drawer. I am wanting to build the storage bed, and I am trying to get a few practices in with drawer making first.  We draw names for Christmas in my husbands family and I drew the name of a wine lover.  I hope she likes it!

Estimated Cost
Less than $100
Estimated Time Investment
Weekend Project (10-20 Hours)
Finish Used
Rustoleum Carrington stain and two coats of Polycrylic in semi-gloss finish
Recommended Skill Level
Beginner

Comments

Child's arbor bench

Submitted by ppd142 on Mon, 03/20/2017 - 22:06

After painting this bench, I customized it by adding the child's name, as well as some other art to it using black acrylic paint.  Turned out awesome!

Built from Plan(s)
Estimated Time Investment
Afternoon Project (3-6 Hours)
Recommended Skill Level
Beginner

My First Bed

Submitted by toolman81 on Wed, 01/20/2021 - 12:10

This was my first bed since we can not find any in stock due to the pandemic. I switched up the headboard legs to 2x6s for a slightly wider base. This helped with the mattress in a box we ordered. I built a simple frame using 2x8s, all basic lumber from the big box store, and used 2x6s for the footboard legs. I built the bed frame just about two inches shorter in width to give it some variation in sight lines. I finished it with basic white enamel paint and put 1x4 slats under the mattress. My wife loved it and it turned out well.

Built from Plan(s)
Estimated Cost
$380
Estimated Time Investment
Weekend Project (10-20 Hours)
Finish Used
White Paint
Recommended Skill Level
Intermediate

Small bench

Submitted by Miaya39047 on Sat, 02/16/2013 - 21:00

My husband and I needed a small bench for our long hallway. This plan was perfect! Somehow though we bought extra wood, I followed the shopping list exactly. Took about an hour to cut and put together. Painted it a matte black and sanded edges to looked distressed, and then 1 coat of polycyrlic. Cost about 15.00 to make.

Built from Plan(s)
Estimated Time Investment
An Hour or Two (0-2 Hours)
Finish Used
Black matte paint.
Recommended Skill Level
Beginner

Comments

Sand box

Made in South Africa. Have a cutting list which takes into account our timber lengths.    I made it on my own on my dining room table. I did the tops and then transported it in a flat pack in my car to the farm (4 hour drive) and completed the assembly and placement there. I painted it with wood preservative before I started to ensure that it was all coated. As we were placing it on a covered veranda I stapled 100 micron black plastic to the base. It is perfect for outside as the lid ensures that all animals and other creatures are kept out of the sand. I used washed sand for the box as the kids using it are toddlers and it is a good idea to include bulk coarse salt to keep creepy crawlies out.

It is perfect for mommies to sit with their toddlers as the seats are a comfortable height!


Built from Plan(s)
Estimated Cost
R1500
Estimated Time Investment
Day Project (6-9 Hours)
Finish Used
Any stain or varnish you like. Can also be painted.
Recommended Skill Level
Beginner

Beautiful Modern Farmhouse Table

Submitted by Anonymous (not verified) on Fri, 03/24/2017 - 10:56

I added black accent brackets to this project to give it a more unique feel. Love it!

Estimated Cost
$175
Estimated Time Investment
Weekend Project (10-20 Hours)
Finish Used
Dark Walnut
Recommended Skill Level
Intermediate

Modular Bookcase turned Game Console table

Submitted by Anonymous (not verified) on Sat, 01/23/2021 - 08:24

I'm married to a manchild lol and he wanted a custom Nintendo console like one he saw online. I made this a little taller and added more shelves to store the games. He also decided he wanted a back and I happened to have some extra faux brick paneling. This was when he got super excited to add stickers to it and complete the wall too. It fits everything he needed and it actually turned out pretty incredible. He wanted the controller to be 3D even though I'm itching to try out epoxy. But maybe on a later project :)
The plans are so easy to follow and this being my 6th project from AnaWhite I'm really learning alot!
I can't thank you enough for what you do!!!

Built from Plan(s)
Estimated Cost
$80
Estimated Time Investment
Weekend Project (10-20 Hours)
Finish Used
I actually used some black semi gloss outdoor paint to avoid another trip to the store, and I wouldnt recommend it. The layer paints didnt stick and the finish was less than desirable. Lesson learned lol. I also used acrylic on the details
Recommended Skill Level
Intermediate

Comments

Rosie's play sink and range

Submitted by bbomer on Mon, 02/18/2013 - 10:58

I built this using the plans in the book, which are basically the same as the older plans linked here. I did not intend to build a nearly identical set to the one in the book, but that's basically how it turned out.

Modifications:

I used a 1x12 (plan calls for 1x10) for the shelves in both the sink and oven and ripped it down by 3/4" making it 10.5" in width. This allows the oven door to rest against the shelf when closed. It also allowed me to attach a magnetic clasp to one side to keep the door closed.

I also used a router table to make a rabbet around the inside opening of the oven door so that the plastic sits flush to the door surface.

Estimated Cost
$150
Estimated Time Investment
Weekend Project (10-20 Hours)
Finish Used
Shellac seal coat (prevents discoloration from knots), 3-4 coats of flat latex applied with an HVLP sprayer, 3 coats water based poly (also sprayed)
Recommended Skill Level
Beginner

James' Castle Loft Bed

Submitted by hmkeith11 on Fri, 12/26/2014 - 09:04

We built this bed for my three and a half year old son and gave it to him for Christmas. He and also my almost two year old daughter LOVE it! We did modify the plans a little: we added a handle for getting into the bed from the stairs and also added more slats for support. 

Estimated Time Investment
Week Long Project (20 Hours or More)
Recommended Skill Level
Intermediate

Comments

Hanging Beds

Submitted by Anonymous (not verified) on Sun, 03/26/2017 - 17:10

Using the daybed plan I modified the beds to hang supported by two walls. I mounted the bed to the wall into the studs using 5/16 GRK Rugged Structural Screws, and also used structural screws to attach all the framing supports. I originally tried to hang the unsupported side with rope from a lag thread screw eye in the wall stud and a lag eye bolt in the bed frame, but the rope had too much stretch and would not adequately hold the corner (as the rope stretched the weight on the corner pulled on the 2x4 wall support at an odd angle that would probably eventually break the frame). So, I found stainless steel uncoated wire rope, with the appropriate fasteners, and that seemed to hold well with less give on the corner. I was still a little uncomfortable with the amount of force pulling on the 2x4 center supports at the 2x4 wall brace so I also added 2x4 joist hangers on the center supports. The corner still moves slightly when I hang on it (I'm about 110lbs), but I have no doubt the bed will support the weight of my kids without issue. My 200lb husband got on it without any problems. The beds are straight forward  and cost-effective to make, you just have to be sure you mount them safely. Also, a tip for those of you planning on mounting the beds to a wall, mount the frame first and then screw on the decking boards...so much lighter and easier to work with that way!!

Built from Plan(s)
Estimated Cost
180.00 for 2 beds and all the hardware to hang them from the wall.
Estimated Time Investment
Week Long Project (20 Hours or More)
Finish Used
jacobean stain, sanded to distress, and one coat of triple thick poly in satin
Recommended Skill Level
Intermediate

Modern take on the Rustic X Small Rolling Kitchen Island

Submitted by bsstrong on Wed, 01/27/2021 - 11:13

Used your plan as a base to make this kitchen island for my daughter. It is made from ambrosia maple and soft maple, has an integrated knife block in the drawer (also from one of your plans), and has a cutting board top made out of cherry and black walnut.

Comments

Modified Kitchen Island

I have been wanting to build this island for years! Seriously. But we finally got to the point that we had some extra time, and no other projects were screaming at us! We decided to make our island 24in x 36 in. So 12in shorter than the original plan. This was an easy adjustment. We also added another shelf, which we love.

The only issue we had was the slat length. Almost all of the pictures I looked at showed that the aprons, and side supports weren't exactly lined up with the front or back of the 2x2 legs. I'm guessing they were put in the middle, but I couldn't find that info in the plan. So we decided to make our aprons and sides flush with the front of the 2x2 leg. This added about an 1in to the slat length. Sadly, I didn't figure this out till after we cut the slats. After re-cutting, things went smoothly! It was my first time using a Kreg Jig, and it was great. We had to use A LOT of spray paint to cover it, but I am so happy with the final result! It's not perfect, but it's homemade, sturdy, and I hope Ana-White would be proud!

Built from Plan(s)
Estimated Cost
$75
Estimated Time Investment
Afternoon Project (3-6 Hours)
Finish Used
Rust-Oleum Heirloom White Spray Paint (2-3 coats), and Rust-Oleum Clear Coat )2-3 coats).
Recommended Skill Level
Beginner

Comments

superchou

Wed, 02/20/2013 - 13:53

I am about to do the same project... love seeing what others are doing with it :) nicely done.

Desk & Hutch

Submitted by Wildlife26 on Mon, 12/29/2014 - 08:04

I was not able to get to this desk last year and thought my 15 year old teenage daughter had forgotten about it and was getting too old. Around Thanksgiving she made a comment with a sigh that it would never happen and she understood. I immediately went to work in the garage to have this ready on Christmas morning. She had no idea and was very surprised to find it near the Christmas tree!

Desk included a power strip with USB ports, an under the hutch light, magnet board & dry erase board w/ magnet markers to stick on the magnet board.

Thank you so much for putting these plans on-line.

Estimated Time Investment
Weekend Project (10-20 Hours)
Recommended Skill Level
Intermediate

Comments

Nitzan

Submitted by Anonymous (not verified) on Mon, 03/27/2017 - 14:04

I love this plan, it was easy to follow. 

I live in Israel, so had to translate to centimeters. 

I made the X from 2 full pieces, cutting a half width dado. Found it easier to assemble. 

Few minutes after placing it in the house front, a friend suggested buying it....

Thanks


Estimated Cost
300 NIS, it's about 83$
Estimated Time Investment
Week Long Project (20 Hours or More)
Finish Used
Chalked rustoleum,
With Yacht Varnish Matt top.
It made the bench a bit too yellow, but the result is still nice
Recommended Skill Level
Advanced

Truss Beam Dining Room Table

Submitted by td_tx on Wed, 02/03/2021 - 08:57

We built this table for our dining room. The project followed the plans for cuts and dimensions except for the top. Instead of using 2x10, we used 2x12 and ripped an inch off each side to have flatter top with out needing to plane.

We used pine for the top and douglas fir for the 4x4 base. Before staining we used a pre-stain conditioner. The table was stained using Minwax Early American and then finished with a clear satin polyurethane.

Built from Plan(s)
Estimated Cost
200
Estimated Time Investment
Weekend Project (10-20 Hours)
Finish Used
Minwax Early America and clear satin polyurethane
Recommended Skill Level
Beginner

Comments

Farmhouse bedside table

Submitted by JimmyE3 on Sat, 02/23/2013 - 09:19

Another project for the wife, though there will be a matching one for my side of the bed in the near future! This was the first plan I constructed from this site.

Built from Plan(s)
Estimated Cost
$60
Estimated Time Investment
Day Project (6-9 Hours)
Finish Used
Hand wiped Minwax Early American 230 - which is why it is not quite as dark as my other projects.
Recommended Skill Level
Starter Project

RH Inspired Shanty Sideboard & Hutch

Submitted by jhavinga on Wed, 12/31/2014 - 14:34

Have been wanting to build this for 6 months now and just havnt had the time. Finally completed it!
I made some small changes to the design, different trim layouts, different dimensions, and went with a plank look for the back of the hutch instead of a solid peice of 1/4" plywood.

Built from Plan(s)
Estimated Cost
$500.00. This price includes wood, stain, and hardware.
Estimated Time Investment
Weekend Project (10-20 Hours)
Finish Used
1 coat of Minwax Weathered Oak, then 1 coat of Minwax Special Walnut.
Recommended Skill Level
Beginner

Comments

In reply to by ehays216

jhavinga

Thu, 01/01/2015 - 22:48

Thank you ehays216! Ive looked at your Farmhouse Storage Bed a few times.. Have always wanted to try the Steel wool/Vinegar trick.

Cheers,
Justin

timberandsoul

Sat, 01/03/2015 - 07:40

Great job! The love how the color turned out. May I ask where you purchased your backdrop from? And what size it is?

Thanks!

In reply to by timberandsoul

jhavinga

Sun, 01/04/2015 - 16:09

Thanks a lot timberandsoul!
Photo was taken on an empty wall in my living room, Which is currently a light gray wall. thought it looked boring so I did a quick switch of backdrops in PS. I just typed in brick wall in google.

Cheers,
Justin

Singhs

Sun, 01/04/2015 - 16:27

What type of wood did you use, home depot/lowes regular pine or some specialty wood ?

jhavinga

Sat, 01/24/2015 - 13:08

Sure! the plans call for 2 solid sheets of 1/4 plywood for the backing.. I simply just ran the plywood through a table saw at 5.5" wide and brad nailed it the back. =)
The stain is weathered oak and let sit for 15min. Then right away special walnut and let sit for 15 min.
repeat until desired colour. let me know if you have any more questions!

Cheers,
Justin

Sschoono

Sun, 01/08/2017 - 07:33

How many coats did you have to do to achieve this look?  The weathered oak looks so light...and gray.


Thanks!

Painterlyrhett

Sun, 05/17/2015 - 19:40

What was your strategy on attaching the sideboard to the Hutch. I haven't seen where there is any instructions or conversation around this. What and how did you accomplish this and/or is there anywhere to go that discussed this that helped you.

Thanks,

My girlfriend loves it!

Submitted by Anonymous (not verified) on Wed, 03/29/2017 - 12:38

Very easy to build!! Looks great!

Estimated Time Investment
Weekend Project (10-20 Hours)
Recommended Skill Level
Beginner