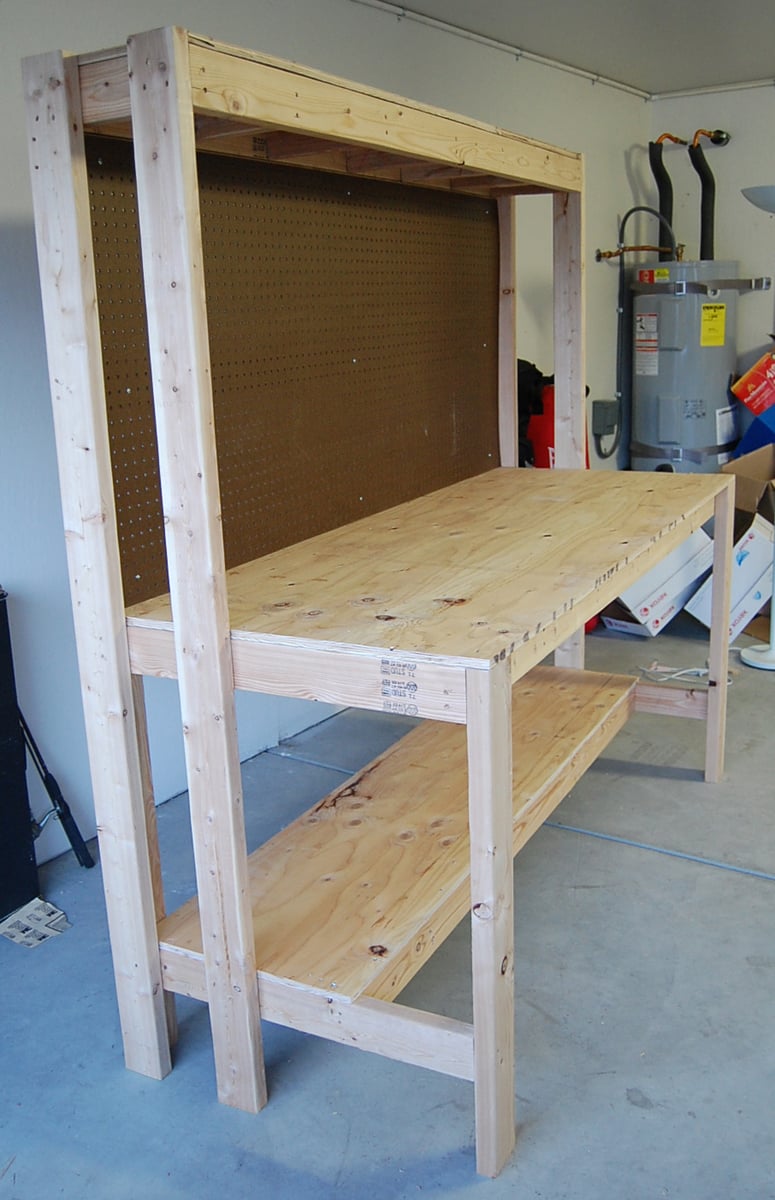
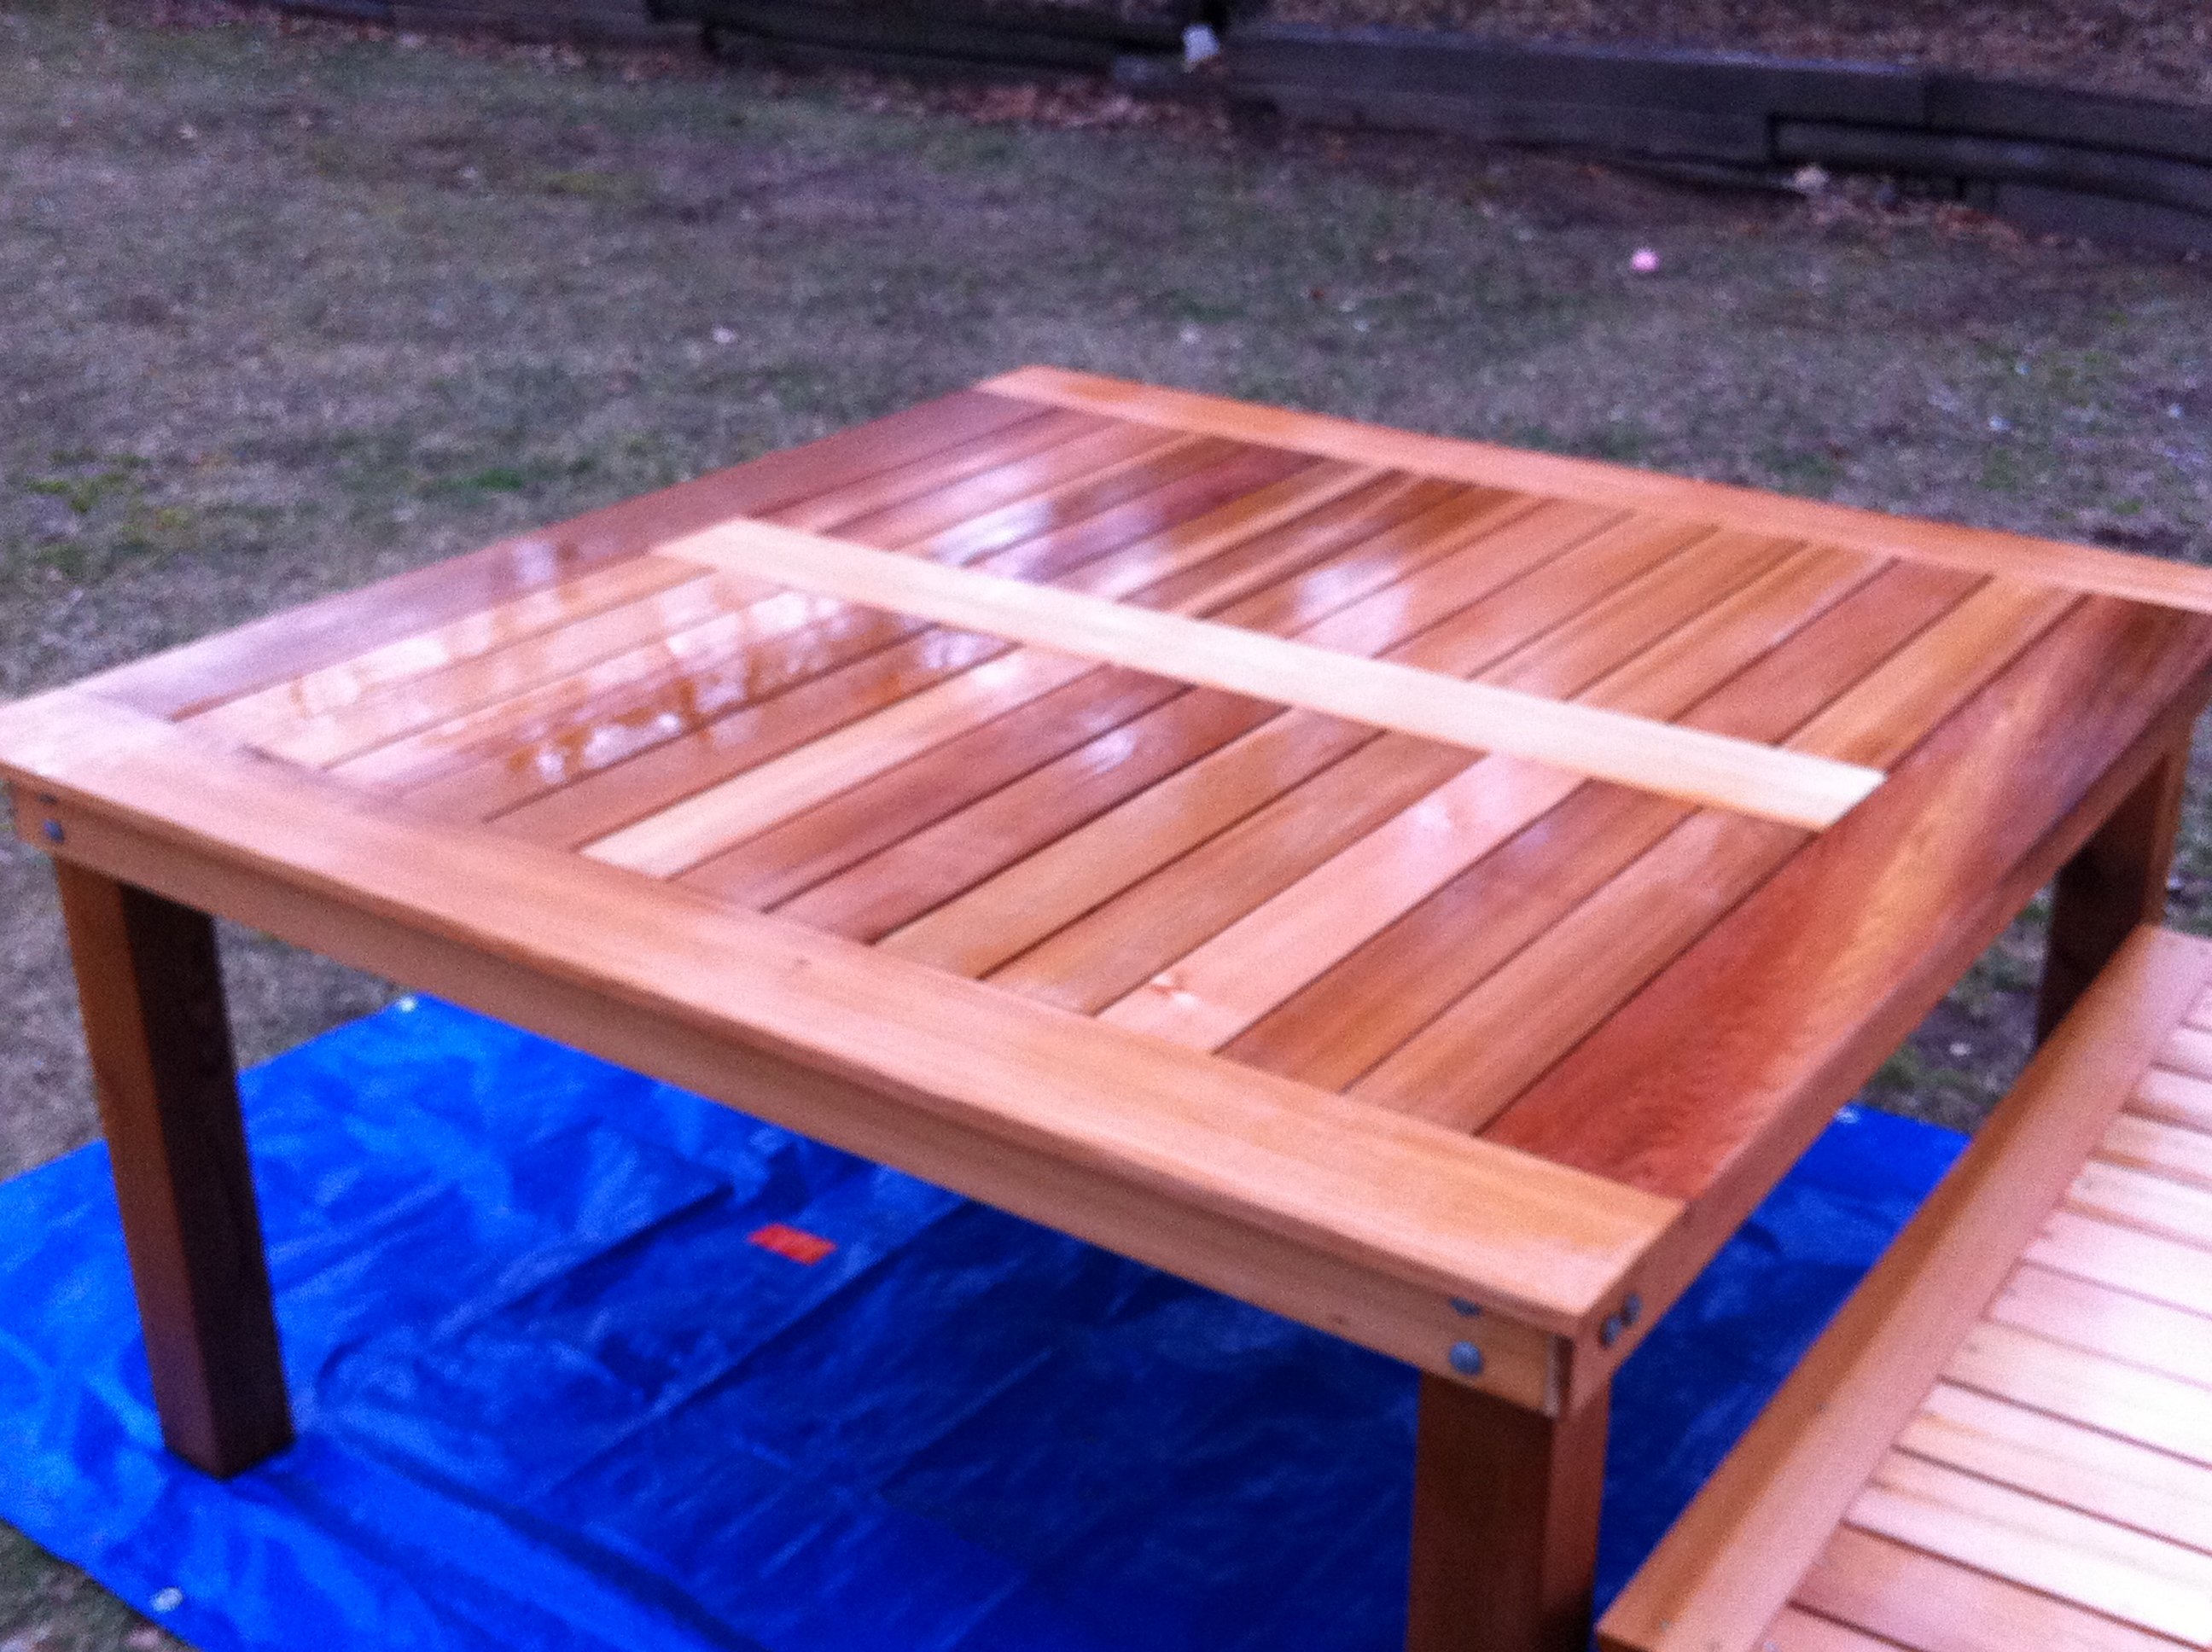
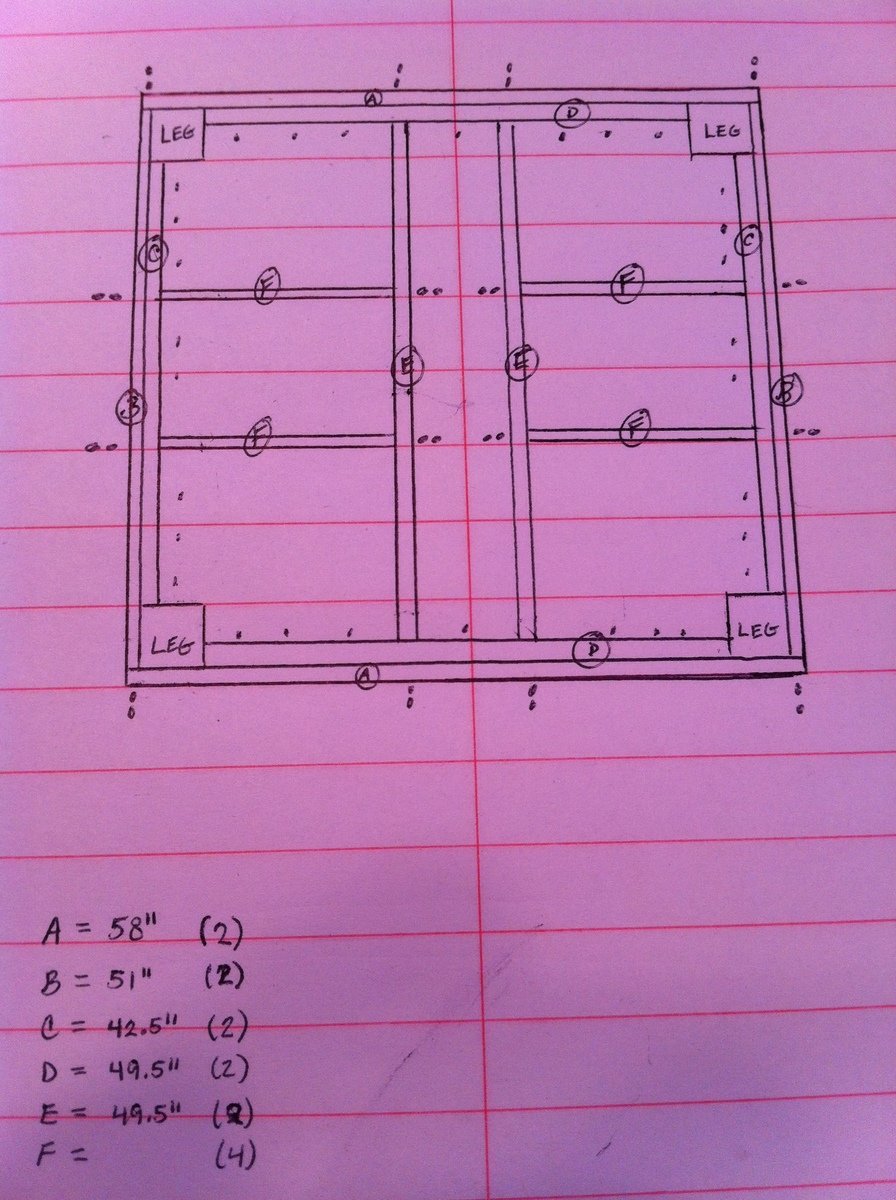
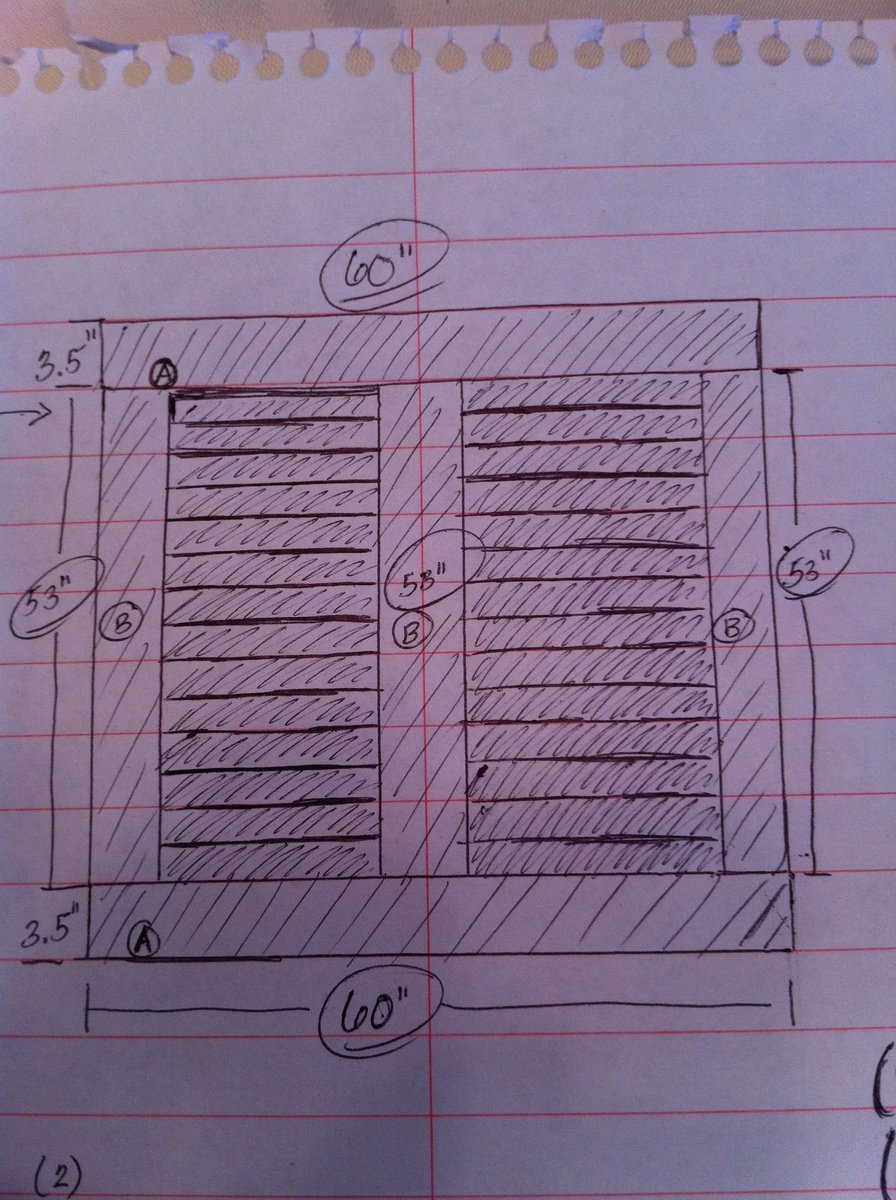
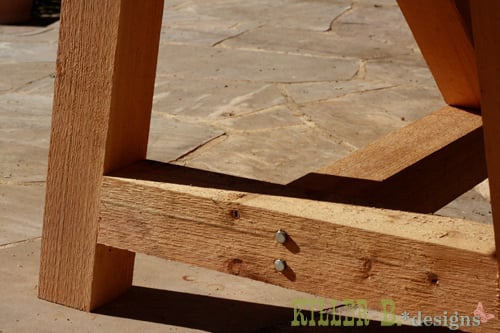
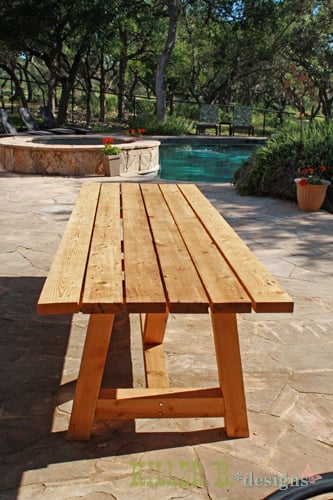
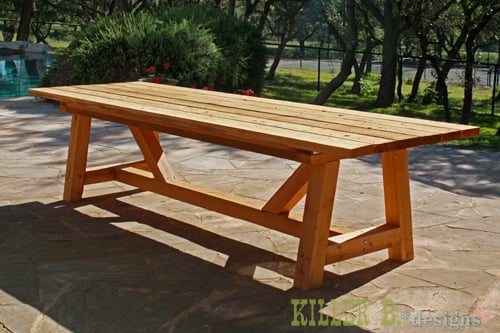
Community Brag Posts

Workbench

Submitted by jaimej on Sun, 04/28/2013 - 18:38

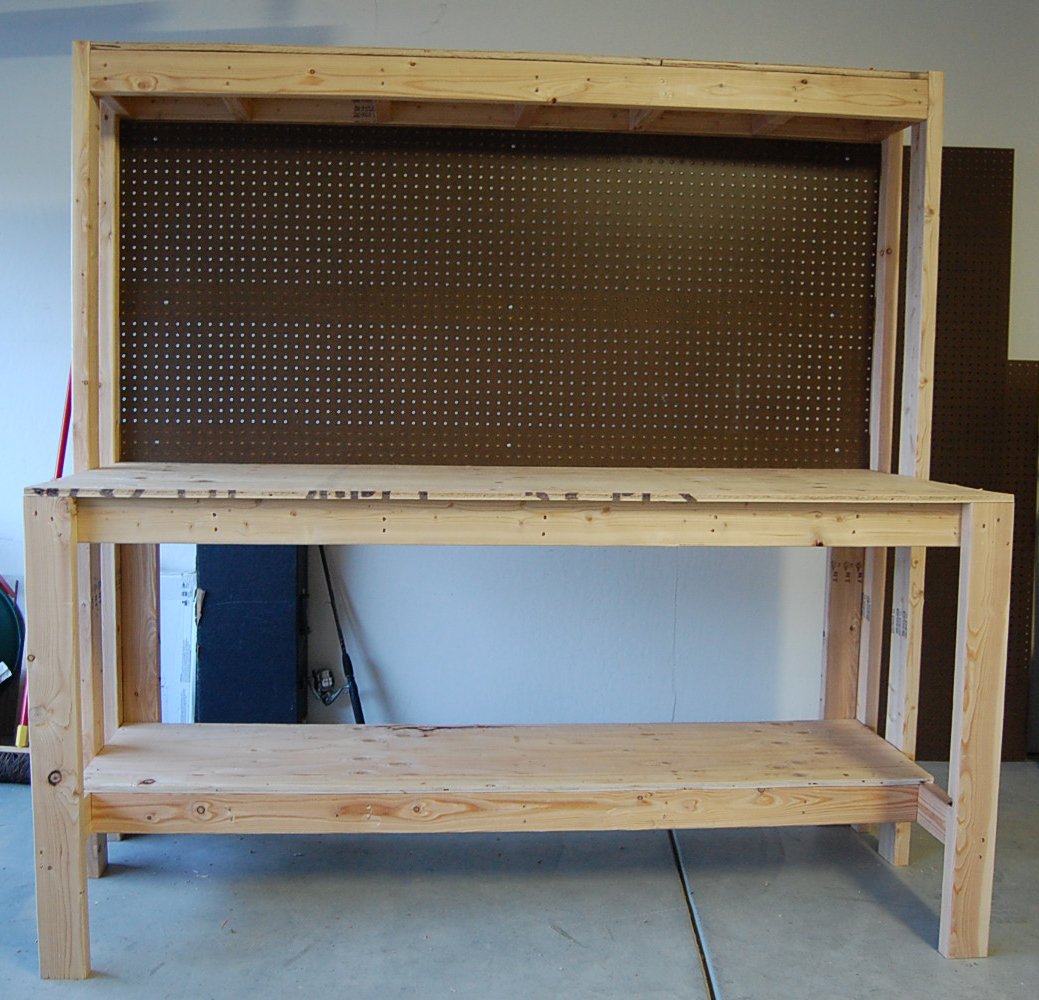
This is our 2nd project - we liked building the bookshelf so much, we decided we're gonna keep going and need a good workbench. Got these plans from the Family Handyman Website (http://www.familyhandyman.com/DIY-Projects/Woodworking/Workbenches/how-…). They claim the cost to be $50, but it was closer to $80 for us - still a GREAT project and easy to put together with the nail gun.

Built from Plan(s)
Estimated Time Investment
Afternoon Project (3-6 Hours)
Finish Used
none
Recommended Skill Level
Beginner

Comments

My First Project: Spinning DVD Rack

Submitted by Dan Y. on Sat, 07/13/2013 - 20:19

I was looking online for a spinning DVD rack to buy when I stumbled across a picture of a custom built rack. I decided to give it a try and this is the result. This is the first project I've done outside of basic shelves and it was a great learning experience. The overall fit and finish isn't quite where I'd like it to be but overall I think it turned out pretty well. I was able to find a 12" lazy Susan at a hardware store that supports over 300lbs and worked perfectly for this project.

I used pocket holes for the shelves, finishing nails for the top and screws for the bottom and lazy Susan. I also used pocket holes to attach the shelf backs and hid them behind the shelves. One thing I definitely won't use next time is spray paint/enamel. The finish isn't nearly as nice as I wanted and it cost far more than I was expecting.

This is also my first time using SketchUp and I'm really impressed with it. I've uploaded a copy of the plans.

Criticism and suggestions are appreciated.

-Dan

Estimated Cost
$170
Estimated Time Investment
Weekend Project (10-20 Hours)
Finish Used
Rust-Oleum Universal Satin Spray Paint - Espresso Brown
Rust-Oleum Crystal Clear Enamel
Recommended Skill Level
Starter Project

Comments

Val Manchuk

Sun, 07/14/2013 - 11:35

I like this spinning DVD unit! Coincidentally, I just finished using spray enamel to redo some cupboard door handles. It's horrible stuff! I ended up sanding it off, and doing it over in flat black. I roughed up the edges with 180 grit to antique them a bit. Looks much better!

My first project - metric mitre saw stand

Submitted by EmH-C on Sun, 09/13/2015 - 03:30

Adaptation to fit my little mitre saw, small workshop and the metric timber available in B&Q. My first build, this should let me build more while staying comfortable and safe. I'm ridiculously pleased with myself!

It took longer to build than expected because my little boy thinks naps are for wimps.

In case anyone in the UK wants to build similar, here's my adapted sizes.

18mm plywood cutting list:

2   85cm x 50cm (sides)

3    50cm x 50cm (shelves)

2    50cm x 60cm (leaves)

2    45cm x 30cm (leaf supports - replaced fancy brackets that were too expensive over here)

Timber cuts:

6  34mm x 34mm @ 50cm (cleats)

6  18mm x 70mm @ 52cm (supports)

2  18mm x 70mm @ 42cm (spacers) 

Built from Plan(s)
Estimated Cost
£40
Estimated Time Investment
Day Project (6-9 Hours)
Finish Used
Help me use my mitre saw safely and comfortably.
Recommended Skill Level
Beginner

Comments

DIY Murphy Wall Bed

Submitted by Dstor22 on Sun, 03/15/2015 - 07:05

Just finished up my Murphy Bed project. Hope you like.

Estimated Cost
280.00
Estimated Time Investment
Weekend Project (10-20 Hours)
Finish Used
Weathered Oak Stain
Recommended Skill Level
Intermediate

Comments

Sandbox with Cover

The cover is a tonneau cover for a pickup truck. It's for a 6.5' truck bed so if you notice, I had to ad a 2x4 and one more picket on top to accommodate the extra length. 

The cover would add a ridiculous amount of money to the project but it was repurposed.  I found it on a truck that was in an accident and going to the scrap yard. I think it it came out great and my grandson loves it.

John

Built from Plan(s)

Small End Table from 2X4's

Submitted by jbknakal on Sun, 04/10/2016 - 11:55

I made a smaller version of the Tryde End Table with Shelf. I made 2 of them from 6 2X4's

Estimated Cost
$30
Estimated Time Investment
Afternoon Project (3-6 Hours)
Finish Used
Black Paint
Recommended Skill Level
Beginner

Comments

Screen door with built in dog door

Our old screen door wasn't cutting it anymore, so I built a new one, and to kill two birds with one stone, I included a built-in dog door. Now I just need to find the motivation to close off the old dog door.

I have the plans to build this screen door with a built-in dog door posted via the blog link below for anyone interested.

Estimated Cost
80
Estimated Time Investment
Afternoon Project (3-6 Hours)
Finish Used
white exterior paint
Recommended Skill Level
Intermediate

Triangular Rabbit Hutch

Submitted by Medeek on Fri, 05/03/2013 - 18:14

This is a rabbit hutch I created for my kids 5 rabbits. The thing that makes this hutch really nice is if you have a large lawn you can just move the hutch a little bit every day and the lawn gets mowed, fertilized and you don't have to worry about cleaning up all the rabbit droppings. I also mounted a rabbit feeder on the inside of the house door to keep the food dry, which has worked really well.

Here is a short blog of all the steps in its construction:
http://design.medeek.com/gallery/RH3080_COPALIS_2013/RH3080_COPALIS_201…

Estimated Cost
150
Estimated Time Investment
Day Project (6-9 Hours)
Finish Used
Exterior Paint brush or spray. Choose your color.
Recommended Skill Level
Beginner

Comments

Medeek

Sun, 05/05/2013 - 01:52

I apologize I haven't got the completed planset up for this project yet but I will try to get it up in the next couple of weeks as well as a very complete materials list. You will need to go to a farm/feed store to get the correct 1"x2" wire and 1/2"x1" wire for the floor. Do not go to Home Depot and use the cow wire they have or the hardware cloth for the floor, neither of which are the correct choice. Home Depot has the lumber but not the wire. If you have any questions or even improvements to my design I would be interested in hearing from you.

Medeek

Sun, 09/13/2015 - 19:18

Finally got around to uploading the plans.  I still need to create a material list for this plan but the basics are there now.   We've had rabbits in it for about a year but recently we've tried some guinea pigs and it works great for that as well.  The guinea pigs can pretty much live off just the grass and dandelions but you do need to move it daily to give them plenty to eat.

Simple Square Cedar Outdoor Dining Table

Submitted by Finns-Dad on Mon, 03/12/2012 - 17:58

I've been planning on building a patio table for this coming spring and summer, but didn't know where to begin. I found Ana's wonderful site and now I don't know where to stop! So many great ideas.
After seeing ewood's great table I decided to make one similar. I made my square table based on Ana's and ewood's basic designs. Thank you both. I also made a bench based on Ana's design.

Built from Plan(s)
Estimated Cost
300--475
Estimated Time Investment
Weekend Project (10-20 Hours)
Finish Used
Semigloss Spar Urethane
Recommended Skill Level
Beginner

Comments

7CsShepherds (not verified)

Thu, 03/29/2012 - 07:37

I have a family of 7 (soon to be 8, I hope), and was trying to figure out how to fit us all on the rectangular table. This is the solution! I can simply make 4 benches to go with it! Thanks for the idea and the picture!

Guest (not verified)

Mon, 04/09/2012 - 07:24

Love this table and your modifications to ewood's table. I was wondering what size are the legs on your table - I can't tell if they are 4x4s...which is sort of what I'd like to have on mine. And they are under mounted, which I love because I want to make ours with the ability to remove the legs for reduced storage space in the winter. If you could would you mind putting a few close up photos of how the outside corner came out and the underside of the corners. It would be much appreciated.

K_W (not verified)

Mon, 04/09/2012 - 07:27

Love this table and your modifications to ewood's table. I was wondering what size are the legs on your table - I can't tell if they are 4x4s...which is sort of what I'd like to have on mine. And they are under mounted, which I love because I want to make ours with the ability to remove the legs for reduced storage space in the winter. If you could would you mind putting a few close up photos of how the outside corner came out and the underside of the corners. It would be much appreciated.

In reply to by K_W (not verified)

Finns-Dad

Sat, 04/14/2012 - 13:35

Hi - sorry it took a little while to get back to you. Yes the legs are 4x4's. I used knotted cedar 4x4's for the legs and made them 29" tall. I wanted to be able to disassemble the table and put it away for winter, so I attached the legs using carriage bolts, 2 per side (4 total per leg). I drilled holes using a pilot bit, then used a spatter bit to make the larger holes for the carriage bolt.

I didn't bother to counter sink them, but if I made another I think I would try that to make a more polished look. The legs are sturdy, the table doesn't wobble at all, but I am sure that someone with more furniture building experience might have a different/better idea.

I've added a couple more photos showing the corners, outside and underneath. I've also added my very basic plans that I used to make the table, one of these days I will study Ana's post of how to use sketch-up, until then this is what I worked with.

Joni

Wed, 06/06/2012 - 09:26

Can you tell me what size (width) boards you used on the frame pieces of the table, and what size on the inner boards? From your diagrams, it looks like the frame is made of 1x4s, but the inner pieces look smaller. Thank you !!!

Your table is absolutely beautiful. It looks like a very high-end piece of furniture. One of my favorite things is how the carriage bolts are installed -- I wouldn't change a thing on them!

In reply to by Joni

Finns-Dad

Tue, 07/30/2013 - 16:36

Sorry it took so long to reply - I didn't see your post. So far the table is holding up well.

You're right, the top is made from 1x4's, including the inlaid slats. To support the top, I cut 1x4's down to 1x3's so they remain hidden by the side 1x4's of the frame.

Aussie Paul (not verified)

Tue, 10/16/2012 - 18:02

Love the table - looks absolutely fantastic! I have been looking for a decent square outdoor table for ages and this one certainly fits the bill.

Can you please add a photo of the underside of the table and advise how you fastened inner boards on table top. Thanks.

In reply to by Aussie Paul (not verified)

Finns-Dad

Tue, 07/30/2013 - 16:40

I added a new photo of the bottom. Hopefully this will help show how I attached the top. I have a number of additional photo's I can send to you if you like - this site limits the number of photos I can add.

Everything is attached from the bottom to hide the screws. I used a kreg jig and it helped so much - i really recommend it.

Belmo

Wed, 08/14/2013 - 12:35

I love the look of this table, man - I think I'm gonna steal some ideas from this.

I have a question about your top, though. The slats look to be 1x4s, which I can understand, but the edges seem to be a bigger size.

Did you use 1x6 boards for the edges? 1x8s? Something else?

Thanks for your help.

Finns-Dad

Mon, 09/02/2013 - 11:03

Thank you - please take any ideas from it that you can. That is what I love that about Ana's site. You can take these great ideas and make them fit your own style...

You're right - the table top is made of 1x4's and 1x6's. When i put the top together I made the frame first. Then I added the exterior 1x6's. Next I added the center 1x6. Lastly I cut each 1x4 to size and added them.

livingston.140

Sat, 05/17/2014 - 07:15

This is an amazing table, it is beautiful! I am somewhat new to wood working and was wondering if there was a material list? I plan on creating this in AutoCAD first, so I have a visual to work off of. Also what did you use for spacing in between the boards or what was the allowance of space.

Thanks again, your work is beautiful!

leitaf

Wed, 04/22/2020 - 20:37

In looking at the plans and the underside of the table, there are some measurements missing that make it a little hard to decipher. It would be good to know the lumber sizes e.g. 1x4x8 etc. the underneath side seems to have some additional boards that don’t seem to be in the drawing. I was just wondering if it might be possible to get some additional details?

@njhorseplayer

Sun, 05/24/2020 - 08:05

This is a beautiful table and I'm going to try and replicate in a rectangular version. Primary question I have is what length screws you used to affix the framing pieces underneath to the top side so that the wood doesn't split and that the screws don't pop thru the top. Any help you can provide would be appreciated, if even you still look at this page. Thanks in advance!

Elementary Trestle Table Inspired by Land of Nod

Such a cute, functional table that was easy to build!

Built from Plan(s)
Estimated Cost
$40
Estimated Time Investment
Day Project (6-9 Hours)
Finish Used
Minwax Mission Oak Satin for table top
October Red (a quart of pain mixed at Walmart years ago) for table itself
Recommended Skill Level
Beginner

Wishing Well Planter

Submitted by RobKelly3 on Sat, 03/16/2013 - 16:57

This is a wishing well I made for my sister for her wedding. It will be used during the wedding for people to drop "wish you well" cards into and afterward she can use it as a planter in her yard.
I followed ideas from multiple plans here on Ana-White.com, but I didn't follow any specific plan. Mostly I followed tips and instructions for cutting angles, drilling pocket holes and some finishing tips. This is the first "big" project I've done and I"m quite proud of it.

With everything, it measures 44.5 inches high. The well measures 21 inches across and 15 inches high. The roof measures 22.75 inches by 23.75 inches.

I hope y'all like it. I worked hard on this! :)

Thank you, Ana and everyone who contributes to this site. It's been so much fun and I've got lots of ideas for more stuff. If I was any good at all at Google Sketchup I'd put up the plans but I'm not. If anyone could help me with that, that would great. :)

Have a great day!

Estimated Cost
about $100
Estimated Time Investment
Weekend Project (10-20 Hours)
Finish Used
Olympic Maximum Stain and Sealant in One, Semi-Transparent, in Oxford Brown. Use 2inch stain brush. Used 100, 150, and 220 grit sandpaper before staining.
Recommended Skill Level
Intermediate

Comments

bellows86

Mon, 07/21/2014 - 20:04

Anyway you can please tell me the angle for the boards ont the walls. I reallly like your well, and would like to build this for my wife but im not sure on what angles to use thank you

Best Chairs Ever!

Submitted by Anonymous (not verified) on Tue, 06/09/2020 - 18:16

I made these modern Adirondack chairs for our business in Anchorage. GREAT and easy to build design by Ana - we upgraded the arms to tapered 2x6 and they're awesome!

Restoration Hardware Inspired 4x4 Truss Beam Outdoor Table

Submitted by susanshamp on Fri, 04/10/2015 - 23:48

Hi! I was truly inspired by the plans I found at this site and the many brags that I saw! I have now built this table set a few times (first for myself, then for friends & family) and learned a lot each time. The things I have modifiied include...


1) Length = make it longer or shorter as space allows (I've done tables from 84" to 108" long)

2) Outdoor table top = because these are being used outdoors, I use screws as spacers between boards so that they have a 1/8 to 1/4 gap to allow for water to run through

3) Breadboard end support = I found that with just the pocket hole screws, my breadboards were a little 'wobbly' so I added Simpson Stong Tie metal plates underneath to reinforce the ends.

4) End length = in order to provide a little more legroom to those sitting at the end of the table, I recently changed the plan so that I would have at least 15" from the table base to the end of the table top (although this pic shows the regular plan with the ~8" overhang)

I really appreciate all of the plans and brags which have been shared by users of this site. Thank you!!!

Estimated Time Investment
Afternoon Project (3-6 Hours)
Finish Used
I picked cedar boards that had some color variation in order to add interest. To get an even more rustic & weathered look, you could consider using a steel wool & vinegar mixture.
Recommended Skill Level
Beginner

Comments

spiceylg

Mon, 04/13/2015 - 09:38

Beautiful build! I was just curious what your cost was. I want to build this for outdoor use as well and also want to use Cedar. I priced it at a local lumber yard and they said it would be around $400.

In reply to by spiceylg

susanshamp

Thu, 04/30/2015 - 21:38

Thank you!!! That sounds about right for the cost - I spent about $425 on my lumber and hardware. Cedar is more expensive, but I was happy with the results. And it still seems like a good 'deal' when you consider what you would get for that price from a store.

Seasonal And Holiday

2x4 Sectional , table, and chairs

Submitted by Anonymous (not verified) on Fri, 04/14/2023 - 04:57

Your easy to follow 2x4 proje ts turned out amazing. My outdoor set is complete. The chairs, also, came from your plans. I built all of it by myself in one weekend. Thank you

Comments

King Modern Farmhouse Bed

Made this bed from Ana's plans. Modified it with rail so I can add my box spring. Cost was approximately $160 for lumber, screws and stain. Absolutely loved the plans and easy to follow or modify if needed.

Built from Plan(s)
Estimated Cost
160.00
Estimated Time Investment
Afternoon Project (3-6 Hours)
Finish Used
Minwax wood conditioner, Minwax Special Walnut Stain
Recommended Skill Level
Intermediate

Comments

10 foot long Provence Table with 4x4's

My mom was looking for a new outdoor table, and asked me to come up with something. I found the link for these plans (http://www.thedesignconfidential.com/2011/04/free-diy-furniture-plans-t…) to knock off Restoration Hardware's $4000 Provence Beam outdoor table. Overall I liked the plan, with the chunkier look of the 4x4's. But there were a lot of errors in the diagrams, and the finished height is 34" which is ridiculously tall for a table. So we took it apart and cut the legs back down to change the finished height to 30". We chose rough-cut cedar for it's look and outdoor properties, not wanting to use treated lumber for a dining table. We couldn't find 2x10's like the plan, so we substituted seven 2x6's just like Ana's plan, but left a 1/2" gap in between so water can drain and not pool on top and rot the wood. Also, since we were working with 4x4's for the legs, we chose heavy duty lag bolts instead of screws to join them together. I love the finished look they give. Overall it's a sturdy, yet lightweight table that my mom loves and has already used for entertaining!

Built from Plan(s)
Estimated Cost
$230
Estimated Time Investment
Day Project (6-9 Hours)
Finish Used
outdoor sealer
Recommended Skill Level
Advanced

Comments

brookifer86

Wed, 04/25/2012 - 10:02

Thanks Brook! It was so much fun to build. I put my dad and husband to work while I was the "project manager" ;)

SMALL GABLE ROOF GREENHOUSE

Submitted by Ledopmi on Wed, 12/23/2020 - 06:07

I was planning on building a greenhouse some time next year but I just happen to see this by chance and fell in love with it. I've always built from my own designs but when I saw this I decided to purchase the plans. I couldn't be more happy with it. Right now its doubling as a feed room. I wanted a solid foundation so I build a floating deck to mount the walls on. The deck added quite a bit to the total price.

Built from Plan(s)
Estimated Cost
$1384.94
Estimated Time Investment
Week Long Project (20 Hours or More)
Finish Used
Paint
Recommended Skill Level
Advanced

Comments

Lawnmower Shed

Submitted by PipesTX on Wed, 01/07/2015 - 06:19

Modified the design to allow me to roll lawnmower directly in the end. Fun project.

Built from Plan(s)
Recommended Skill Level
Intermediate

Comments

Bookshelf Hidden Doors Over Closet

Submitted by Anonymous (not verified) on Mon, 10/23/2017 - 10:13

Hidden door bookshelves hide a furnace closet.  Built by Kraig Faulkner

Built from Plan(s)
Recommended Skill Level
Advanced

Comments

charkue

Thu, 09/17/2020 - 08:01

I'm currently working on a basement renovation project. I'm probably going to incorporate a feature like this for my mechanicals, too.

One important safety note for anyone who wants to do this: It's recommended that your furnace be a minimum of 30" away from any combustible materials. That includes walls and partitions. The image of this project displayed is right next to the furnace, which is not a good idea.

DIY PLANTER BOXES WITH PALLET WOOD

We picked up a couple 14.9" square plastic garden planters from Home Depot and ended up creating some wood planter boxes from pallet wood for them to sit in. 

I didn't add up the cost of these boxes, because we had most of the wood and only needed a few pieces, but I'd say they were definitely less than $10 a box. 

We altered our dimensions to fit our HD planters so they would slip in for a snug fit and made the legs flush with the top of our sides. We build a simple frame for the top, which allowed the lip of our HD planters to sit firmly on top. 

Something I didn't do, but wish I did: fill in the cracks with wood filler.  There were a couple places that really could have used it, but I was in a rush and decided to skip it.  They turned out great, but could have been even better had I taken an extra 30 minutes.  On an off weekend, we are going to use wood filler in the seams, sand them down, and do a second coat of white paint. 

Can't wait to plant these with some mums for Fall! :)

Built from Plan(s)
Estimated Cost
$20 total for 2 boxes.
Estimated Time Investment
Day Project (6-9 Hours)
Finish Used
White Semi-Gloss outdoor paint
Recommended Skill Level
Beginner