Community Brag Posts

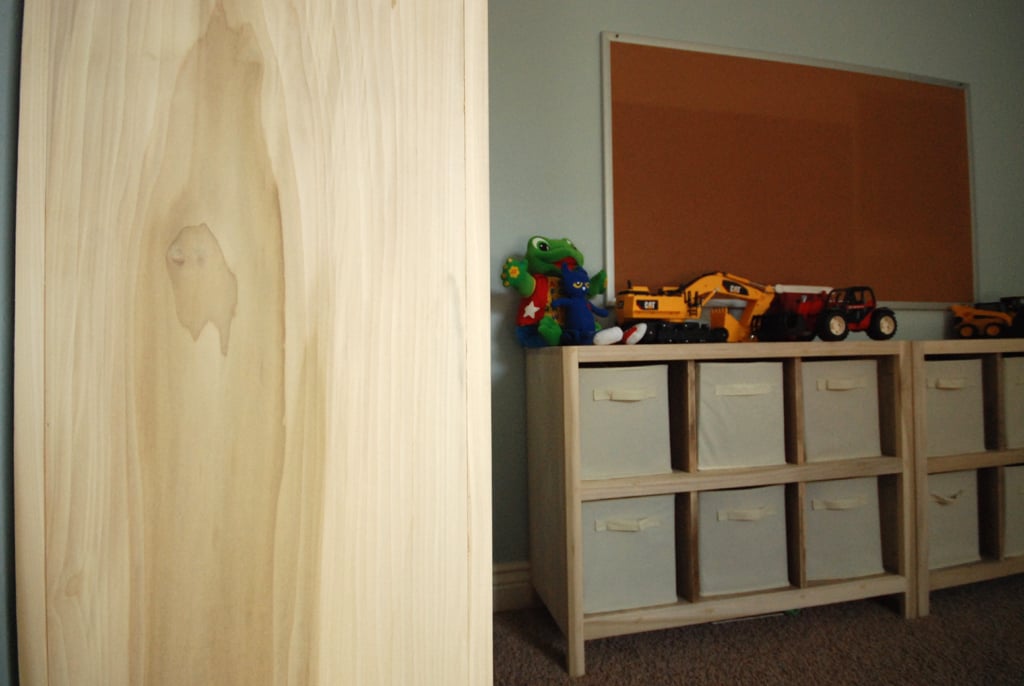
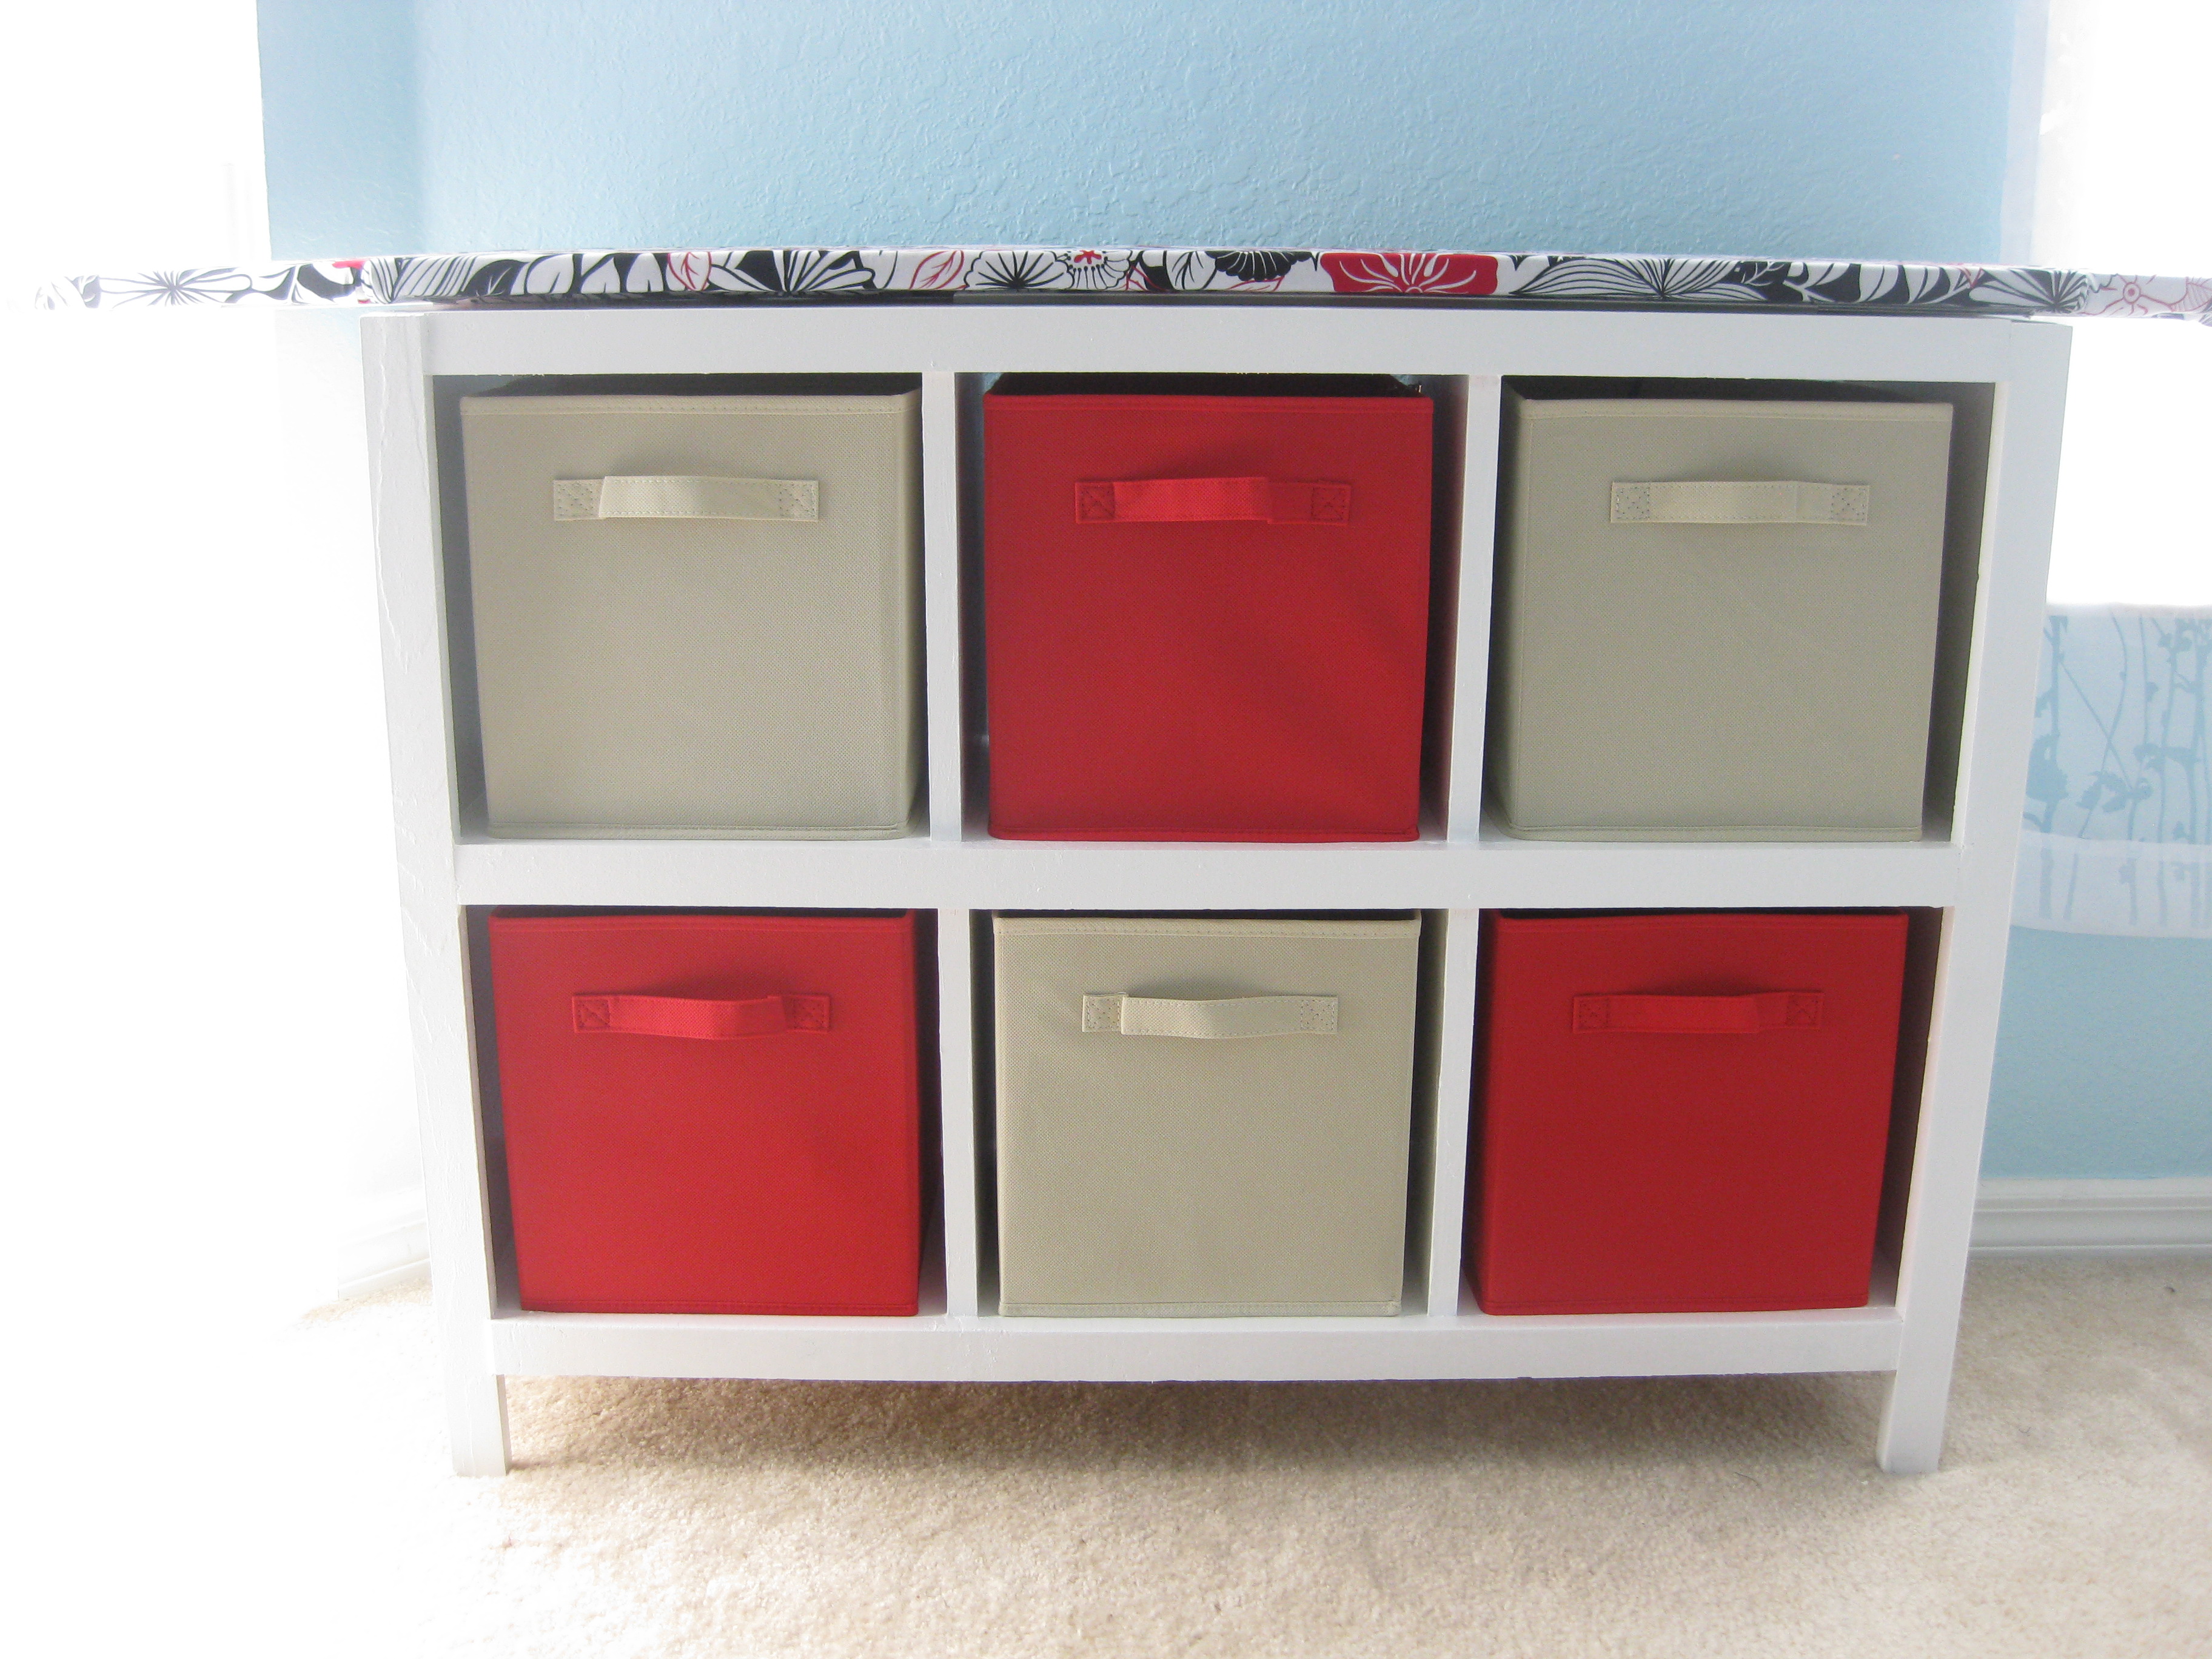
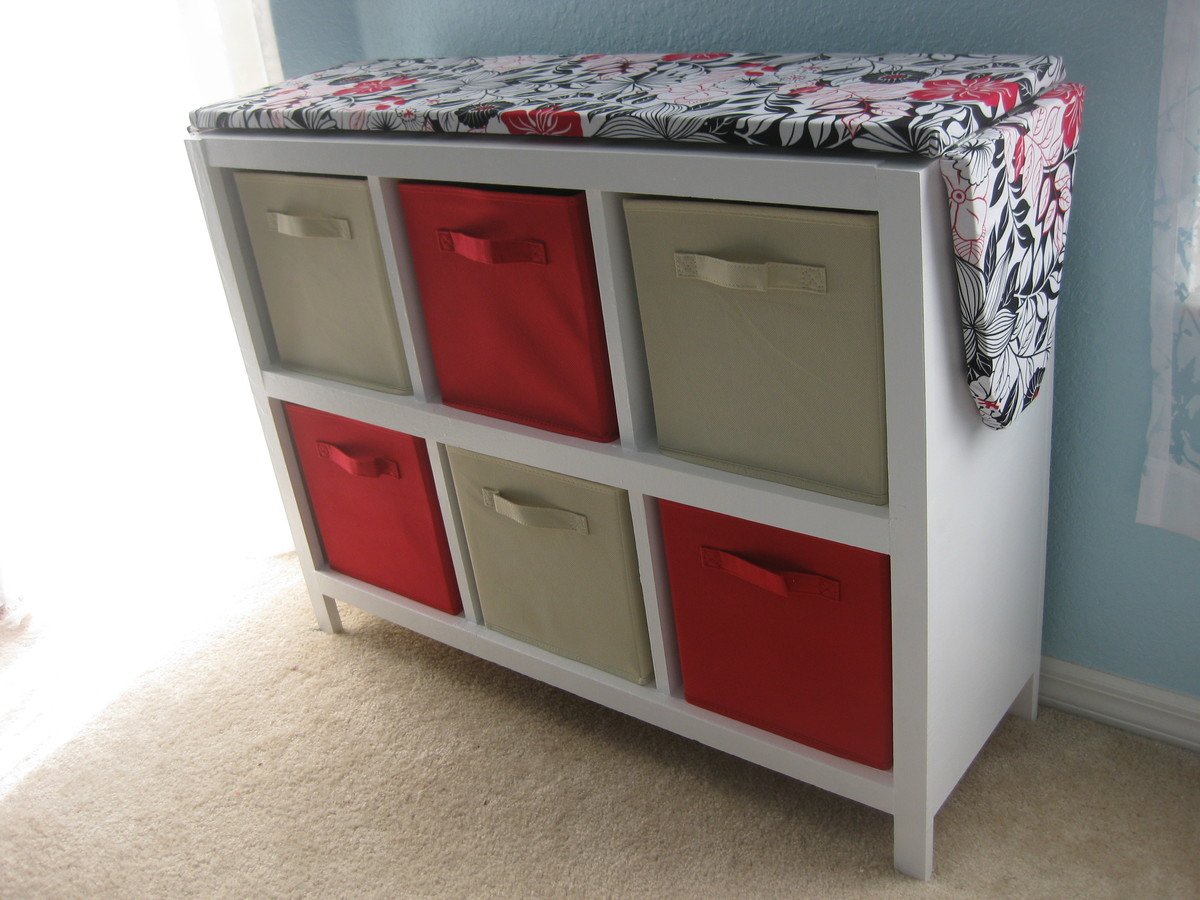
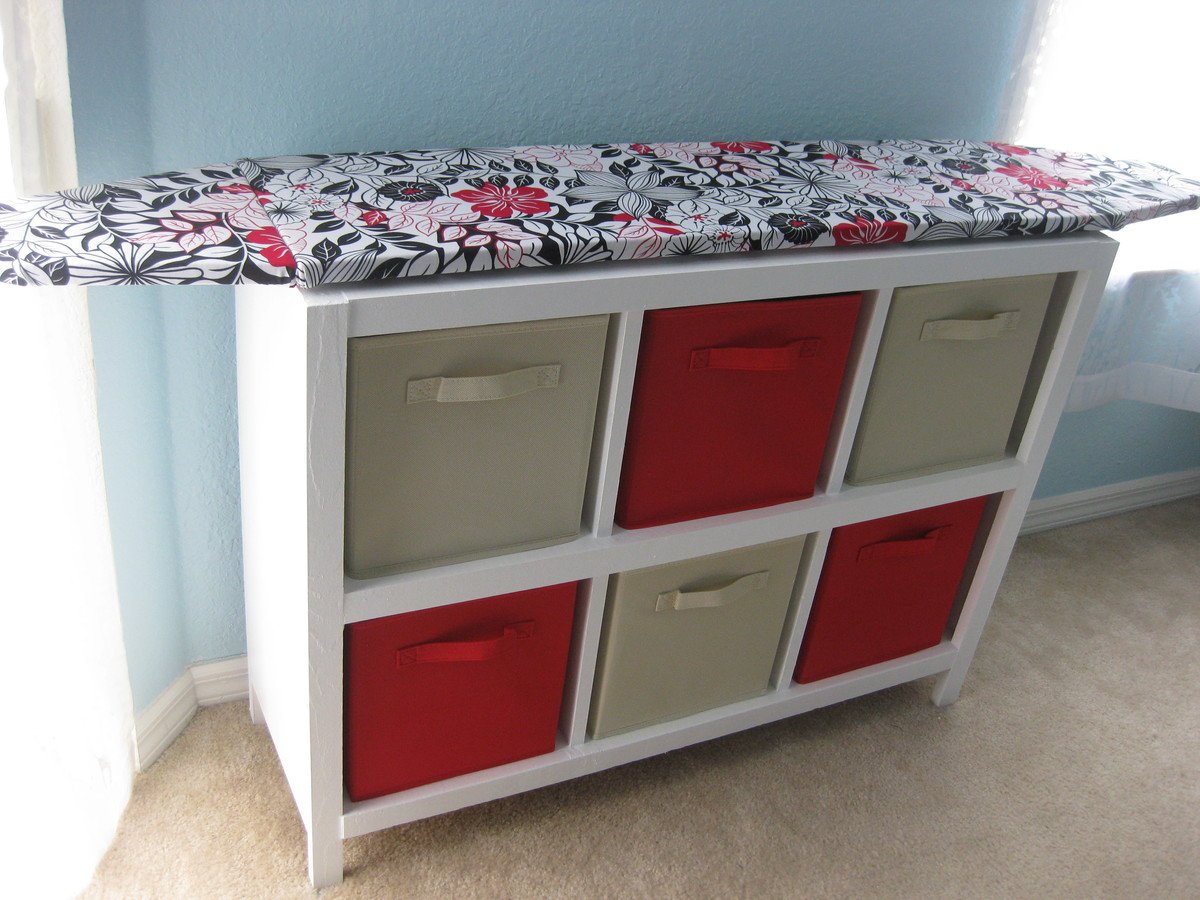
6 Cube Bookshelf - Poplar

Submitted by kev117s on Tue, 07/28/2015 - 18:29

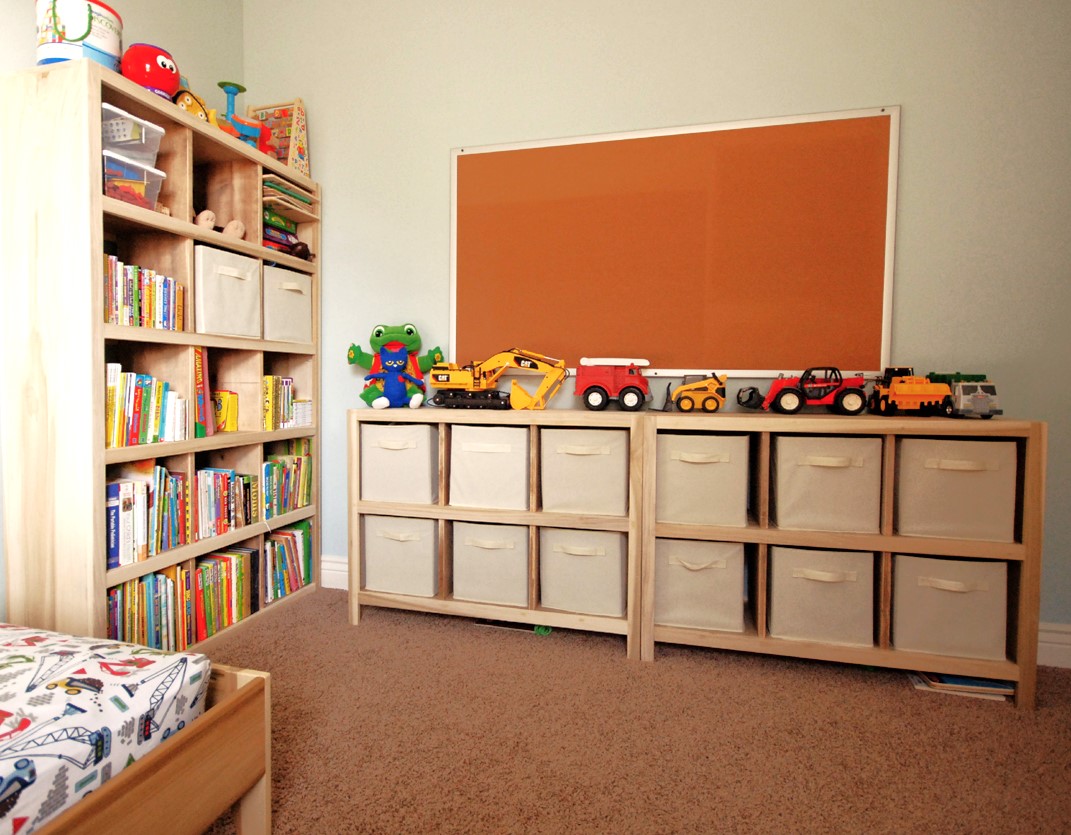
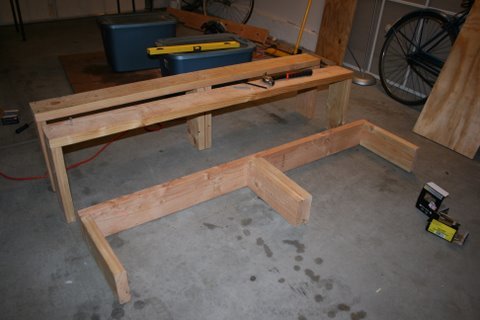
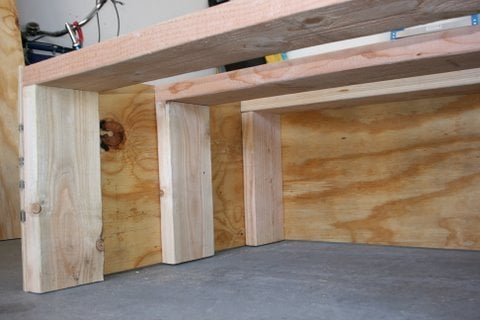
I built this set of cube shelves for my 3 yr old son's room. THANK YOU, ANA! I used poplar as I did not want to paint the wood and I love the irregular pattern of the wood grain. To save money, I used pine for the inner shelves and dividers. I stained it using the oxidized solution (http://www.friendly-home.net/2012/05/oxidized-x-console.html) that Ana recommended from the instructions of the Rustic Console. I added a cup of coffee to the solution to get a darker browner shade and unevenly sanded the wood for the distressed look. It matches the poplar wood more so than keeping the pine wood as is.

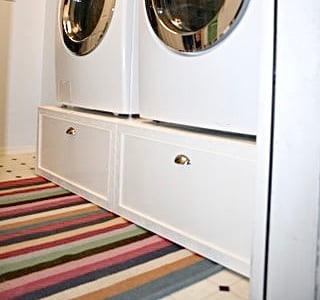
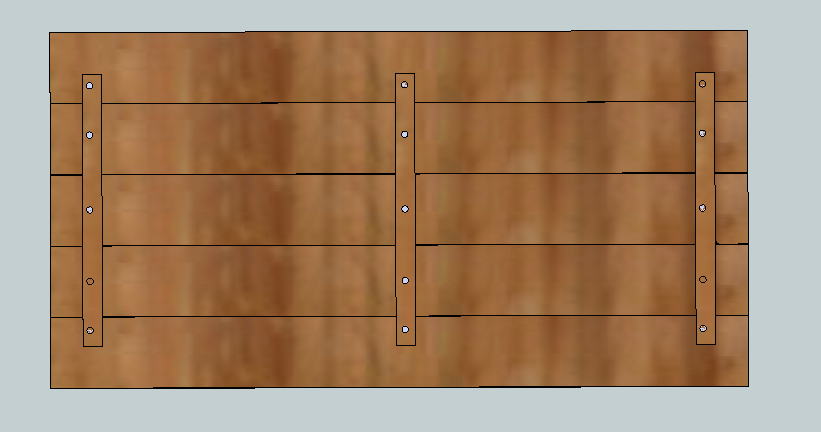
I also created a 5-tier version to match the 6 cube shelves but did not include the legs. I thought it would be more stable to keep the lower frame on the ground.

I purchased the storage boxes from Amazon It was around $20 for 6 boxes!


I am ready for the next project!

Built from Plan(s)
Estimated Time Investment
Week Long Project (20 Hours or More)
Finish Used
Oxidized solution for the shelves and dividers.
Recommended Skill Level
Beginner

Dog kennel

Submitted by Anonymous (not verified) on Fri, 03/03/2023 - 06:54

In January, I came across your plans for the farmhouse, coffee table. I made it, and loved it! I had been wanting a new spin on kennels for our dogs. And thought your coffee table transformed into a dog kennel would be perfect, and they are!!

Comments

Cubby Shelf with Ironing Board Top

Submitted by PinnSB on Sun, 02/02/2014 - 11:56

Originally I wanted a cubby shelf for the empty space between the sliding door and window in our master bedroom. However, that is also where the ironing board always sat out and I got tired of looking at it. So this project evolved and I decided to add an ironing board to the top of it. I used a 41" 1x12 for the top and 2-11" scraps for the flaps on either side. I covered each piece with one layer of felt and one layer of fabric. Flaps were attached to main board with hinges. Under-mount drawer slides were used to both allow the board to shift left and right and to support the flaps in open position.

Built from Plan(s)
Estimated Cost
$85
Estimated Time Investment
Day Project (6-9 Hours)
Finish Used
Valspar Ultra White Satin Paint
Recommended Skill Level
Starter Project

Comments

rlmilam3

Wed, 02/03/2016 - 21:07

Are there more specific plans for building the ironing board part of this? The other builds are so specific, having everything laid out even the amount of screws needed. But this one is definitely lacking. Is there further directions elsewhere that I'm missing?

itzann

Thu, 02/04/2016 - 09:24

Hi, this particular project was submitted by a reader, who modified the plans of the cubby shelf to include the ironing board top. It is not part of Ana White's project plan, so that is why there are no specifics. Perhaps you could try contacting the person who posted, and he/she could tell you more details. 

-Ann

Chicken run

Submitted by Anonymous (not verified) on Thu, 05/19/2016 - 19:28

Or use the same plans with the exception of I extended the height so I could actually walk into the run fairly simple to assemble I would strongly recommend an air compressor staple gun or you'll end up with four arms like Popeye

Built from Plan(s)
Estimated Cost
$250-$300
Estimated Time Investment
Weekend Project (10-20 Hours)
Recommended Skill Level
Beginner

Patio Adirondack Chairs and Patio table from Ana's plans

chairs from Ana's adirondack chair plan and table from the round adirondack table plan. Plans were easy to follow and this was fun to do. Made for my daughters patio.

Estimated Cost
$200 in wood, stain and polyurethane
Estimated Time Investment
Week Long Project (20 Hours or More)
Finish Used
early american stain and polyurethane
Recommended Skill Level
Beginner

Comments

bridgeta

Fri, 11/20/2015 - 06:42

I'm wondering where to find the steps for this post? I tried going via the tags but nothing comes up on the site anywhere. Just let me know. Thanks!

Storage Daybed with Trundle Drawers + Storage Headboard and Hutch

I combined Ana's plans for Daybed with Storage Trundle Drawers and a Storage Headboard with a Small Hutch.

This is my 3rd daybed with storage drawers. It's such an easy build and gives so much extra space. The entire project took about 40 hours. I used Minwax stain in Classic Grey and three coats of polyurethane. For the drawers, I used 1.5" casters. I drilled a hole through the back of the headboard to feed cords through. Then I put the whole thing in the back of my truck and drove 500 miles for the final assembly. :)  In the provided photos, some of the pieces are flush because I hadn't permanently attached them. 

Estimated Cost
$450
Estimated Time Investment
Week Long Project (20 Hours or More)
Finish Used
Minwax Classic Grey
Recommended Skill Level
Intermediate

Workbench

Submitted by Ulrike on Sun, 06/21/2020 - 09:37

Built 2 of the workbenches for our garage. The plans made assembly very easy and quick. We had Home Depot cut the plywood to size.

Estimated Time Investment
Afternoon Project (3-6 Hours)

Comments

Petra's Doggie Day Bed

Submitted by Joni on Sat, 08/25/2012 - 10:33

Yes, my husband and I share our bedroom with 6 dogs and an occasional cat (or 4). Our older dog (Petra) has slept on our bed for over 10 years, and she's getting too old to jump anymore. We didn't want her to feel like she was getting kicked off the bed, so I made Petra her very own bed at the end of ours so that she wouldn't feel left out. I was inspired by MurdaRae's dog bed (http://ana-white.com/2012/06/doggie-daybed), and thought it was genius to use a toddler/crib bed. So I went looking for plans on Ana-White, and came up with a mixture between a couple of twin bed plans. I love that the plans are easy enough to modify my sizes, and come up with exactly the custom solution that I need. This was my first big project using Bri-Wax. The last one was kind of a disaster when the wax changed the stain color to something not-so-great. With this project, I learned to wait at least 2 weeks before attempting to wax it. I was blown away with the results. It is a beautiful subtle satin finish that feels great to the touch. Plus, I can easily touch up all the dog fingernail scratches that will inevitably occur. When I re-assembled the bed in my bedroom, I actually nicked it in a few places. No problem -- slap on some more Bri-Wax! My Bri-Wax was 11 years old, and pure liquid. I tossed it in the fridge (per Bri-Wax's recommendation), and it was as good as new. The only real problem I had with this project was leaking sap from one of the 4x4s. I'm still fighting this today. In talking with Rustoleum/Zinsser reps, they said that no sap could penetrate their "Seal Coat" shellac product. After 5 coats, the sap is still penetrating, but only if I turn it on it's side or upside down. I'm still baffled. I made the mattress cover out of a dog blanket, and made the cushions from some remnant fabric (suitable for dogs and weekly washing), so this was a fairly inexpensive project. It was a success because Petra slept in her bed from the fist night and loved that she had all the room to herself, and no boston terrorists (I mean terriers) attempted to bother her.

Estimated Cost
$65 for Wood, $60 for Crib Mattress, $7 for stain, $9 for Decorative Clavos
Estimated Time Investment
Weekend Project (10-20 Hours)
Finish Used
Combination of Minwax Water-based stains: 6 parts Colonial Pine: 1 part American Walnut, followed 4-5 Coats Bri-Wax (Light Brown)
Recommended Skill Level
Beginner

Comments

spiceylg

Sat, 08/25/2012 - 18:41

You did an amazing job! Looks professional and at first glance, you definitely can't tell it's a dog bed.

StacieM

Sun, 08/26/2012 - 10:24

It matches the woods in your bedroom so well and looks great! Also, I love the bolster pillows around the edges. That is something I need to make for our dog bed. Thanks for sharing.

Front porch planters

Submitted by Anonymous (not verified) on Thu, 01/07/2021 - 20:21

Followed your plan but added extra 1 x 2 trim to the sides, feet made from 1 × 3 and 1x 3 trim around the top

Built from Plan(s)
Estimated Cost
$35 per planter
Estimated Time Investment
Afternoon Project (3-6 Hours)
Finish Used
Cedar Naturaltone Behr Waterproofing Wood Finish
Recommended Skill Level
Intermediate

Comments

Seasonal And Holiday

Washer & Dryer Pedestal / Platform with Drawers

Submitted by dmccoy on Tue, 03/12/2013 - 10:26

Platform (Pedestal) with Drawers for front-loader Washer & Dryer. Cheaper than buying the manufacturer's plastic pedestals and more fun to build anyway! The drawers are also much wider and deeper than the manufacturer's pedestals. We can usually fit about 3 full loads of laundry in each drawer. (That's 6 loads of laundry before we have to start folding!) It's a very easy and basic DIY project. I made a 2nd one for my brother using these plans (sans the drawers). I gotta say, the drawers are SO nice to have though. But you could just leave the front open, without drawers, and slide some laundry baskets underneath for an even quicker project. We've been using this platform now for over 2 years and there is still no squeaking or rattling. The washer & dryer haven't moved from the vibration even in the slightest. They're exactly where I placed them on the pedestal 2 years ago. There's also zero problem with the weight of the washer either...it really is a strong frame. (After finishing, I jumped up and down on it!) A couple small tweaks I would make doing it over is raising the drawers a 1/2" in. off the floor to tuck a rug underneath (as is, they sit about 1/8" in. off the floor). Also, I would cut out a couple of square holes in the back panel to access those socks that fall behind (I can't access the sides of my W&D in our particular laundry room). Lastly, I would have painted with a quality paint (I just used a few cans of white spray paint to be quicker). Step-by-Step Plans and Materials List (PDF) and many more photos found at the Blog Link below...I'm certainly no professional "Plans Writer" so email if you have questions! Happy DIY-ing! Estimated Cost: ~$200 (2x6 lumber, plywood, drawer trim, nails, screws, paint)

Estimated Time Investment
Weekend Project (10-20 Hours)
Finish Used
White spray paint
Recommended Skill Level
Beginner

Comments

nikolegraves@h…

Wed, 03/13/2013 - 10:12

I have wanted to do the pedestal project for quite a while. I am so glad I held off though. Yours are fantastic! I would never have thought of drawers to hide the dirty laundry! Love it!

gmccoy20

Tue, 04/02/2013 - 11:06

Really appreciate the help with mine brotha! We really like them (even without the drawers) and are glad you had these plans to go off of for ours.

I'll be calling you for our next project!

strahmers8

Fri, 02/07/2014 - 17:05

Hello this looks great and for the amateur carpenter I am but one item I need clarified "the top measurement at 64" is .25" greater than the bottom at 63.75"

Please explain if I am missing something
Thanks

dwm22

Mon, 02/10/2014 - 15:33

Not sure what measurement you mean that's 63.75" since there's no "bottom" to the pedestals. Or do you mean 1/4" wider than the sides? The top panel should overhang both sides by 1/4" each so that when the side plywood is attached, it will be flush. Hopefully that helps? (If I'm understanding the question correctly)

jmkc

Mon, 02/24/2014 - 10:29

Could leave the back panel of plywood out so you could reach what may fall behind? Then you would just have to pull the drawers out?

heverest

Wed, 06/22/2016 - 16:35

Back panel is very very structural and provides lot of strength. If i wanted more access than the 5-7 inch of duct space behind the pedestal gives me, then i would replace the back panel with a long 2x6, that holds the three legs from going in different directions due to all that weight.

dmccoy

Mon, 12/12/2016 - 14:58

This is the one modification I could make if i could redo these plans...I would still put on the back panel of plywood as it stabilizes the pedestal, I would just have cut out a rectangle (behind each drawer) so that I could remove the drawers and stick my hand/arm through to grab fallen clothes or vacuum the lint.

dachiri

Mon, 12/18/2017 - 19:17

Rather than cut holes in the back, I just cut the back and side boards a little small and left a gap around the bottom the whole way around.  That way I can get a vaccuum hose in there or reach through and get lost items.  Because my washer and dryer seem to be deeper than yours (I needed at least 33" depth, so I went with 3'), that also worked out well in getting the most out of the boards.  I could do the top, back, and sides out of one single sheet of good 3/4" plywood just leaving those small gaps at the bottom for clean-up and retreival.

Jperera

Fri, 11/20/2015 - 05:23

Hello,

I downloaded the pdf but have exactly the same information that the website html, where can I find a solution step by step guide?

Thank you for all the interesting posts.

Pergola

Submitted by dekew on Fri, 06/07/2013 - 13:33

Built this great pergola from Anna's Weatherly Pergola Plan. I am very pleased on how it turned out. This was a fairly simple build and I added a few of my own touches to it. I used Red Cedar as my wood of choice. I also added a great Olympic Stain + Sealer to help keep it looking brandnew. I hope y'all enjoy the pictures.

Built from Plan(s)
Estimated Cost
$650
Estimated Time Investment
Weekend Project (10-20 Hours)
Finish Used
Olympic Stain+Sealer 704 Redwood

Pieces where first cut to size then sprayed with a Graco TrueCoat Plus. After drying the pergola was assempled.
Recommended Skill Level
Intermediate

Comments

dwm22

Thu, 06/27/2013 - 15:33

I like the red color and the added touches (lights, bird feeder, and "wall"). I finished mine in May and like the idea of adding small lights for the evenings. Well done!

jbayer80

Sun, 04/13/2014 - 11:17

I just wanted to say that 4th picture is so cool looking. Love the dark clouds and blue sky. Very nice pergola, by the way.

These Adirondack Chairs are super comfortable

Submitted by Anonymous (not verified) on Fri, 02/03/2023 - 05:45

I built a couple of these for the garden area and they are wonderful to sit in. As an experiment I painted these with chalk paint then finished them with several thin coats of spar urethane. After a couple of years in the sun, they seem to be holding up pretty good. I may sand and apply more spar urethane this summer just to keep them looking good.

Comments

Outdoor Sectional

Submitted by ghozt21 on Mon, 05/27/2019 - 16:54

I followed the plans as written,  It took me about 6 hours and that includes sanding and staining. Very simple yet offers a very wow finish.  I think in total we spent about $300 for all supplies including cushions which was the most expensive part. I just finished it off with Teak Oil and an Americana theme for our covered patio.  We love it.  

Estimated Cost
$300
Estimated Time Investment
Day Project (6-9 Hours)
Finish Used
Teak oil
Recommended Skill Level
Beginner

Outdoor day bed

Submitted by TamTamW on Wed, 07/03/2019 - 09:28

Loved making this. Used old sun curtains and a sheet for extra splendor. 

Built from Plan(s)
Estimated Time Investment
Weekend Project (10-20 Hours)
Finish Used
None.
Recommended Skill Level
Beginner

Comments

King Bed Frame for adjustable base

Submitted by Anonymous (not verified) on Tue, 10/08/2019 - 05:50

I could not find a frame which would accommodate my new adjustable king base. Modified Anna's plans by increasing the height of the headboard and footboard. Finished with chalk paint and antique finish for a rustic look. Side rails attached with mortises to allow for moving bed in 4 pieces if needed. Love my new bed

Estimated Cost
$300
Estimated Time Investment
Weekend Project (10-20 Hours)
Finish Used
Chalk paint (purchased from Habitat for Humanity re-store) using recycled paint. Finished with three coats of Annie Sloan wax
Recommended Skill Level
Intermediate

Comments

khowe791

Sat, 11/30/2019 - 03:31

Hi! We are making this headboard this weekend. We want to increase the headboard height and footboard as well. Do you happen to know the cut measurements or how you adjusted the height of the 1x6 (or 1x8 as others used) to make it work? Yours looks perfect! Thank you in advance for any feedback! 

Mini Planked Farmhouse Bedside Tables

By far my favorite project! It was challenging combining two sets of plans, changing dimensions, and learning new skills all at the same time yet so, so, rewarding.

I loved the look of the Mini Farmhouse Bedside Tables but wanted to create a bookshelf as well so, I used the planks idea from the Planked Wood Bedside table plans to create solid sides, and a plywood backing for support and to hide lamp and phone cables.

I have a very low bed, so I shortened the height and made the top proportionate in size.

I used 1x6s for the top, 1x4s for the bottom shelf, 1x3s and a 1x2 for the side panels, 1x4s for the drawer, and 1x2s for the trim and a piece of 1/4" plywood for the backing.

I found that the drawer fell out when you pulled it too far so I added piece of wood between the drawer and the top to keep it from dropping as you pulled it out. 

Estimated Cost
$120 for 2
Estimated Time Investment
Week Long Project (20 Hours or More)
Finish Used
Minwax Penetrating Stain and Minwax Polyurethane
White cabinet paint from Sherwin Williams
Drawer liner :)
Recommended Skill Level
Intermediate

Playhouse castle

Submitted by vic b on Tue, 05/22/2012 - 17:44

visit us at www.madeatthisplace.blogspot.com, for details. We built a large platform off the ground and just put a house on top. Then gradually extended the design.

Estimated Cost
$5000
Estimated Time Investment
Week Long Project (20 Hours or More)
Recommended Skill Level
Intermediate

Comments

Aargh (not verified)

Wed, 05/23/2012 - 05:50

This is so bad ass!! One of my favorite memories of my own childhood was a huge cardboard box play house that my dad made. It has 3 or 4 rooms, I loved it. This takes it to a whole new level! Fantastic!!

birdsandsoap

Wed, 05/23/2012 - 15:12

...

^^^ There are no words up there because I am speechless. This is the coolest FORTRESS I've ever seen.

When are you installing the moat??

vicb (not verified)

Sat, 06/23/2012 - 07:46

Thanks guys, I'm lucky I have a husband who doesn't roll his eyes when I say, how about....... He loves building and so do I.

2x4 Outdoor Sectional with Matching Ottomans, Chairs & Table

Submitted by cqueiruga on Fri, 06/12/2020 - 21:01

We were looking for outdoor furniture for our deck, and for the size and amount we needed it would have cost us at least $2000. We really like the idea of having an outdoor sectional that we can also use for dining, and we had trouble finding a set we liked. We found Ana's plans for the 2x4 Outdoor Sectional, and i loved the look. After seeing what others have done with the plans, I thought I would be able to modify it to get everything we needed for much less cost than buying a set.

We ended up extending the size of the 2x4 outdoor sofa by one 24" section, for a total length of 96". I then used the same design to make two outdoor chairs, just reduced the length to 24". I modified the 2x4 outdoor coffee table plans to create two ottoman's that can be moved around to make the seating more lounge style Finally, I modified the coffee table plans to make a 5 foot outdoor dining table. All in all, it took about a week and I couldn't be happier with how it turned out!

Estimated Cost
$800 ($200 for wood, $600 for cushions)
Estimated Time Investment
Week Long Project (20 Hours or More)
Finish Used
Valspar Semi-Transparent Antique Oak Stain
Recommended Skill Level
Beginner

Comments

jwood4

Mon, 08/02/2021 - 09:44

Looks amazing! What method did you use (pocket holes, dowels, deck screws, etc) to join the visible portions like the arms?

DIY Sofa - Storage Sectional

Submitted by LittleG on Thu, 08/09/2012 - 15:38

Basically I took Ana's plan and tweaked it to create a diy sofa, a love seat, and a corner piece to make a sectional. All 3 pieces have the same basic design and function (they all have a storage compartment), although the corner piece, because of its placement and the thickness of the seating cushions, doesn't open unless the couch is opened first. We purchased custom cut, 6" thick foam cushions for the seats (we bought the XL-38 foam from https://www.buyfoam.com/, but if we had to do it again, we'd go with the XL-28 as the 38 is VERY firm). We also used upholstery fabric instead of a paint drop-cloth to cover the couches. The foam and upholstery fabric upped the overall cost significantly. Other changes from Ana's plan, I used 15/32" OSB because the 1/4" plywood just felt too flimsy (I'm a large guy). I also added I bolts to the underside of the seat before the foam and upholstery so I could add a stress relief rope to prevent the kids from opening the top and dropping it and ripping out the hinges. I used piano hinges as they seemed to me to provide the most support. Finally, I ended up using 1x2s for the base trim since I couldn't find any 2x2s that were straight and finish-ready, then I added router detailing to provide some visual interest. I used 3" pieces of 4x6 for the feet and added matching router detail. Additionally, I used T-Nuts and bolts to make the feet and base trim completely removable.


Built from Plan(s)
Estimated Cost
$1300
Estimated Time Investment
Week Long Project (20 Hours or More)
Finish Used
Minwax PolyShades Espresso
Recommended Skill Level
Intermediate

Comments

masmith38

Fri, 10/23/2015 - 11:11

Love this!  Totally want to think hard about doing this instead of buying when time for a new couch comes. Job well done, and the storage is a total plus.  

Chased

Sun, 05/15/2016 - 21:15

Where can I find the plans to this or the cut list

mikeyb

Mon, 10/03/2016 - 18:11

Awsome job!!! question? is that a typo on the cost to build??

mikeyb

Mon, 10/03/2016 - 18:12

Awsome job!!! question? is that a typo on the cost to build??

albertmick30

Mon, 08/17/2020 - 07:46

It is superb blog and i really appreciate your blog. It is because i always like the informative blogs. You did a great job and thanks for sharing.I am impressed by your post. It contains very informative data and i gain a lot information from it. It is very useful for me. Thanks for sharing and keep on sharing that type of posts.The Mobile App Developer Dubai provides good service you visit here site https://www.mistersaad.com/

Back