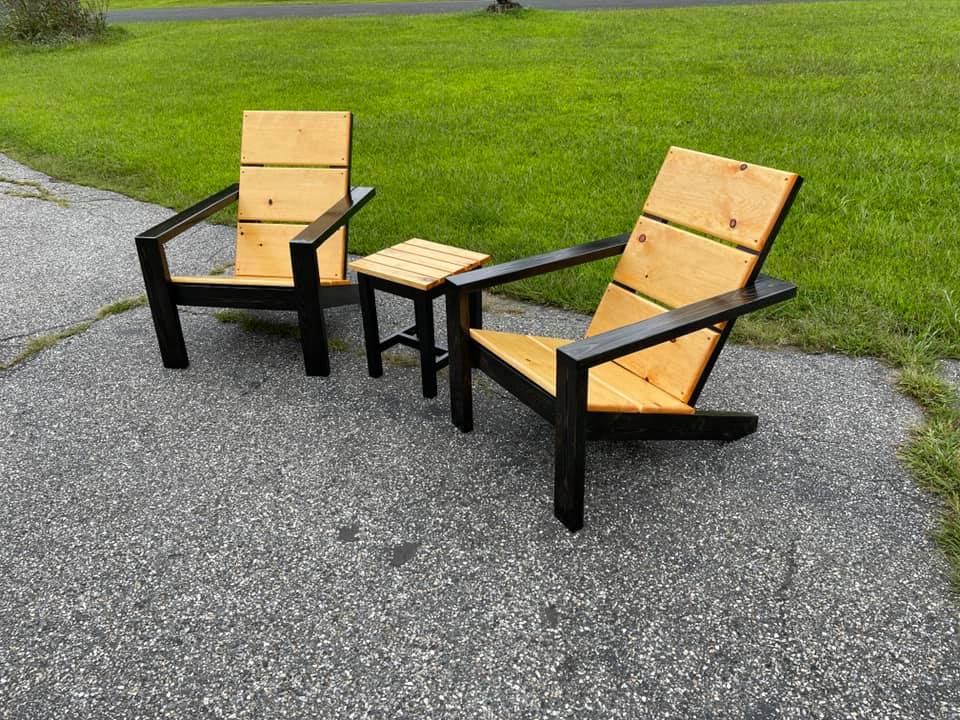
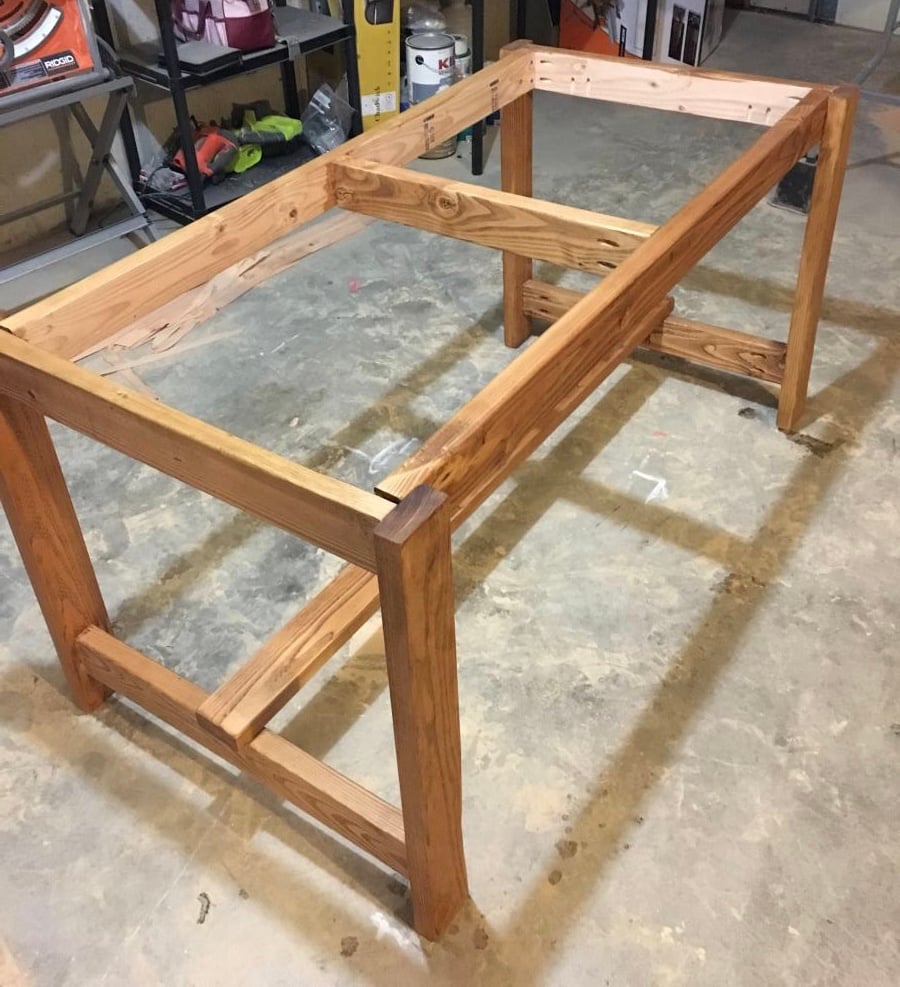
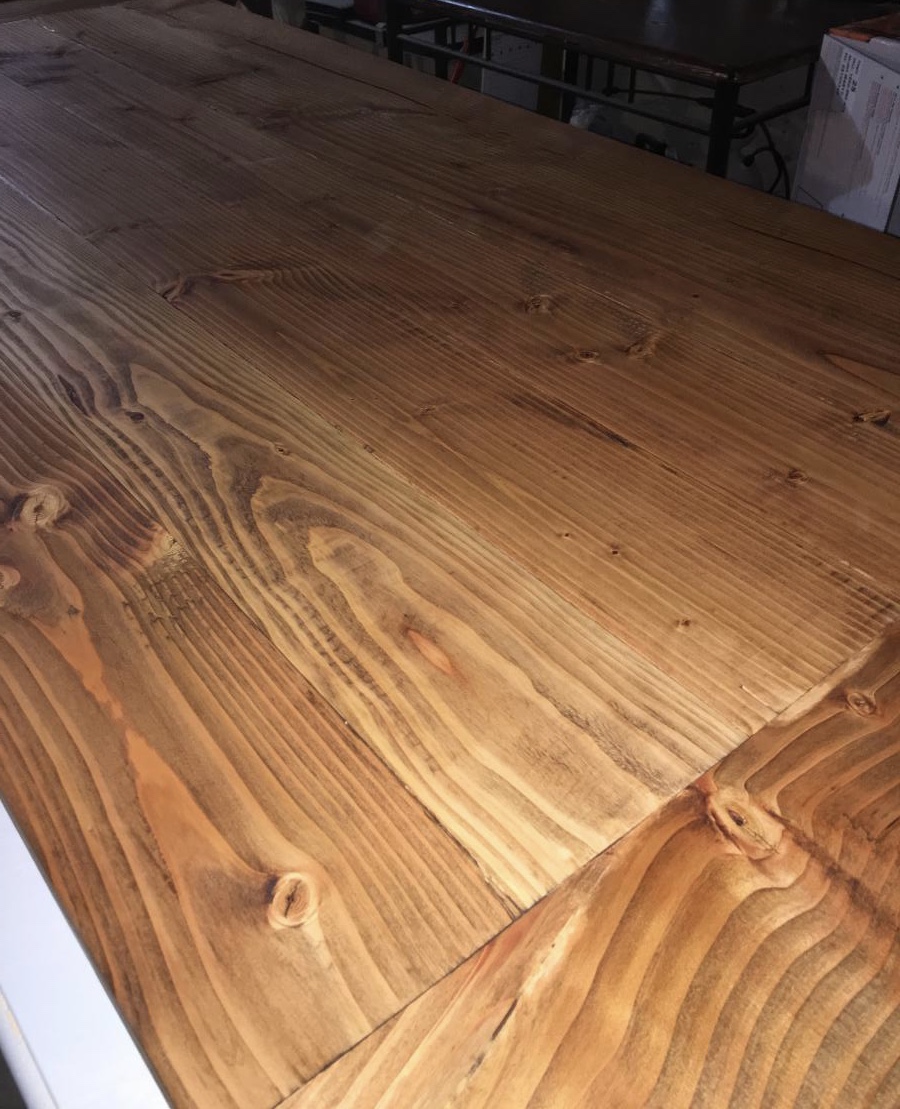
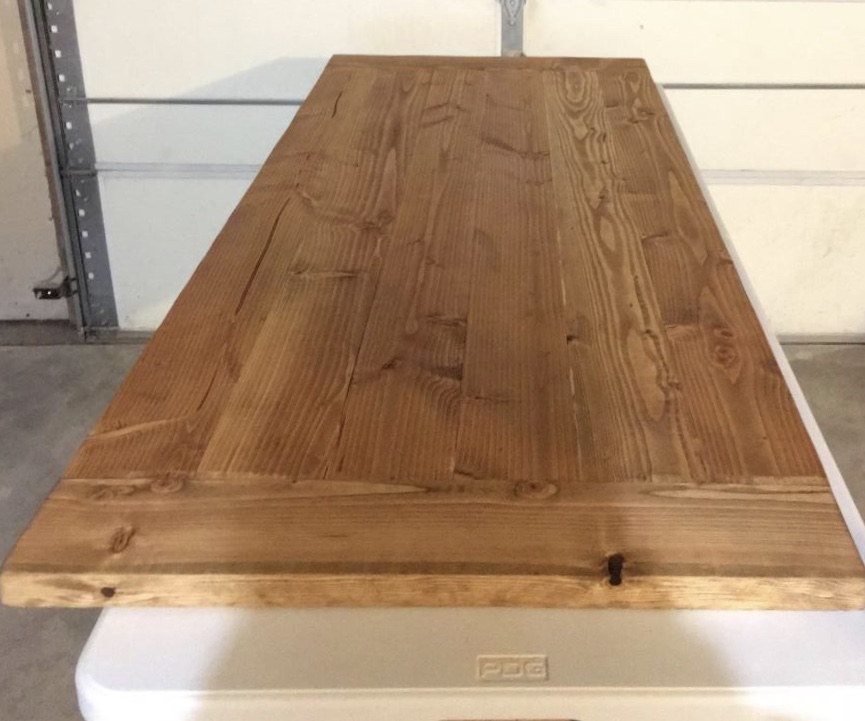
Modern Adirondack Chairs and Adirondack Table
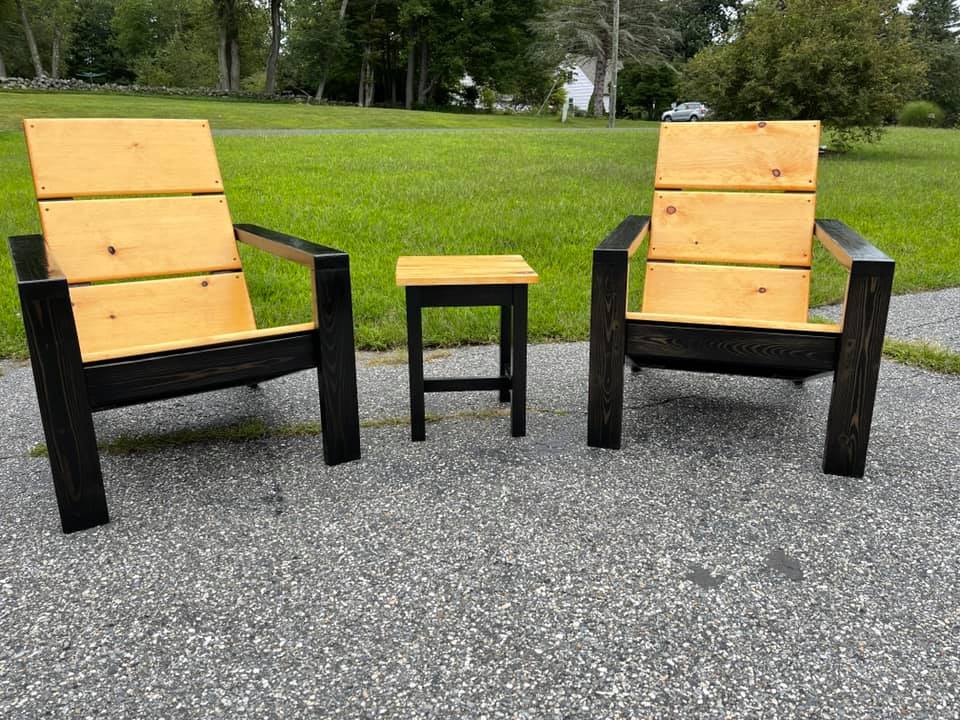
This is one of my first wood working projects I have accomplished and these two plans were some that I really enjoyed making.
Built from Plan(s)
This is one of my first wood working projects I have accomplished and these two plans were some that I really enjoyed making.
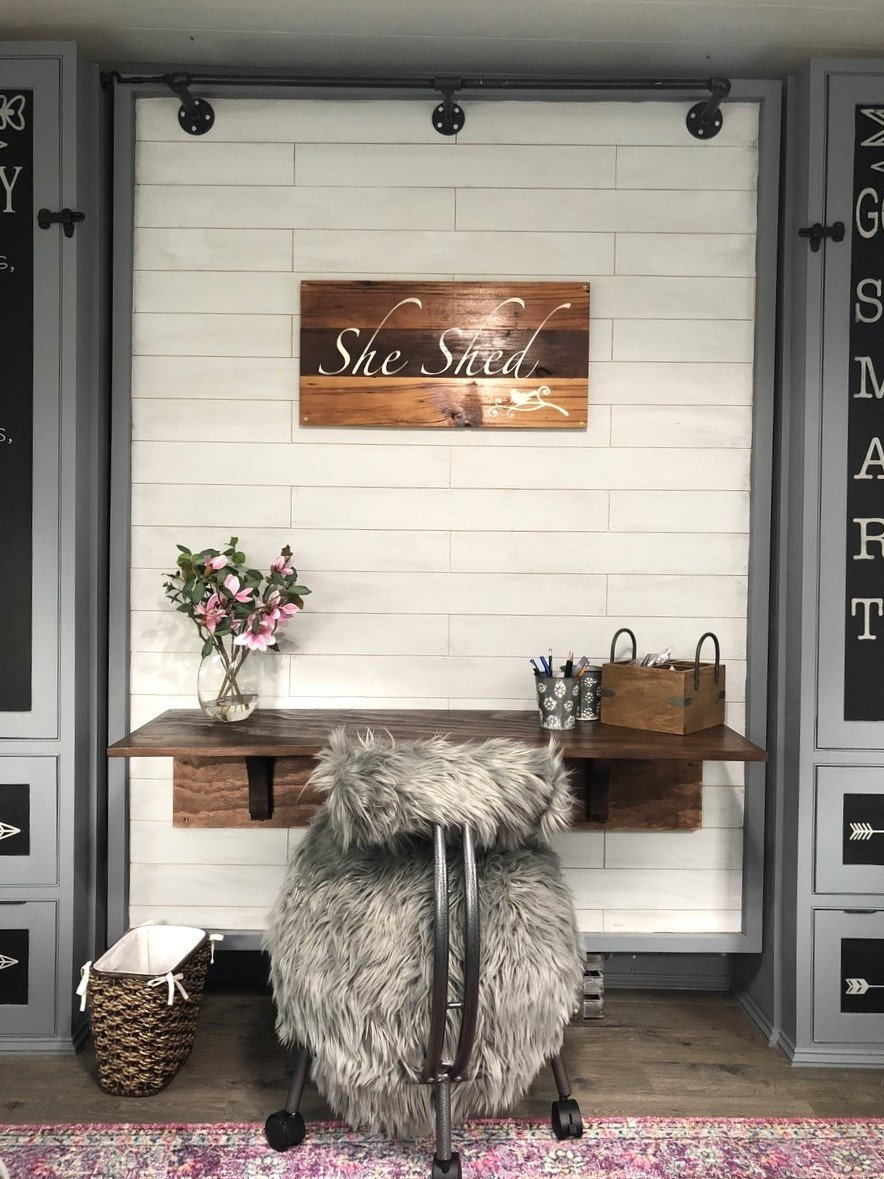
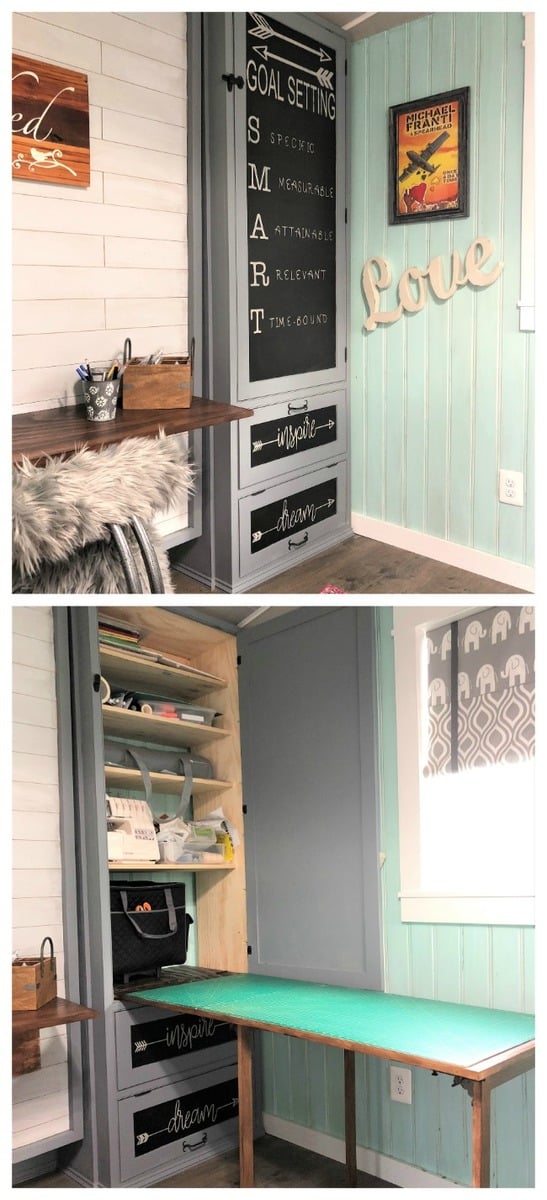
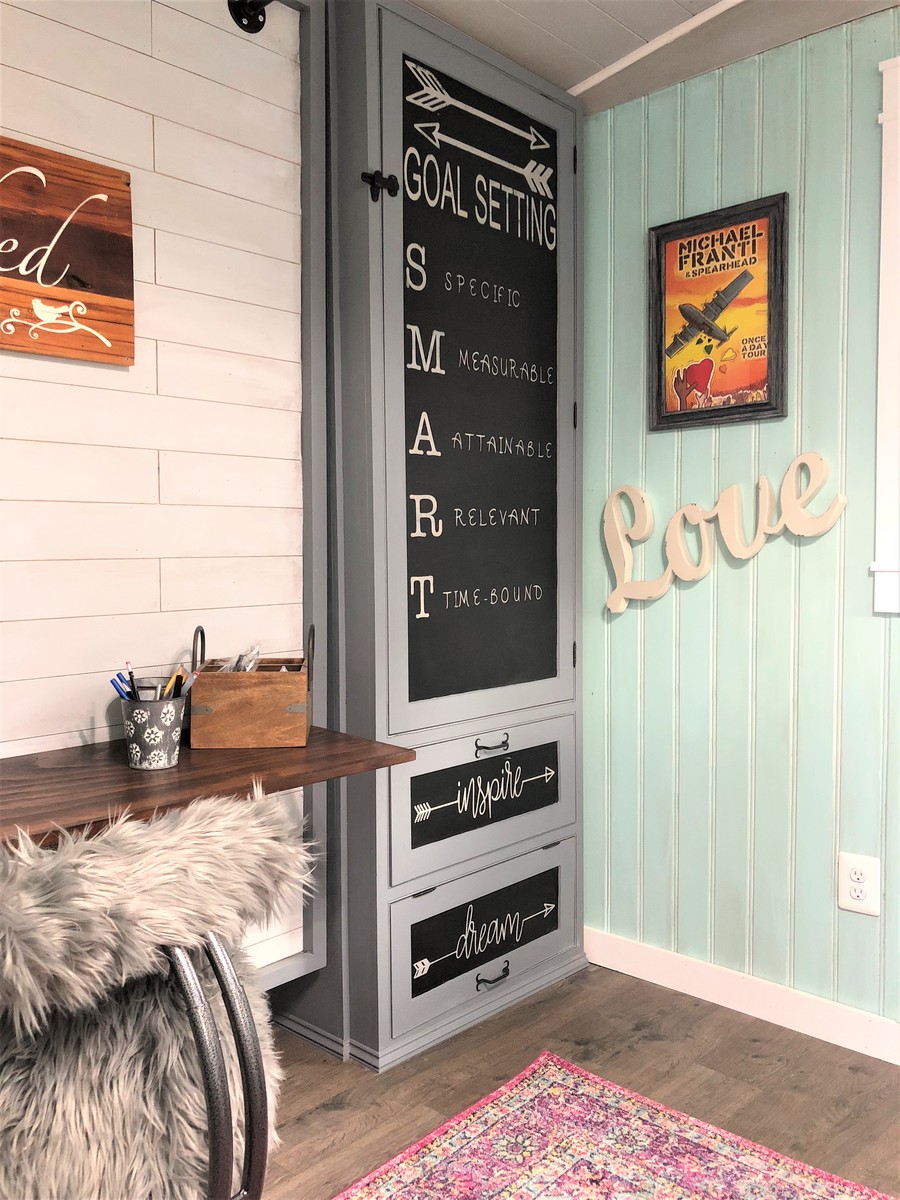
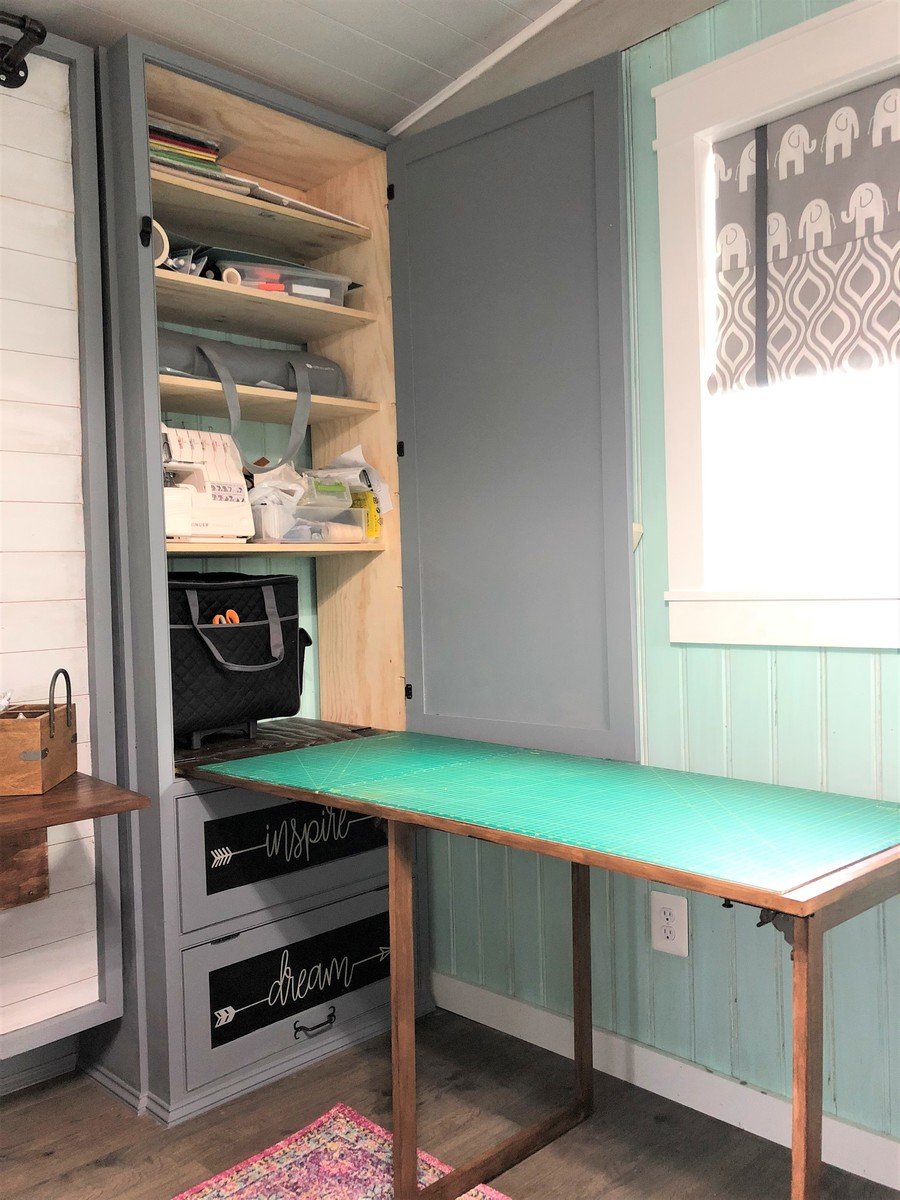
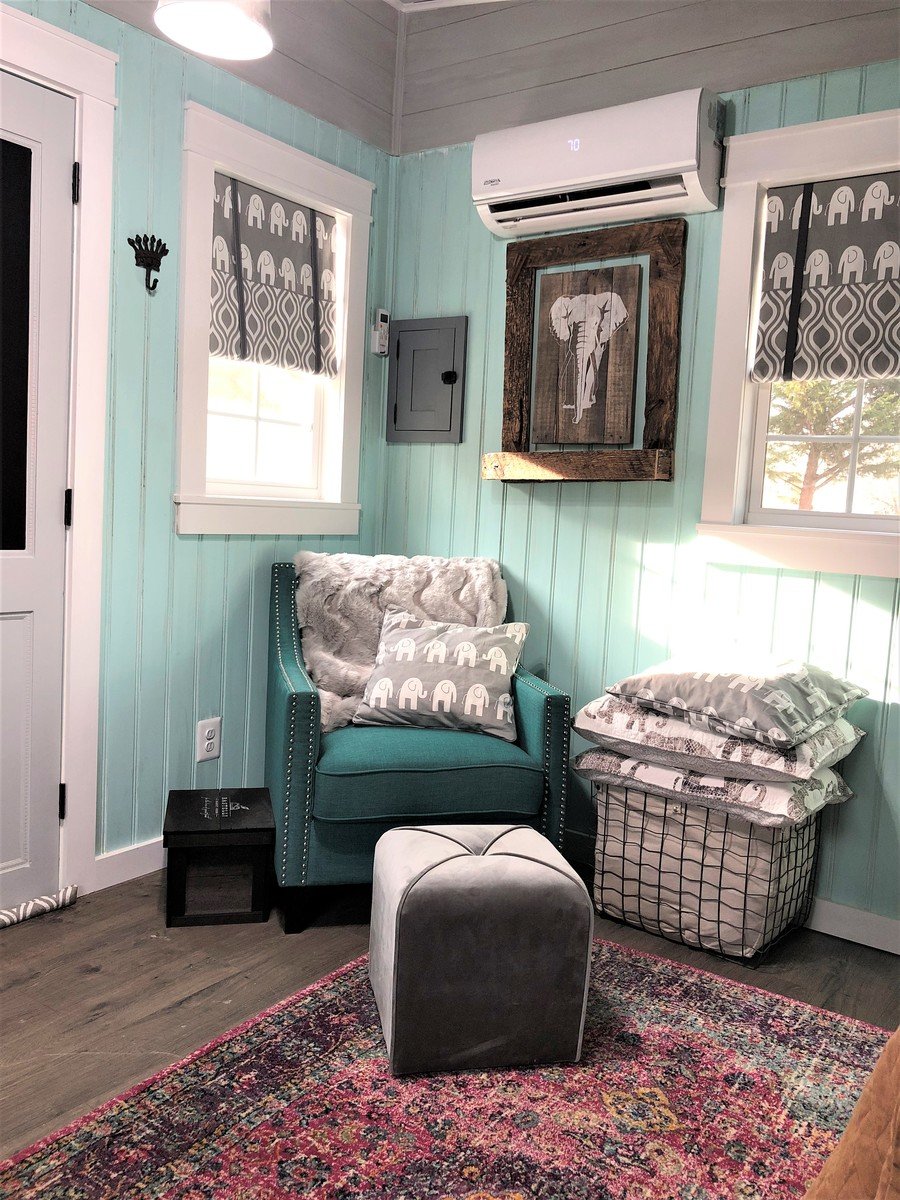
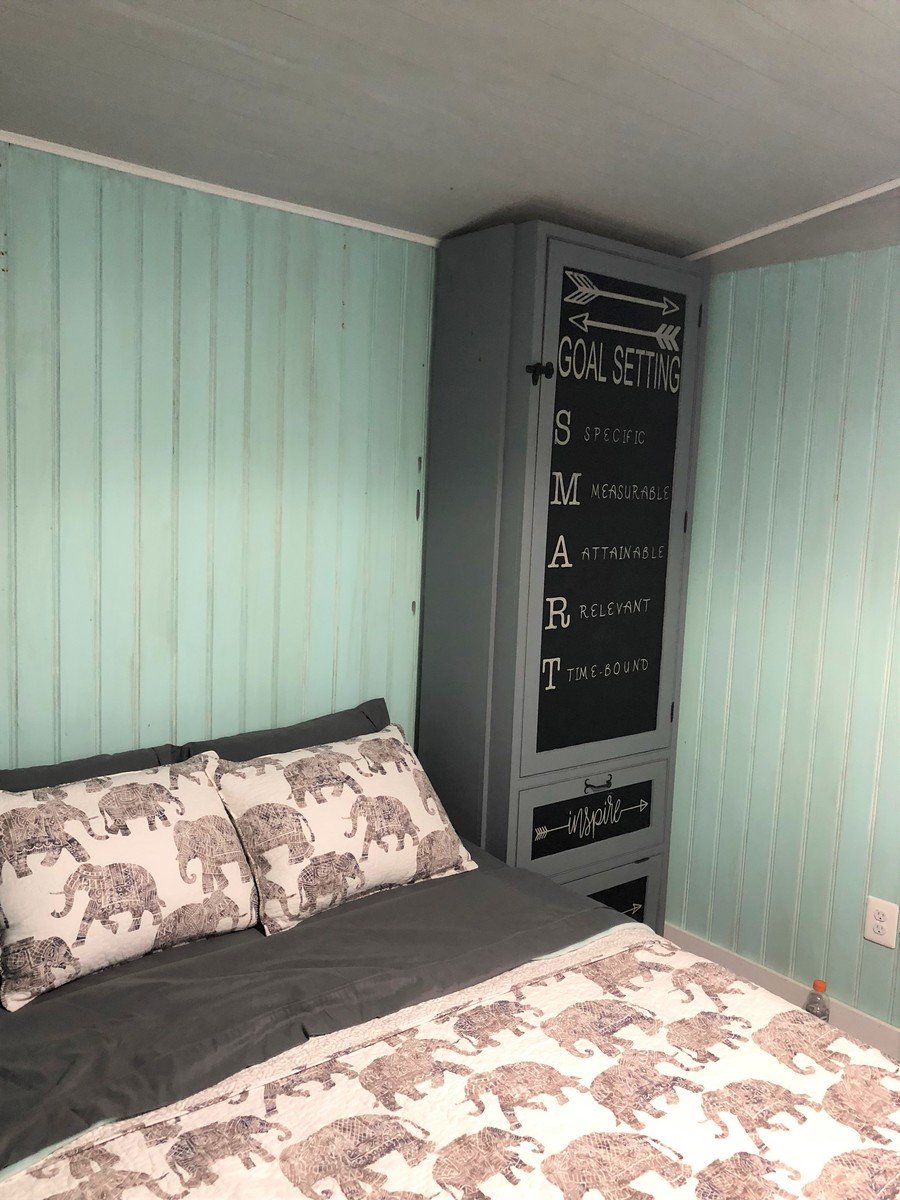
I needed an office and also a guest room so i built a she shed and all the furniture.

Thu, 01/25/2018 - 06:27
I love your murphy bed idea and would love to have plans for it. I too am looking for a guest bedroom and craft area and I know this would work in my space.
Mon, 02/05/2018 - 16:20
I didnt really have a plan when I was building my Murphy bed, I can do a sketchup plan for you if you would like. I used boat chair swivels instead of hinges and there is a YouTube video on how to do this.
Chris
Thu, 06/24/2021 - 23:11
Hi Chris! I would love to have a copy of the sketch up of this. I have a small she shed/guest cottage I would live to duplicate this in. Thanks in advance.
Mon, 11/08/2021 - 14:18
Hi Chris!
I know I'm coming late to this party but I just found your shed and I adore it. You did an amazing job and I cannot express how impressed I am! I would also like a sketchup plan of both the murphy bed and the adjoining side cabinets. Great job!
Thu, 06/06/2019 - 10:59
I absolutely love everything about this she shed!! I would be interested in a sketch up of the murphy bed as well as the cabinets next to it. I would at least like to know what the dimensions of it all is. You did an amazing job! It's so beautiful!
Tue, 06/25/2019 - 15:14
Me too!! I built a horizontal Murphy bed so I have that part done but I would like to see the plans for the cabinets on either side with the pull out desk!
so very cute!
Thu, 05/14/2020 - 05:53
I would love the plans for all of this please! This is exactly what I have been looking for! Thank you!
Sun, 09/20/2020 - 00:13
Hi Chris
Can you advise how I can receive a copy of the sketchup? I love the entire setup from the bed to the additional shelving.
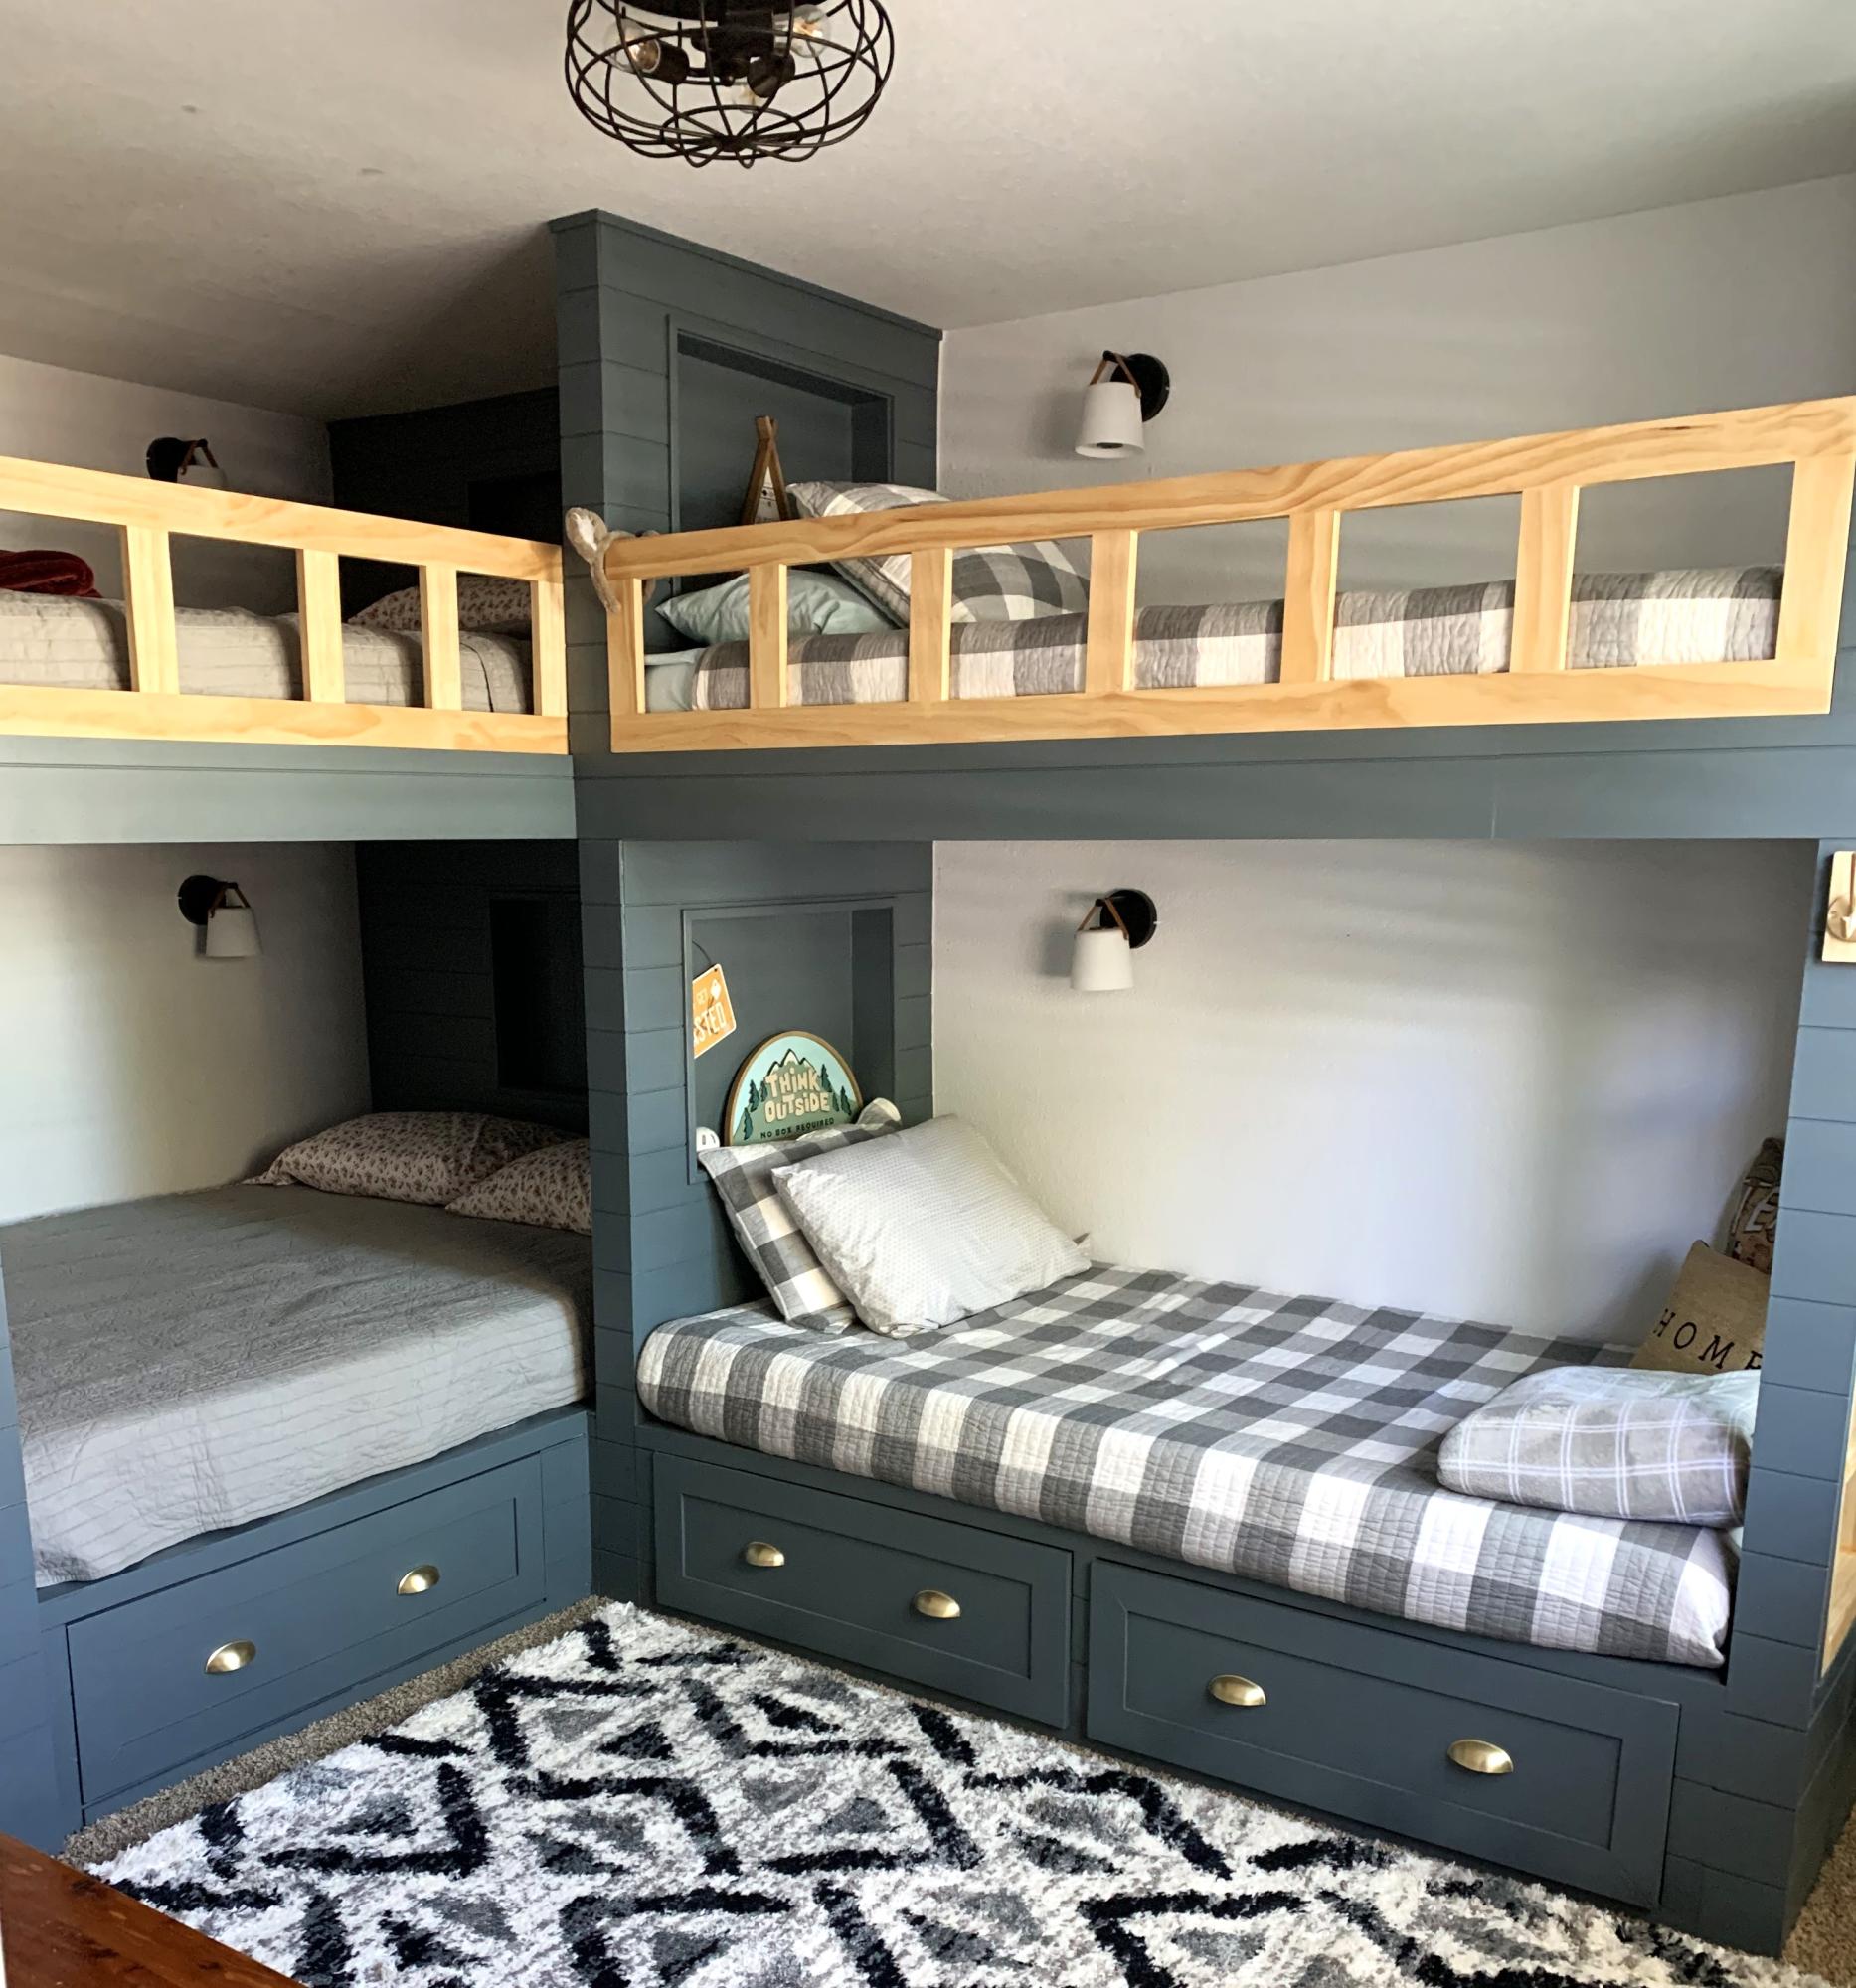
The queen and twin bases were base on your twin bed with storage. Pretty easy to do. This is my first time doing anything this big. I live in a four season resort town and needed beds for heads for ski season.
Debbi H - IG - callintn
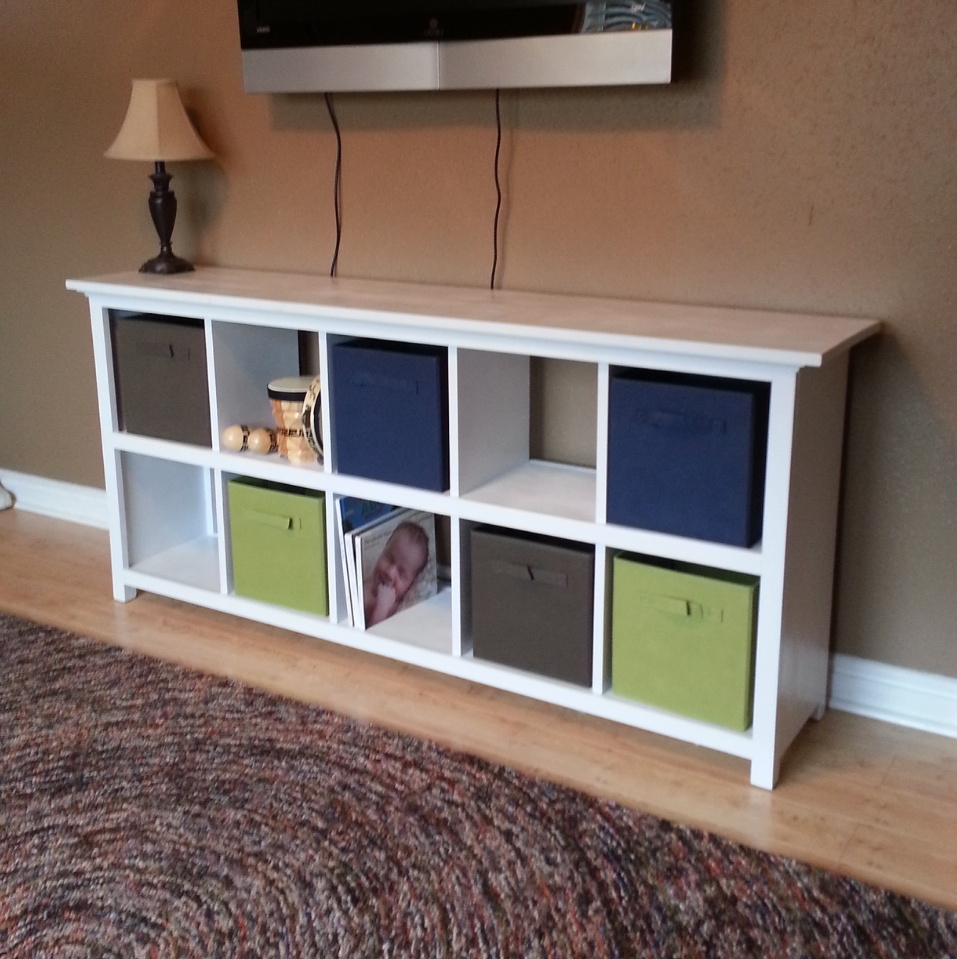
Expanded the 6 cube shelf to 10 cubes, beefed up the feet a little and fancied up the top to more closely match the picture in the plan page. Just joined a couple 1x8's and cut to length for the top.
Used the Kreg Jig to make the shelf box and face frames - biscuit joiner for top.
Wed, 11/26/2014 - 05:32
Hi John- this is exactly what I'm looking for- did you by any chance save your modification measurements and cut list? Also- I'm considering putting a 50 inch tv on the unit- would you recommend additional support? Thanks for any help.
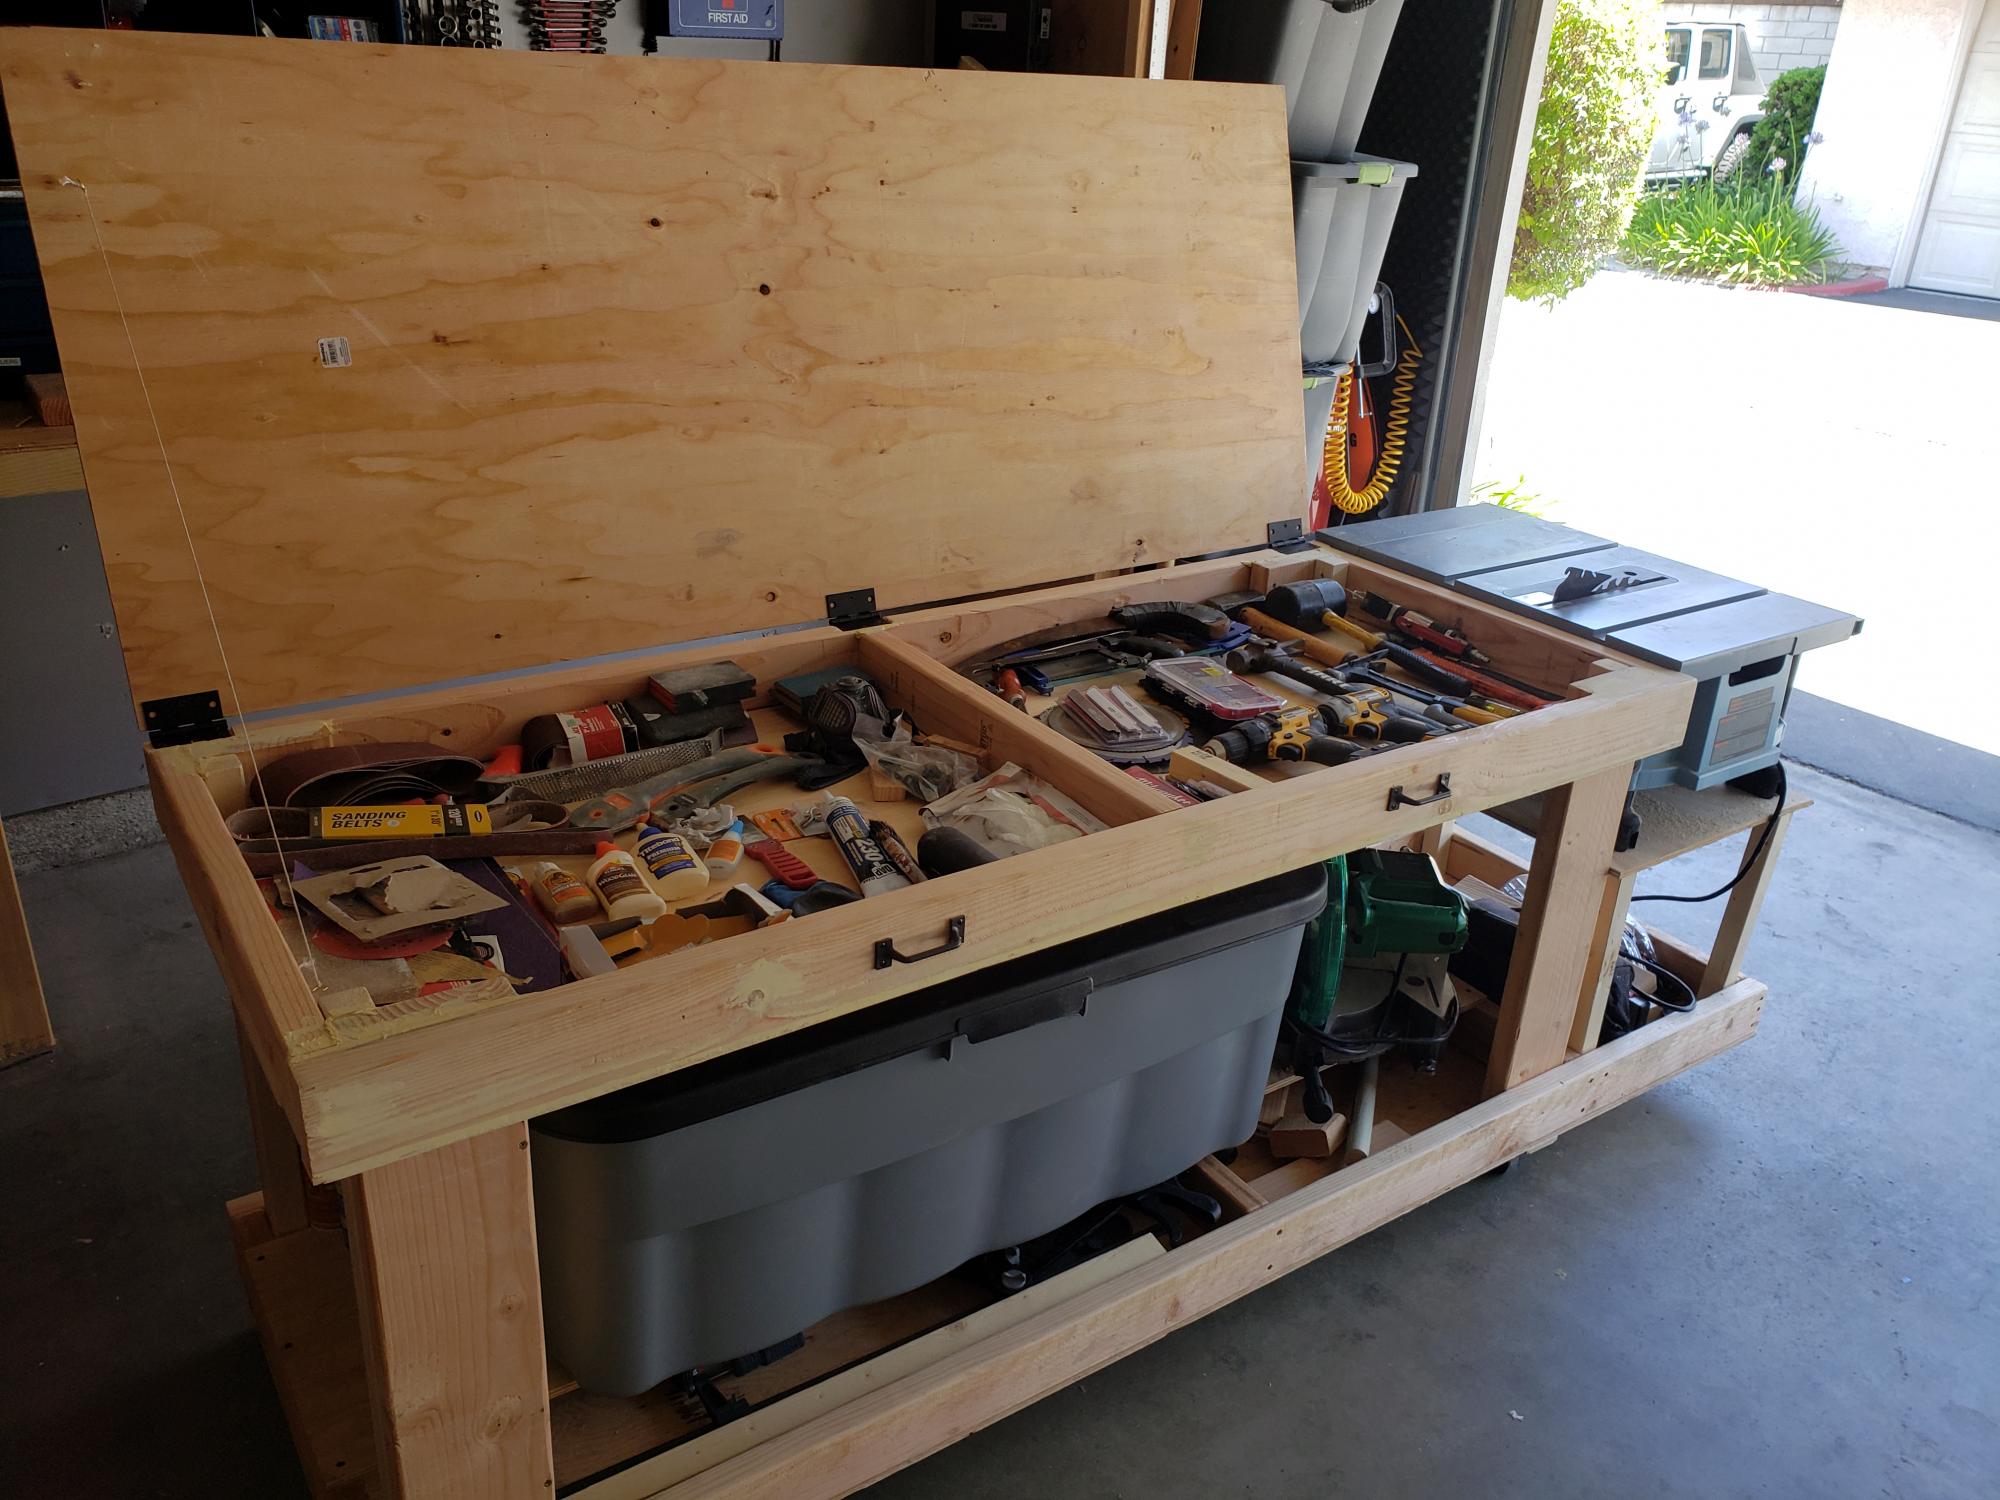
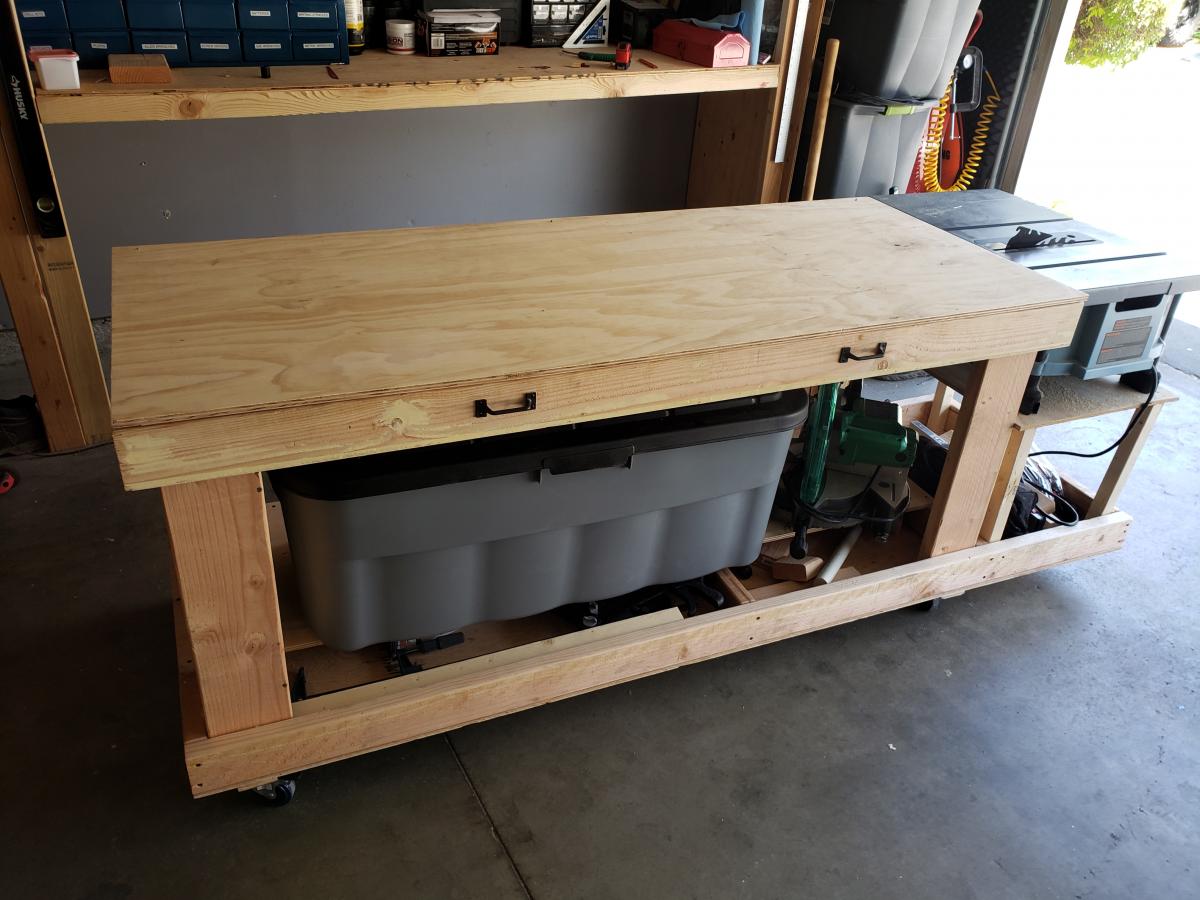
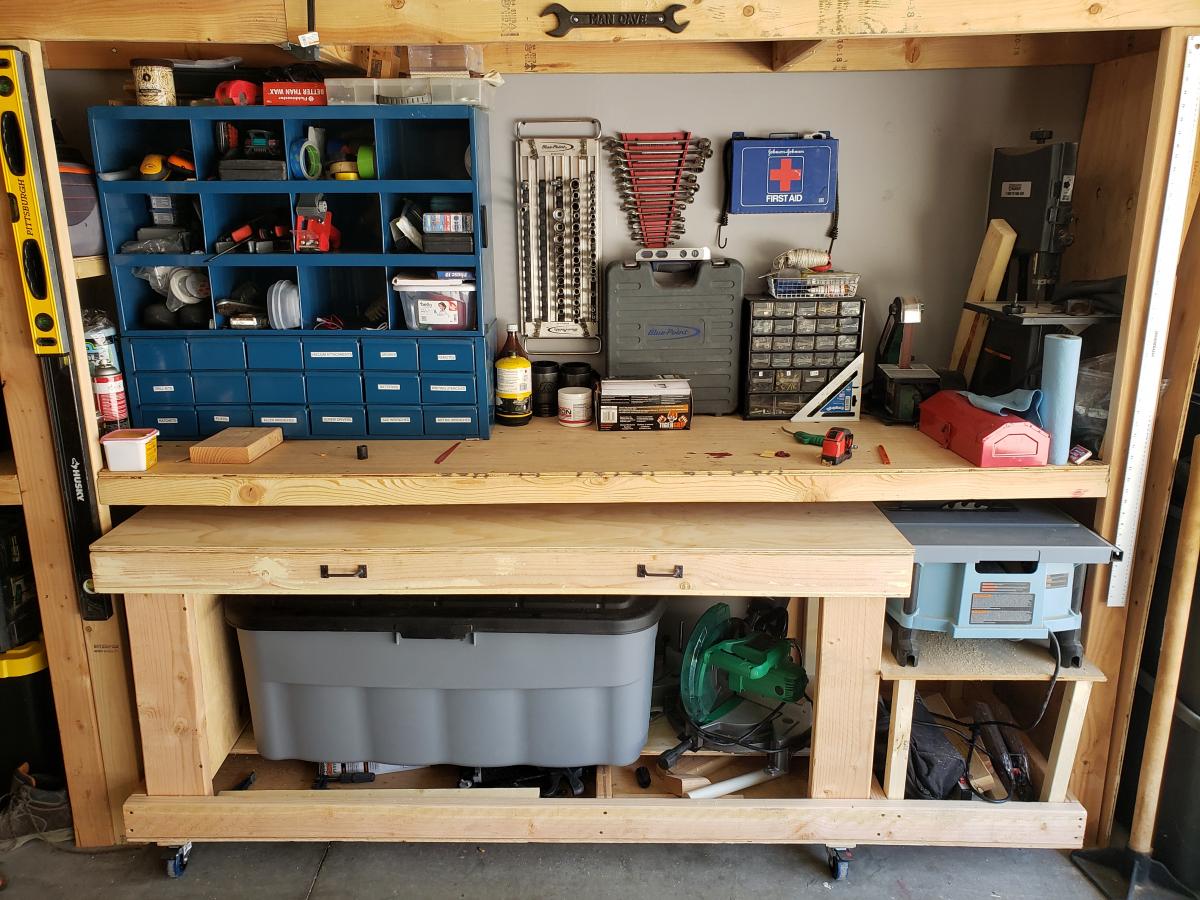
A modification of the traditional work bench. Great for storage. Bench area of 70 inches with 18 additional inches for the table saw.

We loved this greenhouse plan from AnaWhite and wanted to be able to grow in 3 seasons so we modified the design to include humidity & temperature control & 18" deep elevated cedar beds inside with 4x4 posts for support and trellis option. We added electricity in order to have a lighted workspace and the ability to put in a circulating fan to control mold and fungus. We added 2 work tables (2x2') on the inside of the door left and right side door in order to do seed trays & store supplies. This was a wonderful project for my husband and my plants inside are doing incredibly well compared to my outside garden beds here in zone 5. Products used:
Foundation
We had a landscape company come and scape/dig a platform and then fill/compact with crushed rock
My husband then used rebar driven into a 4x4 frame in order to secure the frame to the ground and create a base upon which to build the greenhouse
Active ventilation
AC Infinity Cloudline T8 Inline duct fan
Air king range hood wall cap 8" on the bottom outside of the greenhouse wall for air intake + flex 8" duct to the fan itself
Shelter logic autovent automatic shelter vent kits (1 on each side of the front wall) in order to allow air intake from the bottom back of the greenhouse under the elevated beds to flow to the front of the greenhouse and out
Circulating fan- Hurricane wall mount fan 16" - this fan has 3 speeds with tilt function and small mounting bracket
Soil - sourced 3 yards of 50/50 loam/compost from local landscaping supply
60% loam
30% organic compost
10% organic topsoil + perlite
Soil beds
-cedar frame 2 feet wide along sides, 3 feet wide on the back wall
-galvanized metal roofing with holes drilled into it for drainage
-landscape cloth lined


Wed, 09/09/2020 - 13:09
Thanks for that update! I was wondering how to vent this project, as Green houses need the ventilation. Good to know dollar amount also. Great photos.
Wed, 09/09/2020 - 13:09
Thanks for that update! I was wondering how to vent this project, as Green houses need the ventilation. Good to know dollar amount also. Great photos.
Wed, 09/09/2020 - 13:09
Thanks for that update! I was wondering how to vent this project, as Green houses need the ventilation. Good to know dollar amount also. Great photos.
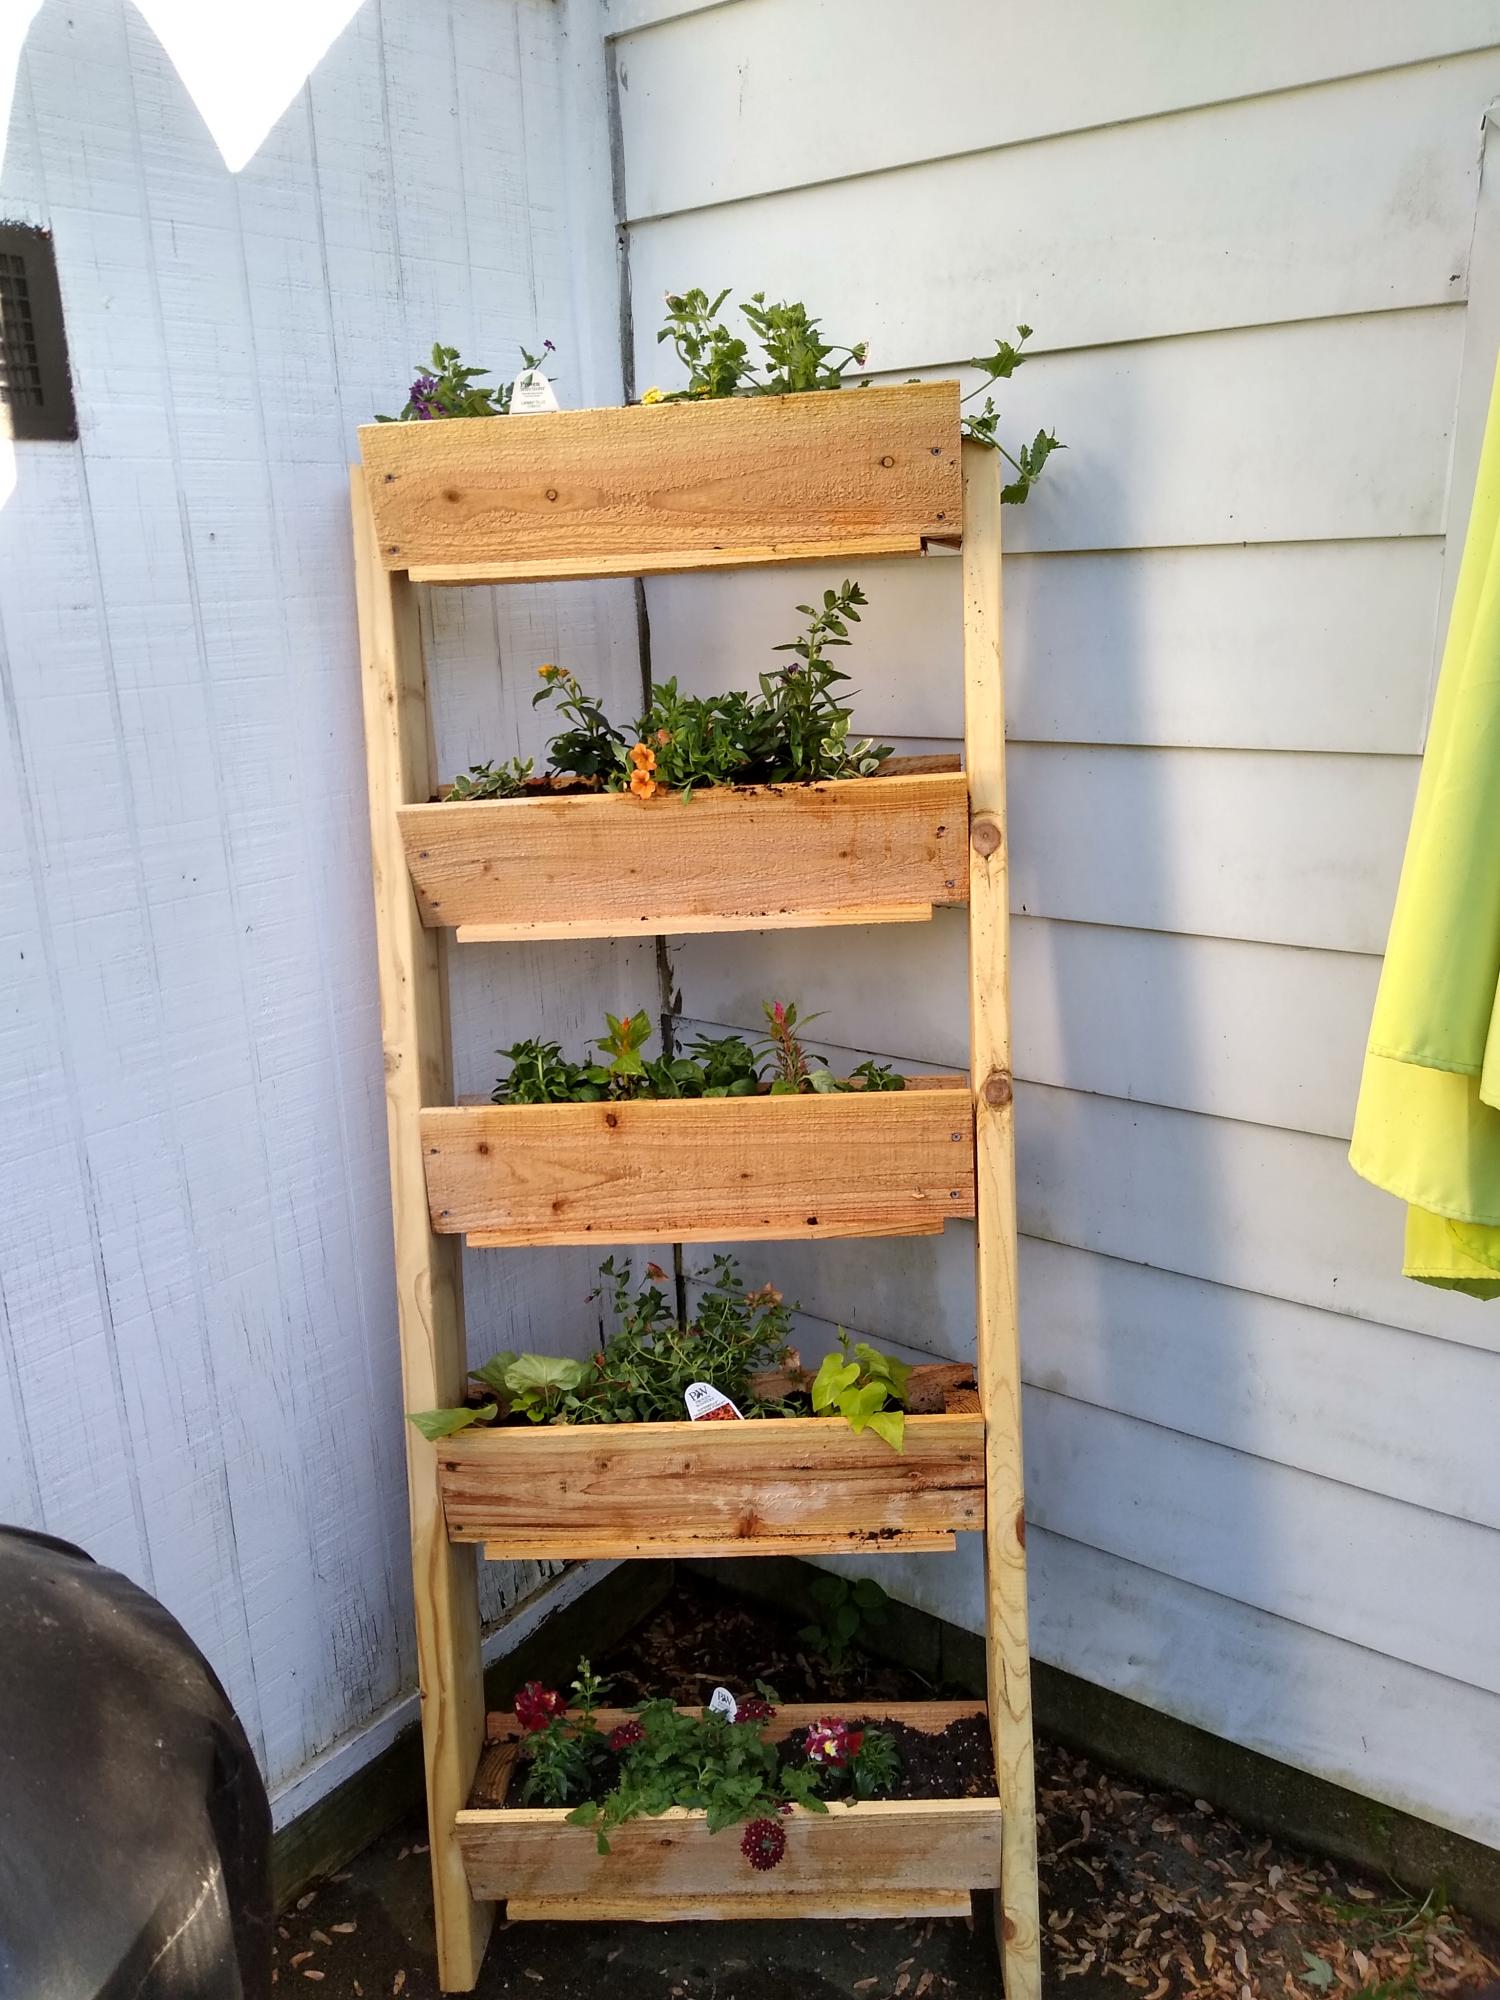
Flower box ! Easy to do.
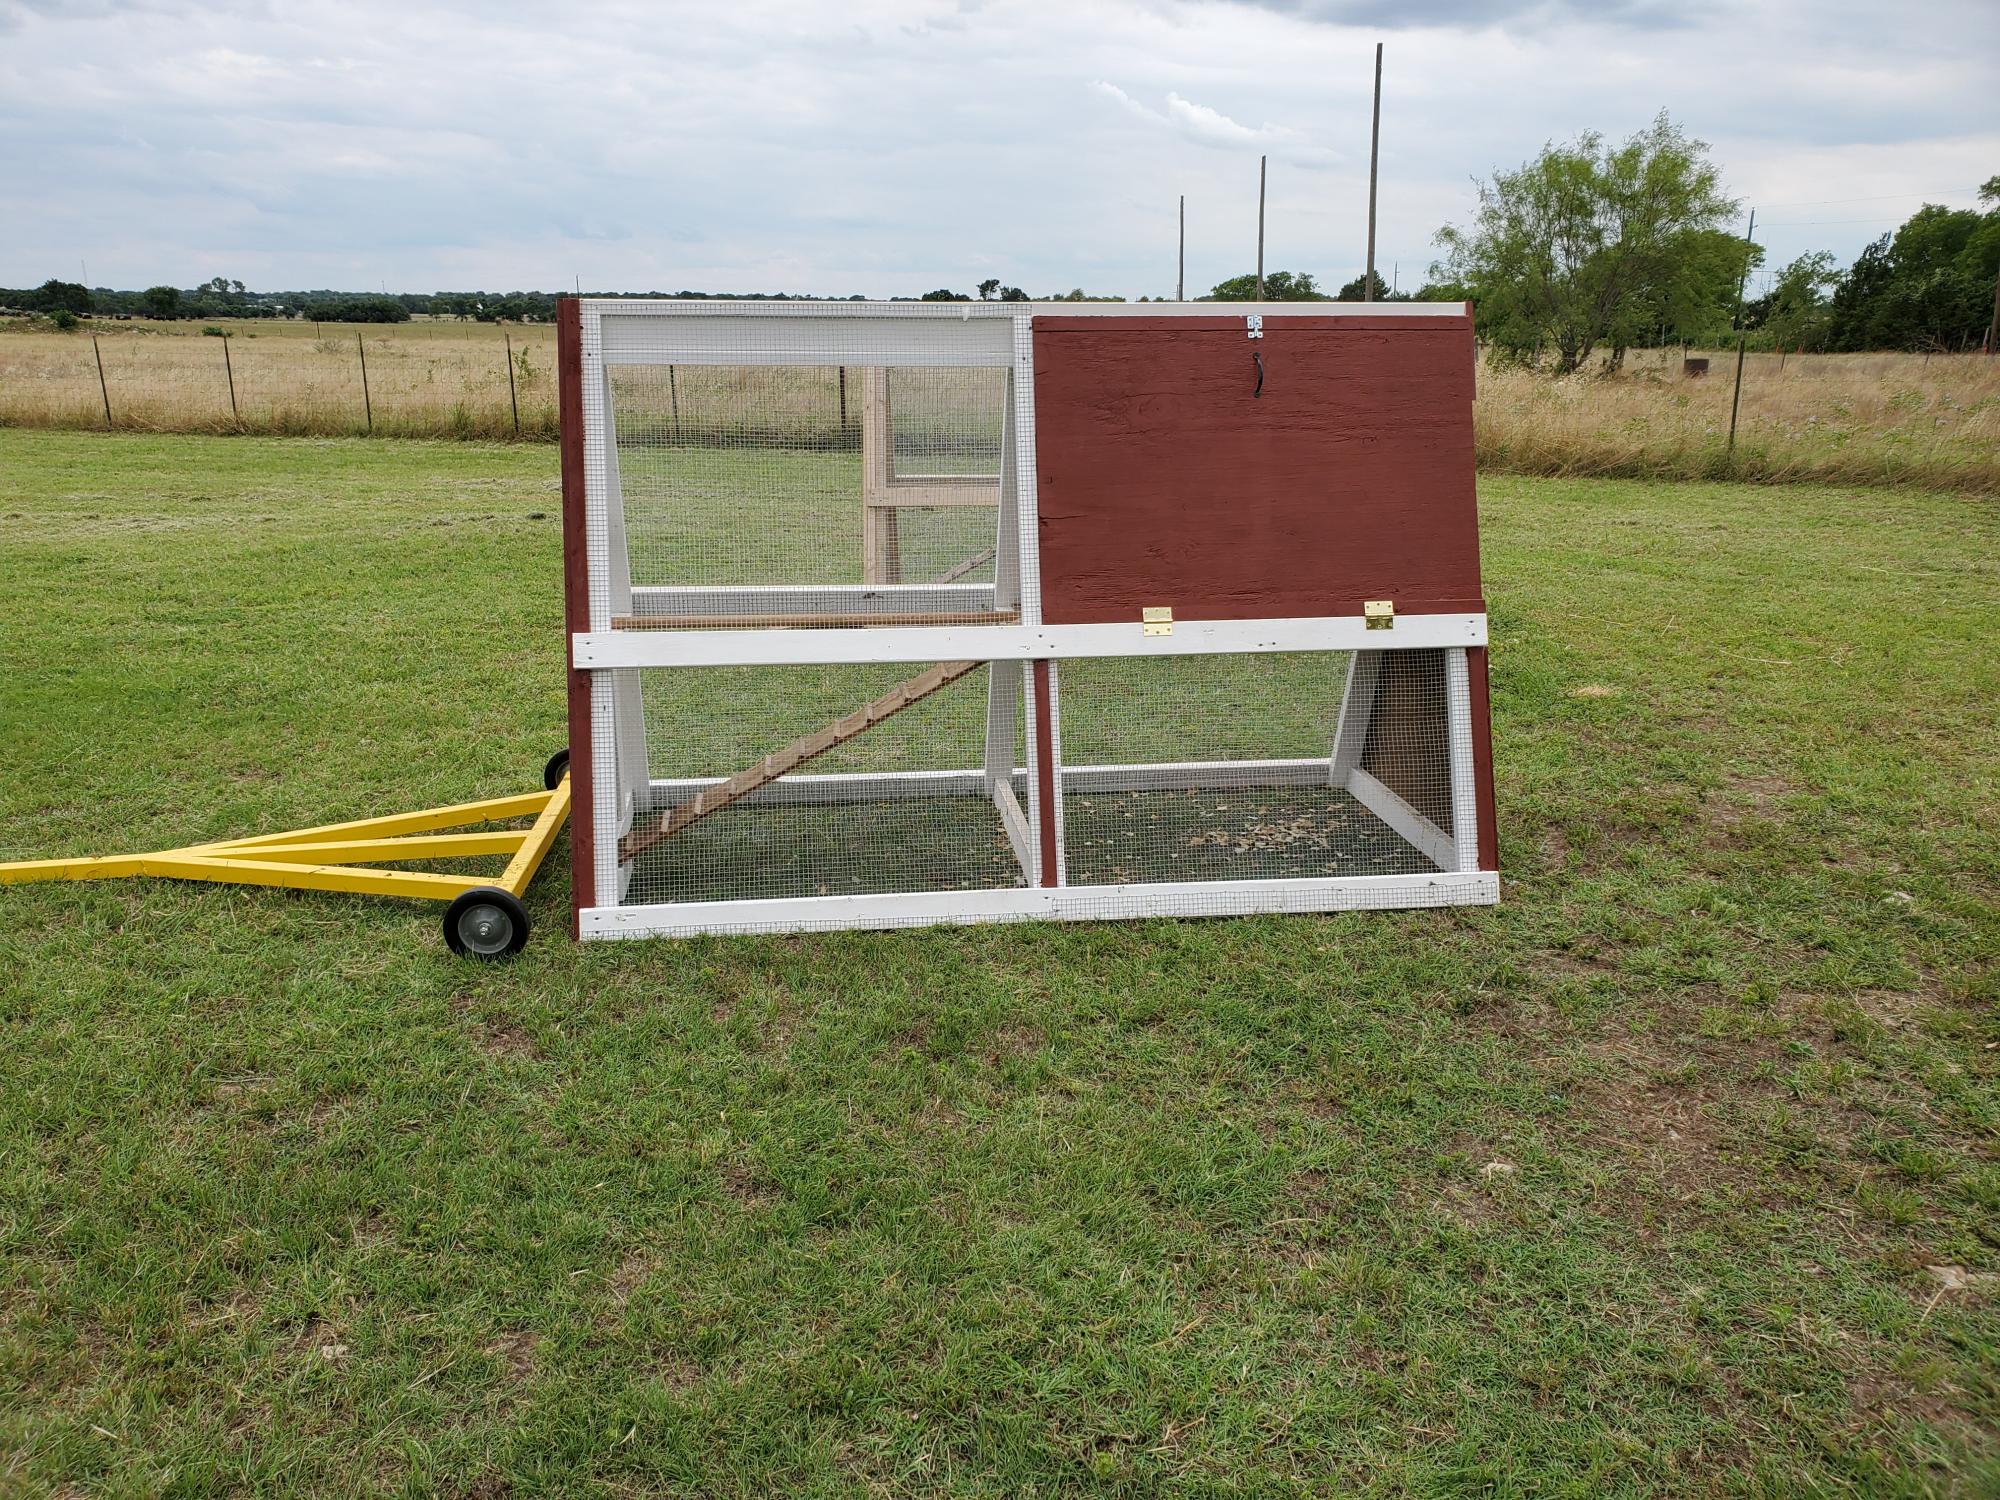
Quick a-frame coop for 4 chickens.

Ana, thanks for these plans! They inspired me to make my first bed build. I also want to thank all of you that added brag posts! They gave me ideas for some of the modifications that I made. I did this build by mixing your Queen Farmhouse and Queen Farmhouse Storage bed plans. I also added a number of modifications to suit my own preferences. The drawer boxes I changed by building a faceplate (I didn't want the plywood ends exposed), and by increasing in depth to maximize some additional storage. Since I increased the drawer sizes, I went with the euro roller bearing slides. I increased the foot-board height to be slightly higher than the mattress. I also designed the footboard to have a removable inner section with hidden latches on the inside. I did this because I wanted to make use of the "dead space" between the drawer boxes. I then used this space to house a hidden drawer, that is approx six feet deep (I couldn't help myself-I love hidden drawers  ). Because I added the hidden drawer, I changed the opptional center support to 4X4 blockes that were pocket screwed under the center of the boxes. I ended up using birch plywood and fir for this build. For my first bed build I'm fairly happy with how it came out. Thanks again!


Thu, 12/11/2014 - 07:41
This is your first build and you did all of those awesome modifications?! Really impressive and it looks perfect! Congrats and welcome to the community!

In reply to Seriously?! by spiceylg
Sun, 12/14/2014 - 06:03
Thanks for the compliments! It was a fun learning experience. Making all the modifications definitely slowed down the build, but also made it more rewarding!
Fri, 12/12/2014 - 13:18
I just started my bed (mostly out of Baltic Birch) and am wondering where you were able to find such nice 4x4s. Your bed is gorgeous! No luck here. I bought redwood, but really wanted fir for the sharper edges. It's my first project, too. I also bought same drawer slides, but the soft close. Didn't want the slam. I figure building it will be the easy part compared to procuring nice 4x4s! Hope you can help!
Sun, 12/14/2014 - 06:01
Thanks! The 4x4s I found at a place called Better Living Building Supply. They had a pretty nice assortment of fir, including the 4x4s, so that is why I chose it for the build. Finding the 4x4s slowed down my start on the build. Our local Lowes only had them in treated pine.
Sat, 09/05/2015 - 20:47
Thank you for the pictures, the bed turned out Awesome. I was wondering about the latching system for the foot of the bed. Do you think a piano hinge on the lower would work too? Also on the center drawer did you use rollers or is it just friction? Can't wait to start the build.
Thanks

Mon, 02/15/2016 - 14:11
This is excellent!!! I really like this, so much in fact that the wife is going to have to get used to it too. lol But really, GREAT work! Any chance you could post a pic and or comment about how you attached that removeable end? i think this is the best part! Cheers!
Wed, 10/24/2018 - 23:21
How can I get / purchase the plans for the construction of the bed ?
Tue, 12/10/2019 - 08:42
Beekeeper, Awesome build!!! Have you posted your altered plans anywhere? I'm very interested in your build, I was wondering about some aspects of it and how you approached it. Plans would clear it up instead of bothering you with all my questions.

Mon, 11/16/2020 - 15:42
Bed turned out awesome. I was wondering if you have the plans for the bed with a list of supplies it took to make this bed. I so want this bed it's just what we are needing
Great job
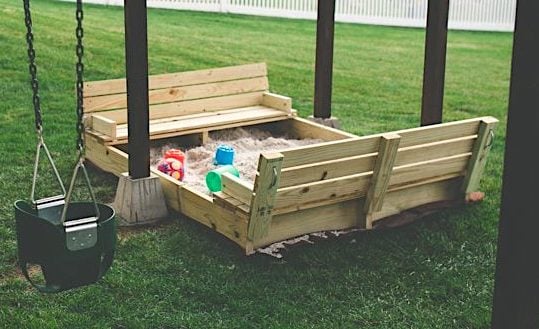
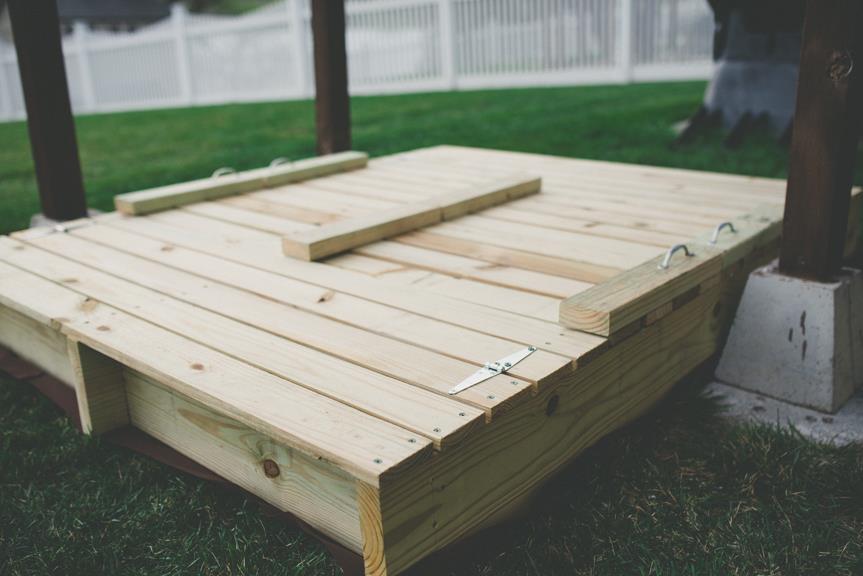
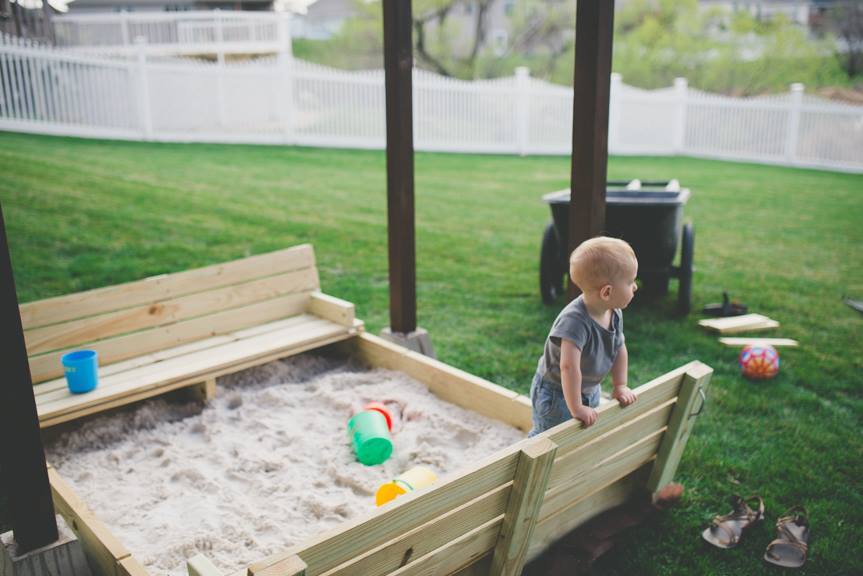
We altered the original plan by enlarging the sandbox (approx 5' x 6') which made for wider benches that can comfortably seat an adult. The benches and back rests are three boards deep instead of two. We added 2x12 supports under the benches for additional support, as well as another 2x4 support in the middle of the backrest.


Tue, 04/14/2015 - 20:00
I just love seeing pictures of these built! Makes my heart swell :-)
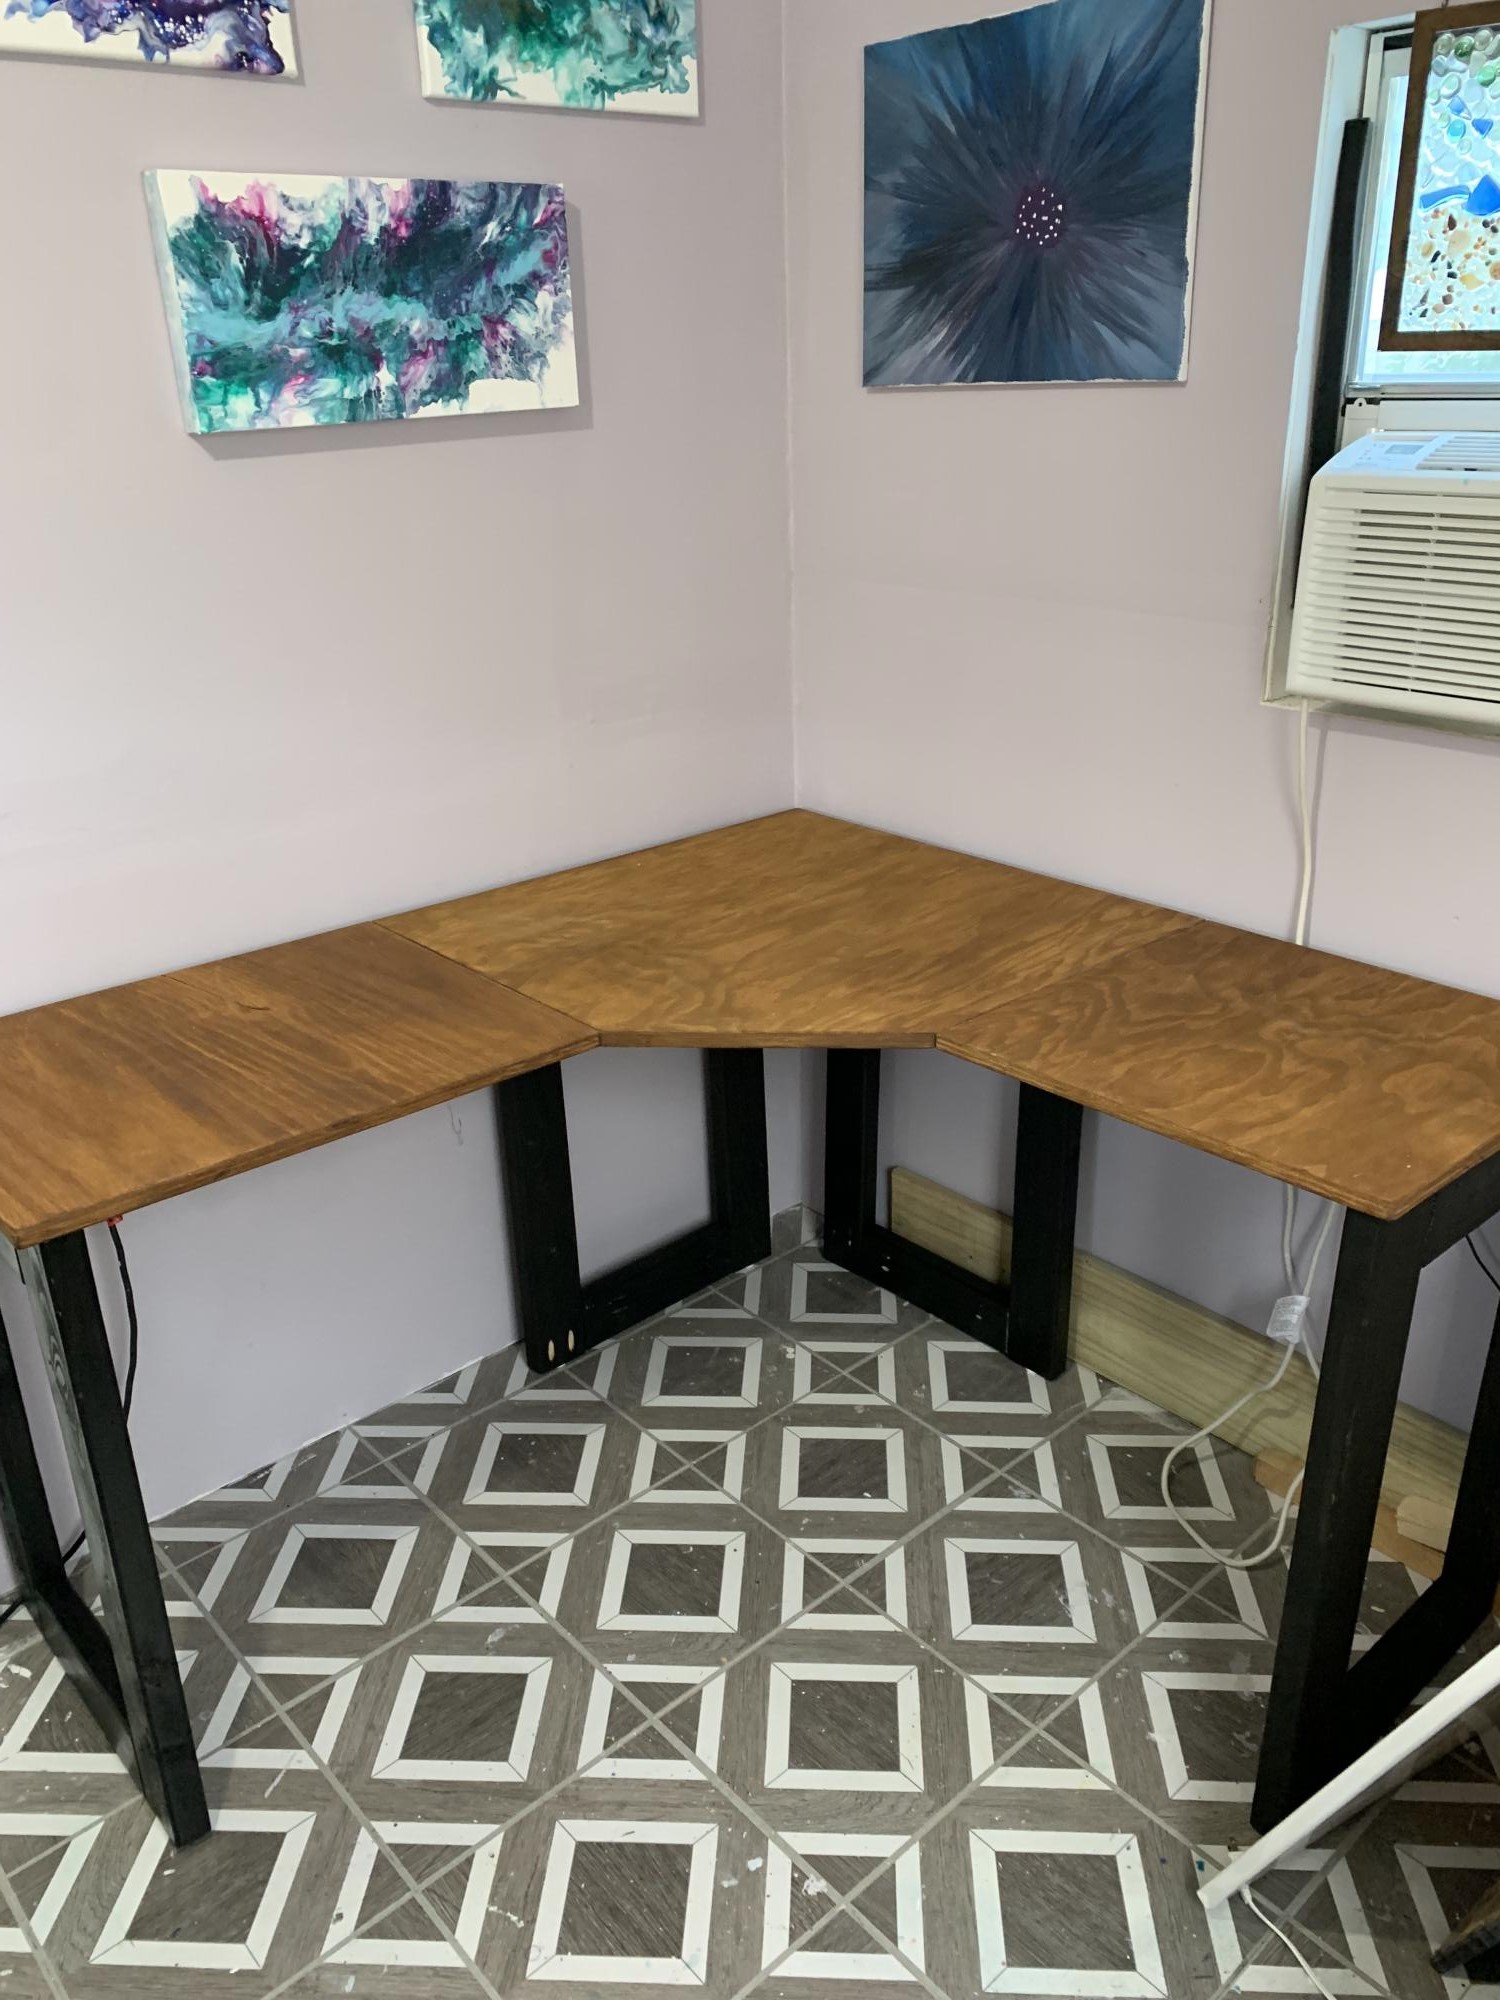
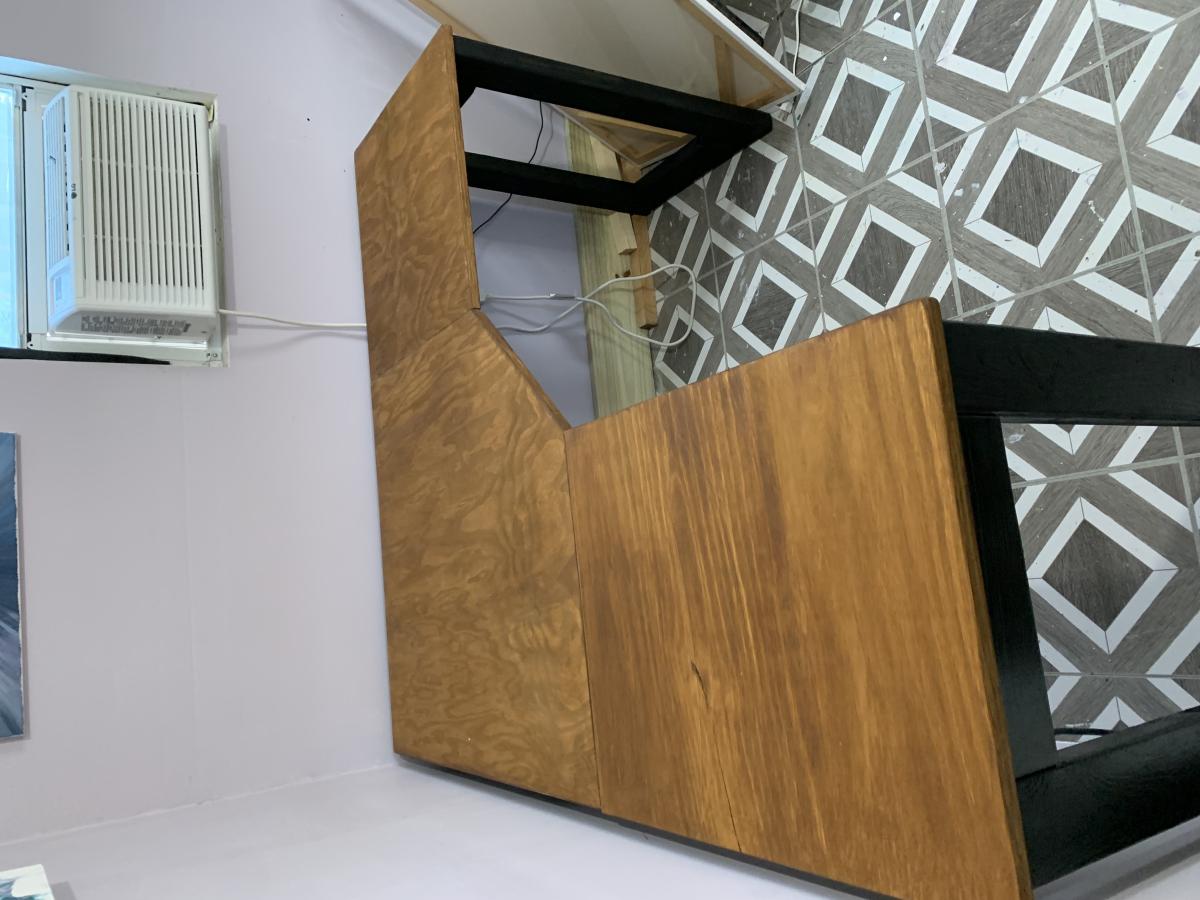
I wanted to convert my craft shed to my office after I accepted a new job and would be working from home full time. My shed is only 10x8, so I needed something smallish and functional. I modified the plans slightly and I did make a few mistakes. In the end, I think it turned out great for a 50 something grandma who likes to work with her hands!
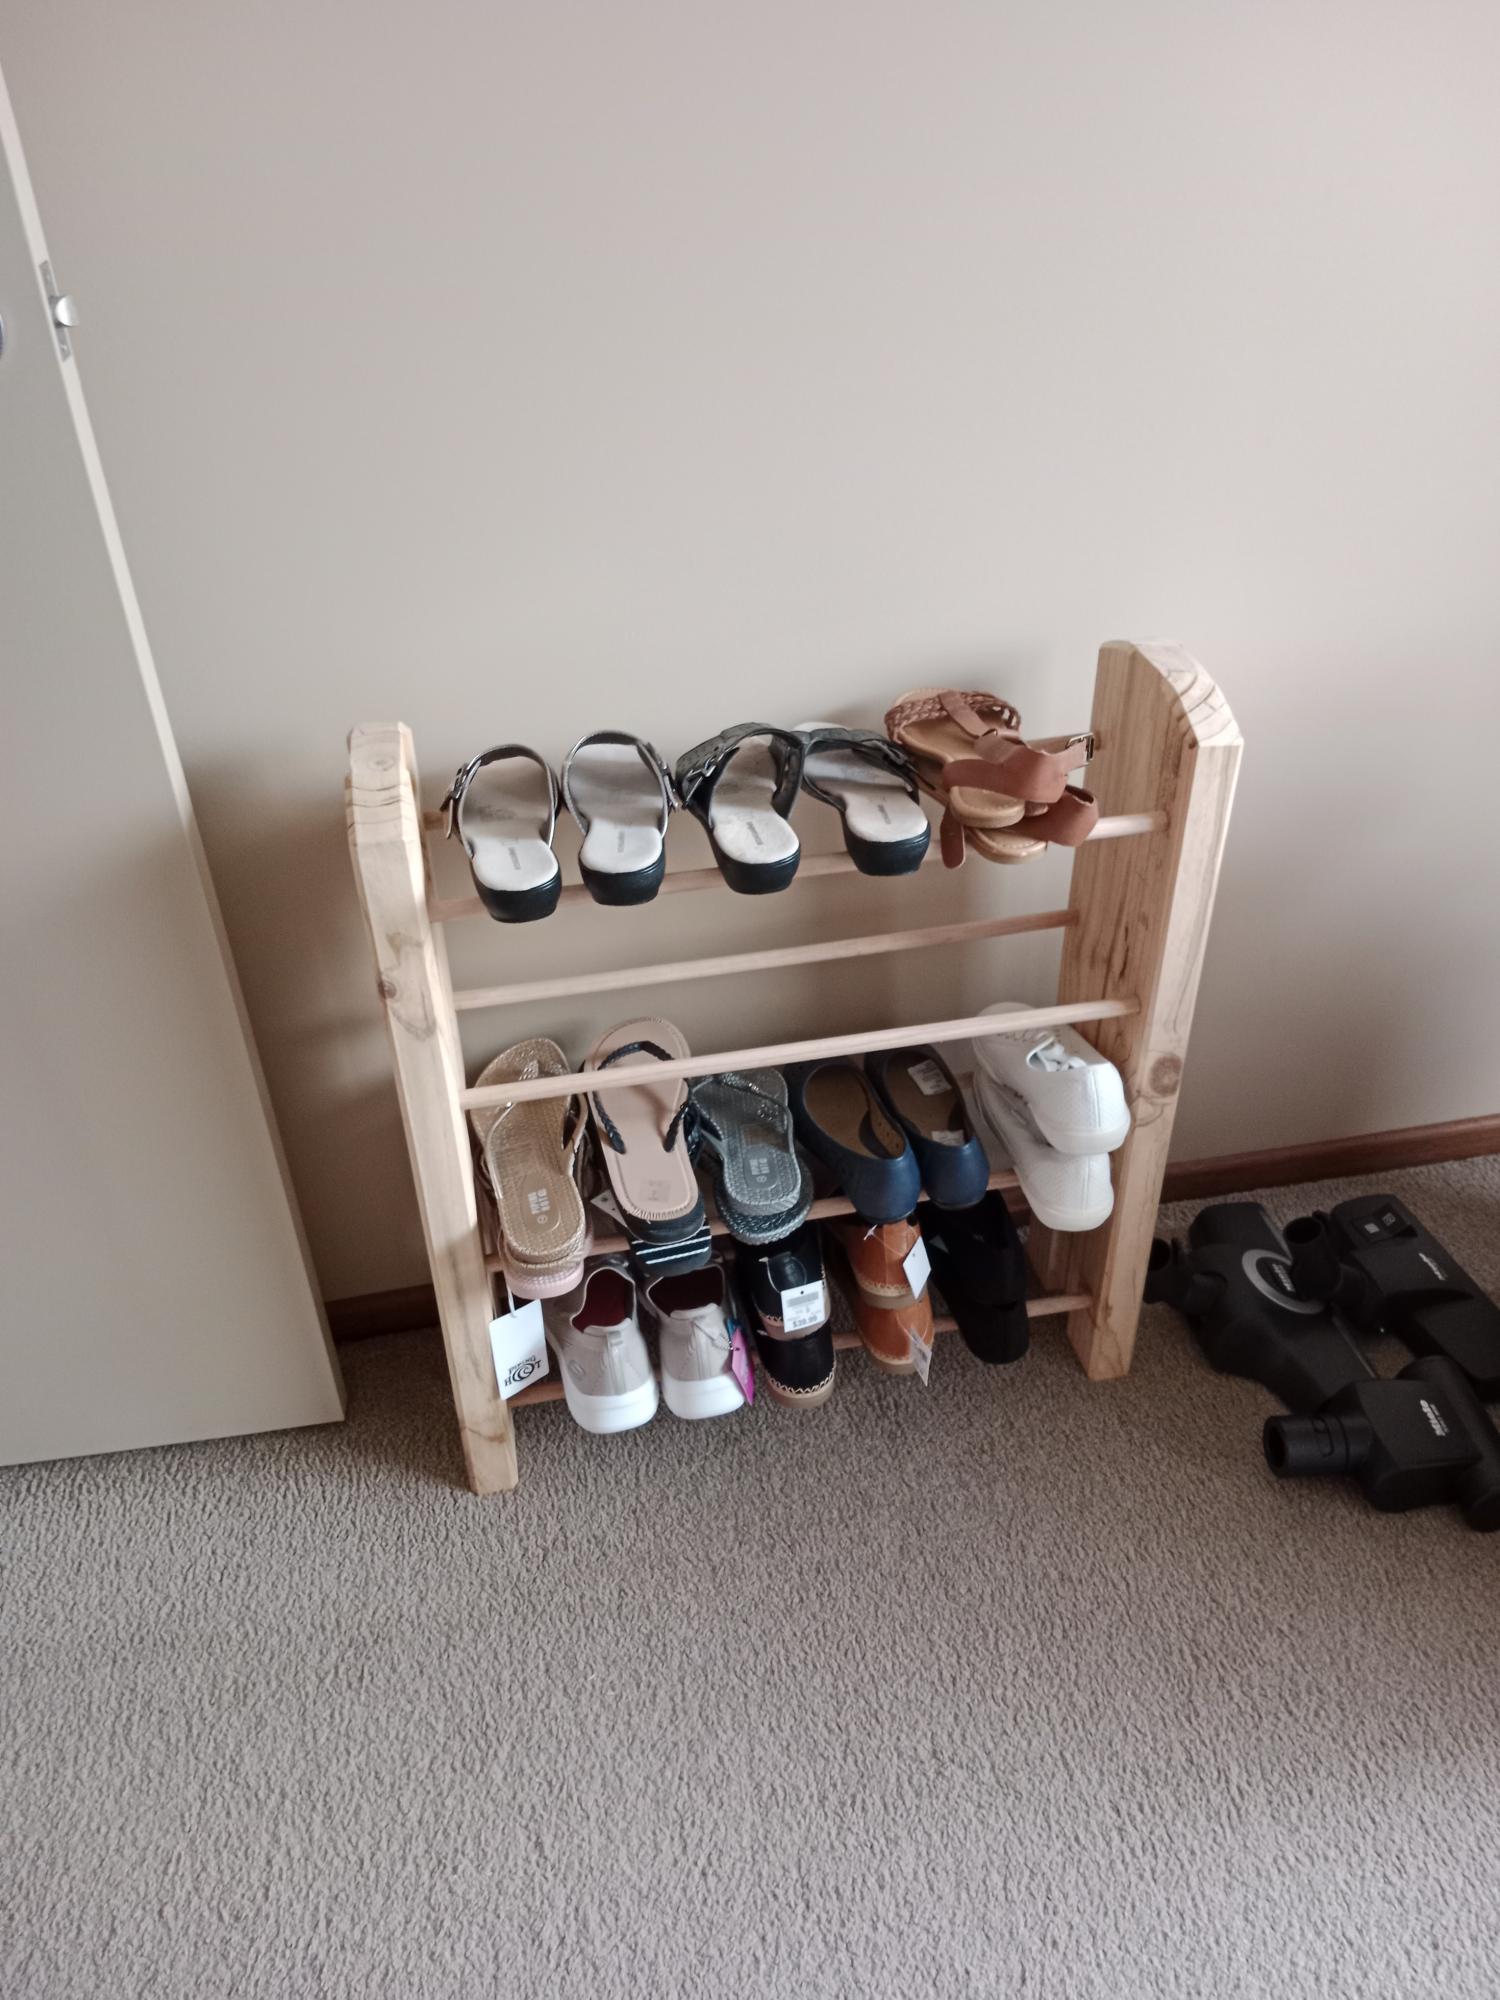
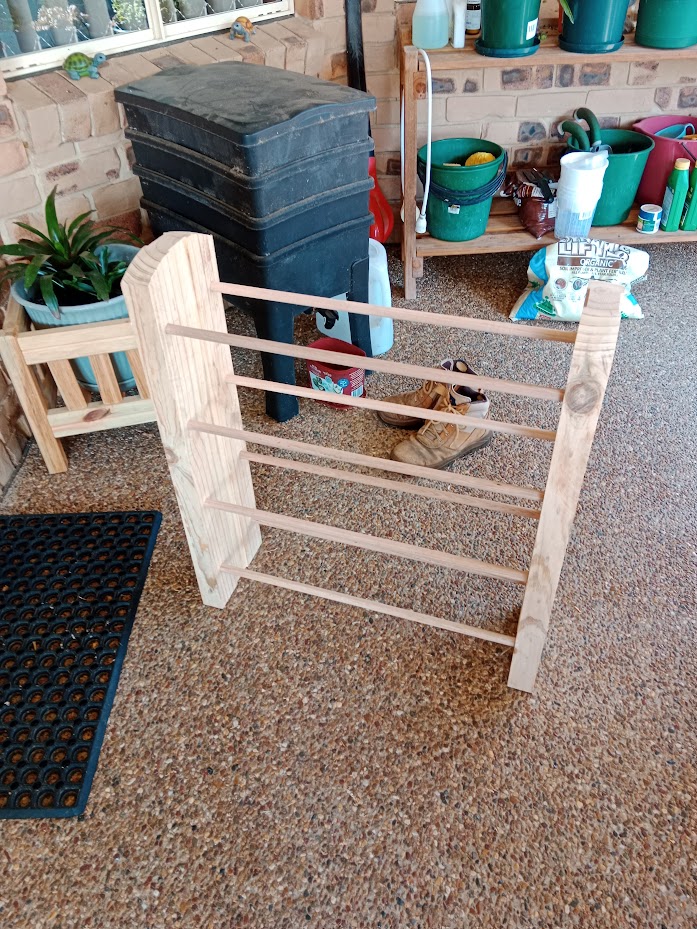
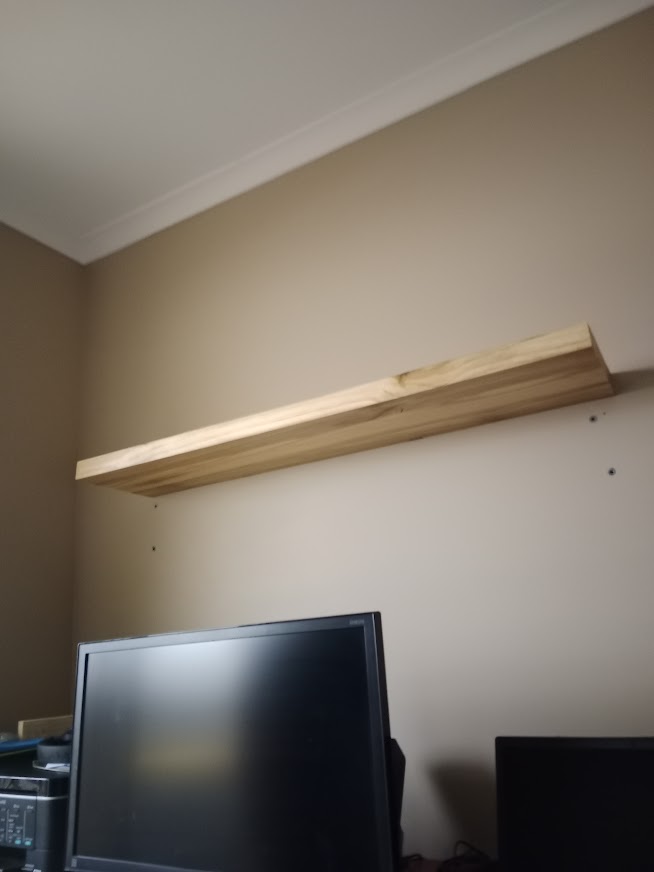
A shoe rack and floating shelf.
The shoe rack is made from 200mm x 50mm rough sawn pine and 16mm dowel.
The floating shelf was made partly from offcuts left over from the 4 x 4 pedestal dining table.200mm x 50mm rough sawn pine ripped into 3 pieces (75mm, 95mm, 75mm) and put together using glue and batten screws the 75mm pieces were offcuts from the table.
The reasons I made them from 3 pieces are
1/ I had offcuts left from a previous project
2/ The timber I use is only 200mm wide the shelf ended up being 245mm
3/ I am unable to dress timber that wide
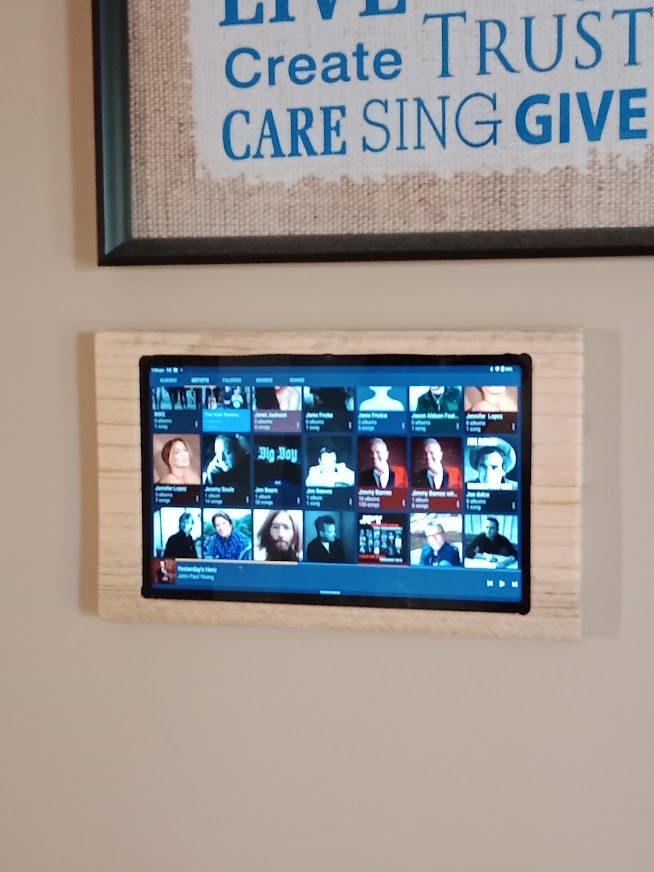
The tablet wall mount was made from 2 offcuts glued together side by side and machined out with the router
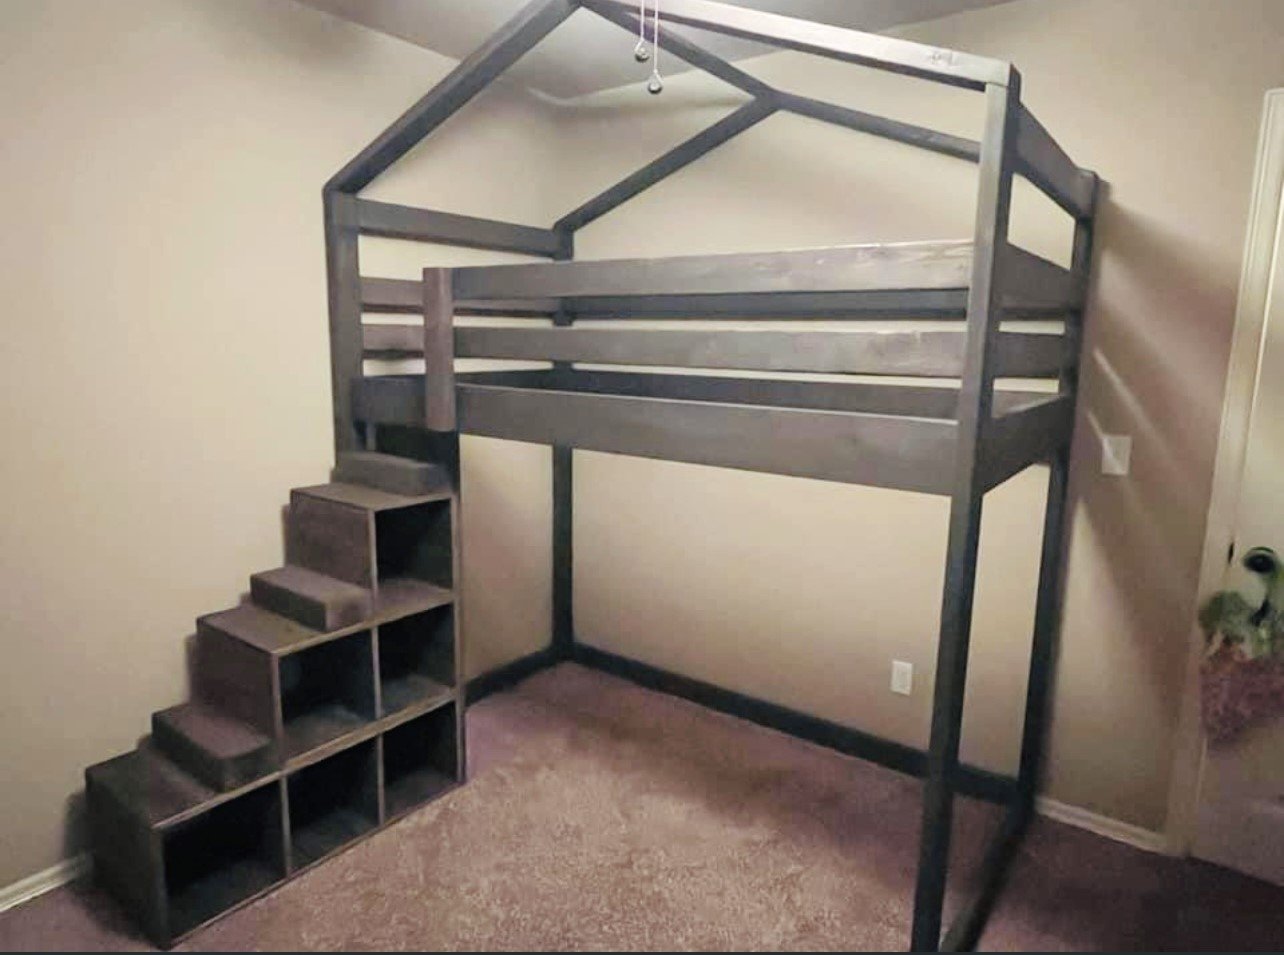
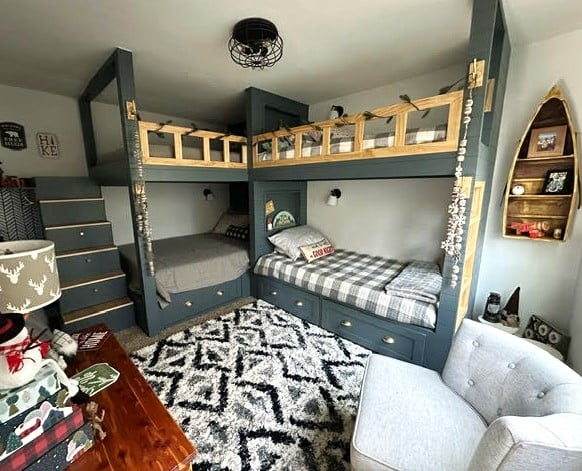
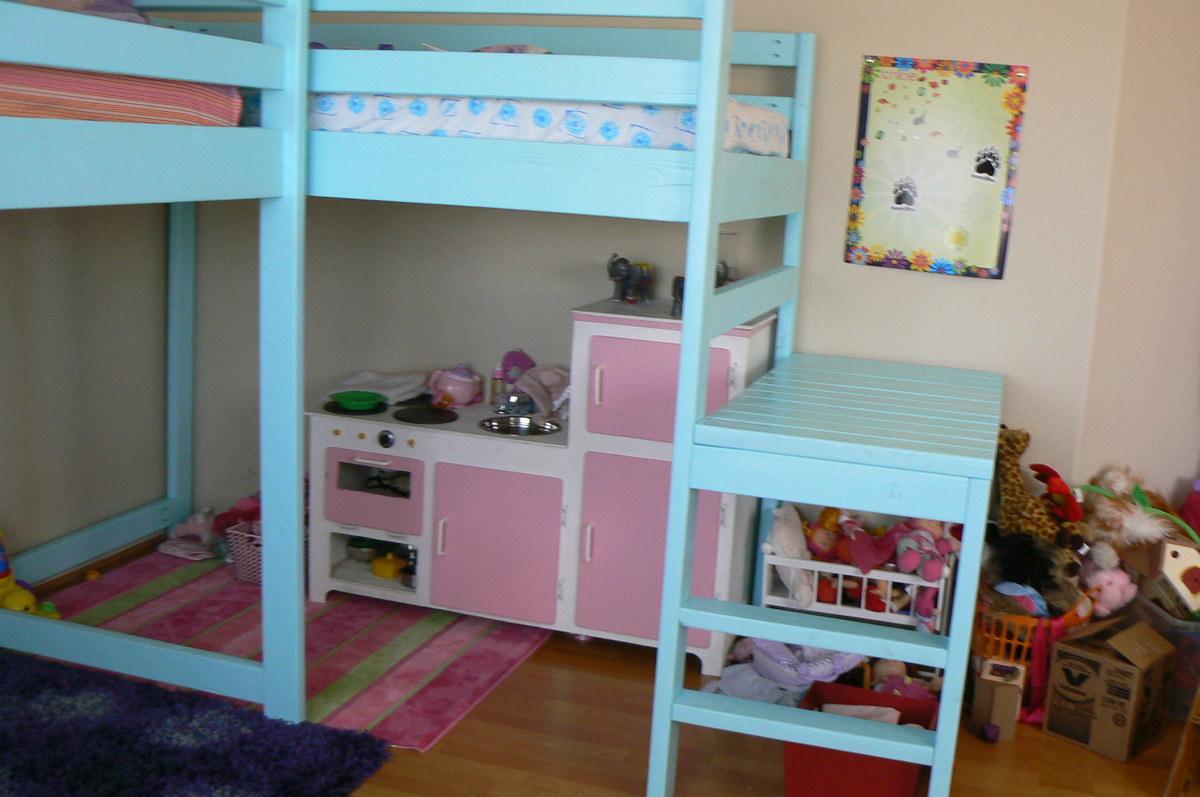
Modified the junior loft plan to add a house design element and storage stairs, by Amy Mott
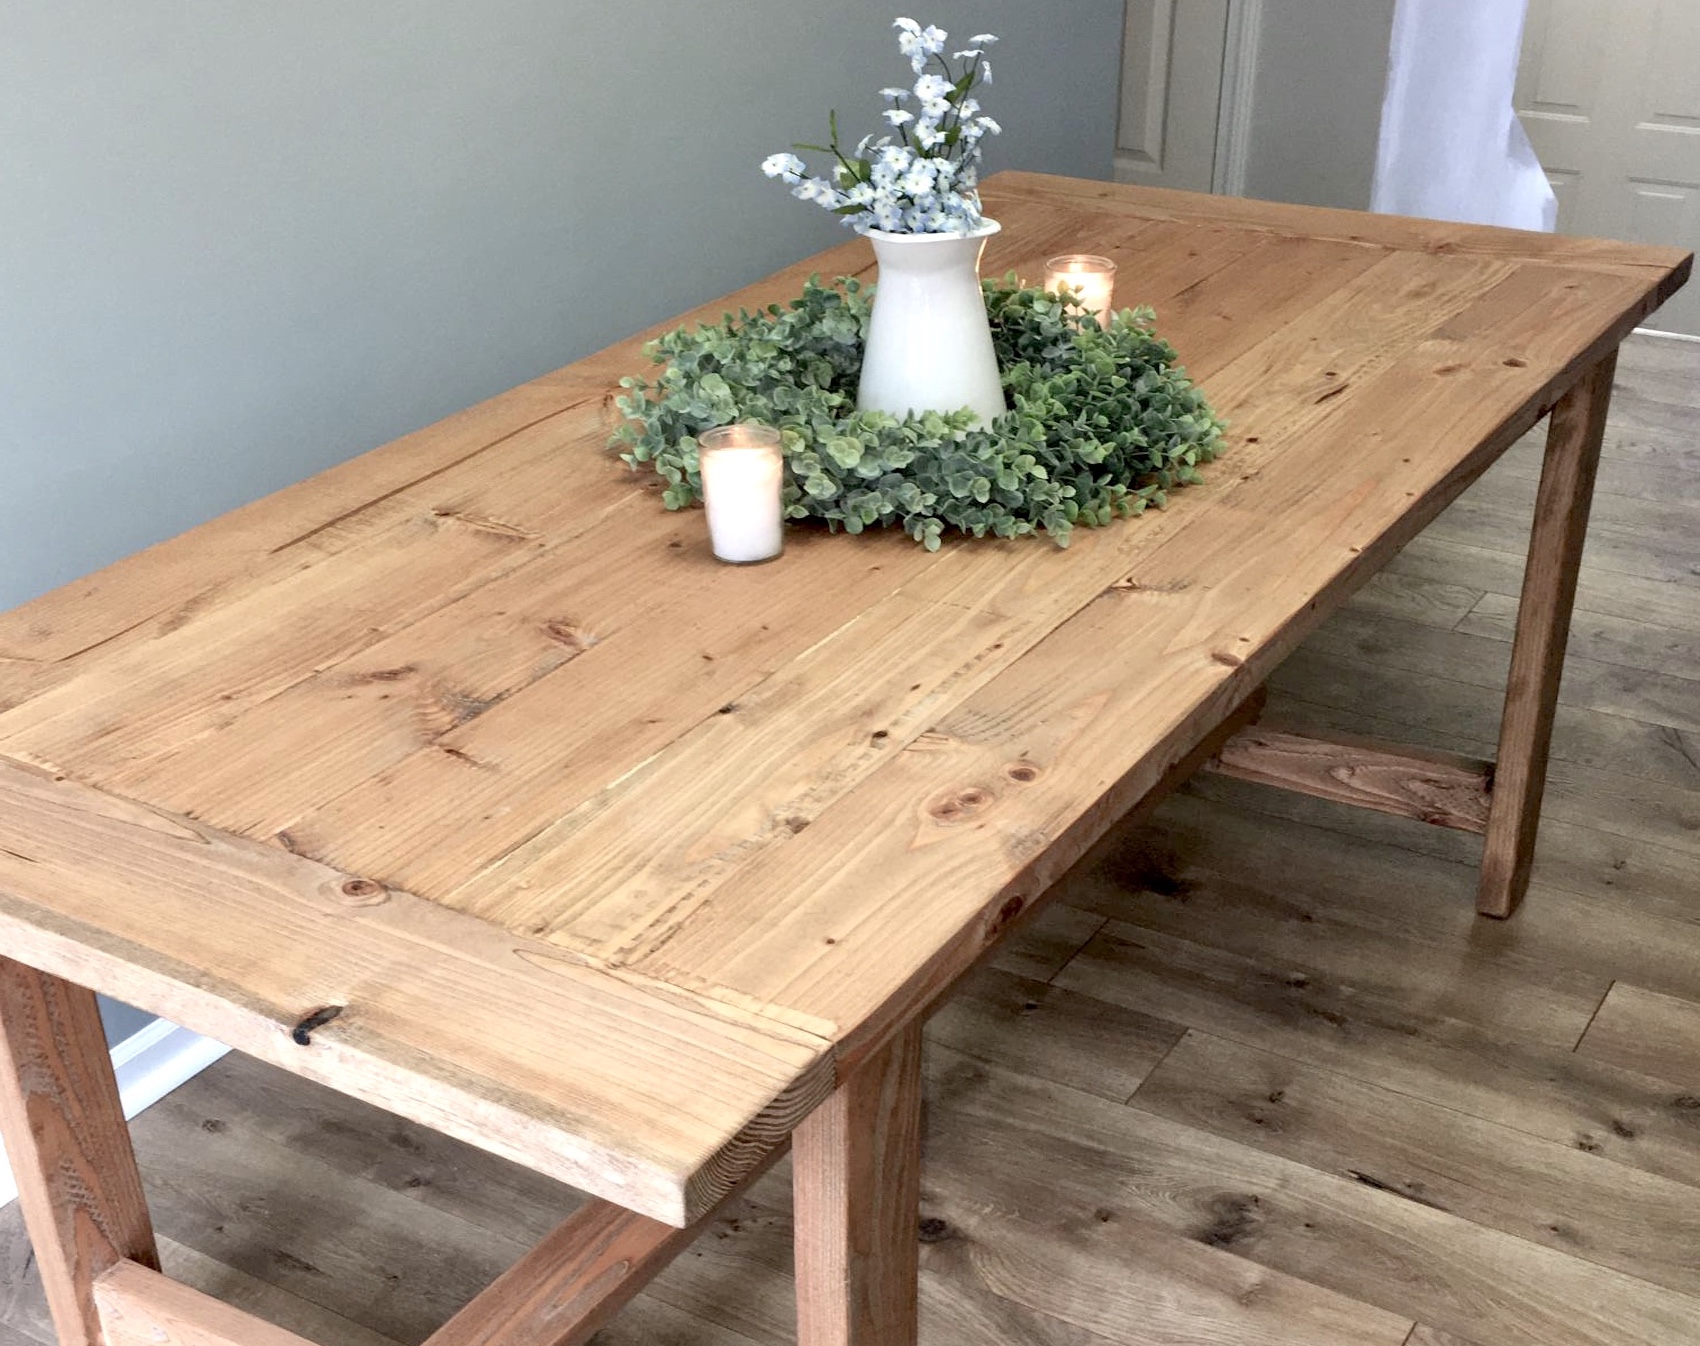
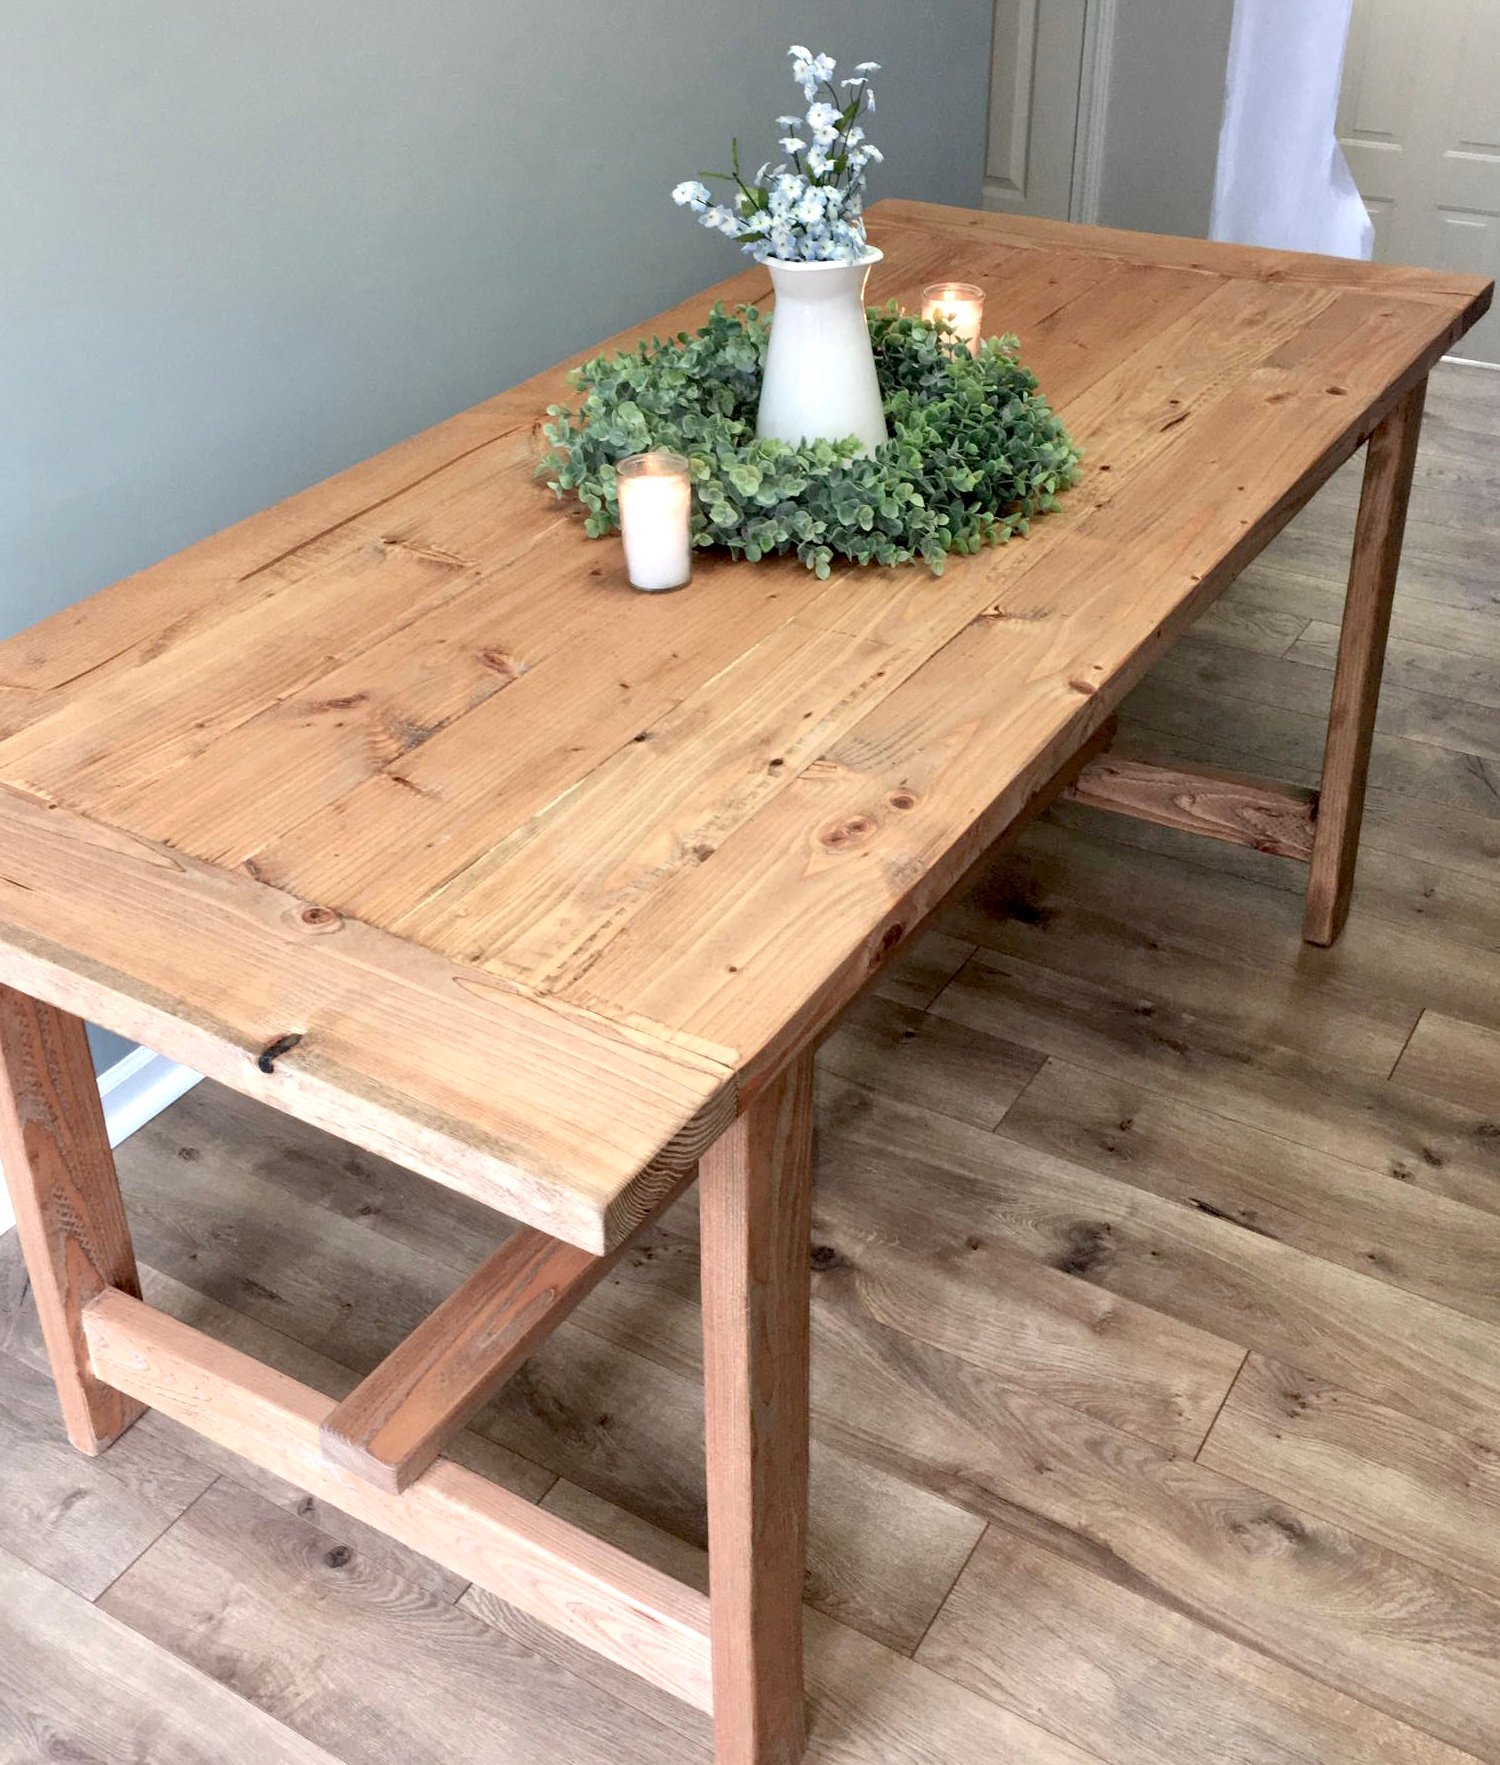
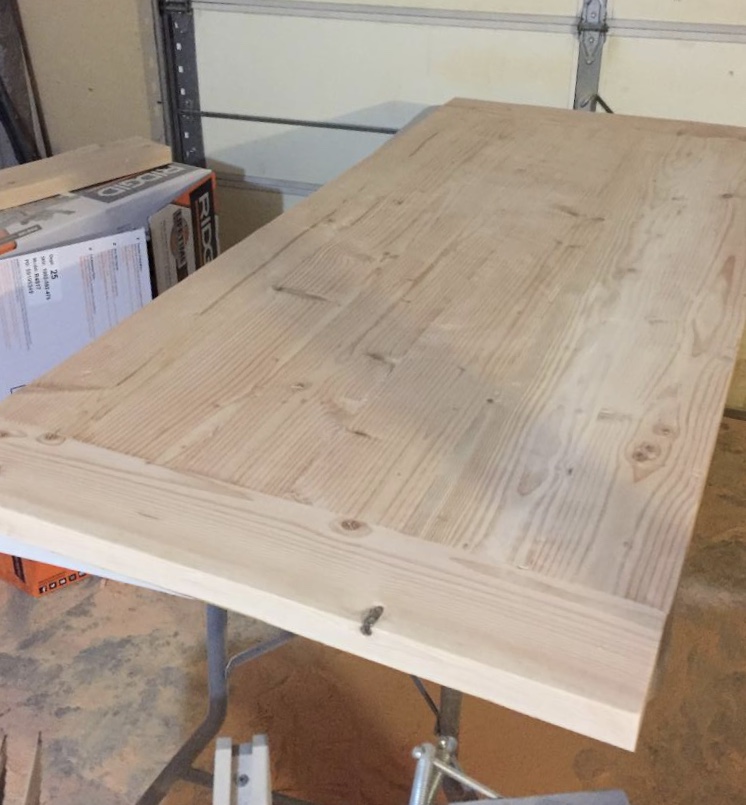
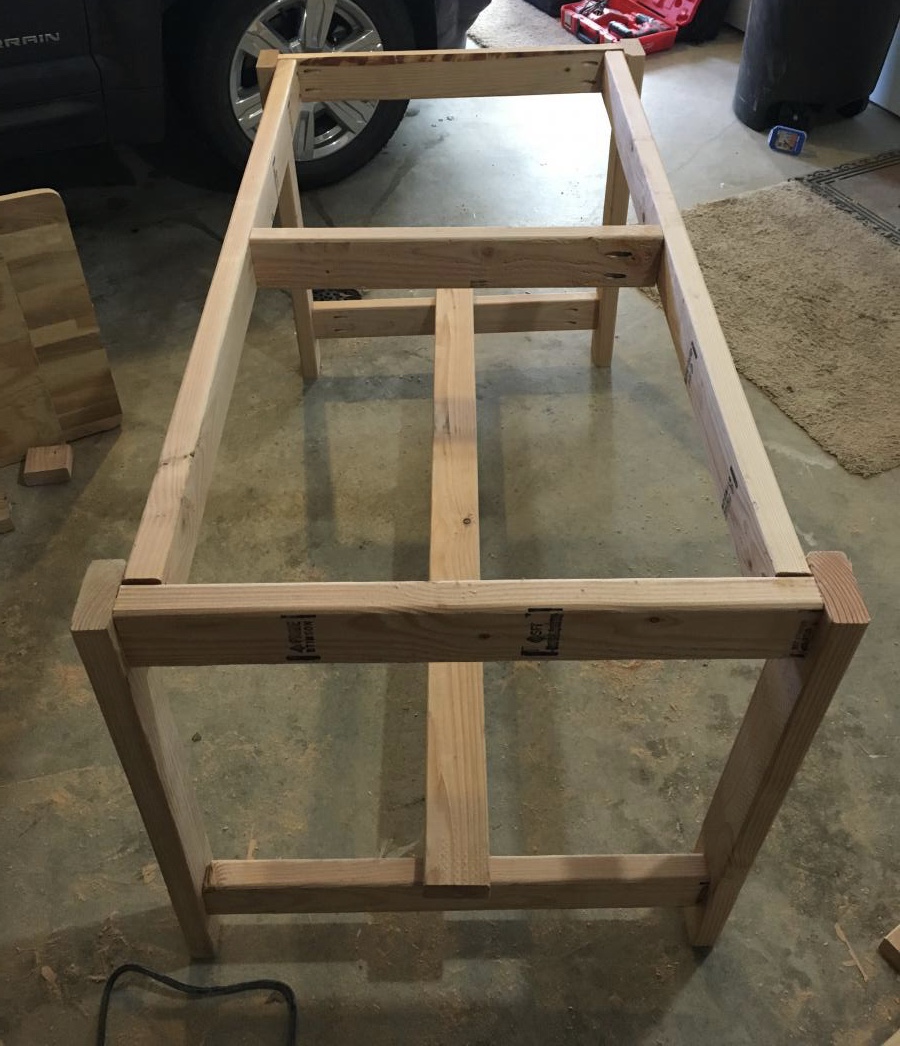
This project was actually my first build (besides a small blanket ladder). I used the Ana White plans every step of the way! Since this build I have created coffee tables, side tables, console tables, head boards and a bed frame. This table gave me the confidence to try an original project of my own. Although this table was fairly simple, it was the project that started it all. That is why I chose for this piece to be my brag post.

This build was also a lot of fun! I made an extra brace to hold the wait of two sitting on the bench. Thanks again Ana for your plans!
David Marks
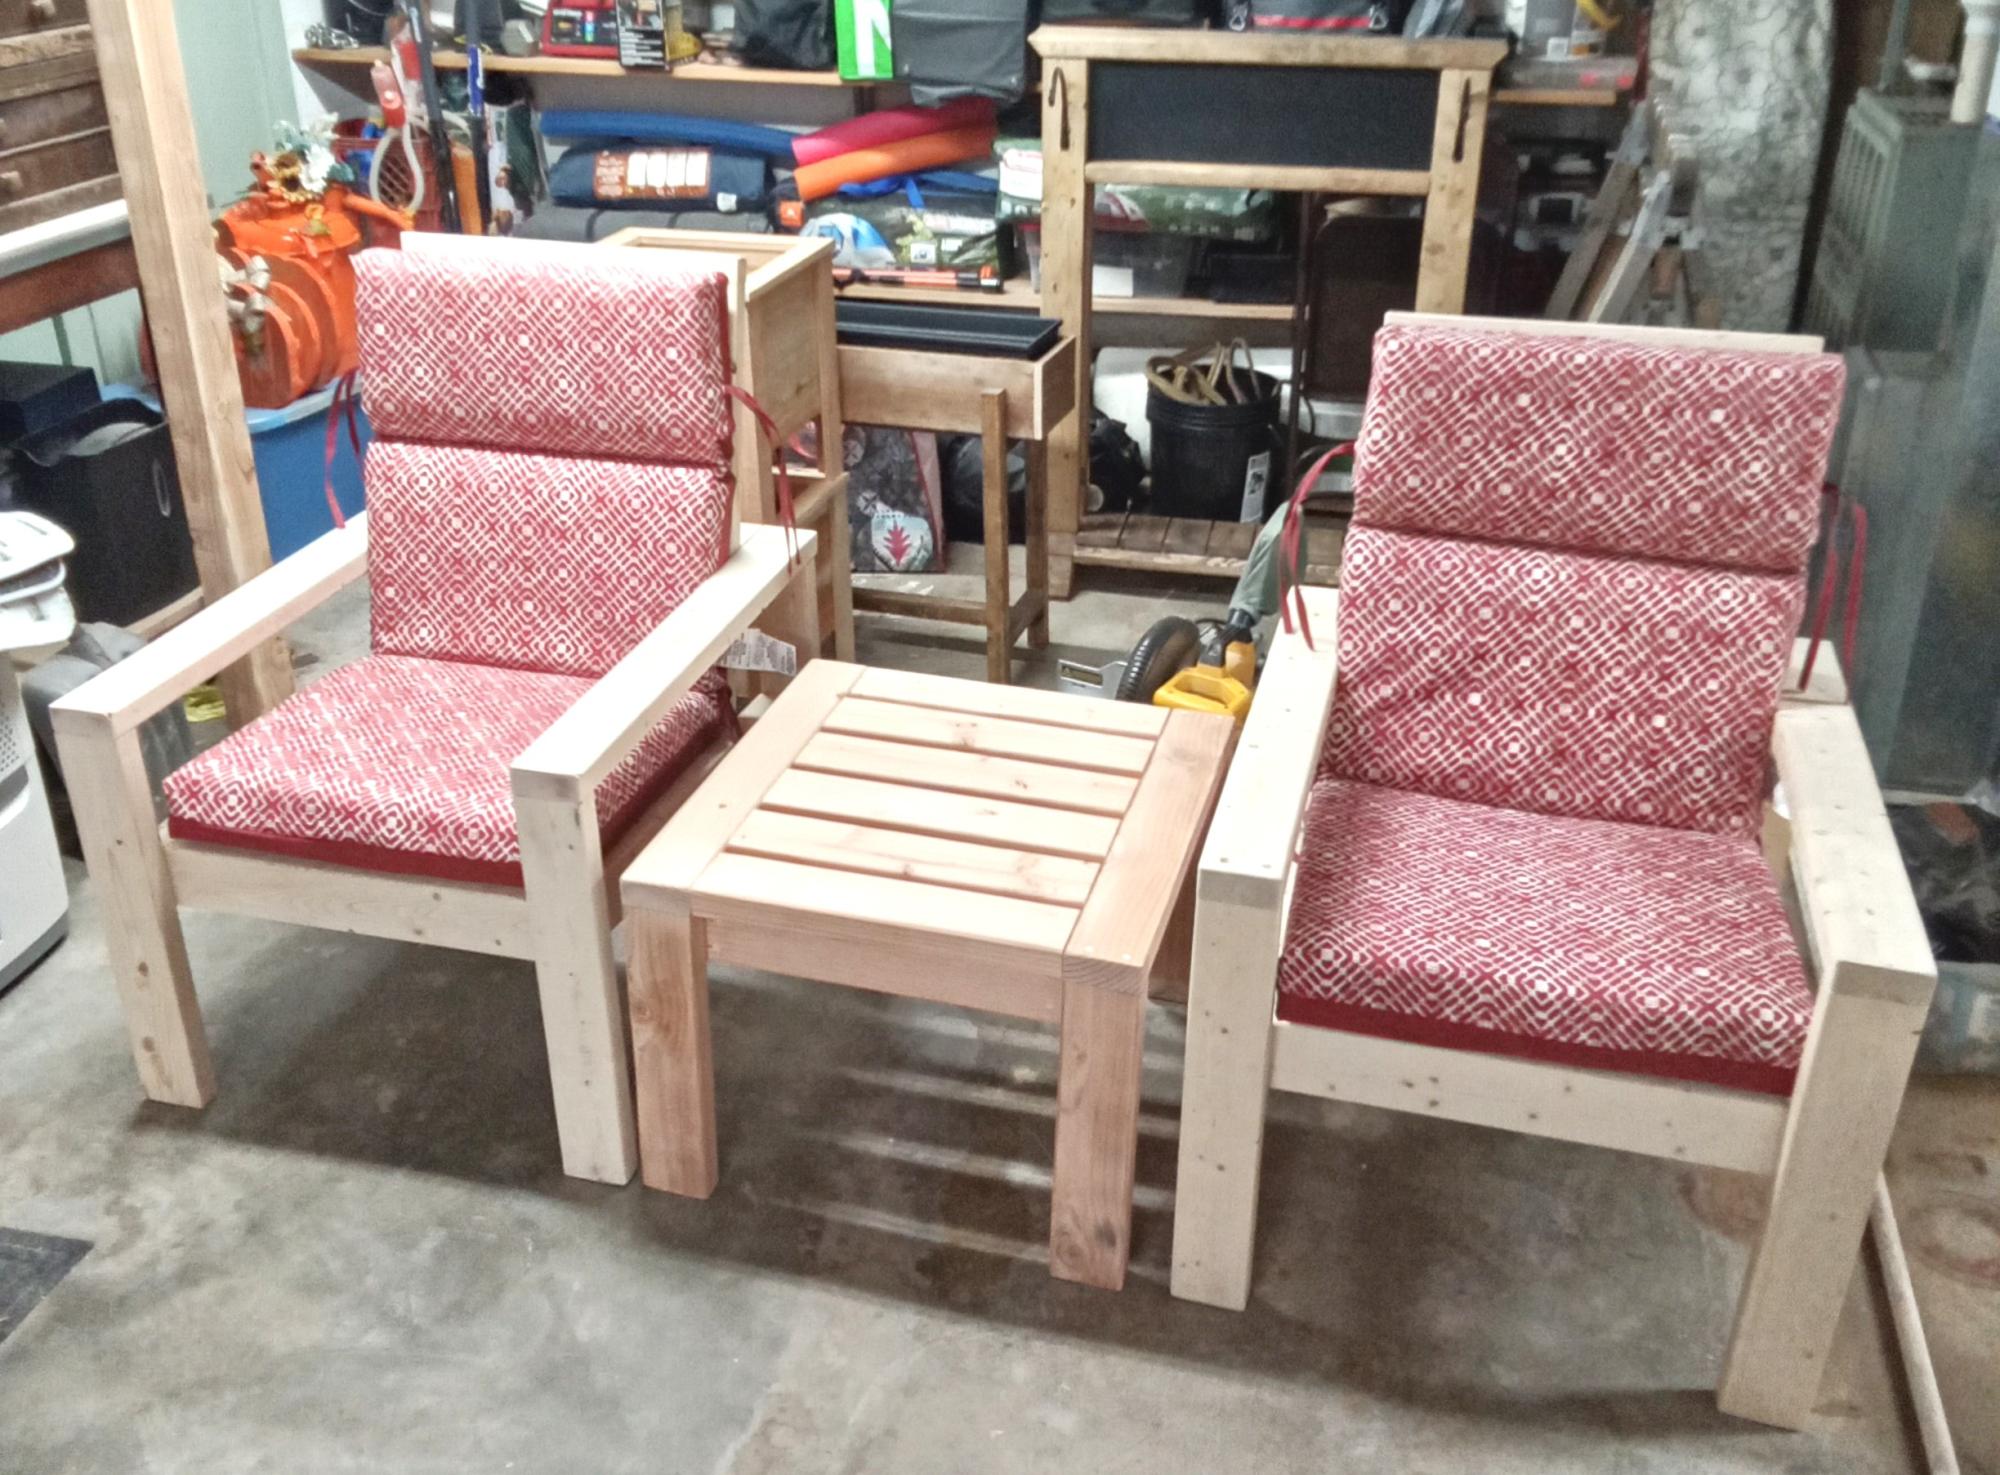
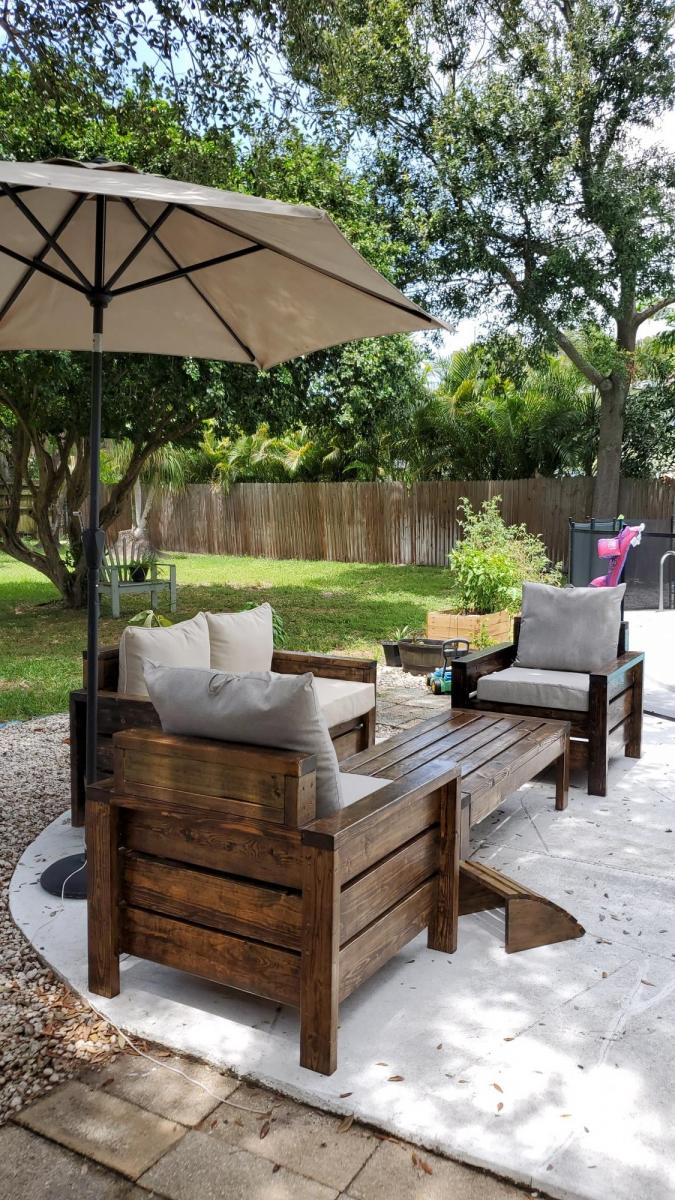
Done the 2x4 chair and table, I think it turned out well. Bought the cushions at Lowes.
Ray and Sandy

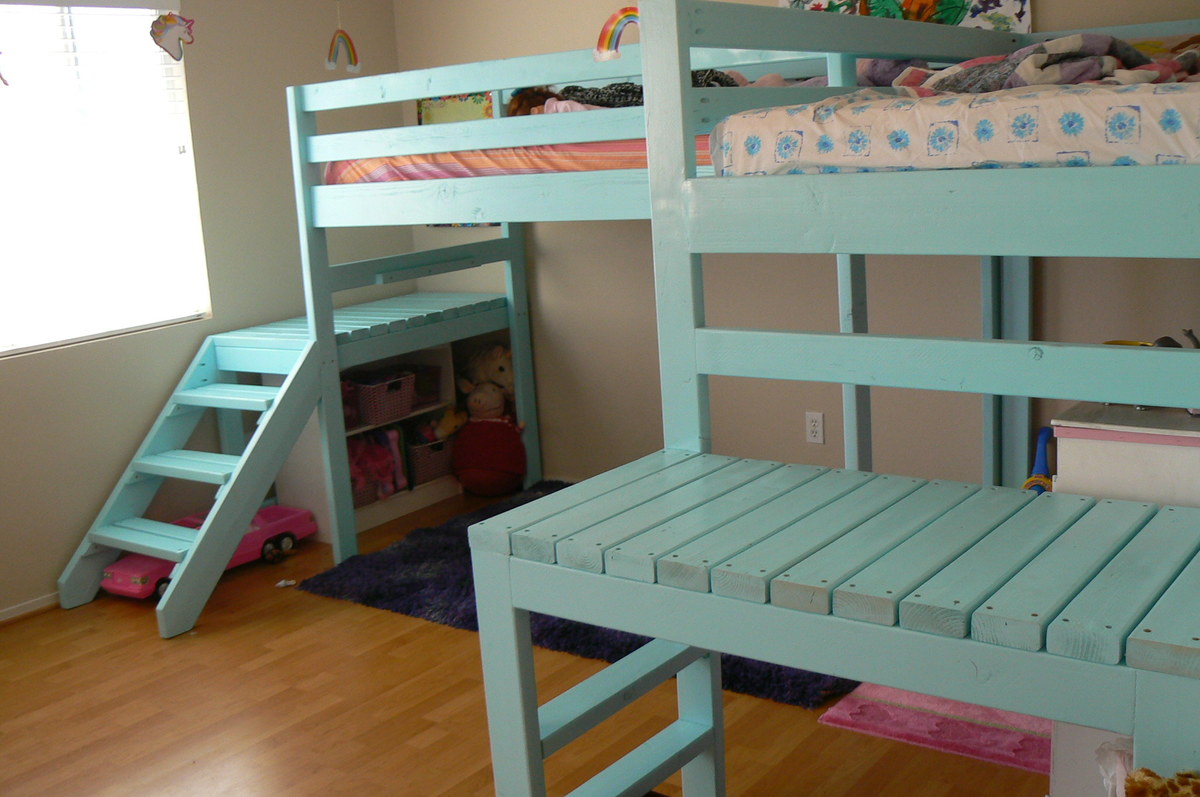
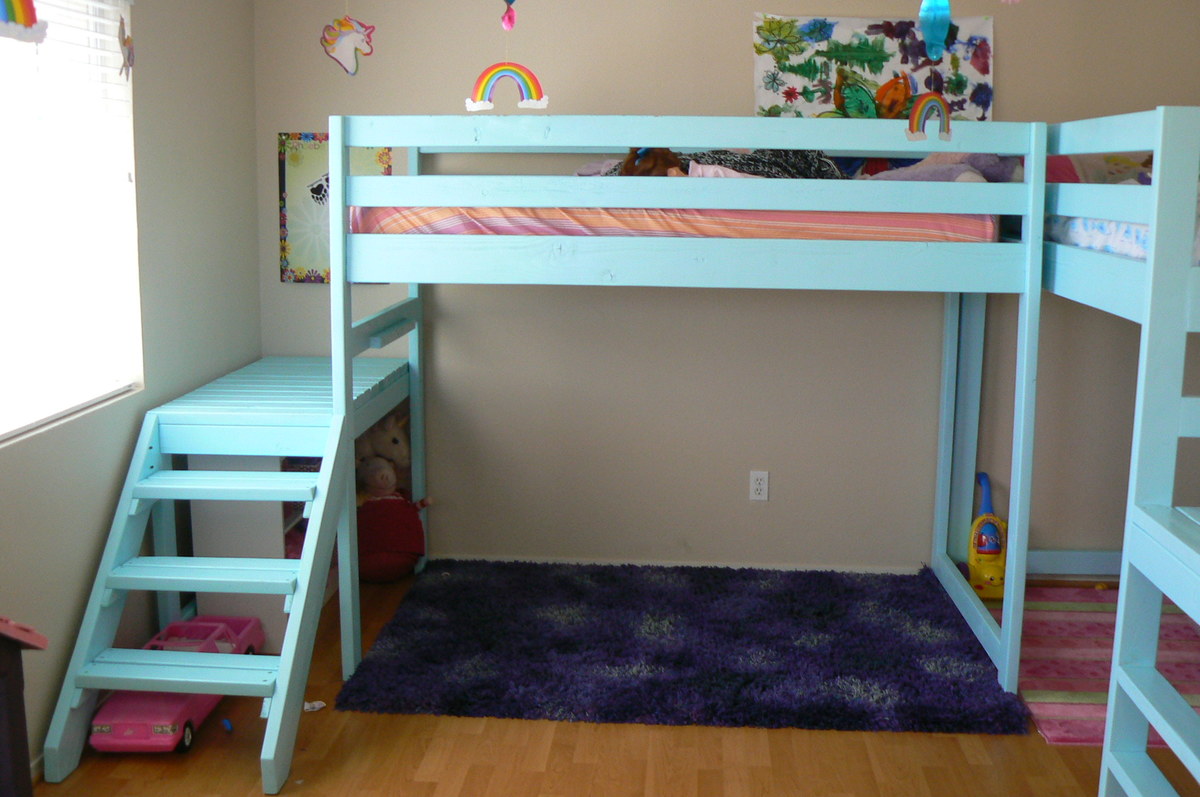
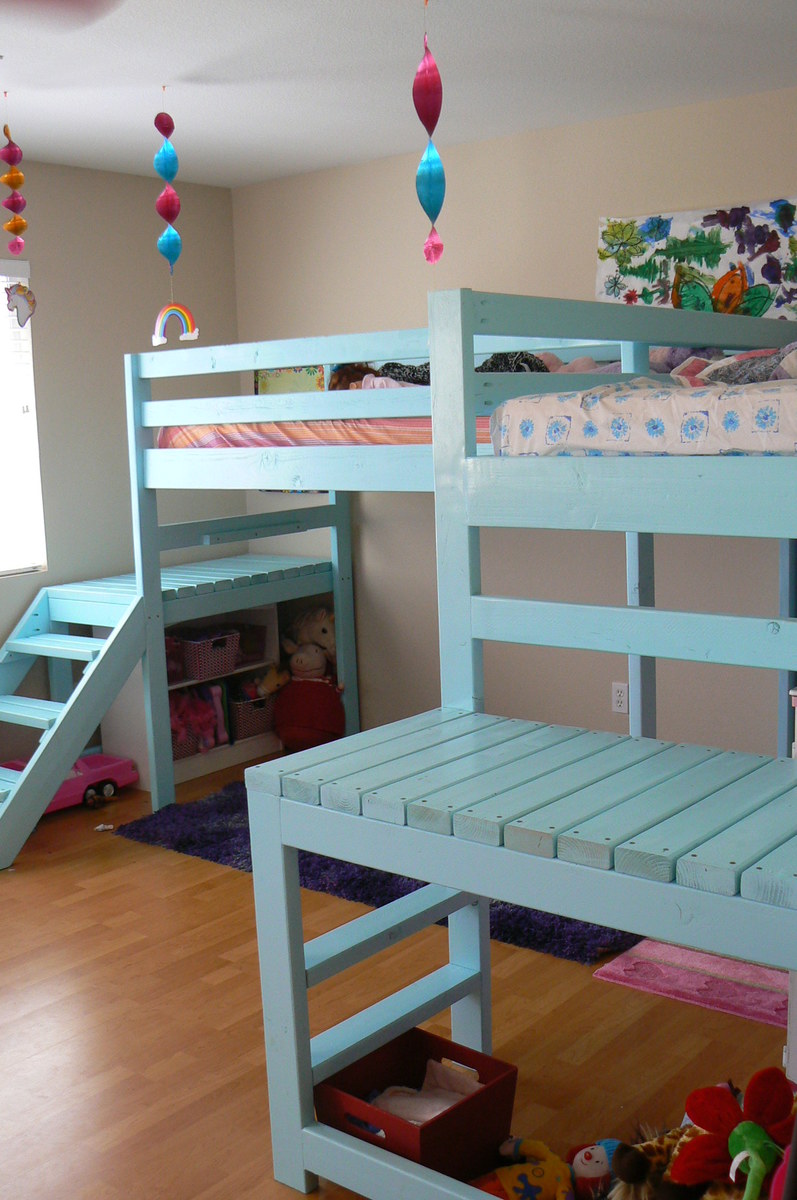
Ana read my mind! I was telling my husband that I wanted "L" shaped loft beds for our girls abouttwo weeks before she posted these plans! As soon as I saw them we went and got our lumber. So excited to have these done and the girls love them!

Thu, 09/13/2012 - 13:05
I saw another post where they did horizontal 2x4s instead of stairs. I see that you did one of each. Could you tell me what your thoughts are on how the kids like them....if the 2x4 steps are easy to get up and down on....
We are adopting and we're not sure what age children we will get....so, I want to make sure they are easy to navigate. Any thoughts???
Thank you!

Tue, 09/03/2013 - 09:30
we id the stairs for our 3 year old and the ladder for our 5 year old. She has no problem getting up and downthem but our 3 year old doesn't like to come down the ladder ones. The stairs are really nice and make the bed easily accesable even for me. =)
Wed, 02/04/2015 - 18:48
What are the overall dimensions with the two landing areas and stairs? I really like this idea, but the bedroom is not super big. Thanks!
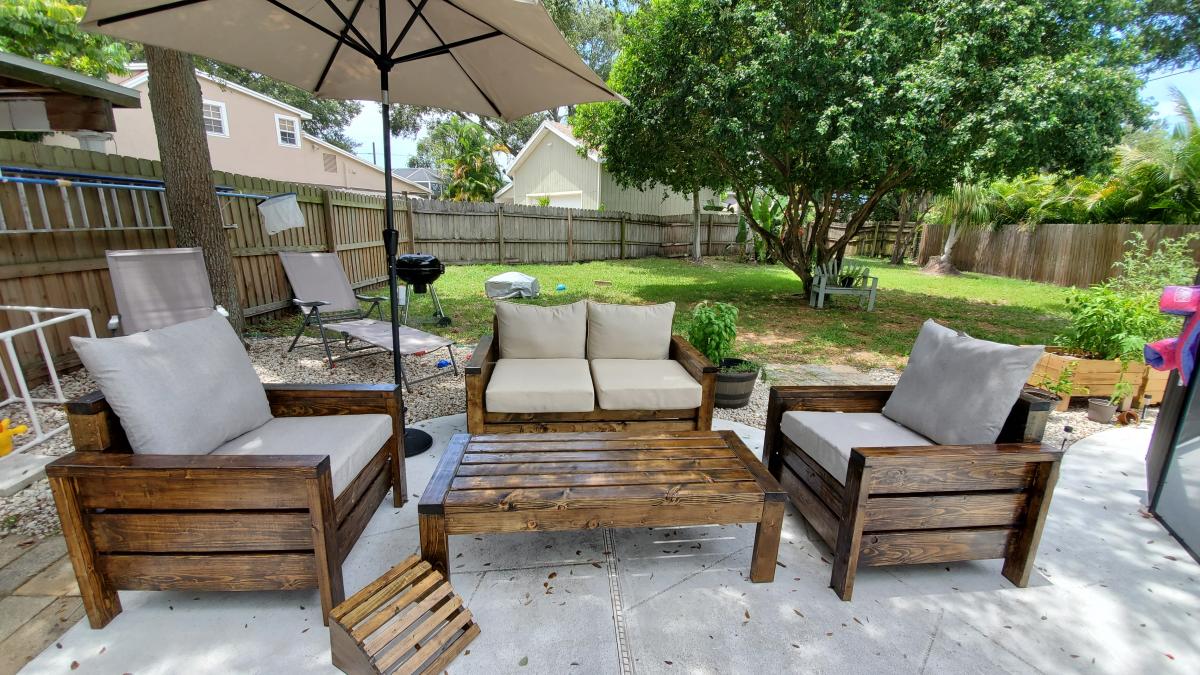
Well, I started with one chair and finished with a full set. Not bad for a first timer. Definitely room to improve. Little tip if you're going to make this amazing set... raise the backs as they are too low with thicker cushions. I built a casing to go on top after the fact. Pretty happy with how it all turned out. Thanks Ana for the plans... now onto the next project!


Fri, 04/28/2023 - 08:41
Very nice workmanship. I'm curious as to how comfortable they are with the straight 90* backs? Let me know please at [email protected]. Again nice workmanship.
Fri, 04/28/2023 - 08:41
Very nice workmanship. I'm curious as to how comfortable they are with the straight 90* backs? Let me know please at [email protected]. Again nice workmanship.

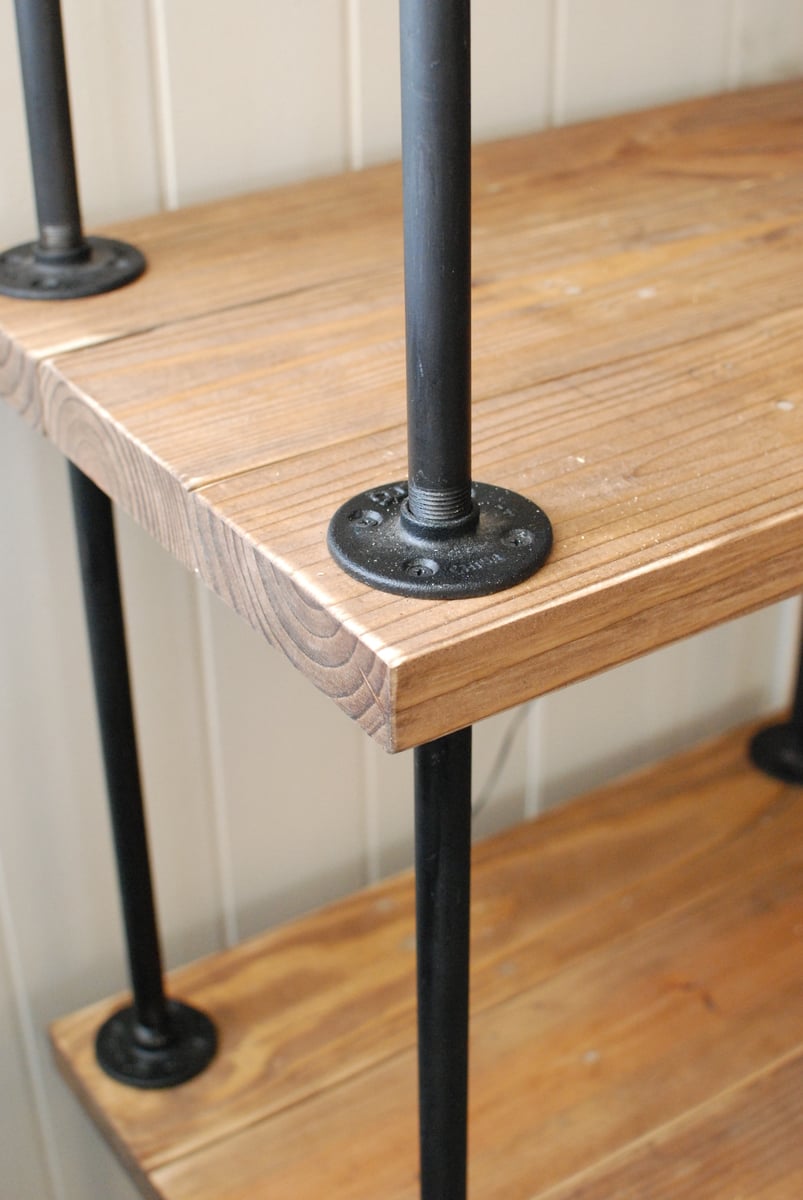
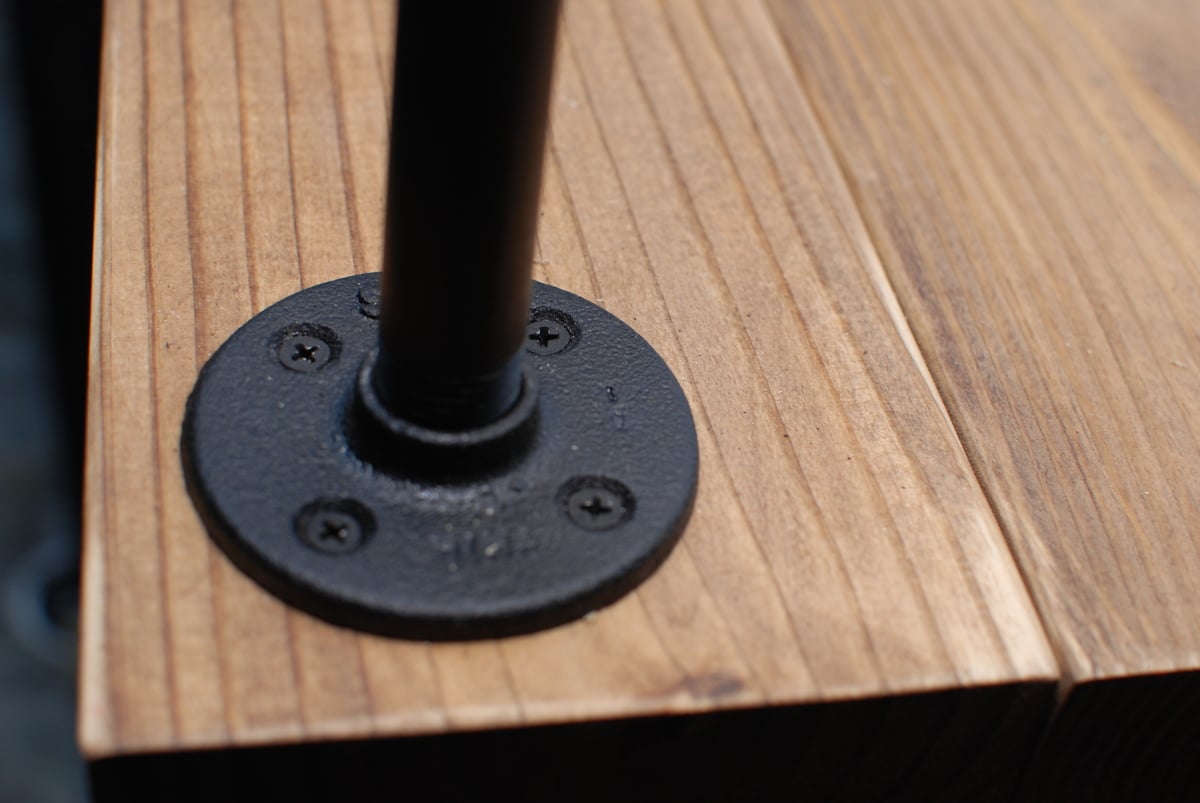
1/2 ' x 18" black pipe was used along with 1/2 ' flanges. The wood was re-purposed 2x6' pine lumber that had been used for pallets, that would have been thrown away. The boards were joined with a Kreg Jig, It will house my stereo components.
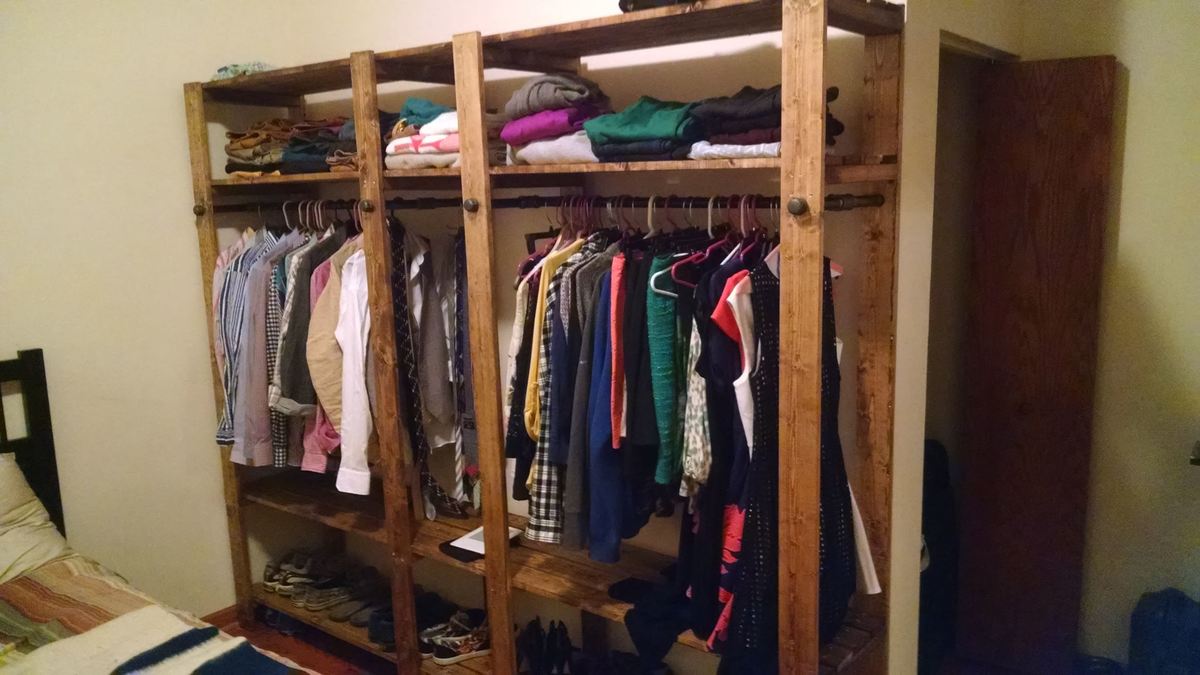
My girlfriend and I just moved into our new apartment. It has hardly any storage space at all and very little closet space. So we built our own! It was a long day's work, but the reward of a beautiful Chifforobe is well worth it.
This was my first carpentry project, and I couldn't be happier with the way it turned out.

Tue, 03/10/2015 - 18:42
This is sooo awesome! You look like a professional!
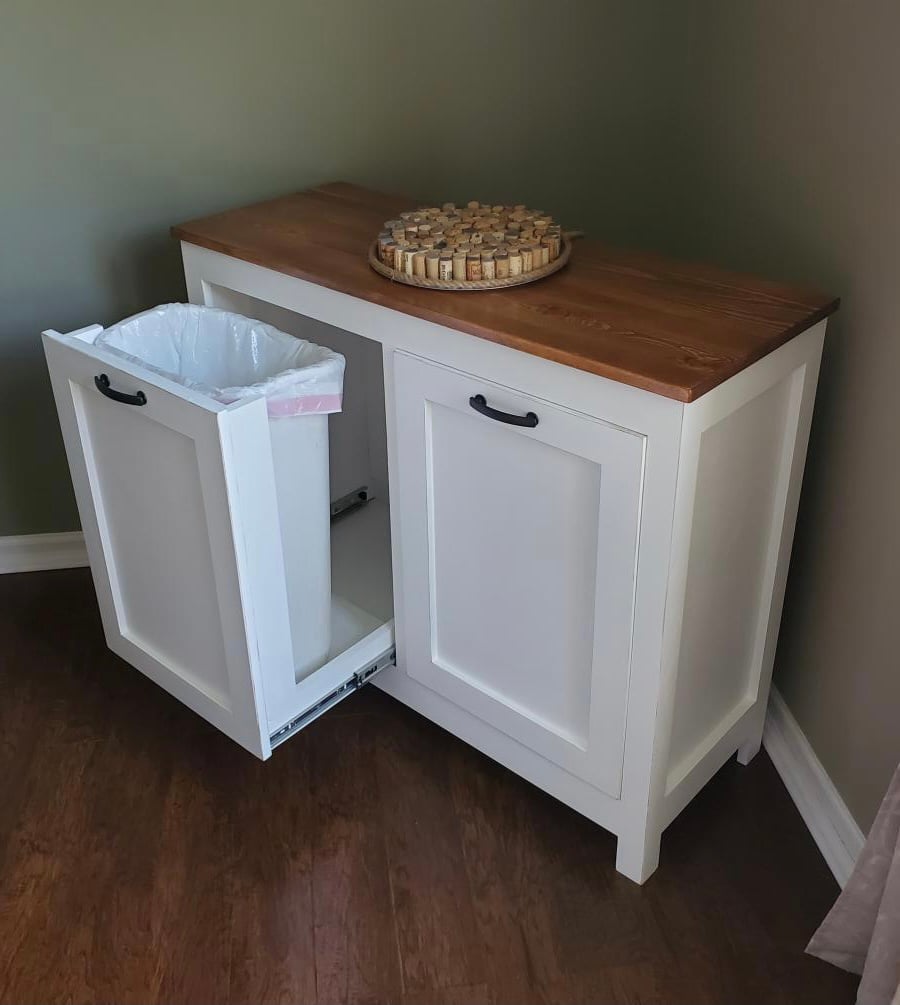
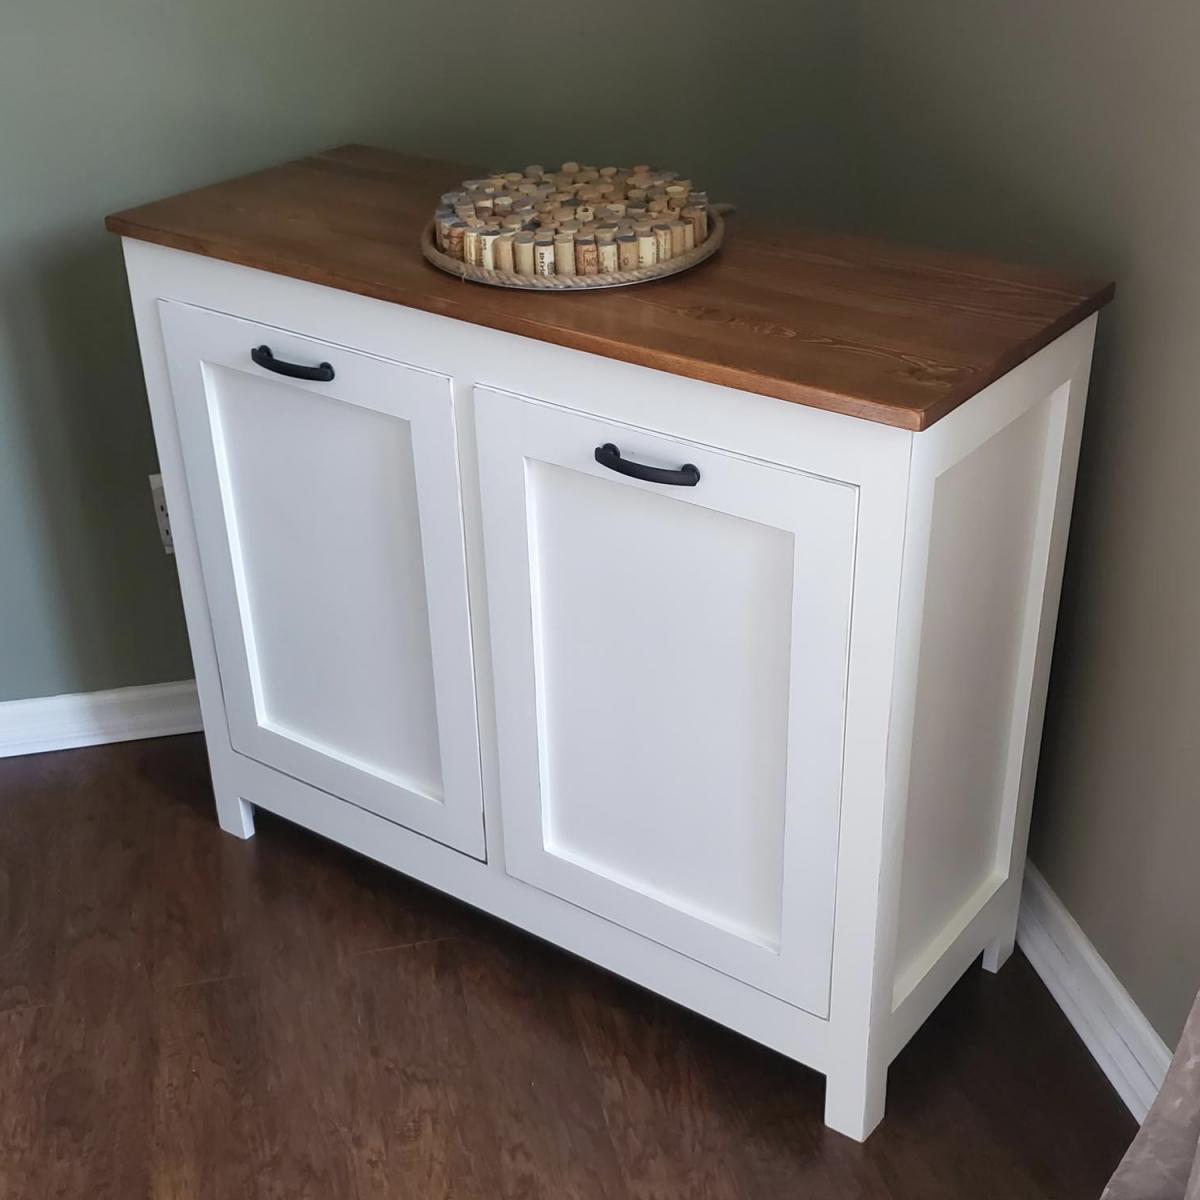
This was a build I was able to check off my Honey-do List. We use it as a Trash / Recycling Cabinet. Basic cabinet build with tray drawers for the trash cans.

Comments
Ana White Admin
Tue, 08/31/2021 - 09:13
Lovely!
Great set up, thank you for sharing!
jer727
Fri, 09/03/2021 - 08:36
Thank you so much Ana!…
Thank you so much Ana! Appreciate you!