Community Brag Posts

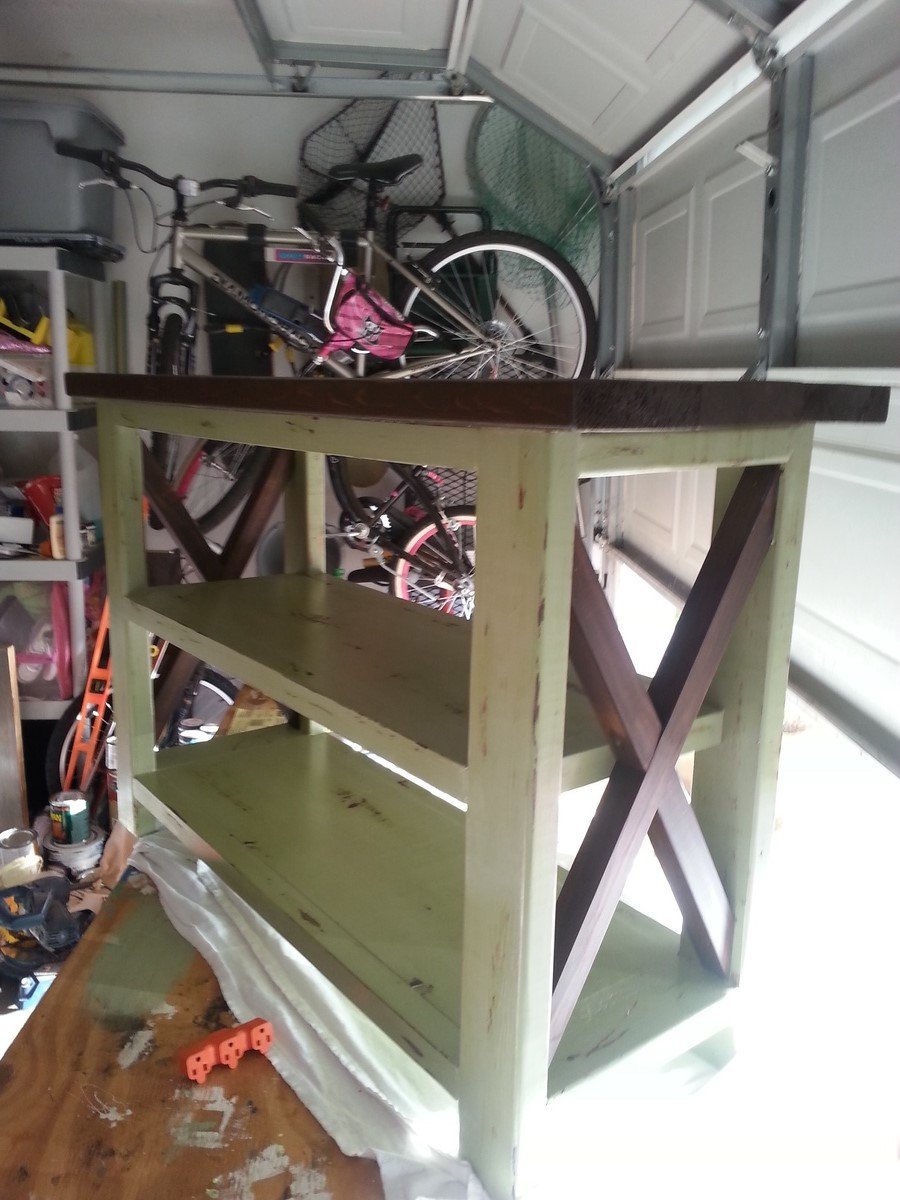
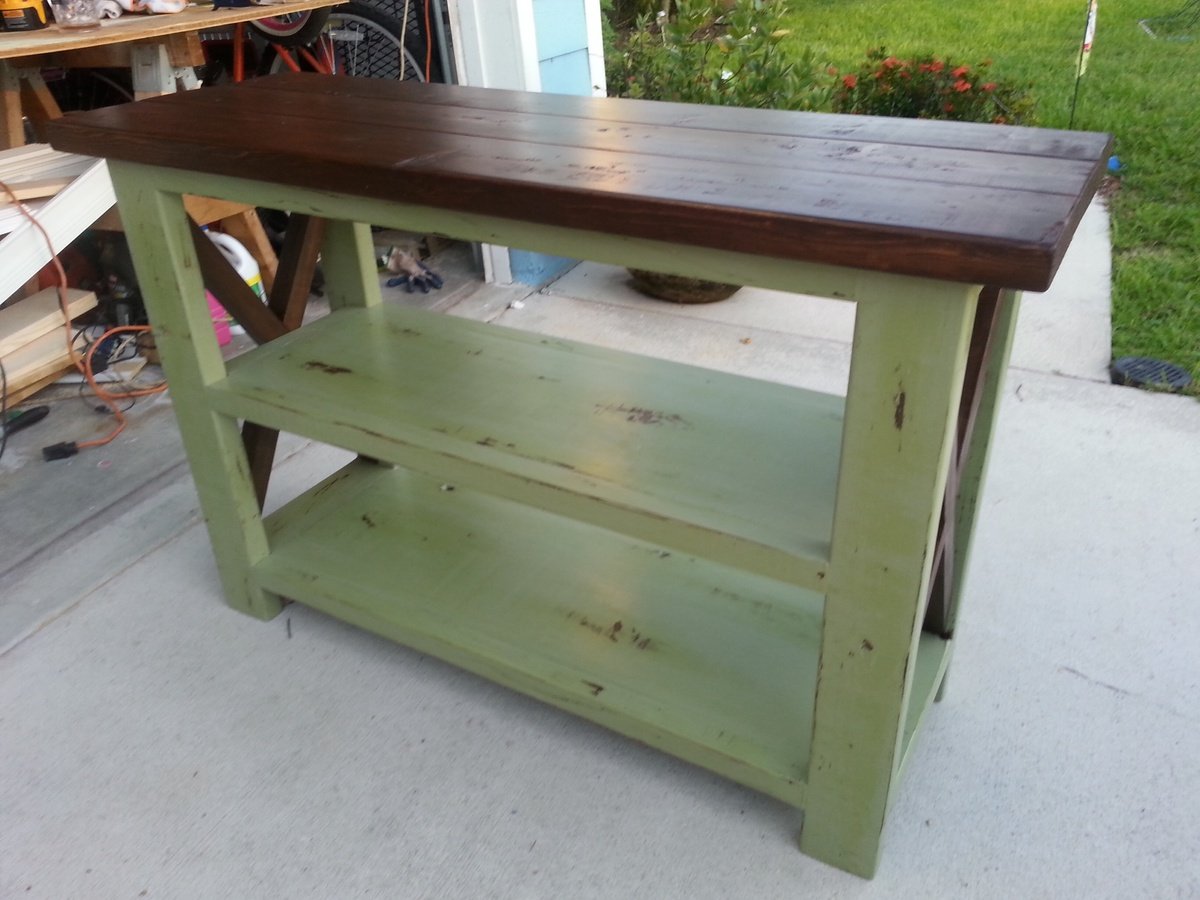
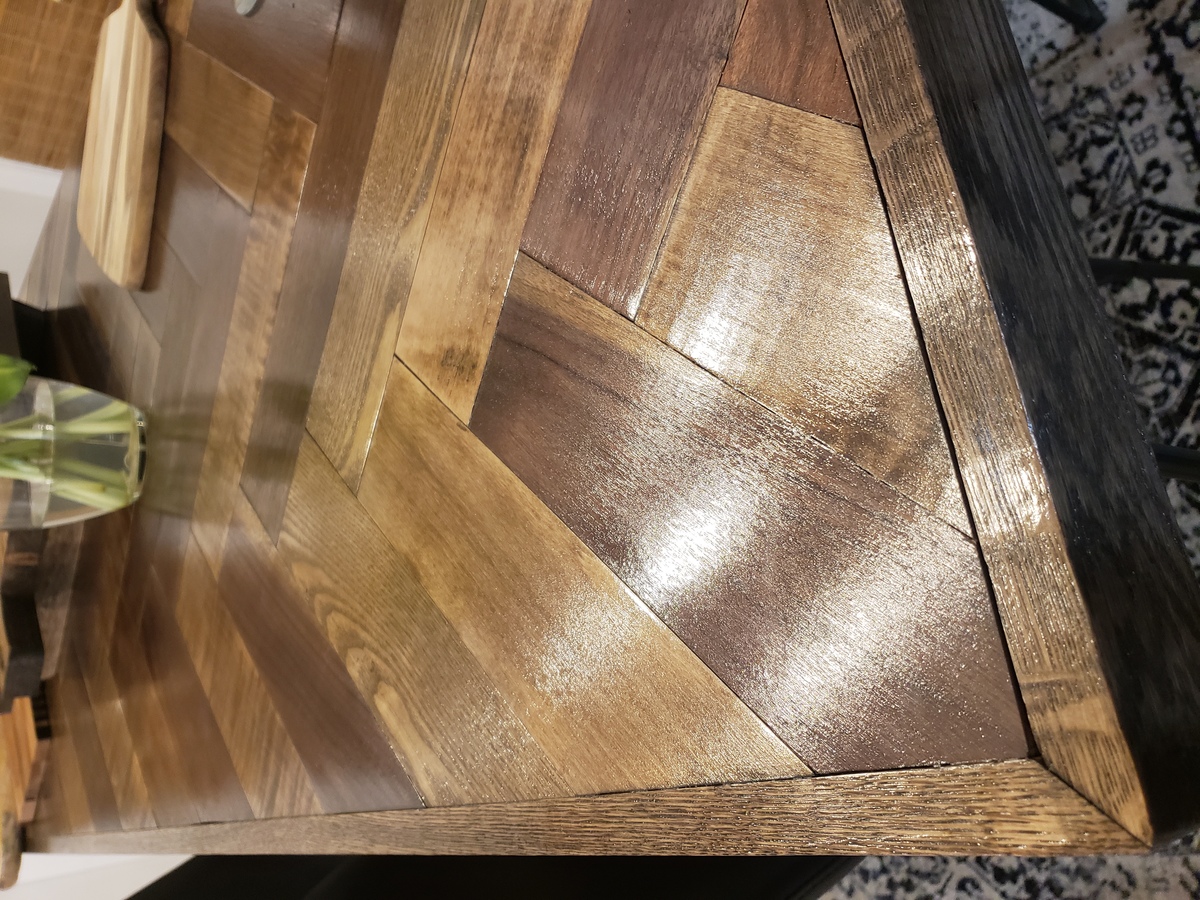
My New Farm House Table

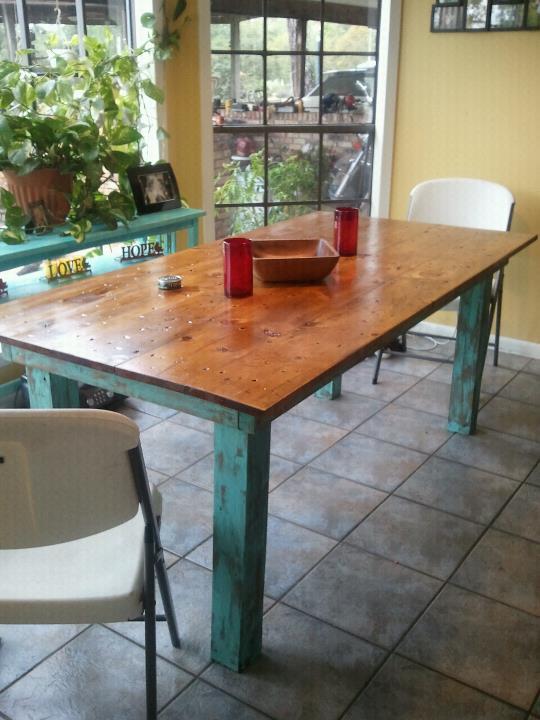
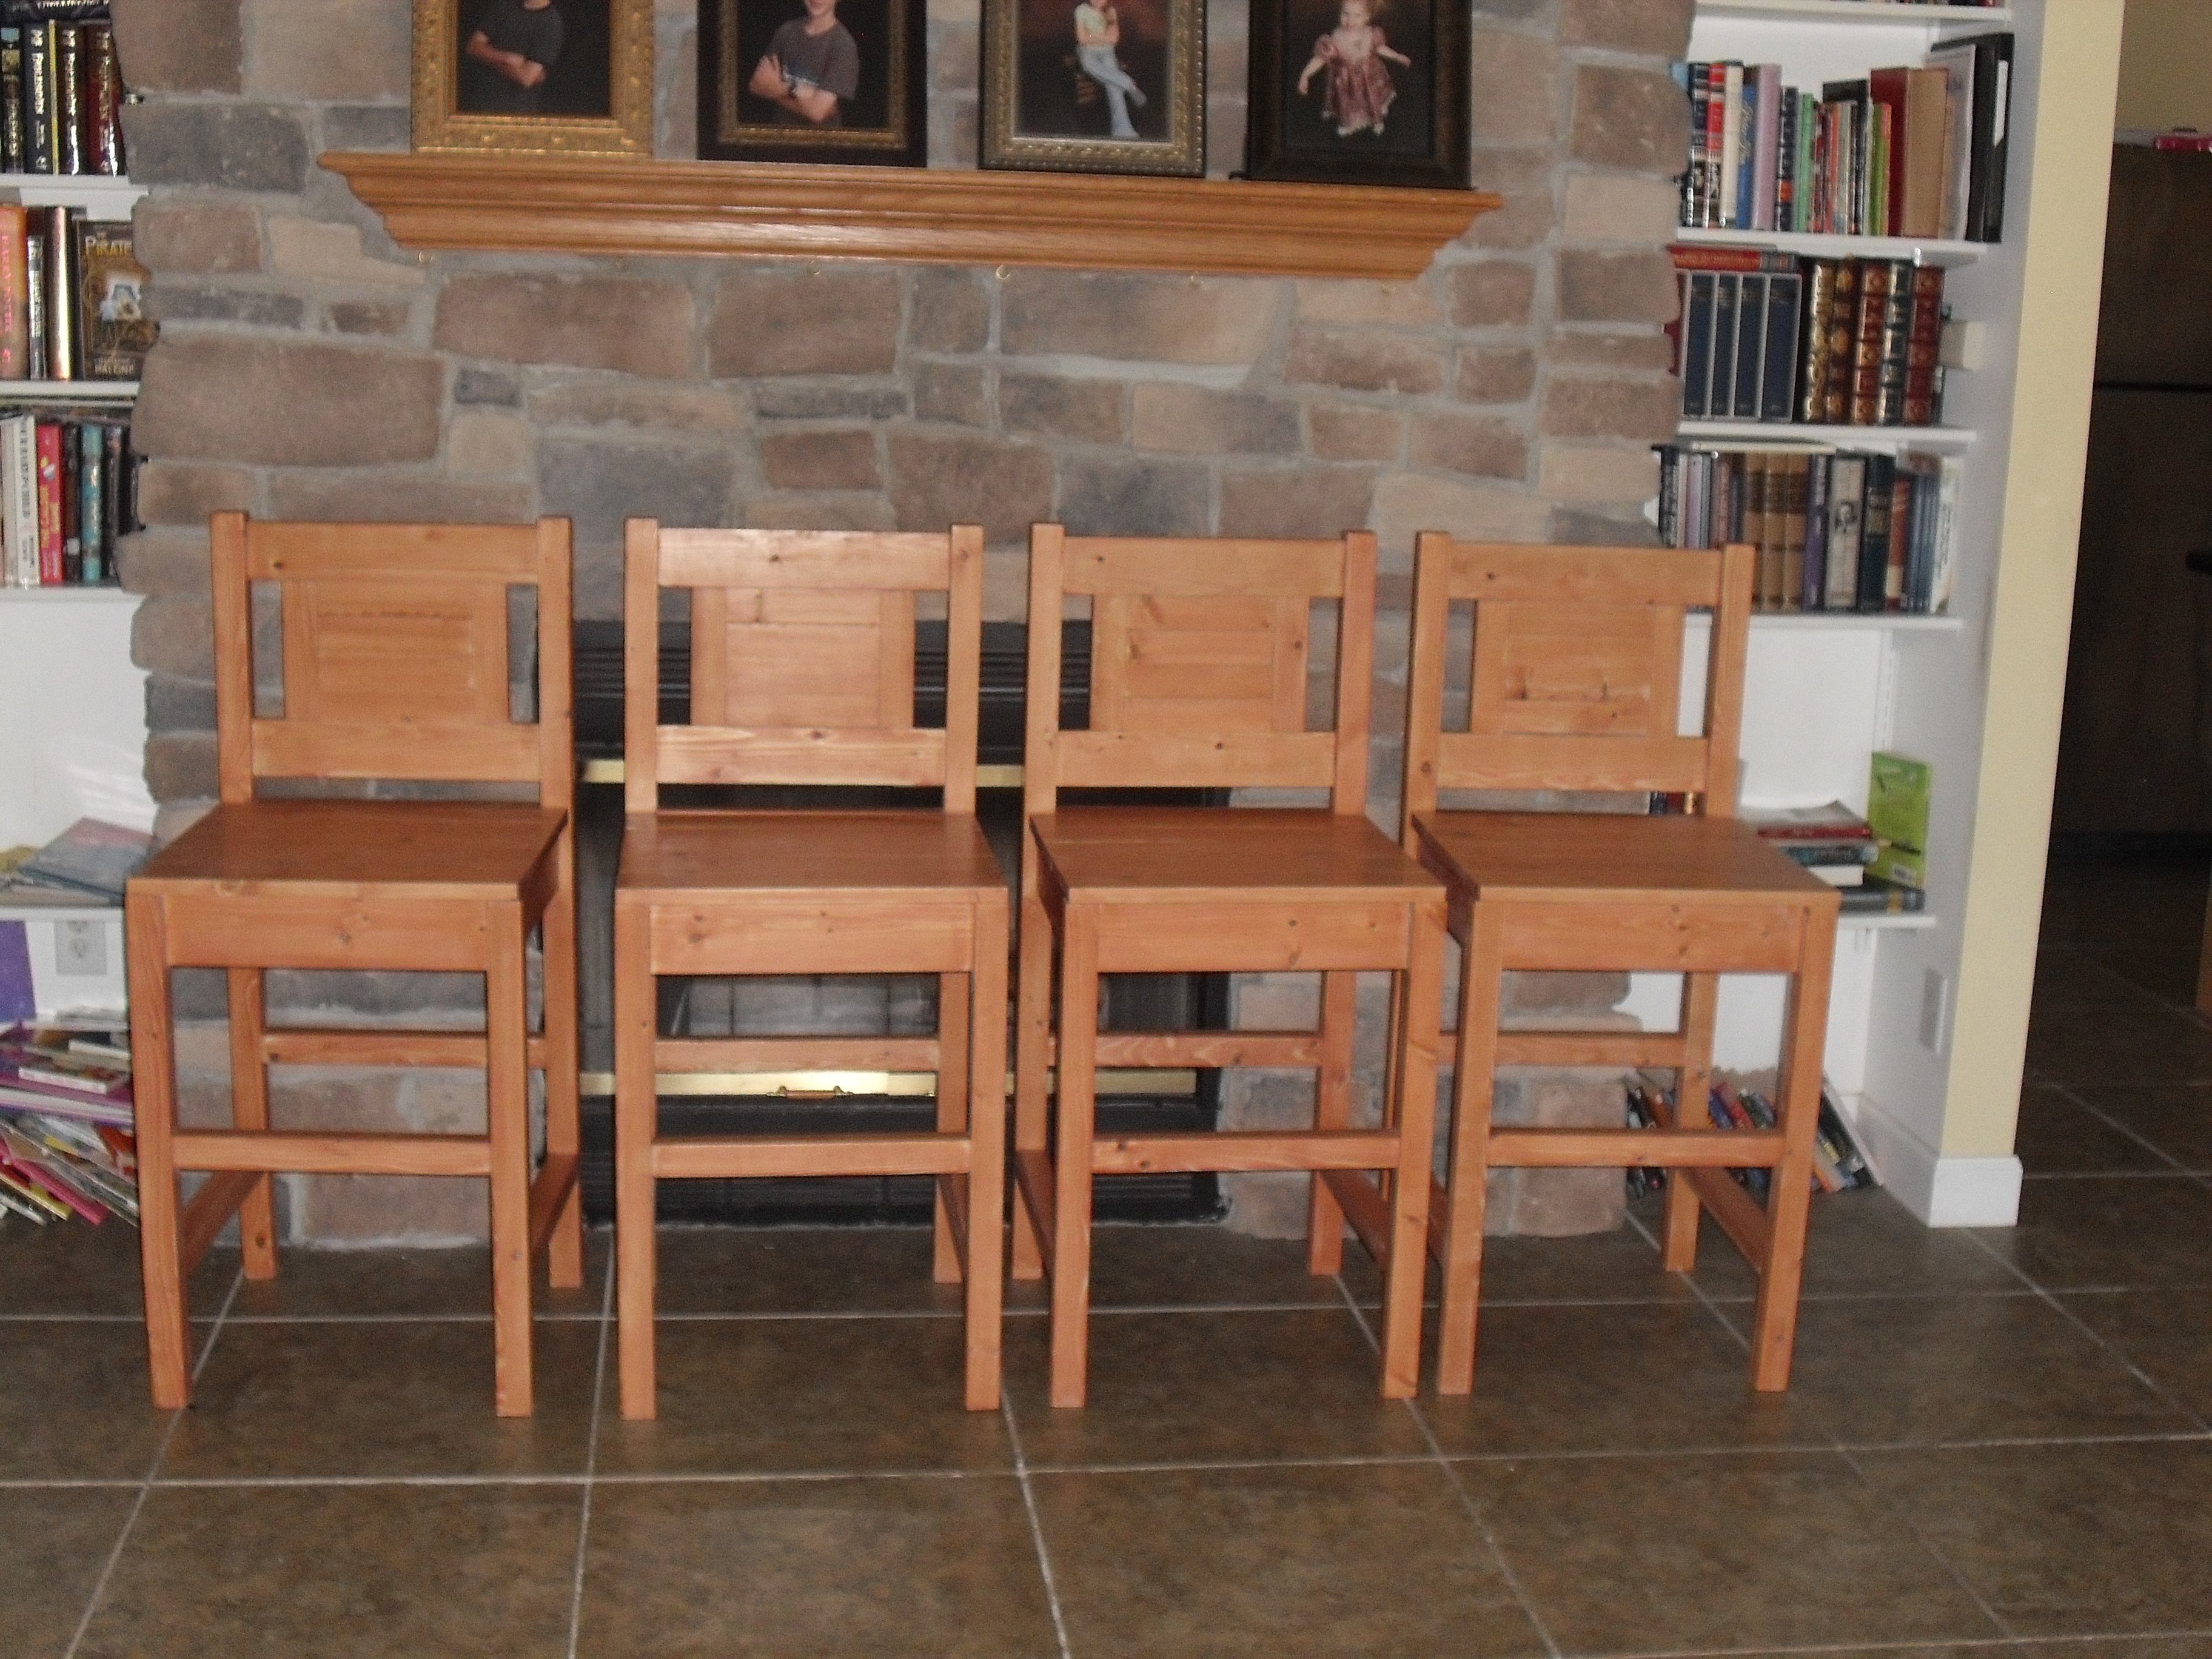
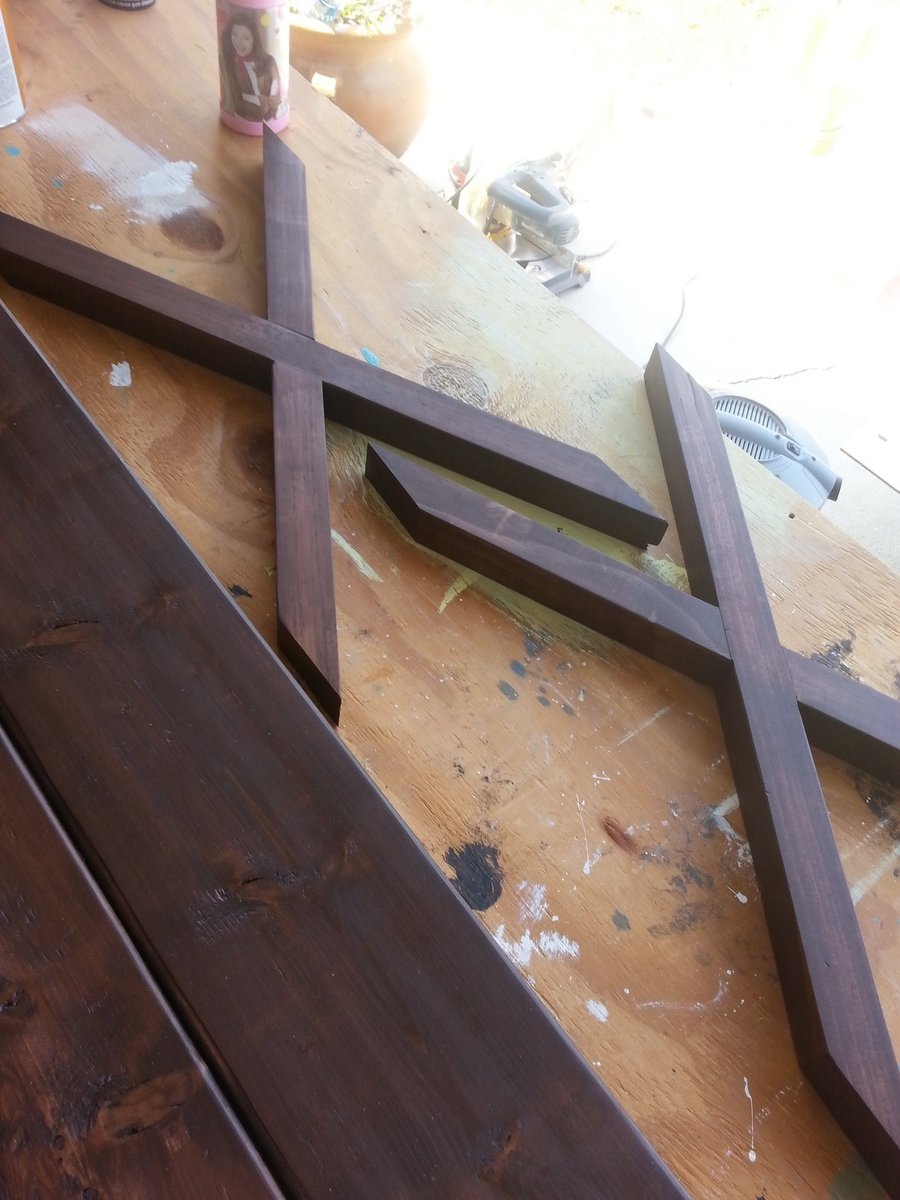
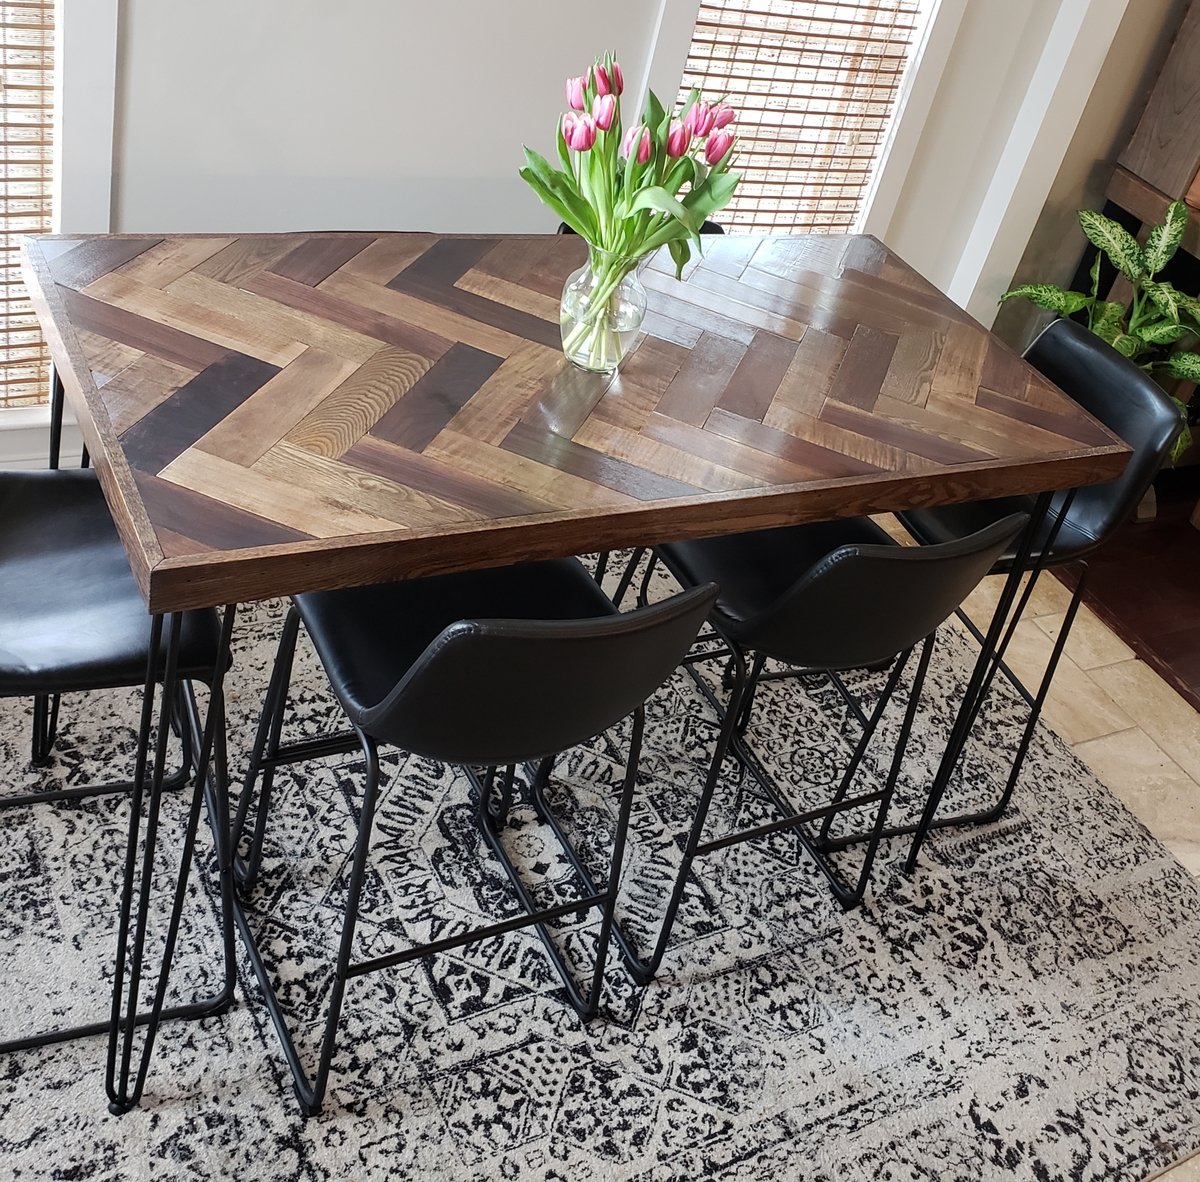
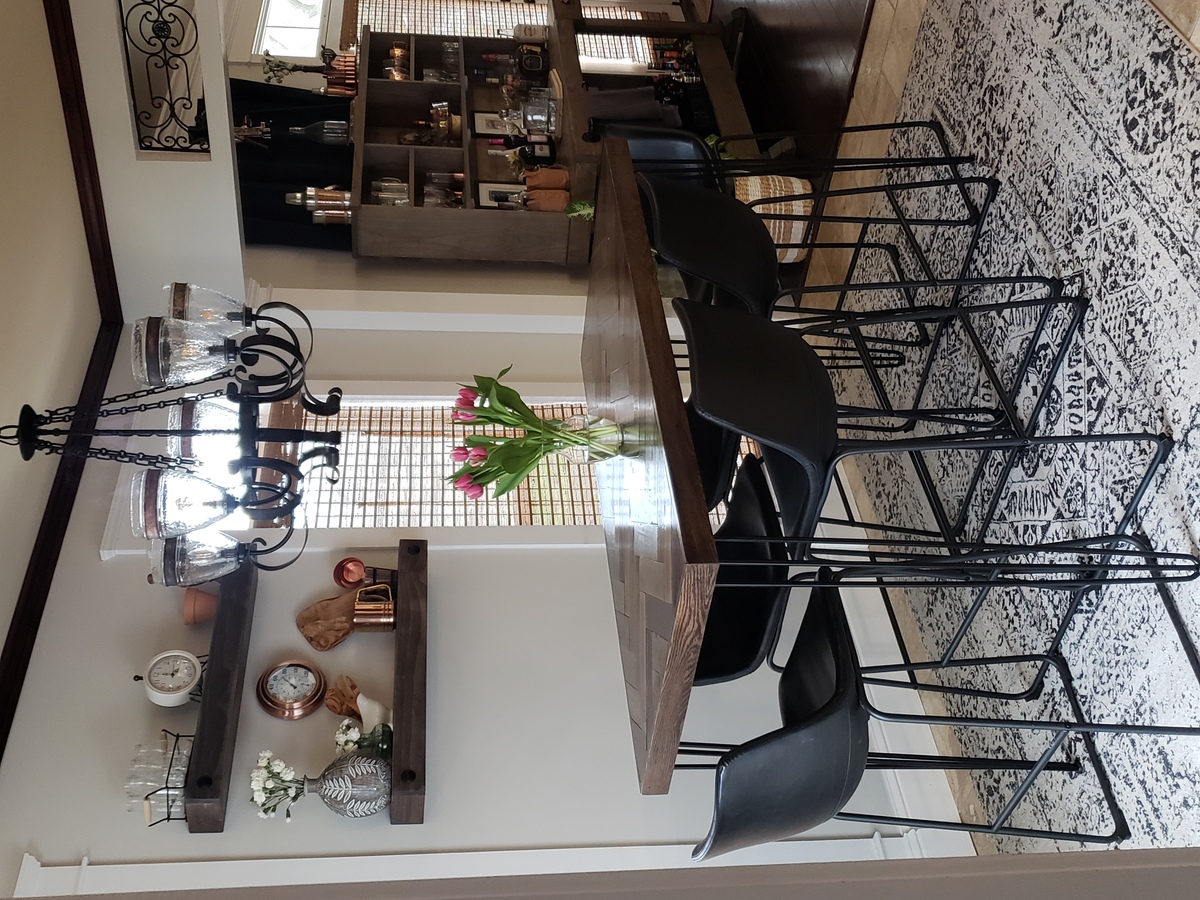
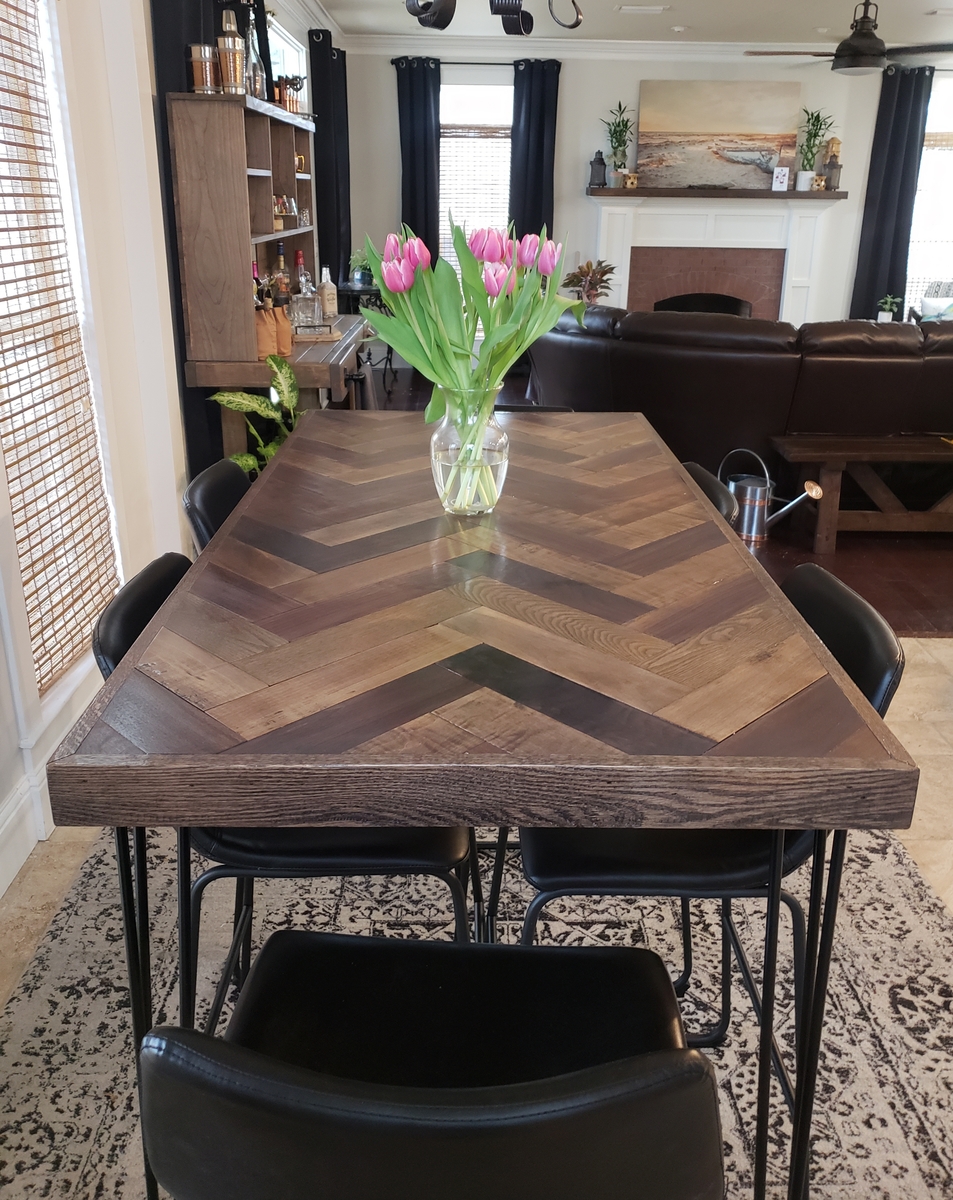
I ran across Anas website in search for the perfect table, My boyfriend and I just moved in together and have gotten kinda excited about making his home our home. I thought about building a table that would be big enough for the whole family (my children and his)I wanted it to be special and mean something to us as it would be our first peice of furniture together. I was searching the web and run across this website with the exactly what I was looking for, rustic, homey, used and special... I got home showed Steve and we went right to the store to buy supplies, He had this table build within 1 hour and I went to work with the finishing touches. WE BOTH LOVE IT!!! we since collected 6 old chairs (not matching of course) and I am in love with our dining area! Thanks Ana for this wonderful website you so graciously share with us! Now we are planning our bed. It will be a farm house bed ofcourse!!! Cannot wait! Pictures will follow!

Built from Plan(s)
Estimated Cost
60.00
Estimated Time Investment
Afternoon Project (3-6 Hours)
Finish Used
golden oak and eggshell turqouise paint.
Recommended Skill Level
Starter Project

Comments

Guest (not verified)

Fri, 09/09/2011 - 18:28

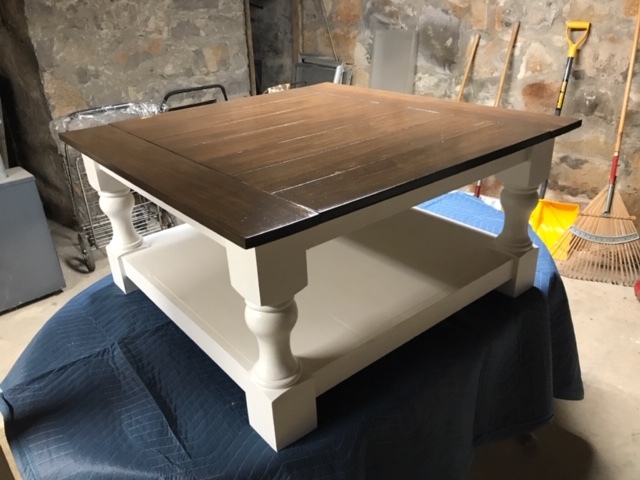
I have been wanting to build this table. Yours turned out gorgeous! Love the color of the legs/frame! Beautiful job!

Guest (not verified)

Sun, 09/11/2011 - 18:32

Love your table, did you modify the plan, I don't see the brace at the ends?

Ruthie (not verified)

Thu, 10/06/2011 - 17:54

What is the exact name of the color on the legs? I love the color, I tried using a turqouise on a bench and it doesn't look like this one....Thank you:)

Colonial Maple Bar Stools

My sixteen-year old son took this on as a summer project and built four bar stools. He did a great job! We lowered them by 4 inches from the plan specs to fit under the counter. He used a Miniwax Colonial Maple finish. This project took a lot of Kreg Jig screws and plugs - almost 100 of each. They are very comfortable and beautiful.

Built from Plan(s)
Estimated Cost
$65.00 for wood for four, $20.00 for other supplies
Estimated Time Investment
Week Long Project (20 Hours or More)
Finish Used
Wood Conditioner, Miniwax Colonial Maple oil-based stain, and 3 coats of polyurethane
Recommended Skill Level
Intermediate

Comments

Farm table and puppy version.

Submitted by Old JMU on Sat, 12/12/2015 - 16:10

Table I built for my wife. She found it while browsing Ana's site. Loved it so much she wanted one for herself. Came out so nice we decided to make our puppy a version of her own.     


LOVE THIS SITE!!!!

Estimated Cost
Dog table - less than $10
Estimated Time Investment
An Hour or Two (0-2 Hours)
Finish Used
Dark walnut stain and satin poly
Recommended Skill Level
Beginner

Comments

Kids Stoarge Table and Chairs

Submitted by Anonymous (not verified) on Sun, 02/03/2019 - 07:06

Built from kids storage chairs and table by ana white

Estimated Cost
$125
Estimated Time Investment
Weekend Project (10-20 Hours)
Finish Used
White chalk paint and light blue valspar
Recommended Skill Level
Intermediate

American Girl Dollhouse with Crawlspace

Submitted by Anonymous (not verified) on Wed, 12/28/2022 - 13:20

We had a lot of fun building this. We made the bottom floor 1/2 the size so she can use it as a storage (aka crawlspace). I also followed another posts idea of using 4 inch tongue and groove pattern board (beadboard) for the roof.

Comments

Laundry Basket Dresser/Kids Dresser

Submitted by MamaPepper on Wed, 09/14/2011 - 14:50

I was reading a book called "ADD Friendly Ways to Organize Your Life", and one thing that stood out to me is that people struggling with ADD RARELY are able to fold and put away their laundry. Well, with 3 little boys (ages 5, 4 and 2)and being a single mama, this is amplified for me. One of the suggestions the book had was to give up the though of folding clothes and get colorful baskets to throw the clothes into once they came out of the drier. . . I immediately remembered seeing these, and I thought, "PERFECT!!!!"

I've made for 2 out of the three boys, but will make for myself and the youngest soon. The older boys now have their own dresser; shirts on top, pants in the middle, socks and underwear on the bottom. Now all I have to do is sort straight into the baskets and put away! Problem solved!

I didn't put the backs on these, mainly because I was being cheap, and they seemed sturdy enough without. I may add backs at a later date if needed.

Built from Plan(s)
Estimated Time Investment
Day Project (6-9 Hours)
Finish Used
Oooops paint and spray laquer
Recommended Skill Level
Beginner

Comments

Distressed Rustic x console

Submitted by Brad Wills on Sun, 09/29/2013 - 18:50

Really like the plan for this table, just not enough space. So I decided to shrink the overall length to 45 1/2 and then just adjusted from there. Stained the entire project and painted the base. After some sanding to distress, I poly coated the entire project. Staining the top and the X's to match was my wife's idea. It came out great. This was only the second thing I have ever built, and I have to say the Kreg Jig made it fun, rather than frustrating and stressful. My first project was from the adirondack table plan, it came out great too. So glad I found your site!

Built from Plan(s)
Estimated Cost
100.00
Estimated Time Investment
Day Project (6-9 Hours)
Finish Used
Stain with flat paint overlay poly for final coat
Recommended Skill Level
Beginner

Comments

bullitt453

Mon, 09/30/2013 - 09:29

The finish on this is absolutely perfect. I built the workbench console table for my dining area a few months ago. Really like how it turned out, but have been considering selling it and building this to go in its place. This may push me in that direction again. Excellent job.

Brad Wills

Tue, 10/08/2013 - 17:33

I used varythane dark walnut stain on the entire project and then painted over with glidden flat in a sage green. Once I 220 sanded the entire project, which aged the green, and took the paint down to stain in areas, I coated twice with varythane polycrylic.

Signy Table and Chair

My husband I and I made this for our daughter for Christmas! It's so cute we couldn't wait and she's been sitting and playing at it ever since.  We are pretty novice and building and this was easy and fun for us to complete.  We will make another chair in the future, but for now we just did the one!


Built from Plan(s)
Estimated Time Investment
Weekend Project (10-20 Hours)
Recommended Skill Level
Beginner

Herringbone Bar Height Dining Table with Hairpin Legs

Submitted by kwildman on Fri, 02/08/2019 - 07:13

We used 3/4" birch plywood and glued 1/2" thick x 3" wide wood pieces in a herringbone pattern to make the top.  We used 1 x 3 oak boards for the trim.  The wood is a variety including walnut, maple, cherry, sassafras, etc.   We ordered the metal hairpin legs.   

We started with a base stain of Danish Oil in Dark Walnut.  Once that dried, we went back over that with a very light coat of Minwax gray wash oil based stain.   We used 4 coats Laquer for the top coat.

Easy build and we love how it turned out!

Estimated Cost
$350 Bar Height hairpin legs were $100, 1/2" wood variety pack was $200
Estimated Time Investment
Weekend Project (10-20 Hours)
Finish Used
Two coats of Dark Walnut Danish Oil, one light coat of Minwax oil based gray wash, and four coats of laquer.
Recommended Skill Level
Intermediate

Comments

beach hut bed

Submitted by knb on Tue, 09/20/2011 - 21:05

Please forgive me for this for being a bit long....but i am excited!
Our daughter picked this beach hut bed to be her new bed that she would be getting for her 3rd birthday. Her older sister has a loft bed and was always climbing up so we liked the idea of it being lower for her. I had saved some pics from other sites and then showed them to her, she didnt want the girly house one's :( no she wanted the one i had actually saved for her brother. lol...
Anyway then i went hunting and could not believe my luck when i came across this site with this bed and plans!
My husband...ye of little faith didnt think we could do it but was willing to follow my lead and have a go!
This was our 1st ever time for builing ANYTHING!
And what a undertaking, however it all came together very smoothly and we are both so very proud of what we have been able to achieve.
Things we did a little different...
We altered the ladder on an angle to make it easier for her to climb (alas also for her 20mth old brother as well), also made the ladder upright supports x3 instead of x2, so the ladder now supports both our weights.(see pic) We made little window sills on each of the windows, added a book shelf inside as she is an avid 'reader' screwed in a light from you will know where. :) On the other 'open doorway' side which is against the wall we screwed on 2 x cross beams using 1x2 pine just for our own sakes to know that she cant fall from that side. We also added some dowell fixed with some saddle clips to hang the material from across the open section.
She has been using this bed for 2 weeks now with no problem.
You have made our daughter a very happy little girl,and parents (she is having day sleeps again now:)) because without your site we would not have known where to start. Thankyou very much.

Built from Plan(s)
Estimated Cost
AU $300 - $400
Estimated Time Investment
Week Long Project (20 Hours or More)
Finish Used
To finish I sanded the whole thing, rounding of corners where needed, ie: ladder, window sills, cross bracings, etc. Then prime 1 coat and 2 coats of chosen colour, which is Dulux, Antique White USA. We used a semi as we didnt want a shiny finish.
I would recommend to anybody going to build this bed is to undercoat/prime all side lining wood before nailing into place as painting in between ALL THOSE GAPS took ALONG time!
Recommended Skill Level
Beginner

Comments

Cindy from Indiana (not verified)

Wed, 09/21/2011 - 09:27

Great job on your first build! We're in the process of picking a first bed for our daughter and this one is definitely in the running. It looks great!

Cindy from Indiana

knb

Wed, 09/21/2011 - 21:39

Thankyou for your lovely comments. We are so very proud of how it turned out. Even better than we thought. Every time i look at it i think "wow, did we really do that" And yes it was our very 1st build. We now think that if we have done this as a 1st build then we can pretty much do anything....lol...and my to do list is filling up fast.

Marisol

Thu, 09/22/2011 - 10:26

AMAZING!!!
I have been eyeing these plans for a very long time, unfortunately my kids are too small for this bed, I contemplated on making it for outside, as part of a tree house of some sort, but never got around to it. You did such an amazing job, I am truly jealous and hope one day I can have this at my house! Love it!!!!

knb

Fri, 09/30/2011 - 05:11

Thankyou for your kind comments, little Madison is still loving her bed, sitting up in there during the day playing with her dolls and reading her books, and yes still having a day sleep...loving it....we are in the middle of a teenager loft bed with a mini robe walk-in underneath for one of our other daughters. Not as cute as this but will post pics when done. :)

reno queen (not verified)

Sun, 10/02/2011 - 04:33

What a nice job, i am jealous. Looking at the job you have done and you say it's your first job is unreal. Looking at your children please send me your husband and i will look after him. lol you are one lucky gal

Janelle (not verified)

Tue, 10/04/2011 - 03:35

Yes i agree with reno queen. Send me your hubby i will pay more haha.Where do i find one like that ? They don't make them anymore haha .What a nice job. This is the best i have seen so far. Would you build and send to New Zealand? How much? i am willing to pay freight etc. Regards Janelle

mandy framme (not verified)

Sat, 10/08/2011 - 02:56

Great job and yes i second that, send him to me ,if he is the one in the pic he is rugged .lol top job

knb

Thu, 10/13/2011 - 15:25

Yes ladies that is my husband in the pic and yes our children are simply gorgous....As far as builing this bed for you Janelle, customs would not allow it because of the wood. We sometimes race jet boats in NZ and the boats can not have 1 speck of mud, dirt or any natural by product on it anywhere. Yes they can spray it with chemicals but would you really want your child sleeping in it then?? So sorry about that. It really wasnt to hard, my hubby just followed my lead (re:I told him what to do! lol) at the time we only had very basic tools, and we managed great. It was more the hours it took, but also having said that we could only work after kids were in bed or weekends.

Guest (not verified)

Wed, 11/30/2011 - 10:41

How seriously cute is that! I love it!

Guest (not verified)

Sun, 02/26/2012 - 18:11

Hi my husband and I are about ready to start building. Our daughter is turning 6 in a few months- and saw someone made this 3 year old. We have 8 ft ceilings - but we are adding a slide out the one side (for fun) and would like to make the height of the loft bed a bit higher - anyone do that ?
How will plan change much?

Lola459

Thu, 04/26/2012 - 13:11

Hello. I have printed out the plans for this beach hut and I plan on starting this weekend. This will be my first build. Something in the plans doesn't make sense to me. In Step 2, it shows the floor supports for each side of the hut being 20" long, but then in Step 3, it shows the length of the pieces for the windows as only 18" long. Wouldn't they need to be the same width?

Yayyyyyyy it's soooooo cute!!!!

This was my first in not just painting but actually building what I was about to craft!!!! I messed up a few times but had a blast and have already started my next build :)

Estimated Cost
50 dollars
Estimated Time Investment
Day Project (6-9 Hours)
Finish Used
Ebony with a lacquer in it
Recommended Skill Level
Starter Project

Comments

Home Office Project

Submitted by Anonymous (not verified) on Sun, 12/20/2015 - 13:43

The Classic Collections was exactly what we were looking for when we decided to re-do our home office.

Estimated Cost
>$500
Estimated Time Investment
Week Long Project (20 Hours or More)
Finish Used
Rosewood gel stain, Poly and Semi-gloss White paint
Recommended Skill Level
Beginner

Wine Bar/ Record stand

Submitted by Anonymous (not verified) on Wed, 02/13/2019 - 08:50

We needed a piece that served two purposes, a Wine bar and a record stand. I used a plan from the site and altered the dimensions to fit records and wine holders. I used thick wood up top and stained and lacquered it. I added a few extra shelves for glasses and so forth, and put in the wine holders. That ended up taking a little extra on this build but I had a great time doing it! 

Estimated Cost
250ish
Estimated Time Investment
Week Long Project (20 Hours or More)
Recommended Skill Level
Intermediate

The Weekend Sleeper

Submitted by vendo on Tue, 01/10/2023 - 10:03

My step son, who is in college, comes to stay with us some weekends and we don't have a lot of room in the rental we are in. So I built a place for him to put his things and sleep, during his visit. This was an easy and quick build using 1x10's for the frame and 1x2's for the face frame. Being 1x10's it's super low profile and doesn't make the room feel much more crowded, so that is a huge bonus! I built it around the dimensions of this floor bed/sofa that I found on amazon

Here's a Youtube Video of me building it, if you want to see how it went together.

I really like this design, because I feel it would make a great addition to a guest room, bonus room, dorm room, shared room and more. I ended up attaching it to the wall as you will see in the video because it will be tippy if not. Hope you like it!

Kids Adirondack Chair

Submitted by Radcrafter on Tue, 09/27/2011 - 14:46

The Kids Adirondack Chair. I love these little chairs! Simple and easy to build. This one was a birthday present for my niece's daughter. Read more about this project on my blog.. Thanks Ana!!

Built from Plan(s)
Estimated Cost
under $20
Estimated Time Investment
Weekend Project (10-20 Hours)
Finish Used
Behr Deck Stain in semi-transparent Sand Beige
Recommended Skill Level
Beginner

So Easy...love the ladder shelf.

Submitted by treegranny on Thu, 10/03/2013 - 09:30

Easy to follow, we made in a weekend. We tweeked our dimensions a bit but otherwise pretty straight forward. We ended up staining half and leaving other half natural then put a varnish over the entire shelf. Turned out pretty neat with the two tones.

Built from Plan(s)
Estimated Cost
used leftover lumber we had around the shop
Estimated Time Investment
Weekend Project (10-20 Hours)
Finish Used
Min wax mahogany stain and gloss varnish over natural pine
Recommended Skill Level
Beginner

Comments

Standing High Chair

Submitted by stacynabby on Thu, 12/24/2015 - 07:49

I modified the "standing high chair" from Ana's plan and from Blame Crayons blog post...so, I did a little freestyling. The standing platform is adjustable height, just like Ana's. My friend asked me to make this for her mom for Christmas.

Built from Plan(s)
Estimated Cost
$30-40
Estimated Time Investment
Afternoon Project (3-6 Hours)
Recommended Skill Level
Beginner

Comments

maxstout

Thu, 08/25/2016 - 08:36

I lovel your modification to add the entry-step to Ana's plans. I think I will try to re-create that myself, any special tips on adding that extra step?

Coffee Table

Submitted by Anonymous (not verified) on Mon, 02/18/2019 - 15:06

For my daughter's birthday, I used the plan from your site, but I substituted 1x6 poplar for the top, rather than the 2x6's. Turned out so well that my other daughter wants one as well.

Built from Plan(s)
Estimated Cost
$145
Estimated Time Investment
Weekend Project (10-20 Hours)
Finish Used
Enamel white for the base and stain/polyurethane for the top.
Recommended Skill Level
Intermediate

Modern Farmhouse Bed

Submitted by Anonymous (not verified) on Sun, 01/15/2023 - 13:37

My husband and I had worked on this bed together, and we are so happy with it! We went with taller side tables that we purchased, and just stained the wood instead of painting it.

Comments

Toddler sized picnic table

Submitted by Nan on Sun, 10/02/2011 - 19:38

This was a fun cute project to start with. My husband assembled it (though I wanted to do it he didn't let me). I used spray paint. Though I wish I had made it with a bit sturdier wood or maybe used wider sizes. but overall this turned out well and the kids LOVE IT! thanks Ana!

Built from Plan(s)
Estimated Time Investment
An Hour or Two (0-2 Hours)
Finish Used
I used an outdoor spray paint.
Recommended Skill Level
Starter Project