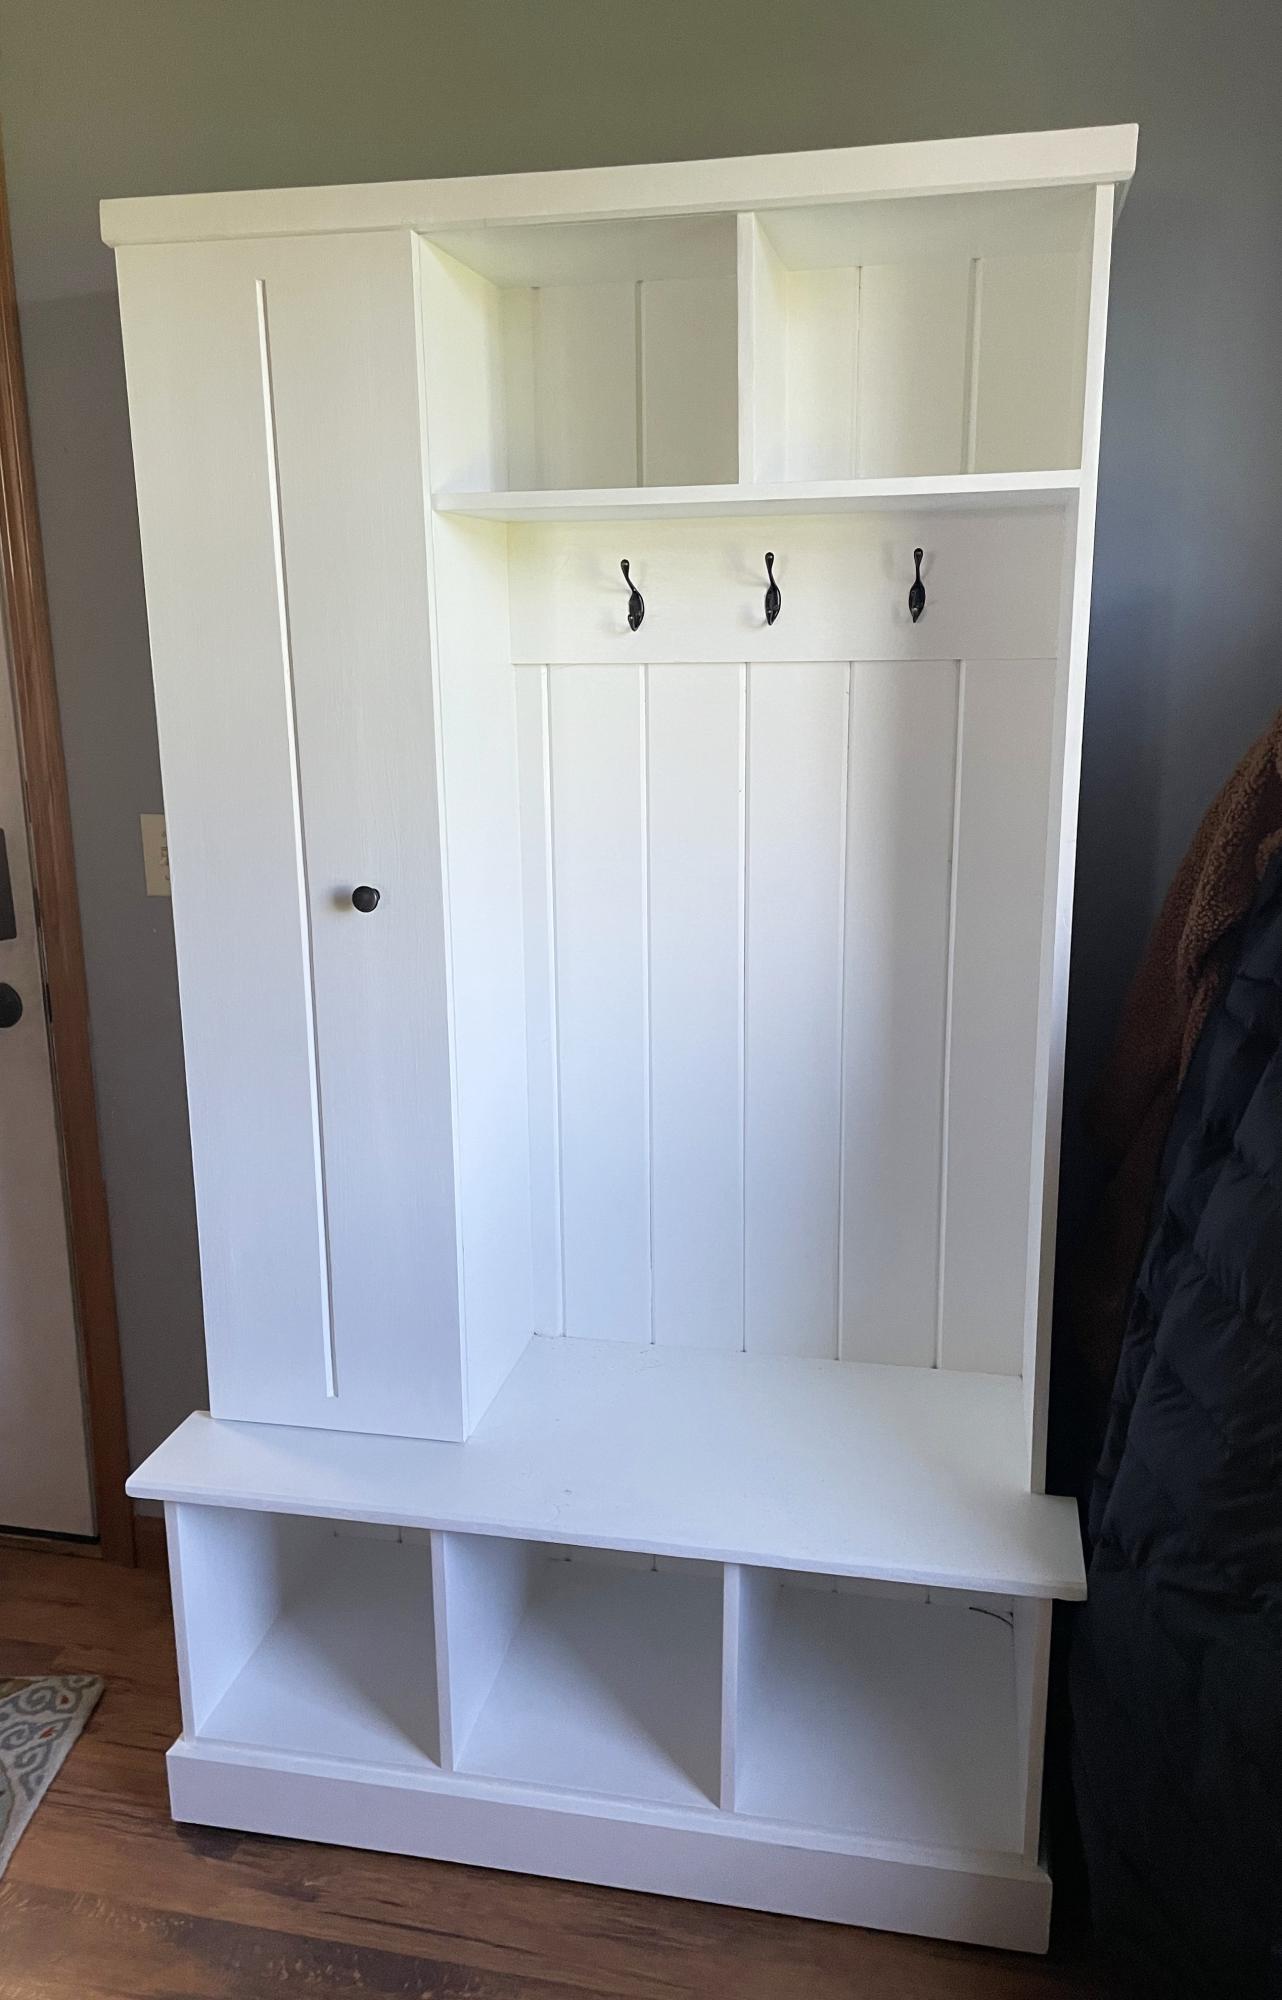
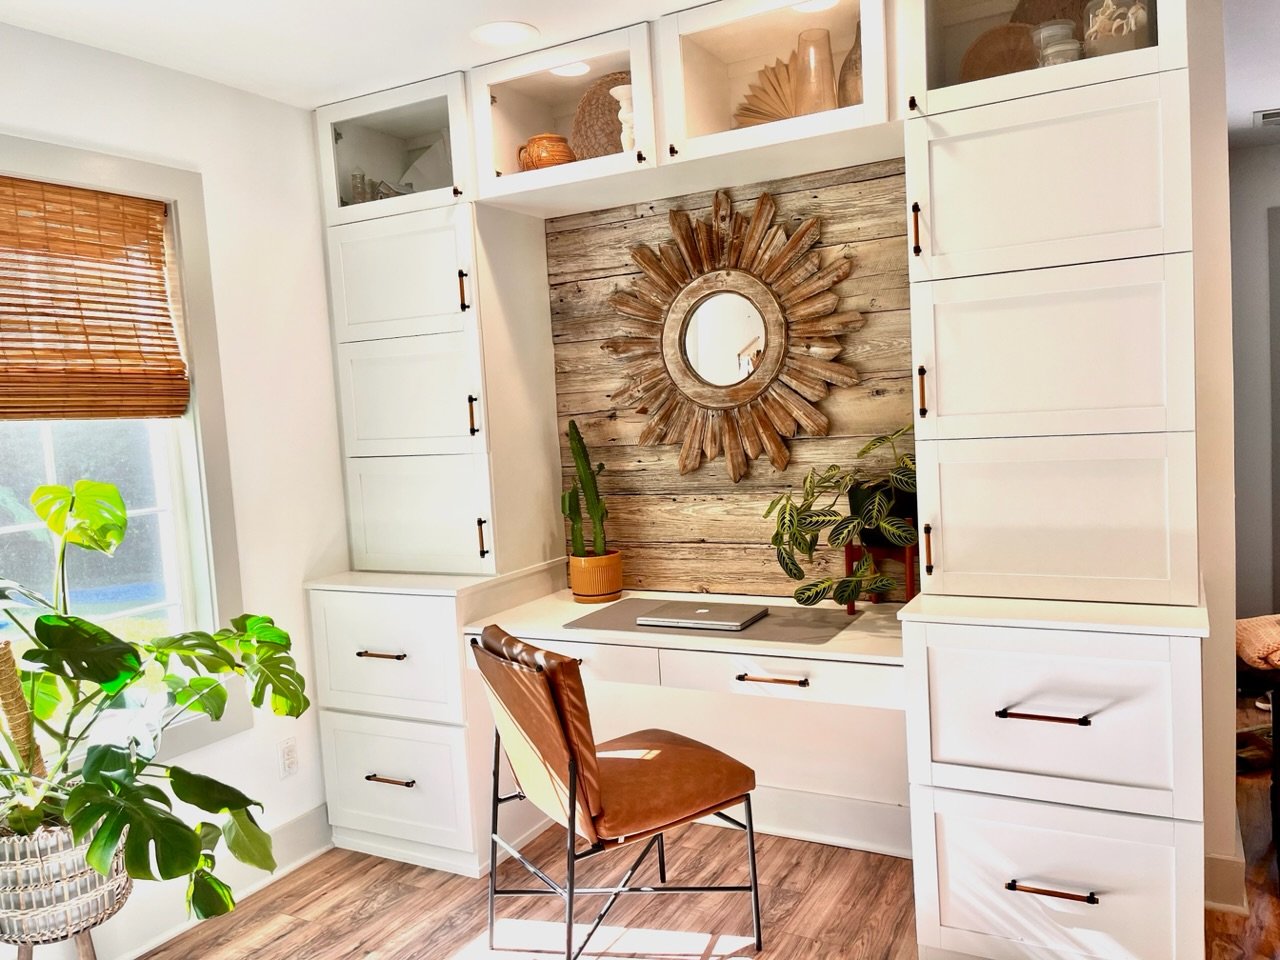
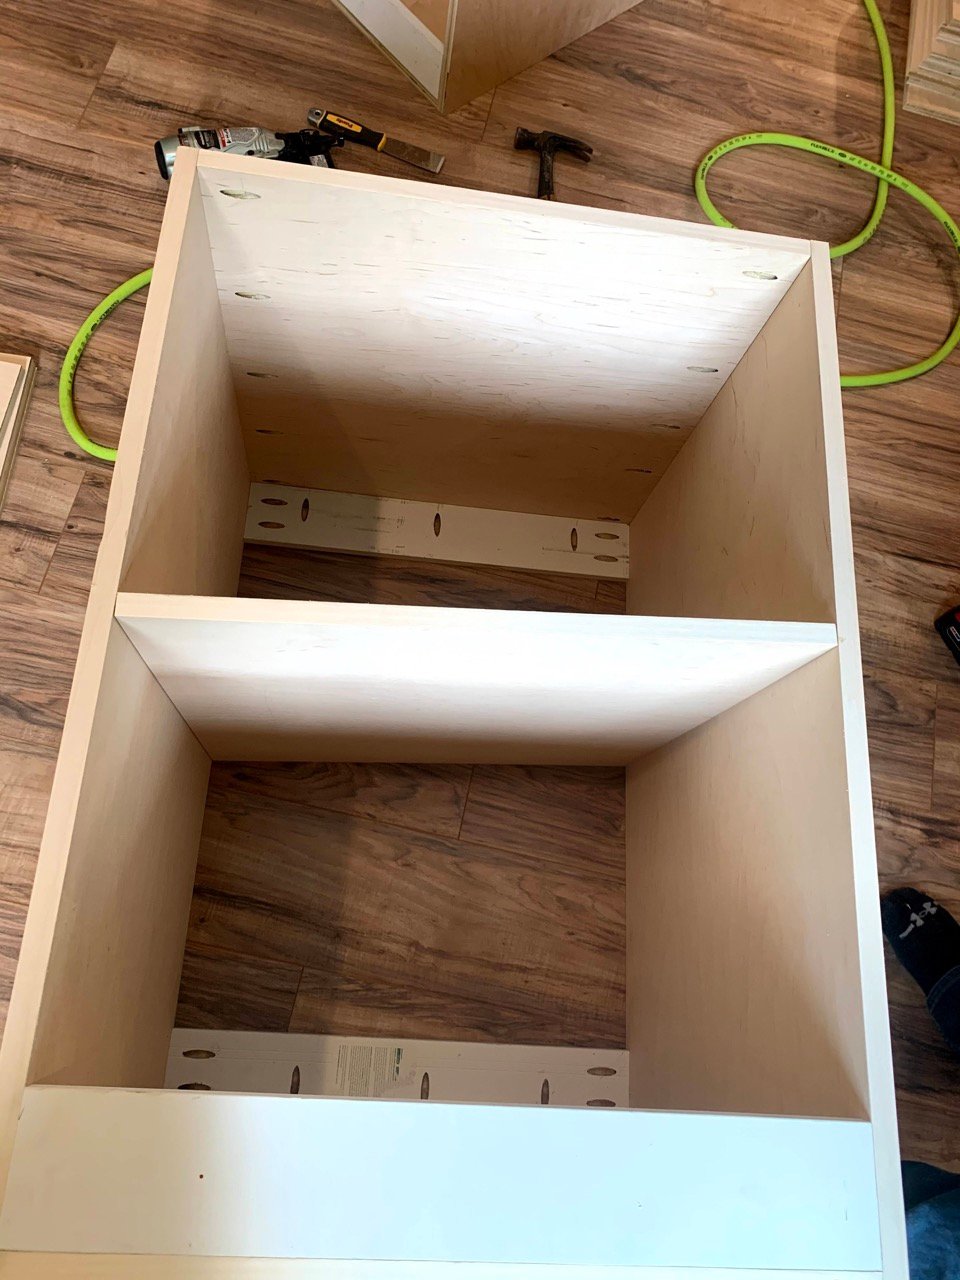
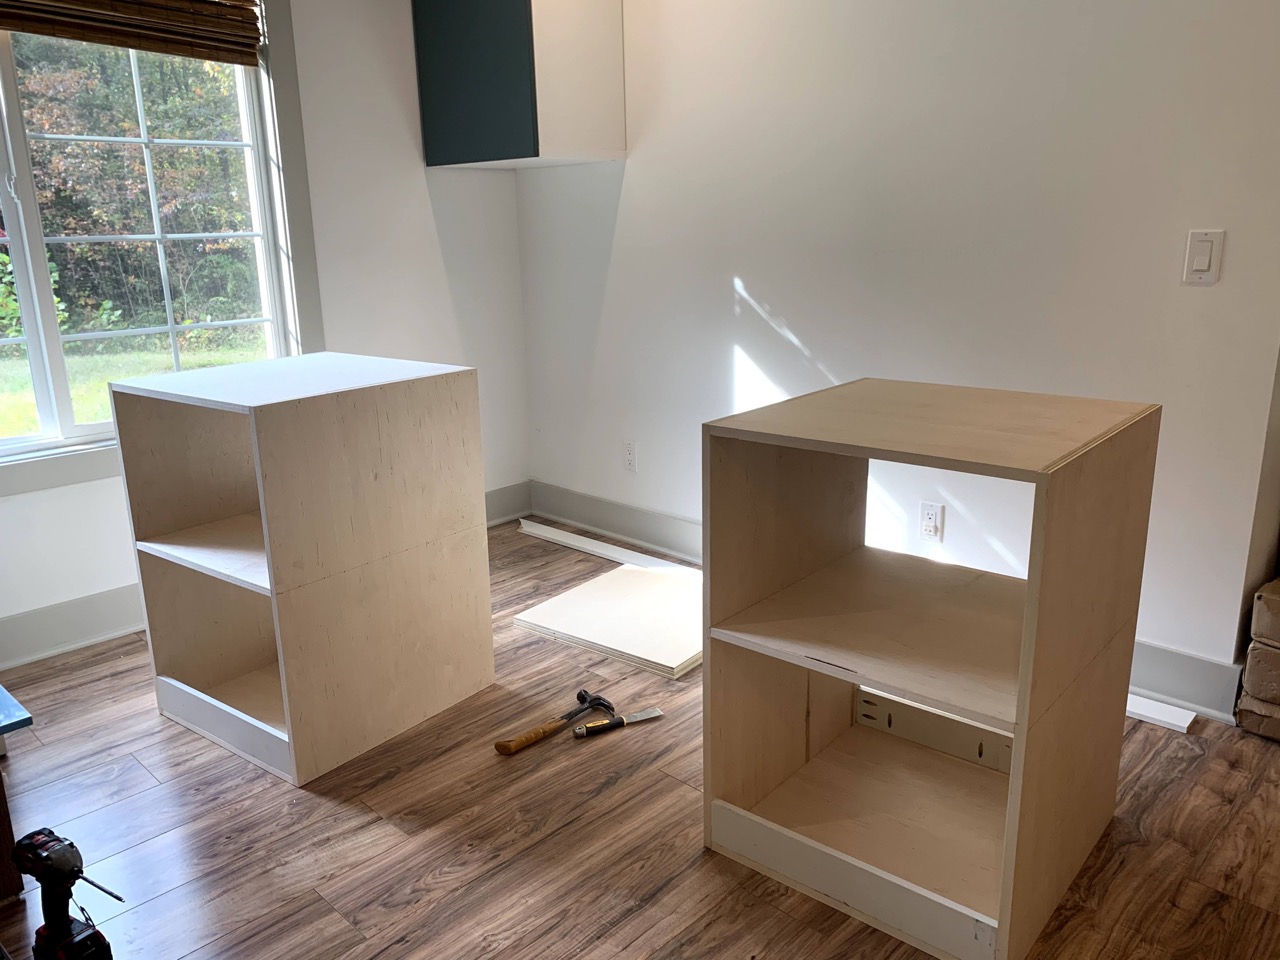
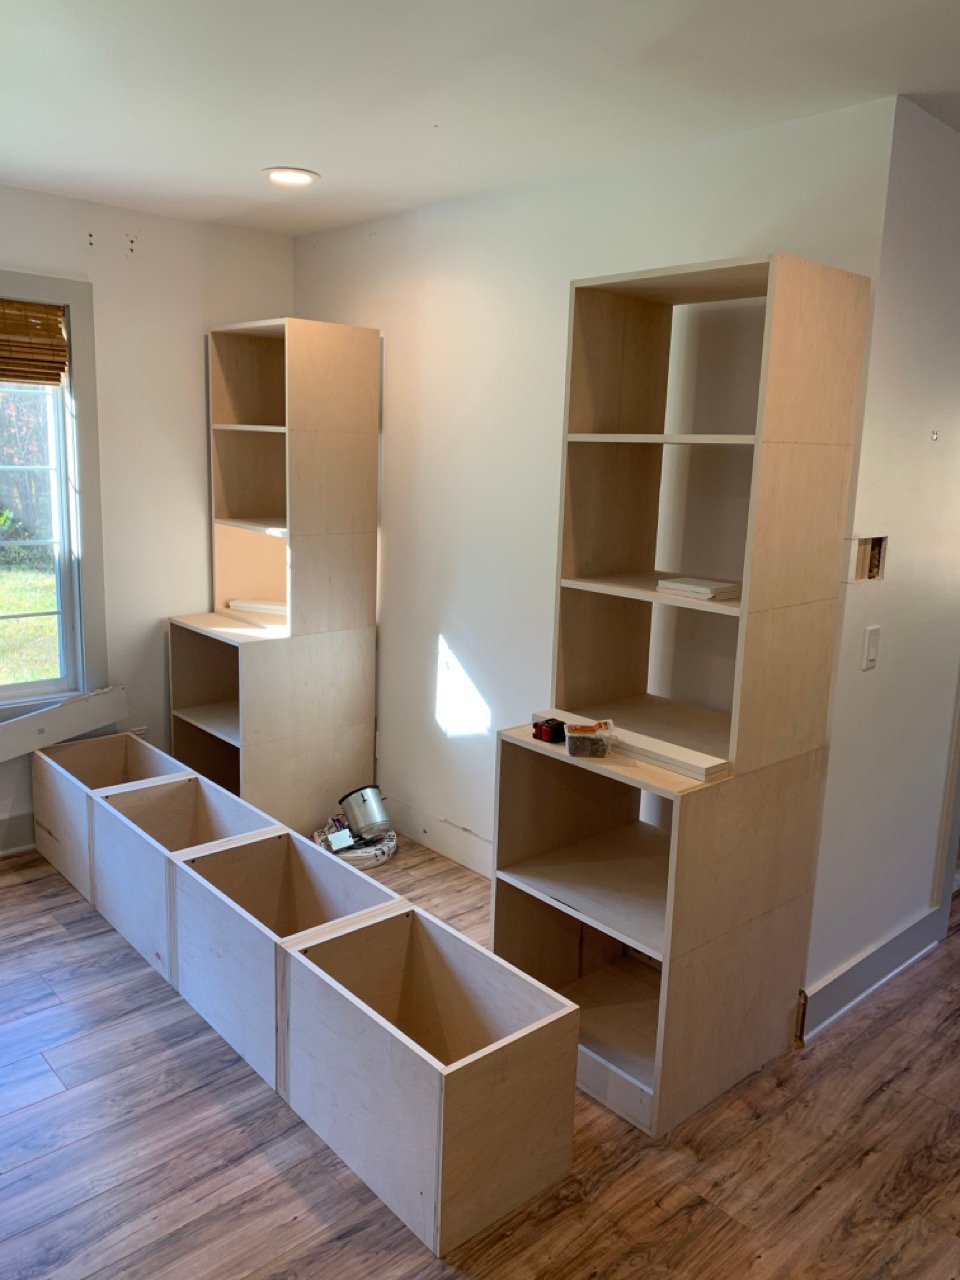
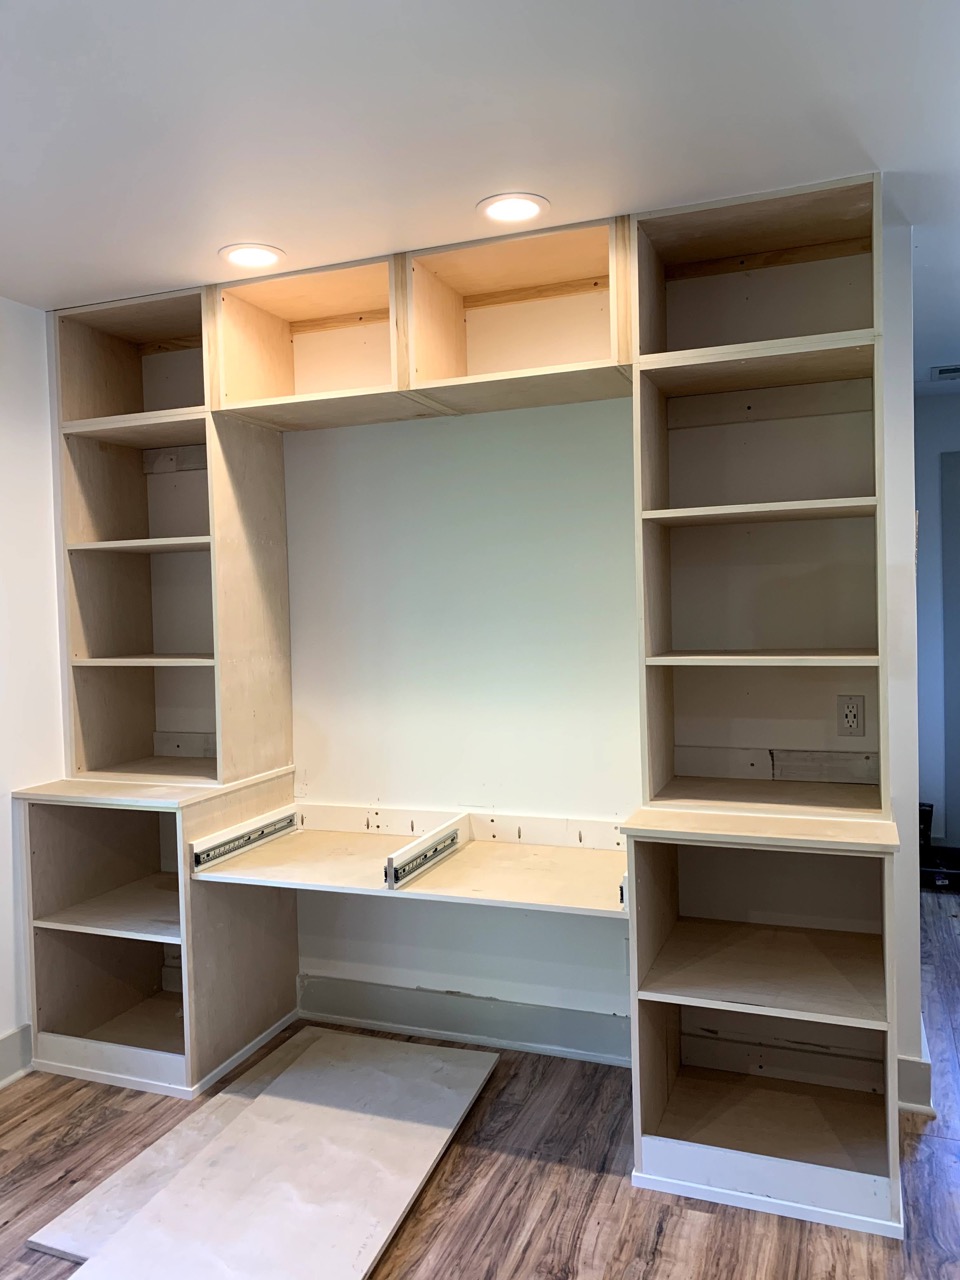
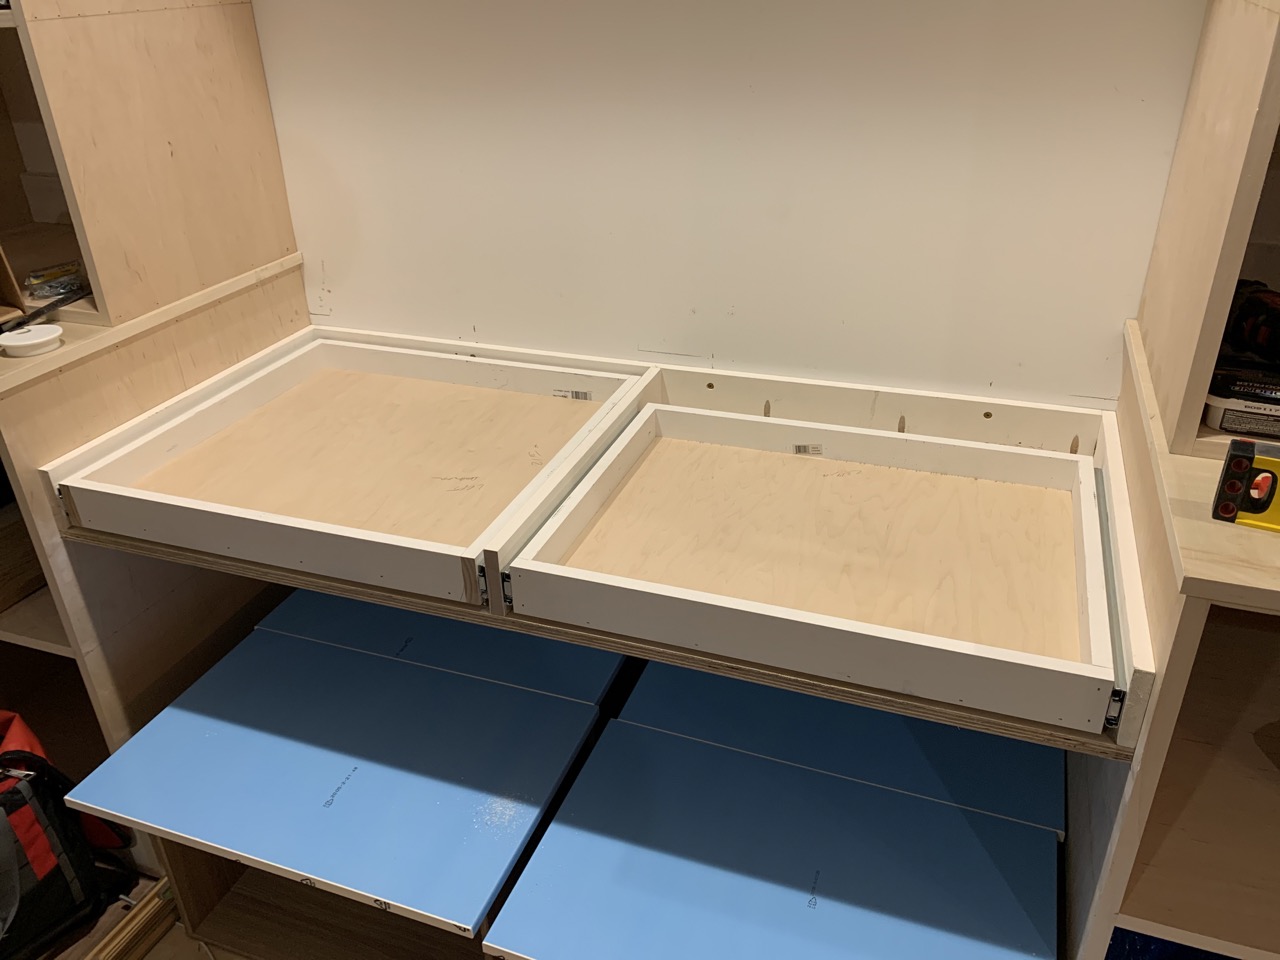
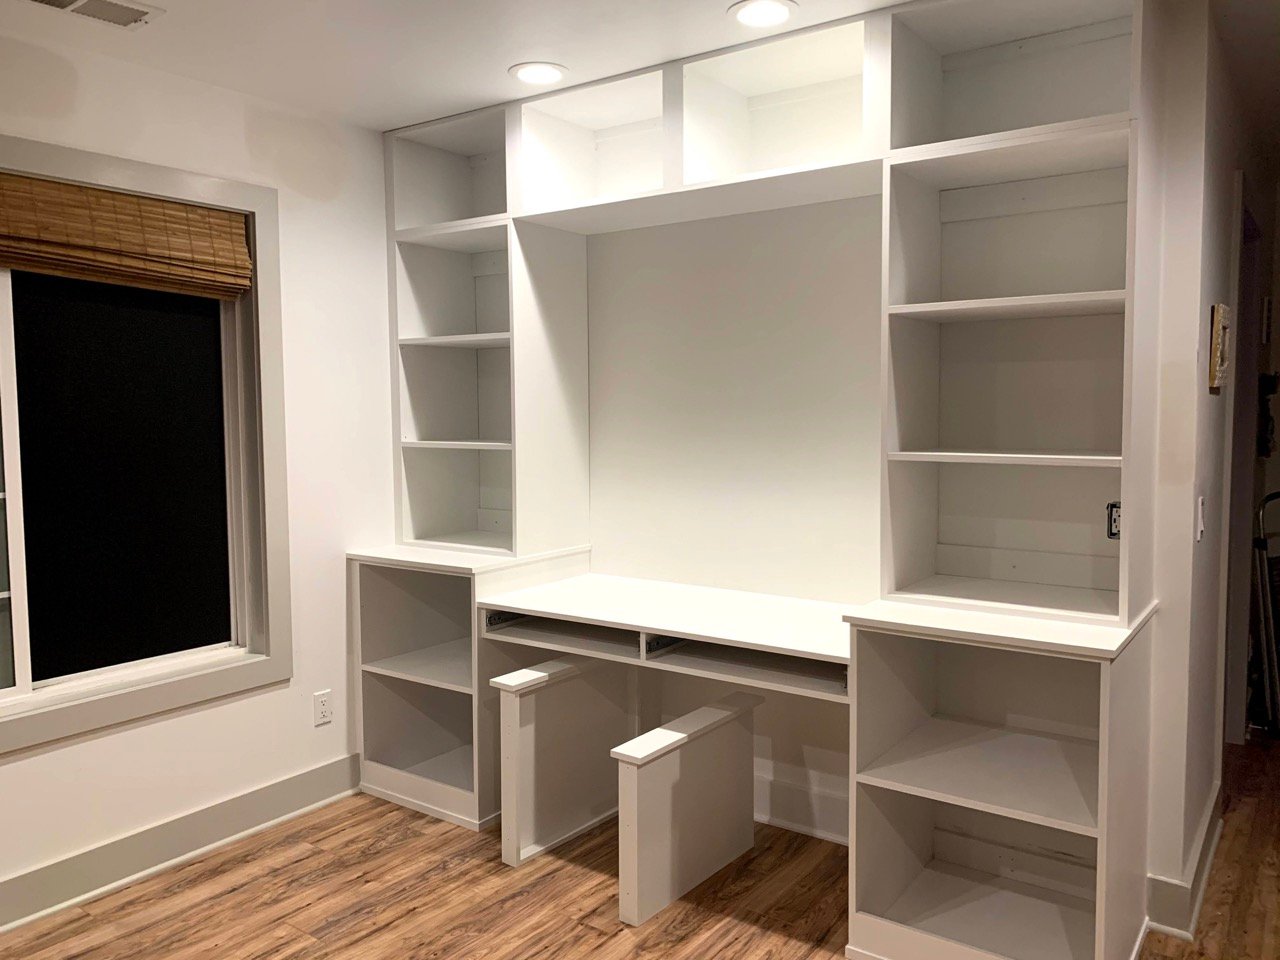
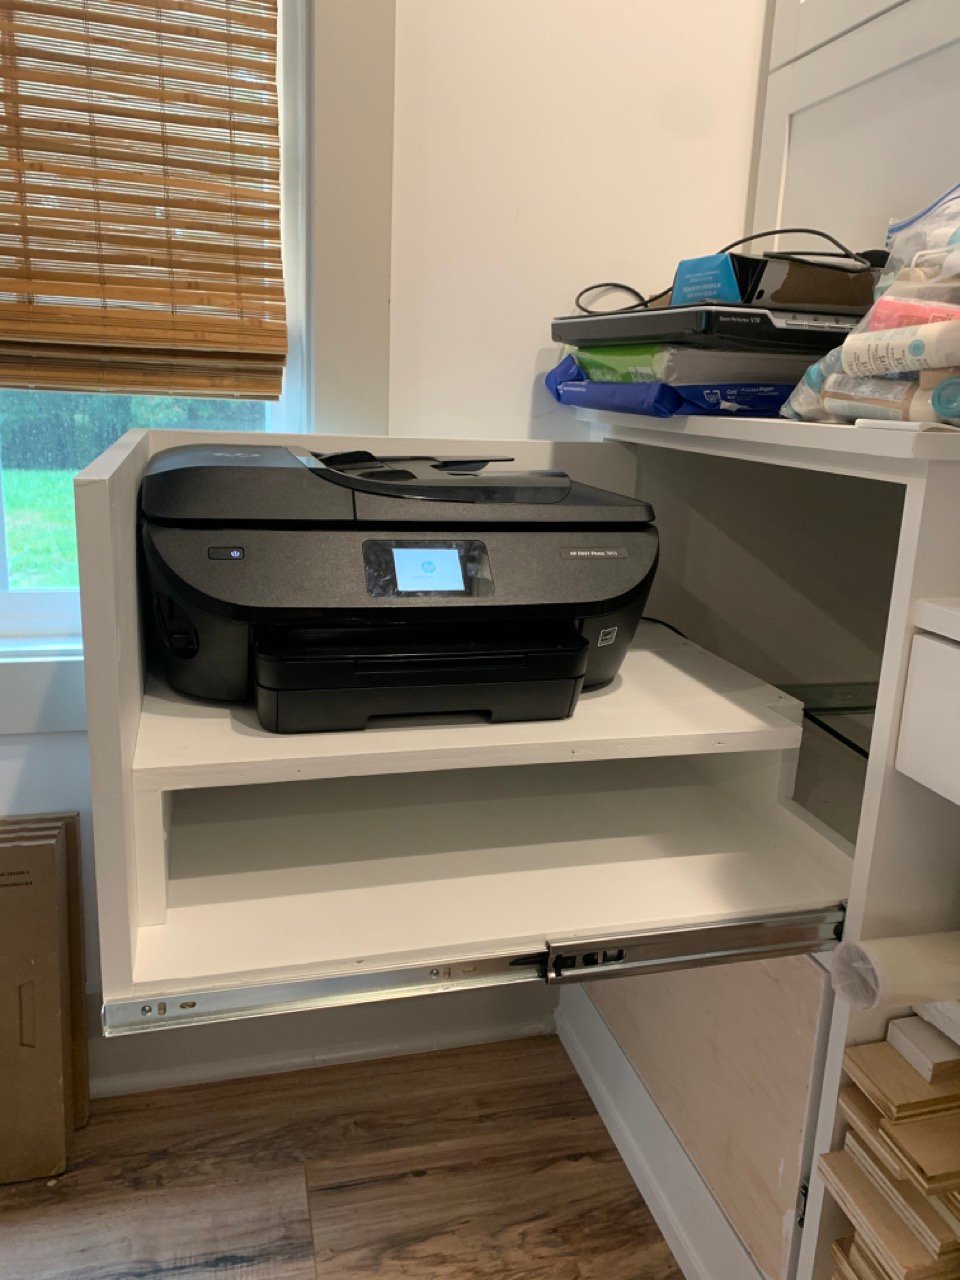
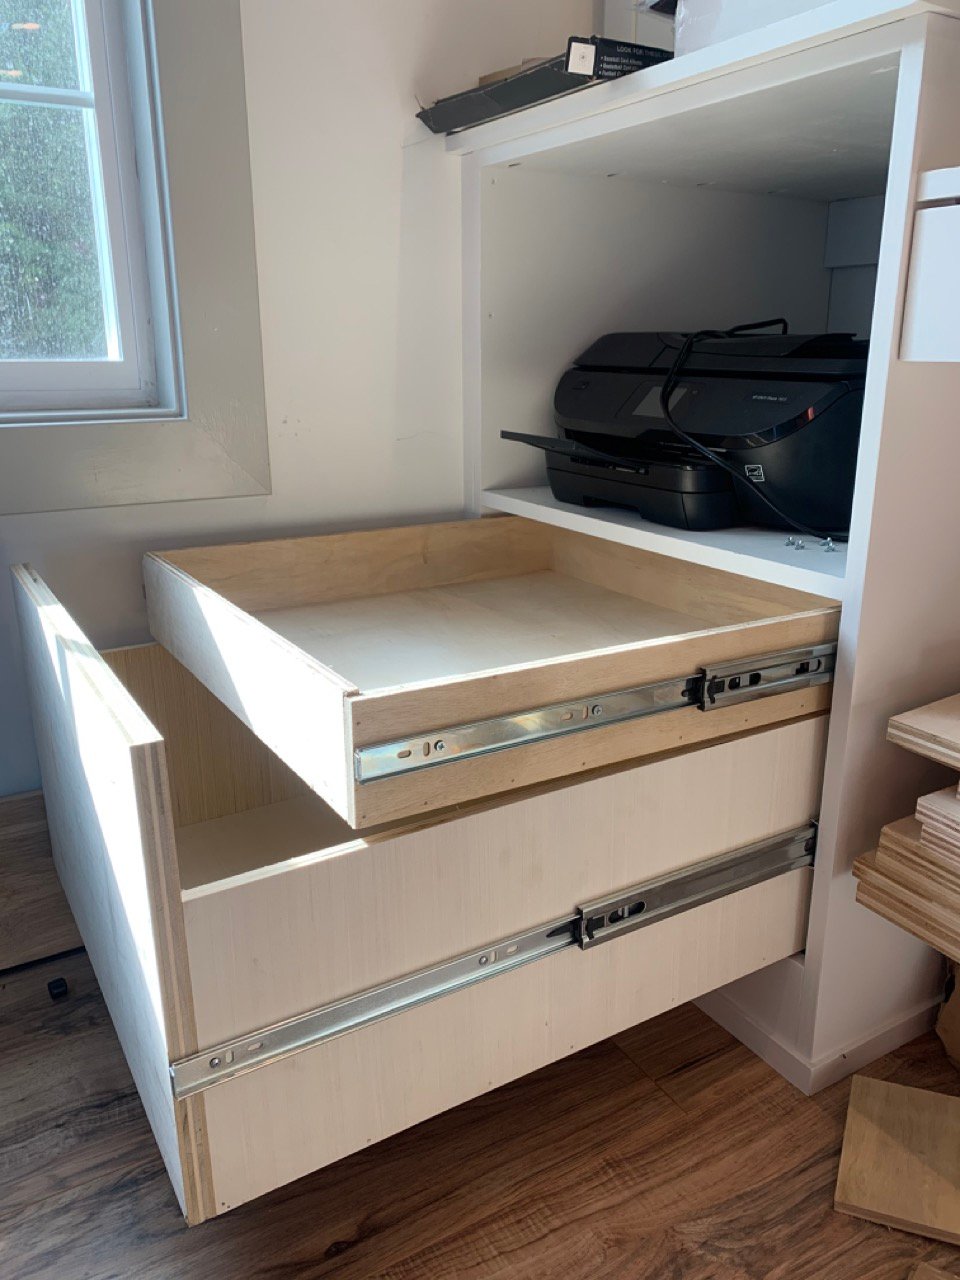
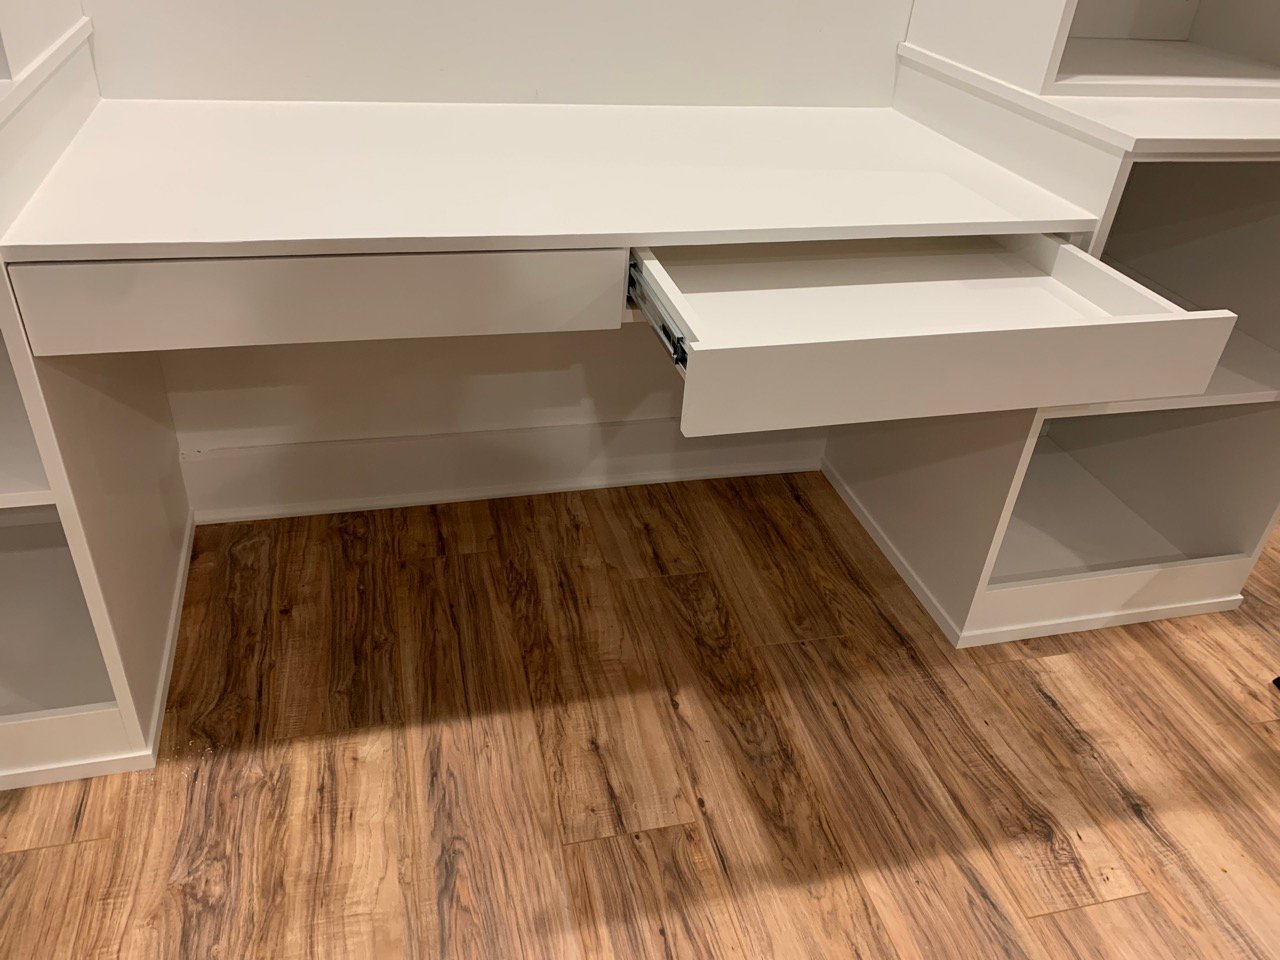
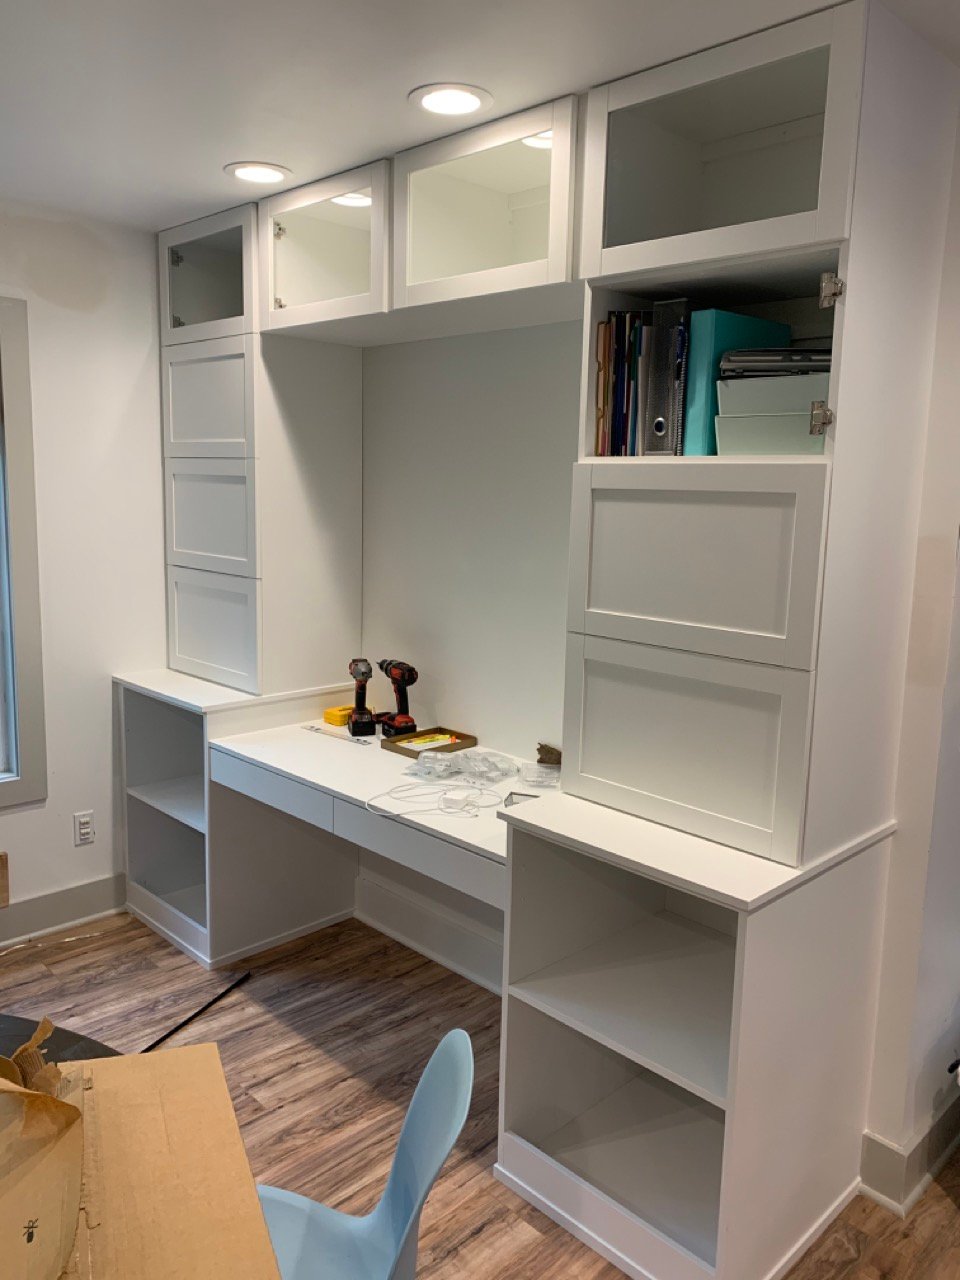
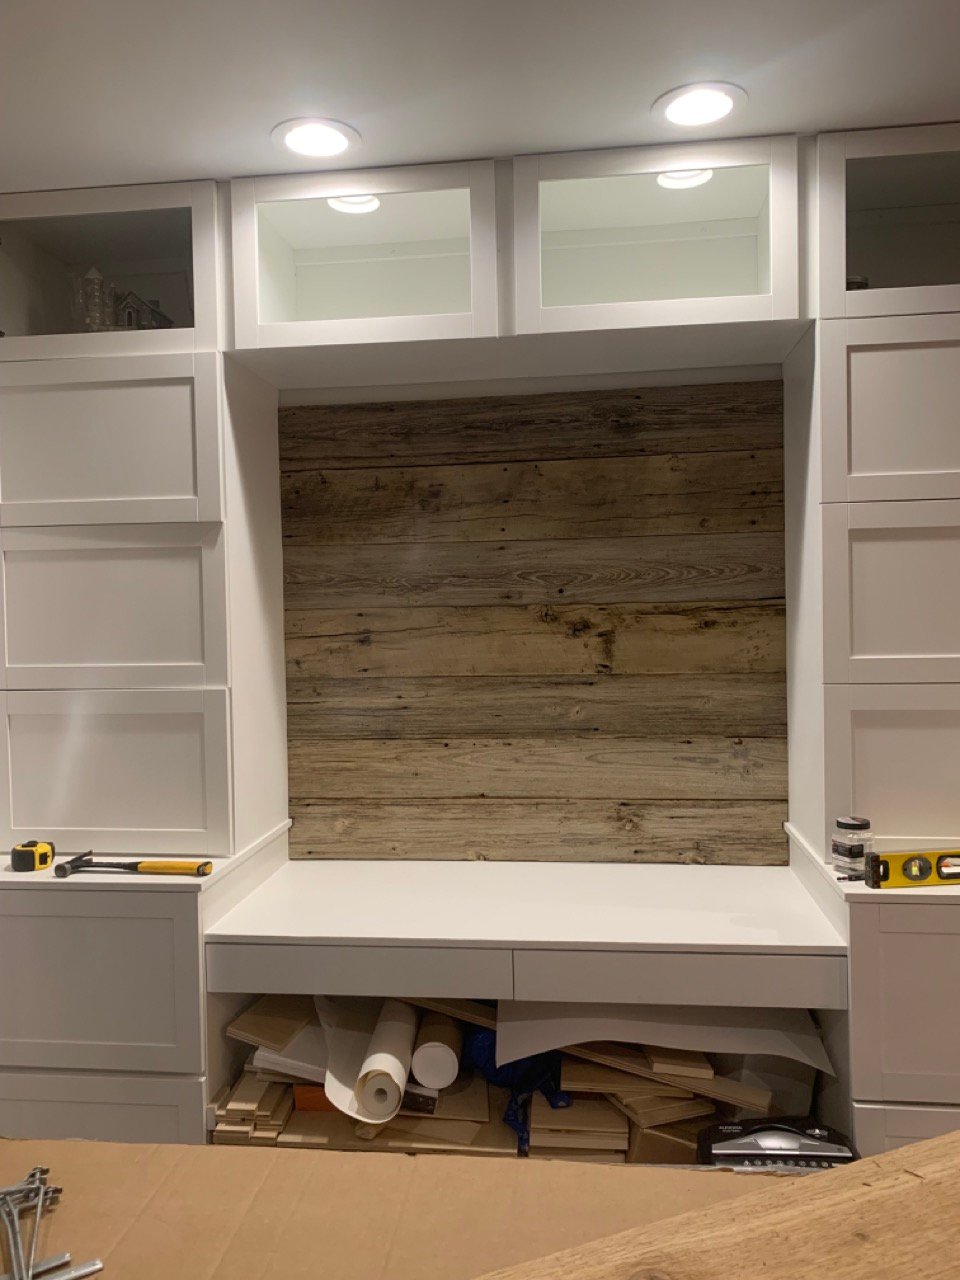
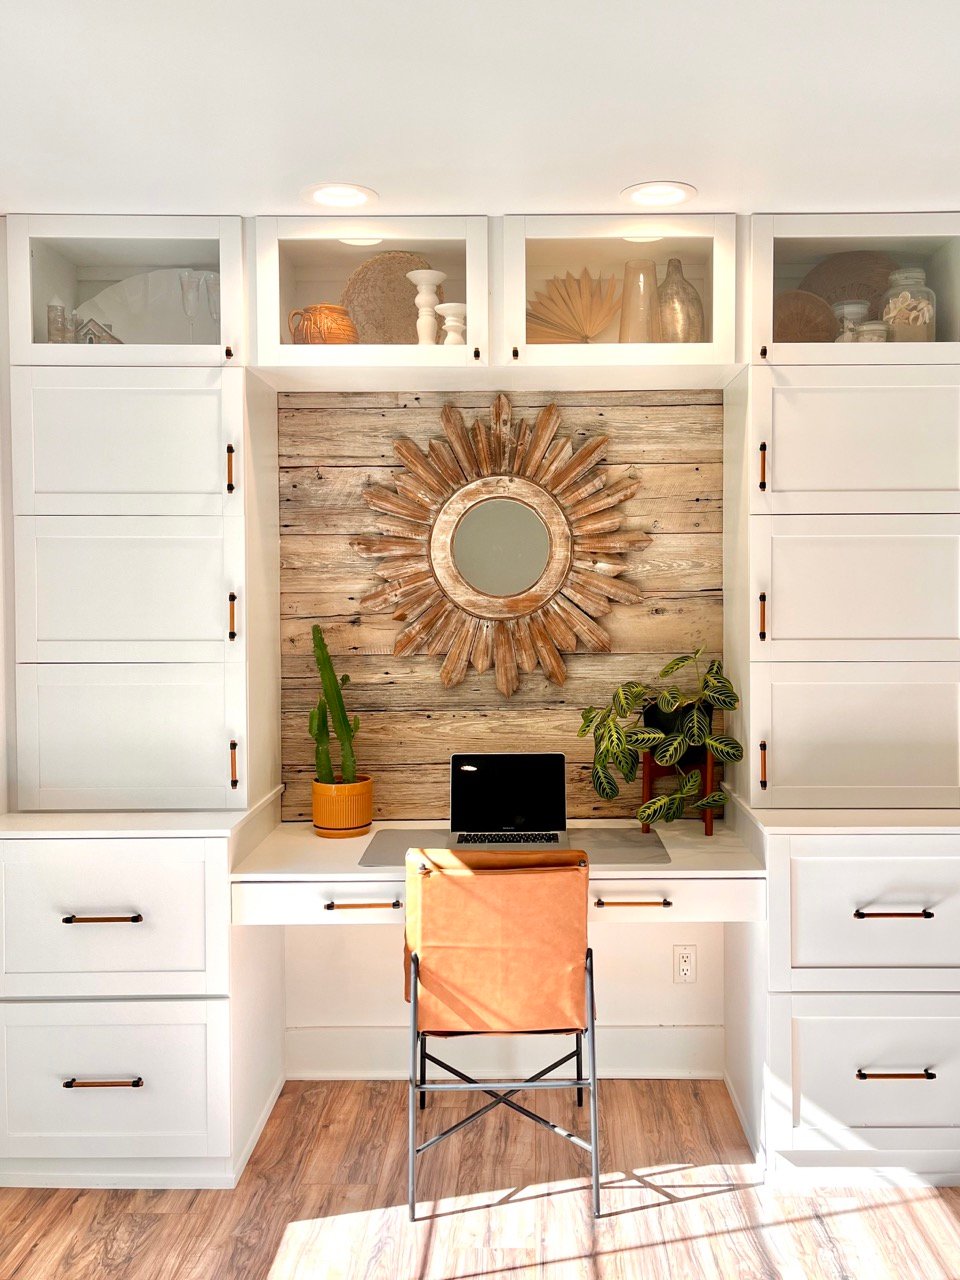
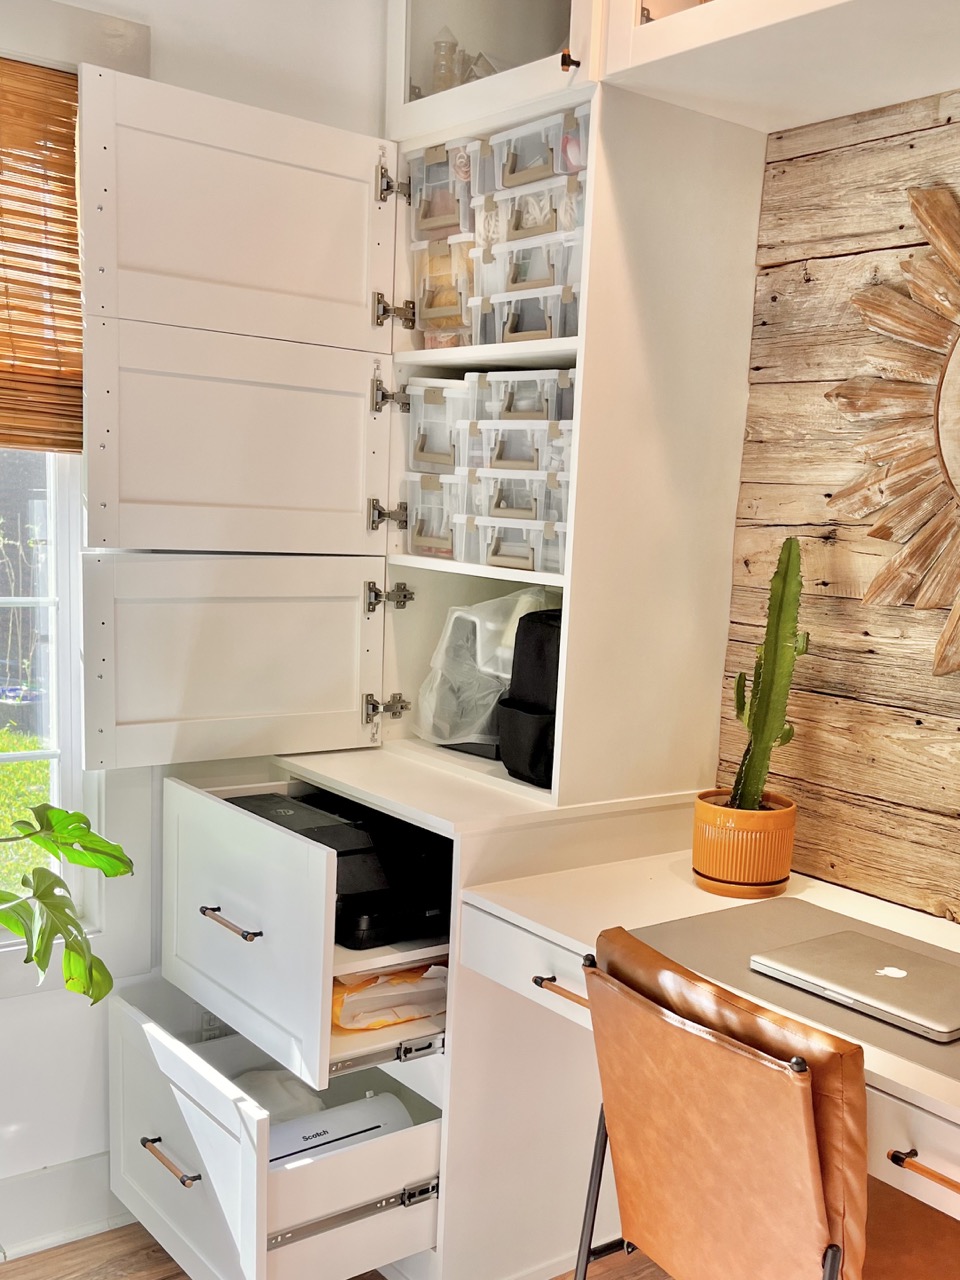
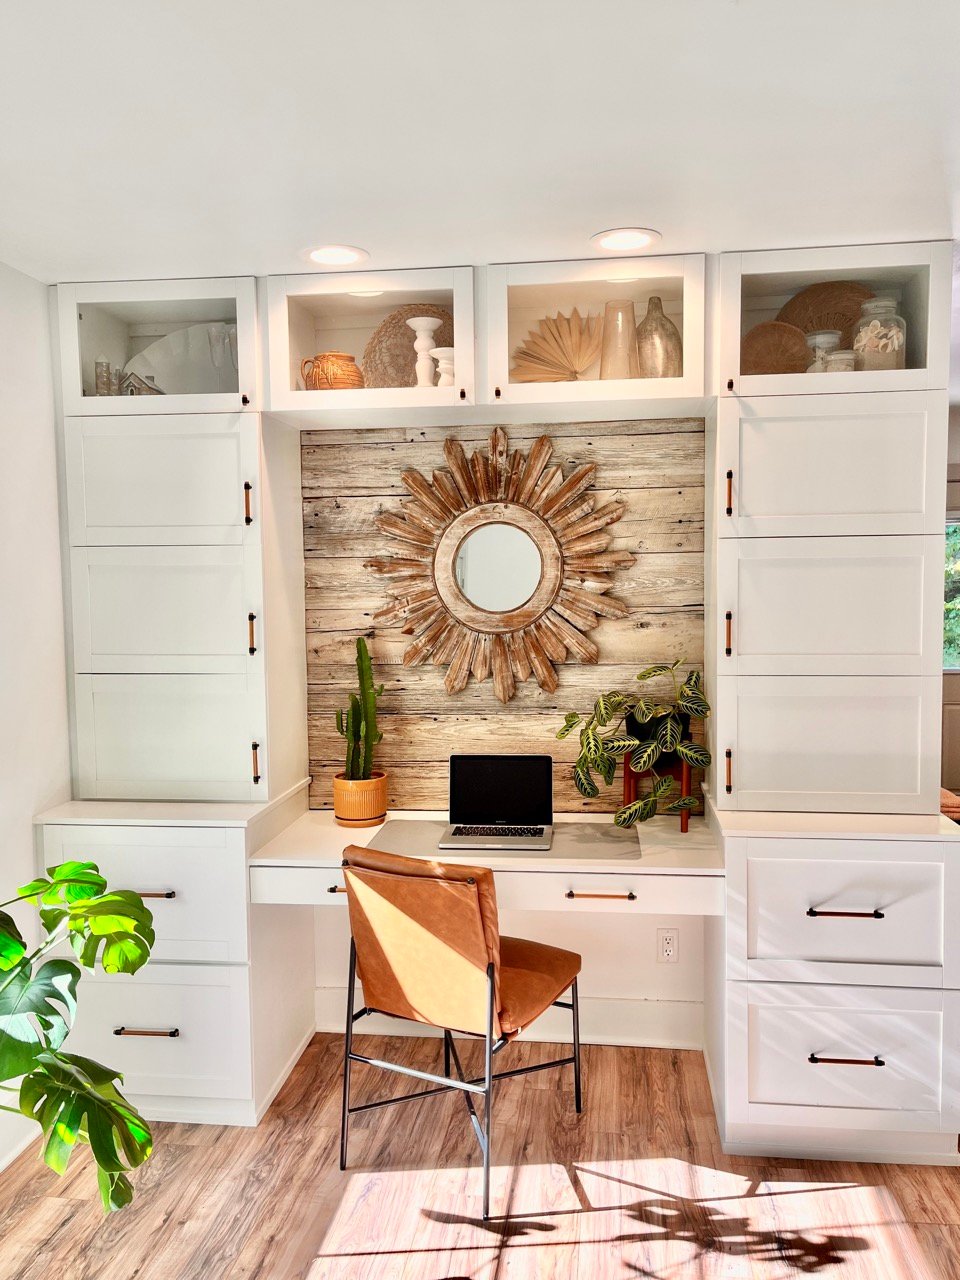
Desk Wall System with IKEA Door Faces
Seasonal And Holiday

We chose to use 2x4 construction because we simply needed a sturdier build. Enough said. :) I wanted to use cedar, but when we went to the lumberyard, they didn't carry 2x4s in cedar, just 1x4 and said it was hard to find. Being that I had wanted this built by Labor Day and it was already July, we bought the pressure treated wood. I know, I know, chemicals galore. We worked on it a little at a time. We modified it for a higher back, but now I wonder if that was needed, because although the cushions are deep they do go down some when you sit on them. Ah well, we are still happy with it. Because of the higher back, we opted to just use the armless section on the end, however we might build a modified arm later on. We'll see how it goes.
Sat, 07/14/2012 - 08:04
So proud of my talented sister. Love to see more. My cat Keko is still loving his bed

In reply to So proud of my talented by Debbie Gregory (not verified)
Sat, 07/14/2012 - 11:24
Aww, thanx Deb!
Sat, 07/14/2012 - 14:47
Very nice work, hey I’ve been sitting on and eating off treated lumber for years ( Maybe that’s what is wrong with me LOL )
My dad built this for my daughter.
Thu, 05/01/2014 - 11:11
Your father is an artist. Excellent craftsmanship. Your daughter is a lucky little girl. :)
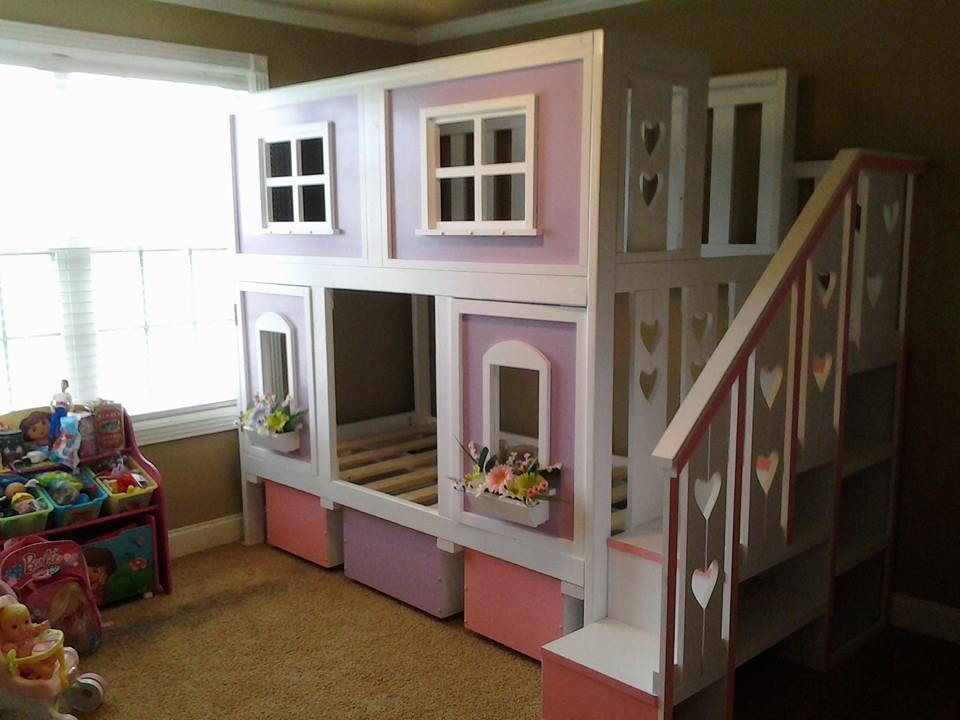
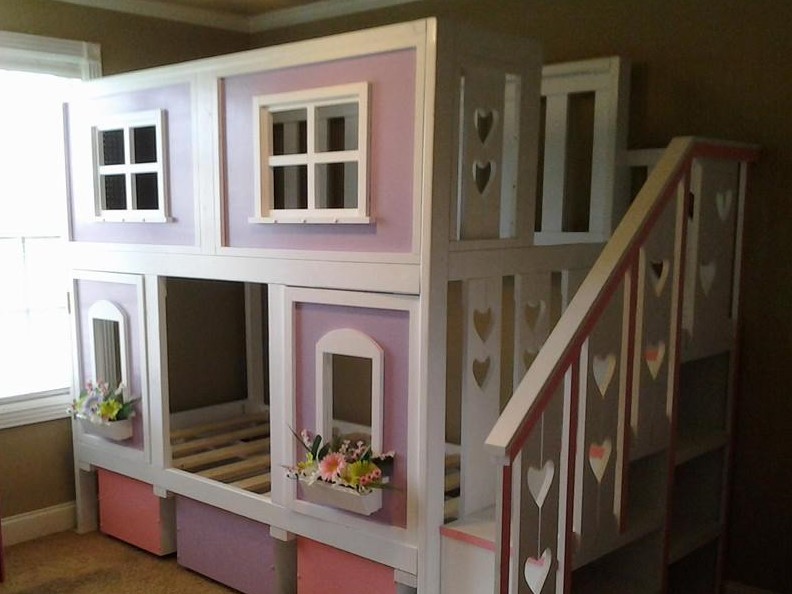
Built mostly from the Simple Bunk Bed plans on this site with a couple of modifications. Namely: made a vertical ladder, used Rockler Bed rail fasteners, increased bed height to fit 3rd twin mattress underneath for when my moms visits, and made a removable bottom safety rail that slides on when my daughter goes to sleep. Overall it was a fun project to do and they kids are really enjoying it.
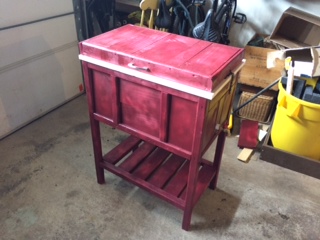
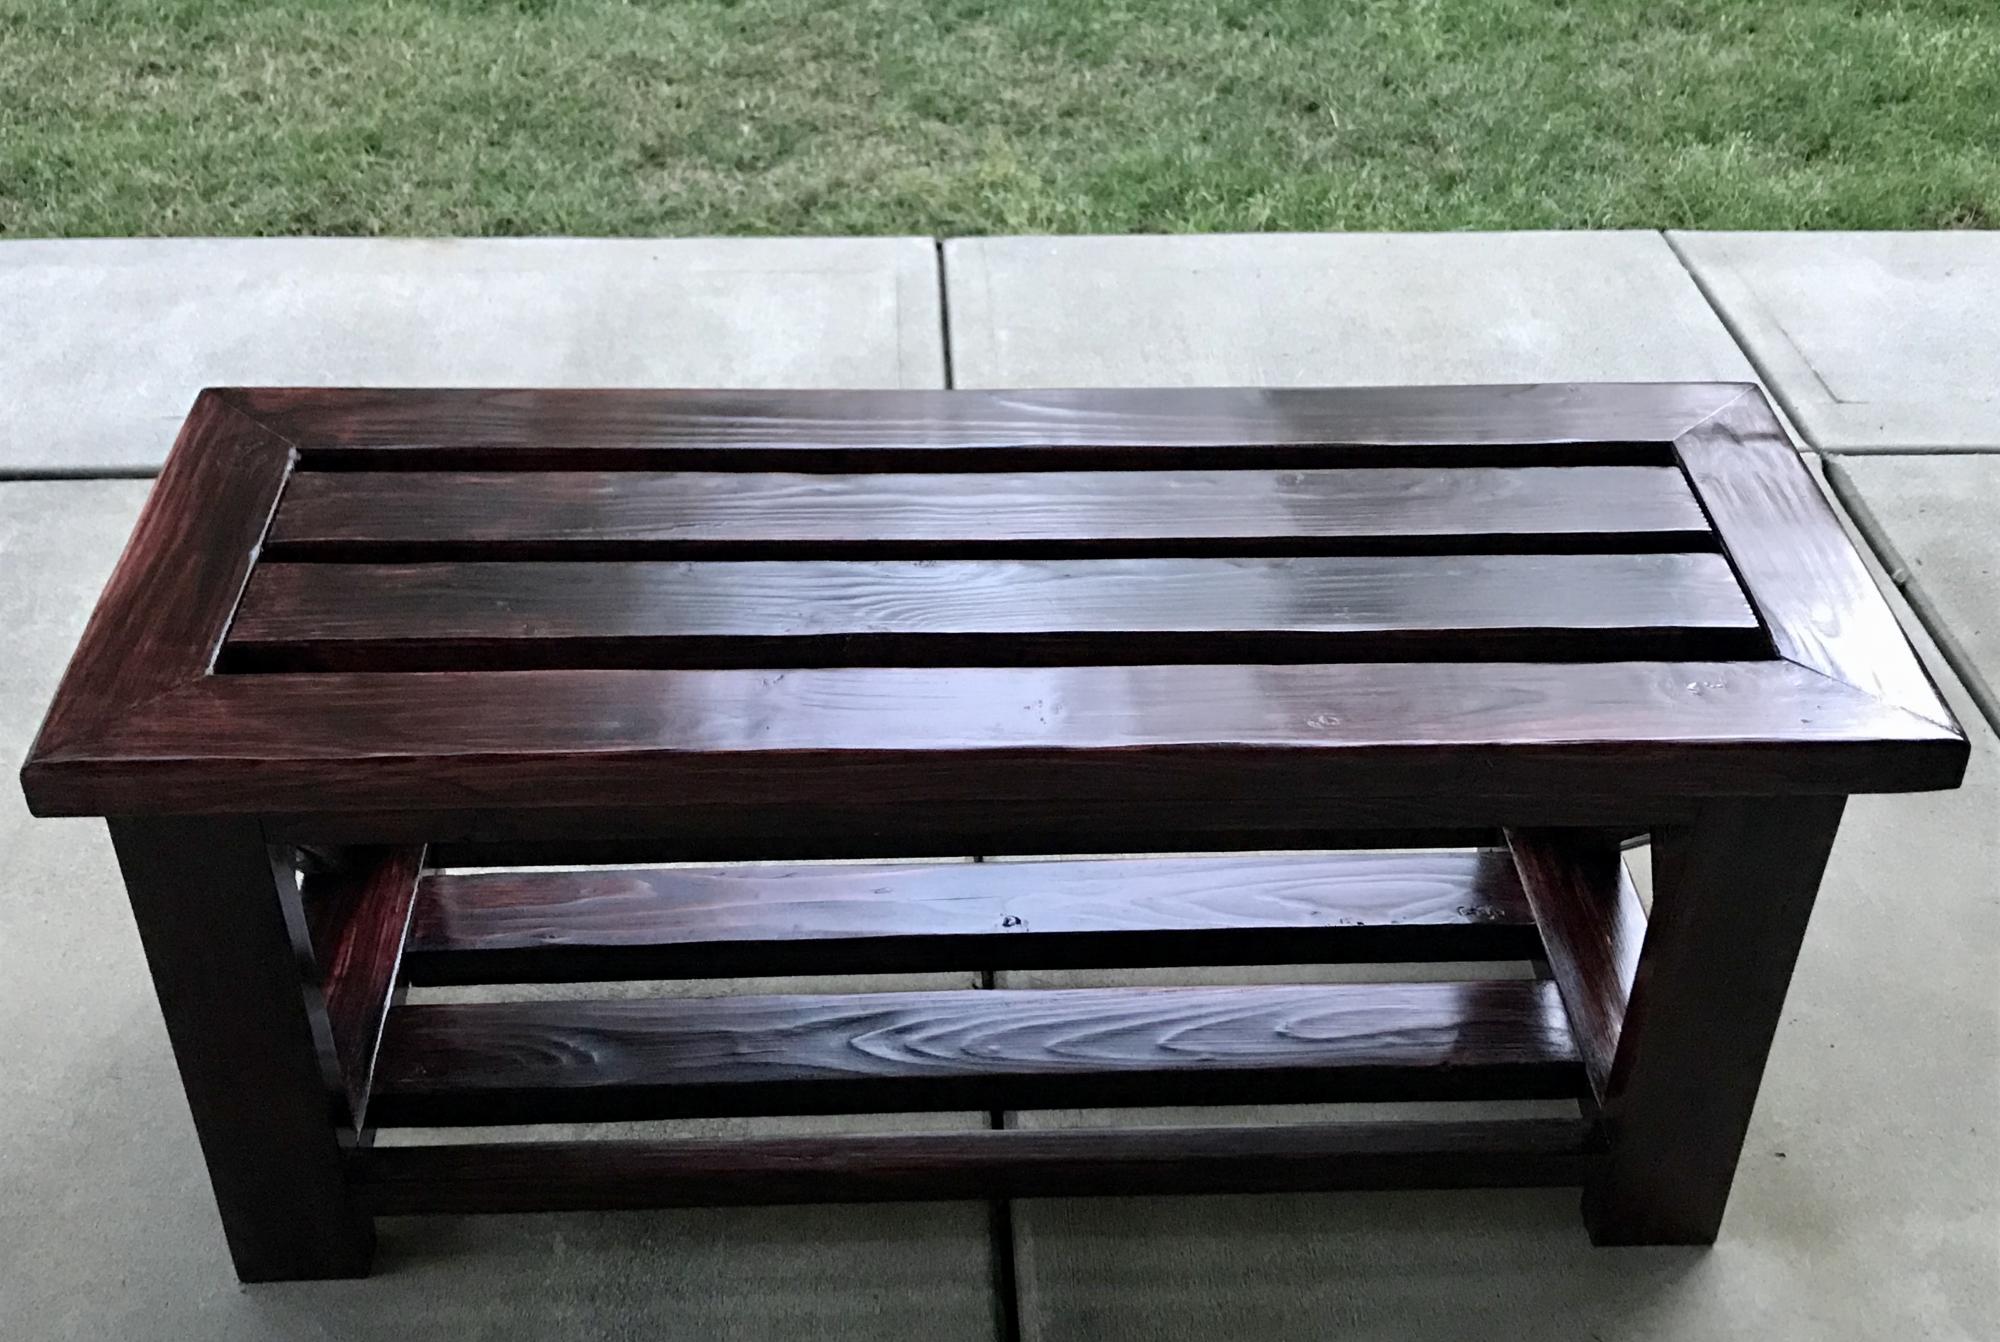
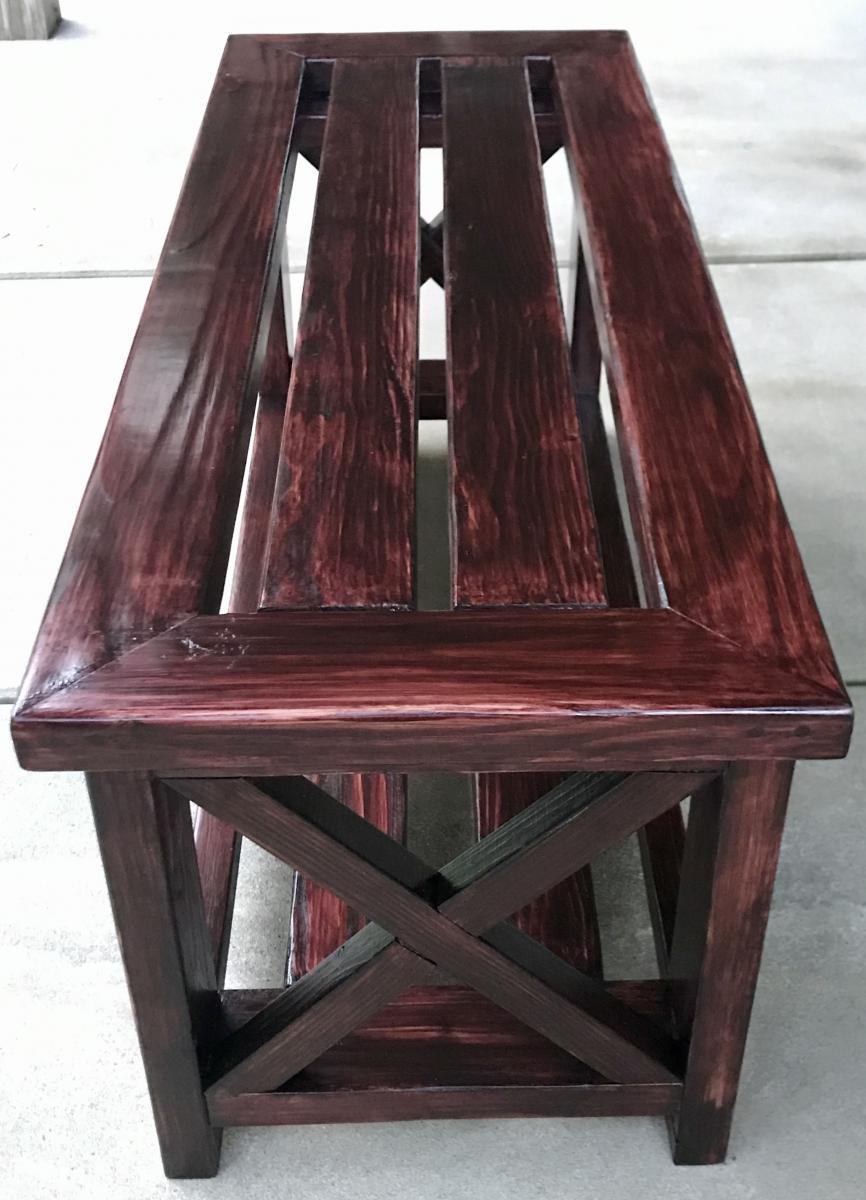
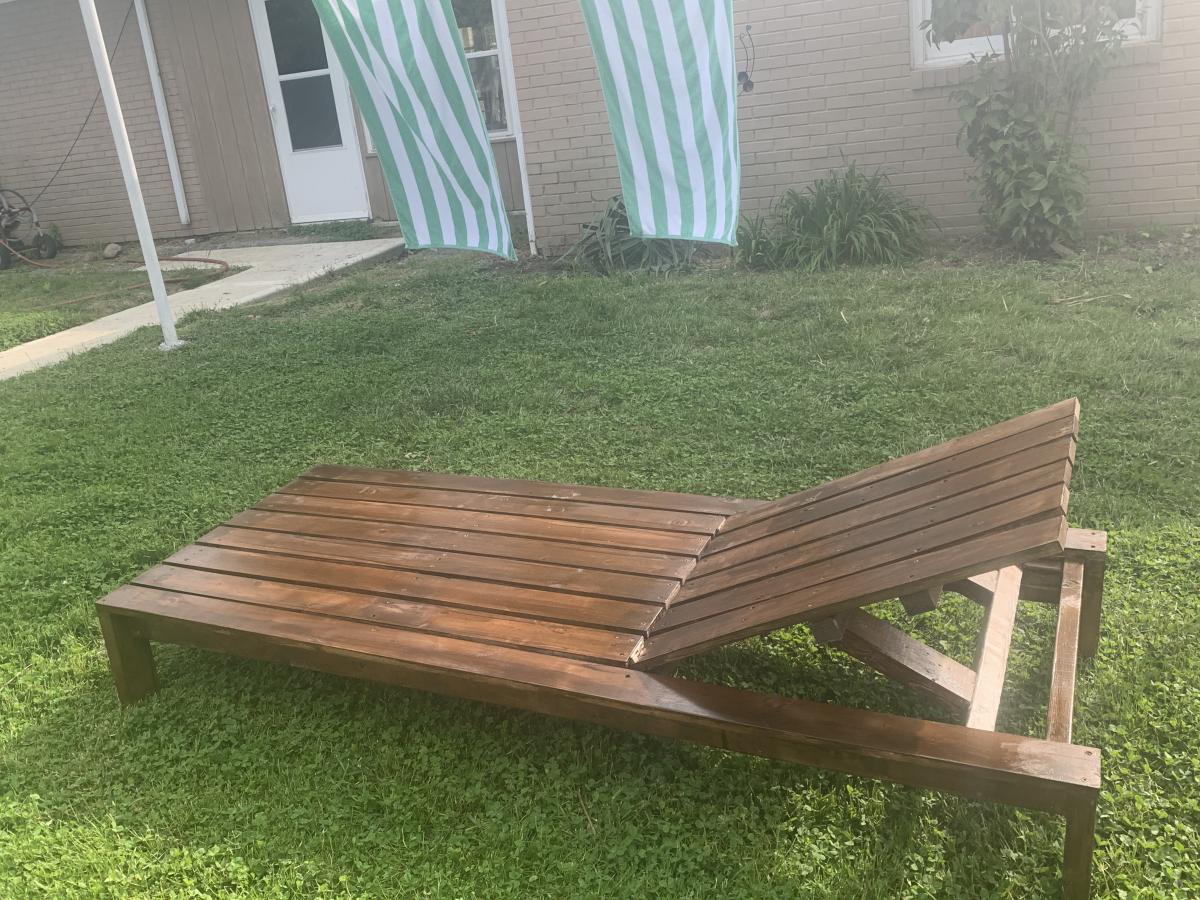
I saw this project posted online and thought it would be a nice improvement to our patio since we just added fire pit benches this would be a great addition instead of dragging the old plastic cooler out every time we entertained.
Once I got all the cuts done it was like putting together a big puzzle. For the most part I did this one my own on the floor of the garage. If you have the space I would suggest doing all the screwing together atop a table and off the floor.
I was very happy with the outcome and I look forward to finding more projects here to add to our backyard.

I used Ana's plans for this entertainment center. I wanted tour pride my husband so I built it while my he was out of town. When he got back into town and settled in to watch television I heard him say "oh wow.....where did you buy this, it's gorgeous"! He thought I had bought it.
thanks Ana for providing easy to follow plans!
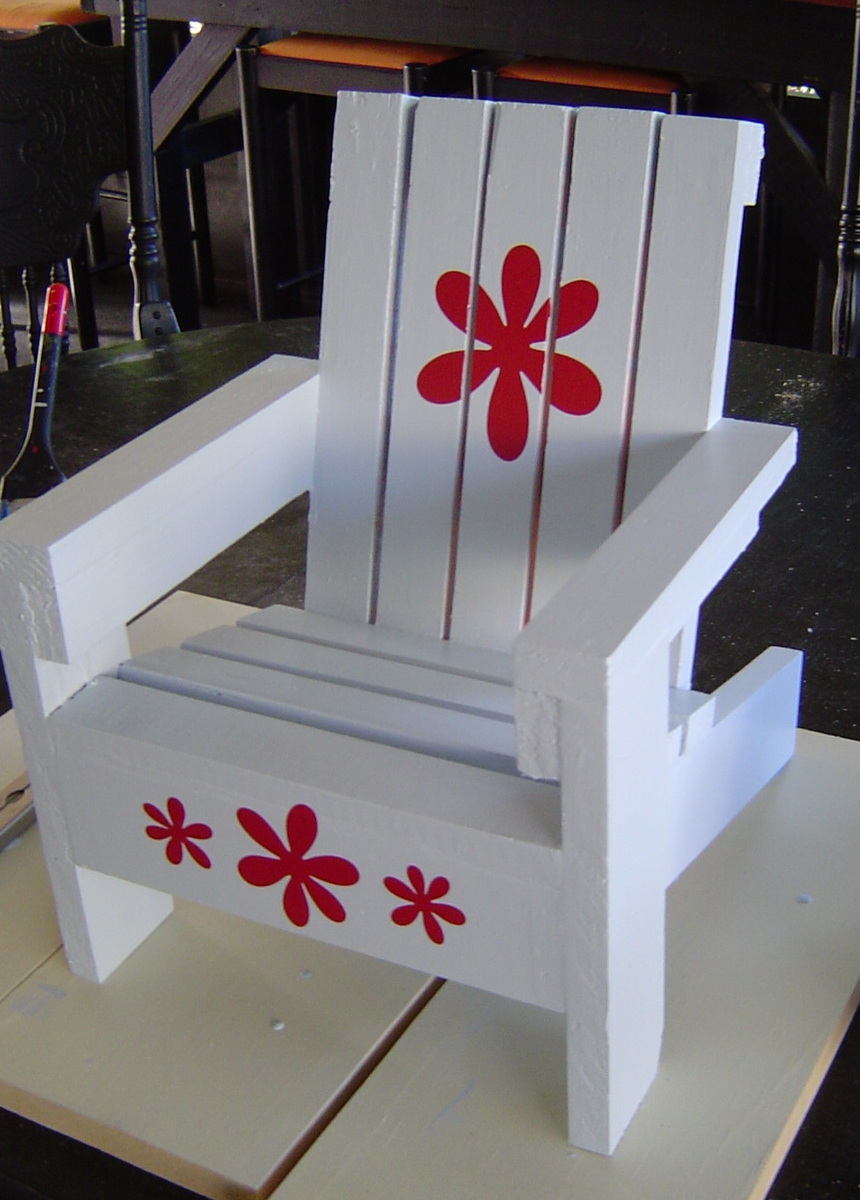
One of my coworkers asked me to build a new stool for her girls. I used the simple stool plans and she loves it.
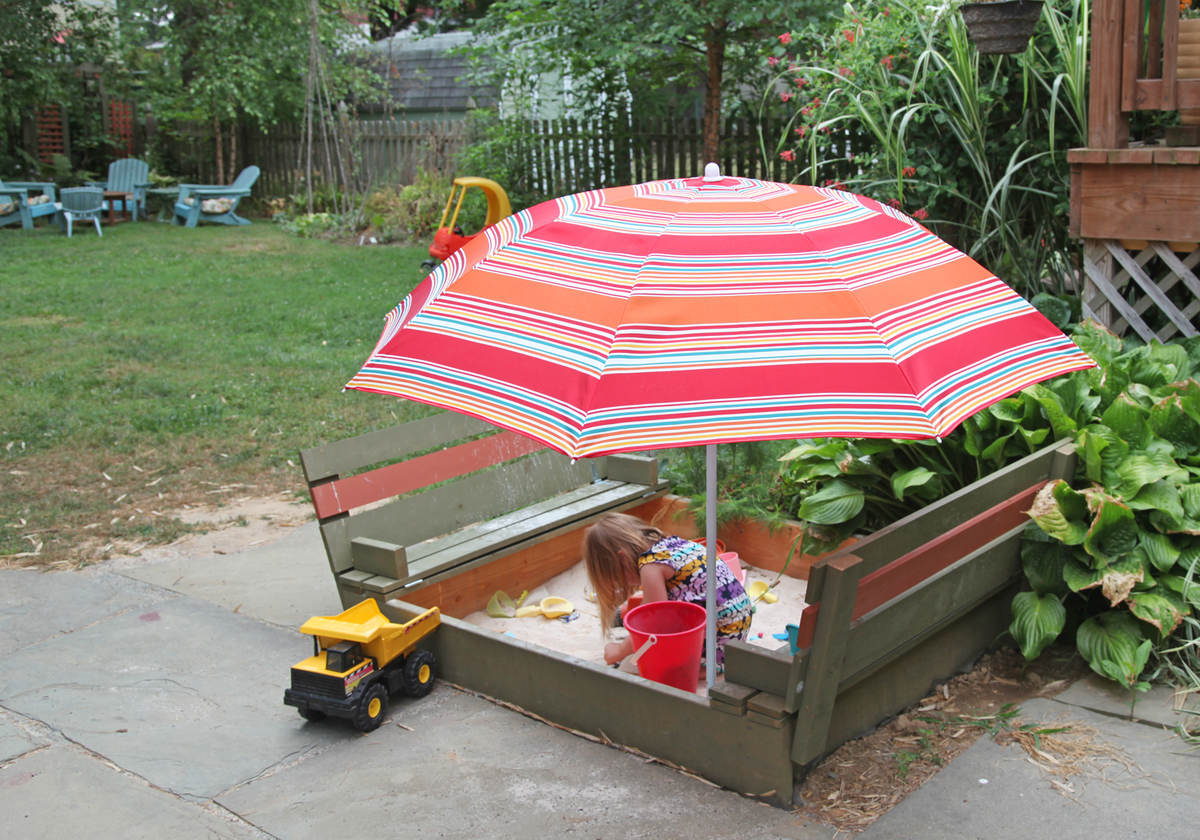
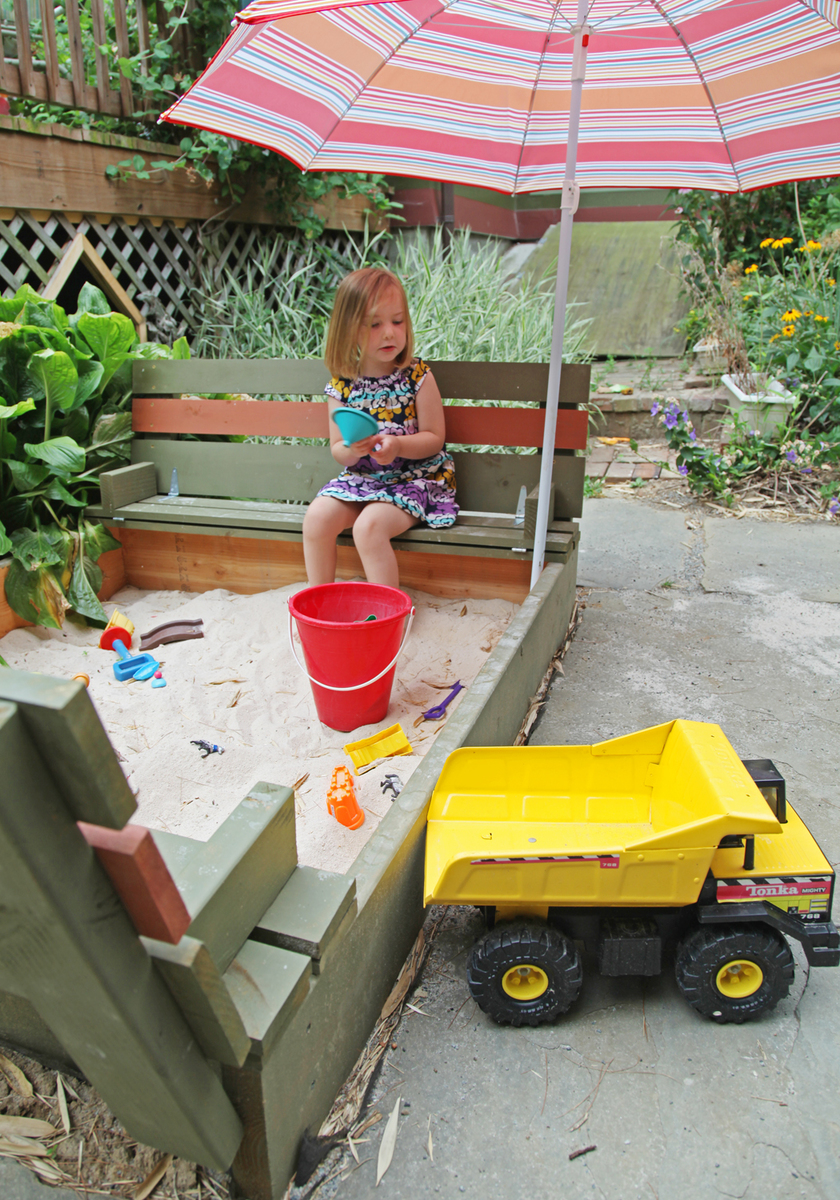
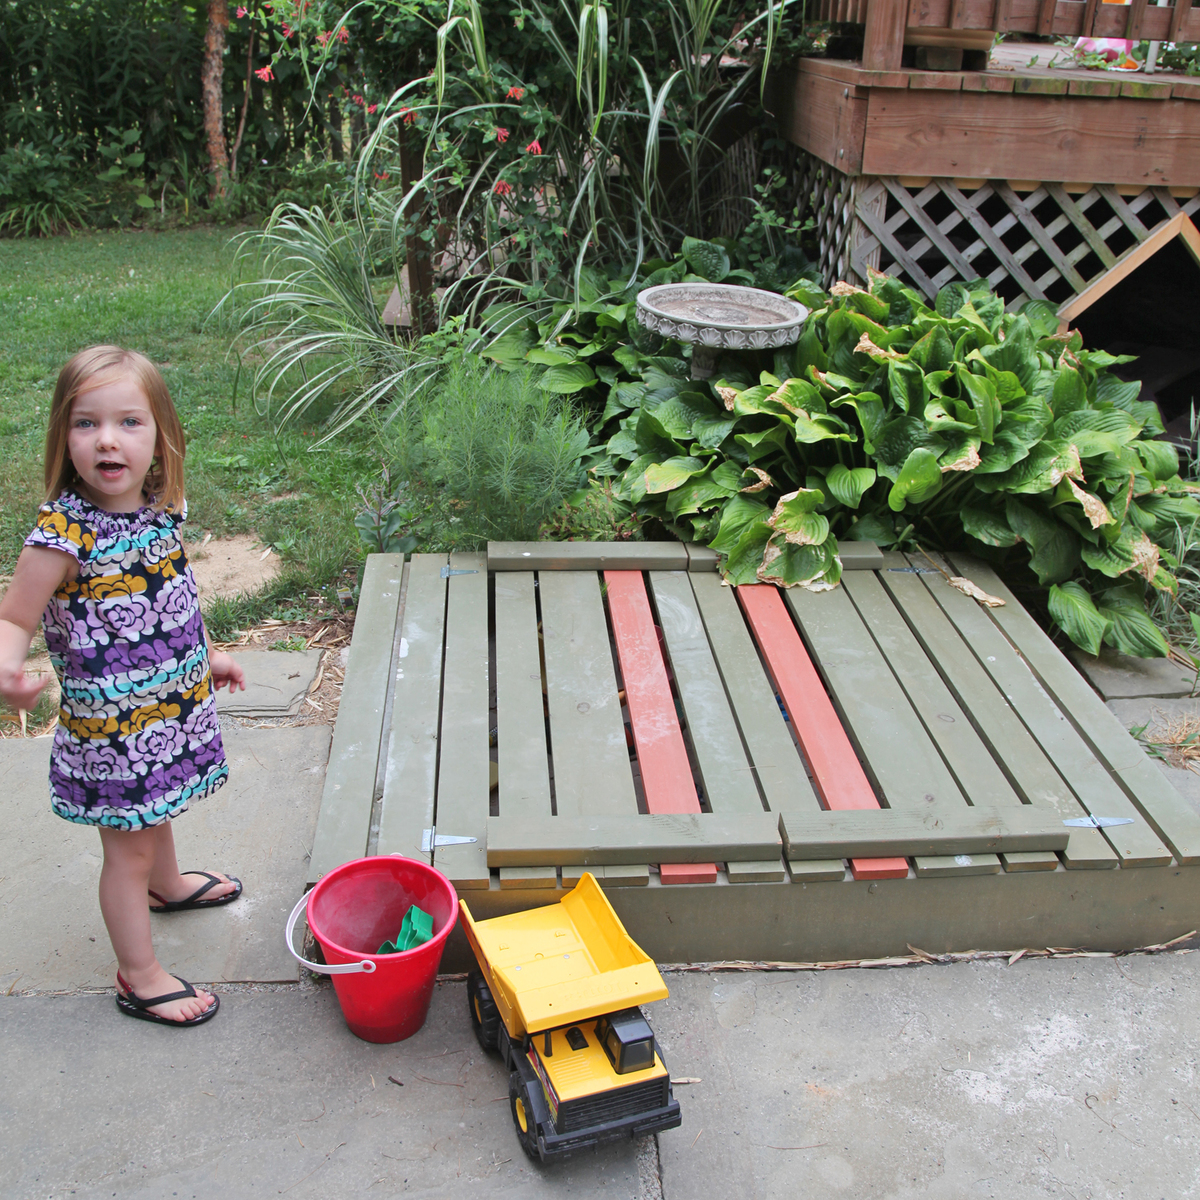
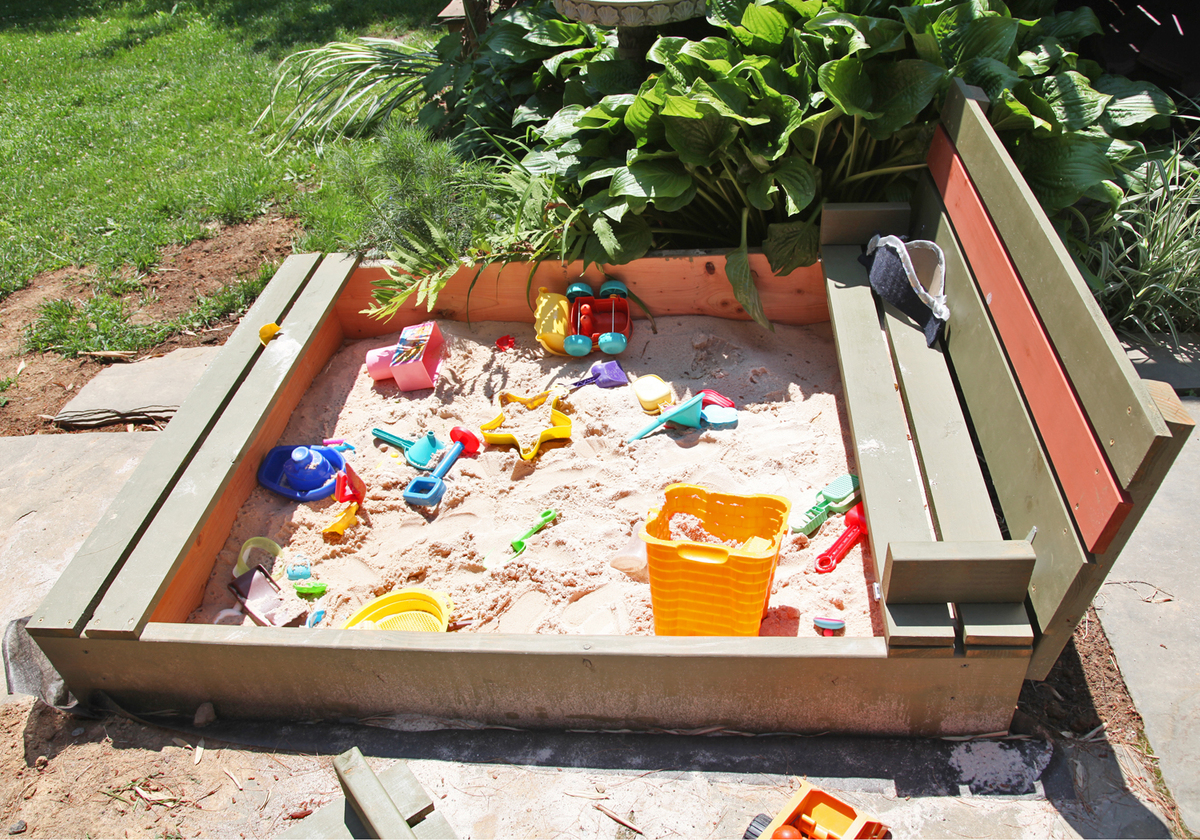
I followed lady goat's instructions but made the seat back taller and the sandbox wider (4'x5'). I have more details here:

Wed, 07/18/2012 - 22:06
Maisie looks like she loves it, too! Love the umbrella addition :-)

In reply to Looks amazing by Lady Goats
Thu, 07/19/2012 - 05:02
The kids do really like it but it has been so hot it hasn't gotten much use yet. I am hoping once the weather cools off they will be out there more. The one other addition that I haven't gotten around to is adding a pvc pipe on the inside so that the beach umbrella will stay in place better.
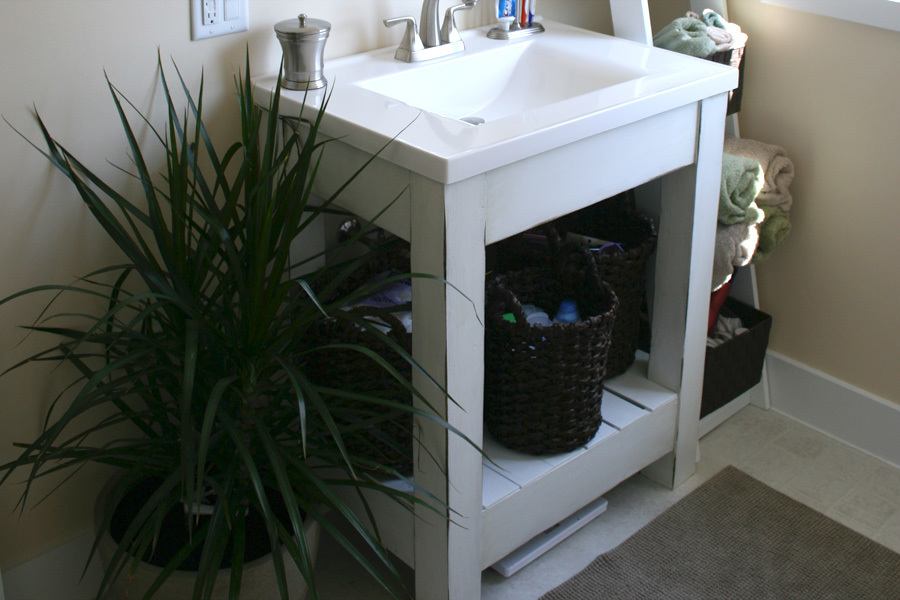
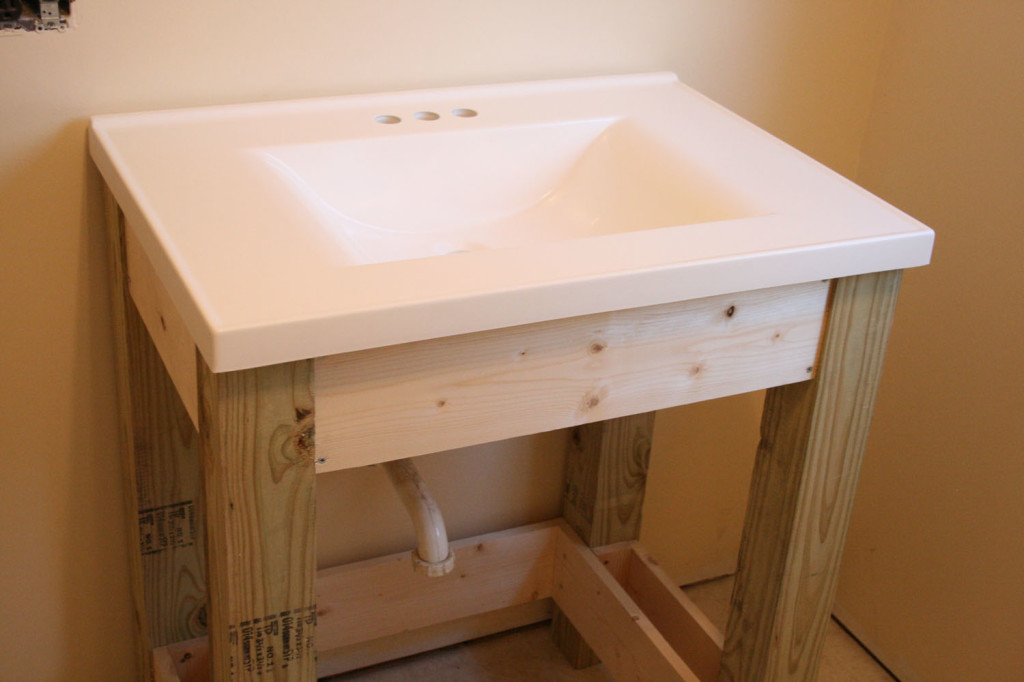
Our first build! After finding a vanity top we loved for our DIY bathroom renovation, my husband and I went in search of a chunky, open base with simple lines and a shelf on the bottom. Nothing at the store appealed to us, and I had been talking about all the projects I wanted to build from Ana's site for weeks, so we decided to try the Simple Open Farmhouse Style Vanity. We would just add a shelf to the bottom and omit the top!
This was a really easy plan to scale for our sink, and because we were not doing the top we could make all the necessary cuts with a chop saw.
The only purchases we had to make for the base were screws, slats and a 12-foot-long 4×4 that the guy at the store cut into four 36″ pieces for me. It’s pressure-treated lumber meant for outdoor use, but it was on sale and they didn’t have any other 4x4s. The rest of the materials were 1x4s and 2″ screws that we already had on hand.
For the bottom shelf, we just duplicated the spacers, aprons and skirts from the top, and placed wide slats over that. They look crooked in the photo because they haven't been glued on yet, and using the baskets makes them shift around!
With the vanity top in place the counter height is a little over 37 inches. We are tall people, so this is a tall sink! Perfect for our first build. Thanks Ana!
Fri, 05/09/2014 - 08:39
It looks like you bought it. Way to go for a first build and a job well done.

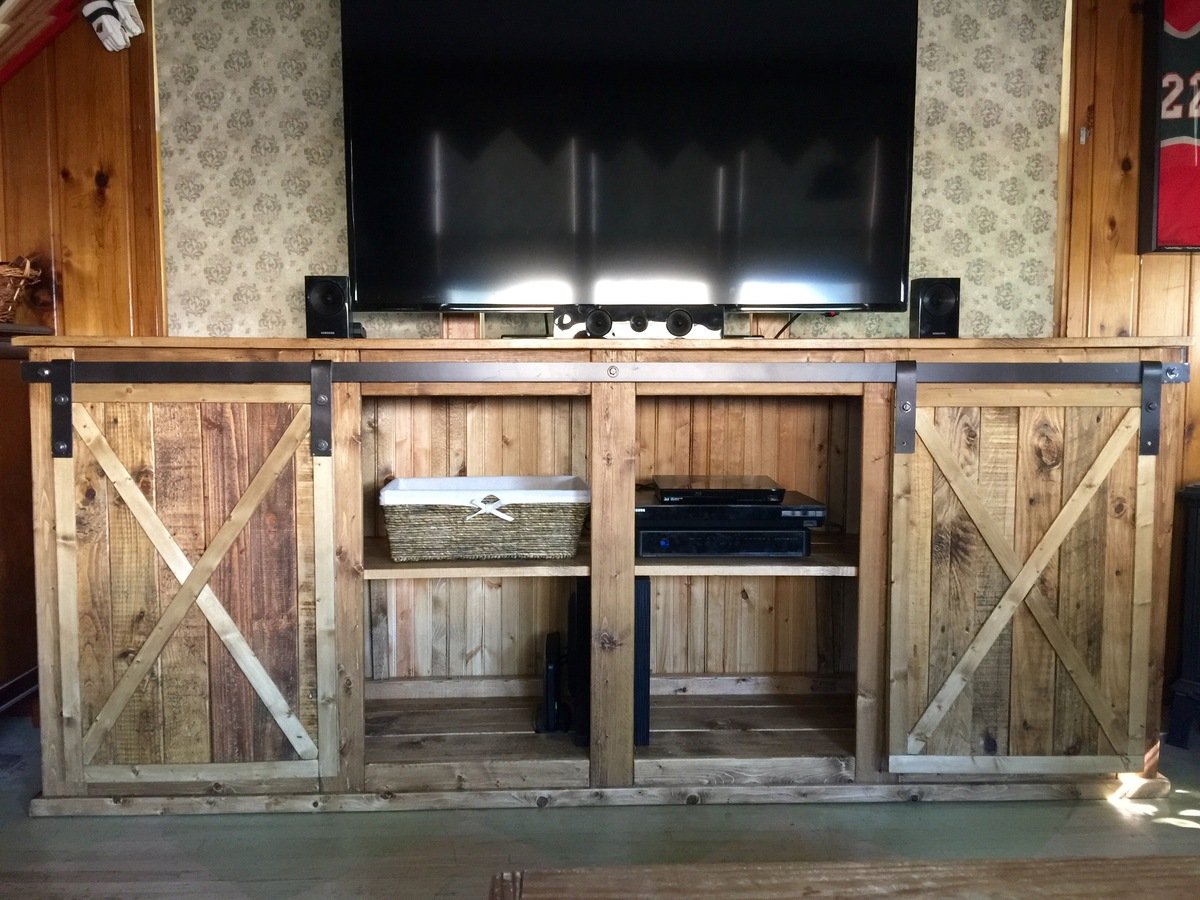
I built this PVR/DVD cabinet by combining my stained glass hobby with my woodworking.
The stained glass door works well as the remotes operate through the glass, I left the rear of the cabinet open for wiring but also to allow any heat to escape.
I used some brushed finish cedar that a neighbor gave to me but used dressed ply on the interior, any wood of choice would work.
My first piece of furniture using the plans as guidance. Needed something to organize the shoes that accumulated at the front door.
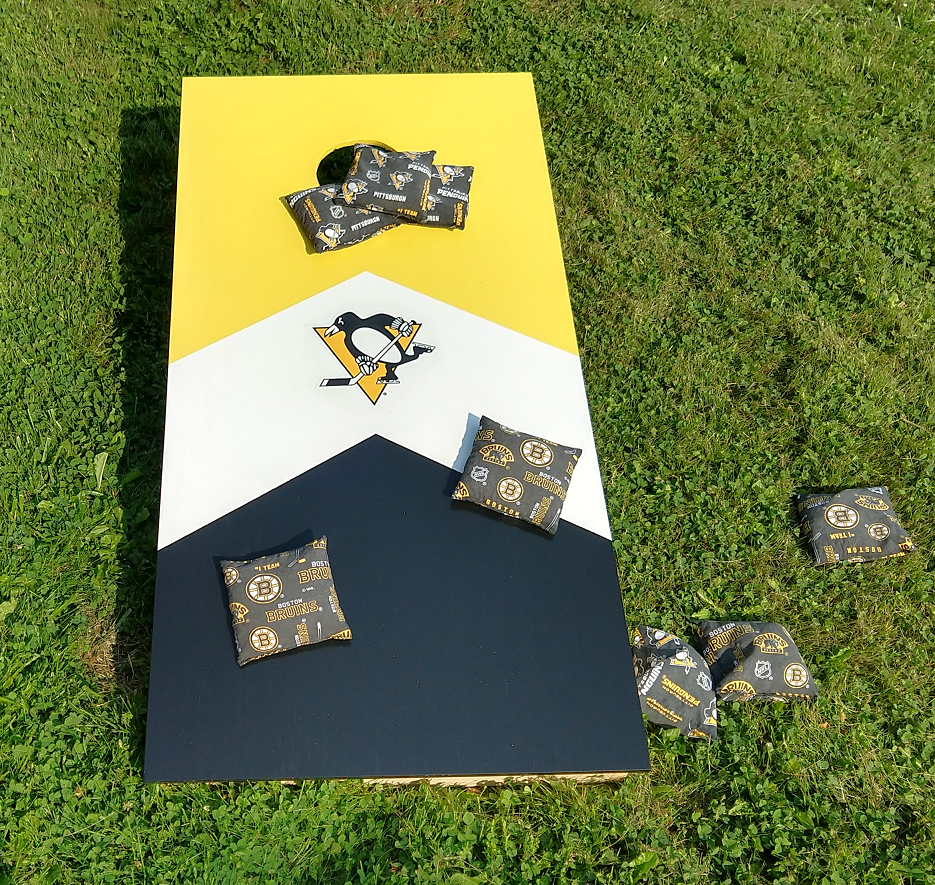
Did one with Bruins as well. Wife made the bags. Did another set with LA Rams for my brother.
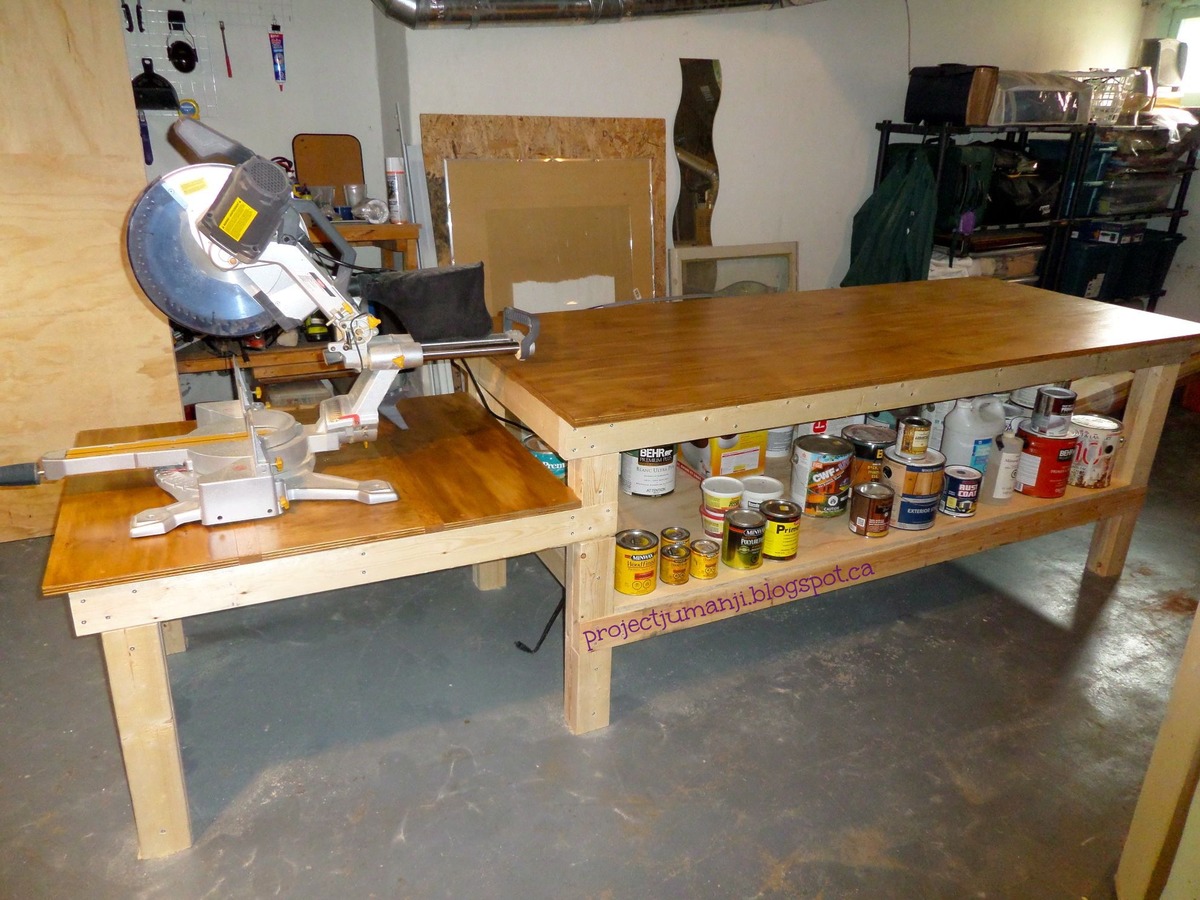
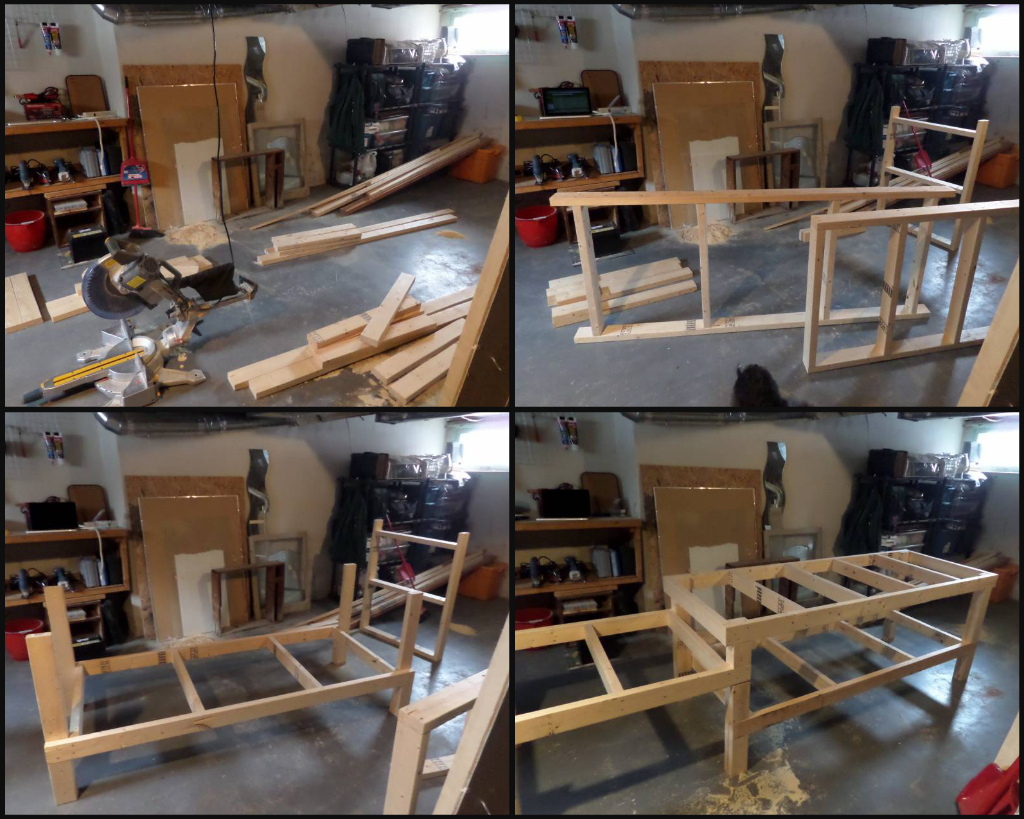
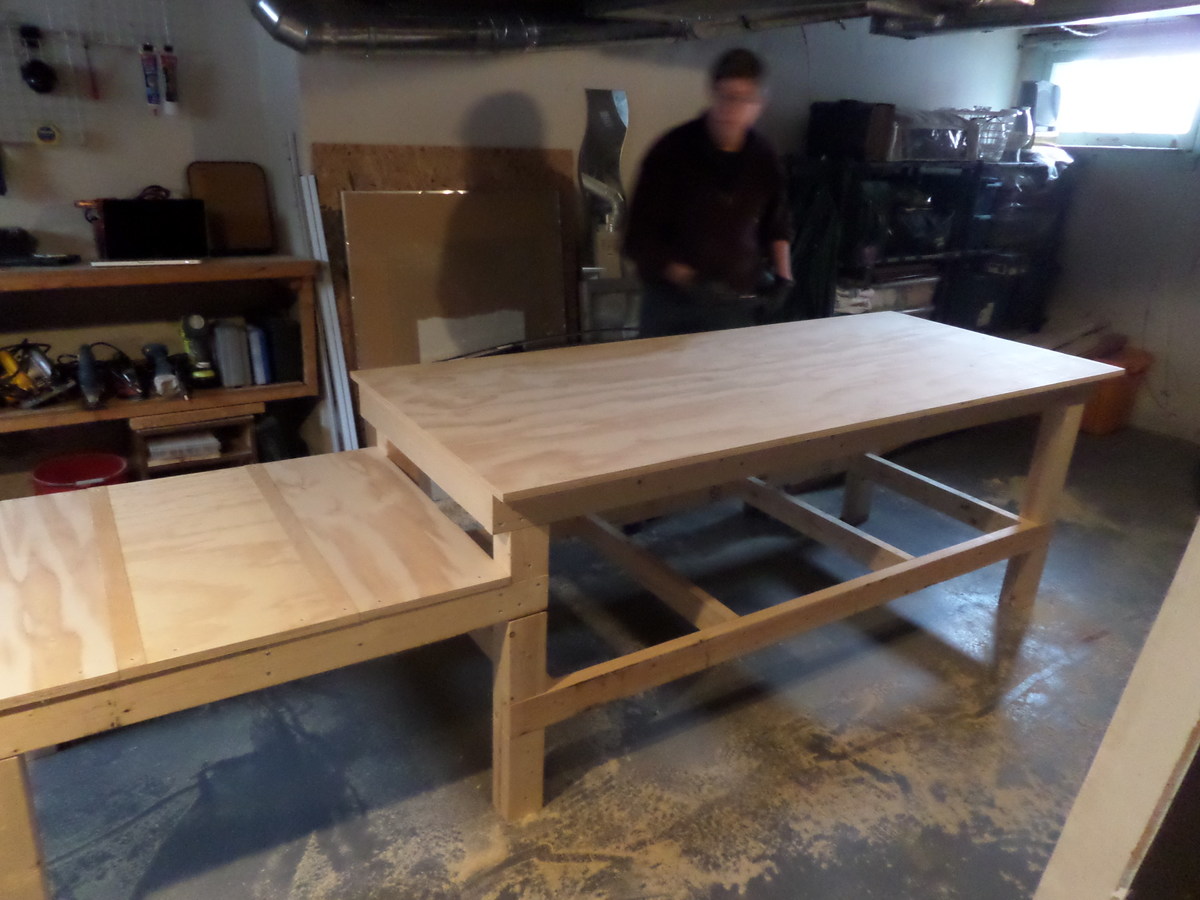
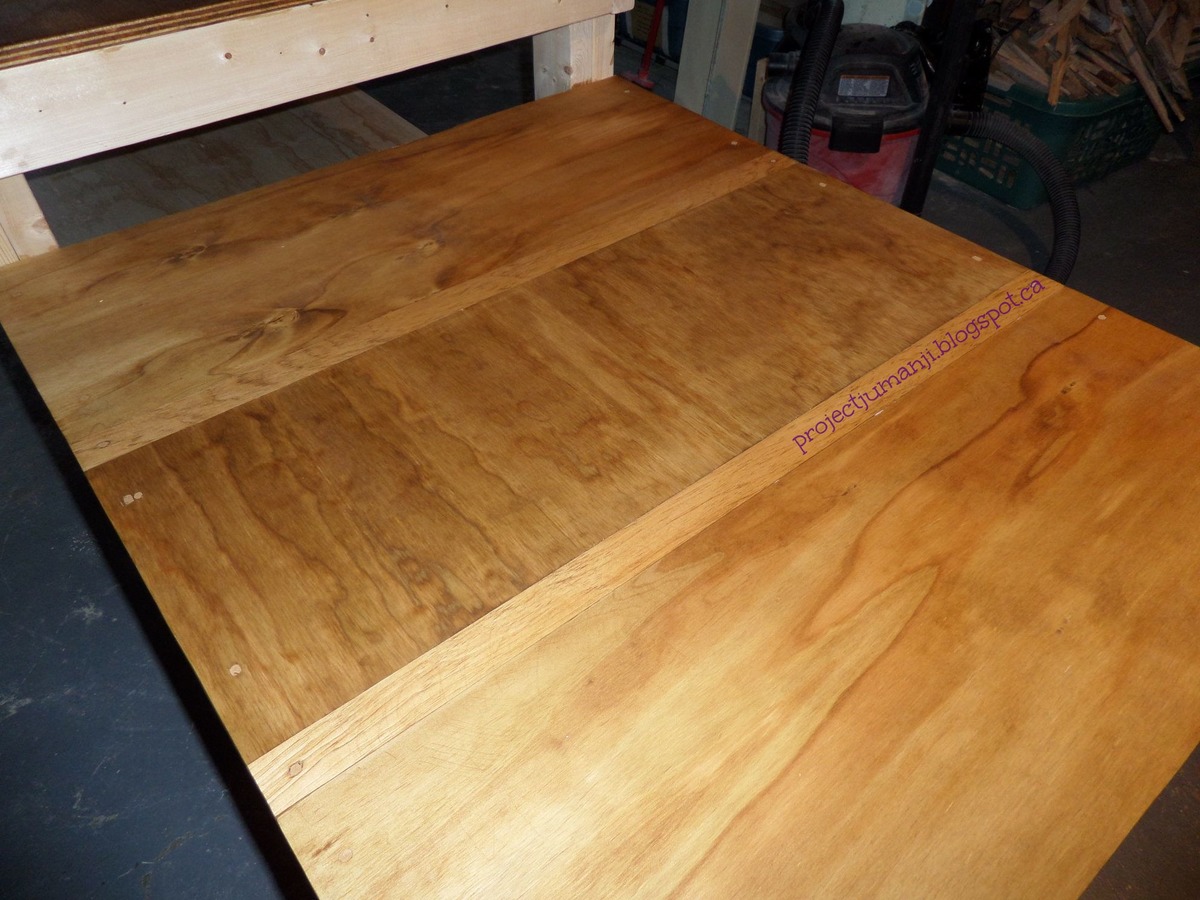
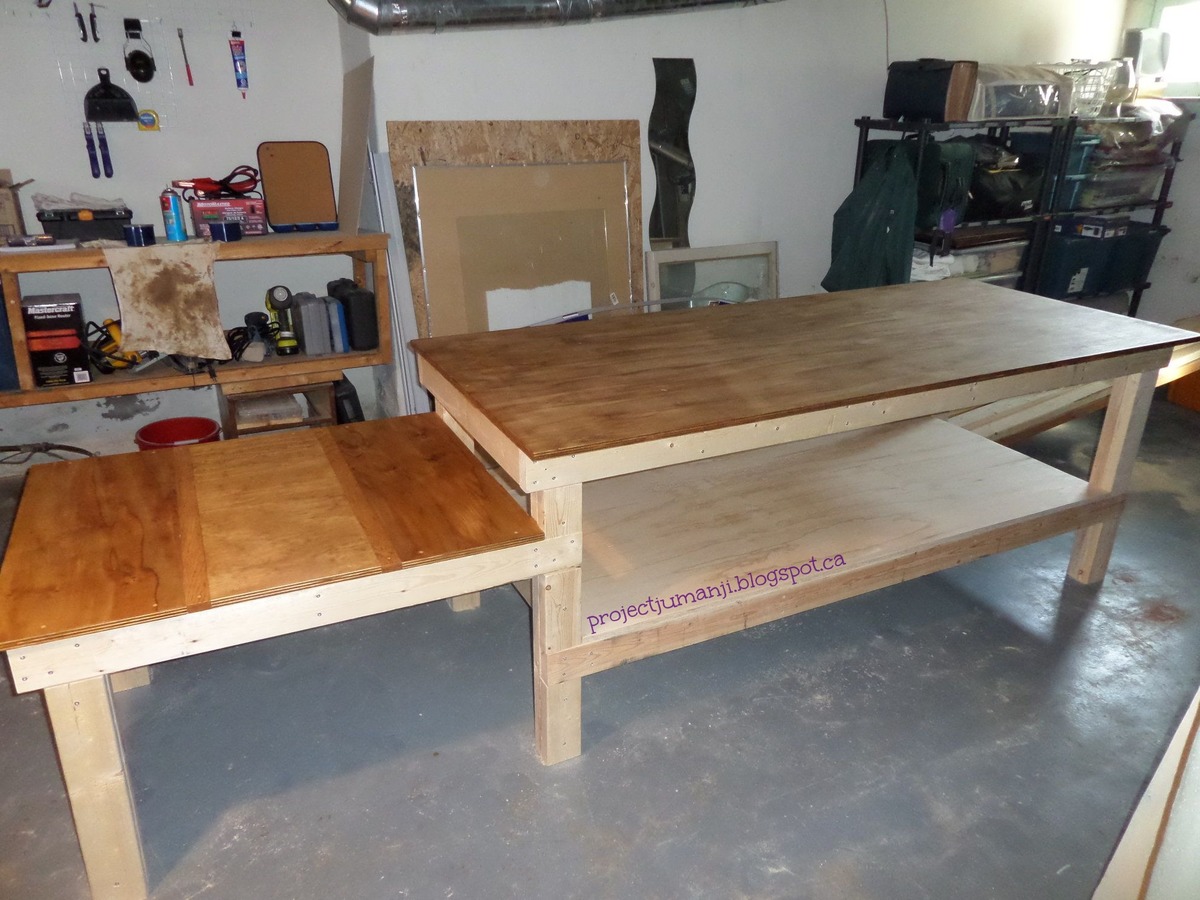
After a winter of working on my concrete basement floor (and up in Canada, that's not any type of awesome), I decided it was high time to build a workbench.
I found a great plan on here (see plan link below) and then made one quick adjustment.
Adding a side table gave me somewhere to put my saw, as I don't have anywhere else for it to go, and buying a stand for it would only take up that much more room in my basement.
It was a relatively easy build, and is a great huge space to refinish wood windows on, build cabinets on, etc.
Leave me a comment, I'd love to hear your thoughts!
I am so happy to be able to submit a brag post. Besides shelves and flower beds this is The first piece of furniture I make besides some mistakes and frustrations in the learning process it went relatively smooth! I am super happy to have made my first piece of furniture on my own :). Thanks for the great plans and for everyone who made helpful suggestions in the comment section. I also recommend using another 2x2 piece above the drawer railing to
hold it in place so it doesn't tip out. Thanks again!
Fri, 09/09/2016 - 18:23
This is just beautiful, great job and thank you so much for "bragging"!
This is my first project, I’m soooo happy with how it turned out!

Wed, 05/27/2020 - 11:16
Looks awesome!!! Thank you so much for sharing photos!
Fun project!
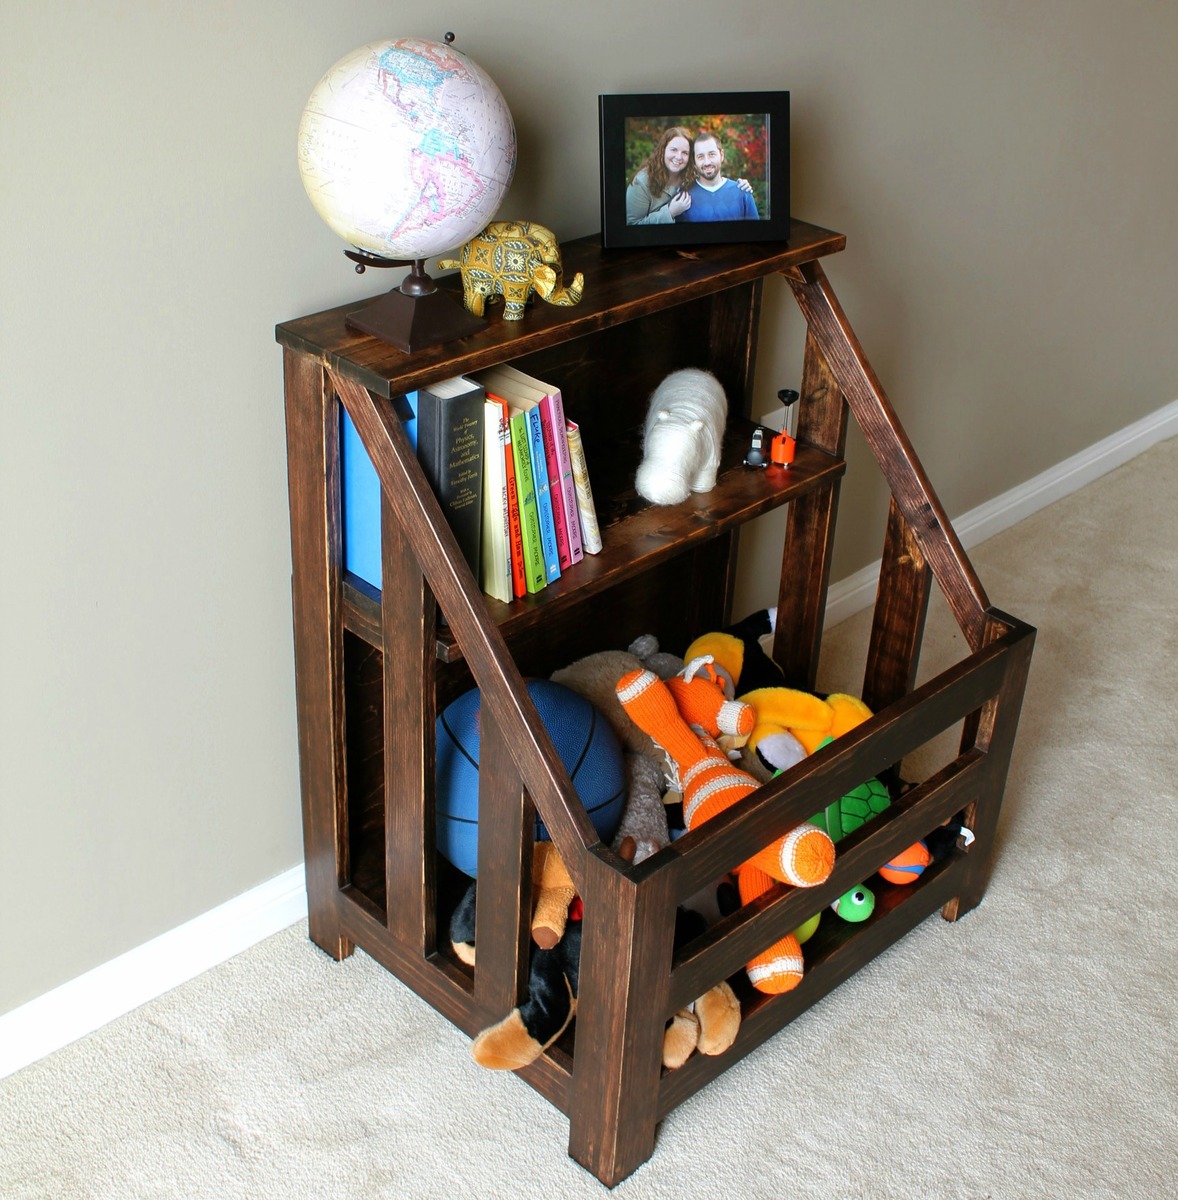
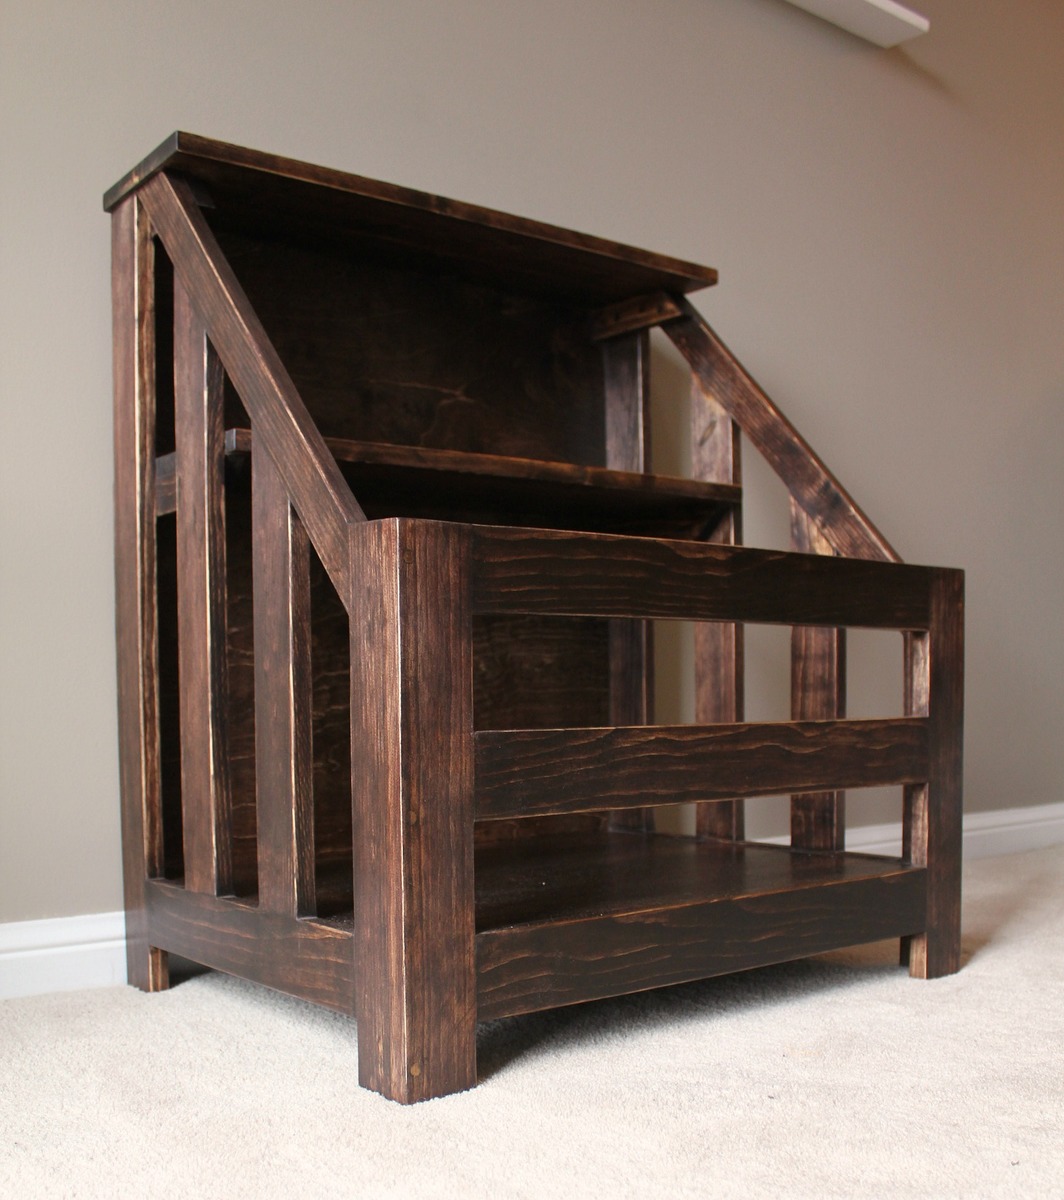
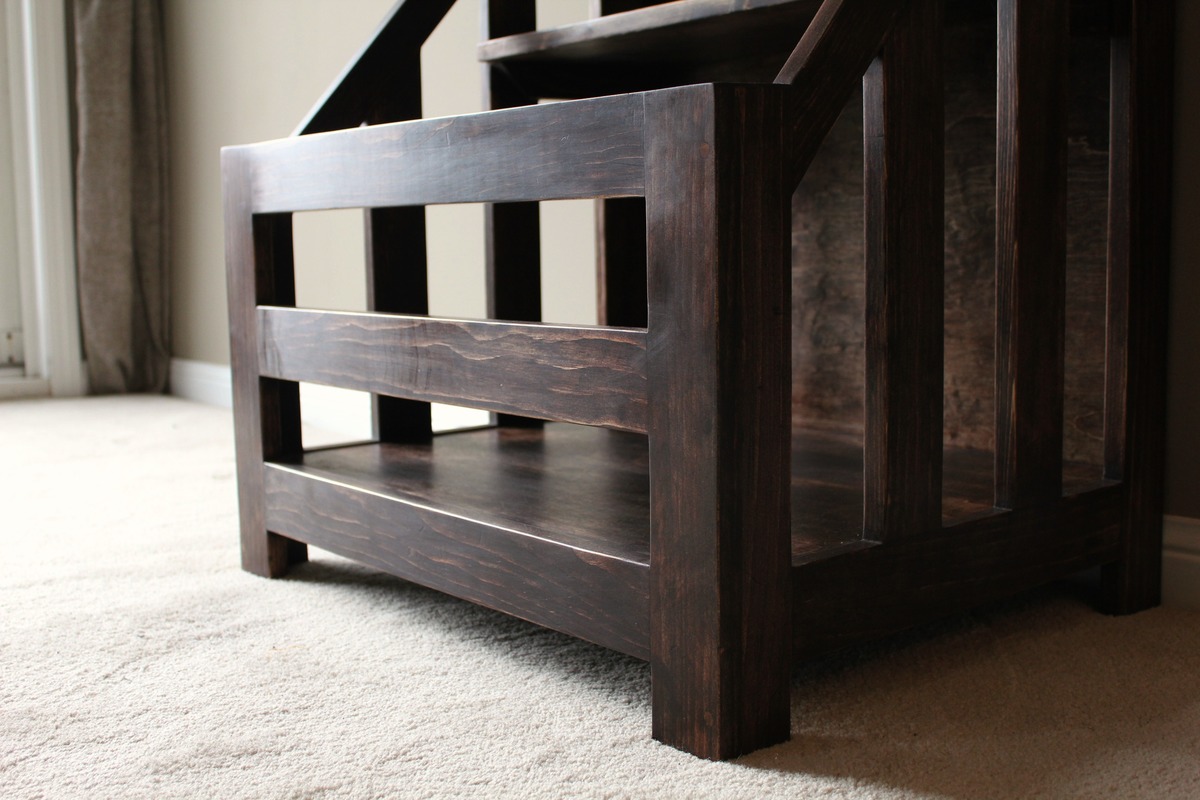
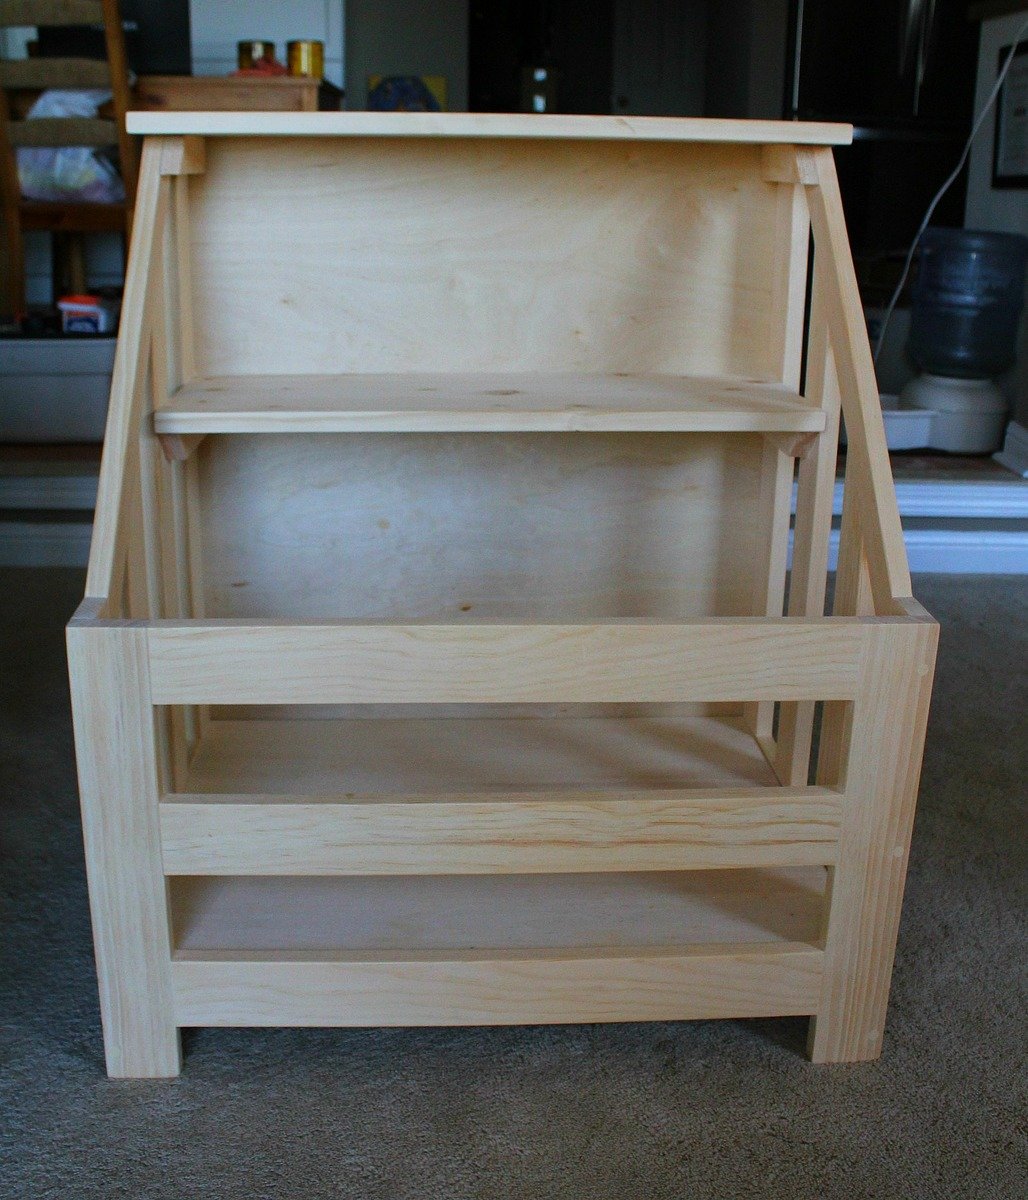
We built this bookshelf/toybox for our cousin's daughter - as a 1st birthday present. Overall, the project only took a weekend (including staining and waxing), and the cuts and assembly are pretty straight forward.
We wanted it to be larger than the one in the plans, so it took some time to figure out the dimensions before we started cutting. There was a bit of, "What do you think of this height?" and, "Is this too wide?"
My husband and I have built quite a few projects together so this one was fairly low on the difficulty scale. As long as you are comfortable with a mitre saw, you can do it. The kreg jig made it easier to drill pocket holes, but even with only different-sized drill bits and a steady hand you can make them.
This is one of my favourite builds - maybe because it was a gift for the sweetest little girl. Plus others have shown interest in it, so I might just have to start a side business!
More details on what we did can be found at:
http://turtlesandtails.blogspot.ca/2014/05/child-sized-bookshelf-toybox…


Wed, 09/10/2014 - 08:13
I was thinking the same thing when I saw the original design. I like it but the dementions are quite a bit smaller than I want to make for the toy box gift that I want. I am doing the same thing. It will be a 1st birthday present for a little girl I am thinking of making it 36 wide and at least 36 high and 24 deep. What would the dementions be and how much would that change the side angle cuts?

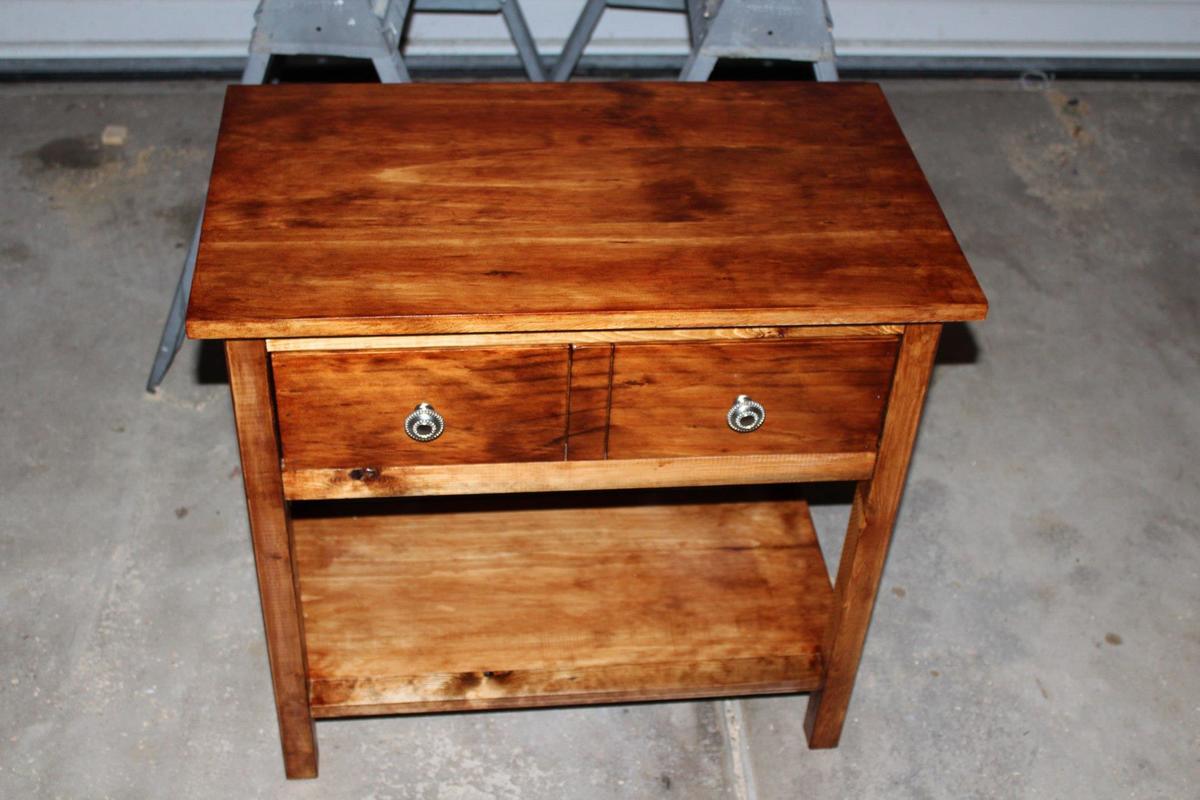
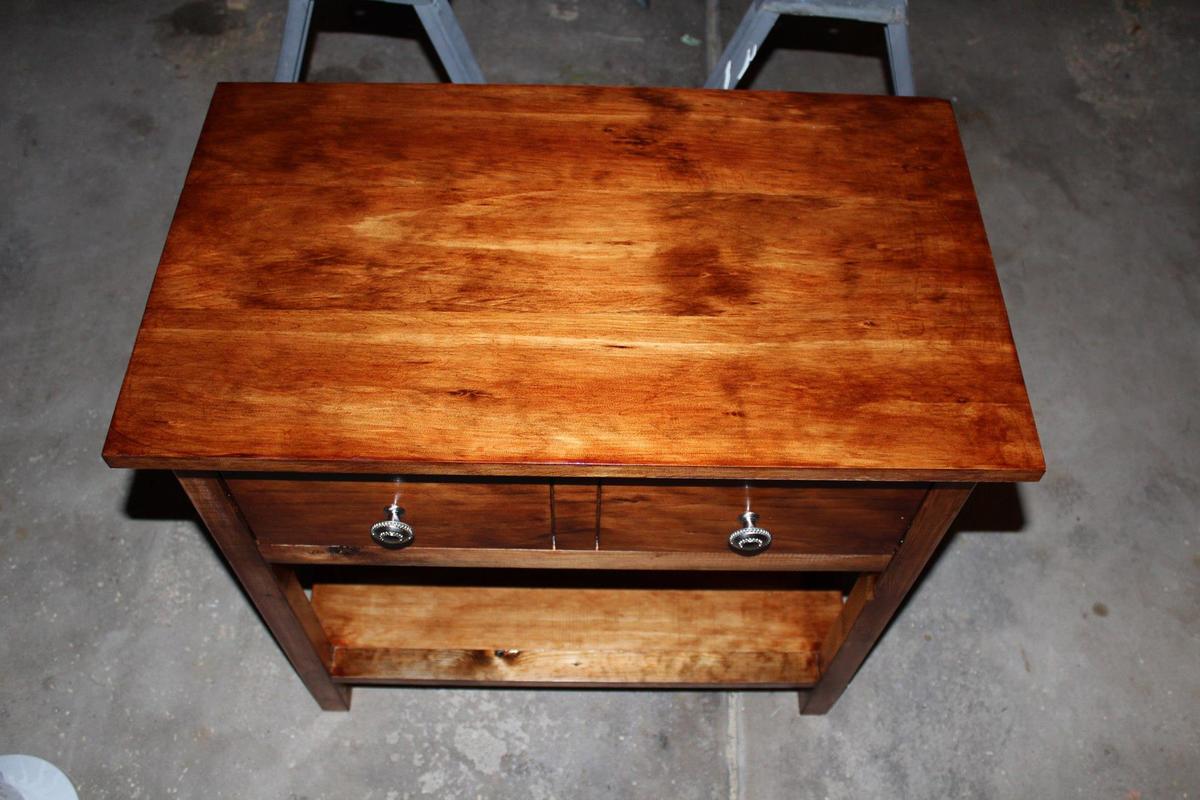
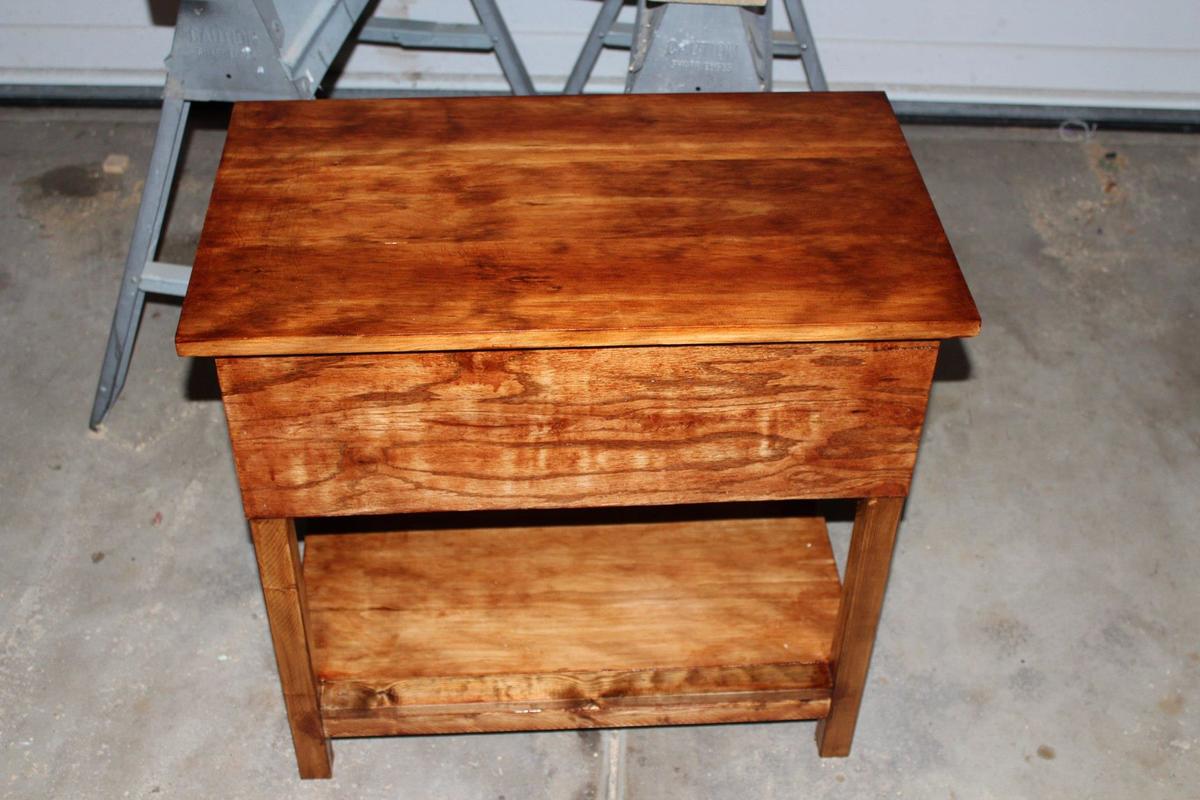
My Wife asked me to look into a night stand for her. I am so so so thankful that I was able to come across Ana's site. I showed the site to her and she asked me to build this night stand as opposed to going out and buying her some expensive poorly built nightstand. Thank you Ana for this wonderful site and the inspiration that some of us need to "get started."
One thing that I didn't think about when I started this project:
The cut list is a suggestion of what you will need to cut. I only ran into one major issue and that was with the inset bottom of my pull out drawer. I cut my drawer sides to the dimensions on the cut list (not paying attention to the note from Ana) and had to adjust my cuts for the drawer. I ended up ripping down the remainder of the 1x12 and paired it with the 1x6 that I had left over. Using the Kreg Jig I now had a perfect fit for my drawer.
I would have liked to have had a darker stain (more of an espresso) and that is my fault for not buying different stains and testing them on my wood choices. As far as my wood choices I used 1x6 and 1x12 "white board" 1x2 and 2x2 precut pine and bought a scrap piece of 1/4in plywood for the backer.
The Kreg Jig made this project very easy to complete as well as my counter sink drill bit. Although not impossible to complete without these two tools it is remarkable easier to complete.
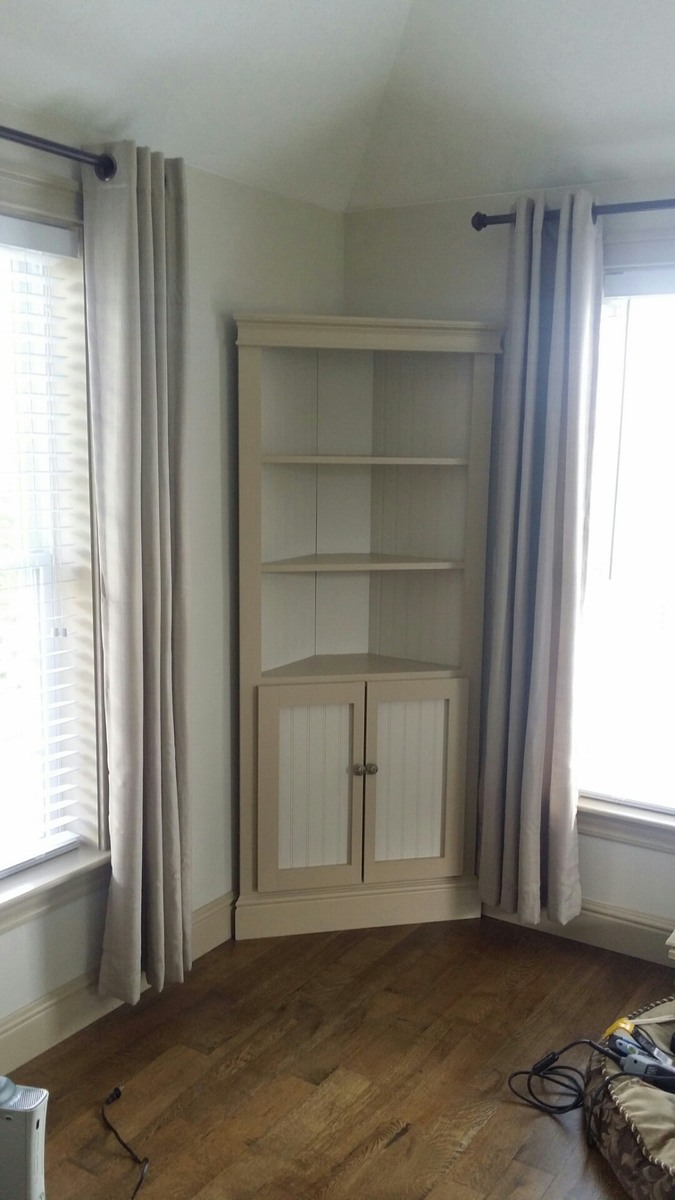
I did this project over the weekend. I love it. Makes the family room pop. I needed something to hide my cable box and this worked perfectly. I made two, one in each corner. I too purchased the creg jig and now that I know how to use it, I will be doing more diy projects. Thanks.
Mon, 05/19/2014 - 06:05
Excellent job, looks great. Where did you get the plans from? My wife bought one from a unfitted furniture store last year and stained it but it looks nothing like what you build. I would like to build one myself if I can get the plans.
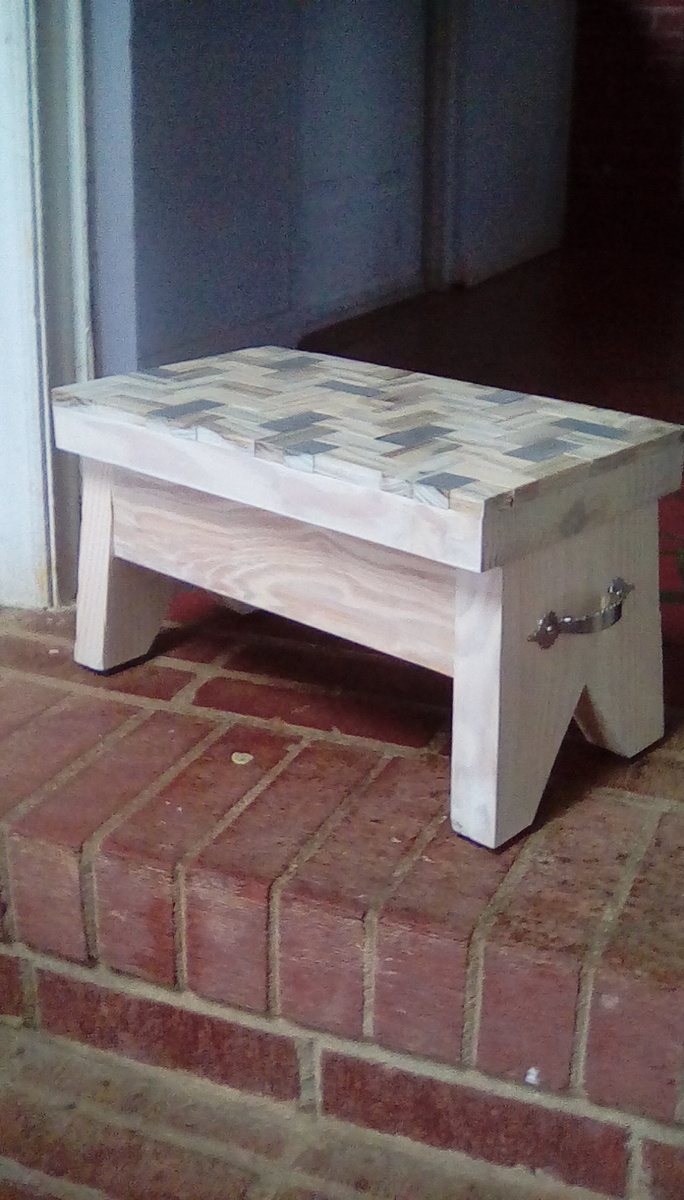
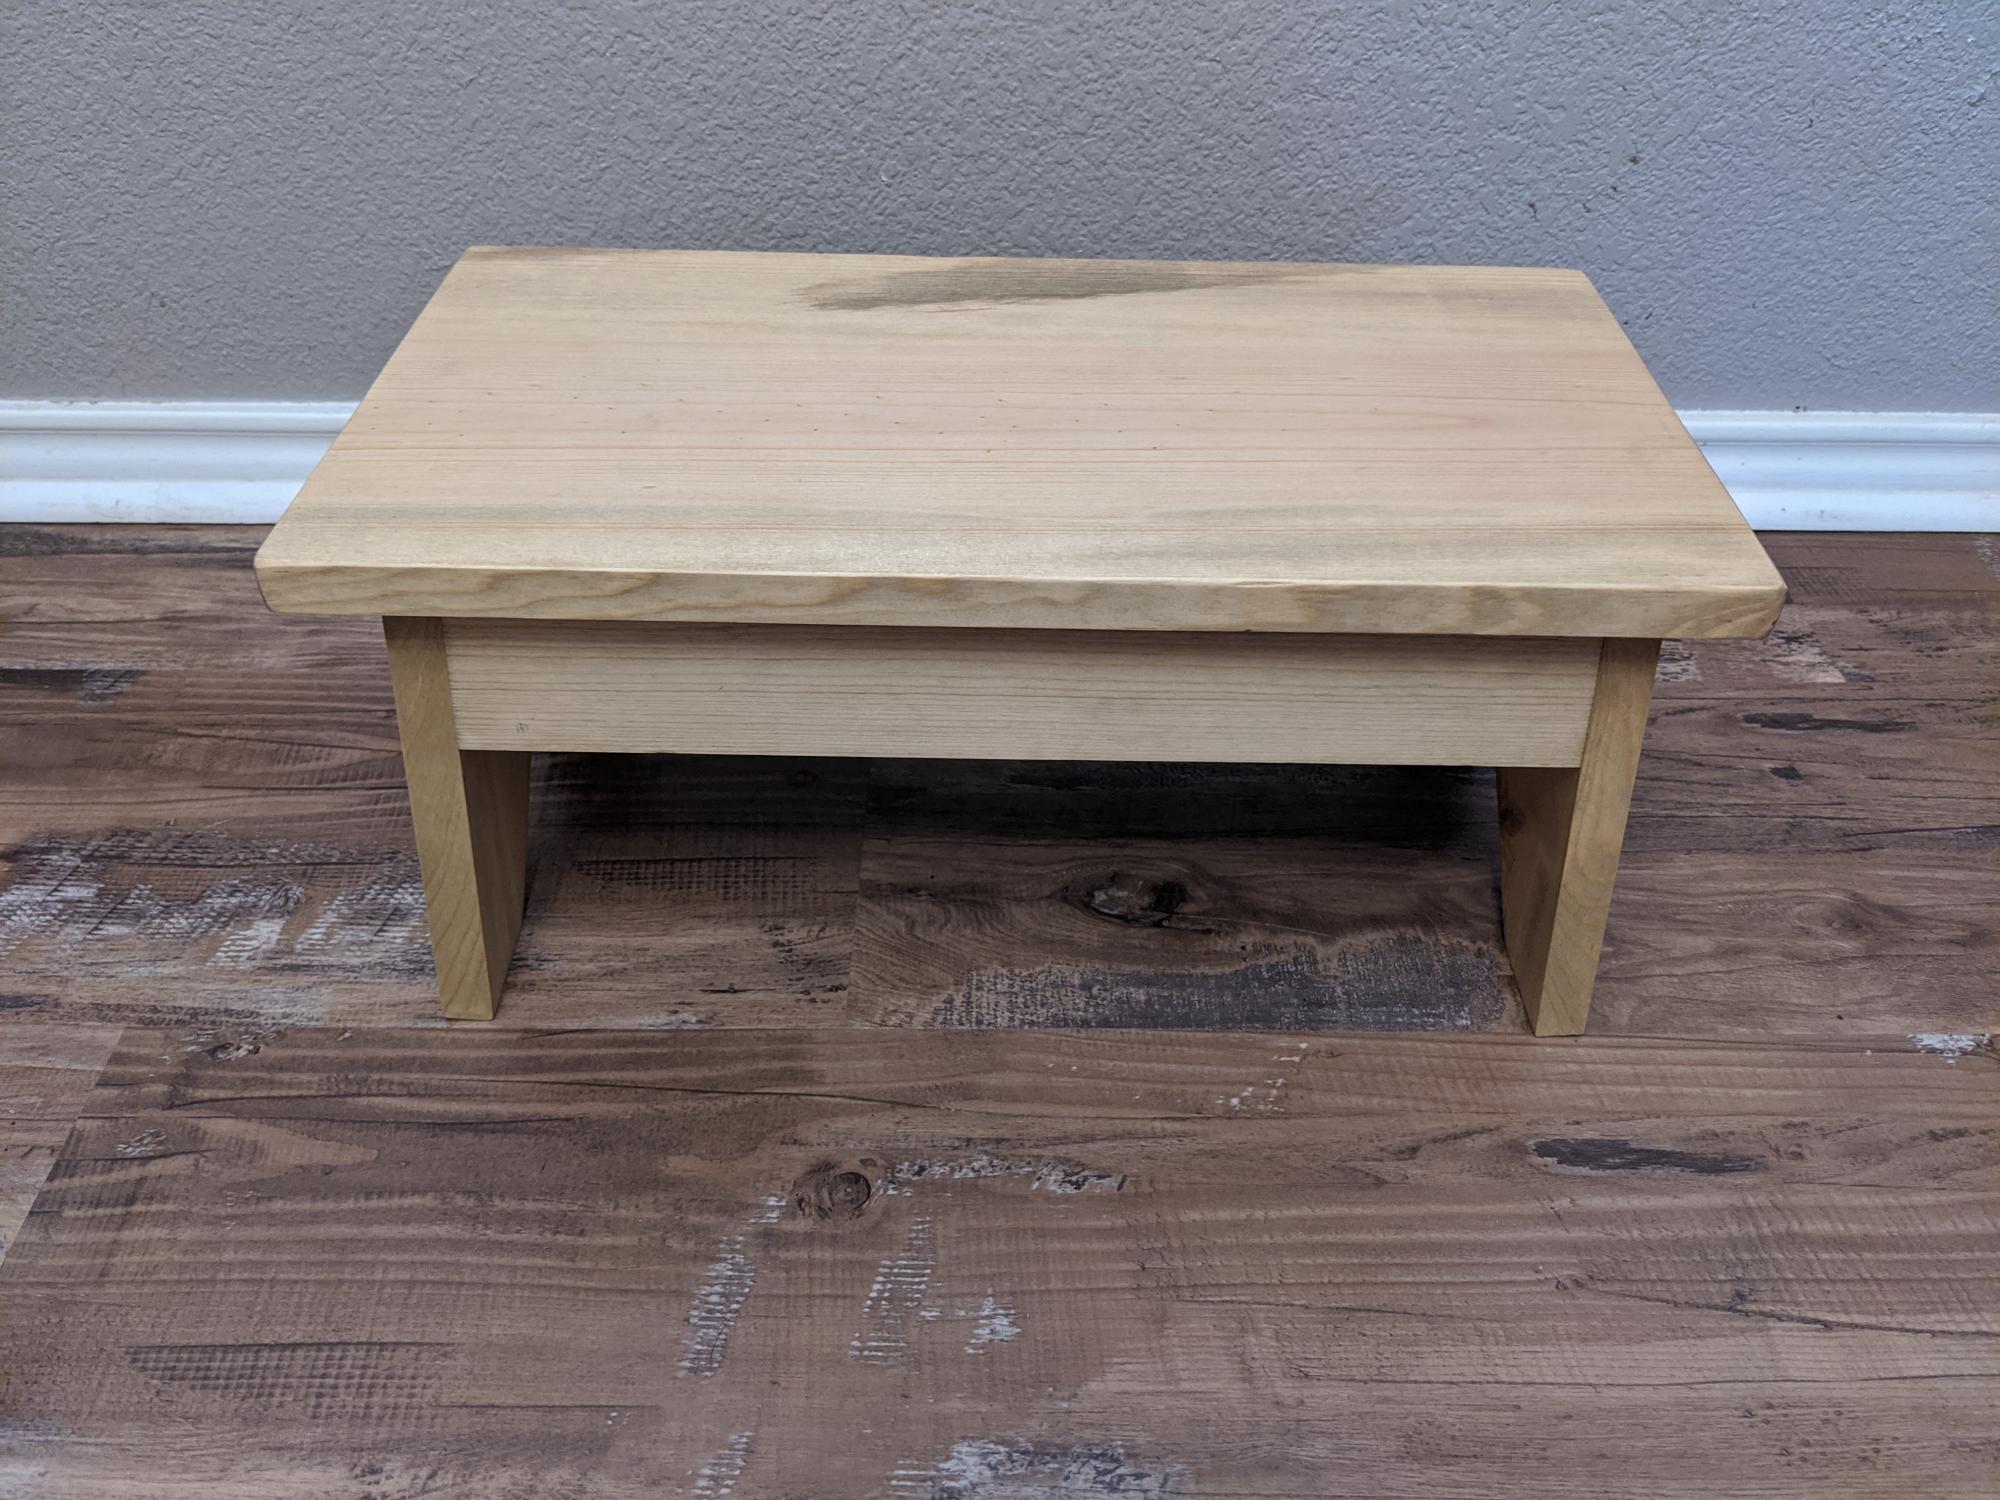
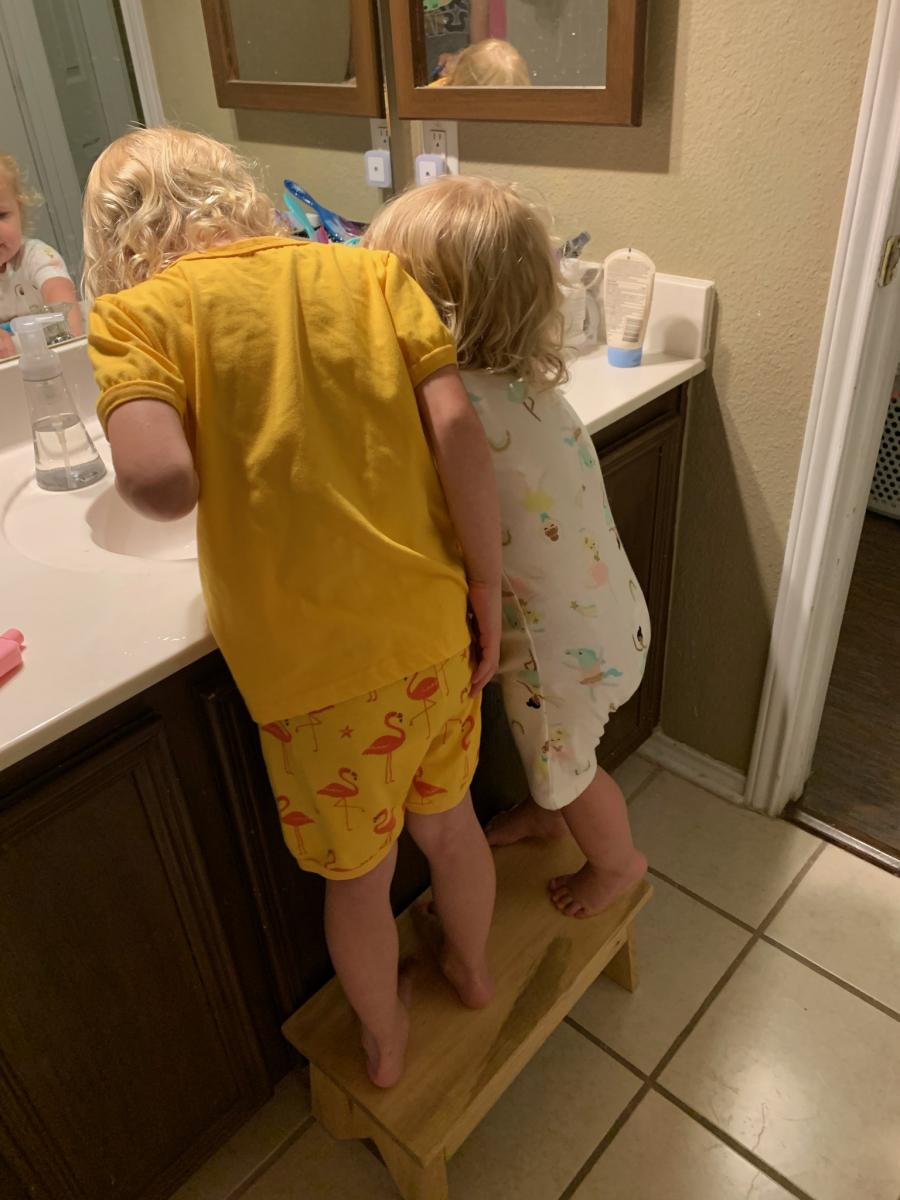
With some left over scrap 2x10 wood I made this stool for my children.
The total heigh of the stool is 9" (7 1\2" for the feet, 1 1\2" for the top, and 1\2" for the design on top made from scrap pallat wood)
The top is 1 1\2" x 9 1\4" x 16" (because of the thickness of the wood I would recommend cutting the top to 18" instead of 16")
The legs are cut with a 5 degree angle
I made the design on the top by ripping some reclaimed pallet wood into 1" strips and then cutting each into 2" pieces