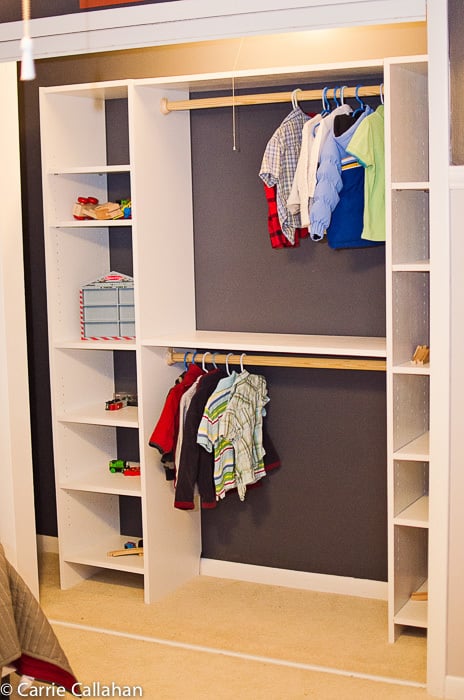
Tower Based Closet System
Built from Plan(s)
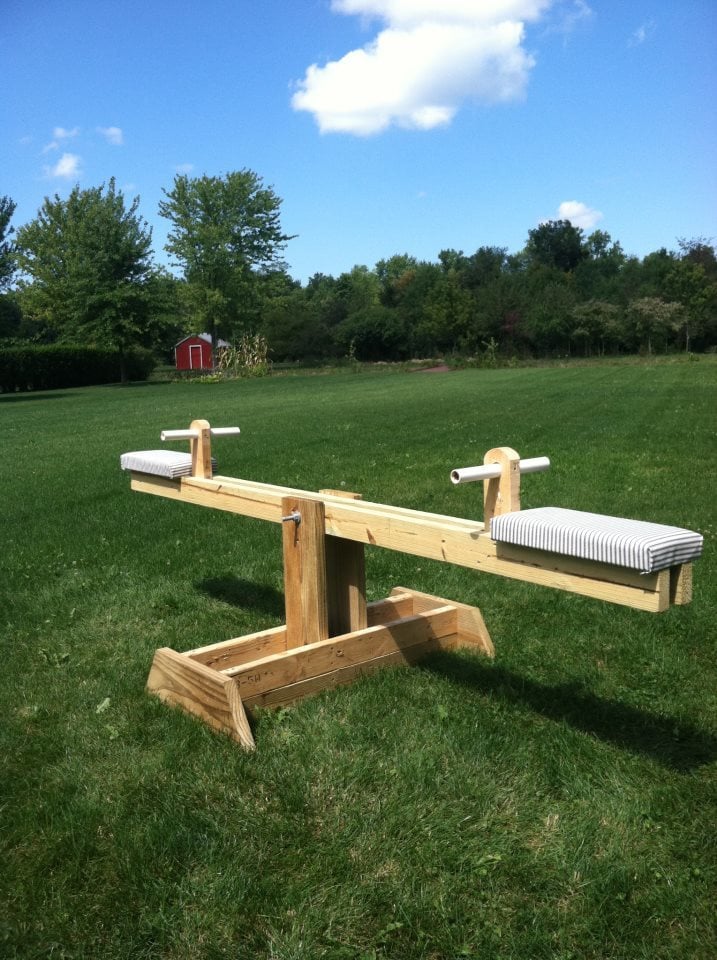
This is one of the cheapest projects for my kids I have ever completed!! And the most rewarding. I think everyone of my neighbors has been on the teeter totter...including adults :) My kids just love it and I am thinking of making a few for my nephews for Christmas. I was able to find all the wood I needed in my scrap pile. I had the PVC pipe and bolt already also so all I had to make a trip to the store for was the foam for the seats. My son helped me build this in an hour. I liked the unfinished look so I just sprayed it with a little Thompson Water Seal. Thank you Ana White!!

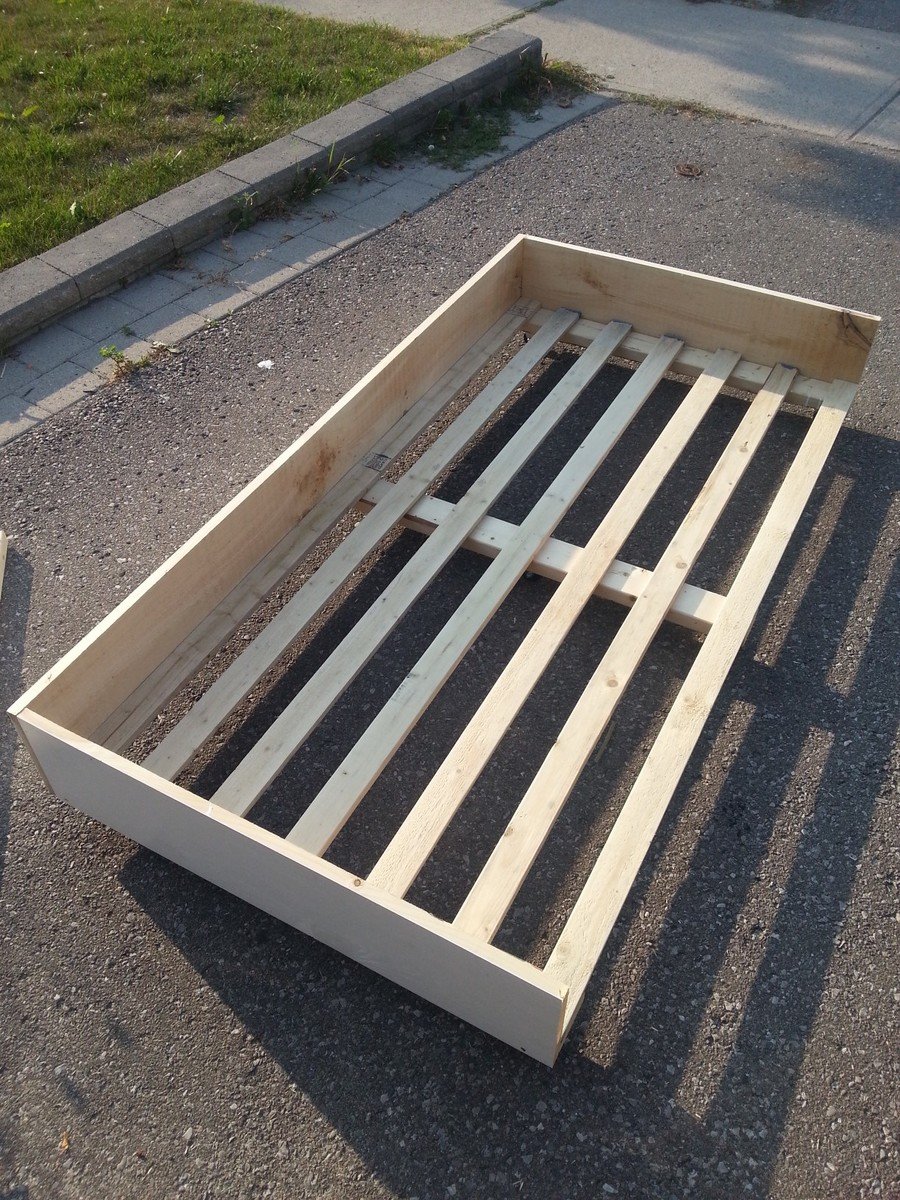
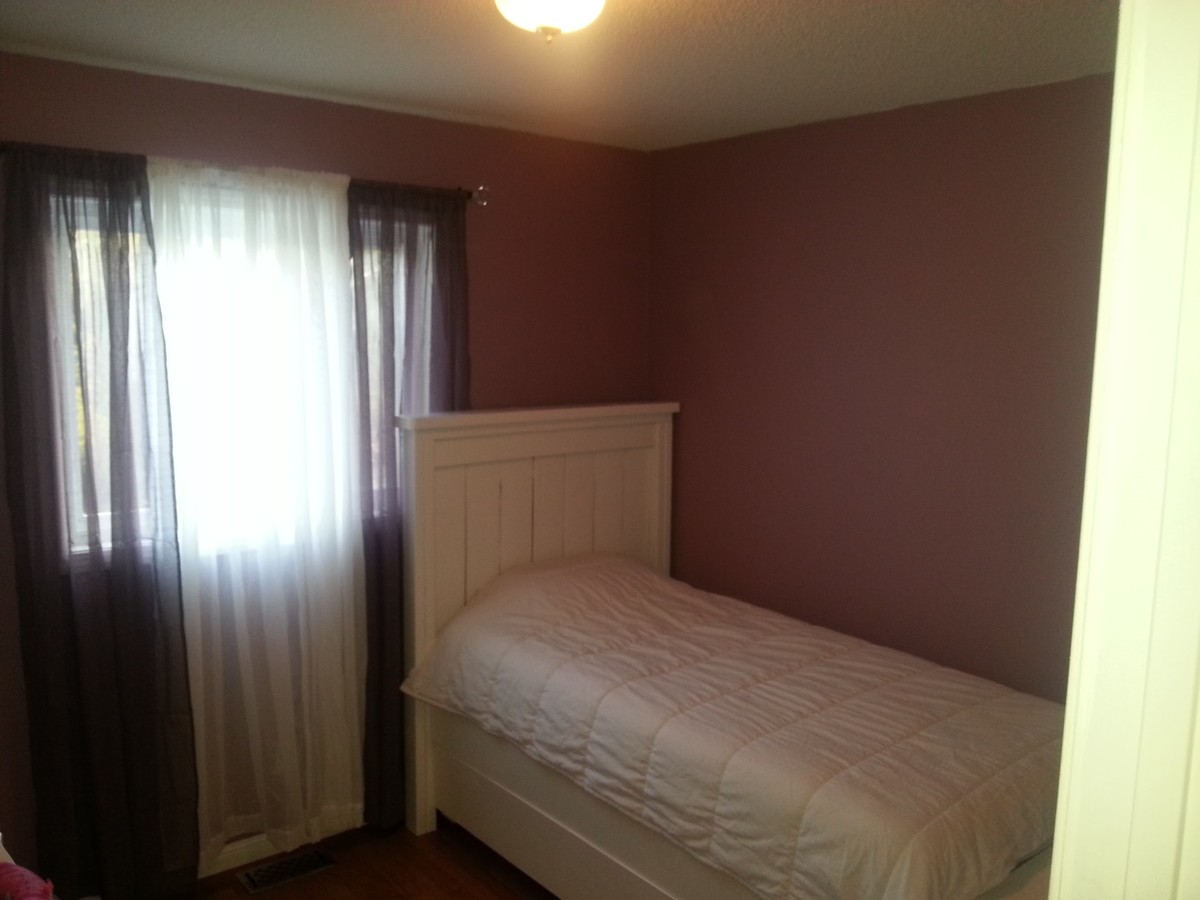
Took the farmhouse plan and added a Trundle. Was initially going to build two farmhouse beds for my two girls, but thought adding the Trundle would free up some much needed floor space. The girls love it!
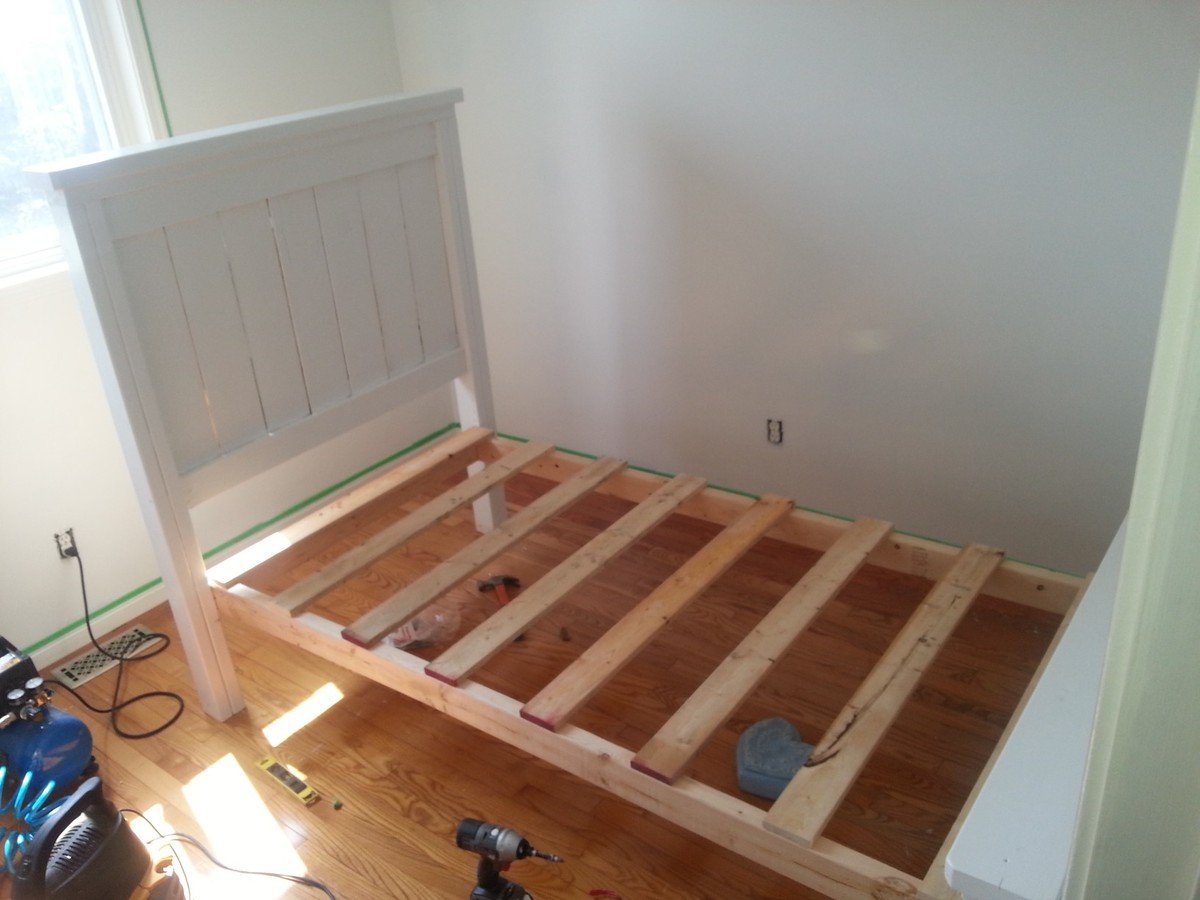

Fun and easy project!

I downloaded the plans for the octagonal table. I have made several and used a few different woods, made a few minor design changes as well as creating a routine and using a jig or two. This jig fits in between the two boards that form the seat support frame. I used a large paint stick and a scrap piece of 2 x 4. Using a table saw, I cut a groove in the 2" edge, approximately 1/2" deep, this took two passes (pass it through, turn it and pass again), a slight adjustment and another two passes. Insert the paint stick and seat all the way down. Place jig between seat support frame, might be a little snug or use a clamp to hold in place. Adjust so just the paint stick sticks up enough to separate seat boards. With seat boards against the jig, it forms the perfect angle/guide to match cuts. I also used 1/2" spacers to create consistent spacing. Love the various plans you make available as well as your videos.


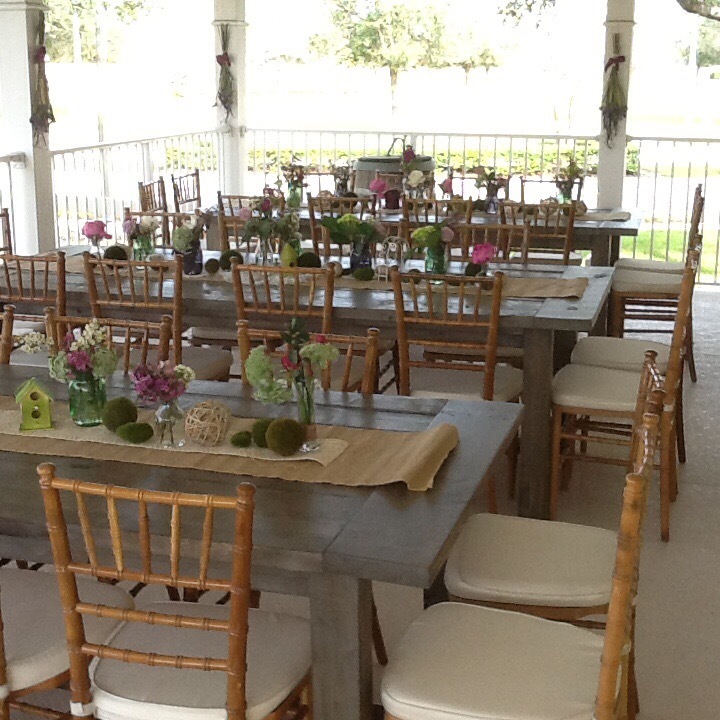
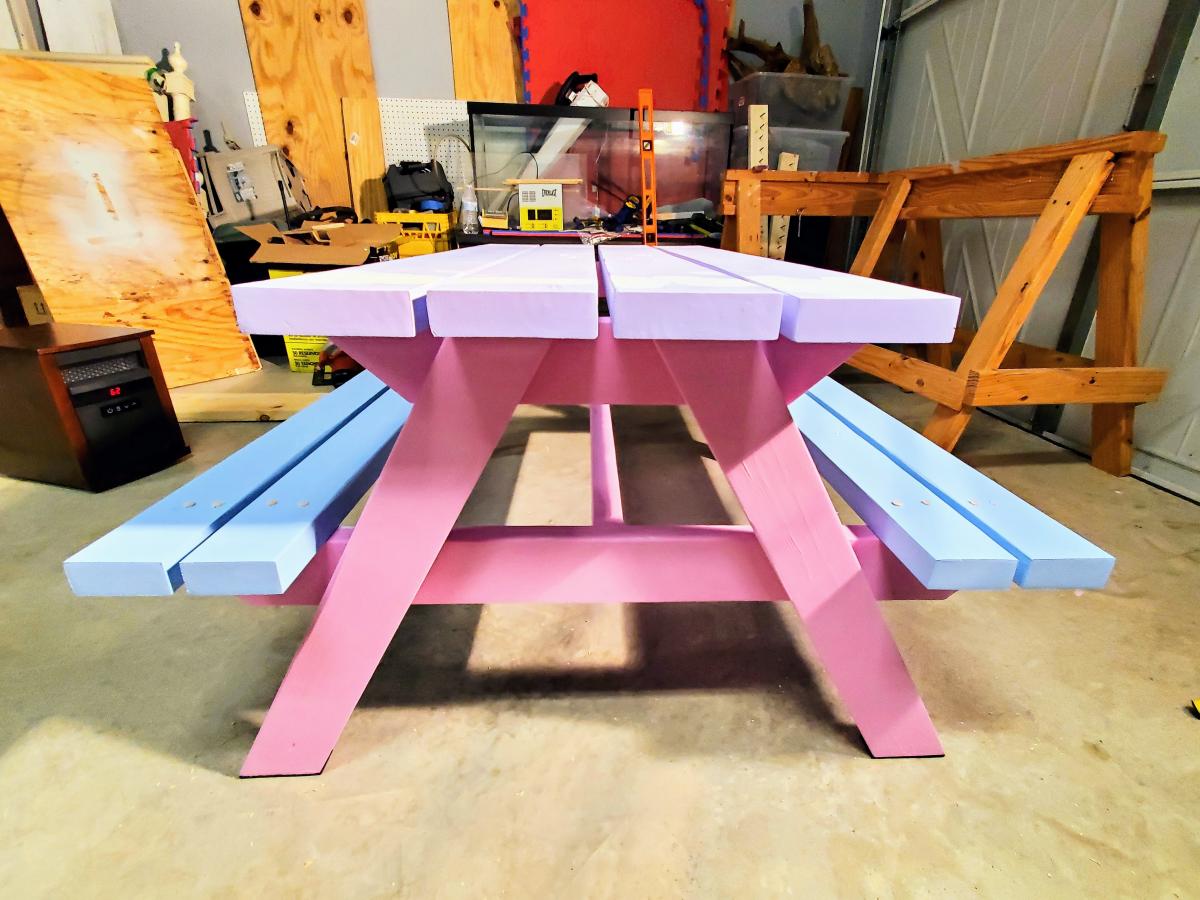
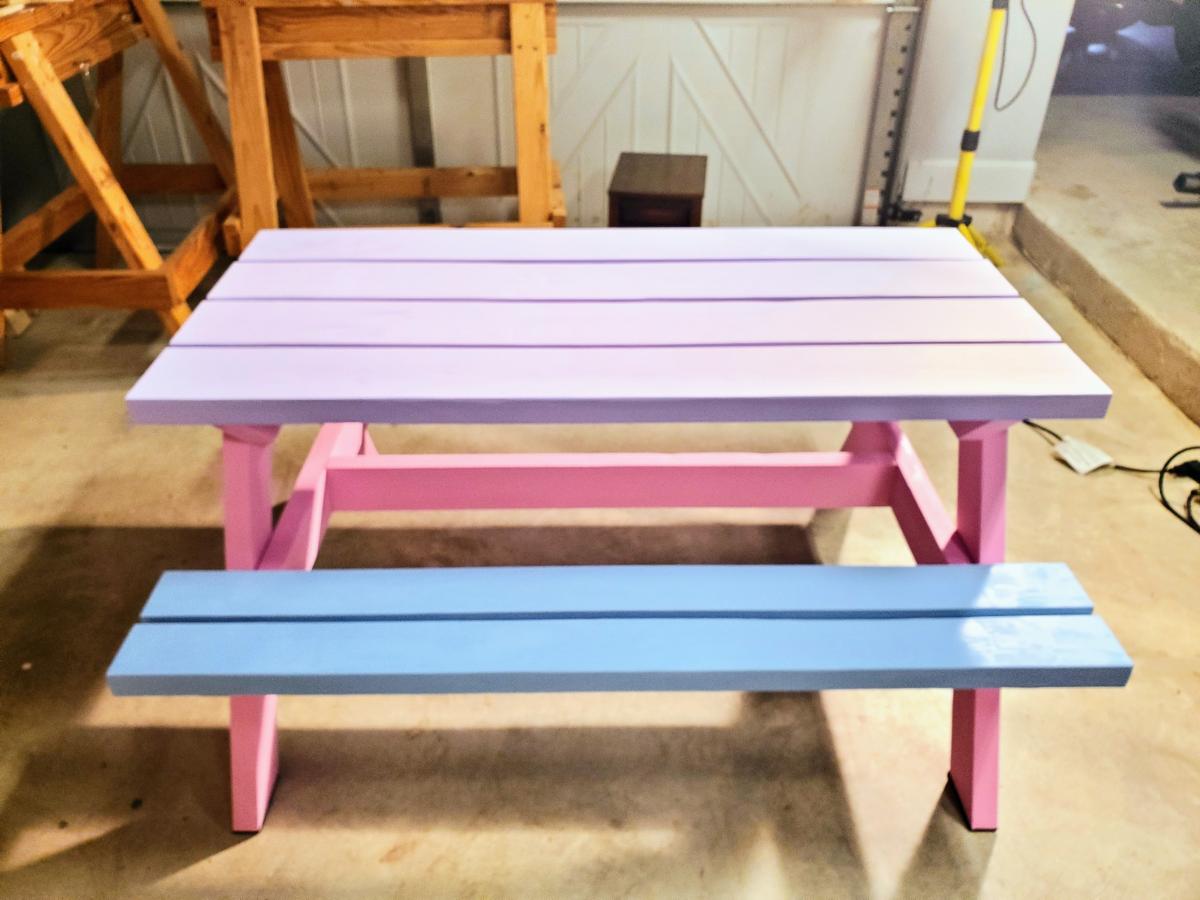
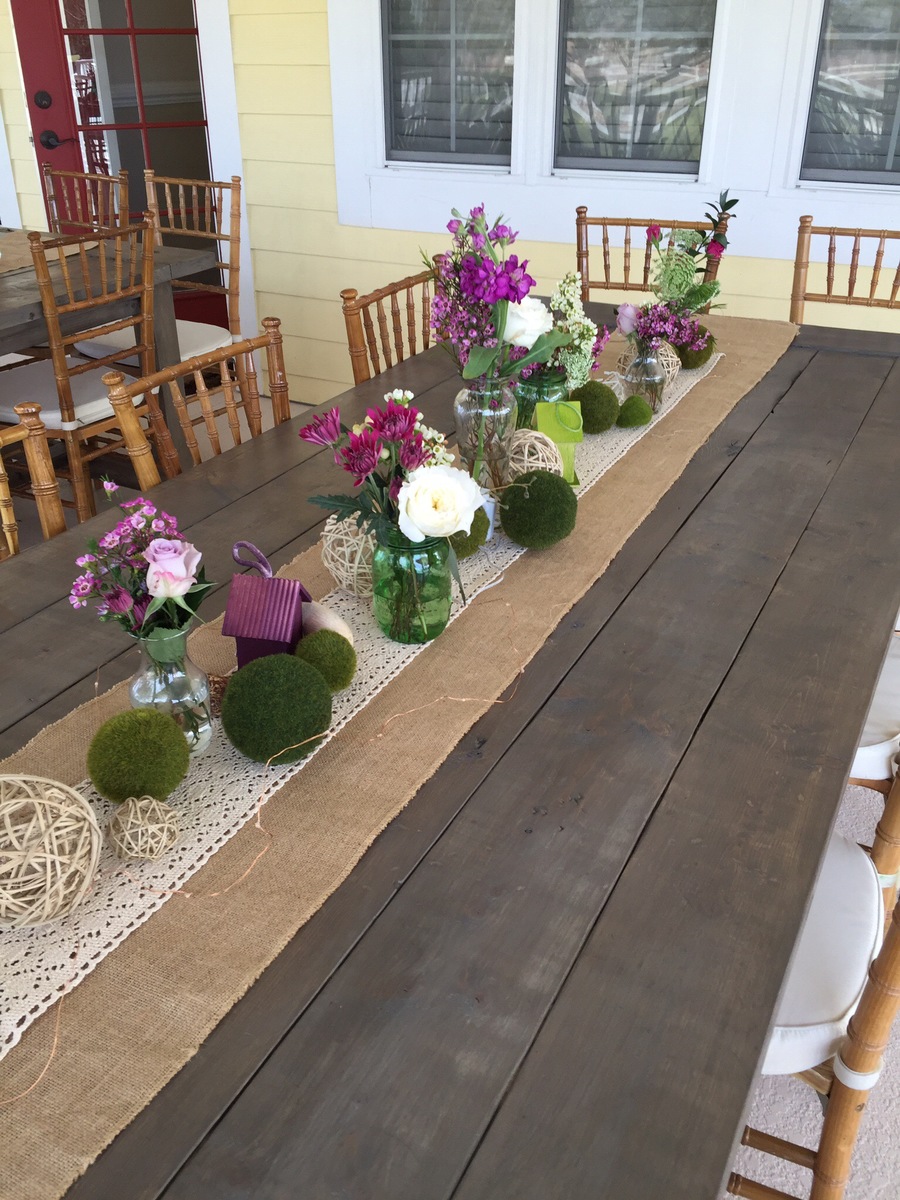
We were going to rent 5 farmhouse tables but the cost of renting was more than double the cost of building them myself plus by building them myself I could finish them the color that I wanted. We were then able to sell 4 of the 5. I kept one for my self. I also was able to build a smaller size one to custom fit my son and daughter in-law new house. Nothing like the satisfaction of building something for something so special.
Sat, 04/02/2016 - 16:31
...did it take to complete all of those tables?!? That was such a special thing to do for your son's wedding...and then for them to have a smaller version for themselves, I'm certain it will become a family heirloom passed down through the years! Those tables "made the look" for that entire setting! Just gorgeous! :)

I've been planning on building a patio table for this coming spring and summer, but didn't know where to begin. I found Ana's wonderful site and now I don't know where to stop! So many great ideas.
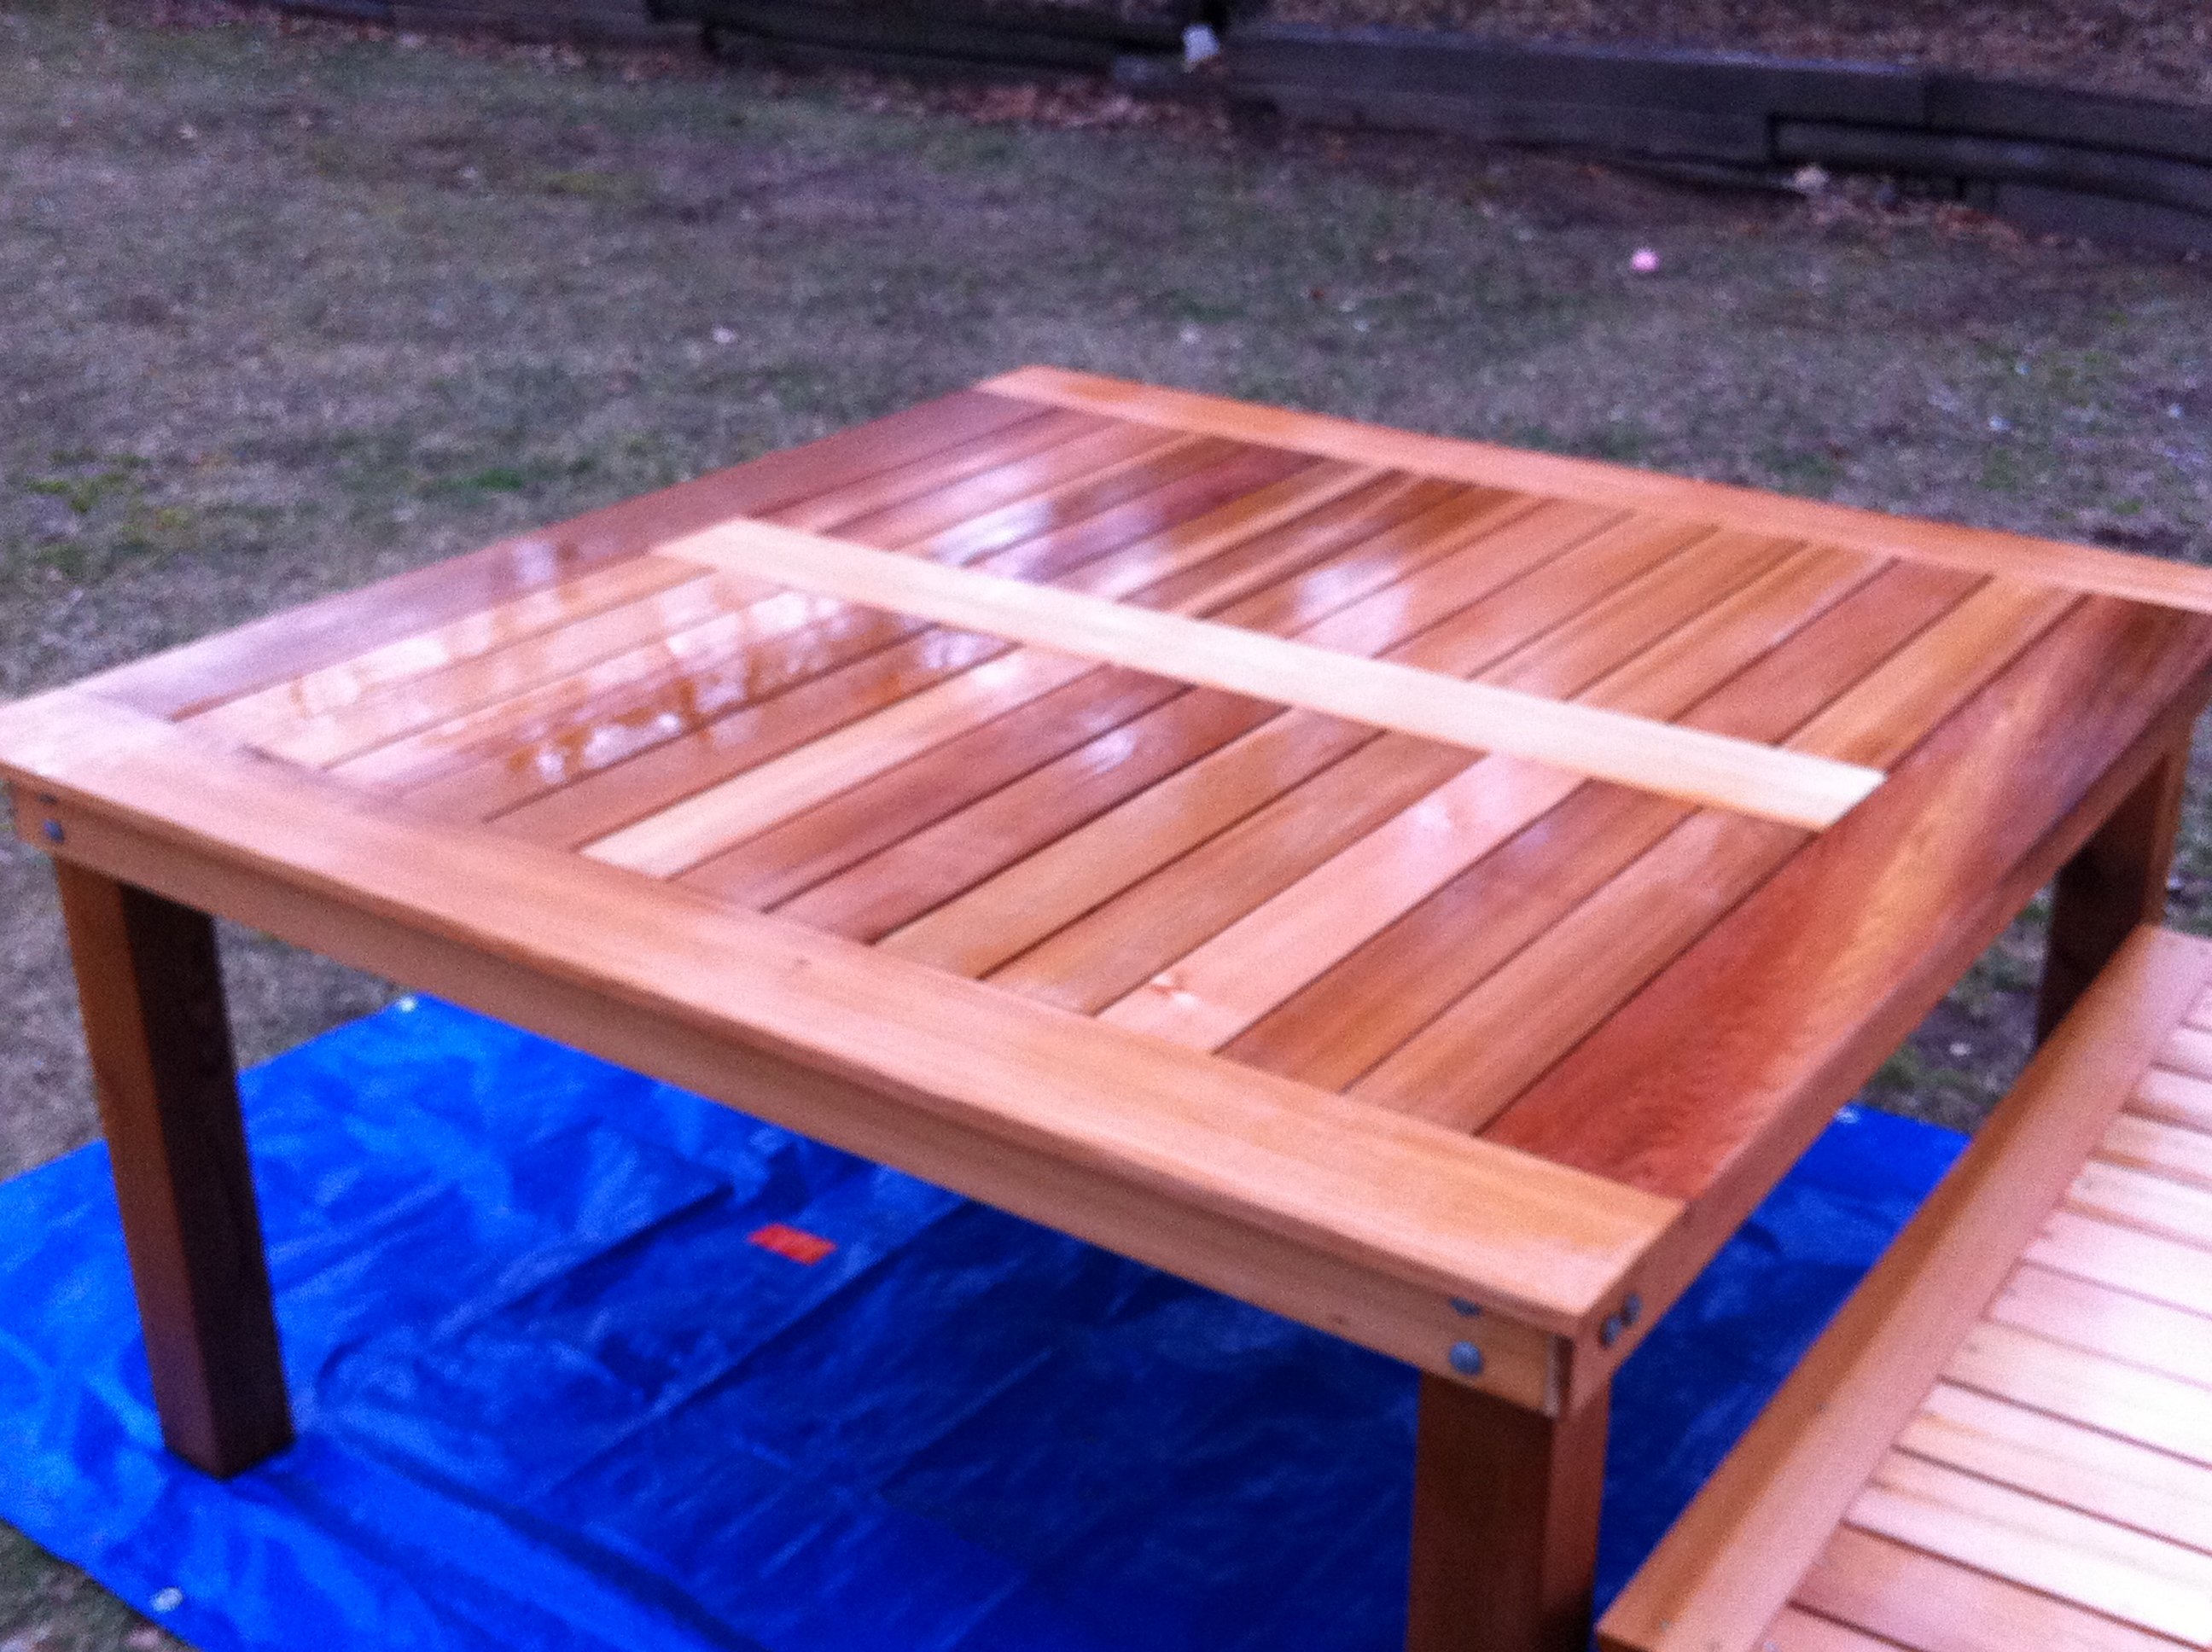
After seeing ewood's great table I decided to make one similar. I made my square table based on Ana's and ewood's basic designs. Thank you both. I also made a bench based on Ana's design.

Sun, 03/18/2012 - 16:36
That looks like it could handle a big and boisterous group. The cedar and the finish are beautiful.
Thu, 03/29/2012 - 07:37
I have a family of 7 (soon to be 8, I hope), and was trying to figure out how to fit us all on the rectangular table. This is the solution! I can simply make 4 benches to go with it! Thanks for the idea and the picture!
Mon, 04/09/2012 - 07:24
Love this table and your modifications to ewood's table. I was wondering what size are the legs on your table - I can't tell if they are 4x4s...which is sort of what I'd like to have on mine. And they are under mounted, which I love because I want to make ours with the ability to remove the legs for reduced storage space in the winter. If you could would you mind putting a few close up photos of how the outside corner came out and the underside of the corners. It would be much appreciated.
Mon, 04/09/2012 - 07:27
Love this table and your modifications to ewood's table. I was wondering what size are the legs on your table - I can't tell if they are 4x4s...which is sort of what I'd like to have on mine. And they are under mounted, which I love because I want to make ours with the ability to remove the legs for reduced storage space in the winter. If you could would you mind putting a few close up photos of how the outside corner came out and the underside of the corners. It would be much appreciated.

In reply to Questions :) by K_W (not verified)
Sat, 04/14/2012 - 13:35
Hi - sorry it took a little while to get back to you. Yes the legs are 4x4's. I used knotted cedar 4x4's for the legs and made them 29" tall. I wanted to be able to disassemble the table and put it away for winter, so I attached the legs using carriage bolts, 2 per side (4 total per leg). I drilled holes using a pilot bit, then used a spatter bit to make the larger holes for the carriage bolt.
I didn't bother to counter sink them, but if I made another I think I would try that to make a more polished look. The legs are sturdy, the table doesn't wobble at all, but I am sure that someone with more furniture building experience might have a different/better idea.
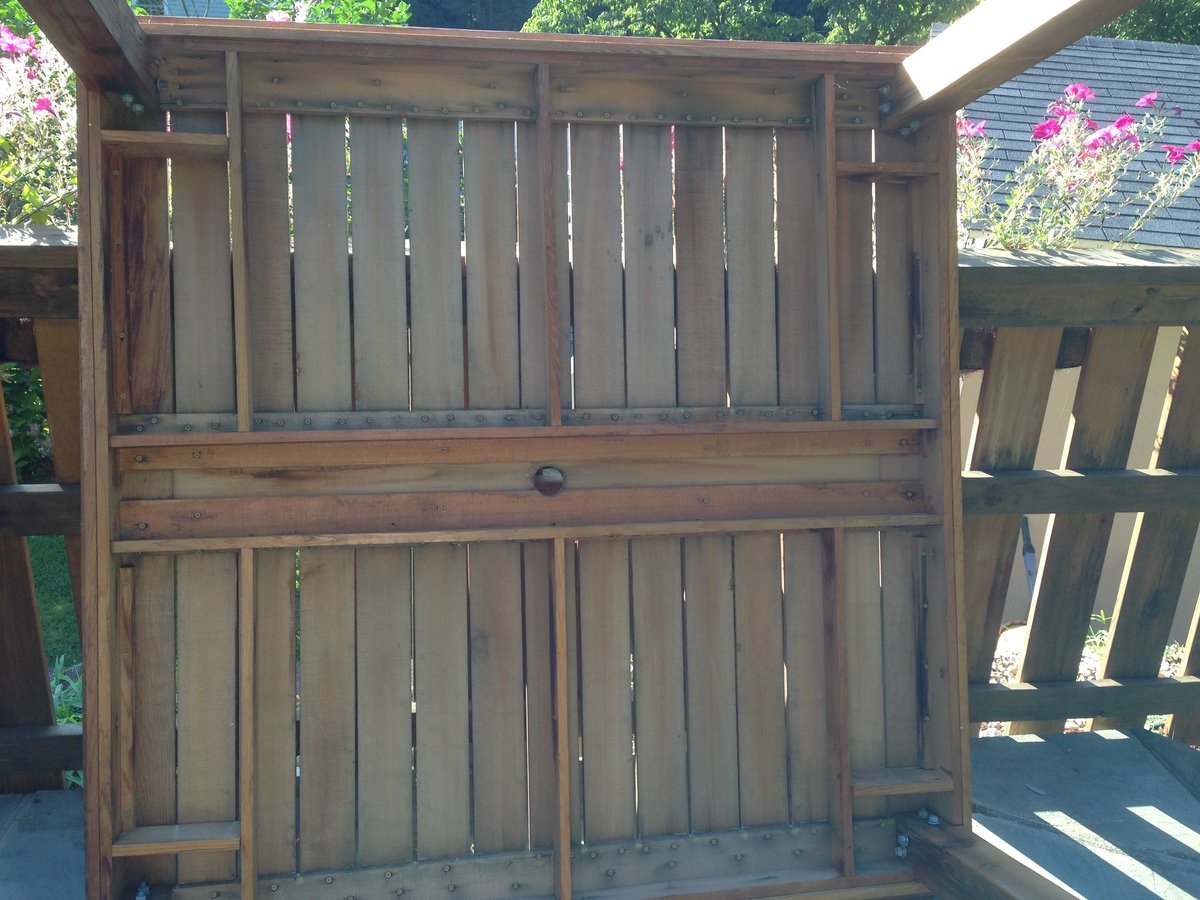
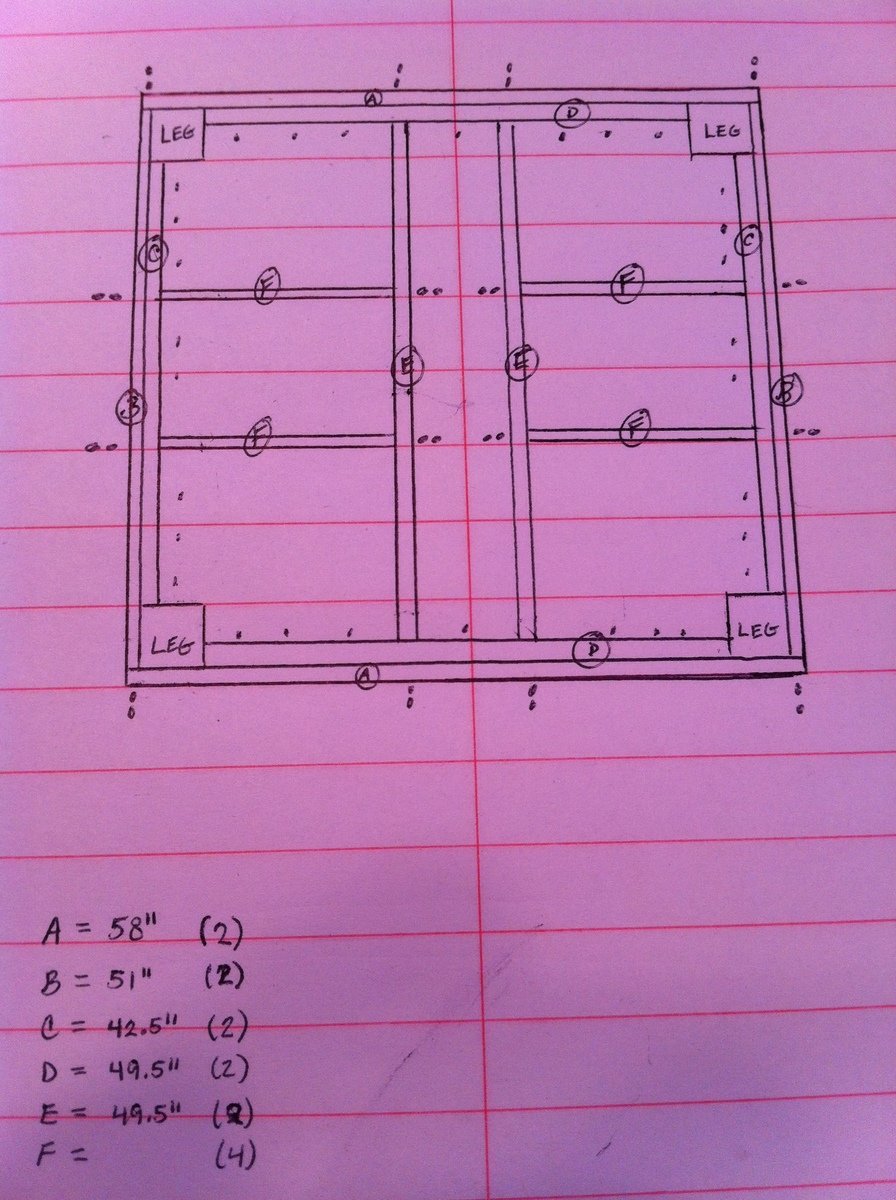
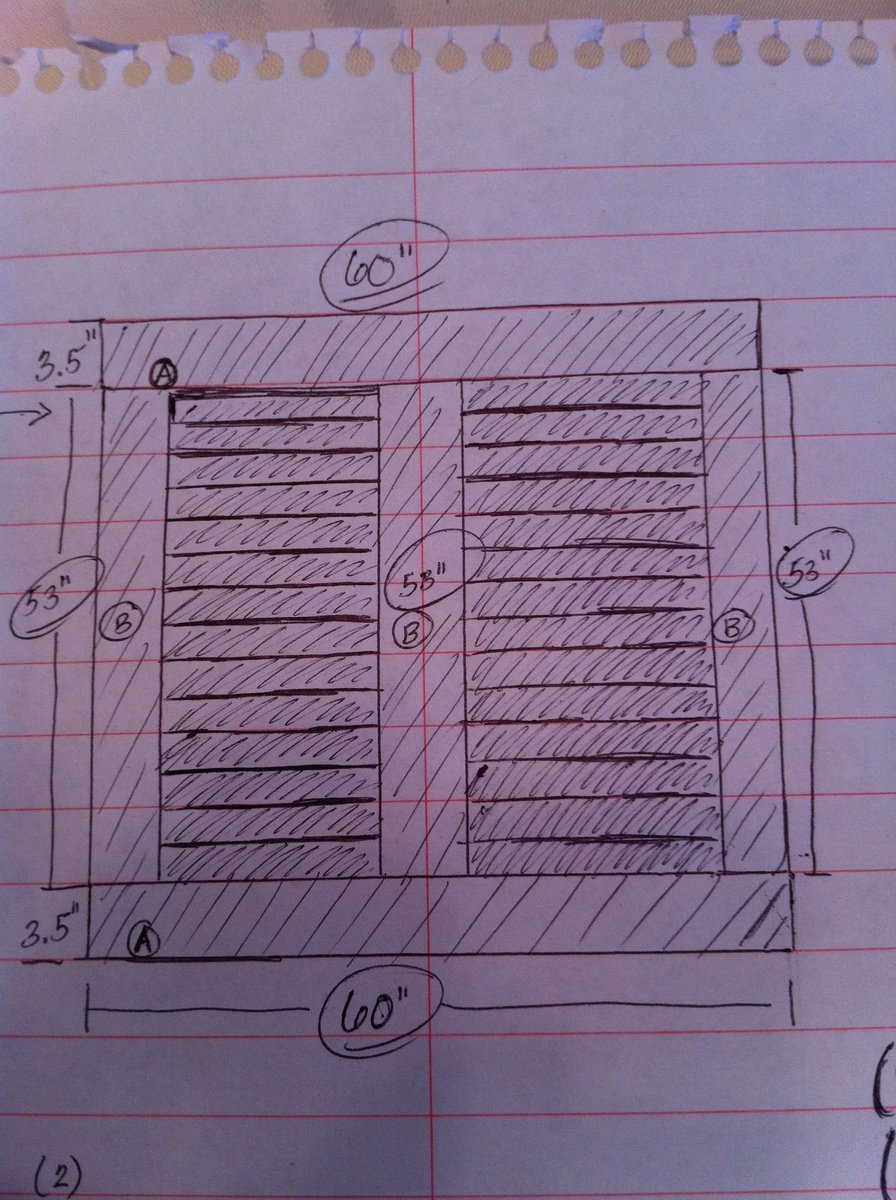
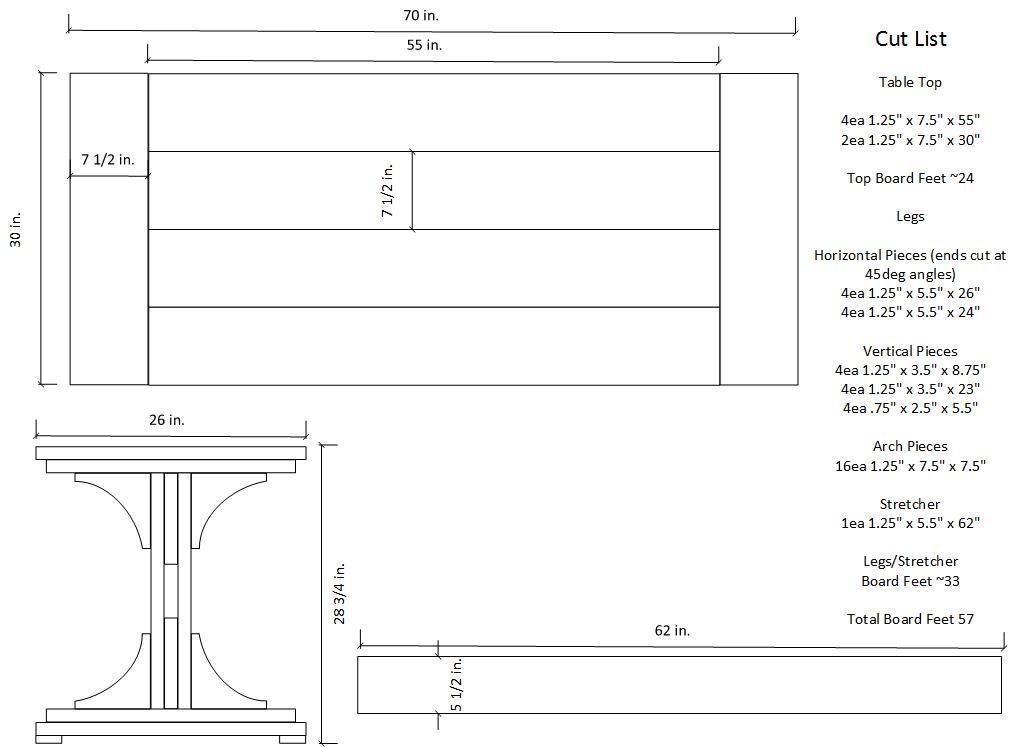
I've added a couple more photos showing the corners, outside and underneath. I've also added my very basic plans that I used to make the table, one of these days I will study Ana's post of how to use sketch-up, until then this is what I worked with.

Wed, 06/06/2012 - 09:26
Can you tell me what size (width) boards you used on the frame pieces of the table, and what size on the inner boards? From your diagrams, it looks like the frame is made of 1x4s, but the inner pieces look smaller. Thank you !!!
Your table is absolutely beautiful. It looks like a very high-end piece of furniture. One of my favorite things is how the carriage bolts are installed -- I wouldn't change a thing on them!
Tue, 07/30/2013 - 16:36
Sorry it took so long to reply - I didn't see your post. So far the table is holding up well.
You're right, the top is made from 1x4's, including the inlaid slats. To support the top, I cut 1x4's down to 1x3's so they remain hidden by the side 1x4's of the frame.
Tue, 10/16/2012 - 18:02
Love the table - looks absolutely fantastic! I have been looking for a decent square outdoor table for ages and this one certainly fits the bill.
Can you please add a photo of the underside of the table and advise how you fastened inner boards on table top. Thanks.
In reply to Question by Aussie Paul (not verified)
Tue, 07/30/2013 - 16:40
I added a new photo of the bottom. Hopefully this will help show how I attached the top. I have a number of additional photo's I can send to you if you like - this site limits the number of photos I can add.
Everything is attached from the bottom to hide the screws. I used a kreg jig and it helped so much - i really recommend it.
Wed, 08/14/2013 - 12:35
I love the look of this table, man - I think I'm gonna steal some ideas from this.
I have a question about your top, though. The slats look to be 1x4s, which I can understand, but the edges seem to be a bigger size.
Did you use 1x6 boards for the edges? 1x8s? Something else?
Thanks for your help.
Mon, 09/02/2013 - 11:03
Thank you - please take any ideas from it that you can. That is what I love that about Ana's site. You can take these great ideas and make them fit your own style...
You're right - the table top is made of 1x4's and 1x6's. When i put the top together I made the frame first. Then I added the exterior 1x6's. Next I added the center 1x6. Lastly I cut each 1x4 to size and added them.
Sat, 05/17/2014 - 07:15
This is an amazing table, it is beautiful! I am somewhat new to wood working and was wondering if there was a material list? I plan on creating this in AutoCAD first, so I have a visual to work off of. Also what did you use for spacing in between the boards or what was the allowance of space.
Thanks again, your work is beautiful!
Wed, 06/17/2015 - 11:48
Great table…any chance you can share the plan and material list? Cheers

Wed, 04/22/2020 - 20:37
In looking at the plans and the underside of the table, there are some measurements missing that make it a little hard to decipher. It would be good to know the lumber sizes e.g. 1x4x8 etc. the underneath side seems to have some additional boards that don’t seem to be in the drawing. I was just wondering if it might be possible to get some additional details?
Sun, 05/24/2020 - 08:05
This is a beautiful table and I'm going to try and replicate in a rectangular version. Primary question I have is what length screws you used to affix the framing pieces underneath to the top side so that the wood doesn't split and that the screws don't pop thru the top. Any help you can provide would be appreciated, if even you still look at this page. Thanks in advance!
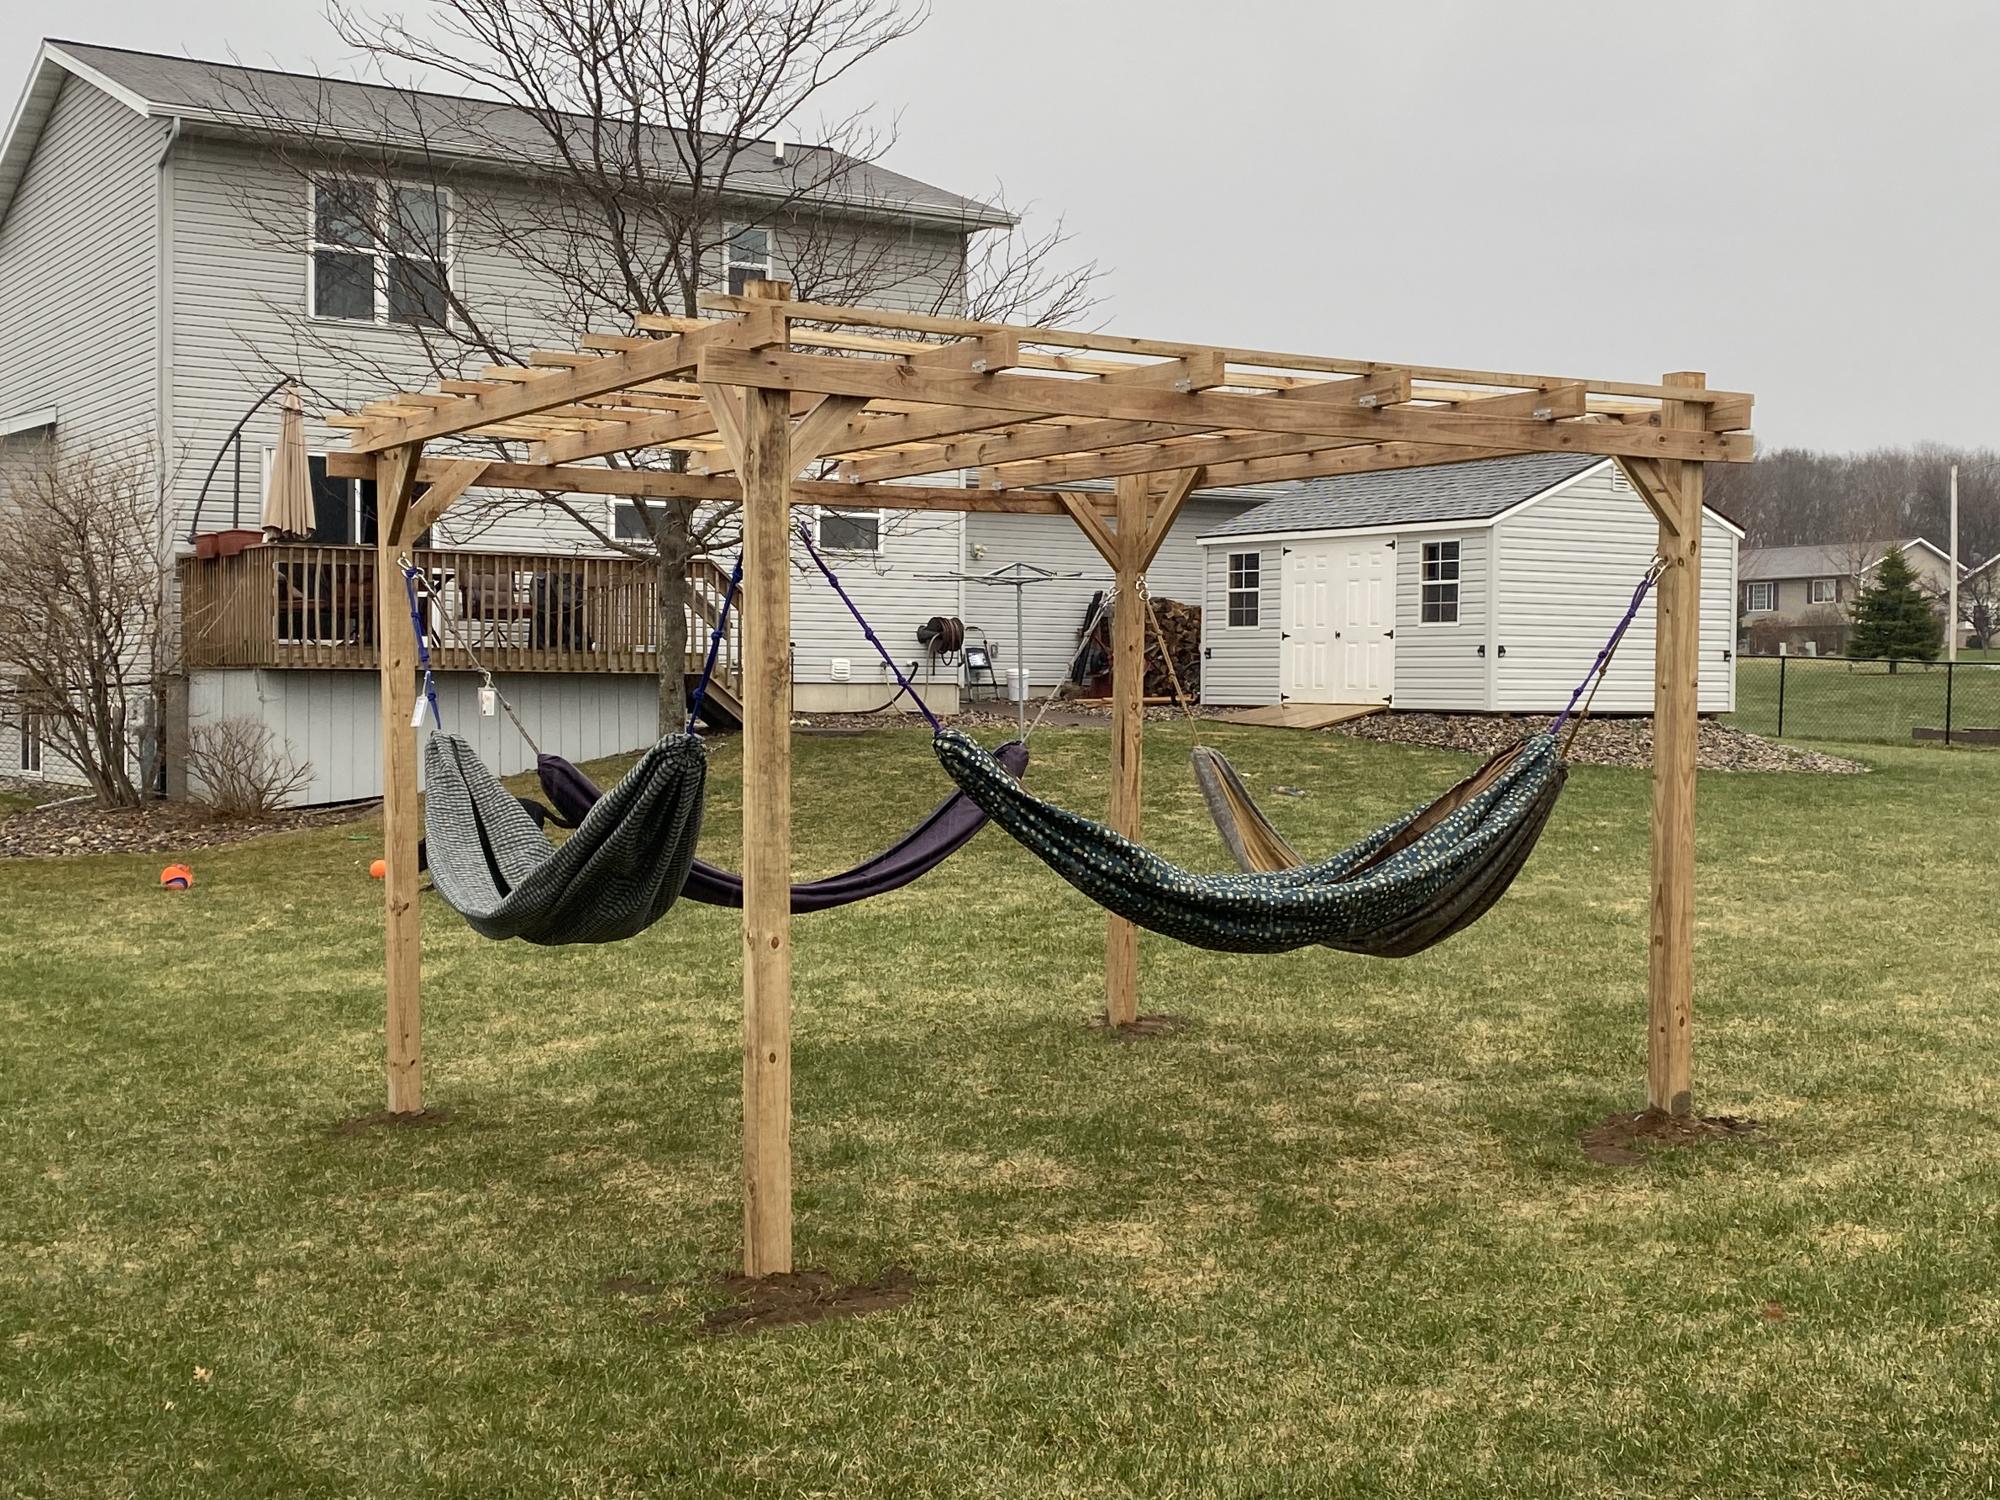
I've wanted a place to hang our hammocks for a few years now. We have some really nice hammocks from a local artisan. This past weekend, we built the framing with intentions of making it a pergola at a later time. With encouragement of my son & boyfriend, we decided to add the pergola on Sunday. I liked this plan because it wasn't as complicated or expensive as a lot of other plans out there that use 2x6s instead of 2x4s. Adding the angle brackets really solidified the whole structure. I'm so thrilled with this project! Unfortunately, today (Monday), it's raining, so I can't go hang out there.
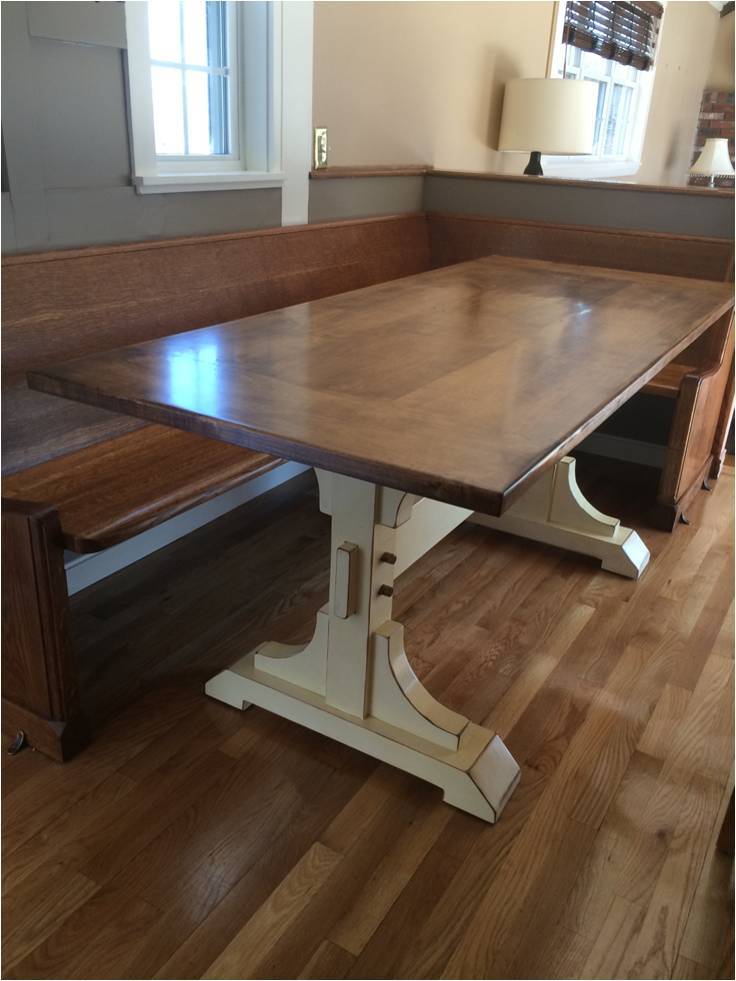
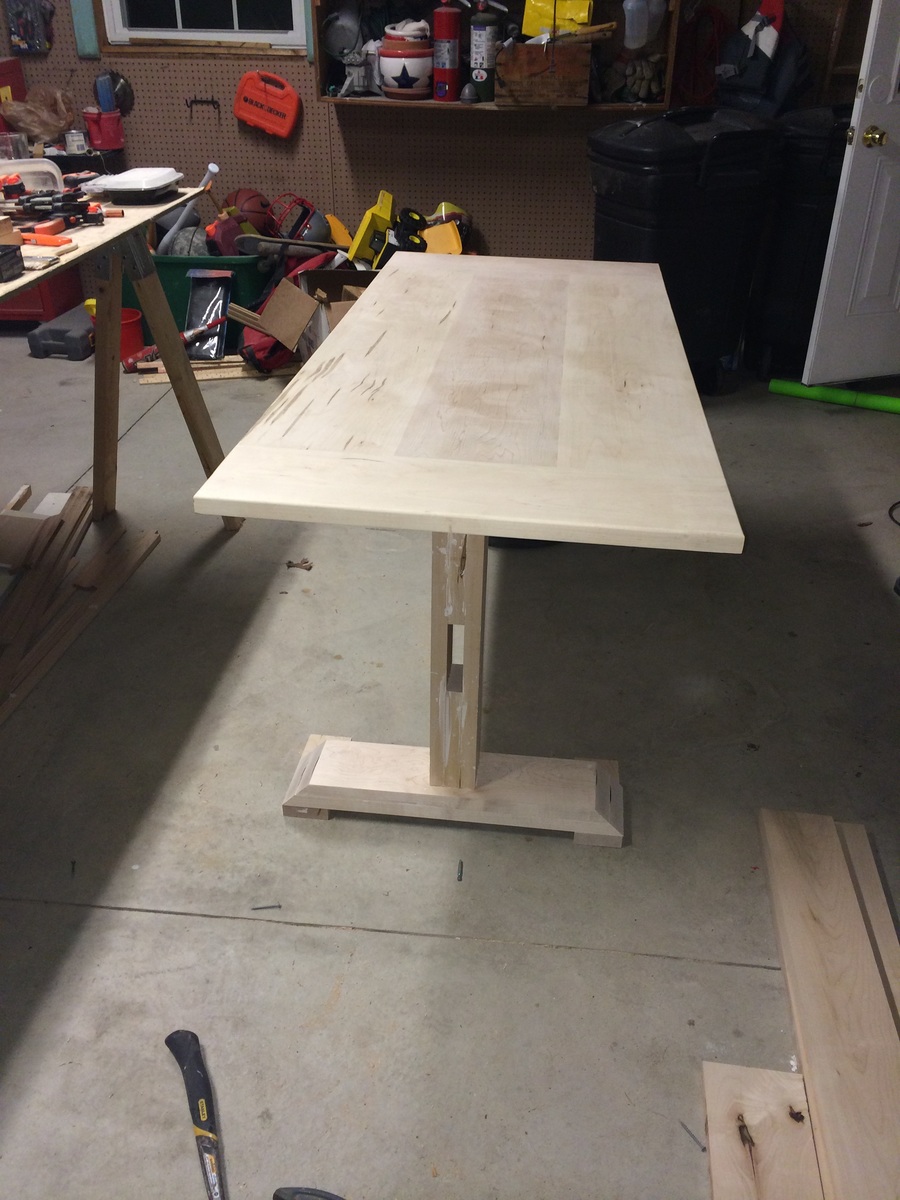
Farmhouse table made from distressed (worm hole) maple.
My neighbor was able to get me the 5/4 distressed maple for about $2/bd ft - I ended up buying 100 board feet and had plenty leftover. The finished board feet for this project was about 60 if I remember correctly. So the $200 was the bulk of the expense. The only other costs were sand paper, I bought a Kreg Jig, screws, Minwax Marker, paint, stain and urethane (much of which I already had).
It came out better than I anticipated. The antique white finish was not difficult at all.
Tip - When following the instructions for the finish here, I applied the first coat of urethane with a brush almost immediately after applying the Minwax marker to all of the sanded edges. I did this in haste, but ended up with some unexpected results that really added a nice touch. The stain from the marker incorporated a bit into the urethane as I brushed it giving it an antique, yellow hue. At first I thought I made a big mistake, but it turned out to add a really nice look.


Mon, 05/19/2014 - 07:29
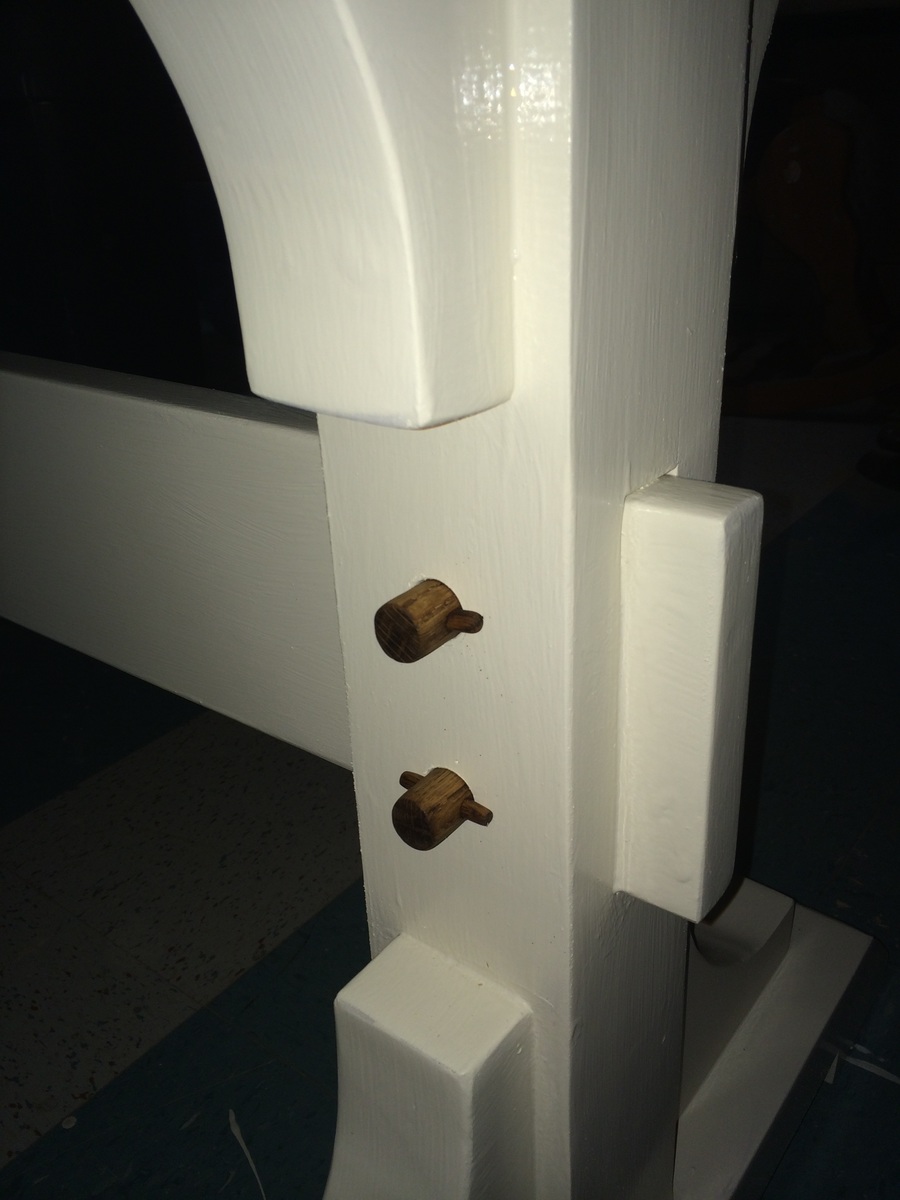
CSaintD - The top can be removed as I did not glue it. I set 3 dowels on top of each of the 2 legs so that the top would always lign up correctly if disassembled and reasembled. The stretcher could be removed, but would probably cause some damage to the finish as it was a tight fight when I finished it. The stretcher would be removed by removing the dowel pegs that I fabricated on each leg.

In reply to Disassembly by g82martin
Mon, 05/19/2014 - 08:21
Thanks. I really like the dowel pegs on the legs/stretcher. Very nice top finishing as well. Did you square the boards to get them to be so smooth when joined?
Mon, 05/19/2014 - 08:26
I cheated a bit on the top. My neighbor who got me the wood works in a furniture reupholsery shop. He planed and joined the boards for me, which saved me a good amount of time. I'm confident I could have done this at home with my table saw, miter saw and hand plane, but what he did in 2 hours probably would have taken me 10.
Fri, 08/05/2016 - 20:35
Love the dowels you added! Planning on building this exact table pretty close to your dimensions and have a very long church pew as well! Trying to decide between L-ing my pew and cutting to straigjy 6'. Do you mind sharing the dimensions of your pew? And how did you miter the pew?
Tue, 01/21/2020 - 09:40
Beautiful table. I love the pegs added to the legs and stretcher, they add a historic detail lost in a lot of today's building techniques

We started with the basic chicken shed coop plans and modified it some. We wanted the peak to be in the front for ease of access and to allow leaves from tree overhead and rain and snow to fall to the back away from the entrance. The windows raise from the inside using 1/8" wire secured on the inside with a rope cleat hook.
We added Dutch doors. We added latches for the pop door to keep it iopen or closed as needed. Dutch doors also have decorative latches and eyehook latches to secure them when they are fully open. I rested the shed on 12 in. x 8 in. x 12 in. concrete patio pier blocks to allow drainage. we extended the roof about 6 " to allow for extra protection and avoid dripping whe it rains.
On the inside I have a roost and a poop deck. Hanging from the poopdeck I have their feed to keep it off the floor and keep shavings, etc. from getting into the food. The poop deck and the floor are covered with comercial grade tile to facilitate easier cleaning.

Sat, 03/14/2015 - 02:50
Hi!
I love your coop and the modifications you made - I was planning on doing the same thing with the placement of the door. I was wondering if you could post a couple of photo of the inside of the coop? I'm especially interested in where you placed the roost.
Thank you so much for sharing!
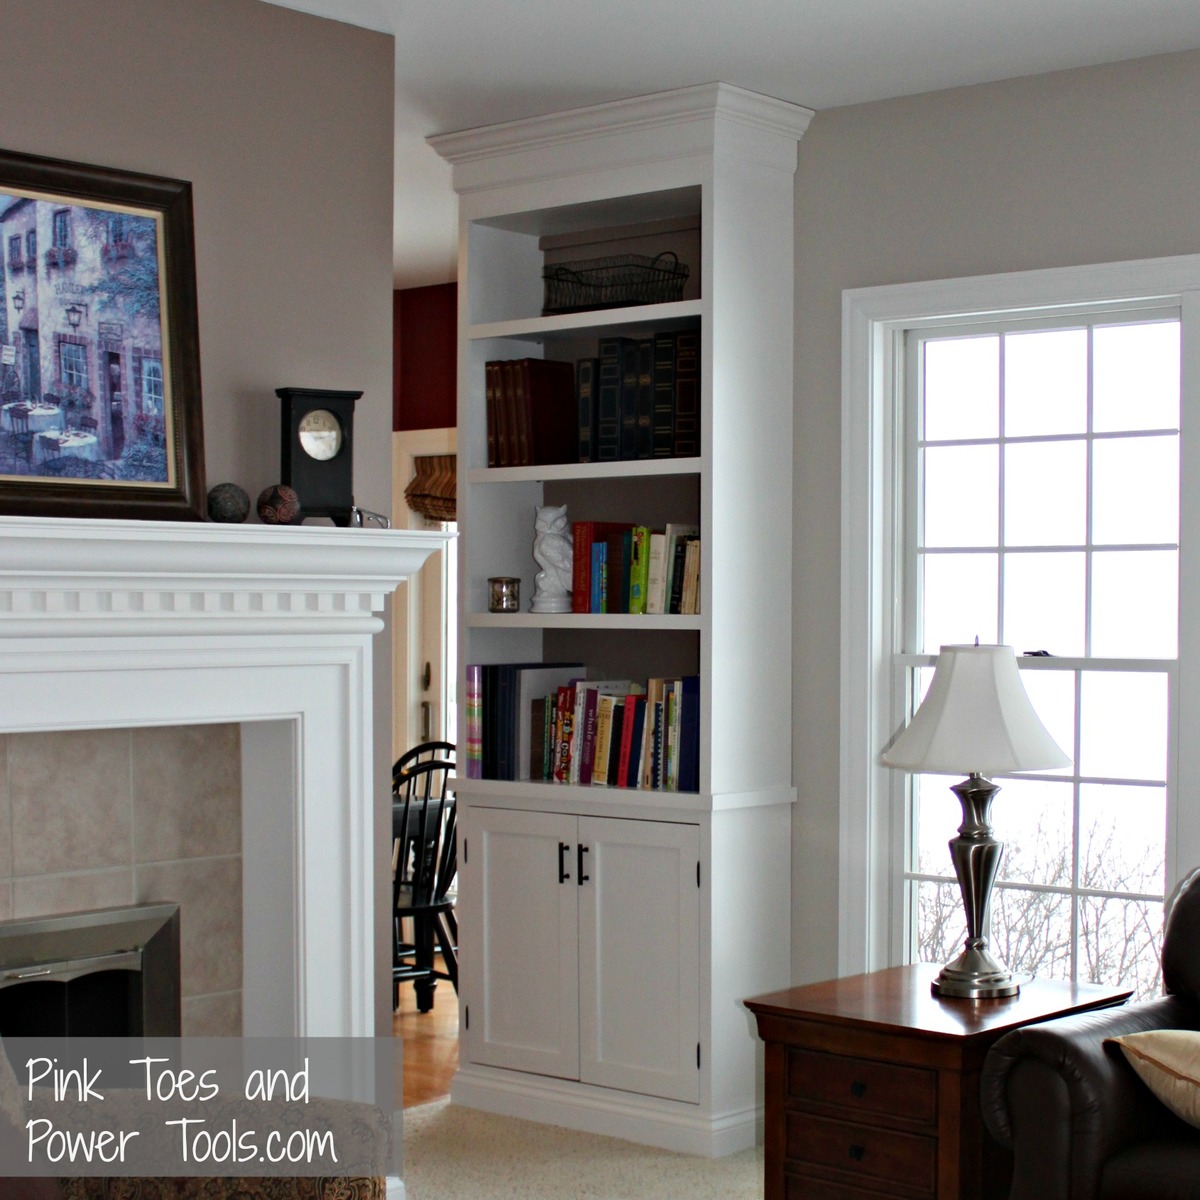
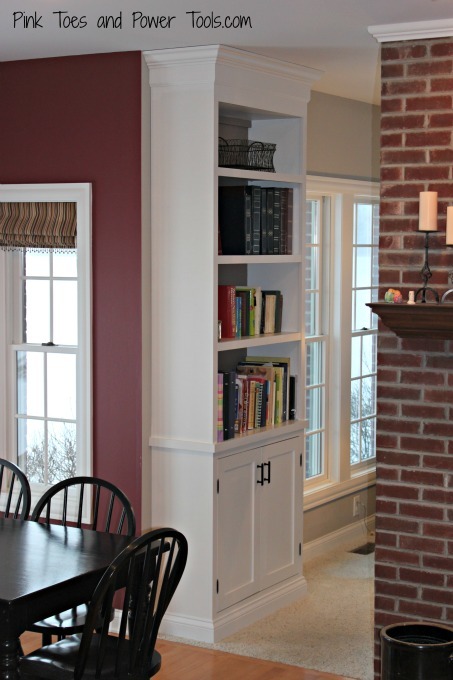
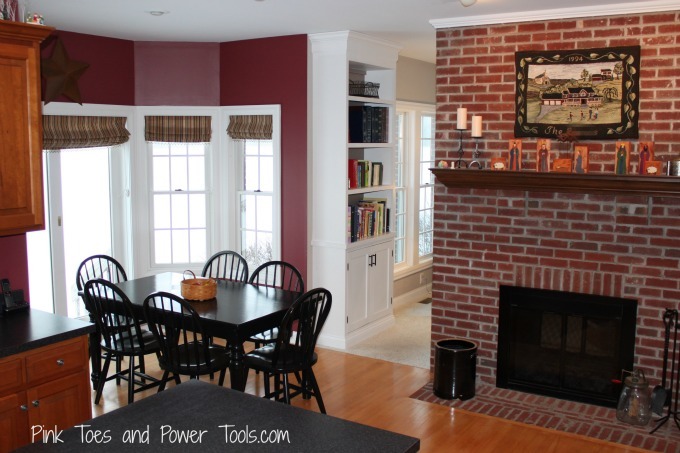
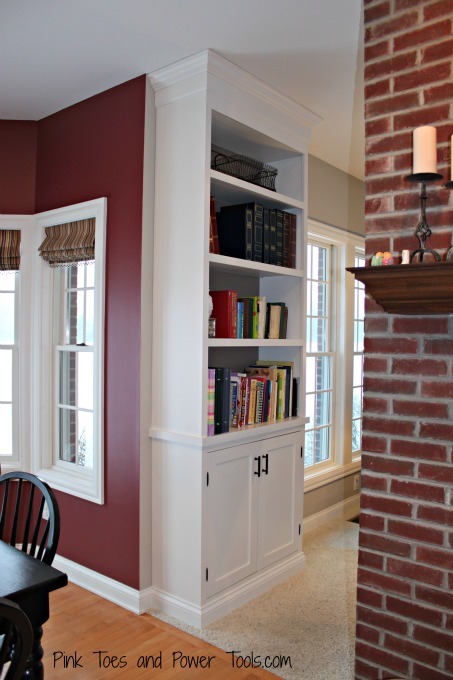
I didn't really follow any of Ana's plans for this build, but it is a result of using her plans up to this point in my woodworking journey that enabled me to complete this one! I don't own a table saw, so this was constructed using a circular saw, miter saw, Kreg jig, and a nail gun. It was the first time I've had to cut and attach crown molding, and I also learned how to cope baseboard trim using a Dremel. Another first was using a router to rabbet out the back so the plywood back wasn't visible from the sides. I learn something new every build :)
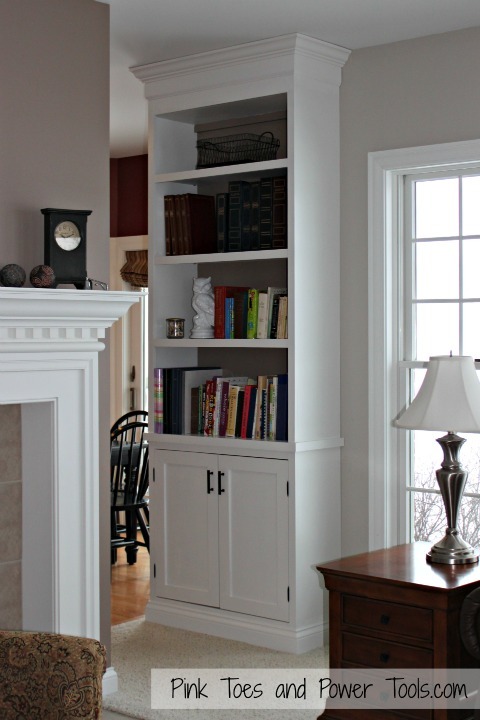
I'm thrilled with the change in the room with this new project. We had two narrower bookcases side-by-side in there before, and they were about the height of the windows with a stain color that didn't match any of the other wood pieces in the rooms. This cabinet looks like it belongs in the room.

Thu, 12/27/2012 - 07:54
Very well done. It fits right in and looks absolutely beautiful. I am working and practicing to reach your skill level so I can do amazing things too!

This was born out of the need for more counter space in our galley kitchen. We don't have the space to add an island. Especially around the holidays, it would be great to have extra space for making cookies, serving big meals, etc. I used Ana's Small Kitchen Island Prep Cart plans for inspiration. I adapted the dimensions to fit at the end of our counters when not in use and added a drop leaf to give us almost 4 additional feet of butcher block counter top when we need it. I used scrap lumber that I had for the cabinet and had an extra drawer handle that matches our kitchen cabinets but bought the butcher block, locking casters, drawer slide and hardware for the legs. Also, the weight of the butcher block makes it want to tip when it's away from the cabinet with the drop leaf down so I added a lead counter weight inside the drawer.


Tue, 04/27/2021 - 18:09
I am so interested in doing this, but would like more details on how the drop leaf was constructed. Would it be possible to get more information?

In reply to I am so interested in doing… by haartd
Sat, 07/24/2021 - 16:59
Sure! I used a 4 foot butcher block and cut it down. The horizontal part is 13 1/2" and the drop leaf part is 32 1/8" attached with a piano hinge. The legs need to be cut and hinged to fit when folded up. This one is made so that the drop leaf fits right under the overhang of the kitchen countertop that it is next to so it's snug against the cabinet and not an issue but, if you want it to be freestanding, the weight of the butcher block will pull it over if you don't weight the cabinet down with something as well. I got a 5 pound lead bar from Amazon in case we need to use it somewhere else. I hope that helps! Let me know if you have any other questions.
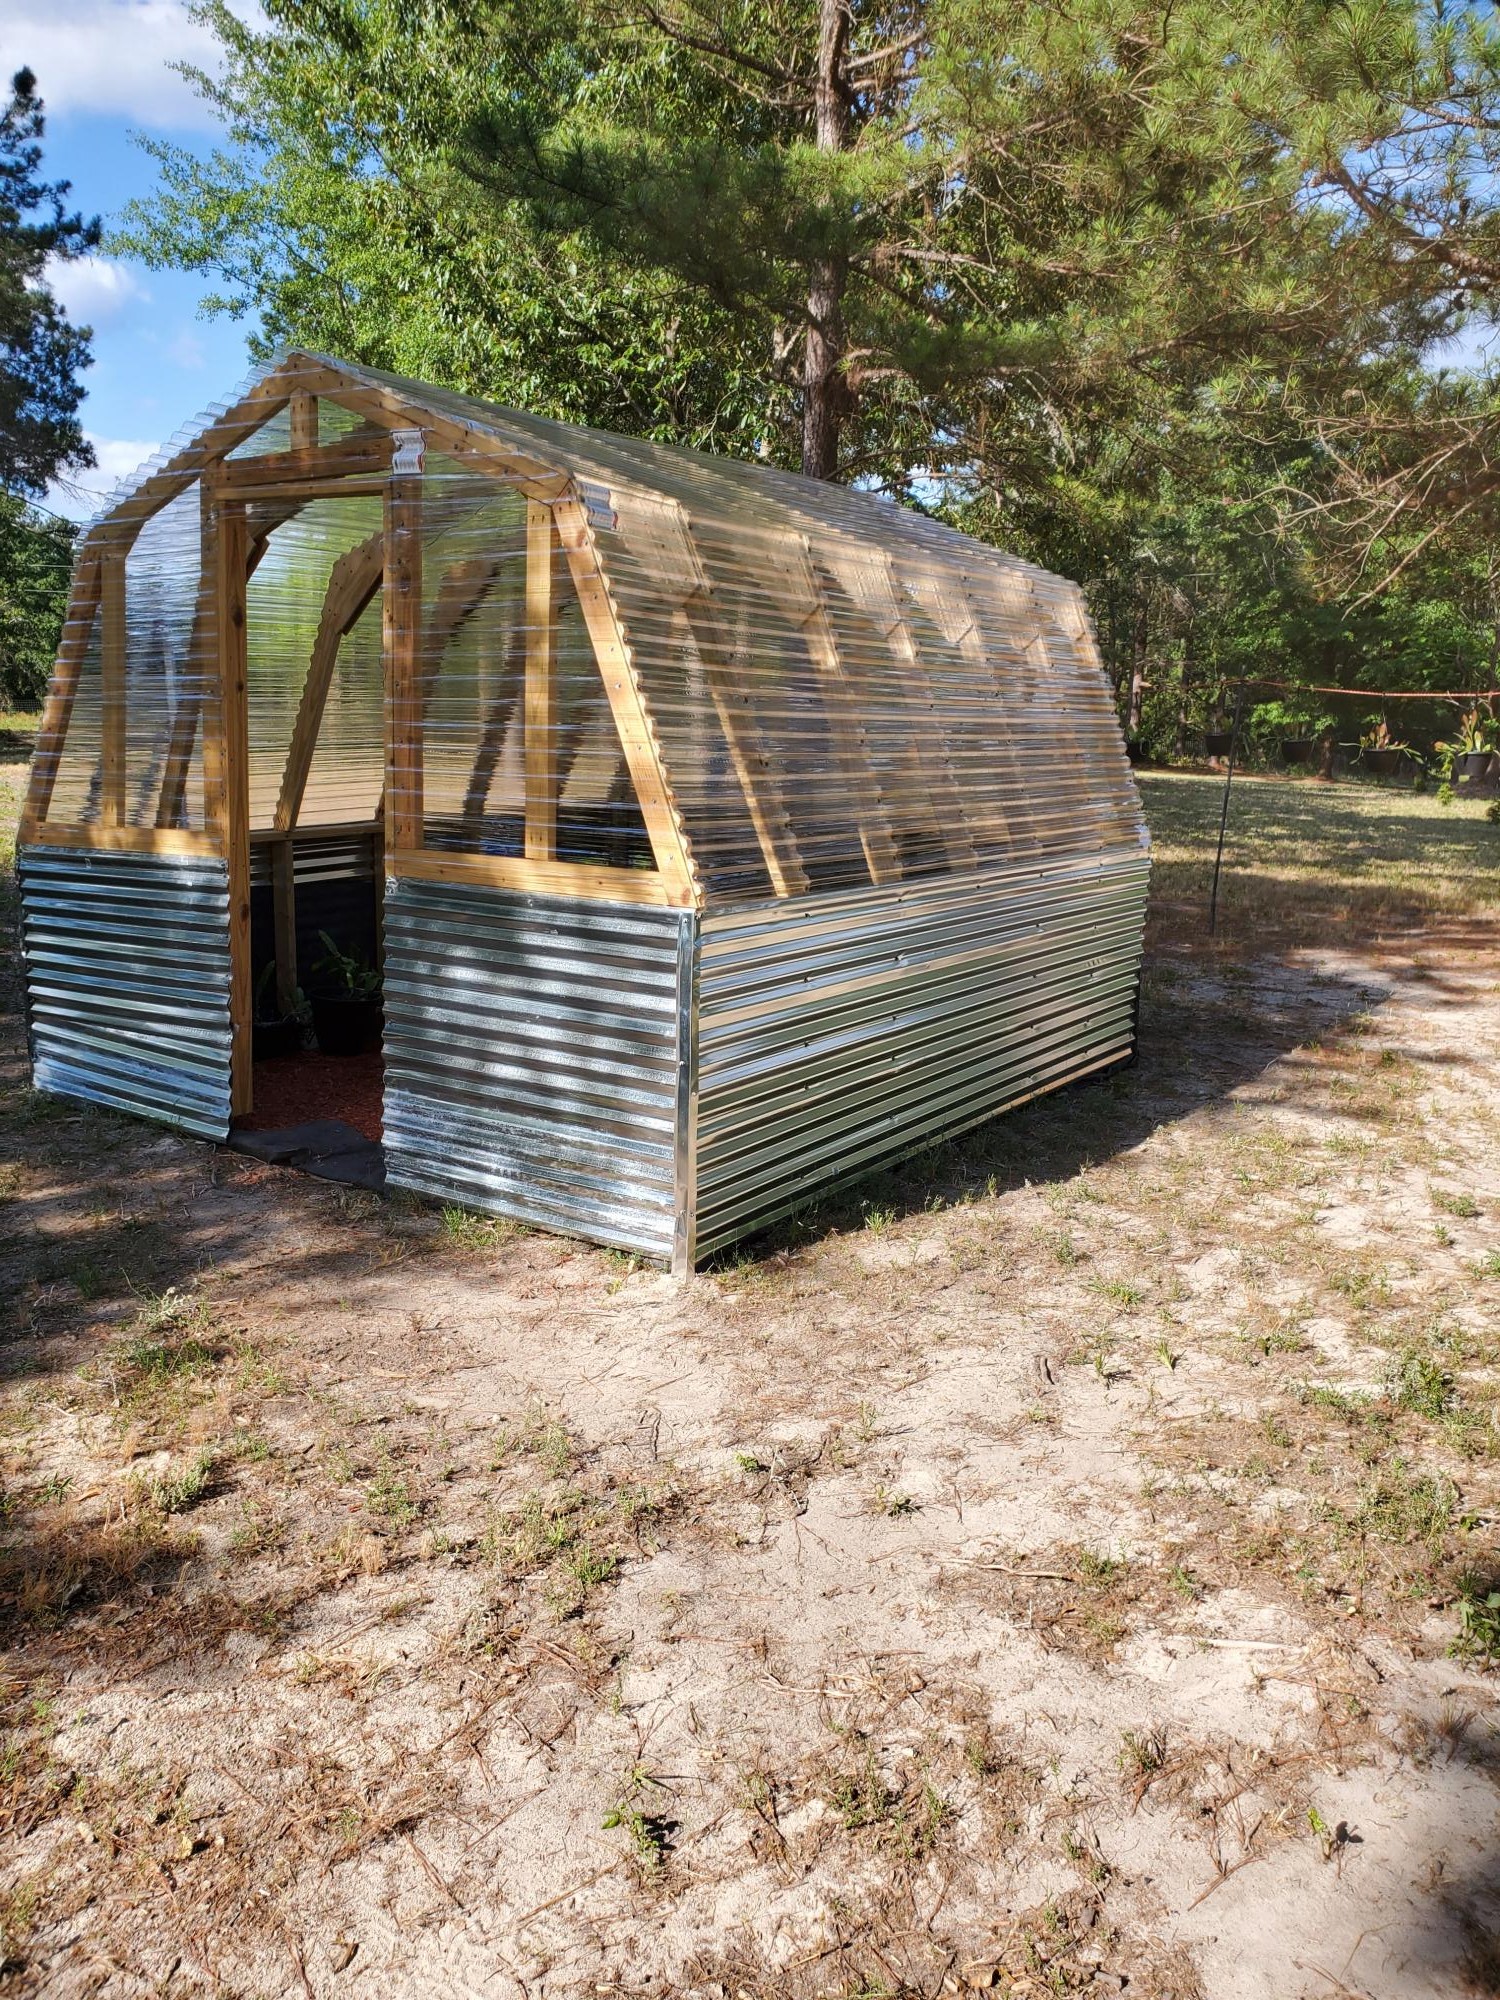
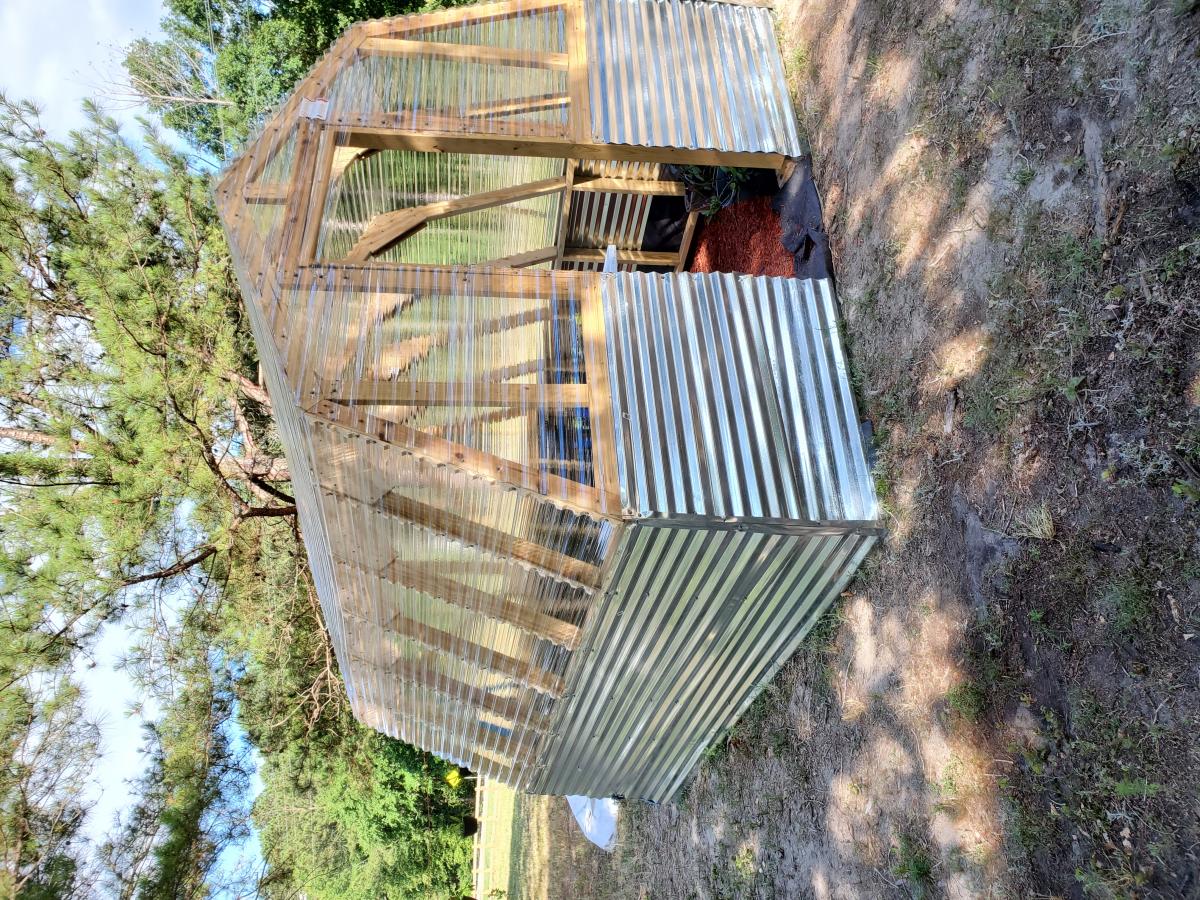
i followed the instructions for the DIY Greenhouse and even though there are a few warts and freckles neither the wife nor the flowers are complaining
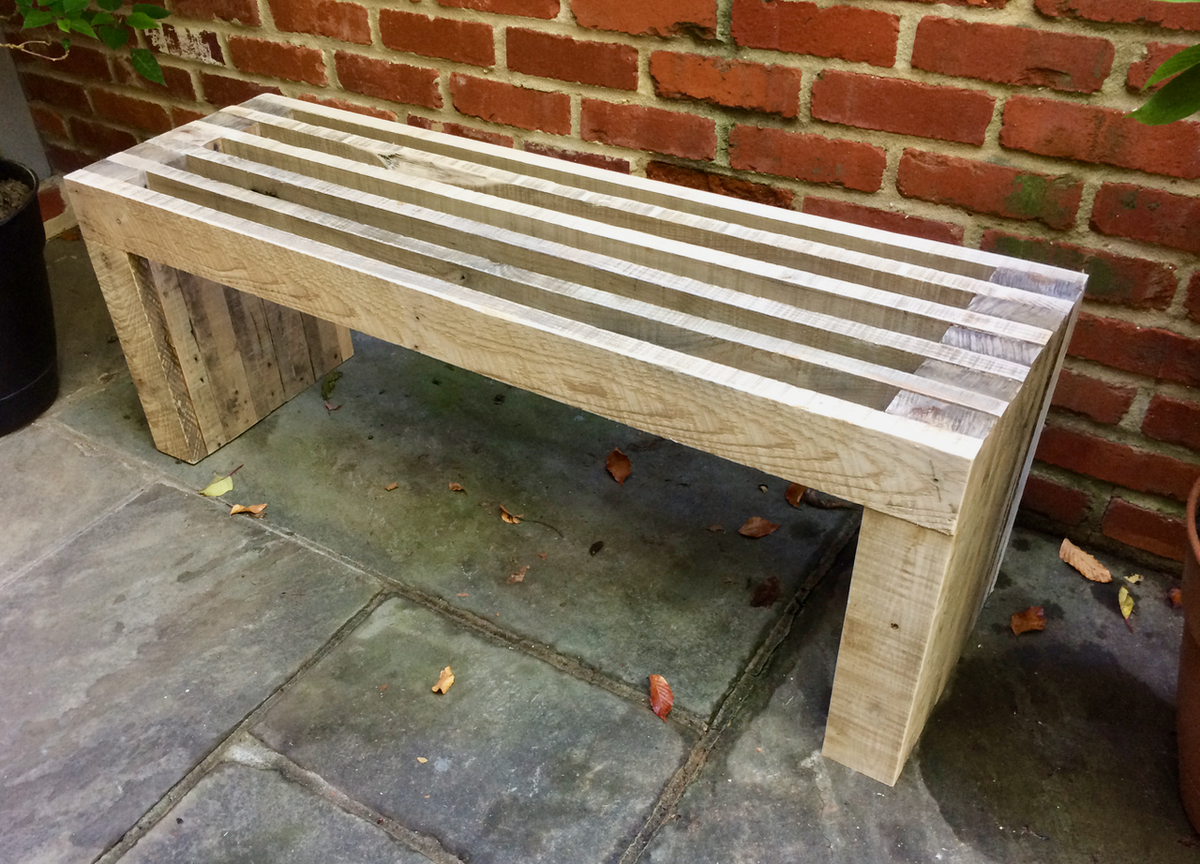
This was made from several heavy duty palettes that were used for delivering stone. Because of the wood I could get off the palettes, I switched the thin and thick pieces so that the slat gaps were where the 2x4 pieces were missing instead of the 1x4s.

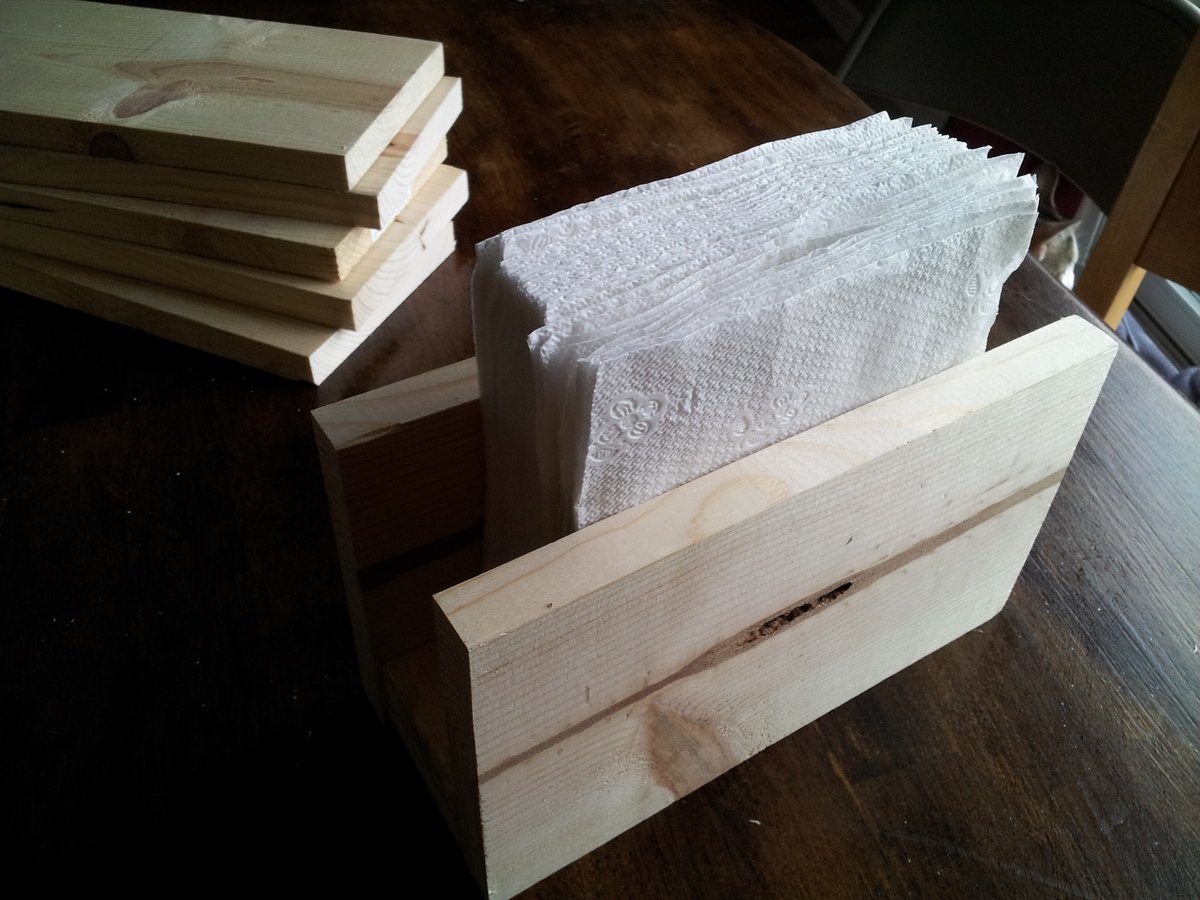
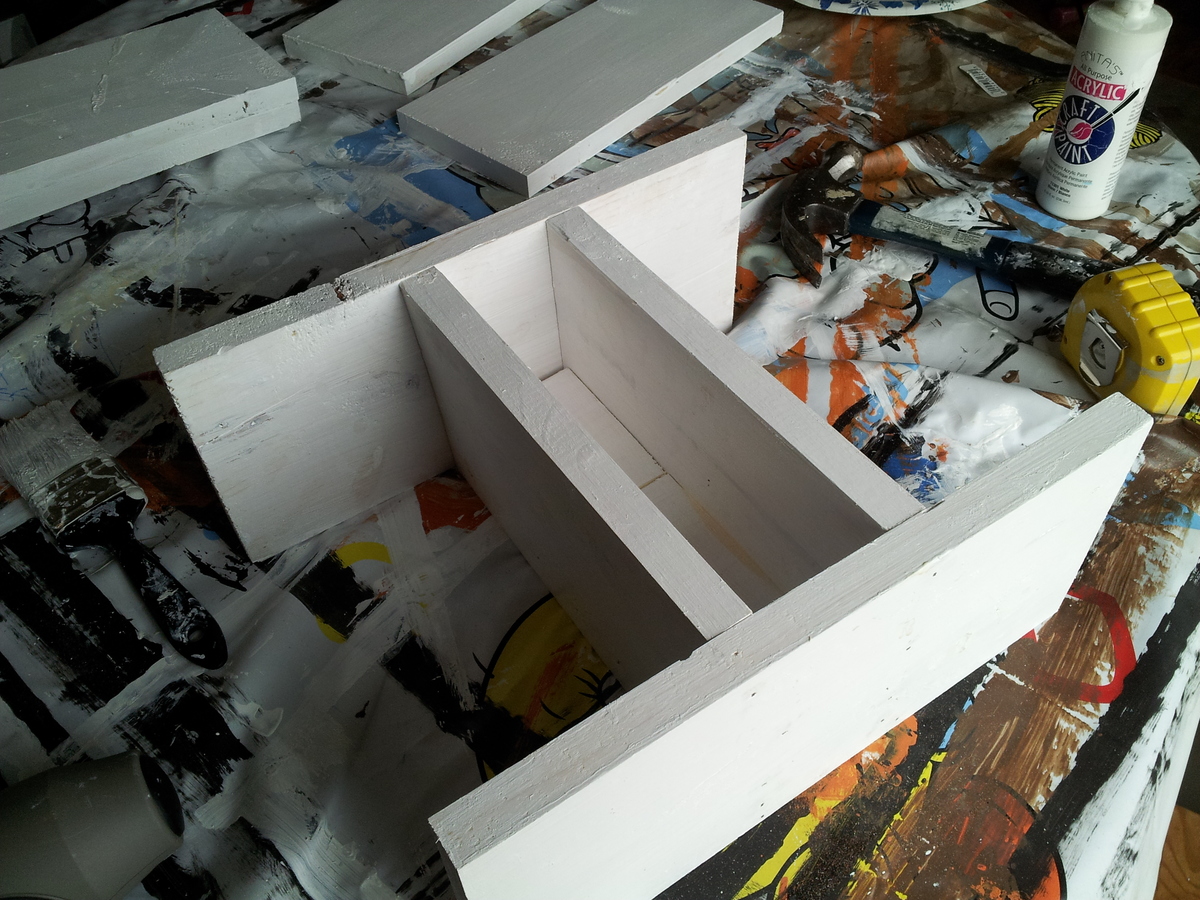
This fun patriotic caddy was created with some small modifications to the plans that inspired this project : Ana White's Soda Caddy . I added a space for napkins to my version.

Sun, 08/11/2013 - 19:20
I love how you modified the compartments fit the napkins!
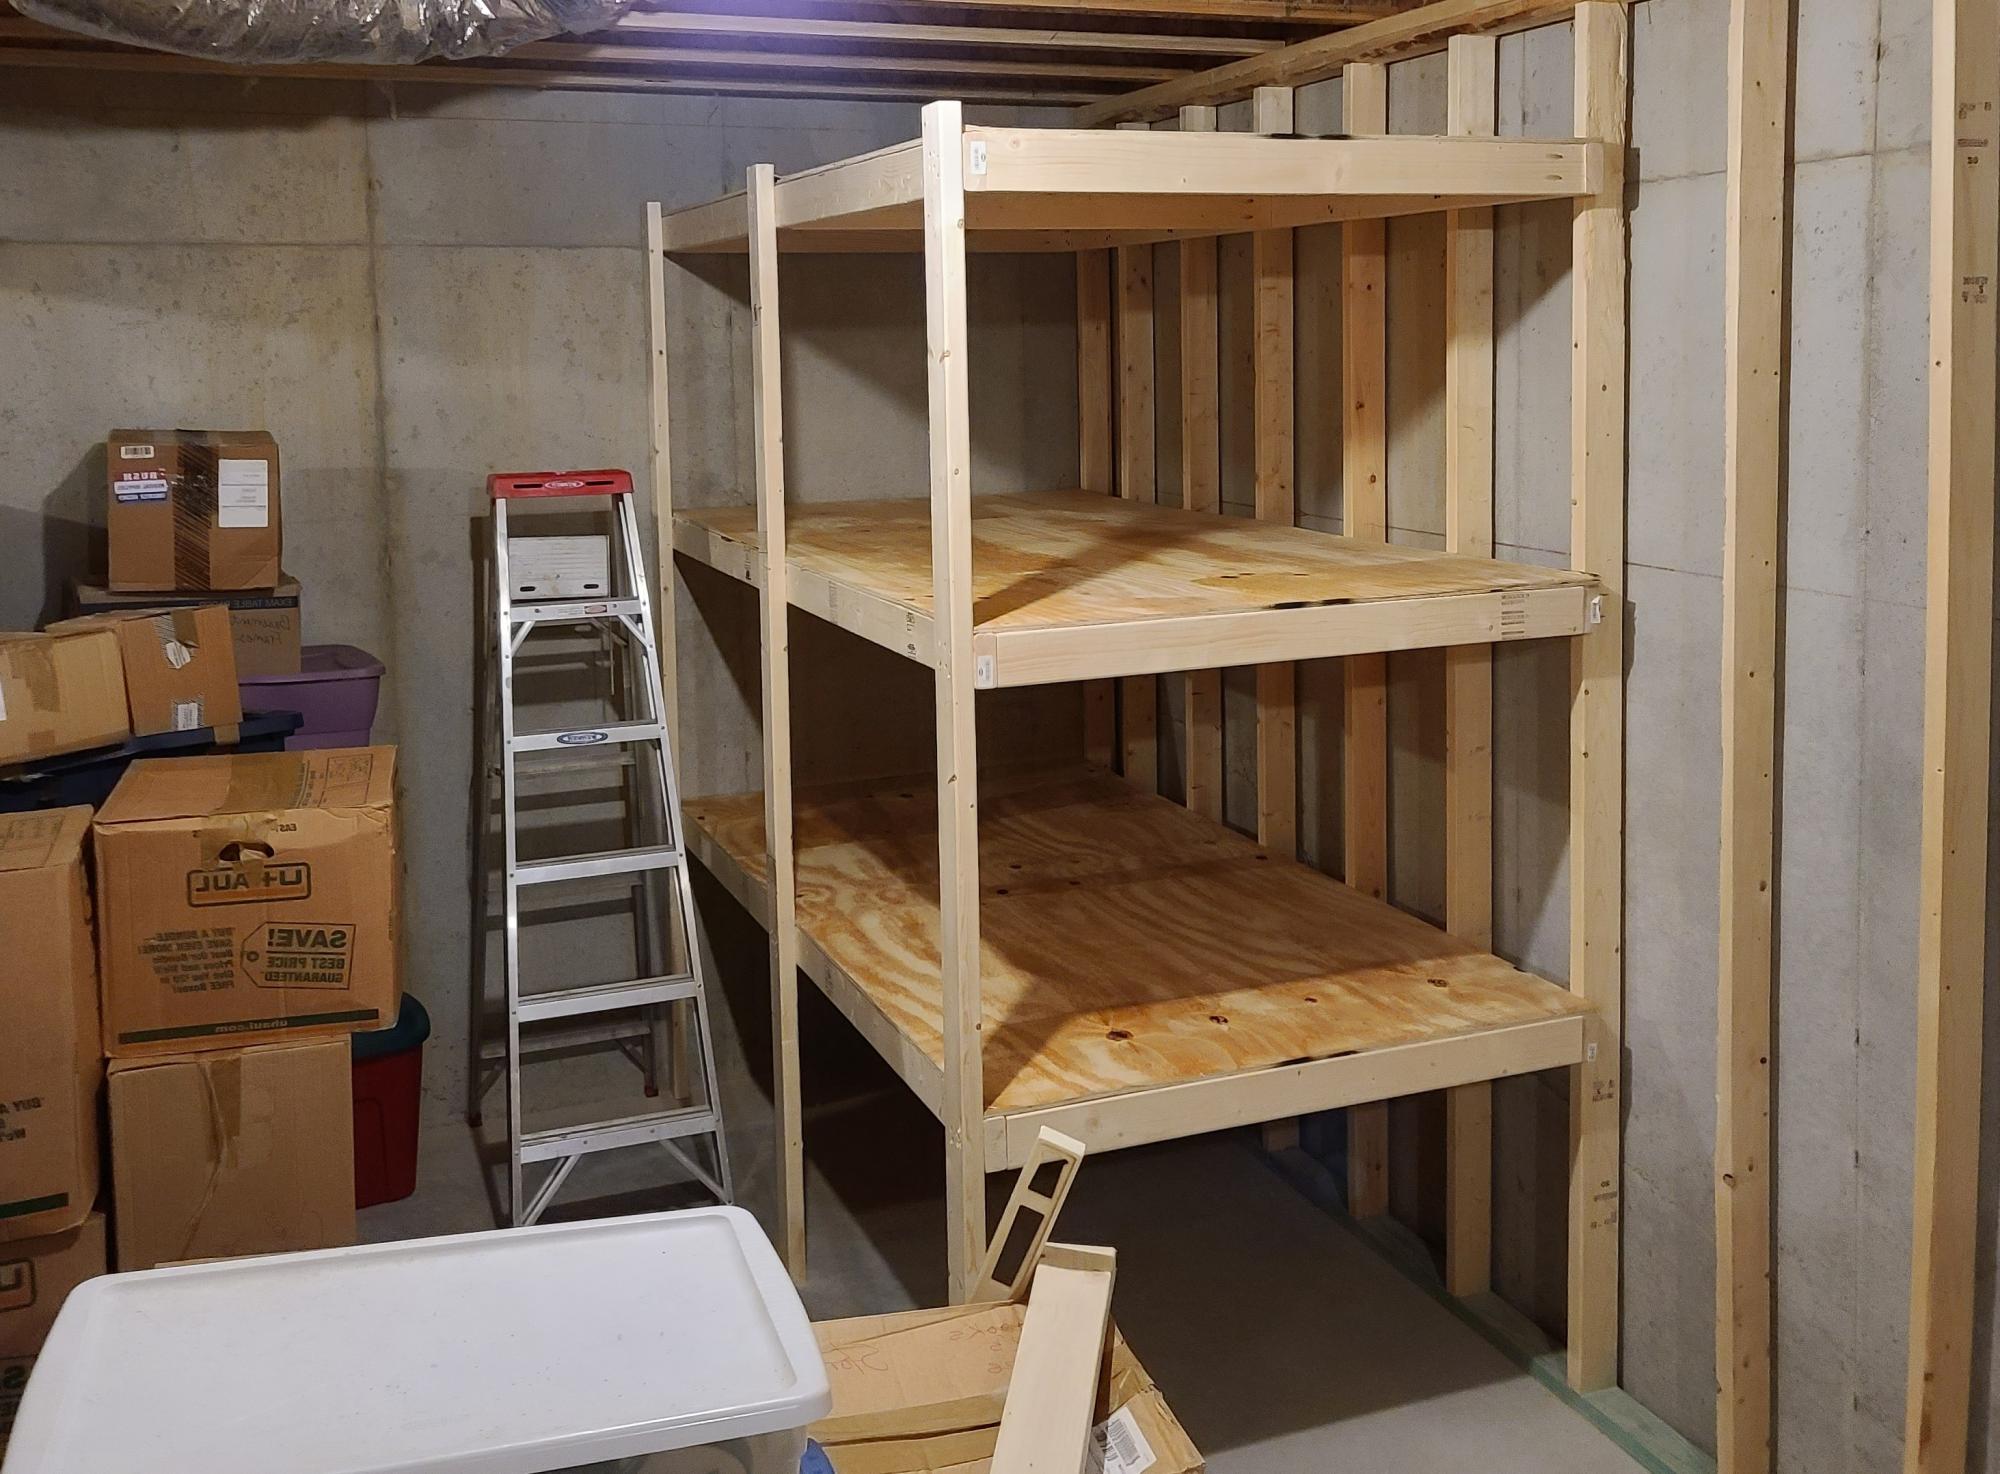
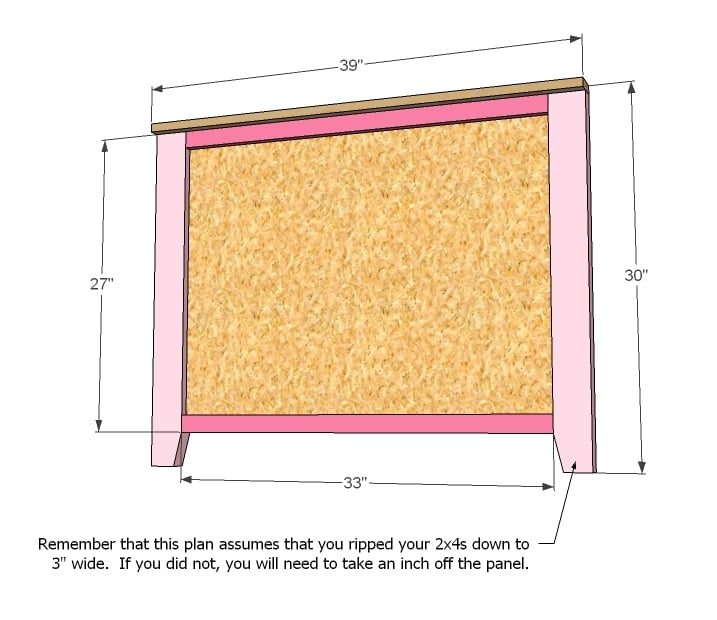
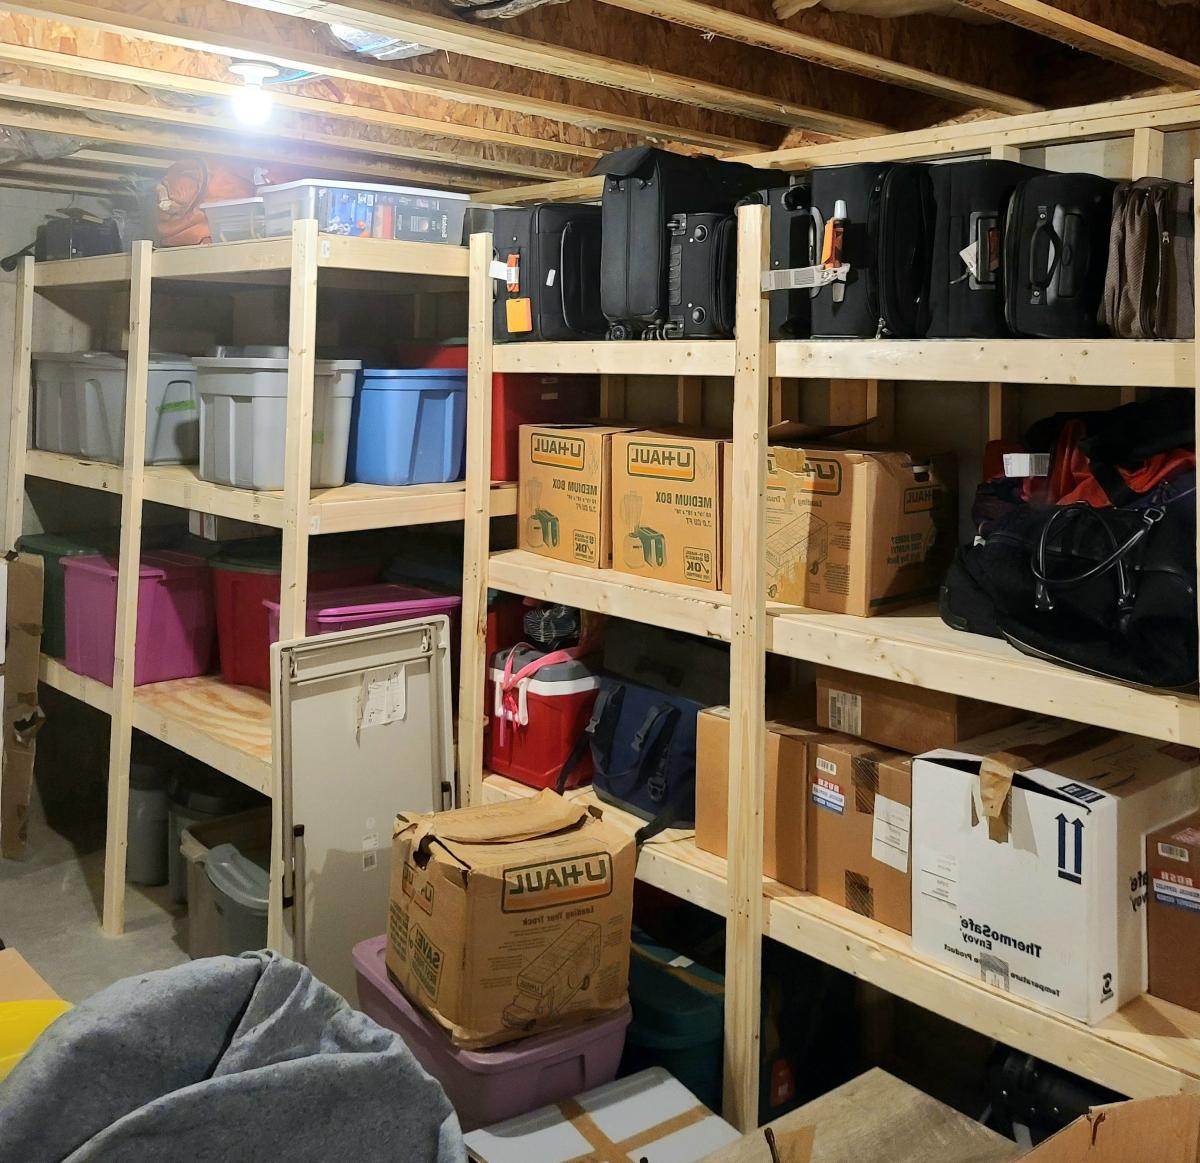
New house equals room for all the junk. Built this off the Garage Storage Shelves plan for our basement storage area. Leveraging the existing exposed studs made it a bit easier. Made these 48" deep to accommodate the big bins with all the holiday decorations. I added another along side, but made it 24" depth...one more yet to go. The wife can't throw anything away!
Fri, 12/31/2021 - 09:47
Thanks for sharing, looks like you added a ton of storage, well done!
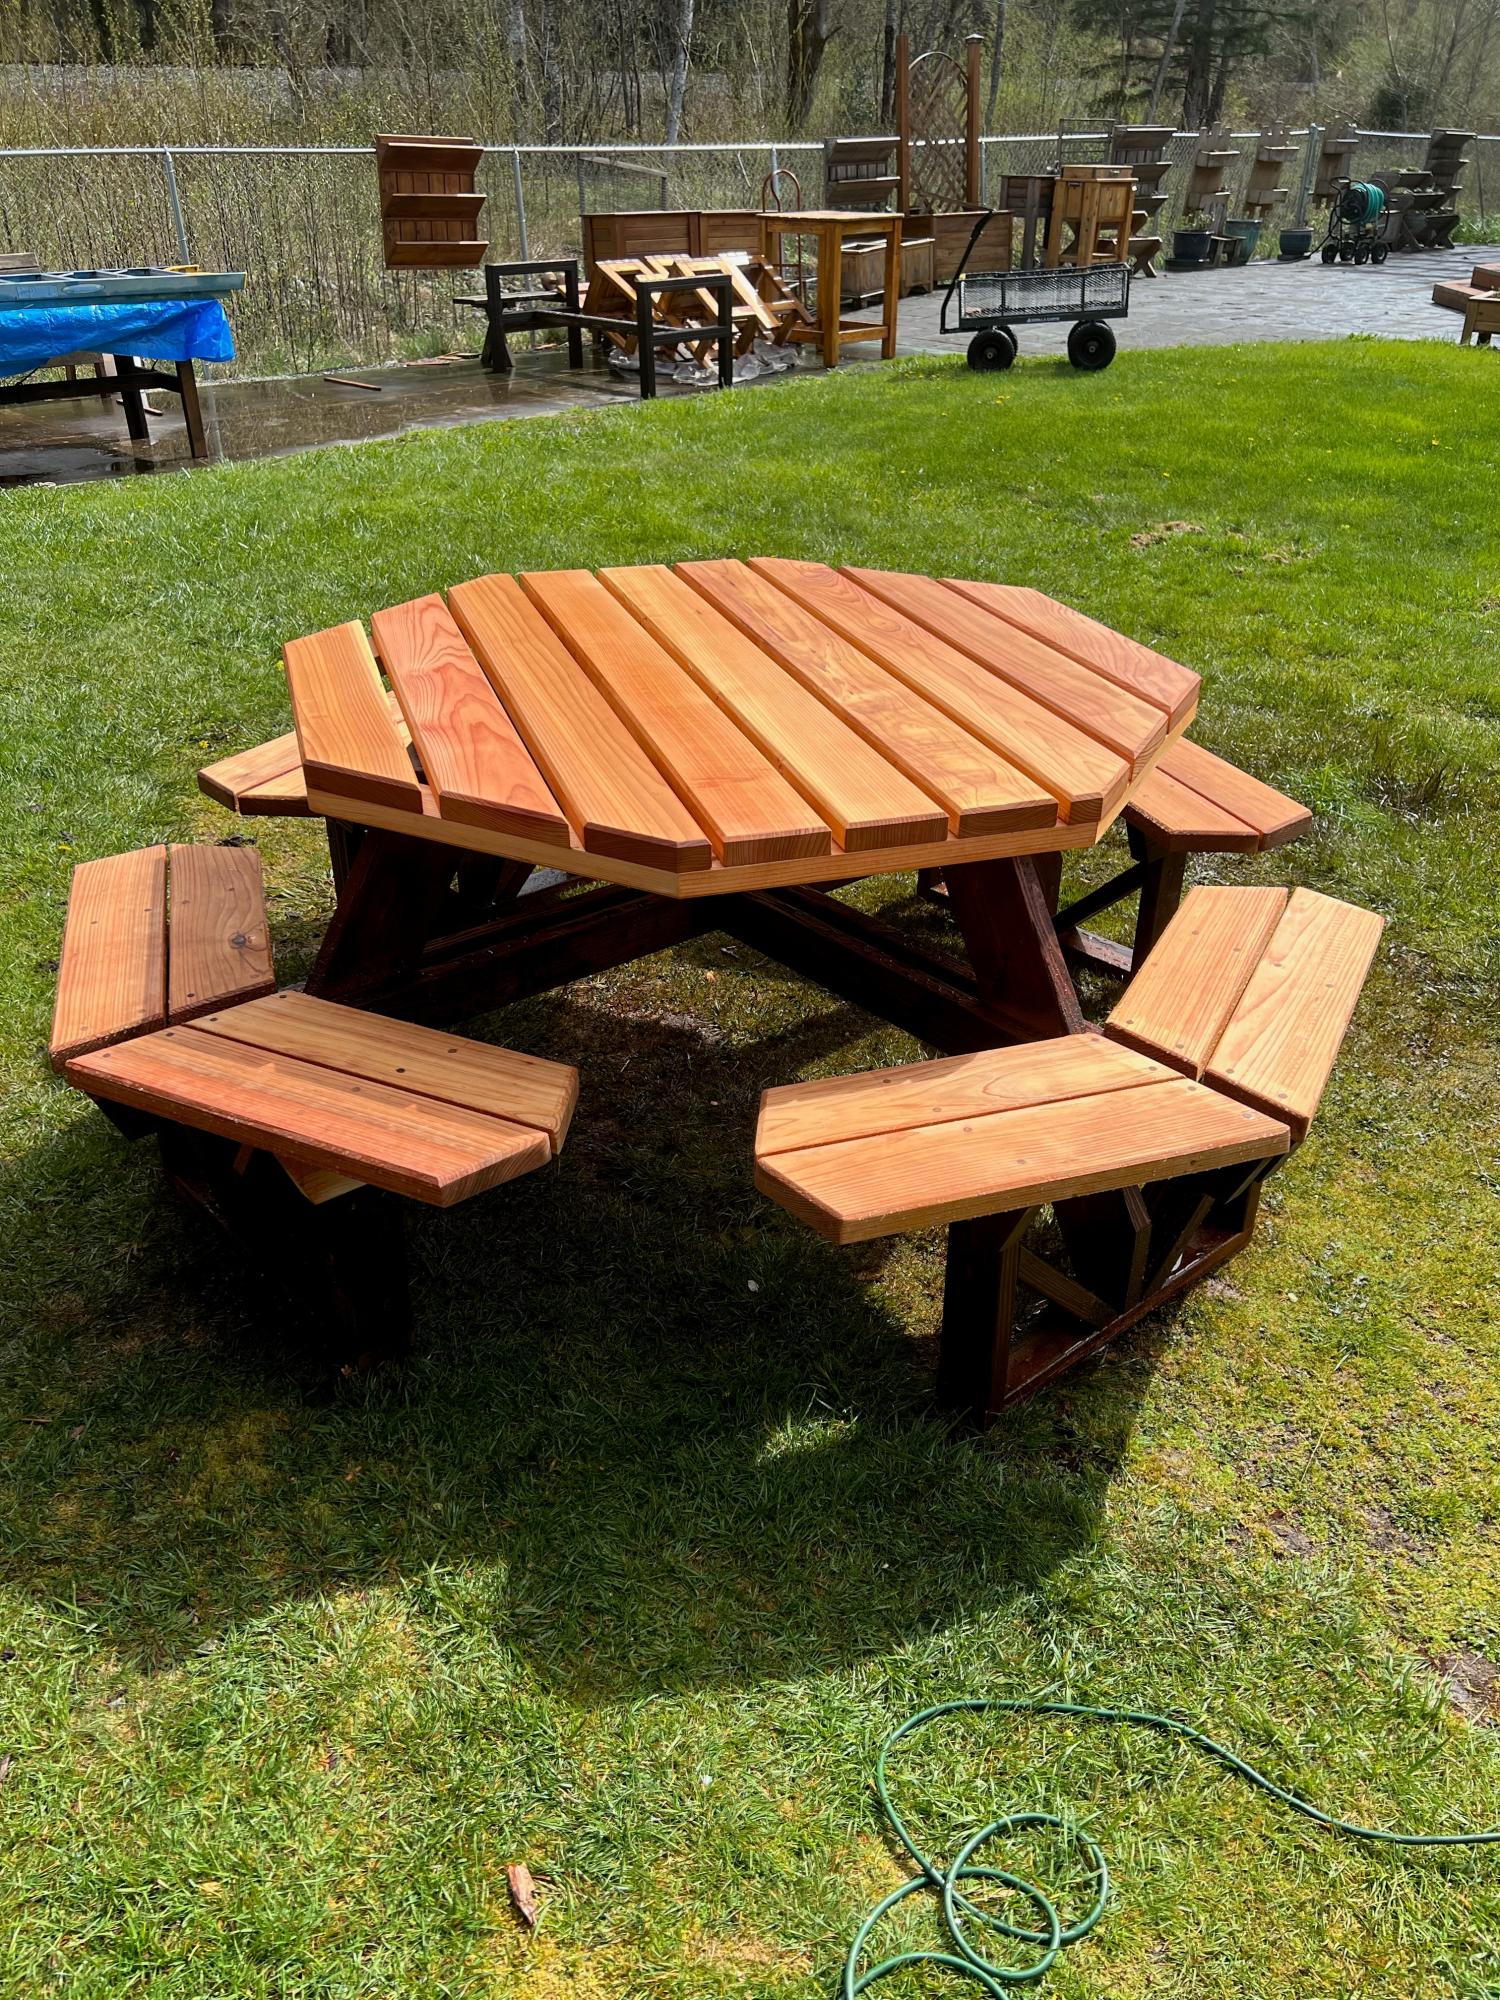
I just finished this octagon picnic table as per your plans
the 2x6 are all clear Western Red Cedar and the skeleton is
Douglas Fir. I think it turned out astonishingly excellent.
Thanks for the inspiration Ana.
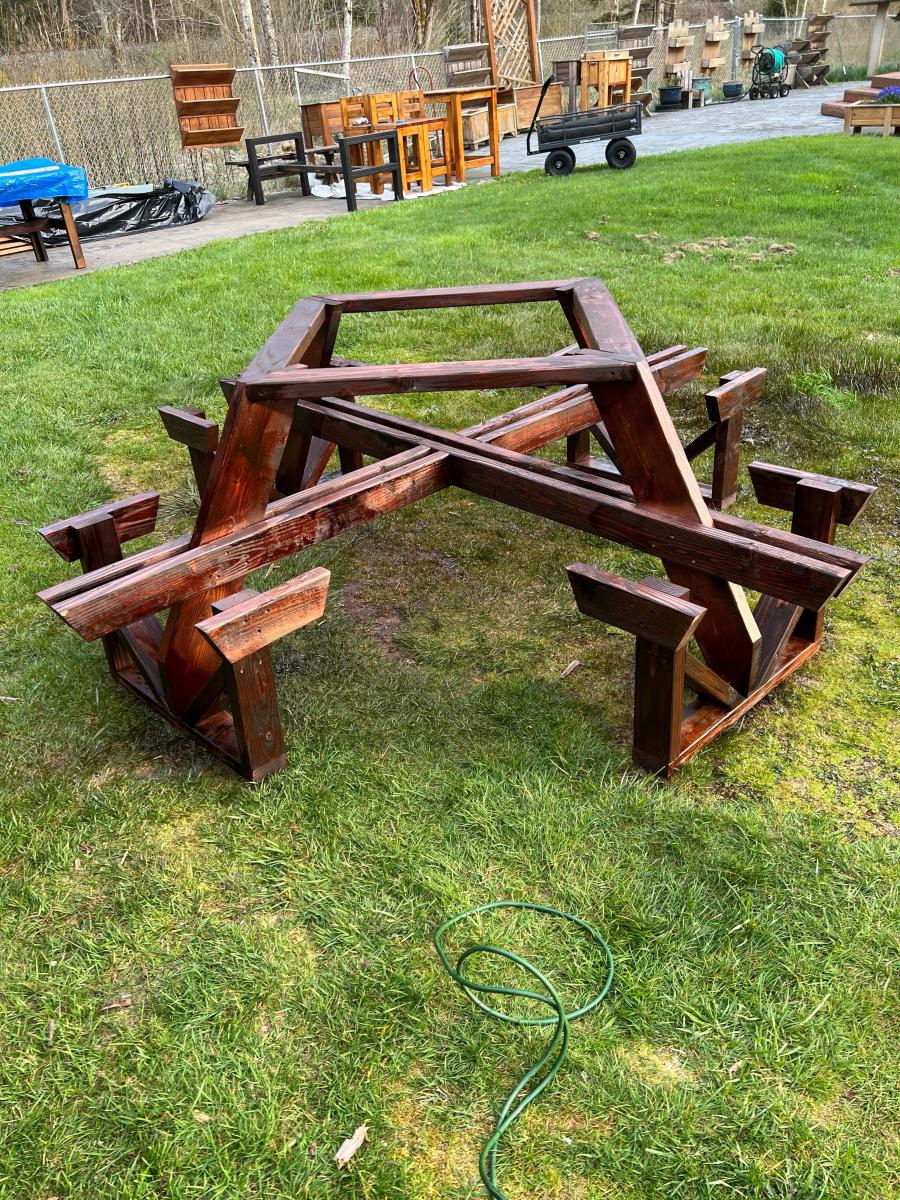

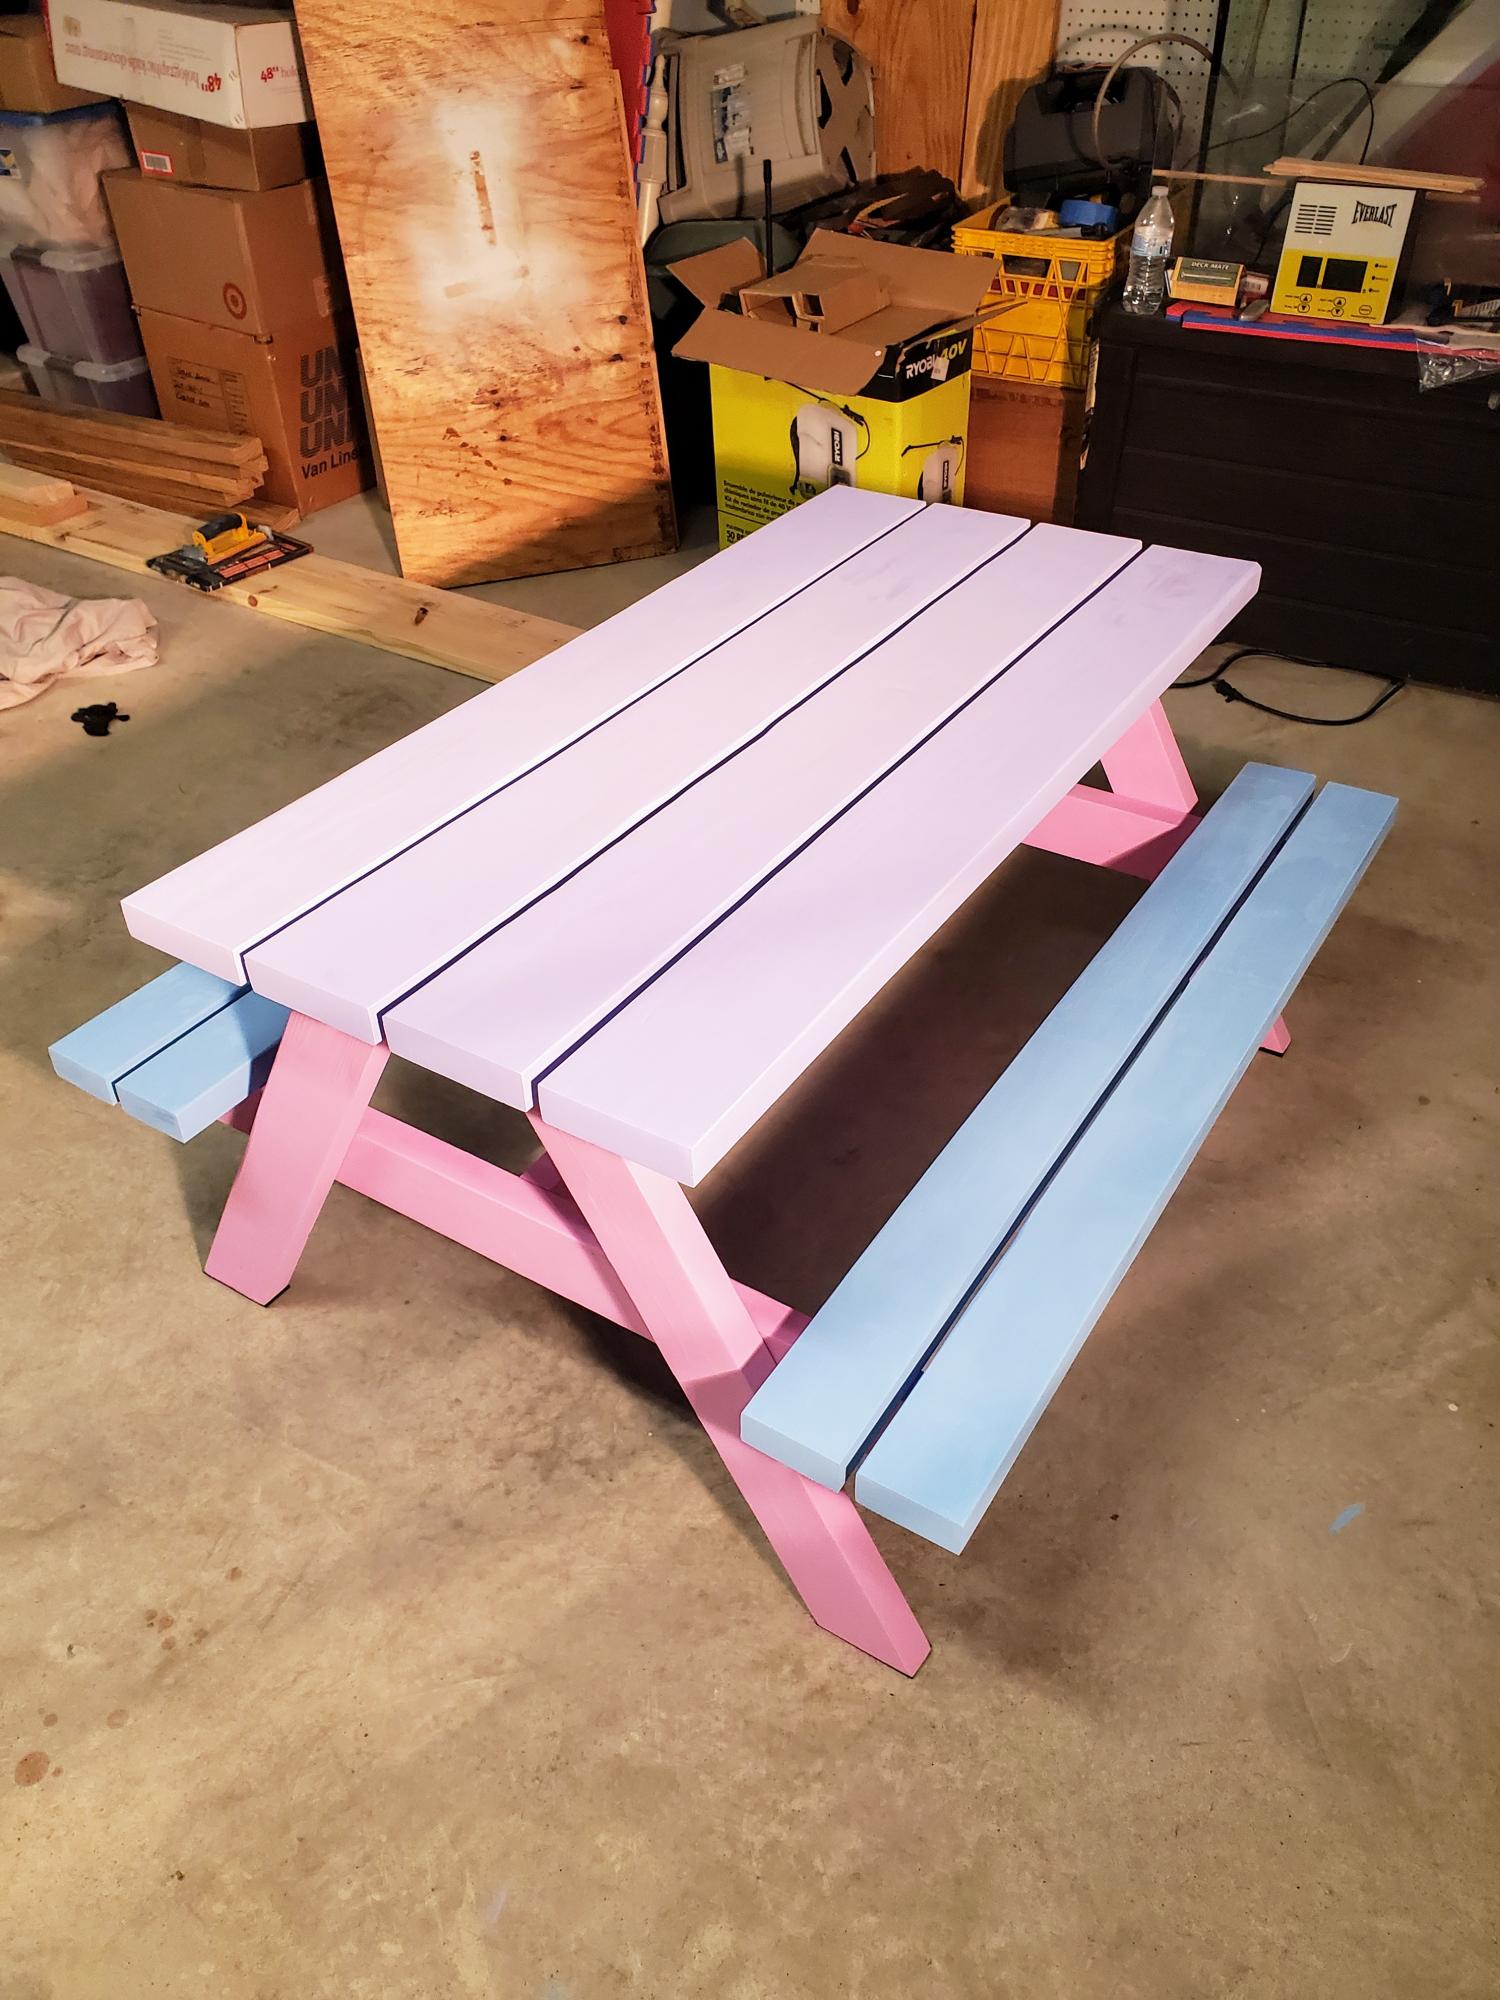
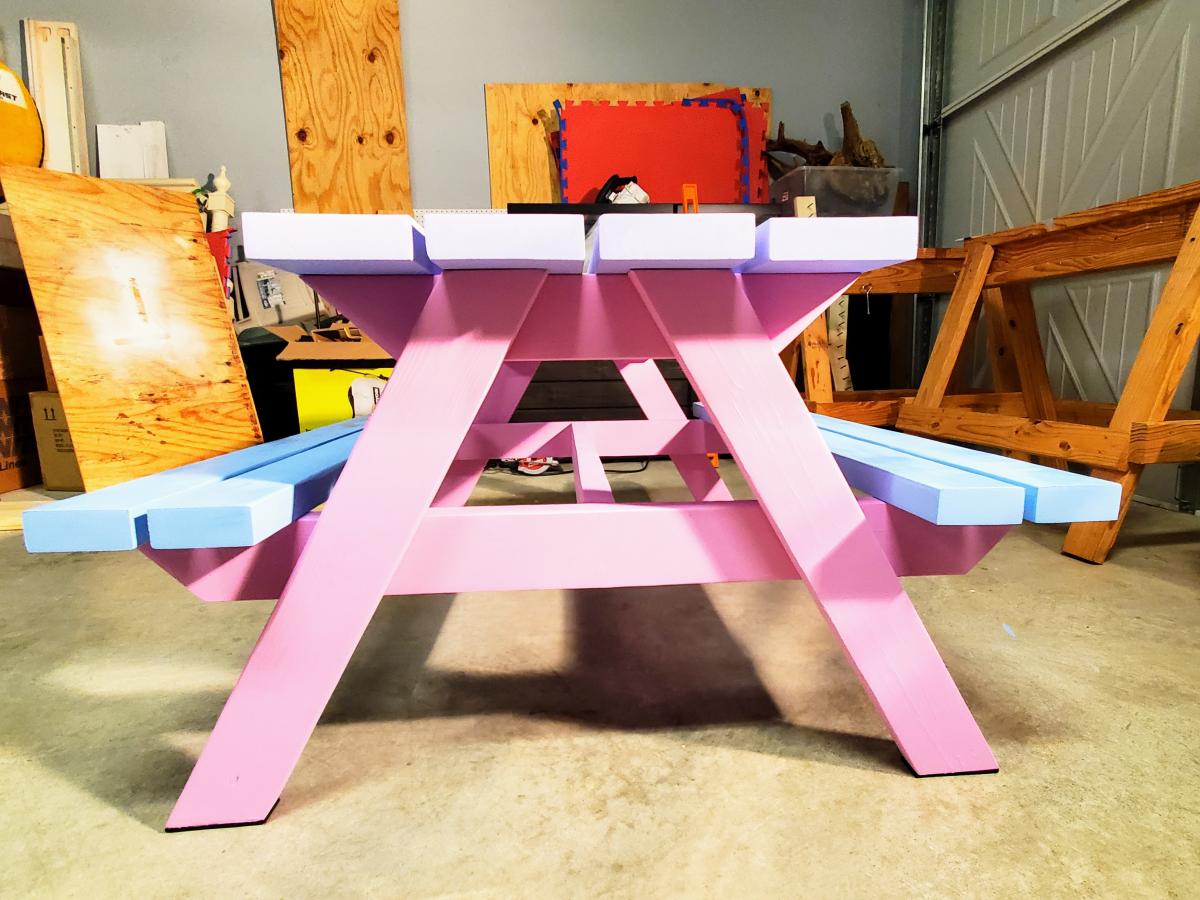
This was a very fun and one of the easiest projects I have made from Ana's plans! This makes me want to see if I can make matching chairs as well!
If you have seen my other projects, you know that I try to keep the lumber cost of my projects as close to free as possible. Living on the Eastern Shore of Virginia, pallets are not free, so I did have to pay $2 for each pallet, being VERY choosy about the slats being all the same size and straight. The hardest part of the project was taking the pallets apart! Check the blog link for more details.
I used 1 1/2 pallets for this project, and the following tools:
Jigsaw (to cut the ends off the pallet)
Pry-bar (to loosen the slats from the center of the pallet)
Miter saw
Drill
Table Saw (ripping the 2x4 sections of the pallet, to make the legs and spacers of the table)
Palm sander


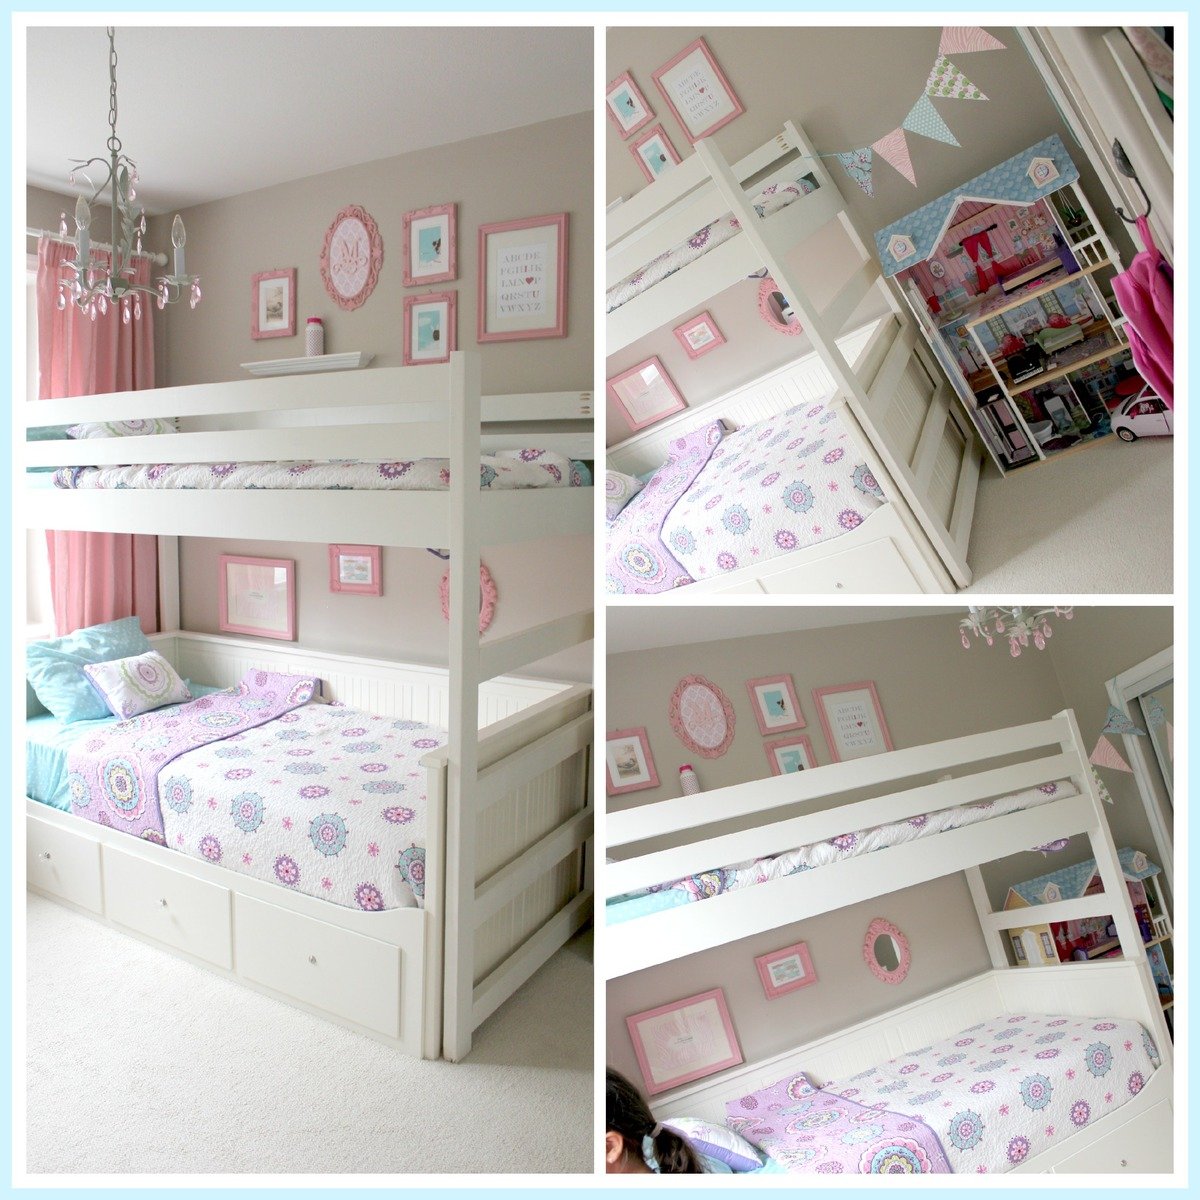
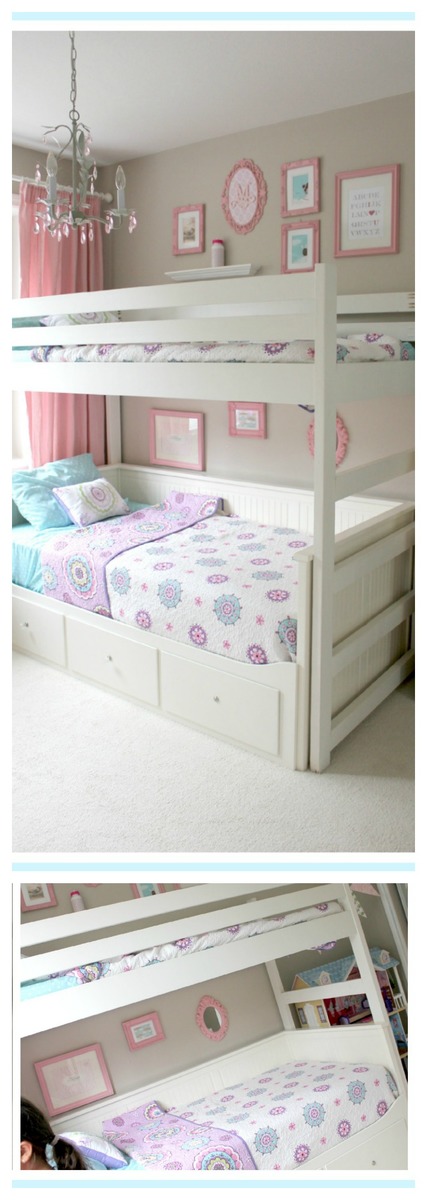
I liked the simple design of the camp loft bed, so I took the plan and modified it to fit over top of our existing Ikea daybed. I adjusted the width of the loft bed and made it a little taller, so that I could sit on the bottom bed and read to the kids with out hitting my head on the loft bed all the time.
I built the ladder into the side of the loft bed so that it wouldn't interfere with the drawers on the front of the daybed. This worked out well, as it also gives the girls more room to play!
This build is super easy, but I have to say that I don't like working with 2x4s. They are so rough....I spent a lot of time sanding and filling, and it's still not perfect. But I'm ok with it ;) I may add another cross support because it is a bit wobbly (probably b/c I made it taller).
The finish is a color matched 'All surface enamel' from Sherwin Williams.
Wed, 08/04/2021 - 06:38
Hello Millhouse. I love the loft bed you created. I have the exact hemnes daybed for my daughter and I beg to build the same loft bed. Do you have the exact modified plan you used with the measurements that fit the bottom bed? This would be super helpful!! Thanks in advance!

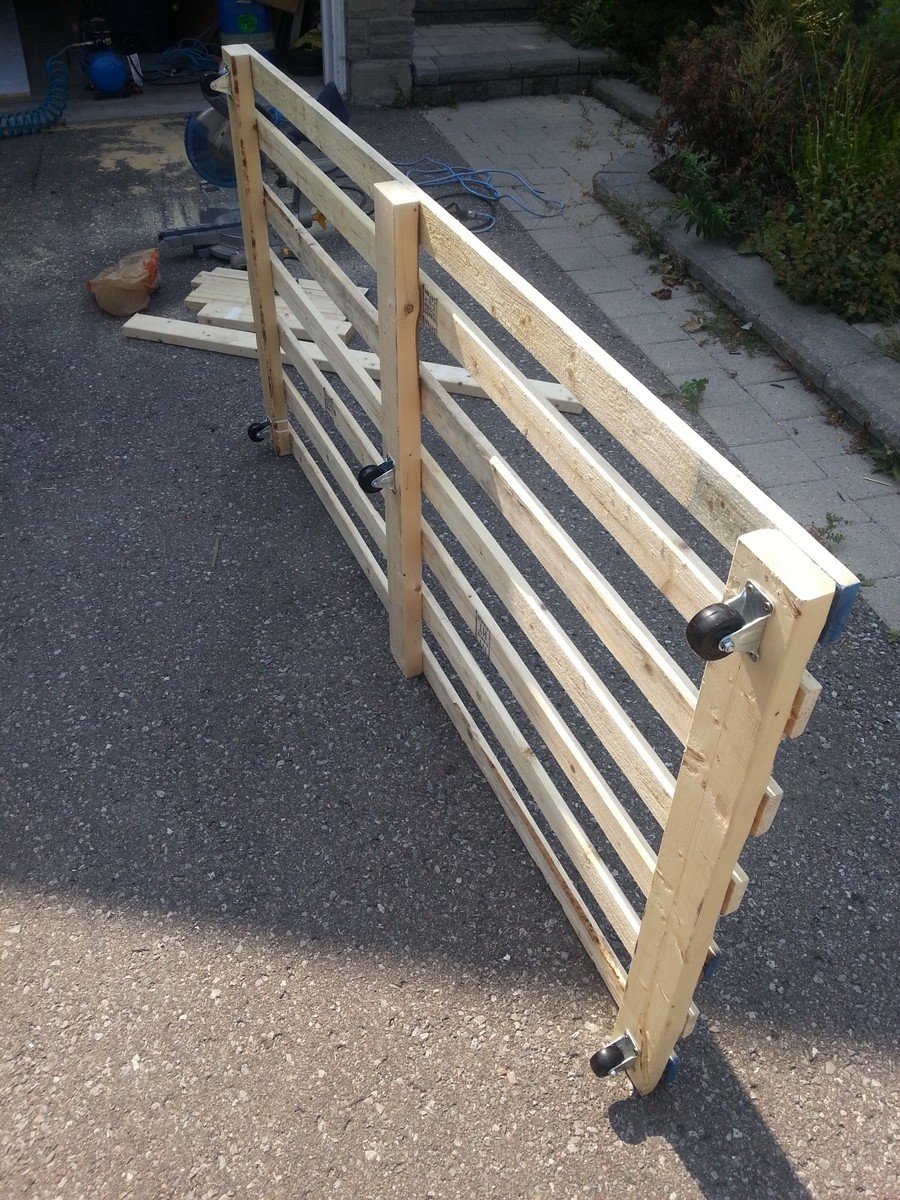
Not too bad of a project but had to a good bit of guess work so I could changed the plans for a queen size bed and flip in on its side.


Sun, 05/29/2016 - 18:50
Good evening!
I am new at wood working, and would be very interrested in knowing the different measurements you changed to get from a twin to queen murphy bed. If it is posted on this page, I tried but couldn't find it. Thank you for your help. Have a good day.
Marie-Julie


