Farmhouse Railing Upgrade - by Sara and Chris
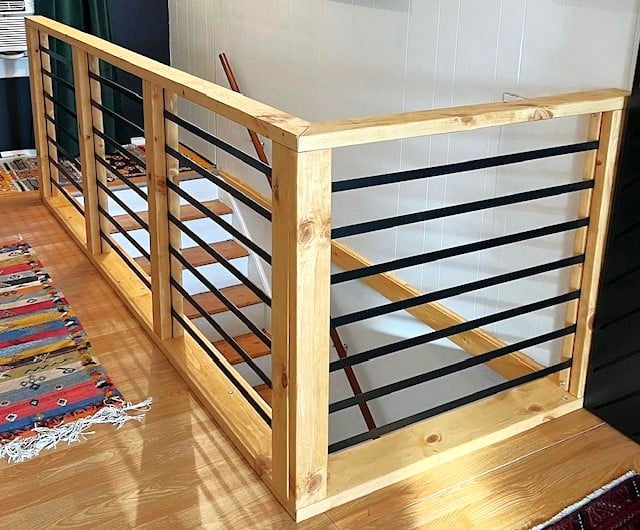
Amazing stair railing upgrade shared by Sara and Chris!

Built from Plan(s)
Amazing stair railing upgrade shared by Sara and Chris!

I honestly think Ana is a mind reader. Whenever I need plans for a particular piece of furniture, they magically appear on her site. Of course if she was a true mind reader, everything will be exactly as I need it requiring no modifications. That's what makes her plans so amazing. I can build bigger and better because I've learned to modify her plans to fit my current needs.
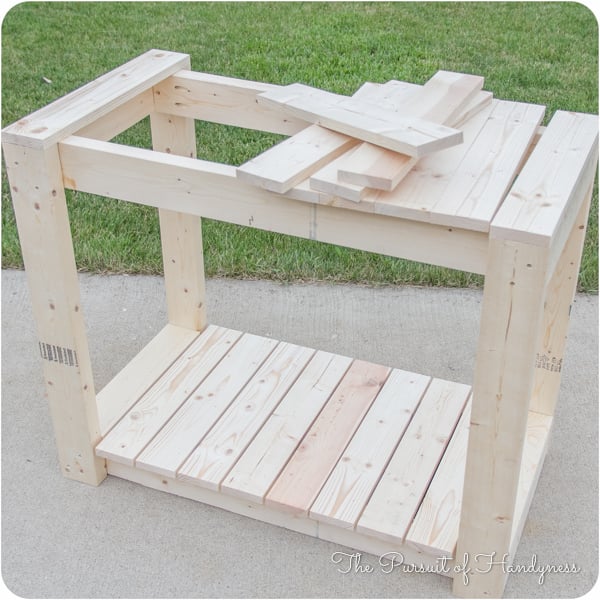
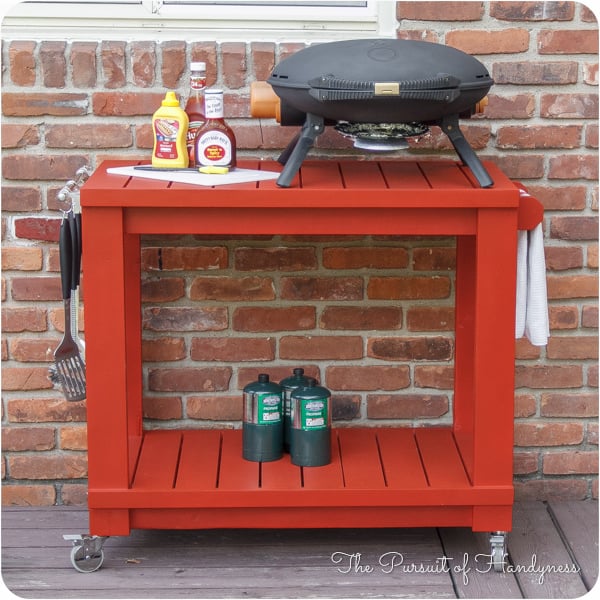
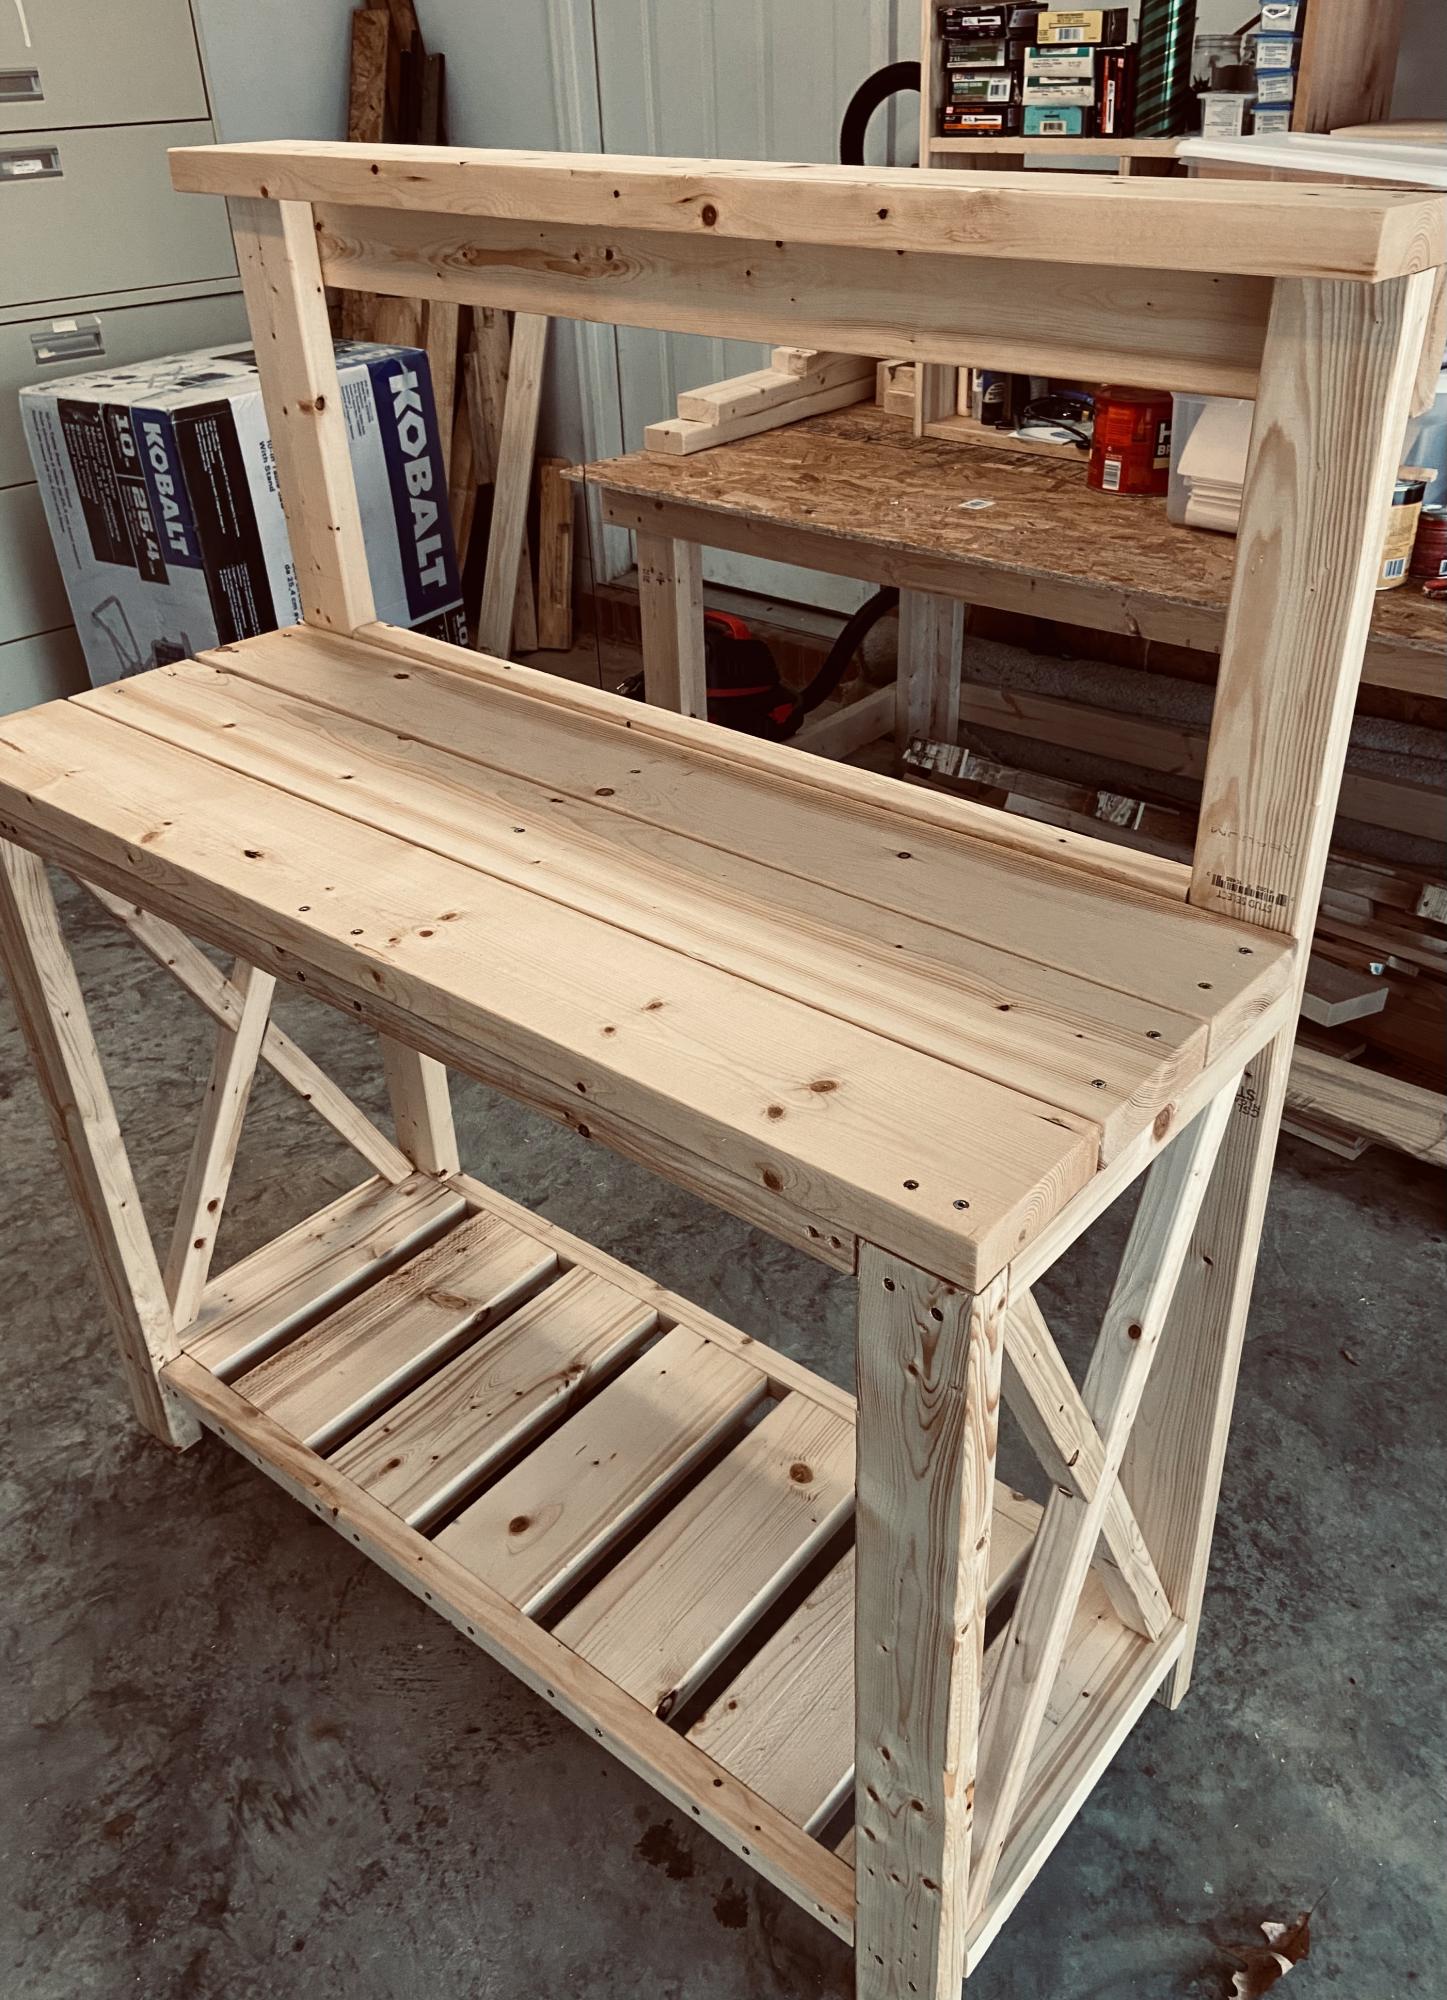
This Cart was no exception. I had to make mine a few inches deeper and change the height of the legs and it was a piece of cake. I put this together in less than 2 hours and finishing was easy too.
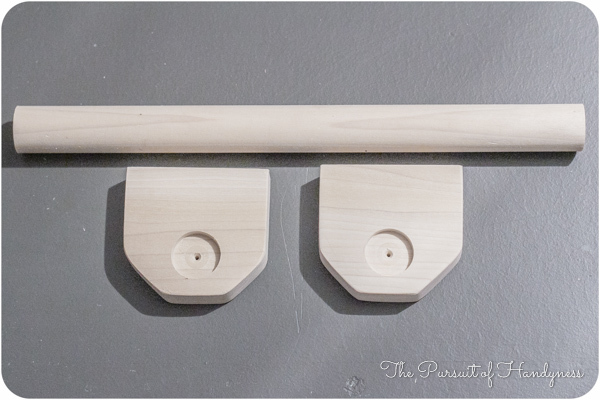
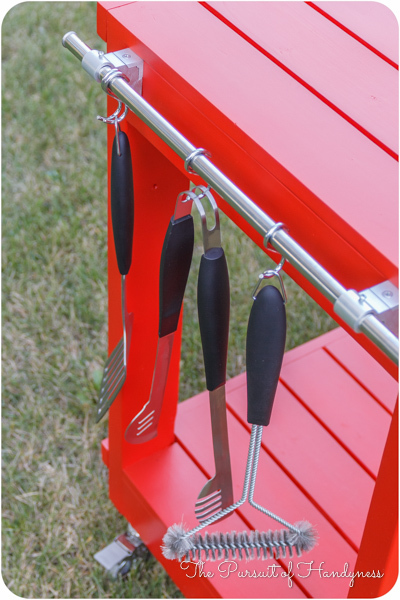
I did a blog post all about what I did differently including how I constructed a towel bar instead of the pipe. Check it out at www.thepursuitofhandyness.com

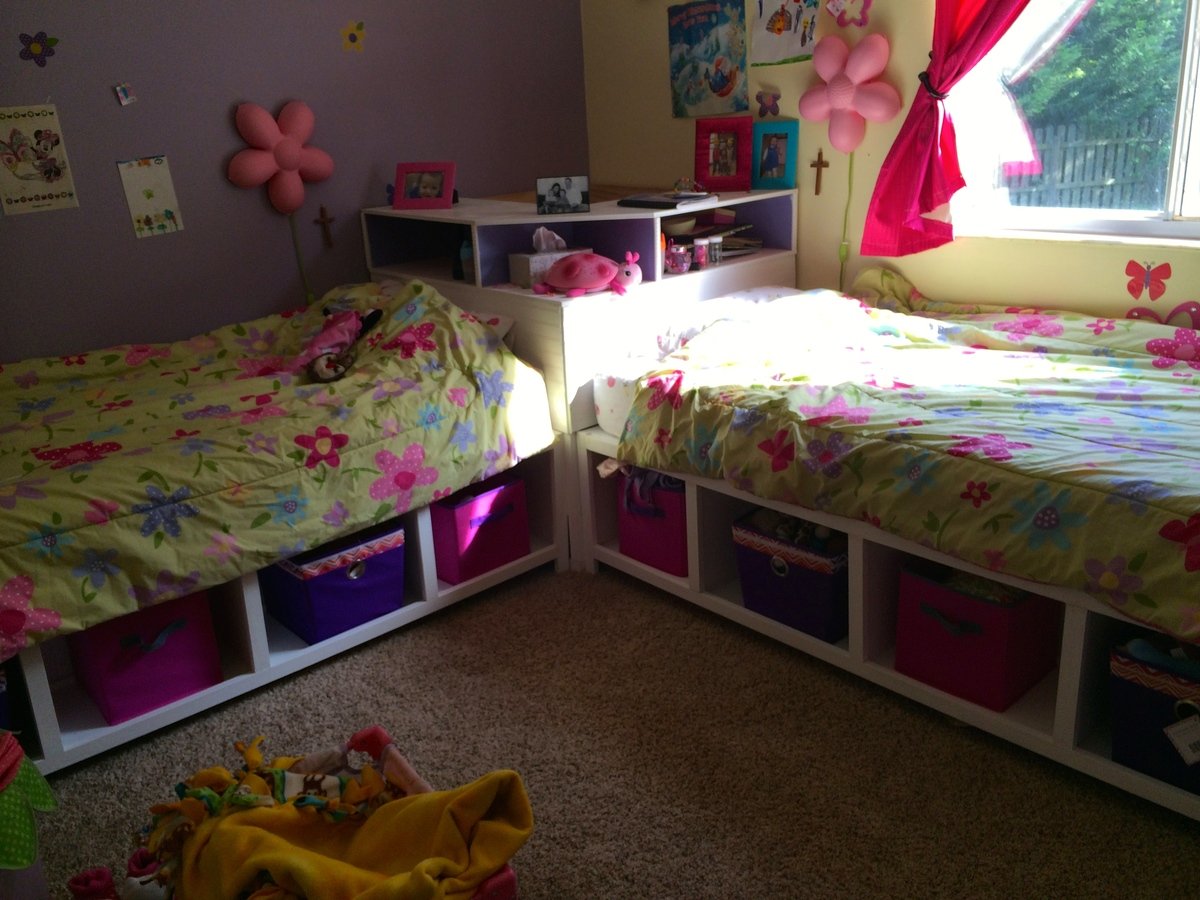
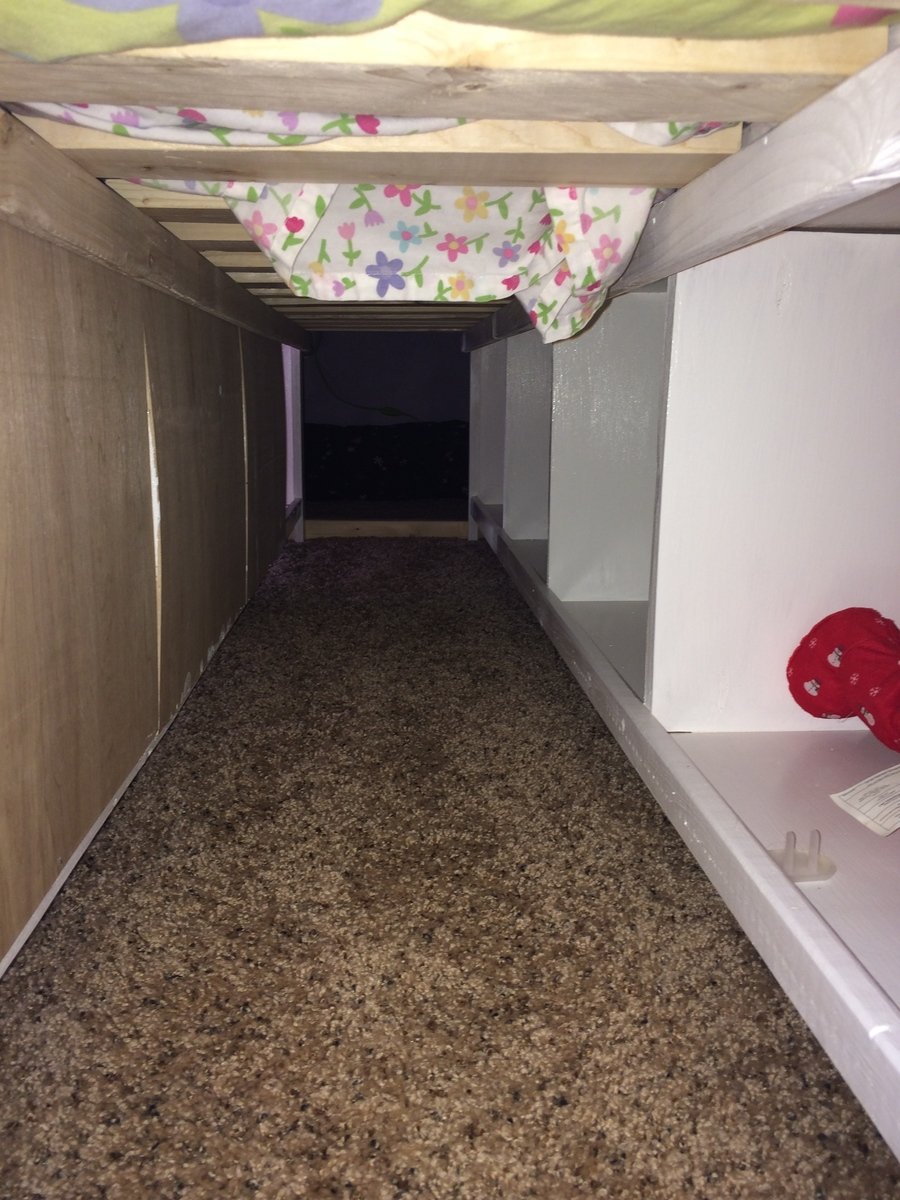
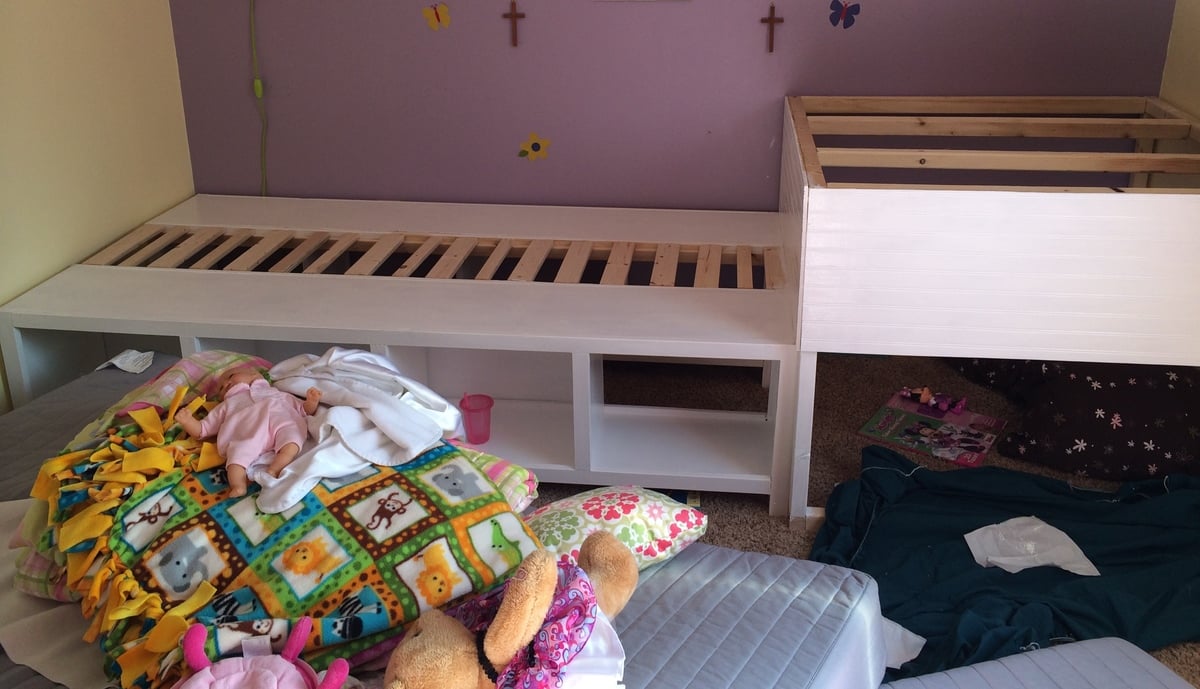
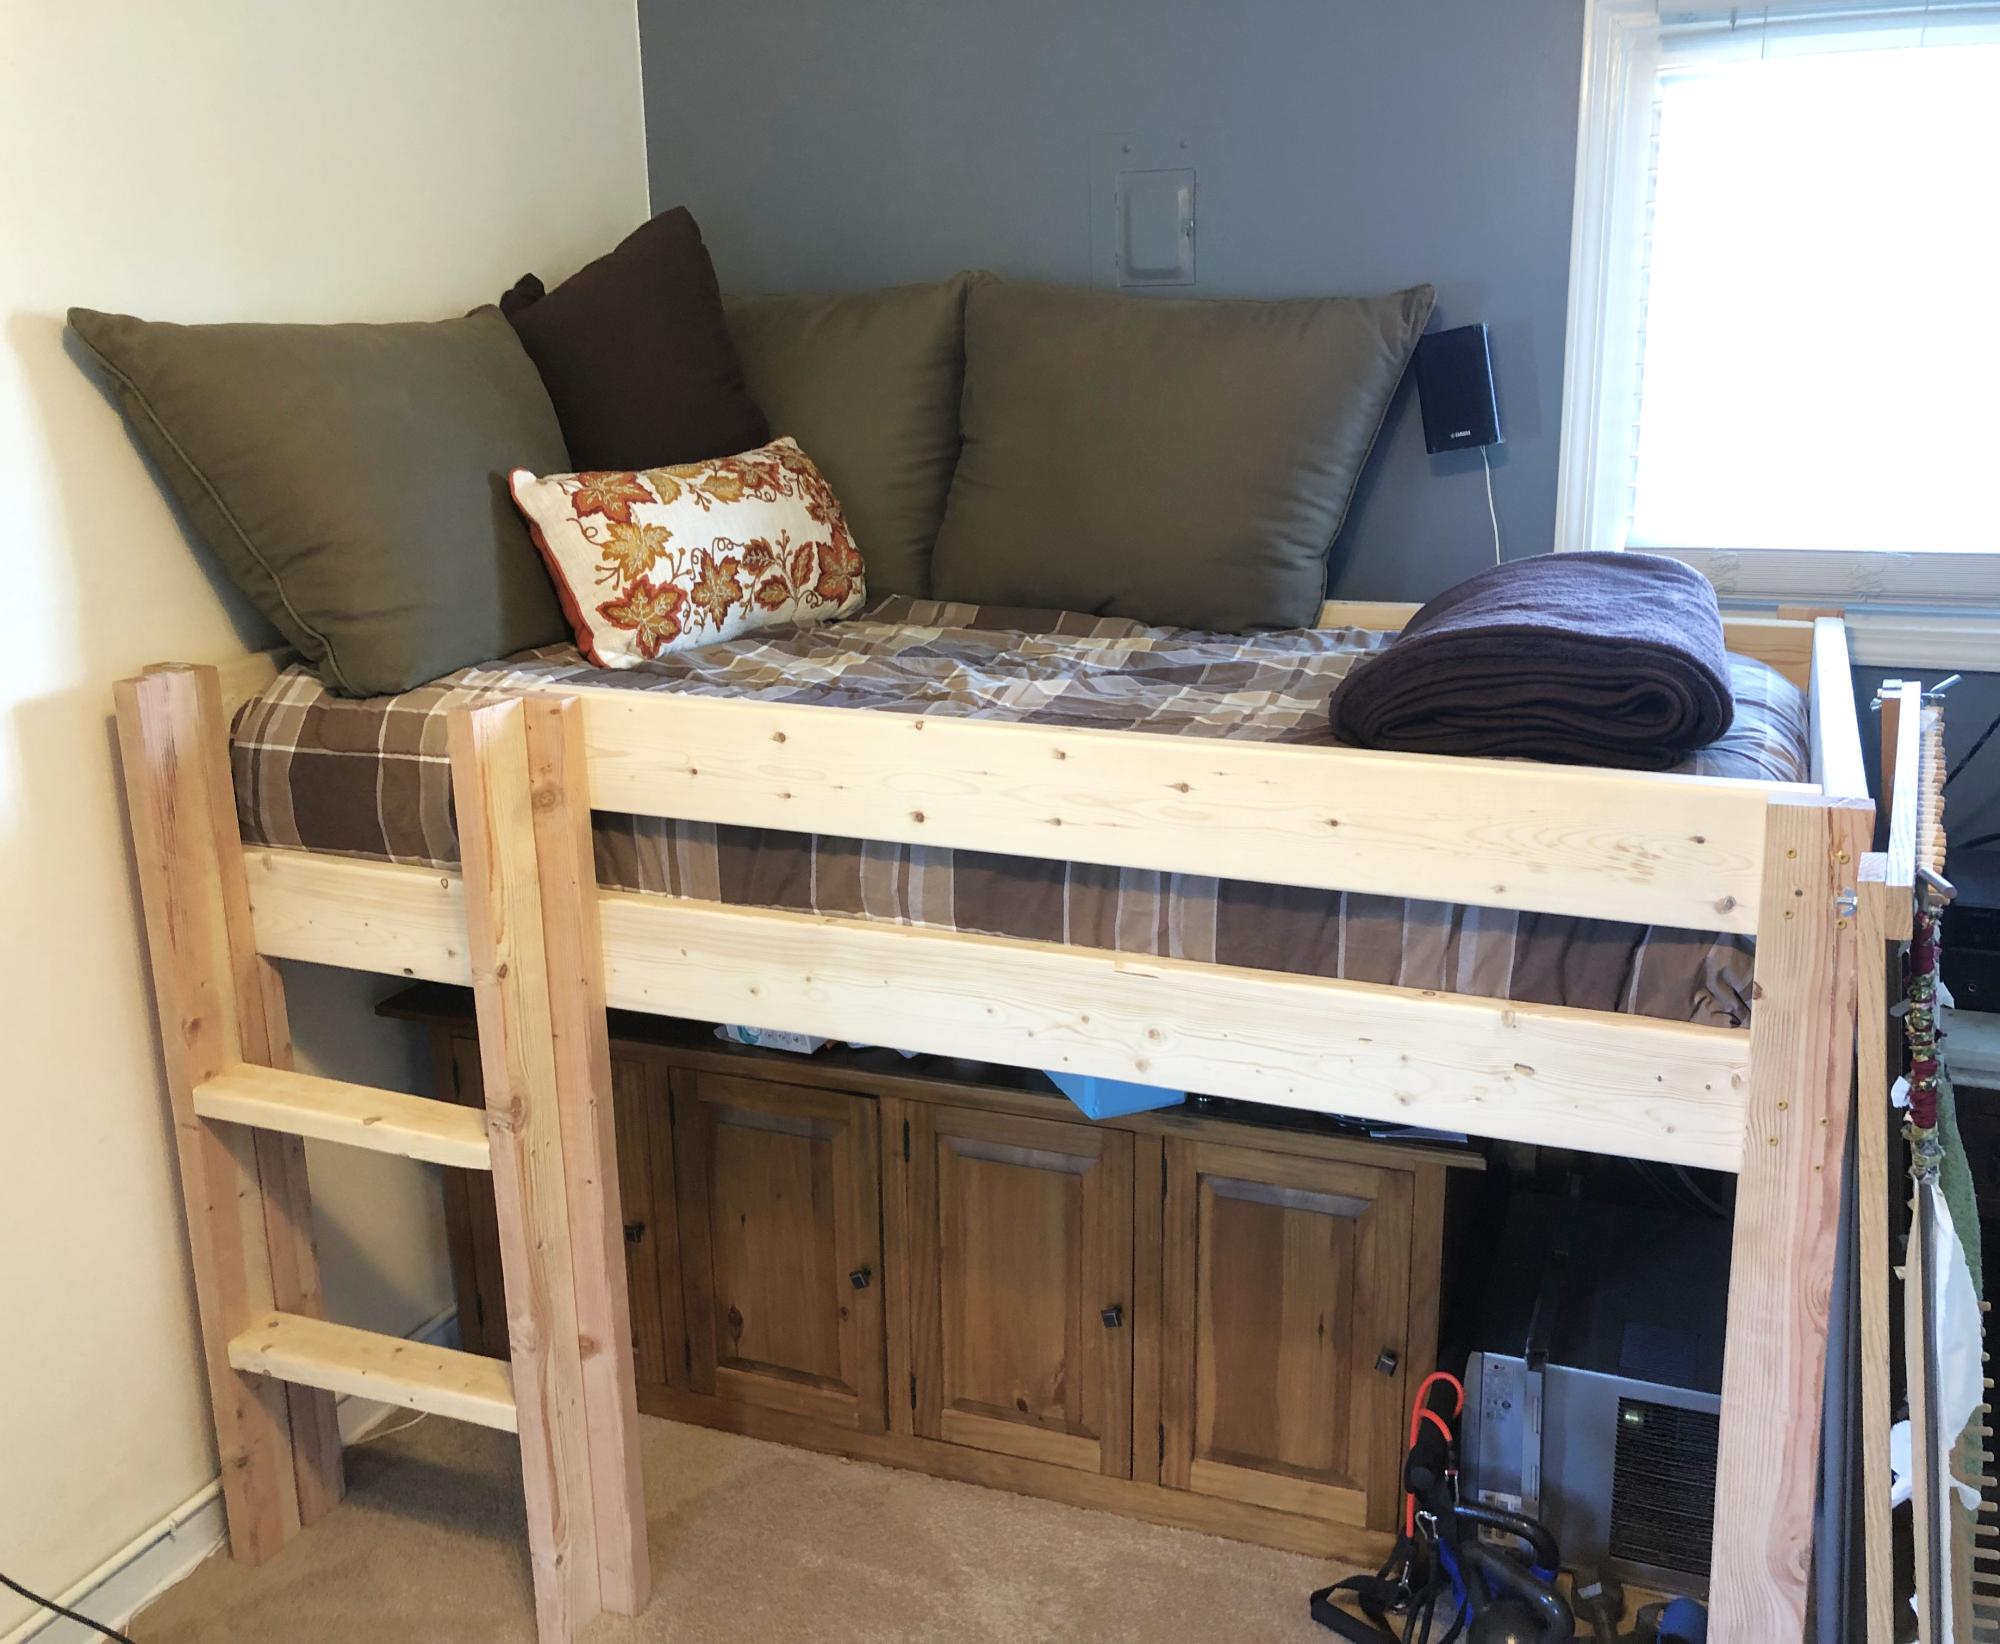
This is my biggest build yet! I combined plans from this site and then modified them slightly to create two twin storage beds, a corner headboard unit with cubbies, and a secret hideout underneath!
The beds are two benches - I left off the headboard and footboards to allow for a secret passageway for my girls to access the space under the headboard unit. I also left the backing off of the benches on the wall side of each bed so that they can be used for storage. (I also left the backing off of one of the cubbies on the room-side bench to allow additional access/exit points for the hideout.)
For the hideout, I followed the Corner Unit plans, except I stopped the headboard pieces at the level of the beds rather than making them go all the way to the floor.
I added trim on the edges of the headboard unit - partly to cover imperfections, but I love the look of it!
Now the girls have a secret hideout (complete with a light and pillows for lounging and reading), the space under the headboard unit is not wasted, and MOM did it all! :) I'm so proud of this project and I love the example it sets for my girls that powertools are for everyone!

Thu, 11/20/2014 - 20:46
Hi!
Your beds arefabulous! Where did you find the benches? ??
Thanks!
Holly
I am a complete newbie to anything woodworking. I just turned 60 and used a drill for the first time about 9 months ago. Thanks to Anna and her plans and videos, I have developed some some self confidence in this art and absolutely loving it.
Farmhouse coffee table and king size bed is next.
Thank YOU Anna!!! You totally rock!!!!!!!!

In reply to Amazing! by Ana White Admin
Tue, 01/19/2021 - 14:31
Awwwww thank you sooooo much! That means so much coming from you! I appreciate you. 🤗🤗
First shot at using plans from Ana, and thought it was great! Can’t wait to try another!
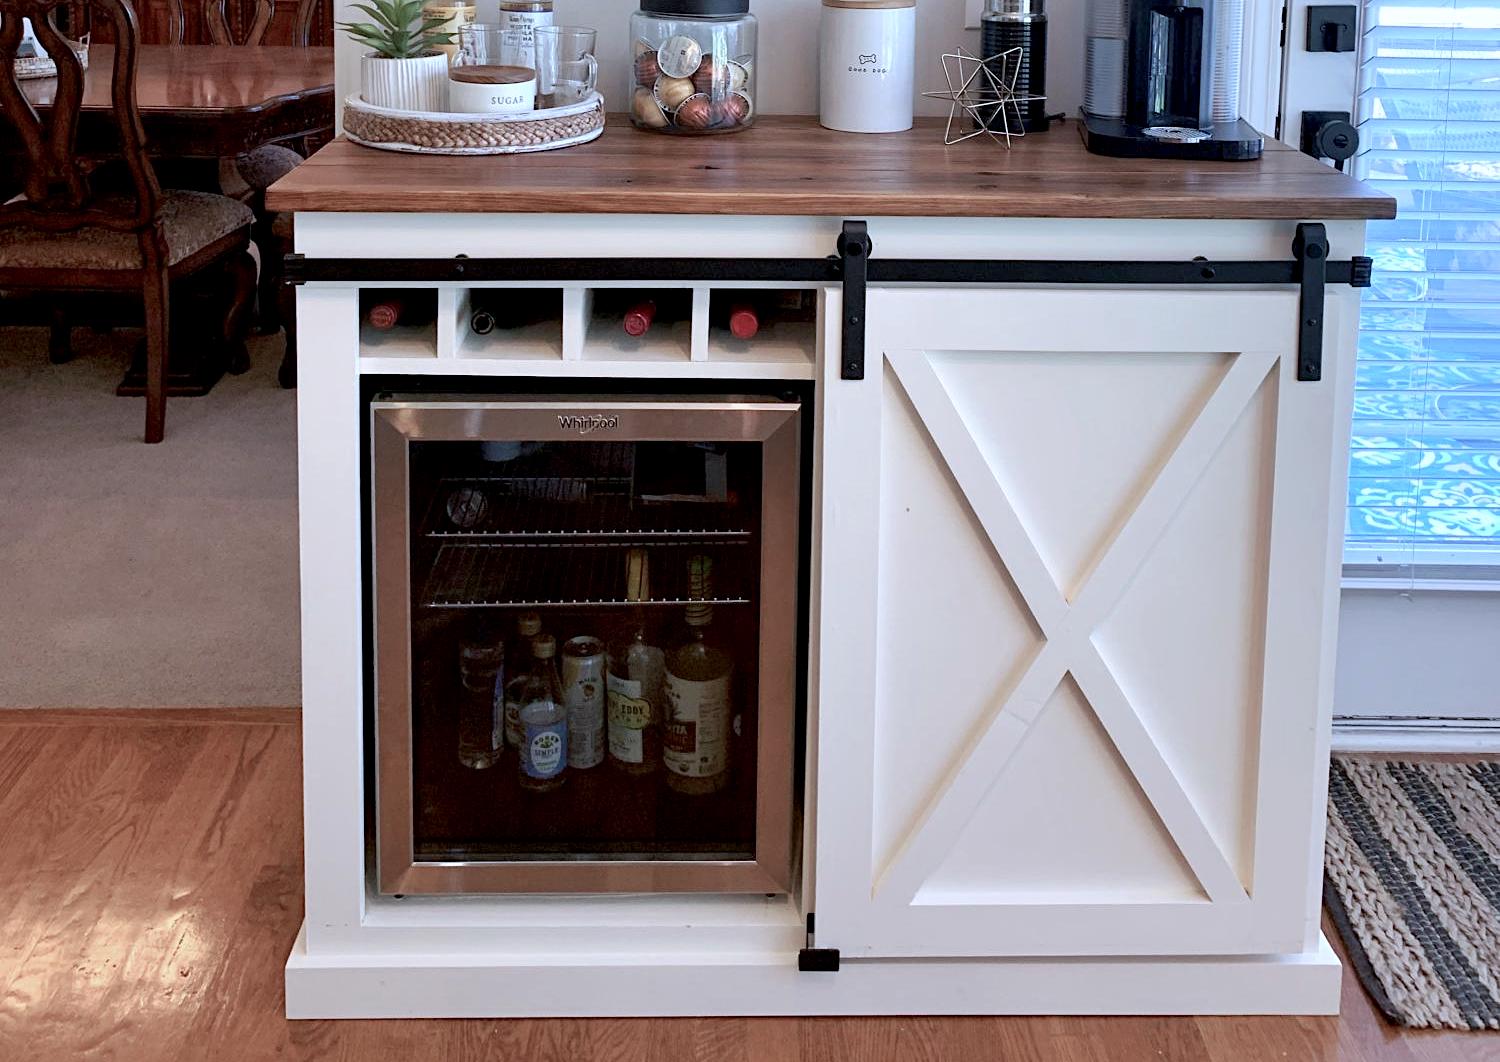
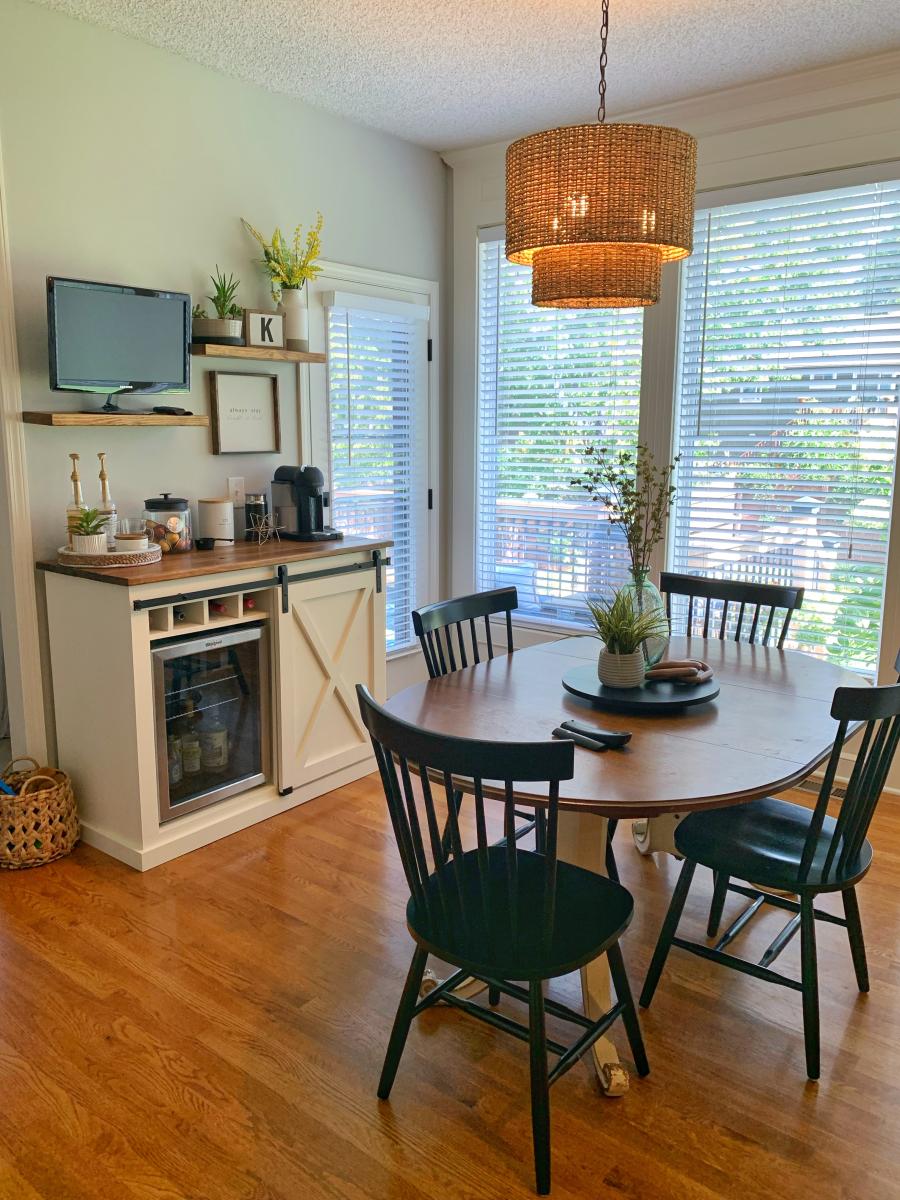
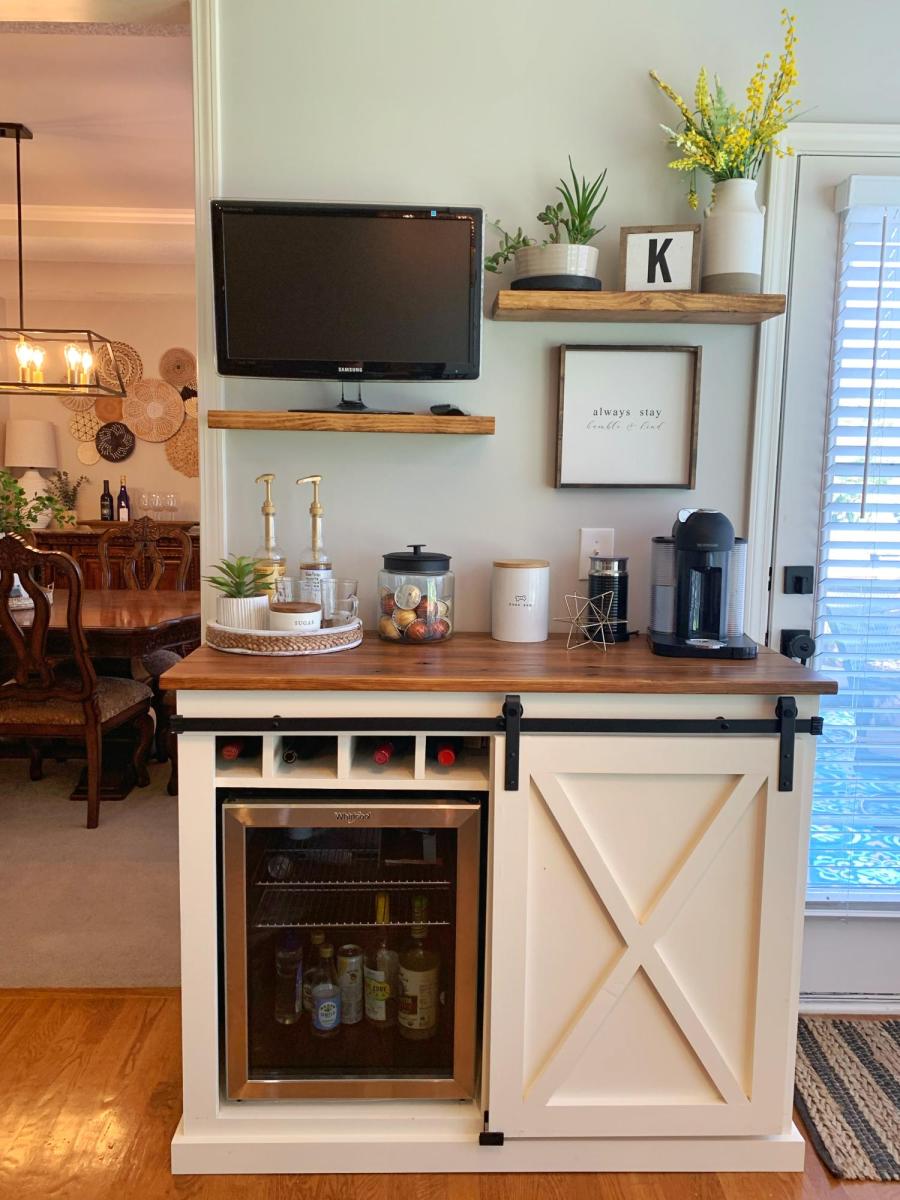
My wife wanted a coffee bar and I wanted a fridge for wine and beer. So we compromised on this.
Thu, 12/29/2022 - 10:02
Pretty much everything you ned in one place! Thank you for sharing, amazing build! Sharing to social media, please email [email protected] if you'd like us to tag you!
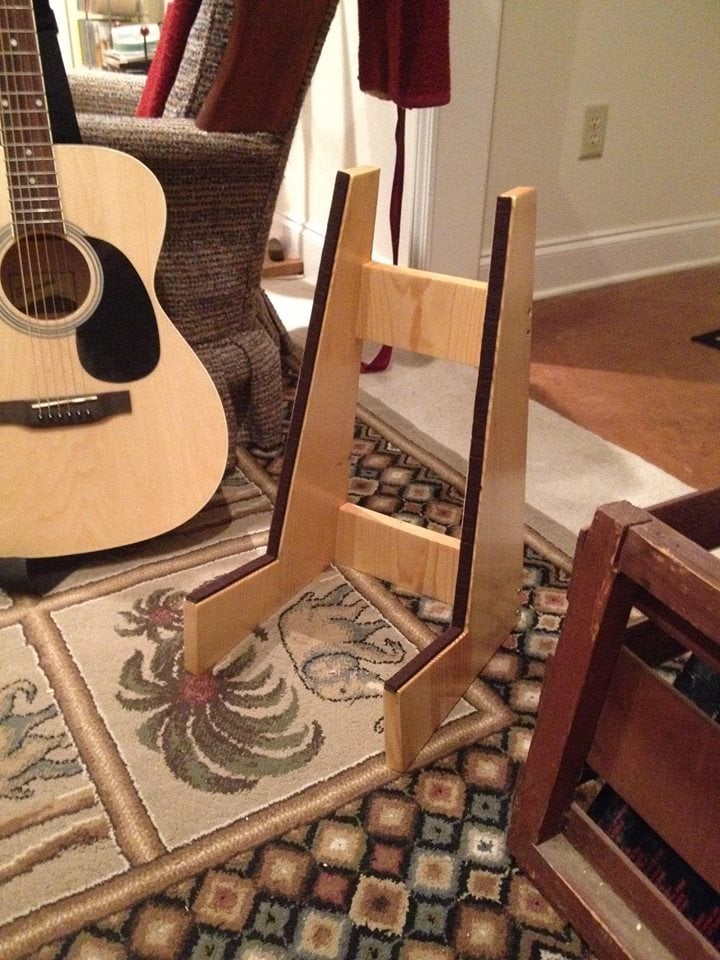
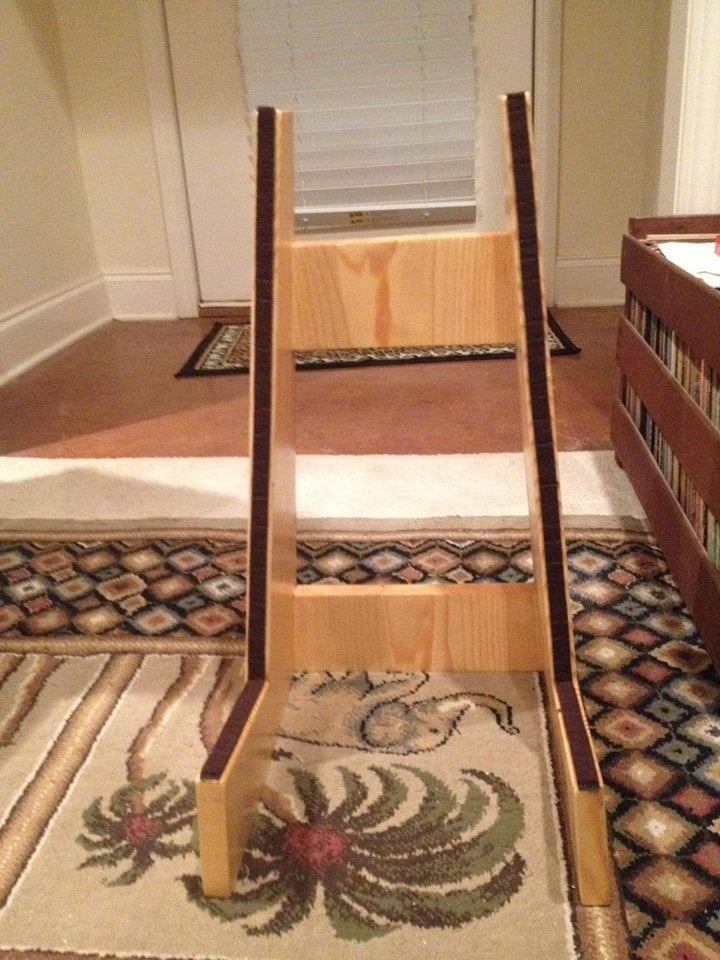
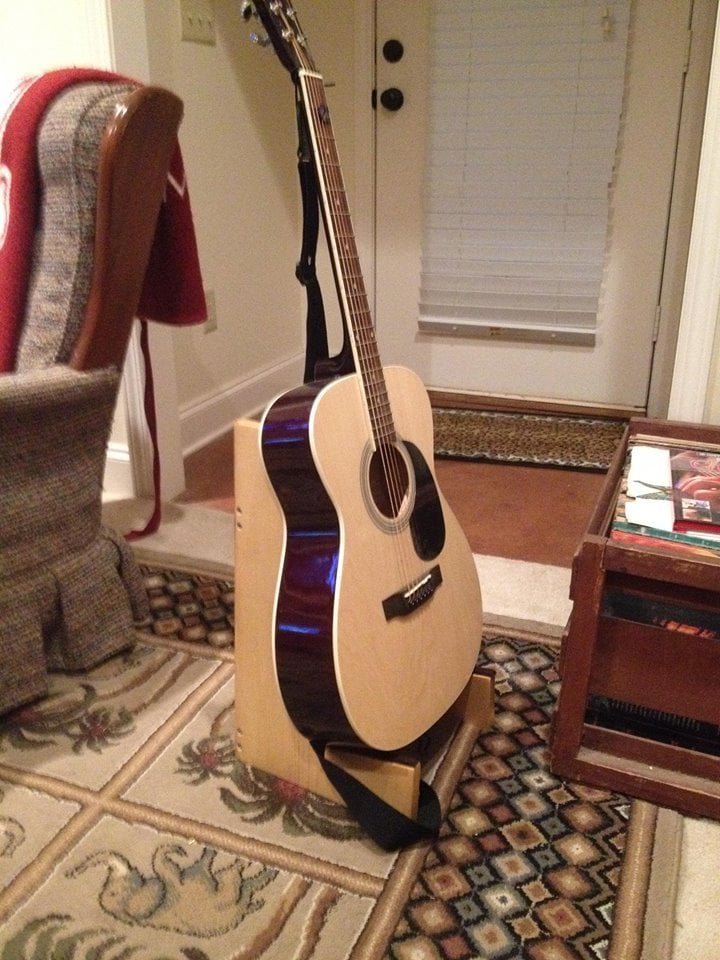
Built this guitar stand basically by using on-hand materials left over from another project. Used 1x12's; 18" tall fir for sides and back braces (cut at 5 degrees on each side). Added felt strips to protect the instrument.
Thu, 05/28/2020 - 17:37
Very nice and well designed. Thanks for some ideas!

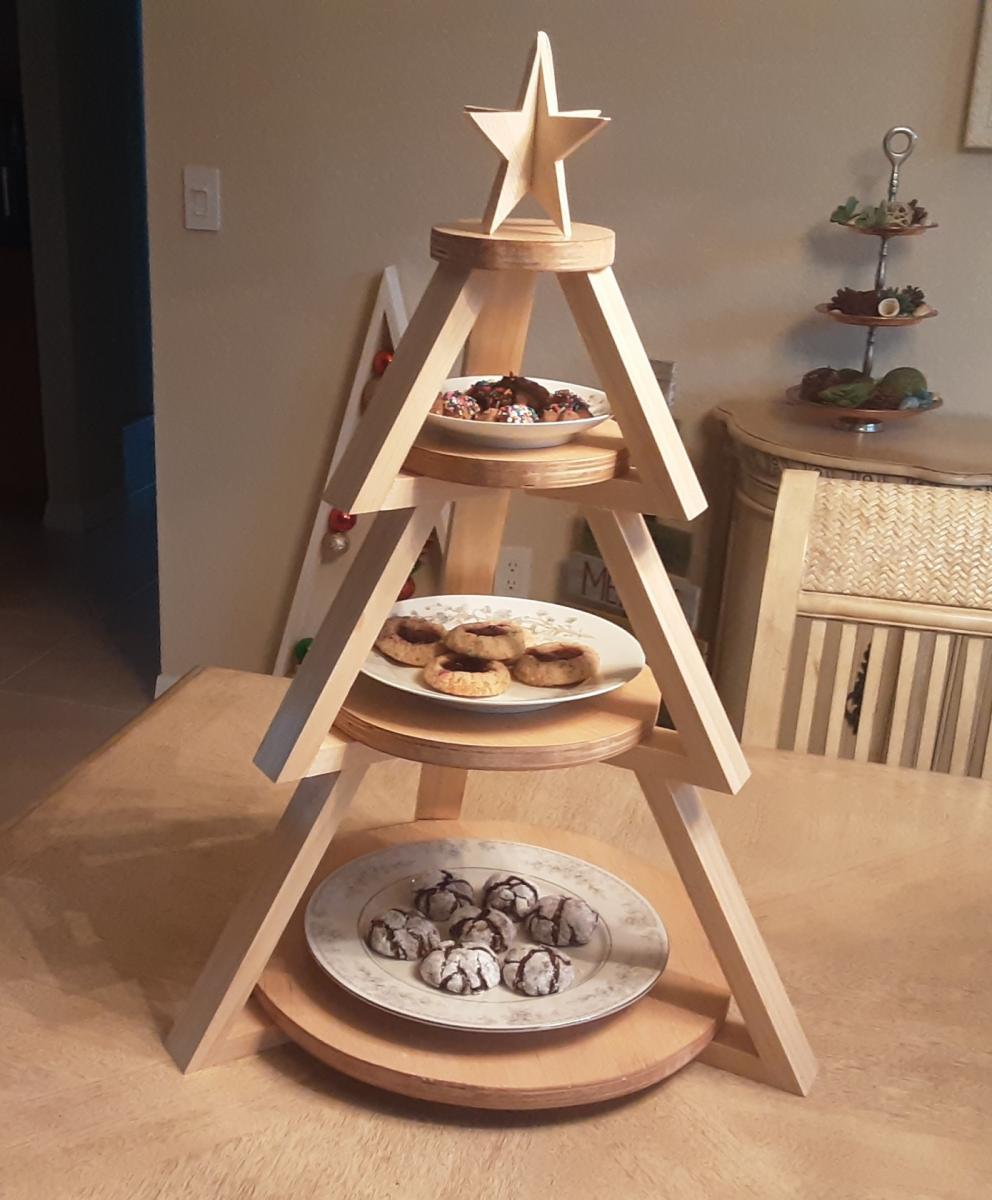
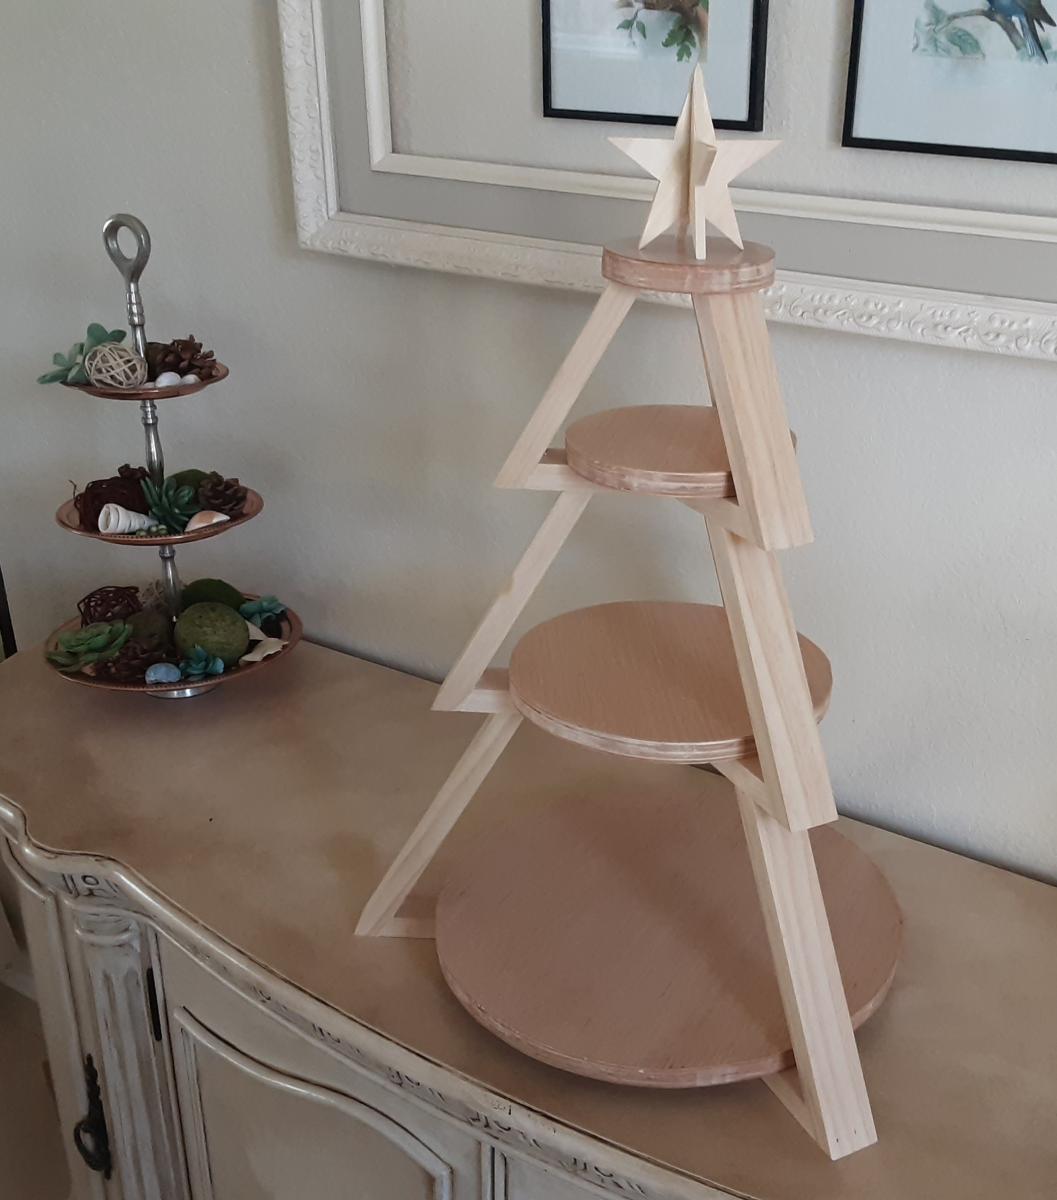
Inspired by Shara of Woodshop Diaries, created this 3 tier tray for displaying cookies for Santa. Added a 3 dimensional star as the topper and simply followed the excellent photos and schematics on Shara's website.
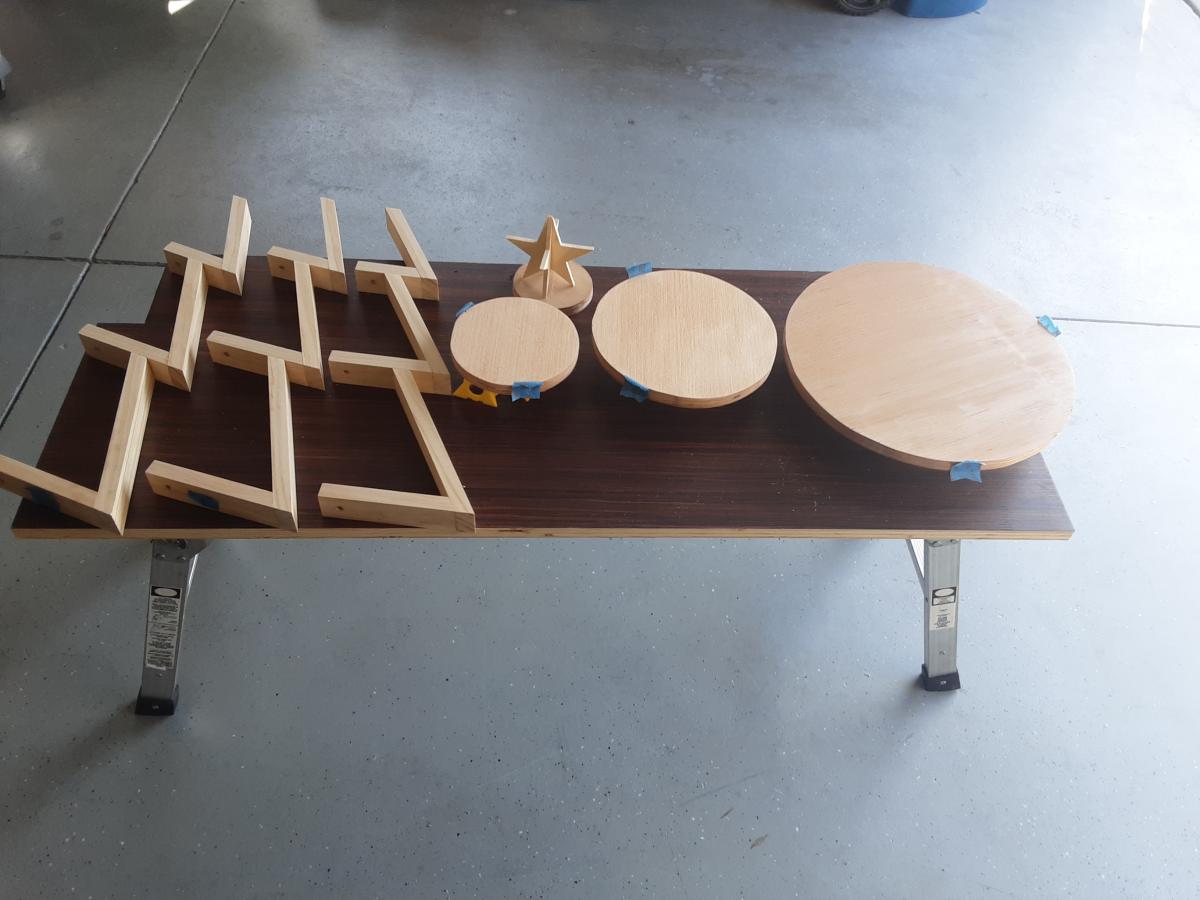

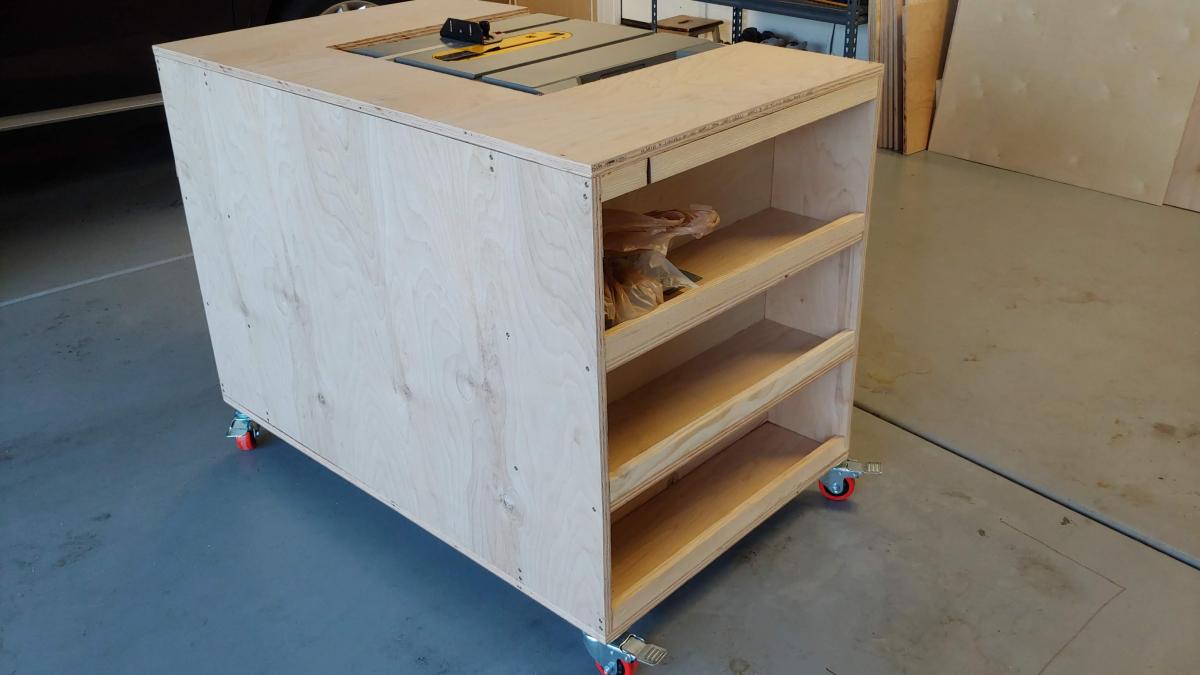
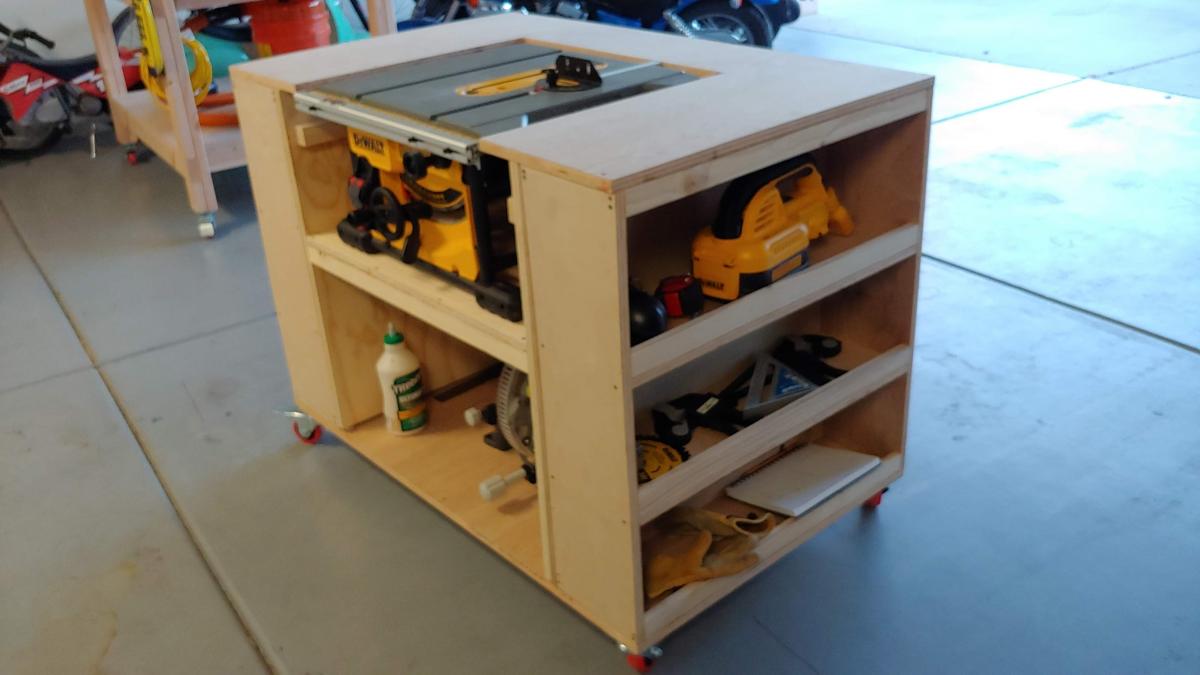
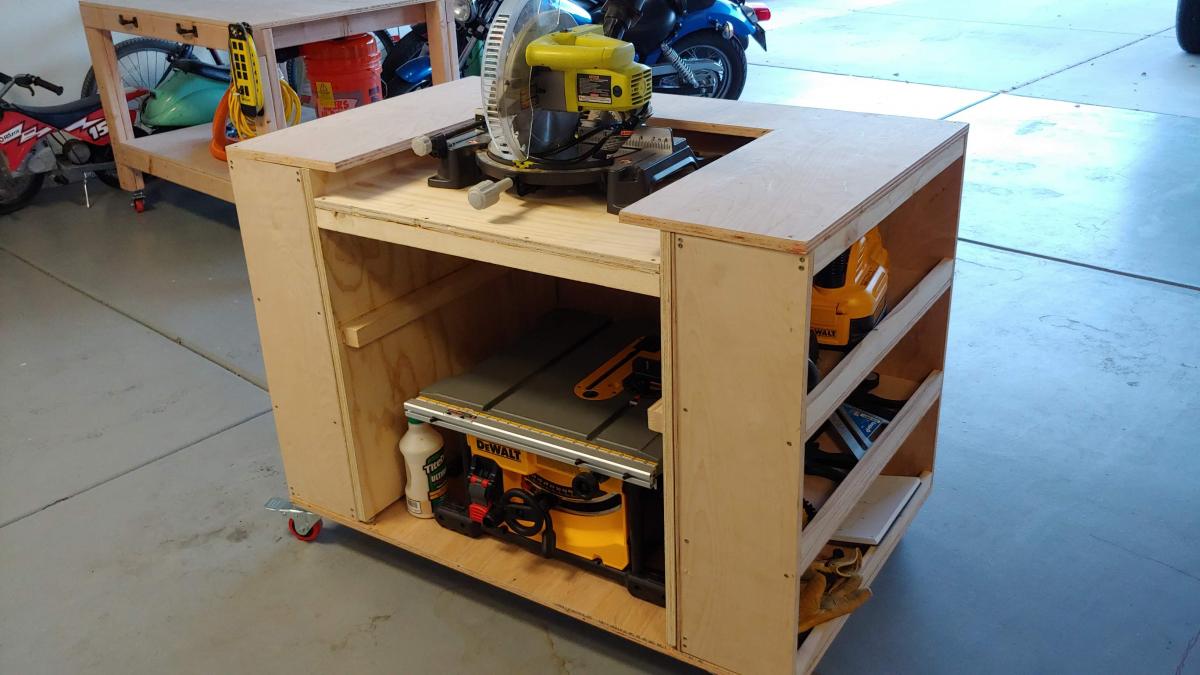
Used part of the Ultimate Roll Away Workbench with Miter Saw Stand to just build one of the roll-away workbenches to work with my miter saw and table saw. I'm very happy with how it turned out.
Sun, 04/28/2024 - 12:57
Hi, I am planning on getingt a dewalt 10 inch table saw as well. I am wondering what you did to adapt it for extending the rails with the fence? Curious if there were more photos. I would very much like to adapt my station to be similar to yours. Thanks. .
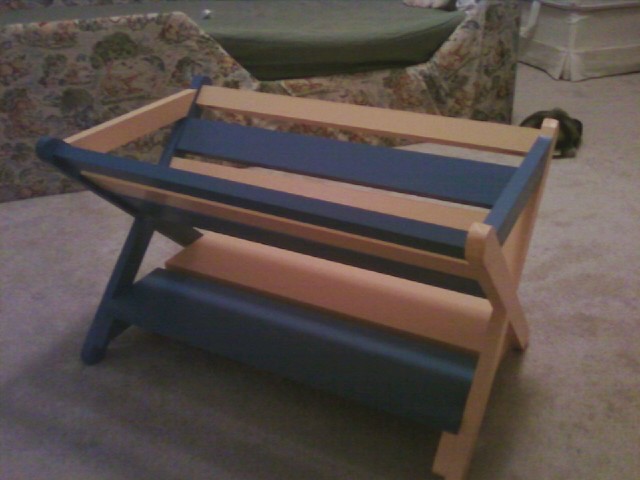
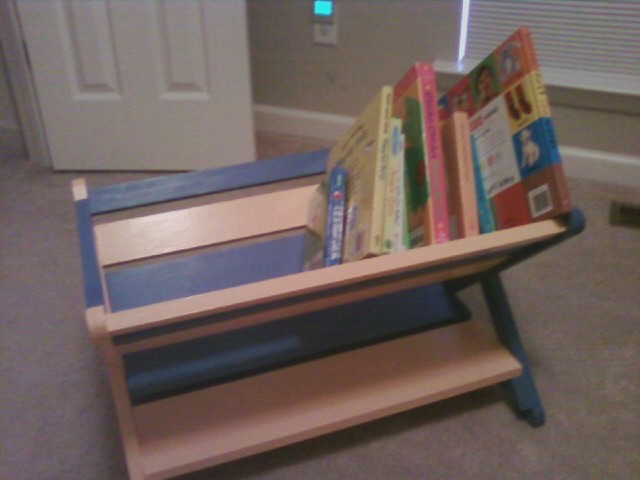
I built this little book caddy for my son's room. I used pocket holes to attach the horizontal slats as well as for making the 'X' pieces. I glued the bottom boards and used long (2.5") screws to attach the top horizontal pieces. I was really happy with the way it came together, once I figured out that I could use pocket holes on the horizontal main beams. I realized you just have to start at the top and work your way down, because starting at the bottom would mean blocking your access to the bottom of the other boards.

Love the results of my first building project.....a pair of redwood adirondack chairs. Angled cuts were a great way for a beginner to learn to use the miter saw.

Sat, 09/07/2013 - 19:59
Love these gorgeous redwood chairs! The color and grain on that wood is awesome, and the clear coat is perfect for it. You did a great job on this build! I popped over to your blog and I enjoyed your post on this build very much. Well done!
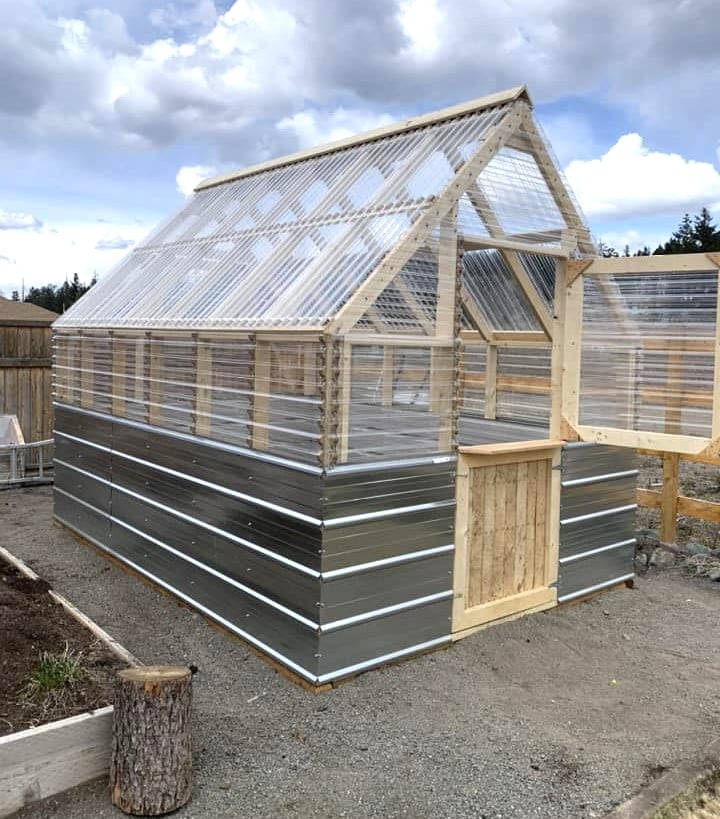
DIY Greenhouse by Trenton Kirby on Facebook!
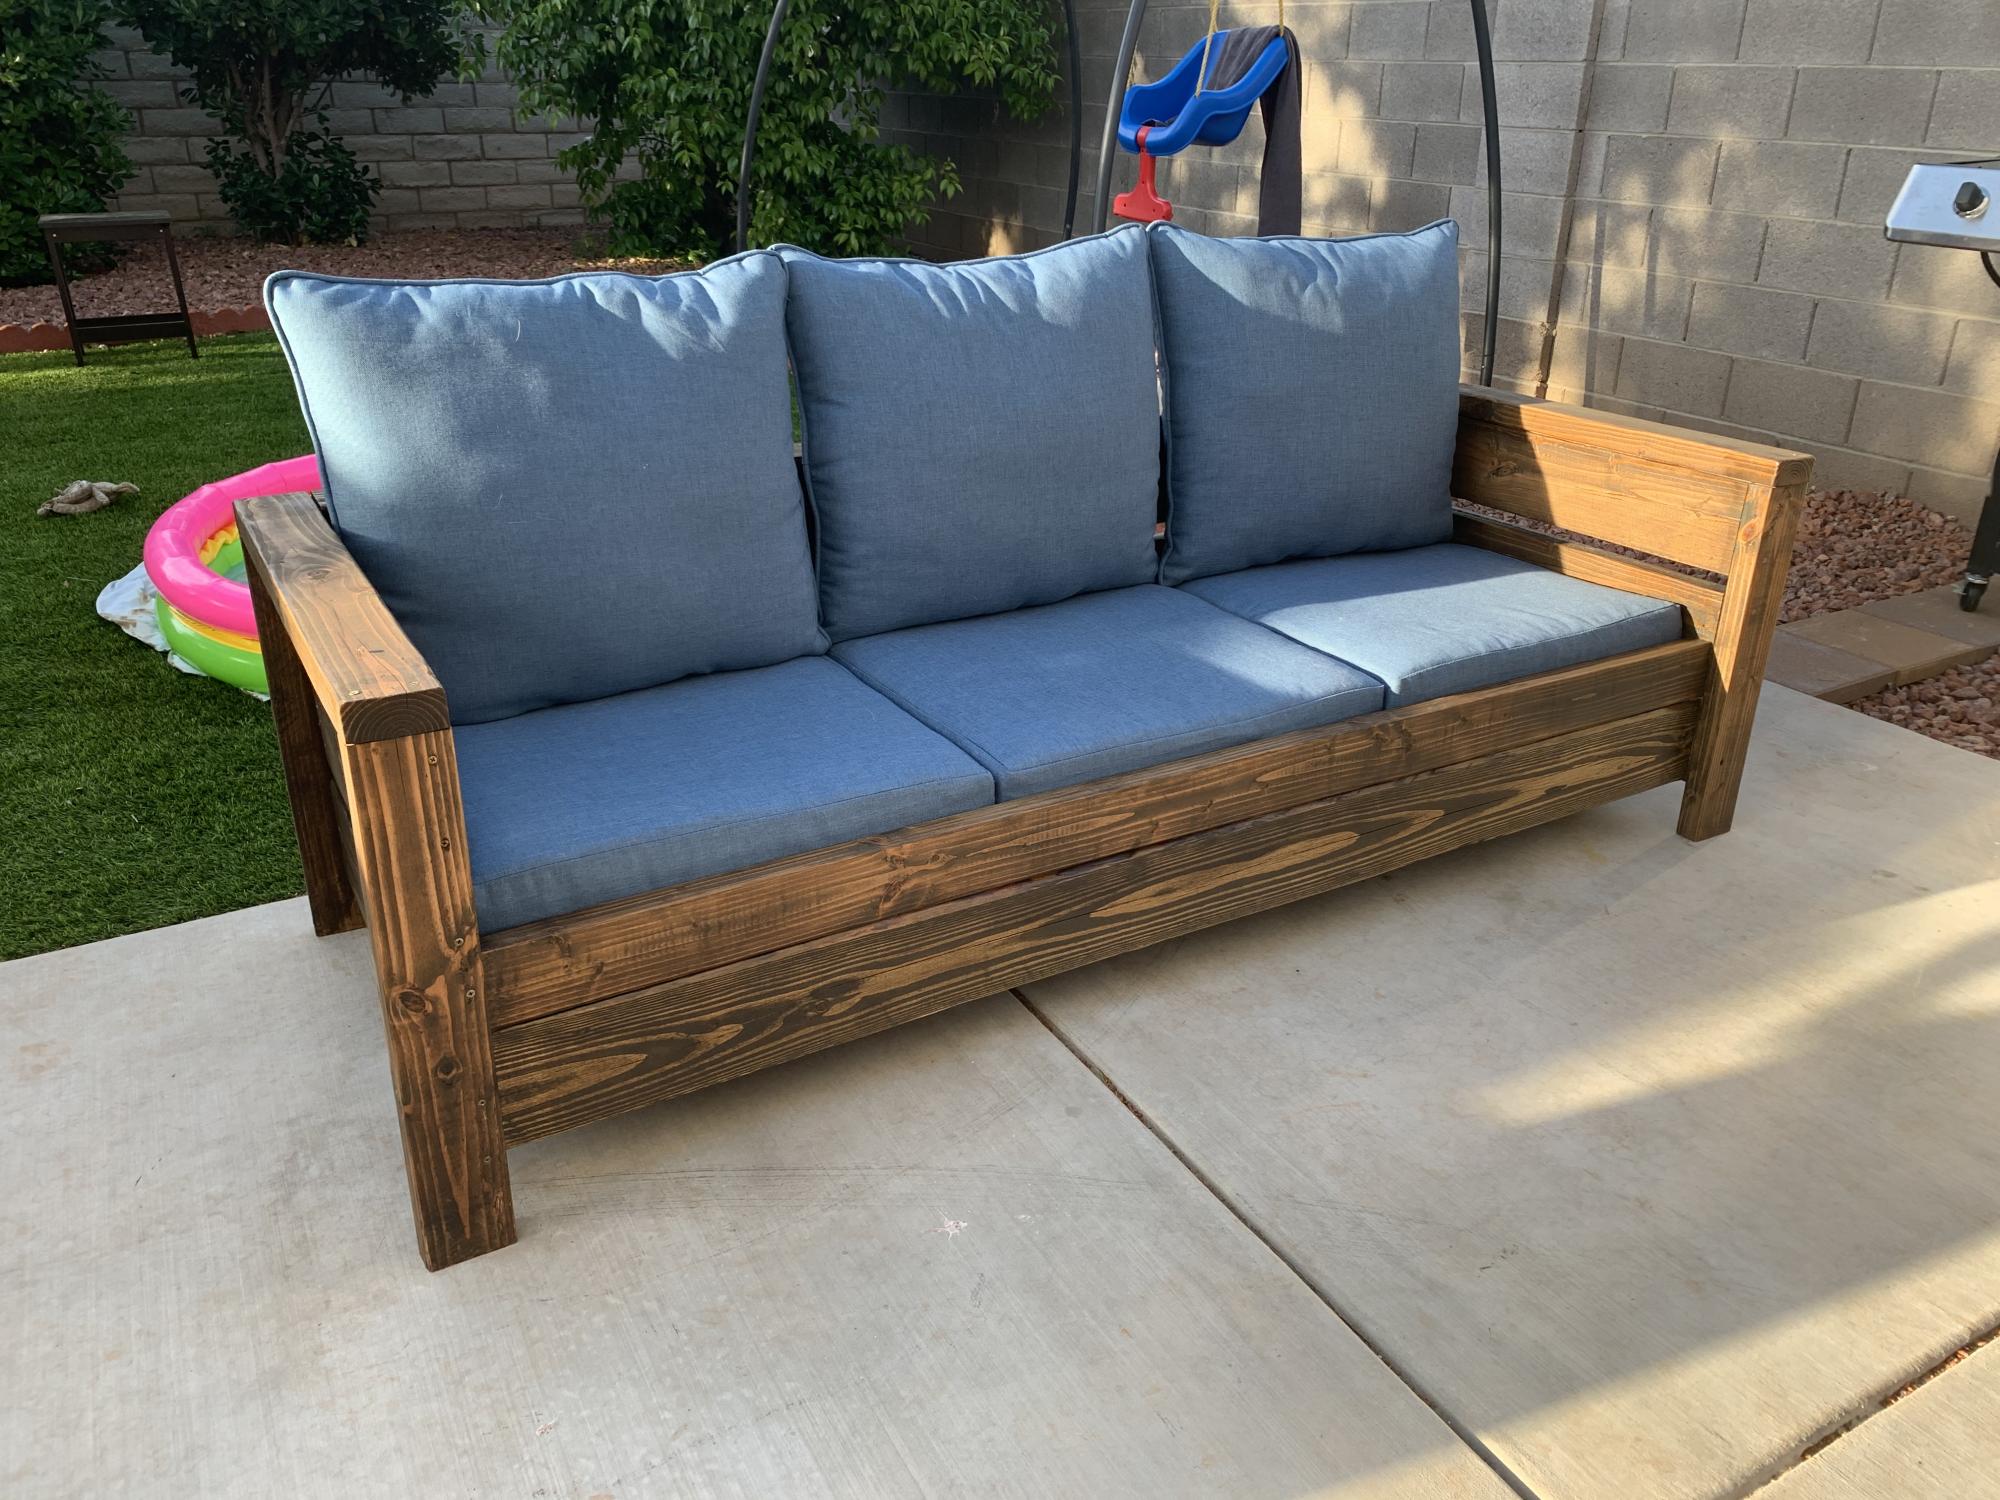
I used the Modern Outdoor Chair from 2x4s and 2x6s plans and slightly modified then to make a 3 seater couch. My cushions(most expensive part) were 24 in x 24 in and purchased from Lowes for $40 per seat. The couch is 79 inches in total length. I also dropped the seat down to the lower level to allow more room for my cushion backs to sit further down into the seat.


I live in Lviv Ukraine and painted it in he national colors of Ukraine.
The wood came from a old pallet.
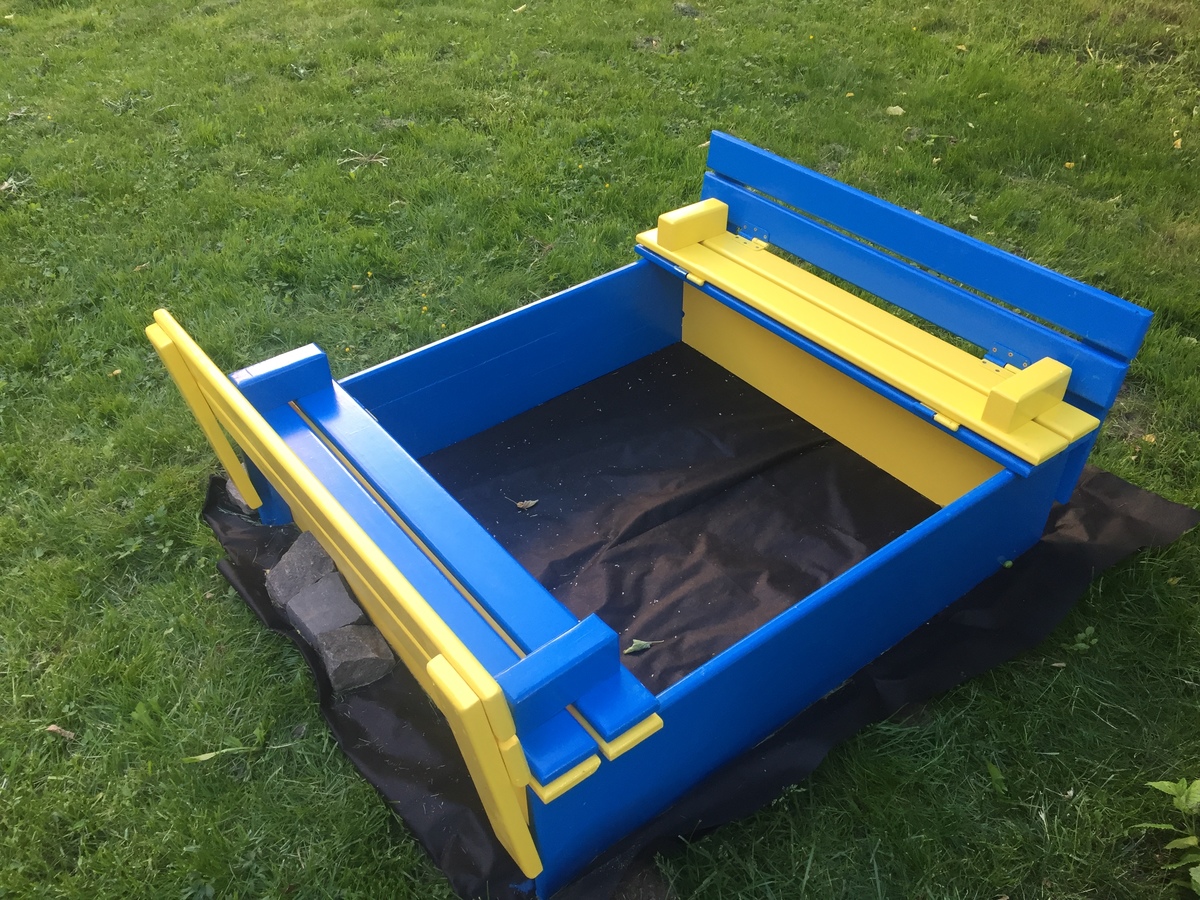
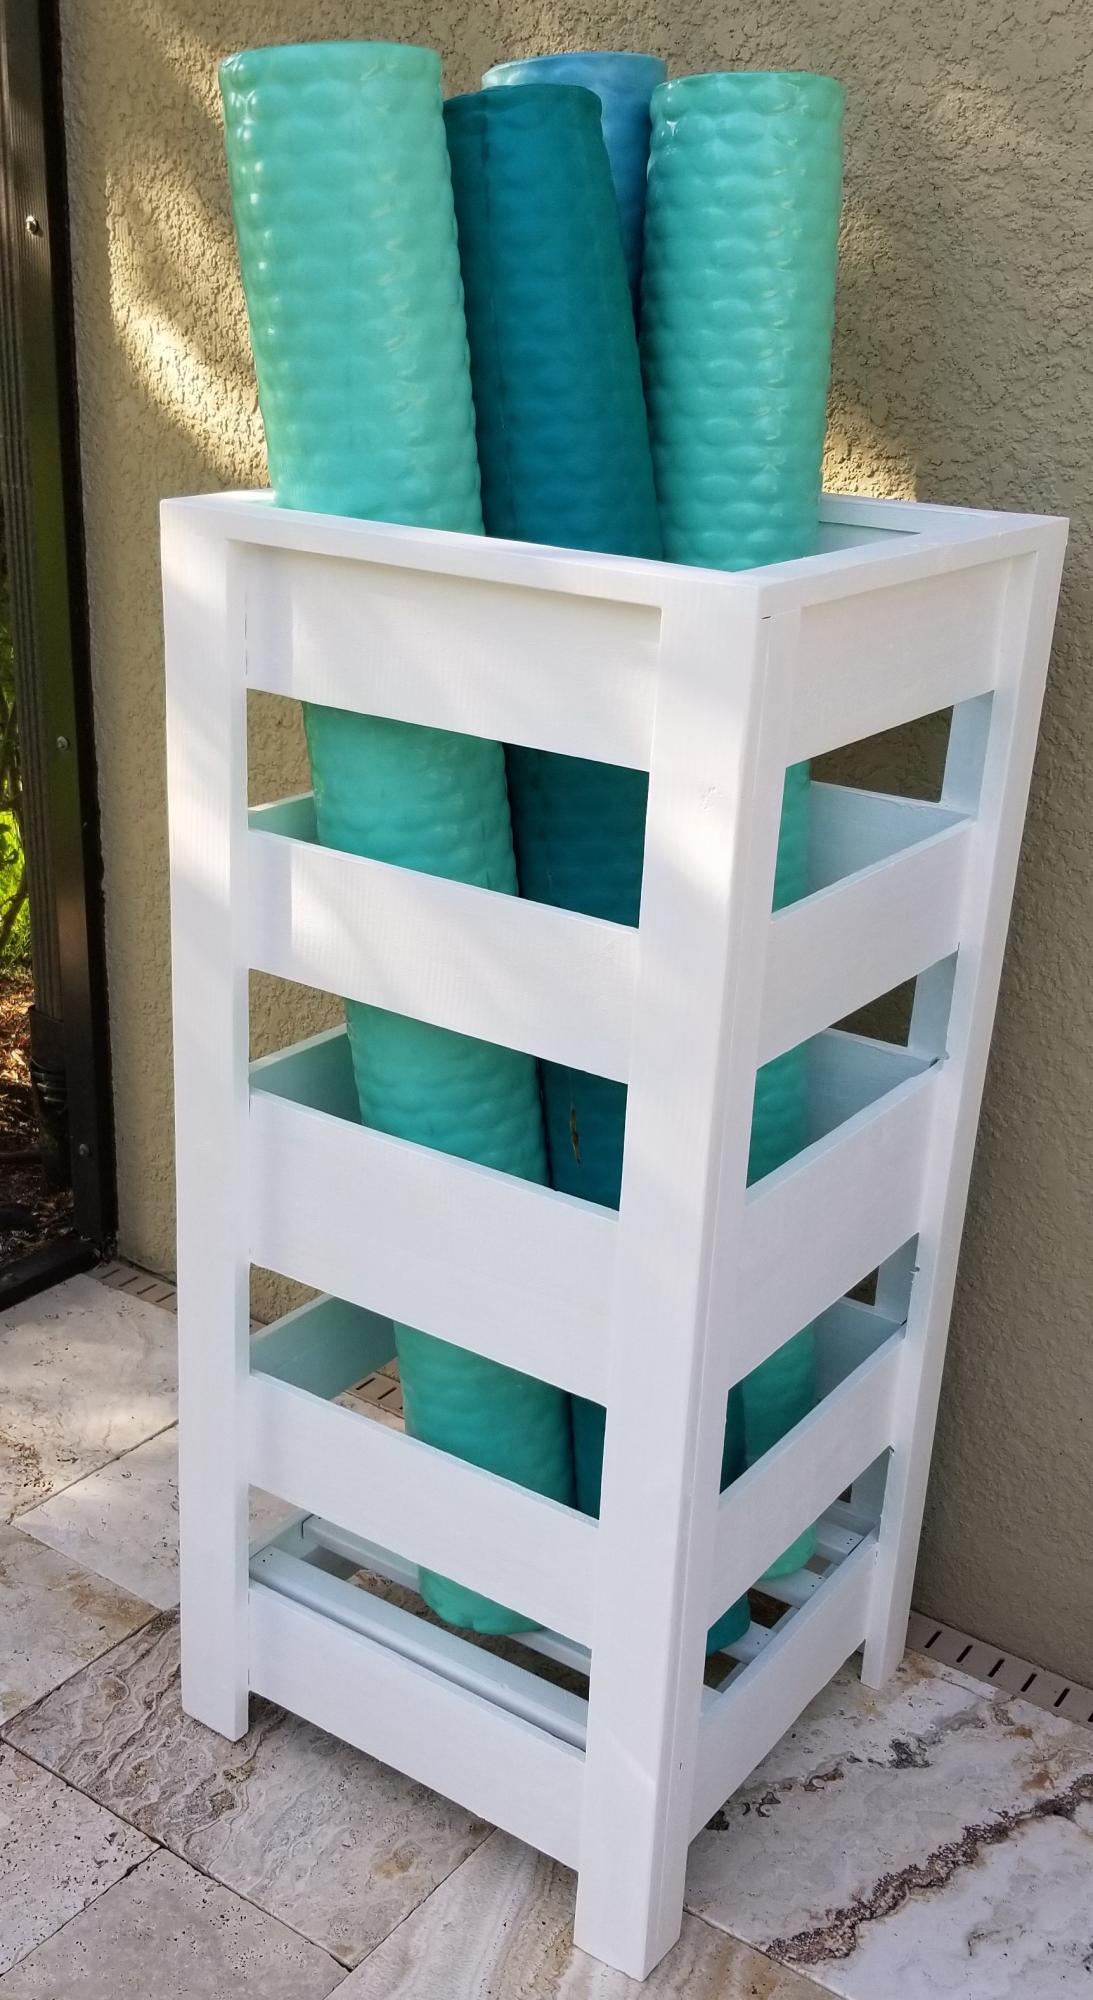
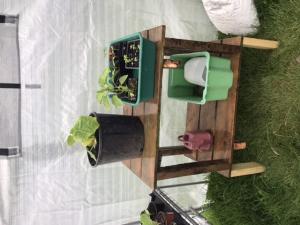
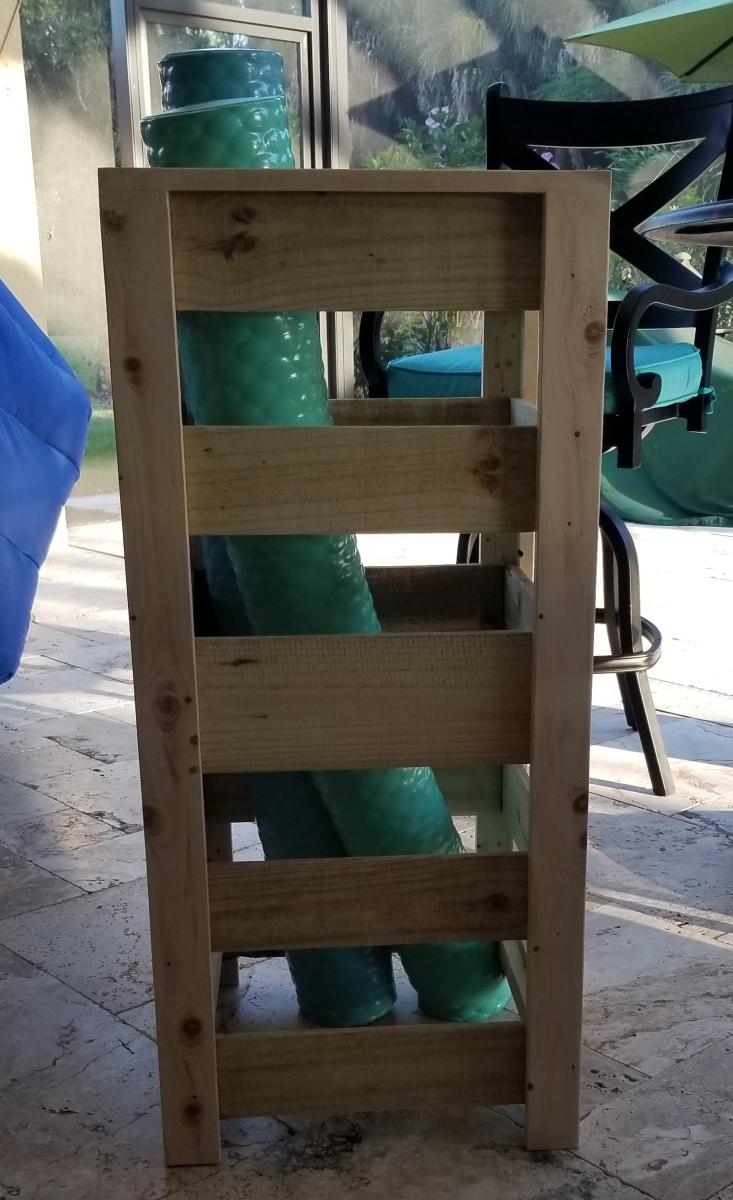
I modified the plans for the planter box to make a holder for Pool Noodles. I made it 40" tall and used 4-4" fence pickets and 1-5.5" fence pickets. I used a 4" spacer and the openings worked out perfect. I stained inside and out since it would show with 2 coats of the solid stain. It is perfect! Thank you so much for the inspiration and plans!
Mon, 06/06/2022 - 14:04
This is so smart and looks great too, thank you for sharing!
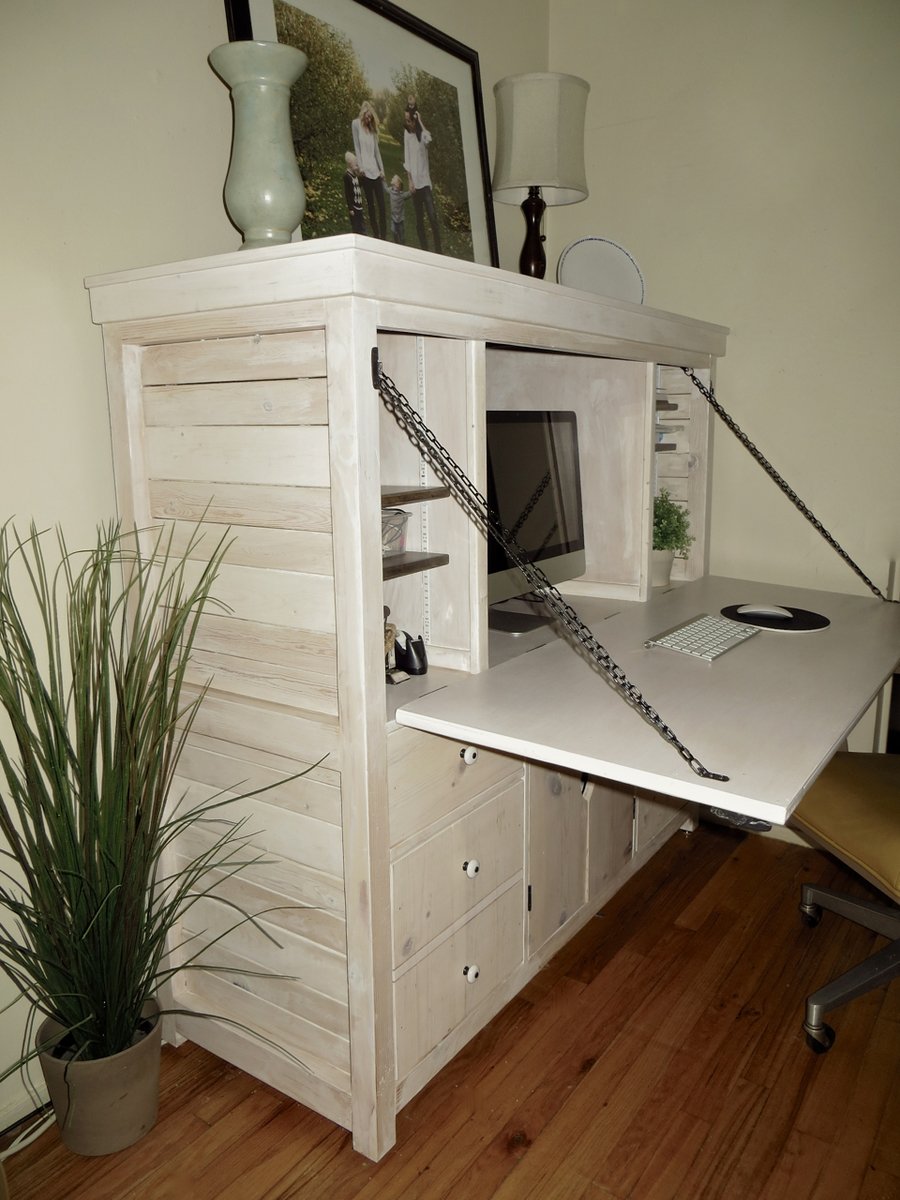
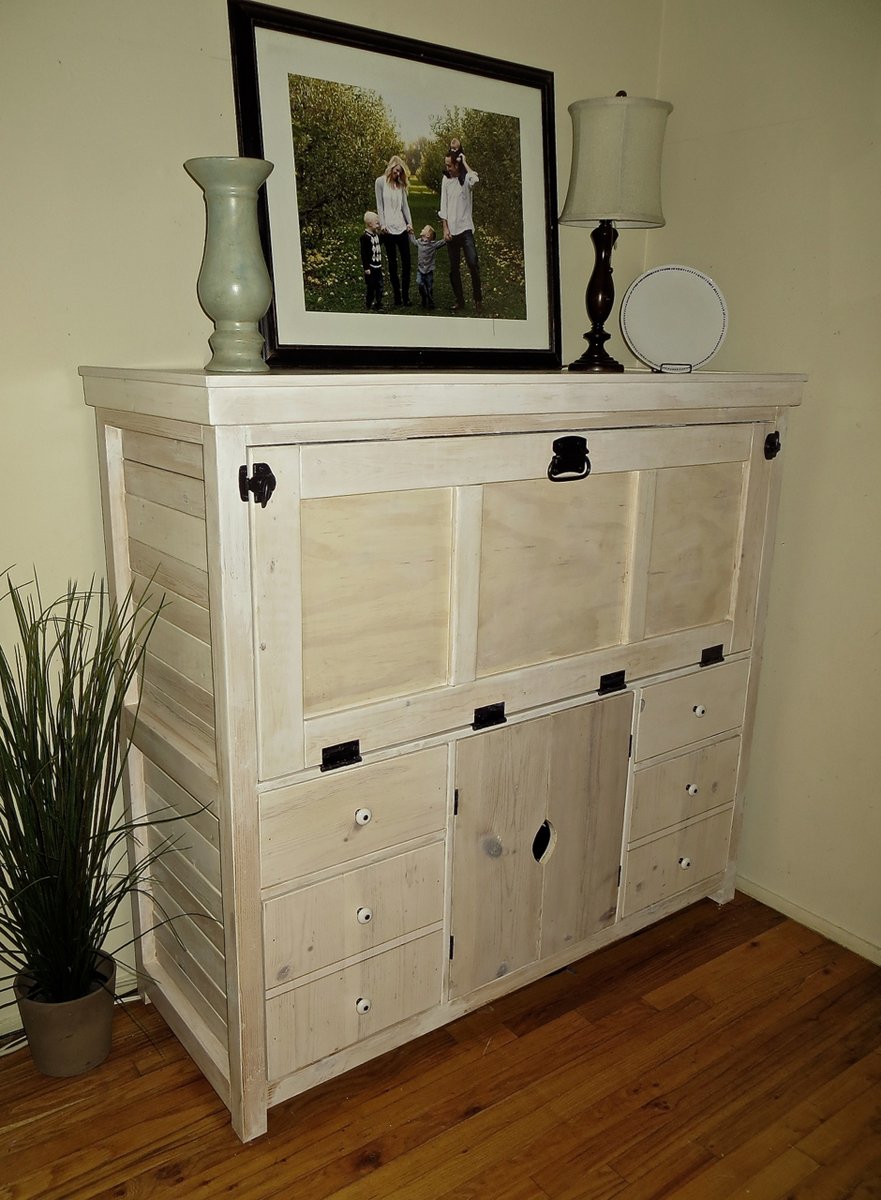
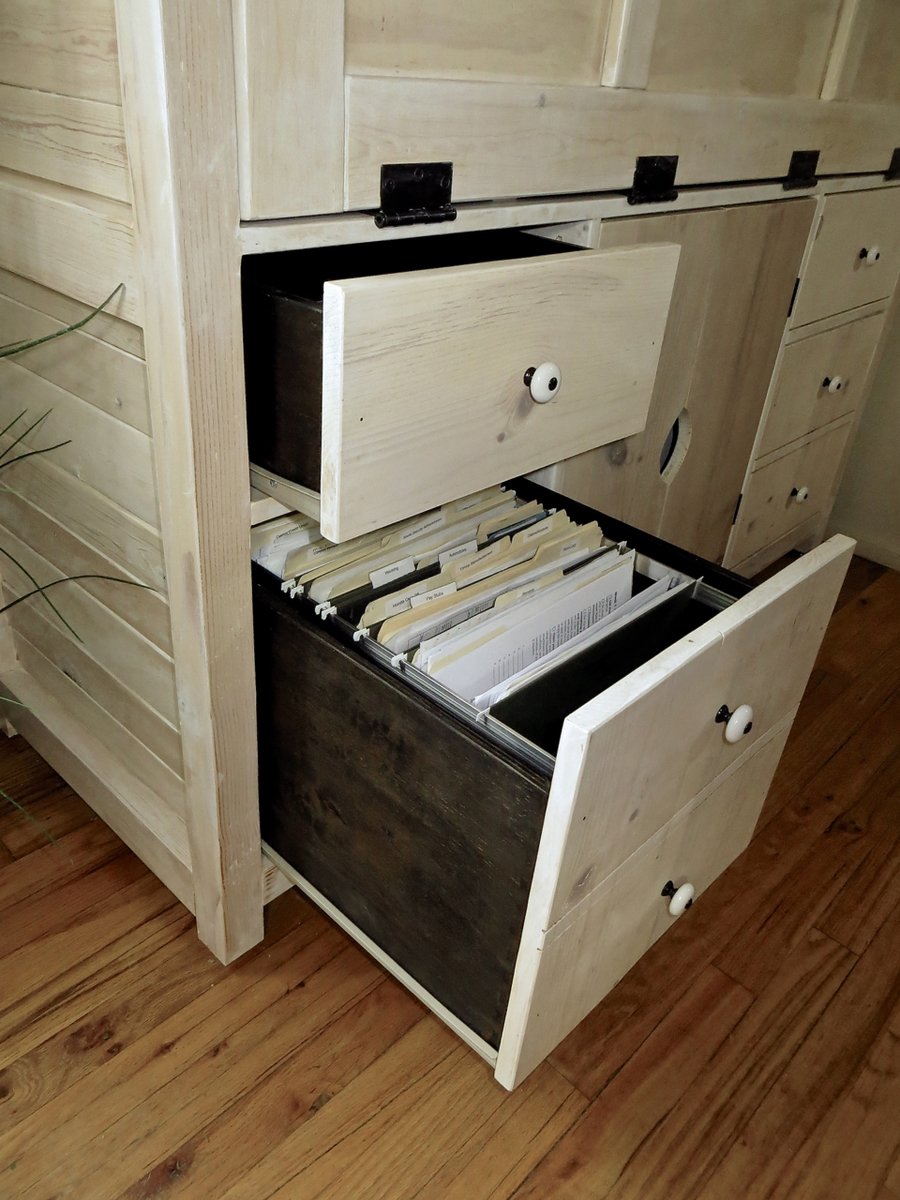
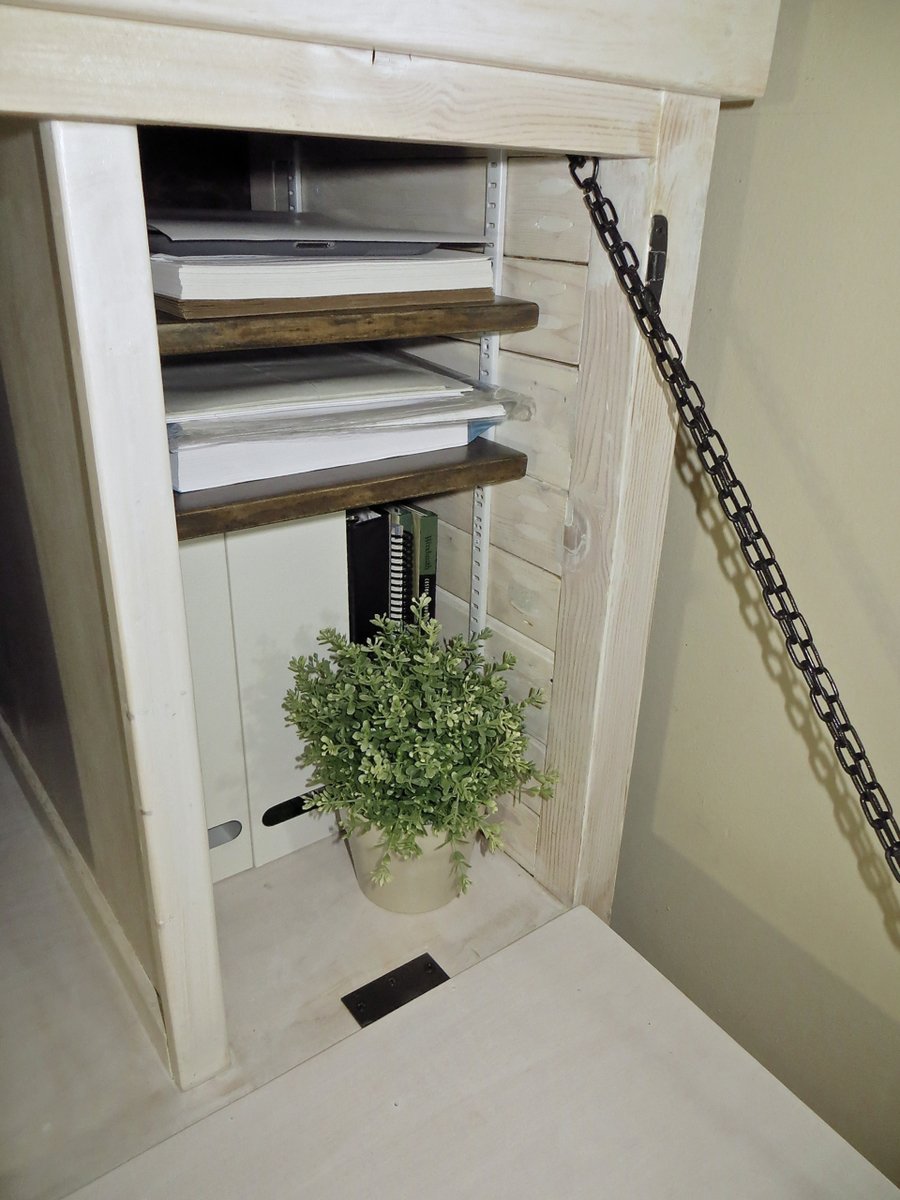
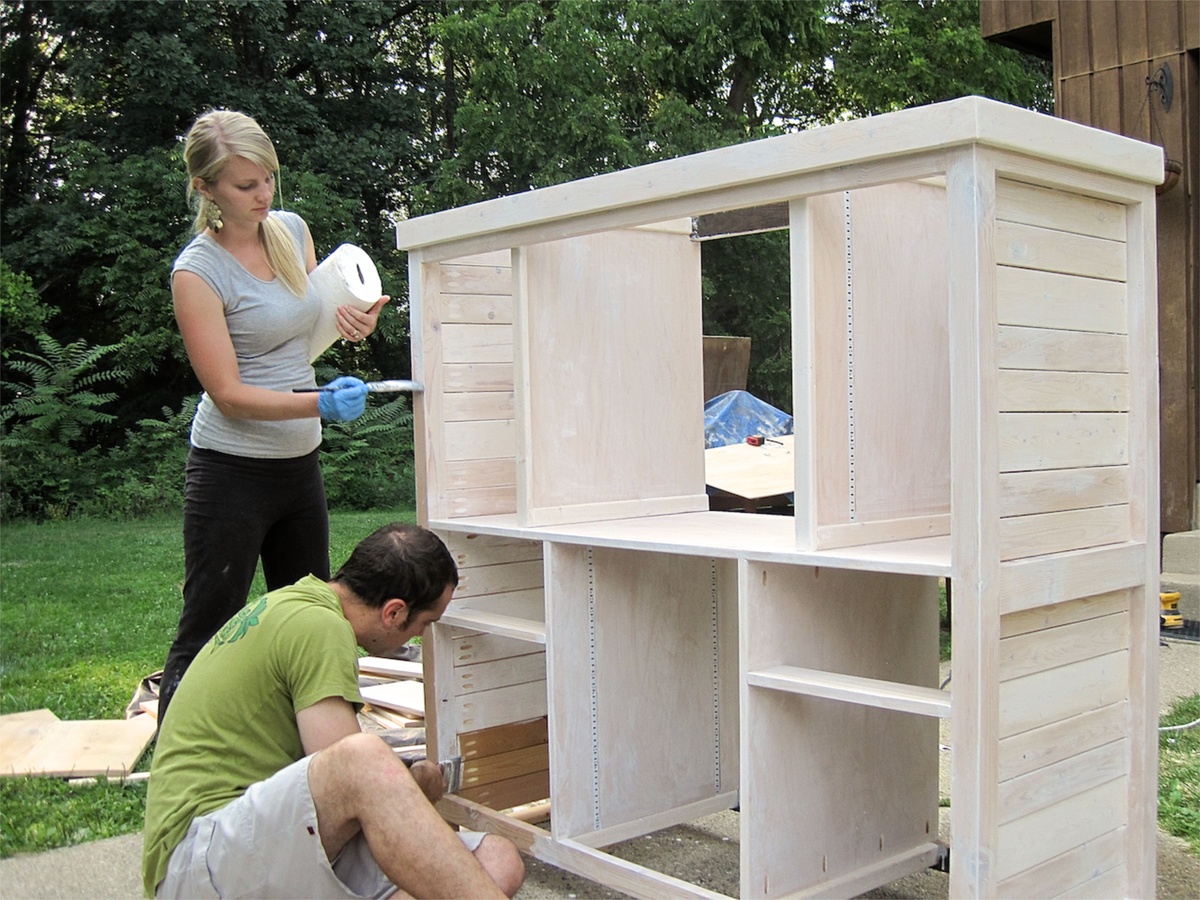
I designed this desk and created a building plan using Google Sketchup. It has 2 file drawers, 2 smaller drawers, 2 large adjustable shelves and a pullout shelf in the bottom, 4 small adjustable shelves on the top and a large space for a computer monitor. The large door drops open for a large work space. When you're done, put the door up and you have a beautiful piece of furniture!
I consider myself an advanced-beginner when it comes to building. I have just enough knowledge to get me by. If you have time, patience and the right tools you can build this too! It took me 10 days to build, working as much as my kids would allow.
It took me countless hours to perfect the building plan - probably just as much work to design it as it was to build it :)
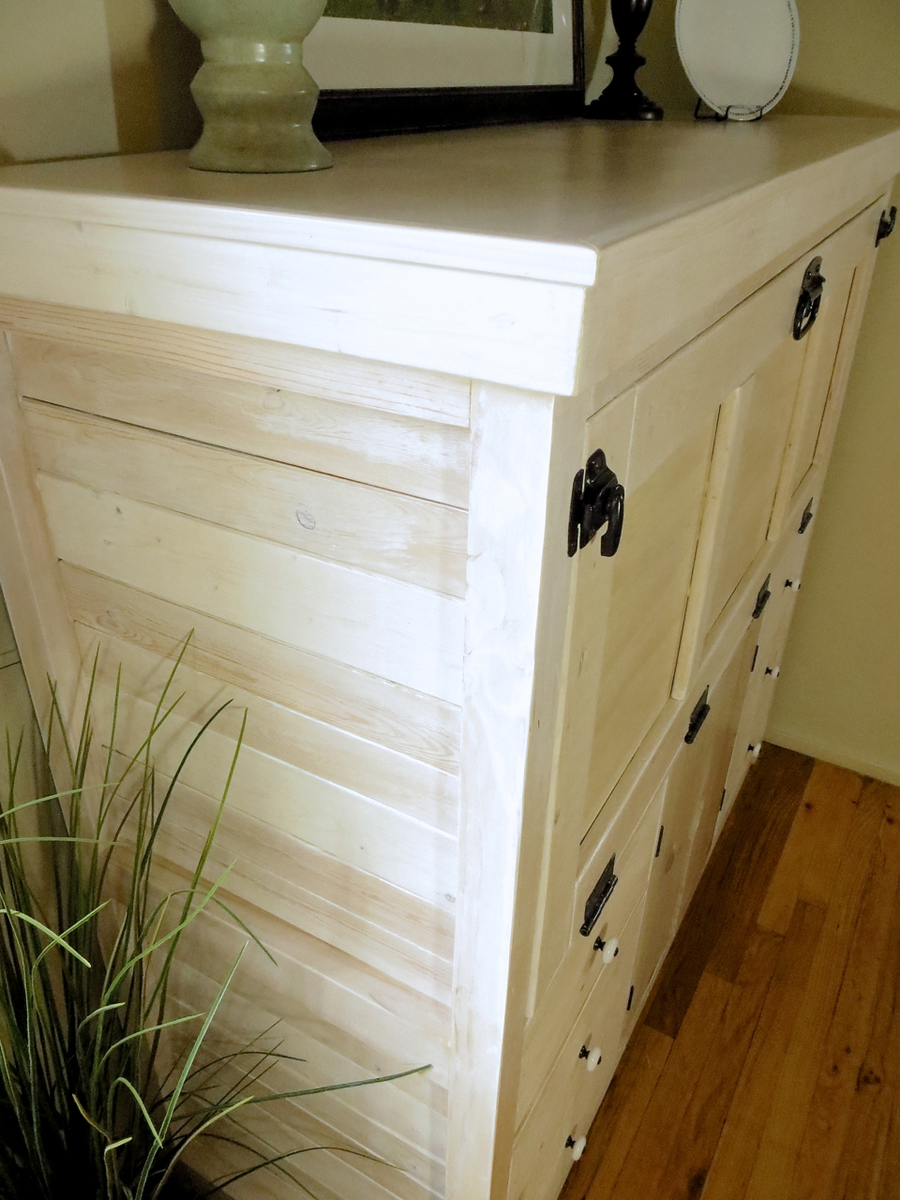
I really scrounged around to build this desk. I used a large beam my friend cut up into 2x2's for the main posts/legs, pine furring strips for the side boards and around the top for moulding (lots of scraps I already had), 3/4" plywood for the inside dividers/panels & desktop, 1/2" plywood for the drawer boxes, drop-down door & top, 1/4" plywood for drawer bottoms & backing-board. I used 3/4" pine boards for the drawer faces and small doors on the bottom. I used drawer slides from an old dresser I found by our dumpster and vintage knobs I bought online. The other black hardware (hinges, pull handle, and clasps for door) I bought from a big box store and is categorized as gate hardware.

Sun, 09/01/2013 - 15:52
Wow! Nice job, this is beautiful. I love the whitewashed finish. Cool hardware too!
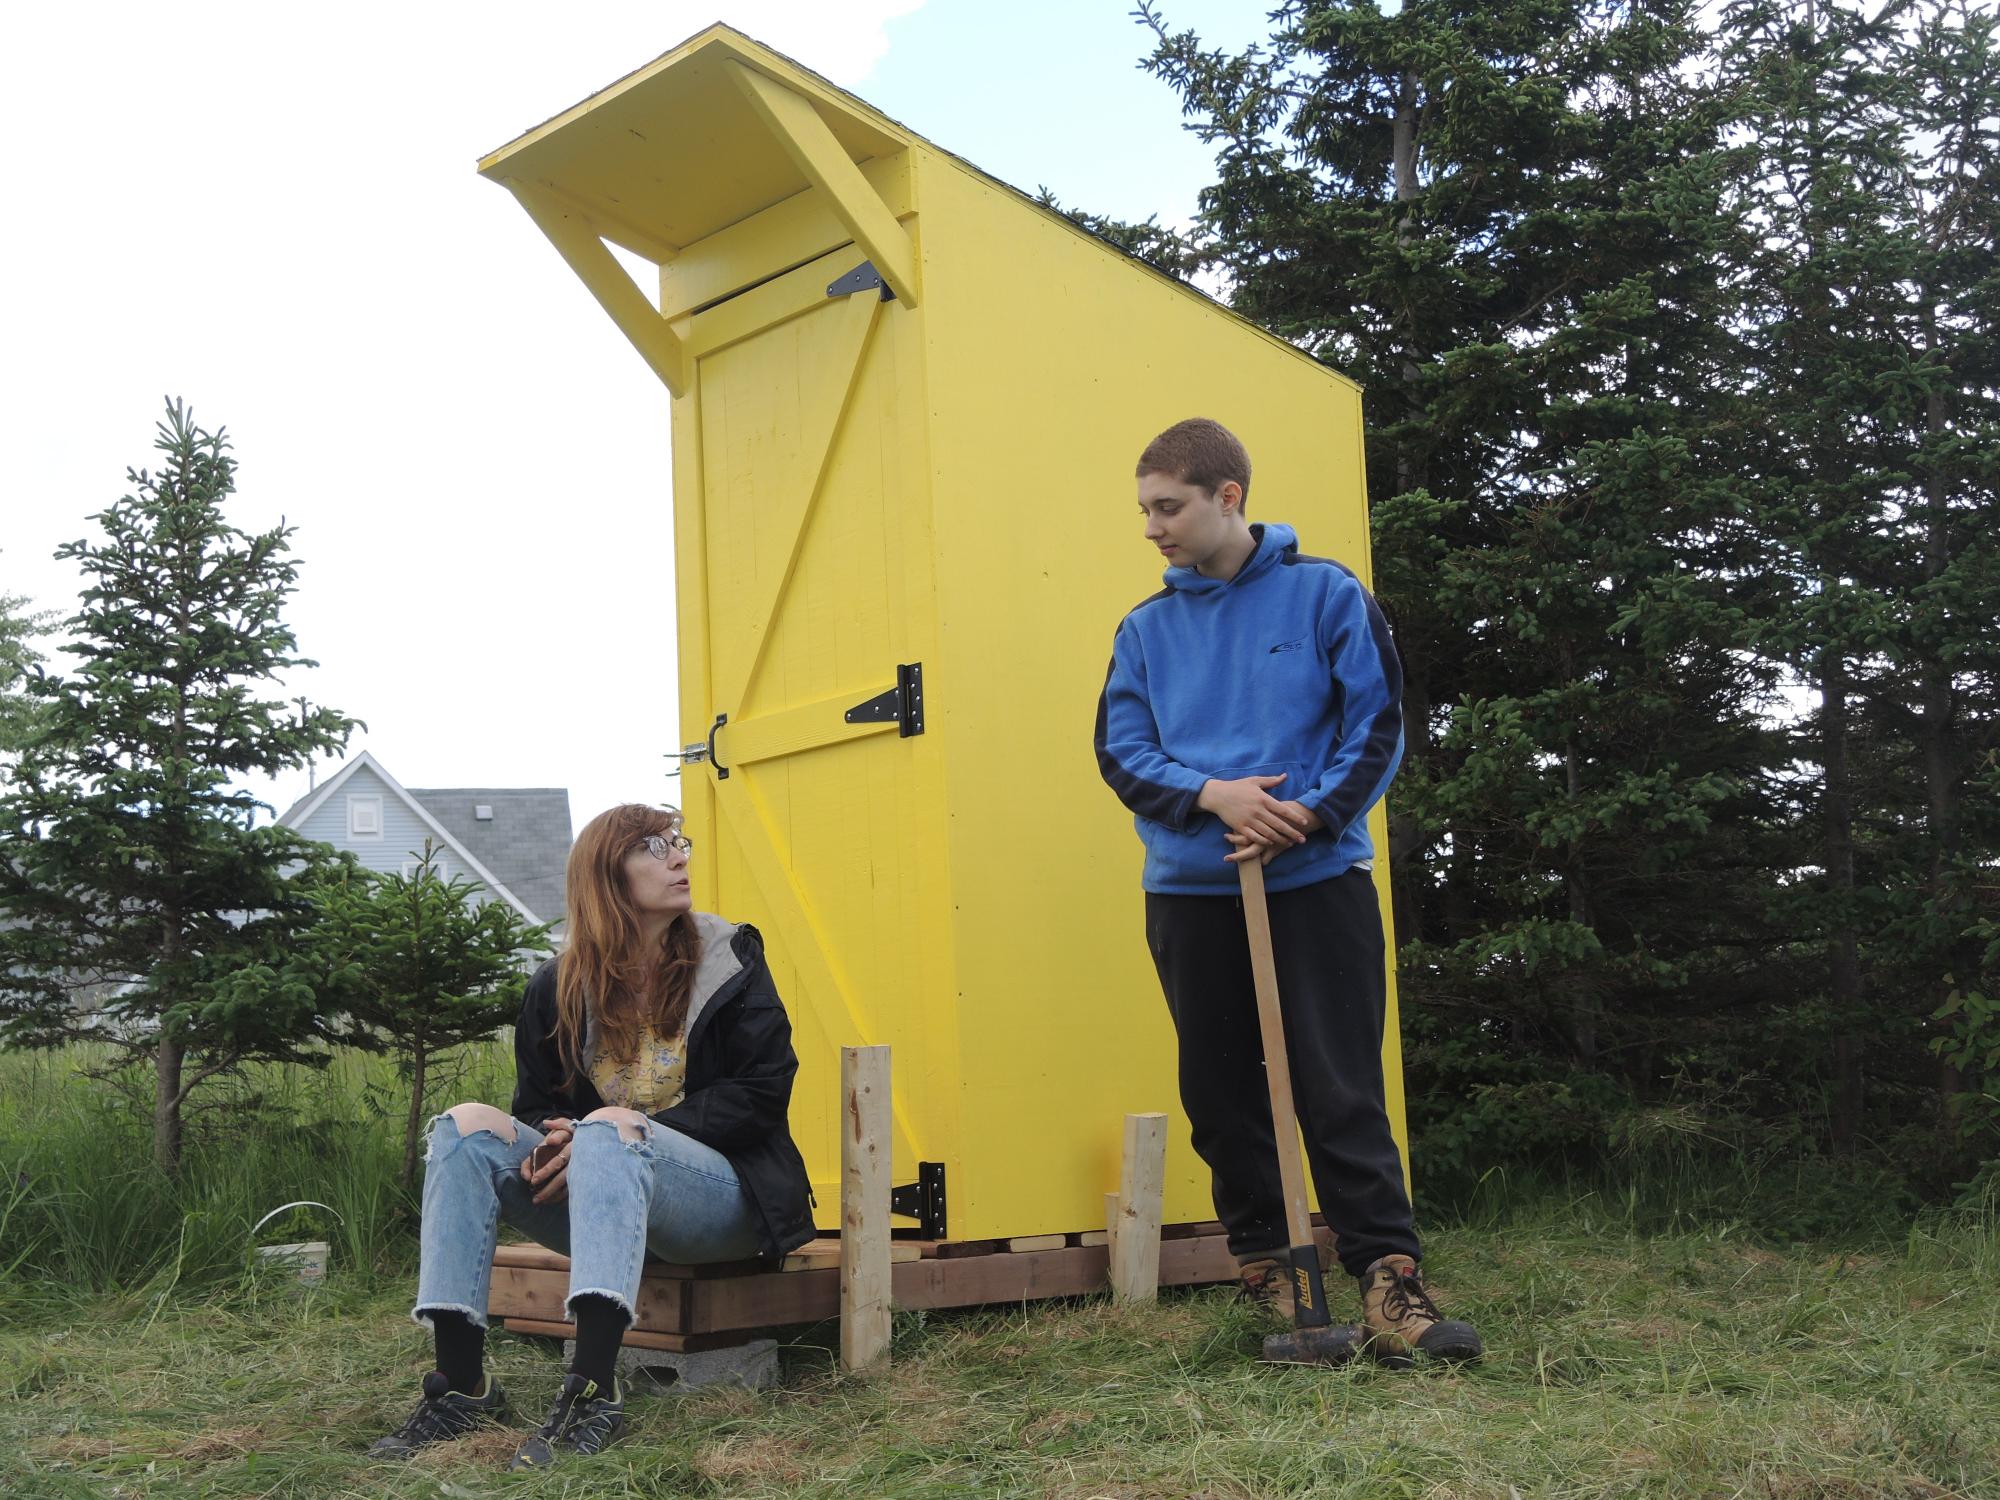
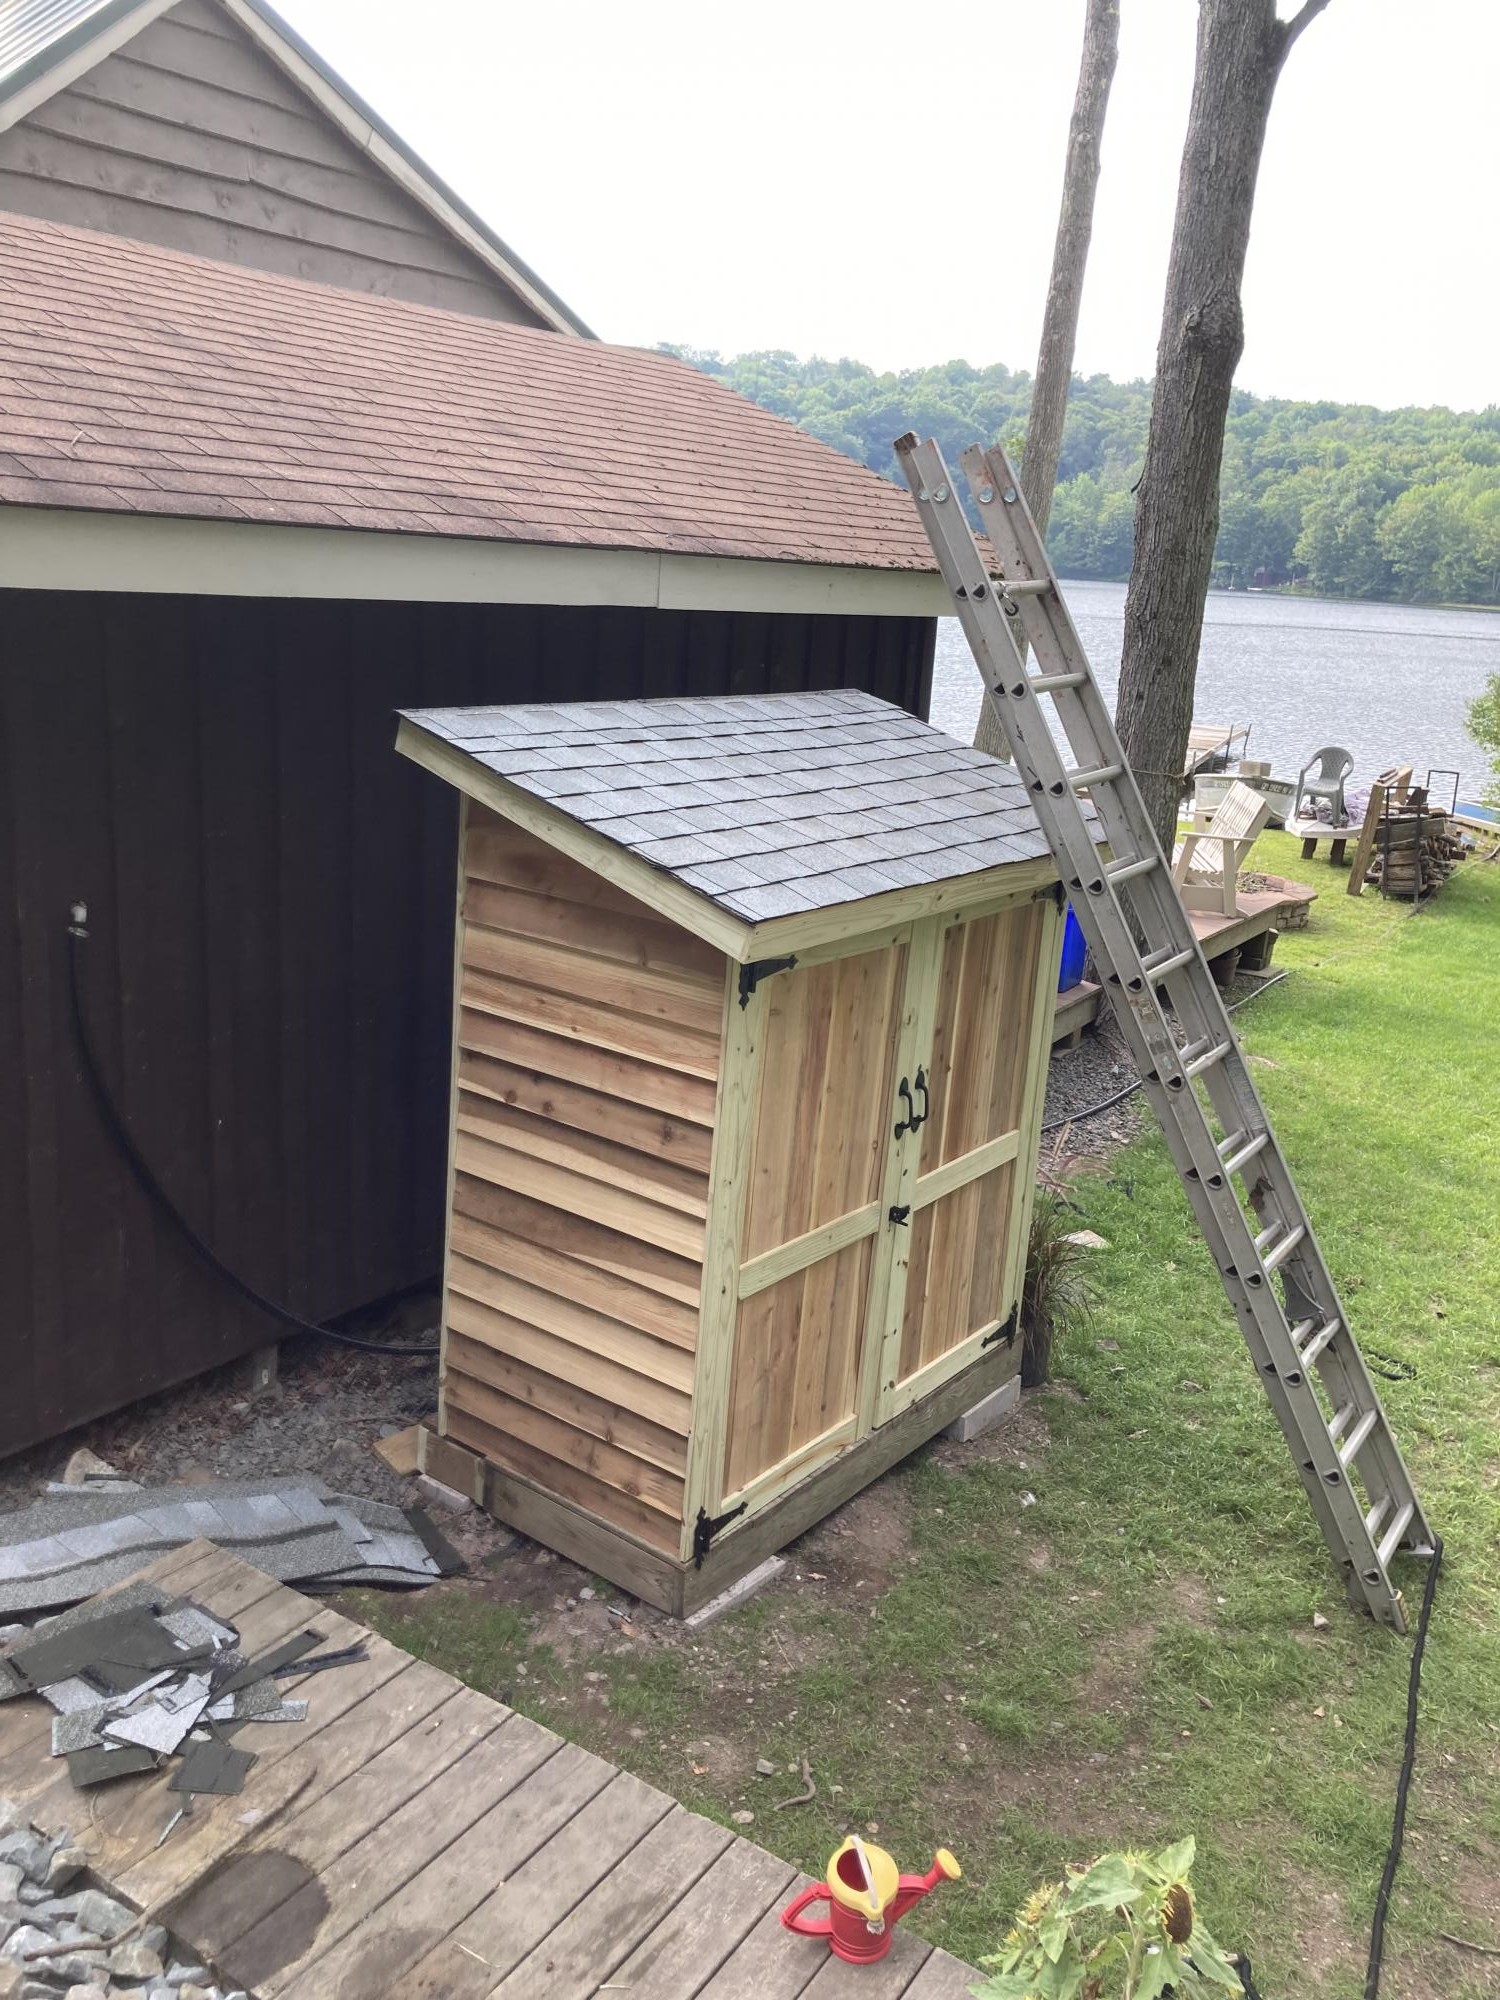
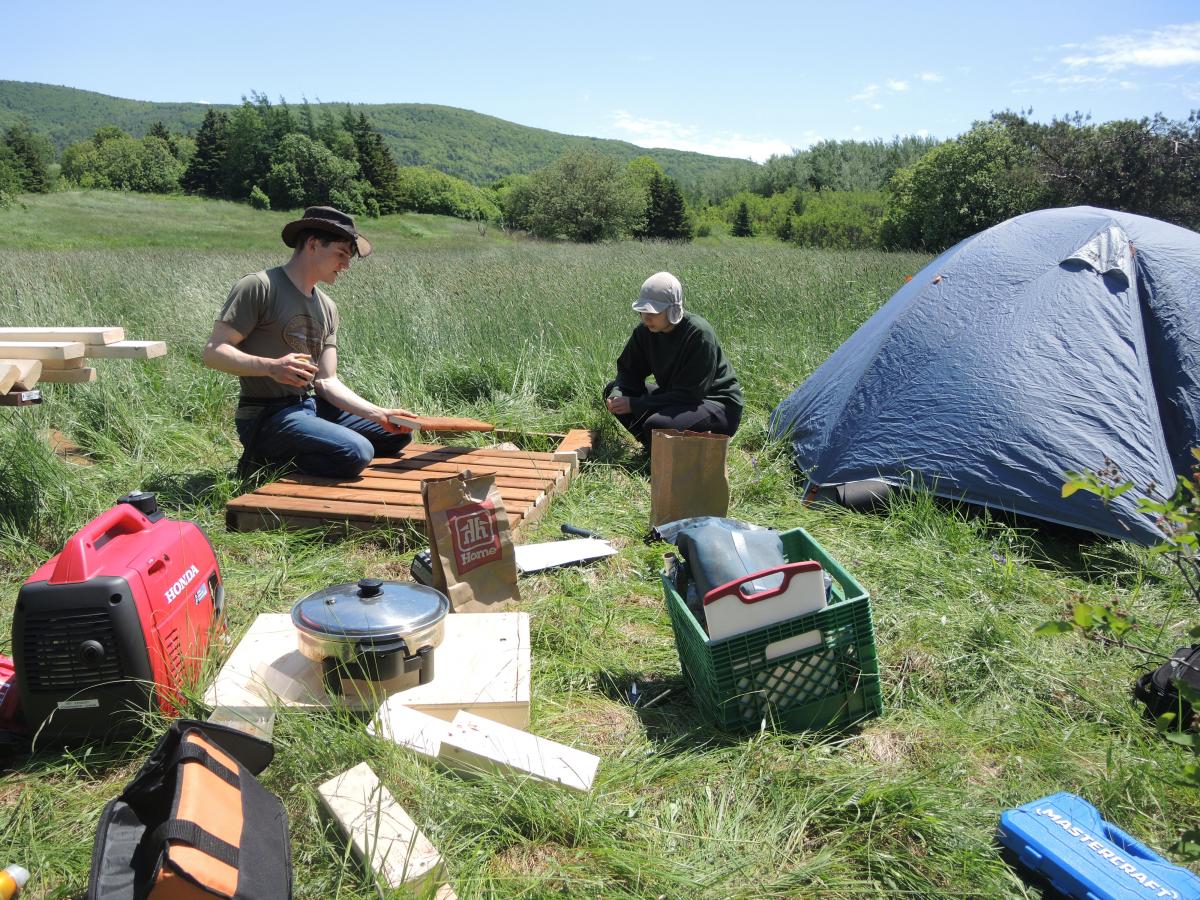
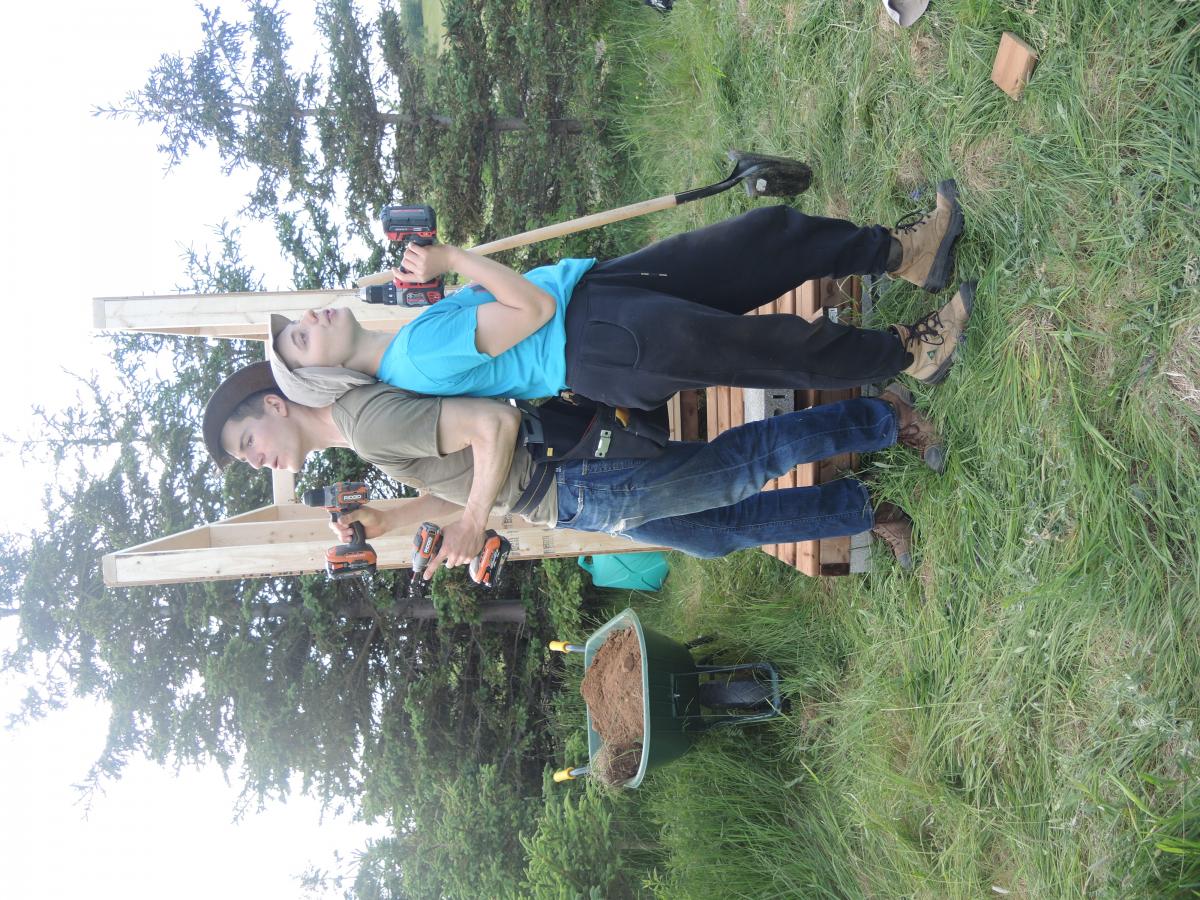
It's the first thing I've built on my land in the Cape Breton highlands, Nova Scotia, Canada. We staked it down because it gets really windy here! Great design, thanks Ana!
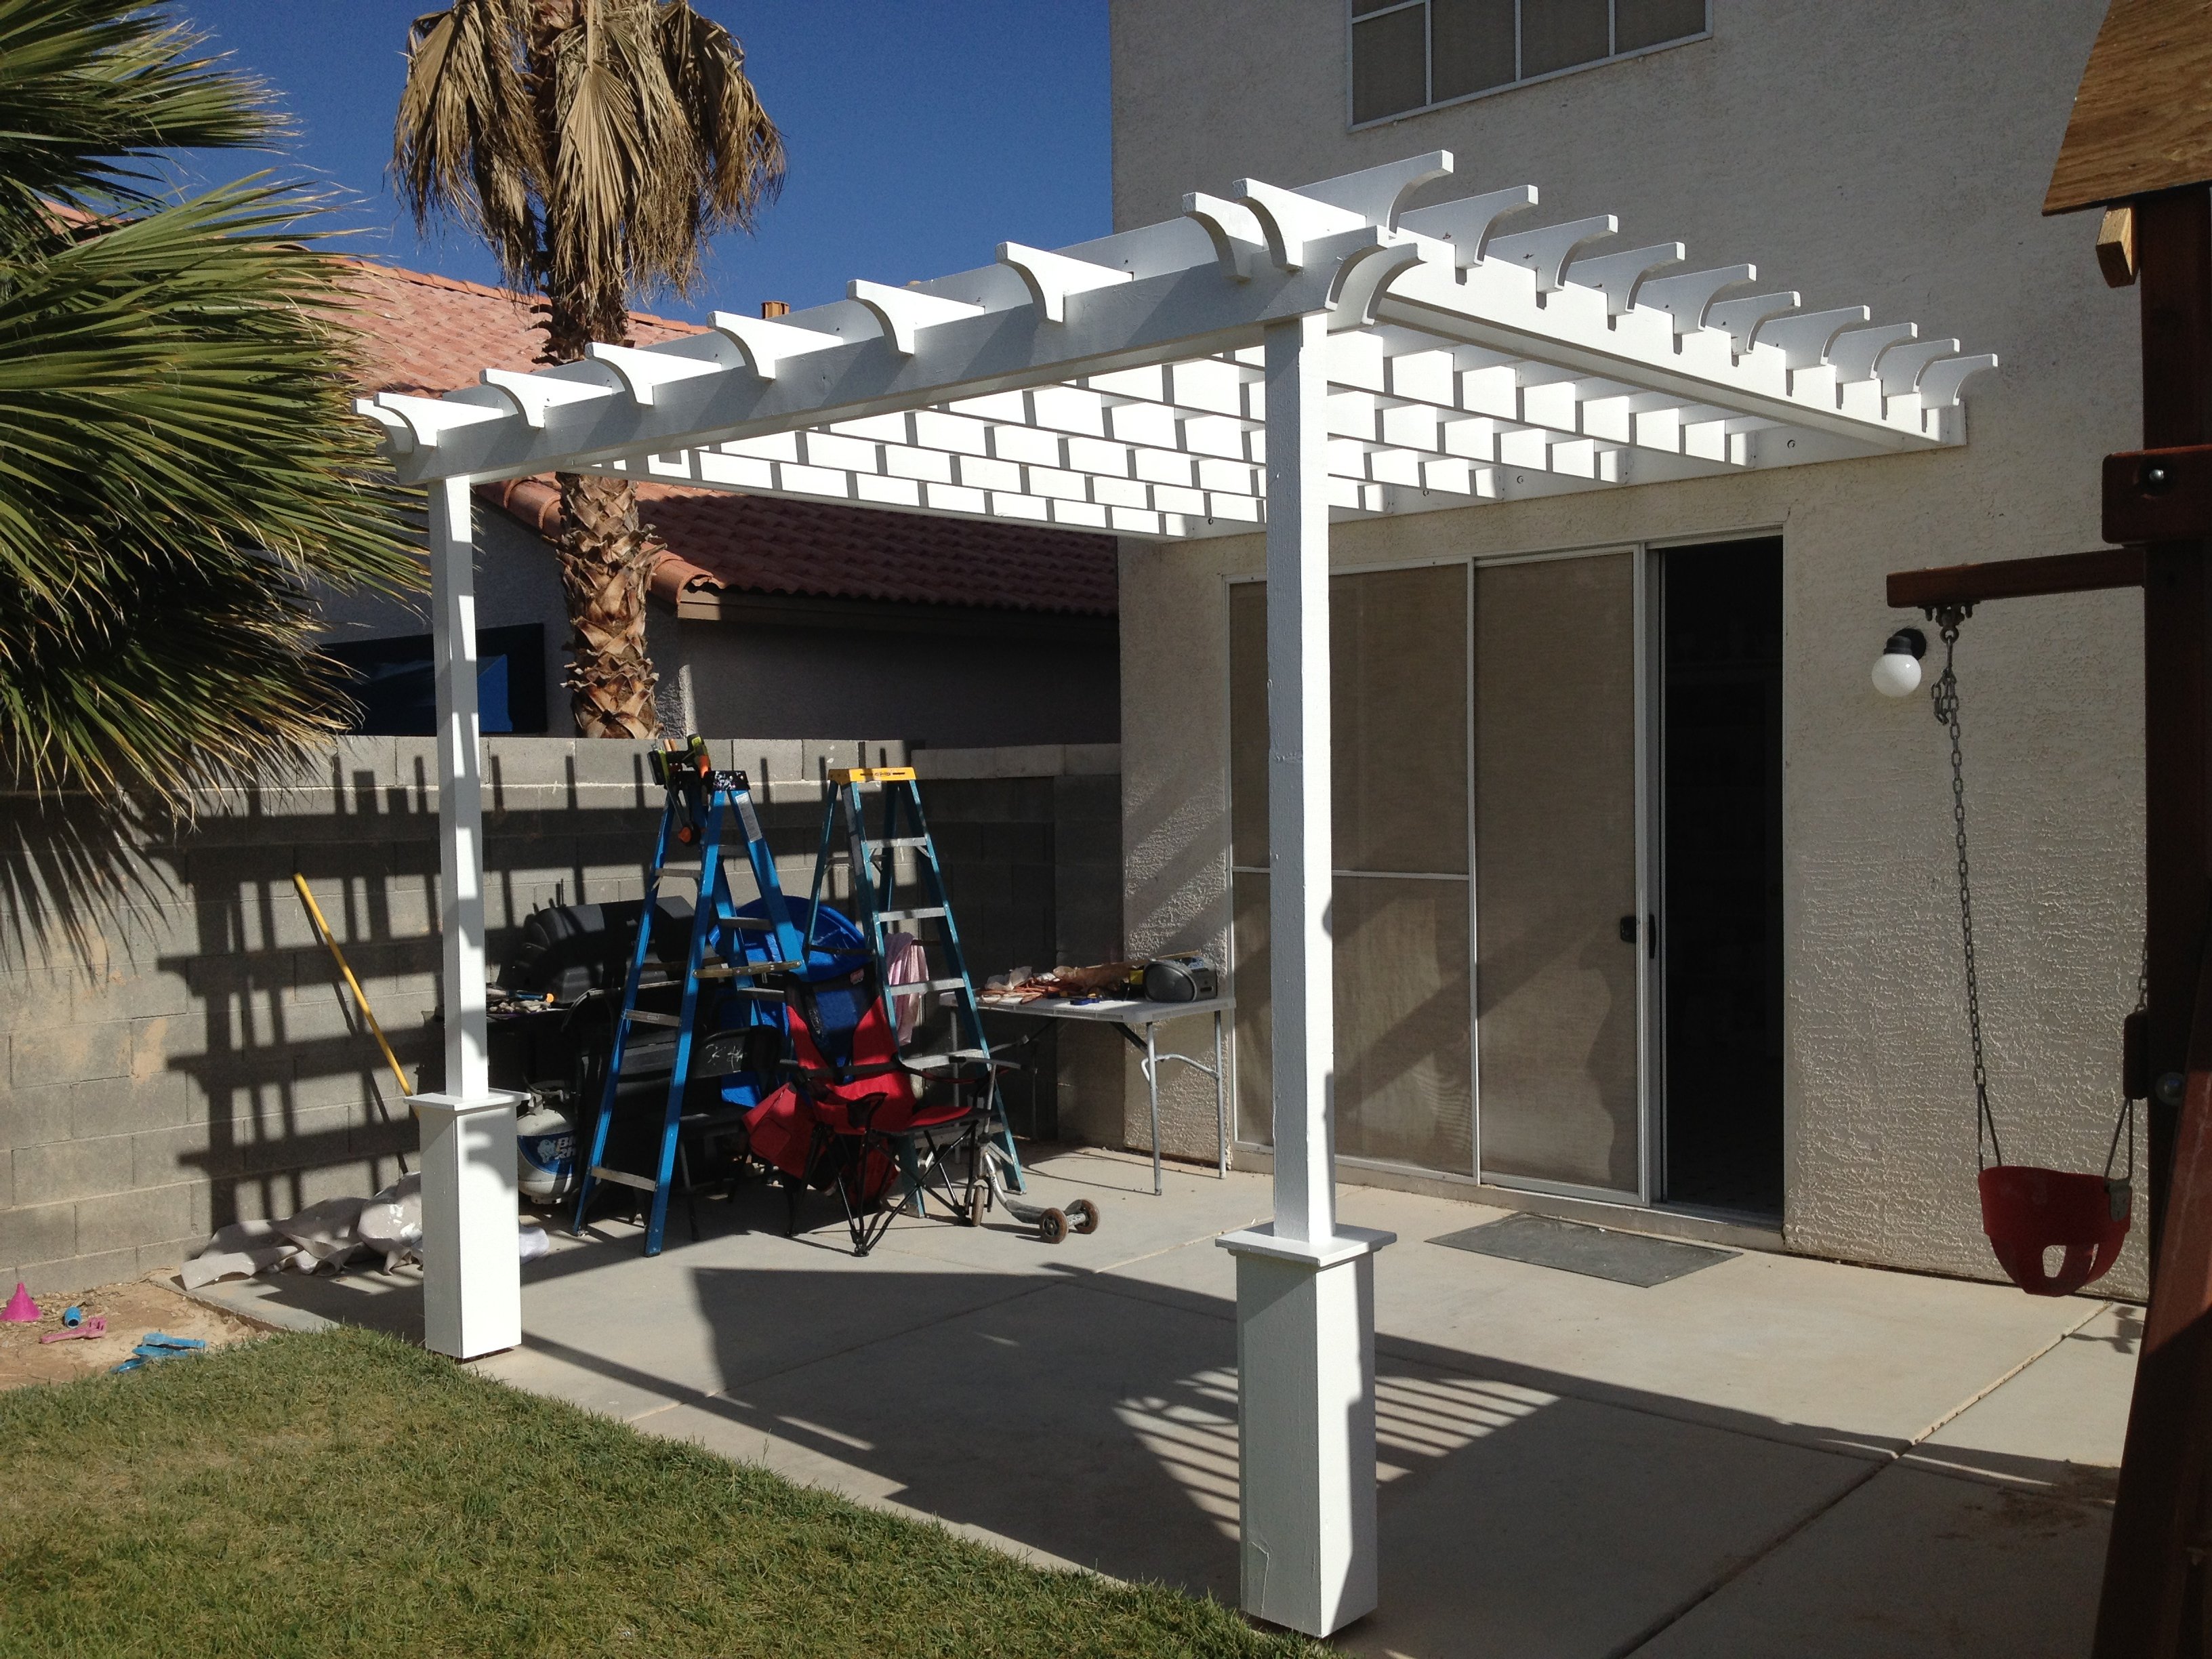
Instead of building a free-standing, 4-poster Pergola, I attached one side directly to the house. There are various Pergola design types and shapes. Simply Google for "pergola" images and decide which design you like best, or combine design ideas together (as I did).
Couple things to consider:
A: Is your Pergola more for decorative purposes or actual shade?
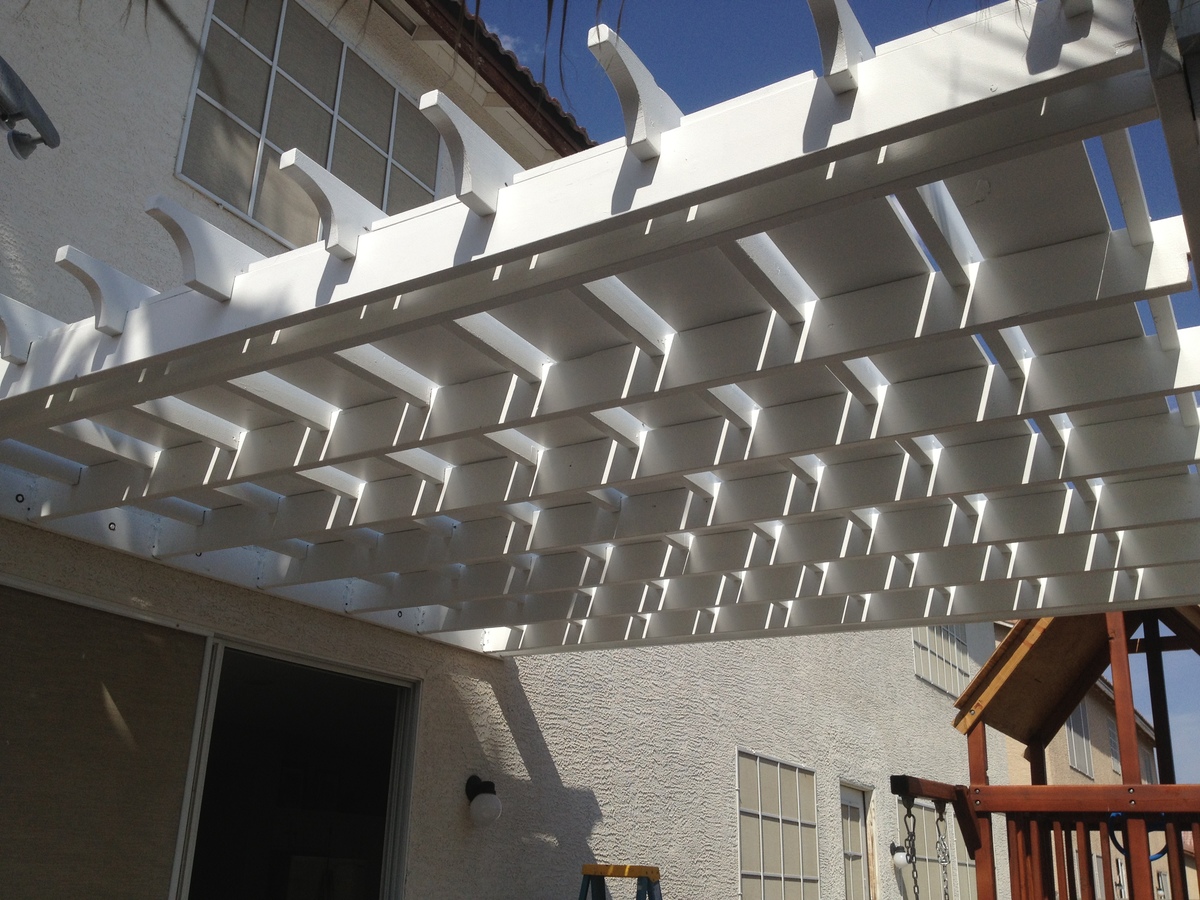
My design was more for actual shade (but with a decorative design), which is why I added the 1in x 12in x 12ft Pine boards between the cross beams at the very end (last picture). If your design is more for decorative purposes, you can space out your support beams and cross beams wider (using less wood and money).
You can also choose to use 2x4s as your support beams with 2x2 cross beams on top (essentially furring strips) either close together or spaced farther apart. This would also reduce the overall cost of your Pergola and make it much lighter as well. I chose to use all 2x6s for both support beams and cross beams.
B: What path does the sun follow across the sky over your Pergola?
If the sun passes directly over your Pergola and you want a lot of shade, you'll obviously need to consider this in your design (i.e., more cross beams that are close together).
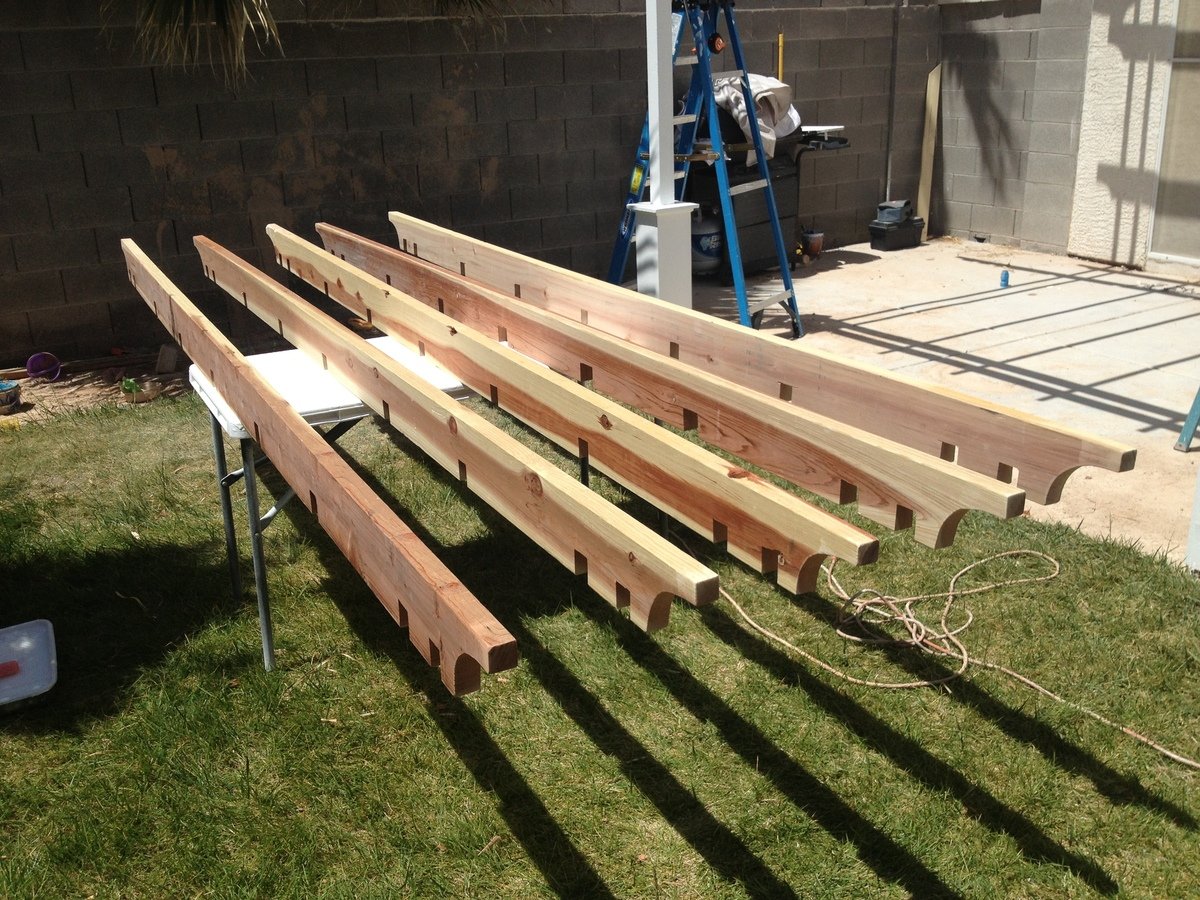
C: Do you want your support beams and cross beams to inter-lock (by cutting square notches and assembling them like linking logs), or simply stacked on top of each other? (Again, Googling for Pergola images will help you see the differences in designs.)
I chose to interlock all of my beams by cutting notches and fitting them together. Obviously more time consuming to measure each notch, cut, and chisel them but the stability of inter-locking beams should hold up a little better in the strong winds of Las Vegas.
HOW TO (abbreviated)
Overall Pergola Dimensions: 10ft Height, 12x12ft
Tip: Paint or stain all your wood prior to assembly. Much easier. You can always touch-up scuffs and scrapes after it's built.
1. 2x6x12 installed directly onto the house (thru the stucco into the studs) using 3/8in. x 5in. lag screws. (Tip: Seal the top edge of the 2x6x12 that's against the stucco so water doesn't run behind it and down into the lag screw holes.)
2. Install the 2x6 Double Shear Hangers (as many as you need for your design)
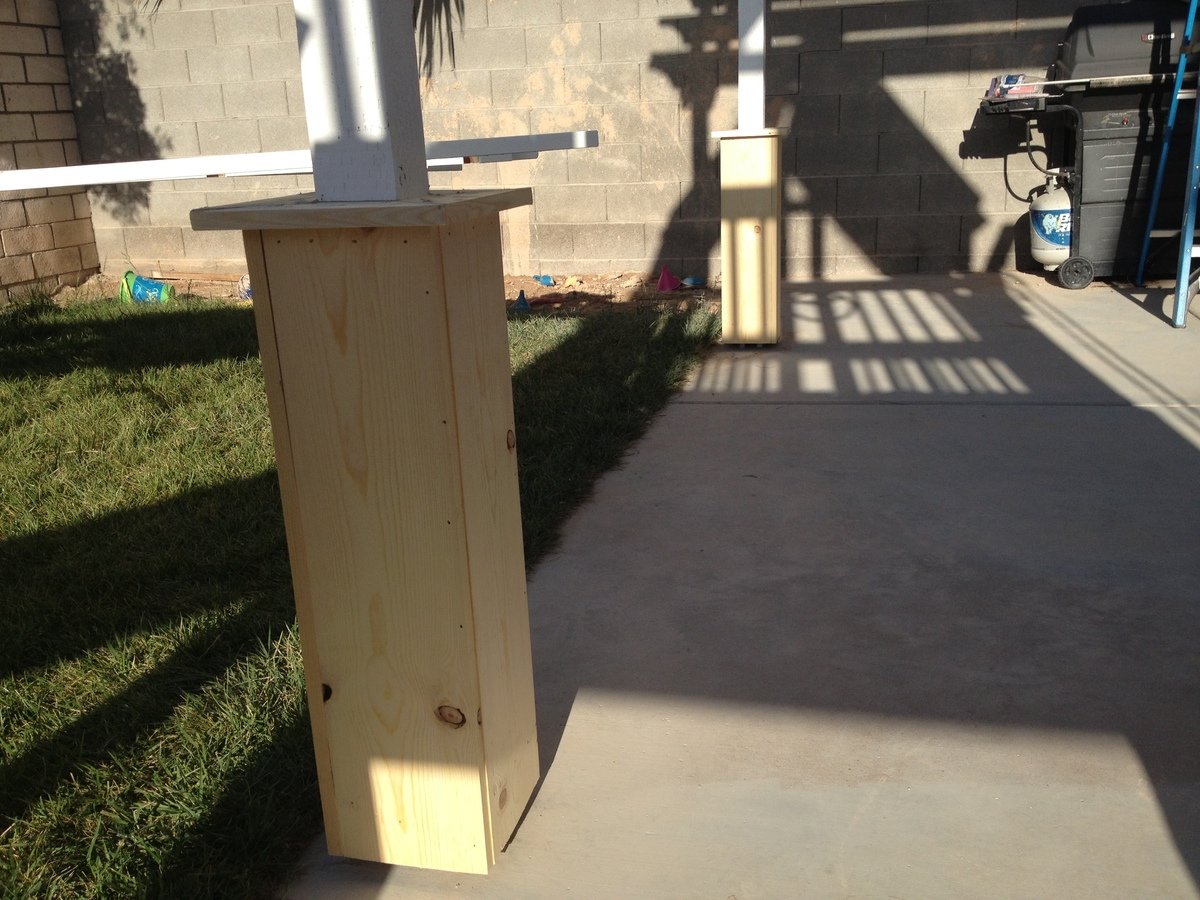
3. 4x4 post anchors secured directly into the cement patio using Tapcon 3/16 in. x 2-3/4 in.cement anchor screws.
4. 4x4x10ft posts screwed on top of the anchors. Ensure level on all sides (use a partner to help hold the posts).
5. Attach the front and side 2x6 beams to the 2 posts (again, use a partner to help hold posts while you're up on the ladder screwing your beams to the posts)
6. Attach the remaining 2x6 support beams.
7. Attach the 2x6 cross beams on top (whether you inter-lock them by cutting notches or simply resting them on top, be sure to toe-nail screw them in with 2in exterior screws).
8. Lay 1x12x12ft pine boards on top in between the cross beams and secure with 2in exterior wood screws.
9. Construct the post bases ("sleeves" or "leggings") which greatly adds to the look, as outlined in the "Weatherly Pergola" plans.
10. Touch-up paint / stain any areas you need.


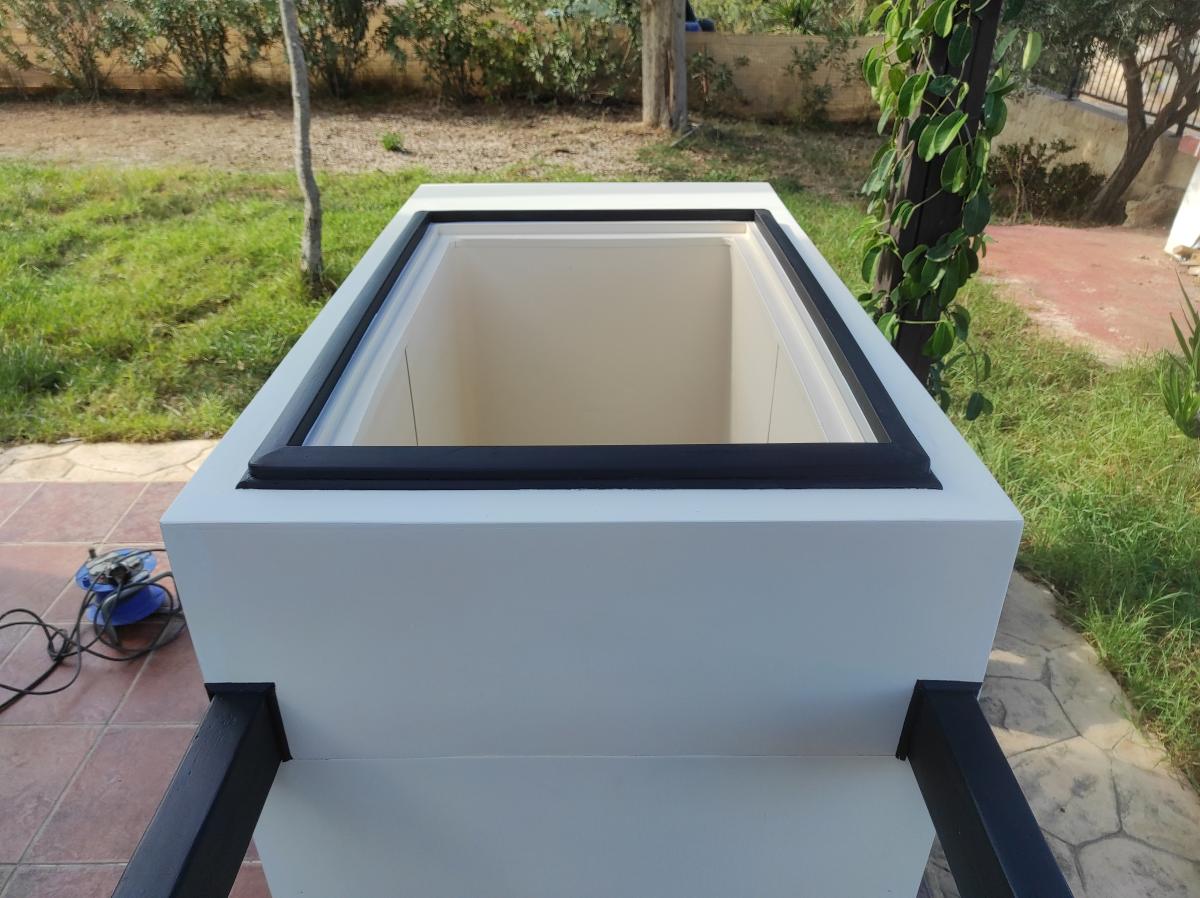
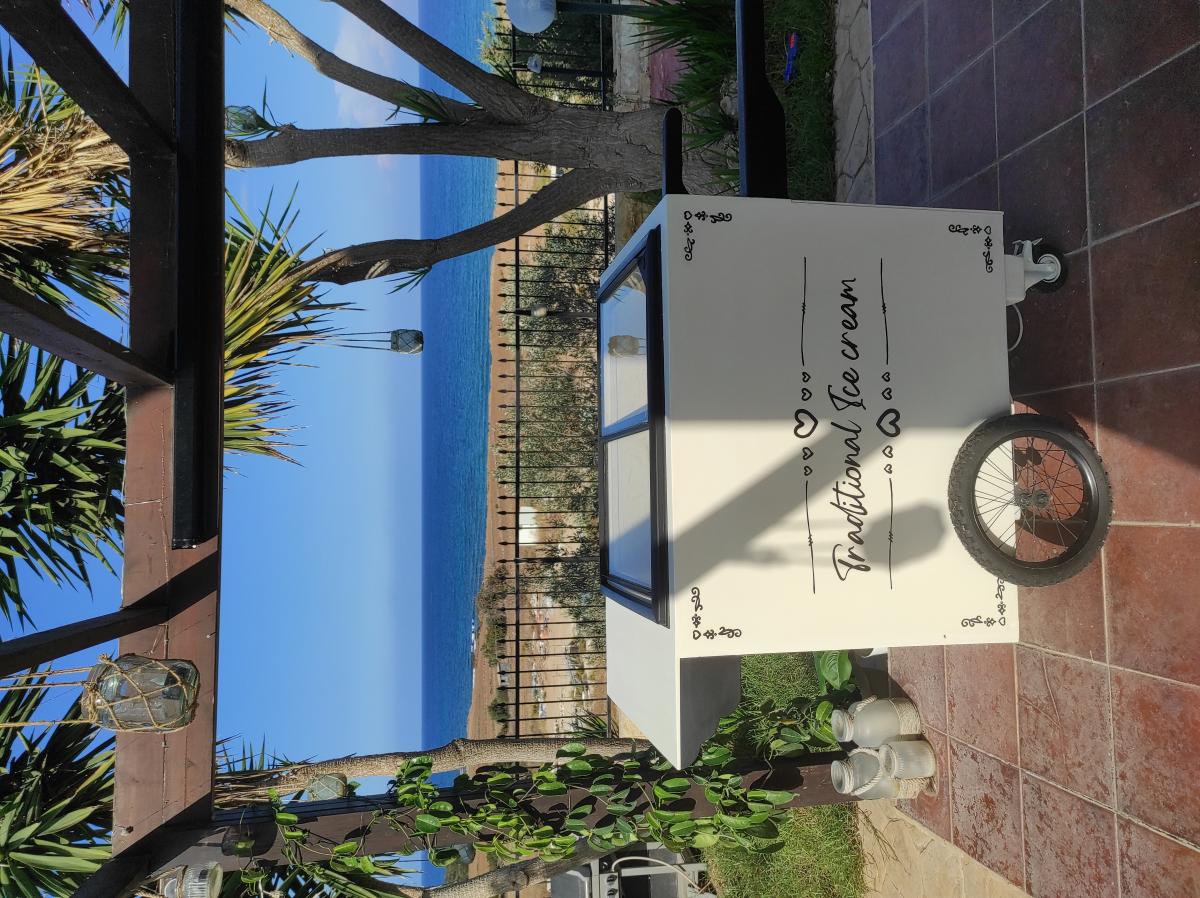
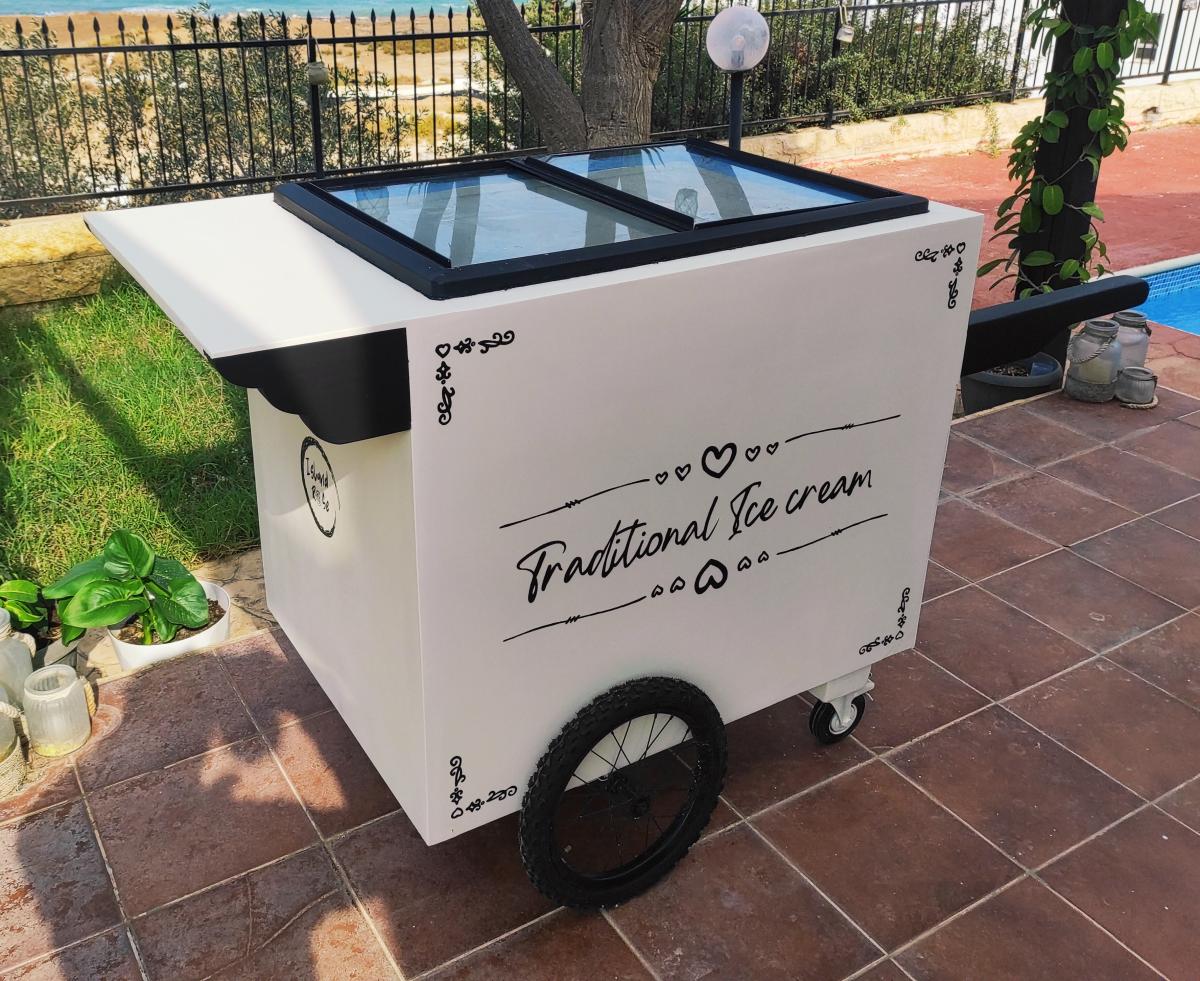
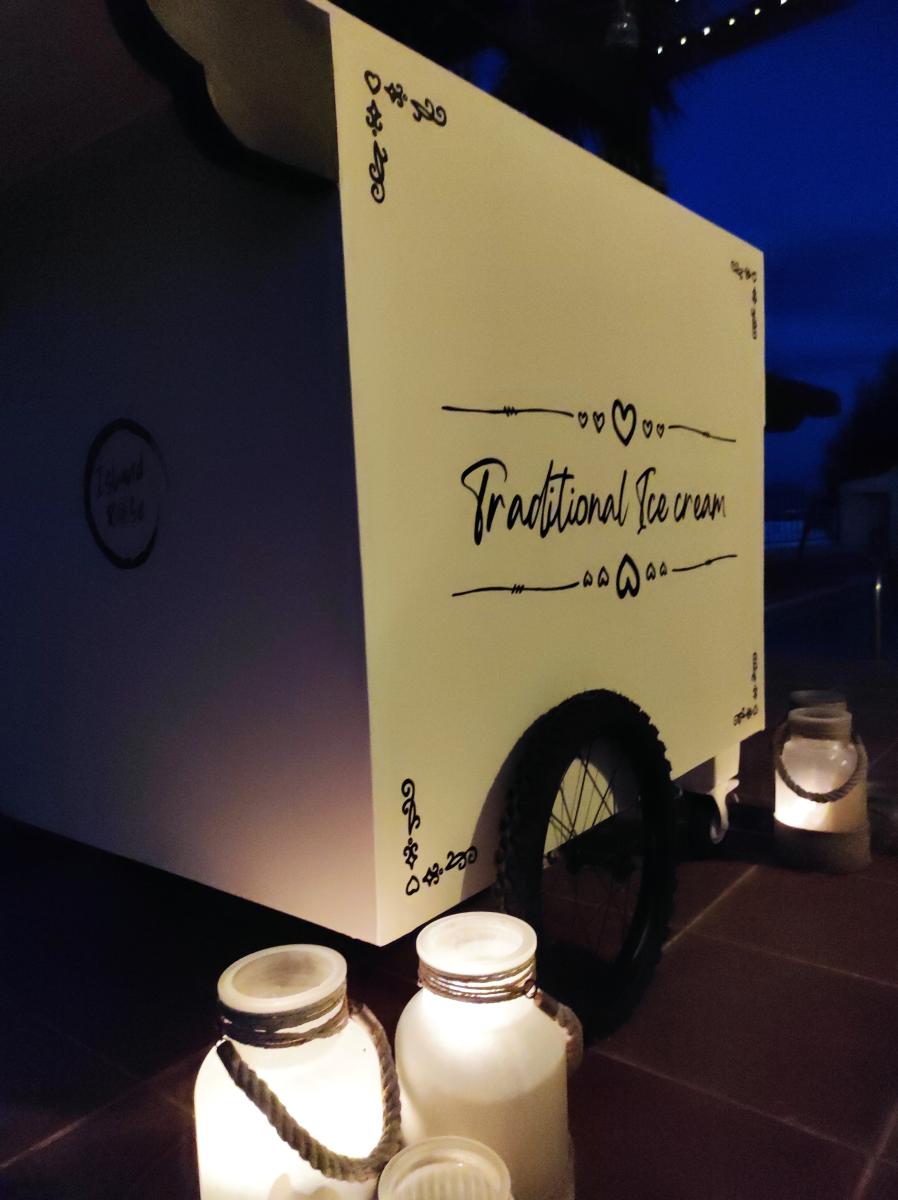
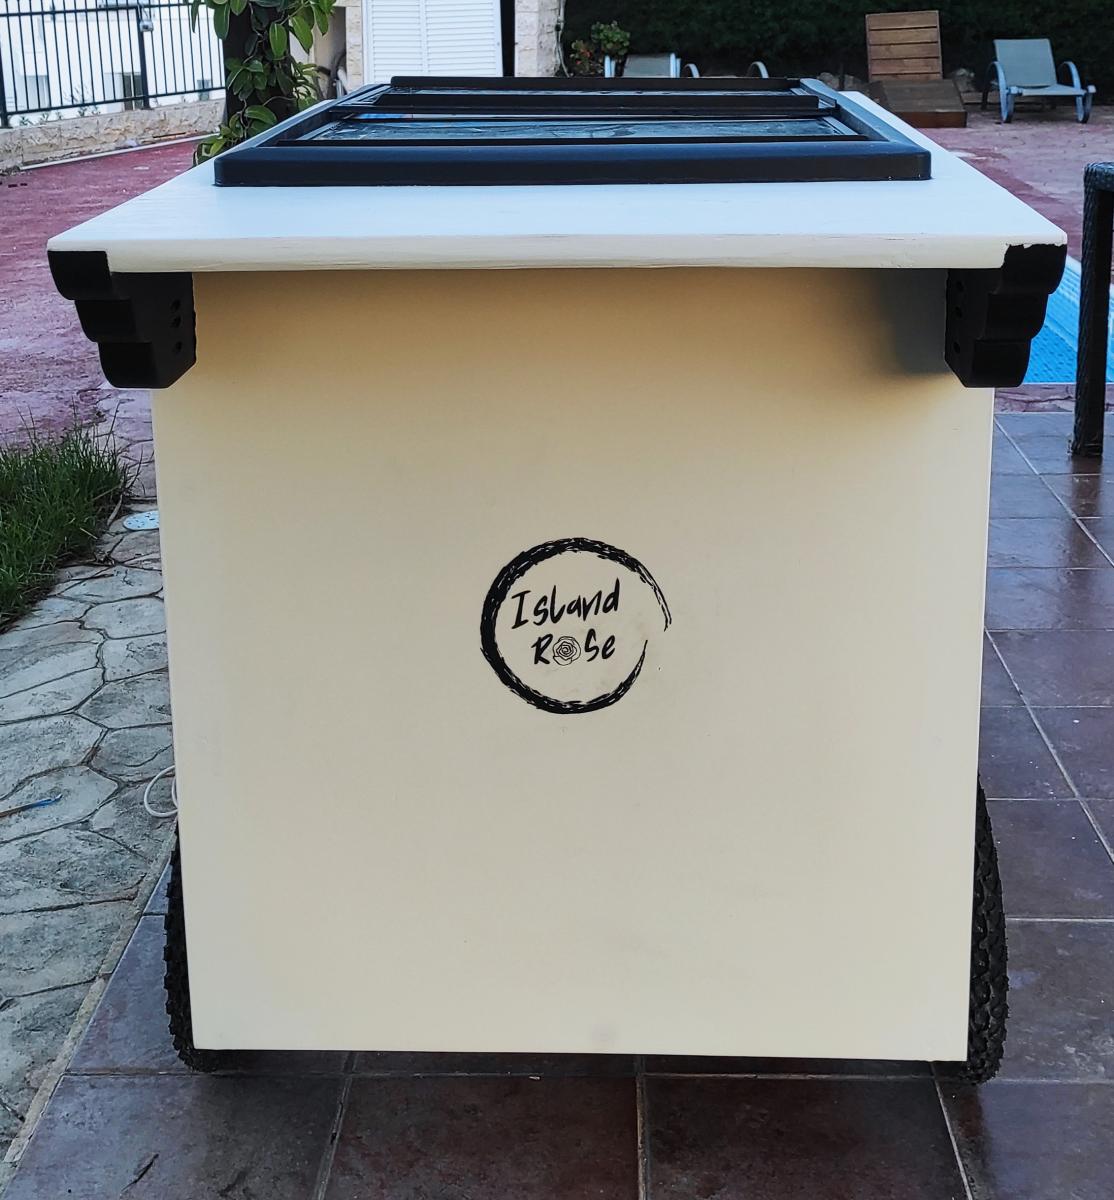
A friend wanted a tatty old chest freezer turning into a traditional looking ice cream cart for her business. The freezer itself was way to heavy and not really fit for purpose but, after a week of tinkering about with a couple of design changes here and there to accommodate the weight, I don't think I've done too bad a job.
The internal frame is Nordic fir, half lapped at the joints and secured in place with 38mm oak dowels, the cladding is 6mm birch ply finished with paint from the French chic Al fresco range, the writing proved a little challenging on the the eyes and my hands aren't as steady as they used to be but she's happy.

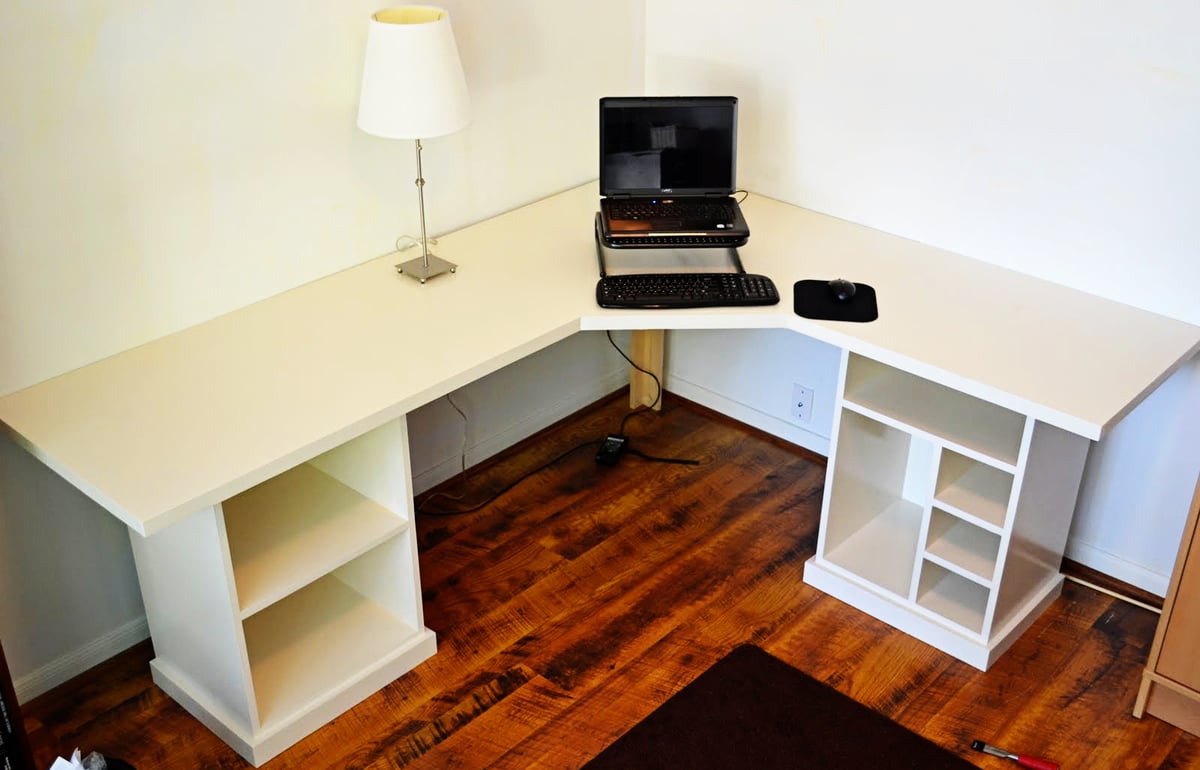
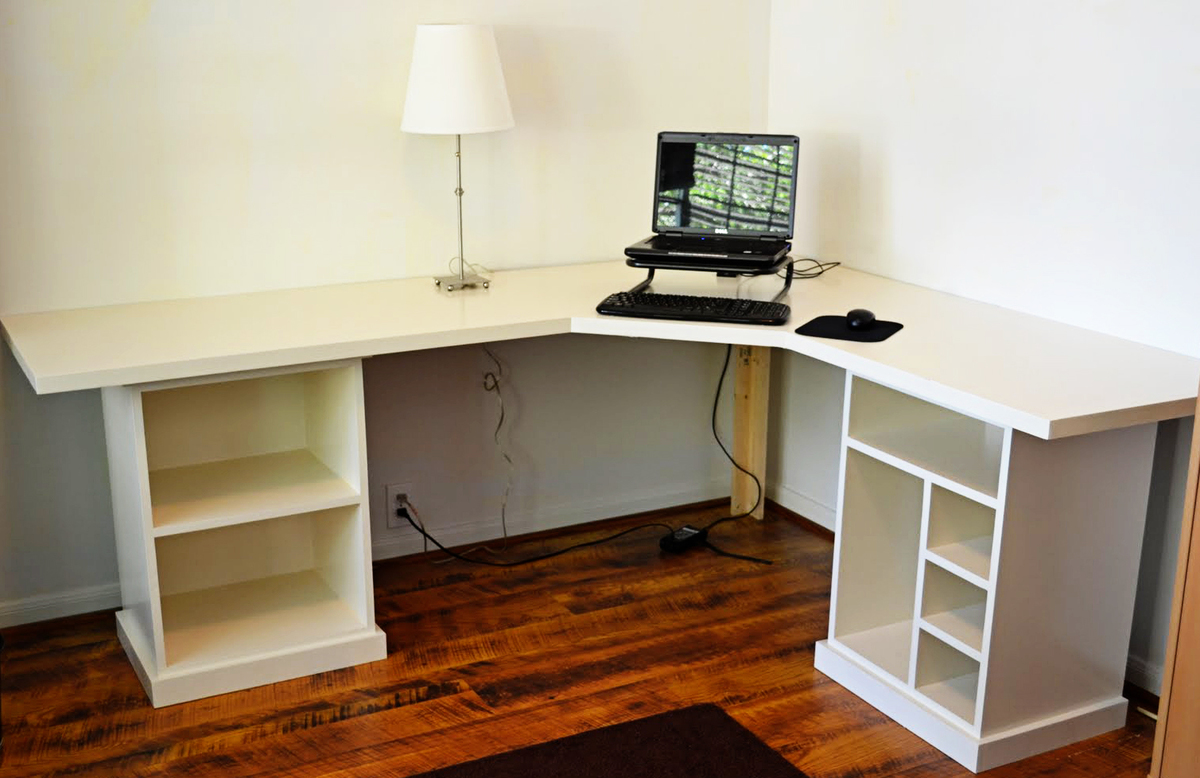
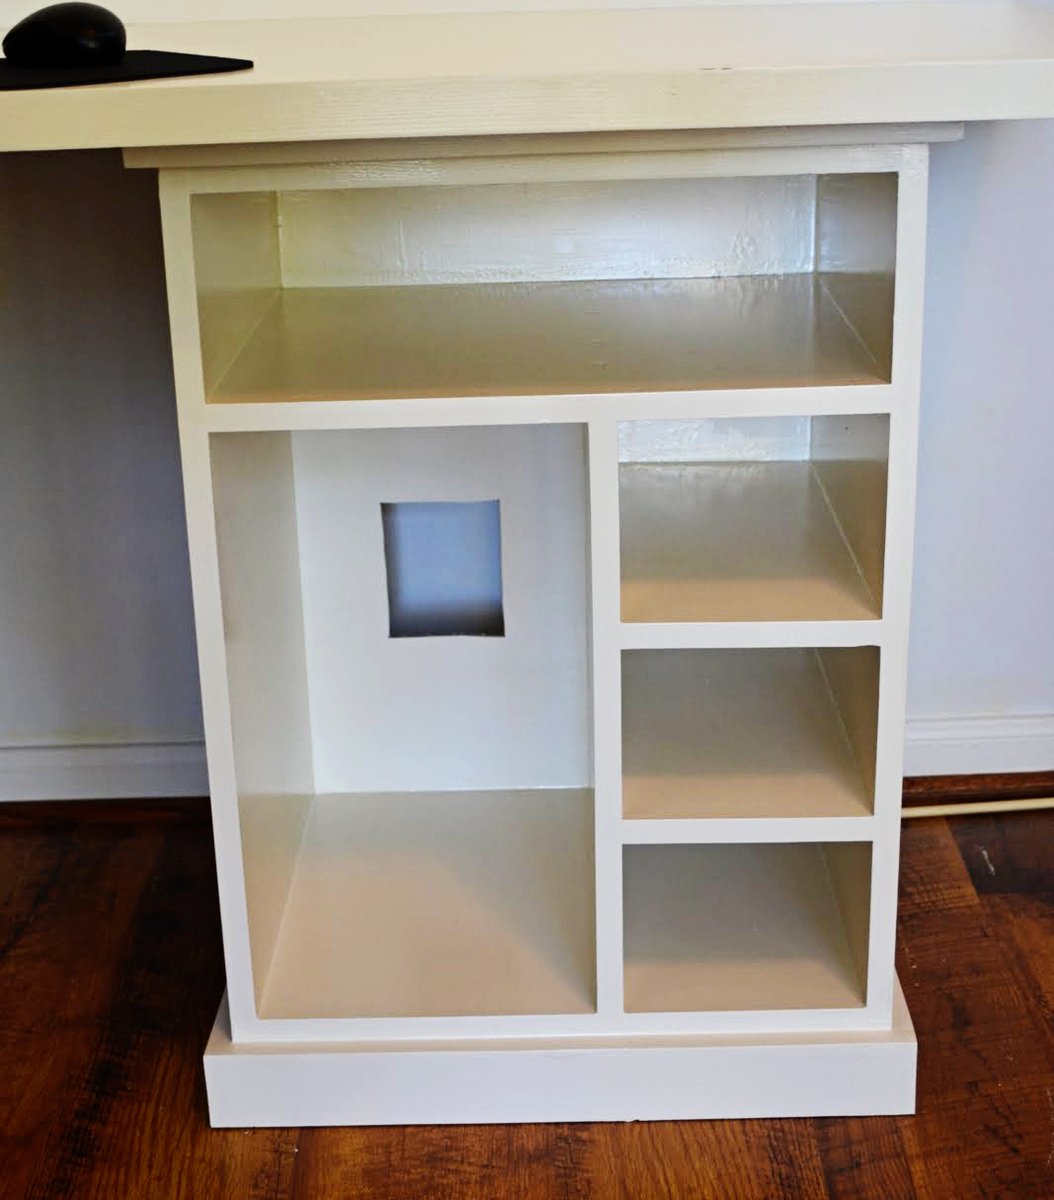
This was all my husband - he did a great job using the modular desk plans to customize (its a bit larger) this desk for our office. He finished it this past weekend so not much on it yet!

Mon, 02/06/2023 - 12:21
WOW, this is so awesome, well done! Thank you for sharing.
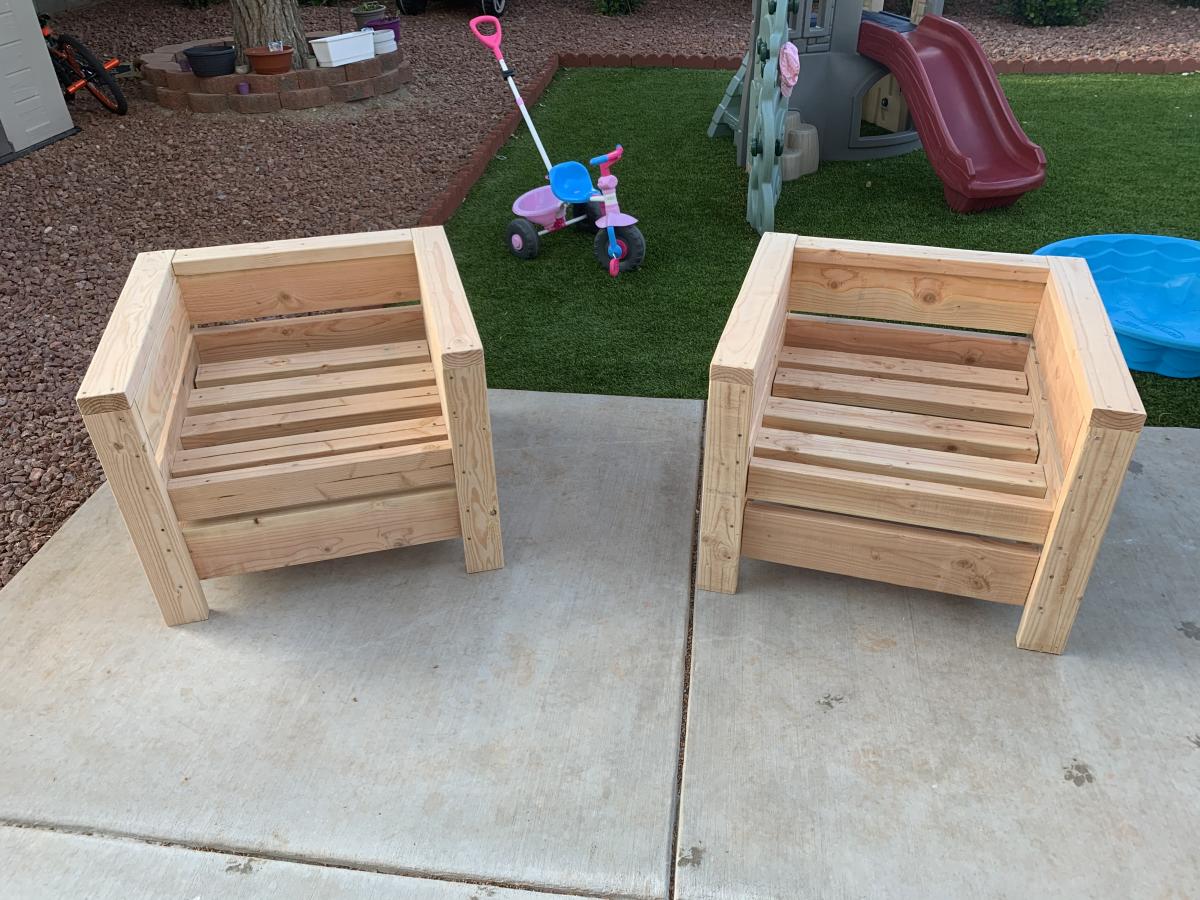
I added support for more weight by adding a 2x4 on the inside of the four legs. This way, I have the entire frame supported by screws AND 2x4, so I can rest easy.
Rebecca Nemeth

