Community Brag Posts

dress up bin

Submitted by clantate on Tue, 09/03/2013 - 06:23

My husband made this for my daughter's 4th birthday. she loves it! We did decided not to add the wheels and it seems to be fine without them. We chose to do her name in letters as well. I did the lines and dots with a sharpe marker.

Estimated Time Investment
Afternoon Project (3-6 Hours)
Recommended Skill Level
Beginner

The Media Hutch Entertainment Center

Submitted by MikeP112 on Mon, 10/26/2015 - 09:28

I built this for my oldest brother.  I only used 2x2's for the legs.  I built the carcuses out of plywood and used 1x2 select pine for the face frames.  I built the top shelfs to be 5 feet tall.  So the whole thing is 7 feet high by 8 feet wide.  

Estimated Cost
$600-$700
Estimated Time Investment
Week Long Project (20 Hours or More)
Finish Used
Primed with Killz, and painted with Sherwin Williams Analytical Grey. After it was painted I used a finishing wax for a topcoat
Recommended Skill Level
Advanced

Comments

Fire Place and TV Surround

We needed a surround for the TV and really wanted to have a fireplace underneath. I took the Shanty Hutch/Sideboard plans and made some modifications. Took about 2 weeks to complete.

Built from Plan(s)
Estimated Cost
We bought the fireplace for the project, so with all included about $600
Estimated Time Investment
Week Long Project (20 Hours or More)
Finish Used
I used Varathane American Walnut on the interior surfaces. I used a paint/stain blend for the exterior. It is a color match tint for my house.
Recommended Skill Level
Intermediate

Comments

Simple Bed Modified

Submitted by Anonymous (not verified) on Sat, 08/27/2022 - 14:34

My daughter needed to get out of her Toddler Bed so I built this quickly. Used 2 2x6 for each rail, and cut down the height of the headboard and footboard. Also as always I use Rocklers 5" Surface Mounted Brackets for all beds. I have the rails also sitting on 3 inch blocks to support the extra jumping this bed will endure by a 4 yr old.

Comments

Shaker Peg Board

Submitted by rhilborn on Thu, 08/11/2011 - 12:15

This was a fun easy & free project! I had a number of 1x4's left over from building the Classic Bunkbed and we paired that with some old knobs I saved. These 3 peg boards have made a great addition to the foyer of our house. We use them to keep purses, bags, dog leashes, and hats handy and still organized. I am tempted to put up a few more peg boards in our hall now!

This probably took 30 minutes total from inception to installation.

Estimated Cost
Free!
Estimated Time Investment
An Hour or Two (0-2 Hours)
Finish Used
Wipe on Polyuerthane and minimal sanding. I basically sanded off any thing that could give someone a splinter and polyurethaned just enough to protect the wood.
Recommended Skill Level
Starter Project

Chevron Cassidy Queen bed

Submitted by blpetrie on Wed, 09/04/2013 - 20:42

We took the general plan of the Cassidy wood shim bed but added some features of our own. Since my husband is in the military we knew we would be moving more than the average builder so we made the bed to be more durable for frequent disassemblies. Instead of screwing the frame to the head and foot board we used carriage bolts to secure the pieces.

We also wanted to add a reclaimed aspect to our bedroom. We bought some reclaim cedar siding from a local estate investor and decided to do a chevron pattern. After staining the whole frame, we applied the siding to both the head and the foot board since we bought basic plywood and wanted to cover both ends. Plus, we liked the look with both ends done better. We cut the siding at 45 degree angles and then custom cut each piece to fit. This was a time consuming area since, with reclaimed wood especially, each piece is unique. We then just used liquid nails to secure the pieces.

To finish we assembled the bed and applied a paste wax.

Built from Plan(s)
Estimated Cost
$200 (with cost of reclaimed wood)
Estimated Time Investment
Week Long Project (20 Hours or More)
Finish Used
We applied one coat of Rust-Oleum Kona with foam brushes then let it set for about one minute before wiping excess with a rag. We really wanted the wood grain to pop and this did the trick. We applied a coat of paste wax after stain was dry.
Recommended Skill Level
Intermediate

Comments

Matthew Martin

Wed, 09/04/2013 - 21:12

This bed sure looks amazing. I made a bed from the same design just a little more like the main shim bed with a tad bit of modifying. like you guys i was military and made the bed for easy take apart with 7in lag bolts vs nailing. Good luck with future builds.

jmorken

Tue, 05/13/2014 - 08:44

You guys did a fantastic job! My wife and i were looking to create a bed with a chevron or herring bone pattern, and this provides the perfect visual. Question about the foot board: It looks like there are varying thicknesses or some type of beading on the boards. Is there?
Thank you!
j

simmersjm

Sun, 11/06/2016 - 15:53

How did you place and secure the carraige bolts to the frame? I move around a bit too and would love to know how to do this. If there is anyway to upload a picture of what it looks like, that'd be great.

Toy storage bin

Submitted by JimDel on Thu, 10/29/2015 - 12:46

This was my first Ana White project and the first time using my new Kreg jig that my wife bought for me as a birthday gift.  I modified the plans to build this as one complete unit and not as separate bins to be stacked.  I used my Kreg jig on the dividers and ends to attach each section to the next.  This saved on material and made it a bit lighter since I was building it 4 units high.  I added small 2x3 feet to the bottom to clear an outlet behind the toy bin.  Two L brackets were used to anchor the unit to the wall. 

Built from Plan(s)
Estimated Cost
Cost was about $80 for materials. The stain was a mix from what I already had.
Estimated Time Investment
Afternoon Project (3-6 Hours)
Finish Used
Minwax polyshades. This was a mix of a couple stains I had left over.
Recommended Skill Level
Beginner

His & hers studio closet

Submitted by Anonymous (not verified) on Wed, 12/26/2018 - 22:55

Instead of using galvanized pipes, to save money we opted for ready made closer rod & hardware from Lowe’s and added additional 2x4 pieces perpendicular to the shelf supports and screwed the closet rods into those. 

Built from Plan(s)
Estimated Cost
>$200
Estimated Time Investment
Weekend Project (10-20 Hours)
Finish Used
Weathered oak stain
Recommended Skill Level
Beginner

Ana’s Rustic Bench

Submitted by Anonymous (not verified) on Sat, 09/03/2022 - 17:42

I used Ana’s plan to build this great bench for the Master Bathroom. It works out great!

Built from Plan(s)

Comments

Square farm table

Submitted by Lady Goats on Sat, 08/13/2011 - 21:03

My couches were inherited from my mom, and she loves everything BIG. So I have very deep, very tall and very BIG sofas that need a hefty table to hold it's own between them. I was working on converting the dimensions of the modern farm table on my own, but Miss Ana is known to be a mind reader, and drew up these plans before I finished mine!

I am terrible when it comes to a) reading the advice given in comments and b.) finishing, so I didn't know it would be absolutely beneficial to stain these pieces before assembly... OOPS! At least it's in a corner! :-p

Estimated Time Investment
An Hour or Two (0-2 Hours)
Finish Used
Minwax Gel Stain - Mahogany
Recommended Skill Level
Beginner

Modern Craft Table

Maui Costco had a craft table but I waited too long to go back (1 week!) and they were sold out & discontinued. I stumbled across Ana White's website and found the "modern craft table." After a couple of modifications I am extremely happy with the results, as is my Golden Retriever "Buddy" who likes hanging out underneath while I am working. And yes, he has a mohawk!

Built from Plan(s)
Estimated Time Investment
Week Long Project (20 Hours or More)
Finish Used
latex & primer in one
Recommended Skill Level
Intermediate

Comments

tracysmith

Sat, 09/14/2013 - 23:39

Buddy looks very comfortable under "his" craft table ;-). Great job and isn't it fun to get something you want anyway - even after the big stores have sold out or discontinued, or both!? Love that part of building!

Modified Michaela's kitchen island

I used the plans from Michaela's kitchen island, but modified the top. Instead of 2x4s pine studs, I used black walnut boards a friend of mine had lying around. They were ~1x8" boards so I ripped them to ~4" width and ~60" length. They were a little warped so I glued and screwed them togther using a Kreg jig (best tool ever). This made a huge difference and there was only minimal gaps (1/16") between the boards. I ended up borrowing a belt sander from another friend to take out the 1/16"-1/8" lips in the boards. First time using a belt sander and it took a few minutes with 80 grit across the grain to get a level surface. Used 120 grit paper with the grain to smooth out the scratch marks from the 80 grit. Attached the top to the base with screws, finish sanded with 220 and 320 grit, cleaned up the dust with a tack cloth and then applied a few coats of polyurethane. For the drawers, I couldn't find 21" slides so I ended up modifying the drawers for 20" slides. Another fun and satisfying project!

used the plans for Michaela's Kitchen Island, more or less, but scrapped the top. Instead of wood, I went with a piece of Corian that I got very, very cheap at a local recycled building materials store. It was not that much more expensive than using wood, believe it or not. It's also easier to work with than wood, at least for this project. We even had enough left over for 2 large cutting boards. - See more at: http://ana-white.com/2012/02/kitchen-island-w-corian#sthash.yUJ3fA16.dp…
Built from Plan(s)
Estimated Cost
$200, includes cost of wood and hardware. The black walnut was free, but otherwise would be over $100.
Estimated Time Investment
Week Long Project (20 Hours or More)
Finish Used
Behr "Frost" semi-gloss paint for the base, Minwax Fast-Drying Polyurethane for the top. After cutting all pieces, but before assembly, I applied a coat of white primer to all base pieces. I then applied 2 coats of Frost semi-gloss. For the top, I applied coats of polyurethane with light sanding using "0000" steel wool between coats. Synthetic 2.5" bristle brushes were used for paint and polyurethane.
Recommended Skill Level
Intermediate

Comments

Boys Garage Bookshelf

Submitted by Chriss45 on Sun, 12/30/2018 - 09:55

I built this bookcase for a friends son for Christmas. She sent me a sketch of what she wanted and I drew up the plans in sketch up. I built it out of plywood and capped plywood with poplar strips. I made the Cedar shingles out of Cedar shims that I cut down to 2 inches, I used corrugated metal for door panels to give garage look.

Built from Plan(s)
Estimated Time Investment
Weekend Project (10-20 Hours)
Finish Used
Behr satin paint
Recommended Skill Level
Intermediate

Comments

My pottery barn ledge

Submitted by ajcajj on Tue, 08/16/2011 - 10:59

I've been wanting the pottery barn decorative ledge forever! I saw the picture online and was hoping I could find a tutorial for it. I ran across a couple but they weren't quite as big as the original and I wanted it to hang above my king size bed. So yesterday I headed out to my garage where I new I had a bunch of scraps/leftovers from my projects as well as my neighbor brought over some of his scap wood. I printed of the PB picture and wrote down the dimensions and got to work! This was my final result.

Estimated Cost
I only bought one piece of trim for $6.36.
Estimated Time Investment
Day Project (6-9 Hours)
Finish Used
I stained with a chocolate brown stain. I then brushed a light coat of white sanded/distressed and then brushed stain on and wiped it off.
Recommended Skill Level
Intermediate

Comments

Barn Wood Buffet

Submitted by nickdevos on Mon, 09/09/2013 - 13:20

Finished this project using scrap pine for the frame and shelves and old barn wood for the doors/siding/table top. Turned out great, can't wait for other projects to finish.

Estimated Time Investment
Weekend Project (10-20 Hours)
Finish Used
Minwax Special Walnut
Recommended Skill Level
Starter Project

Comments

nickdevos

Tue, 09/10/2013 - 13:23

hello, I really don't have plans for the project but I could send some pictures to you that would show how it was contructed. For the legs, lower shelf box, and table top box I used precut standard board (scrap board from Menards, $1 a piece. and then I glued the doors together and the side skirts, the back I just screwed on from the inside and these parts were all the barn wood.

Sliding Door Console

Submitted by kbdesigns on Sat, 11/14/2015 - 12:10

This is my build of the sliding door console. I built this for my wife after she insisted we needed this for our dining room. The build overall was pretty easy, after my wife decided to change the paint color 3 times (yes, after we had bought the gallons, and I had it completely painted every time). I will say though that if you plan on painting this then you should use plywood for the front facing boards of the frame. I built mine over the course of about a month and after I had painted it I noticed significant wood shrinkage on the areas where boards came together. Plywood shrinks minimally if any at all so it should take care of that issue.

P.S. Don’t mind the unfinished construction in the background, we are in the process of installing bigger baseboards, and the planked walls are still unfinished.


Built from Plan(s)
Estimated Cost
$180-240
Estimated Time Investment
Week Long Project (20 Hours or More)
Finish Used
Special Walnut
Recommended Skill Level
Intermediate

Comments

kbdesigns

Wed, 12/23/2015 - 15:00

Hey, Im so sorry for the late reply. I hope you were able to get that doors/hardware done without problems! The doors werent bad at all, I added right angle bar below the door into my plan to keep them gliding smoothly and in line. Also we have a 1 and a half year old that would most definitely figure out a way to get the doors off without it. As far as the rest of the hardware, I used the link that Ana posted on her original post for building it, it wasnt too bad at all. I had to improvise on a few things, other than that I just followed the instructions. Let me know how yours turned out!

Ashlin

Sat, 03/26/2016 - 08:44

Looks fantastic! Where did you purchase the barn door hardware from? Finding it difficult to find some that won't break the bank!

Shannon92314

Fri, 07/22/2016 - 23:56

I recently completed this project with a few changes. I used 1/4th inch aluminum flat bar for the track and the hinges . For the wheels I used metal screen door replacement wheels. I originally had the pully wheels, but when they are on flat bar it's very difficult to move and has a rough time sliding across the flat bar. The screen door wheels were about $6 and gives you a nice smooth glide for your door, because the wheels have ball bearings. 

ryanb4614

Sat, 01/09/2016 - 17:53

Hello. I have one built, about 90% done just need some staining and paint. My wife and I went to home depot today to look at paint and looked are your intellectual because we really like how yours turned out. Intellectual looks to be a dark gray? In your pictures it looks like there is a possible tint of a blue? What finish did you get? We bought a sample and painted a piece of the wood to see how it would turn out in our room. Doesn't seem to match your color.


I made some dimension alterations to our, will post picture when its complete.

kbdesigns

Tue, 02/16/2016 - 20:14

The color is intellectual, but the light coming in might make it look a little blueish. Also the color we have our walls painted behind it is "steel blue," so it may be making the buffet look more blue than gray. The finish we used was satin. Sorry this is a late reply but I hope you got yours all finished and love it!

Lvc1013

Fri, 01/08/2016 - 20:24

Can anyone recommend where to find 2x3 pieces of lumber like she calls for in this plan?  We can find 1x3 and 2x4 but no 2x3s anywhere!  

Stockweb

Sat, 01/09/2016 - 05:09

I'm getting ready to build this and found them at Home Depot. 

Stockweb

Sat, 01/09/2016 - 05:10

I'm getting ready to build this and found them at Home Depot. 

ryanb4614

Fri, 01/15/2016 - 14:43

Is that a 1x10 or 2x10 on the top. All 2x10 I find are rounded on the edges and yours look squared. Ran threw the table saw but now I am short and to big of a gap.

kbdesigns

Tue, 02/16/2016 - 20:18

I used 2 2x10s for the top but I jointed them first so that may be why it looks squared. I ended up rounding it over a little bit anyway to soften the edges. I ended up cutting off more than I wanted also and while I didnt have a gap on mine - the edge doesn't hang over on the front as much as I would like.

phillbuider

Fri, 02/05/2016 - 10:29

what color stain did you use? and when you painted it, did you spray it or roll it on? I'm struggling with the quality of paint job I can do once I finish a project

kbdesigns

Tue, 02/16/2016 - 20:22

The stain I used was Miniwax "Special Walnut." I actually used our paint sprayer that we got for a christmas present for the first time! It took a lot of practice and I ended up having to sand off a bunch before I got the technique down, but in the end it was worth it. The sprayer makes it look much more professional and finished. Just be sure if you use a polyeurathane for a sealer, that you get a water based and not an oil based.

kbdesigns

Sun, 01/15/2017 - 07:07

Sorry for late reply, I never get notified when there has been a comment. At the moment they slide all the way off, but there is a simple pin system you can use that stops them from sliding off. Thank you!

bcnk

Mon, 12/12/2016 - 08:53

So in the materials it lists 

2 - project panel pieces 17-1/4" x 36" (may be advertised as 18" wide project panel - measure in store)


What is the thickness of these supposed to be?  I cannot find this at any hardware store and was going to ise 1x4 strips instead.  My question is, if this is going to have heavy use, do I need to use thicker boards to ensure it can hold the full weight of the top?


This is for my art studio and will hold tools, printer, laptop ect.  


thanks!
B


bcnk

Mon, 12/12/2016 - 12:03

HELP WITH PROJECT BOARD SIDES

So in the materials it lists 

2 - project panel pieces 17-1/4" x 36" (may be advertised as 18" wide project panel - measure in store)


What is the thickness of these supposed to be?  I cannot find this at any hardware store and was going to ise 1x4 strips instead.  My question is, if this is going to have heavy use, do I need to use thicker boards to ensure it can hold the full weight of the top?


This is for my art studio and will hold tools, printer, laptop ect.  


thanks!
B

kbdesigns

Sun, 01/15/2017 - 07:11

I believe the thicknesses are the same of 1x material that you find at a big box store. If you are going to lowes or home depot it would be in the back of the section where the nice 1x boards are (pine ranging from 1x2-1x12). They will be wrapped completely in plastic shrink wrap. Hope this helps, sorry for late reply!

Fancy X-Brace Farmhouse Table and Bench

Submitted by Anonymous (not verified) on Mon, 09/26/2022 - 12:53

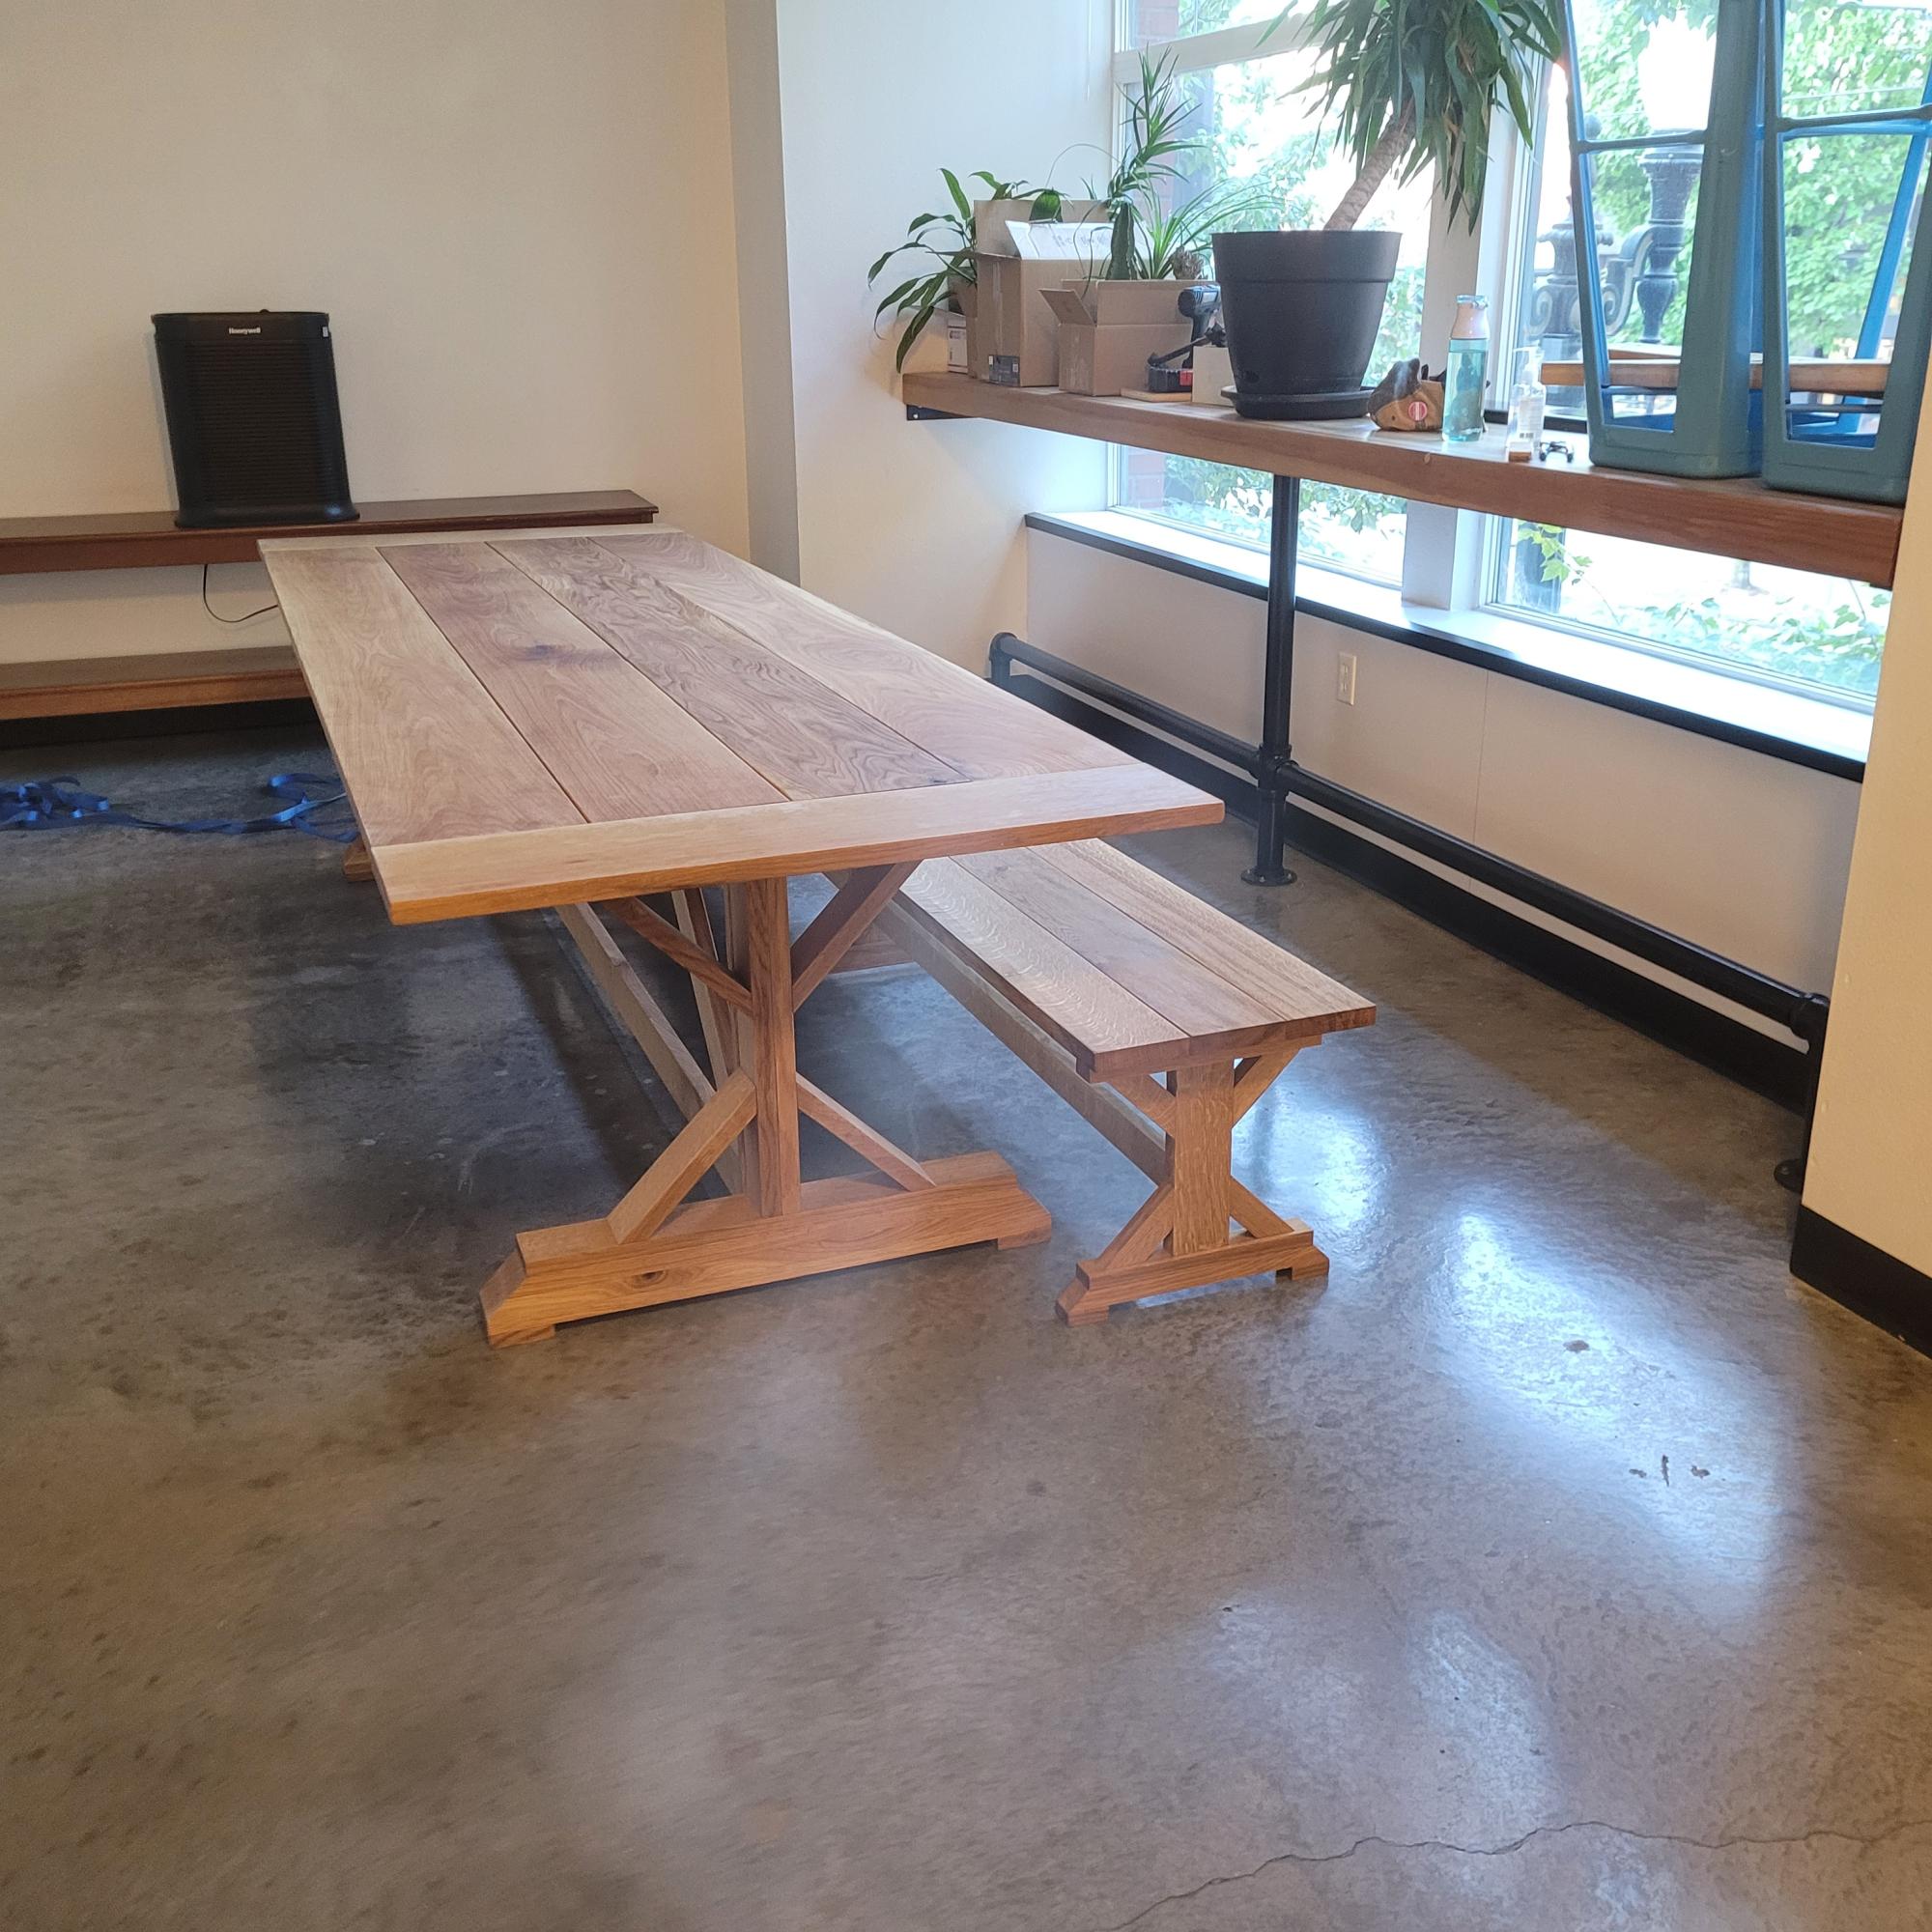
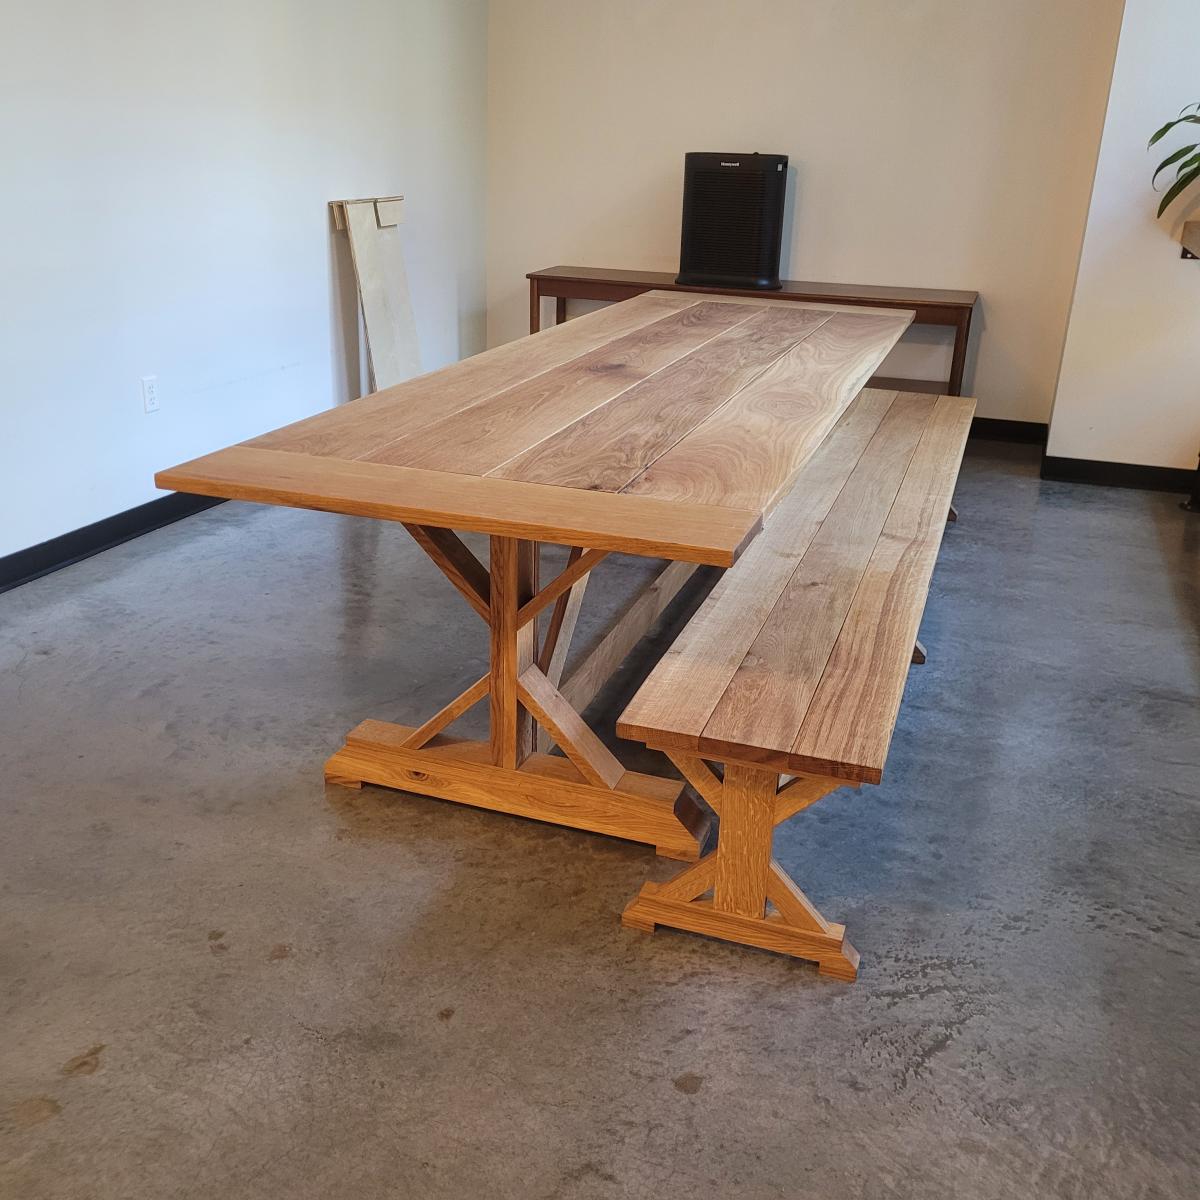
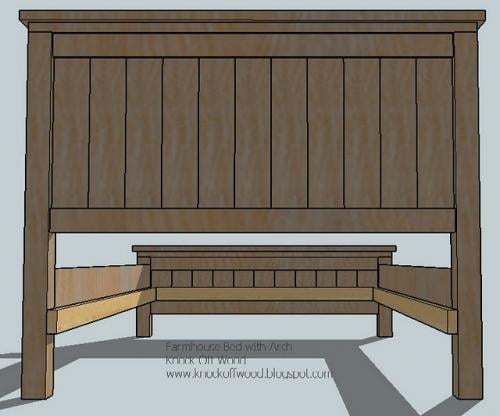
My employer asked for an "upscale farmhouse table" to act as a feature in our new training facility. After perusing designs online, I found this one and decided to upgrade it just a bit for the stated purpose.
Made entirely of white oak (over $1600 worth!) purchased as 4/4 and 5/4 stock, I milled all the lumber to spec in our shop. As it was to be 10' in length, and I was unable to acquire acceptable wide stock for the tabletop in that length, I went with breadboard ends, which also seems to have served to upgrade the appearance over "picnic table" to elegant showpiece. All joinery is invisible, using mostly dowels and glue where joints had to be hidden.
Final treatment was with tung oil, and it took up residence in its permanent home last week. I had to assemble it on-site, as there is NO way to move a table of this size in and out of the building. It's there to stay.

As my lumber wasn't exactly spec-size (1X4, 2X10, etc), I had to do the math and make some adjustments to achieve spec height, but the final product is a rousing success.

Thank you for the inspiration.

Comments

Coffee table with storage, based on the factory cart coffee table.

Submitted by SuperMick on Sat, 08/20/2011 - 13:41

I modified the factory cart coffee table plans to make a coffee table with a removable top for storage. The result was more Pottery Barn than Restoration Hardware. I put a piece of plywood on the bottom, to make an enclosed box. Then modified the frame under the 1x6's of the top, to make it fit snugly in the opening of the top of the box. The sides of the box were 1x12's I had leftover from another project. Actually, everything was leftovers, except the 1x6's for the top, and the castors. The 4 inch castors were painted flat black with high heat wood stove paint (also a leftover from refinishing our pellet stove). I used smaller castors, since the table was already taller than the original plans.

Built from Plan(s)
Estimated Cost
$150
Estimated Time Investment
Weekend Project (10-20 Hours)
Finish Used
Espresso Stain (oil based)
Satin Polyurathane (oil based)
Ralph Lauren Flour Sack White Latex paint
Recommended Skill Level
Beginner

cabin in the woods

This was something I had always wanted to build for my nieces and nephew! it was a blast to build and see it come together. Two people working on this job is best. I loved the look of being able to open the doors top and bottom! I added the awnings above all the windows and doors to prevent as much water going into the playhouse as possible. The roofing was a little overwhelming at first but as we got going it turned out just fine! I wanted to lantern in the front to actually light up but I didn't want to run electricity so I got the lantern and put a motion sensor battery light on the inside and it works great! I also put one on the inside for more lighting there too, along with 3 battery "candle" lanterns. For the inside decoration I went with a wood land theme, put a growth chart on the inside wall to measure their height each year, and even made face masks! This is always and ongoing project for me seeing as how i'm always adding something new. The little ones love coming over and getting mail in the mailbox. Thanks Anna for the playhouse plans! I'm excited to see my nieces and nephews imaginations grow with all the possibilities the playhouse brings!

Estimated Cost
$250-$500
Estimated Time Investment
Week Long Project (20 Hours or More)
Finish Used
exterior paint from menards in "clam chowder" and the brown is exterior paint we had on hand.
Recommended Skill Level
Intermediate

Comments

amelierainfall

Tue, 07/29/2014 - 14:04

So I had a hard time figuring out which house to build for my daughter and your house gave me such inspiration! I cannot wait to make this for my little girls 2nd birthday. She loves play pretend. Thank you for your inspiration!