Community Brag Posts

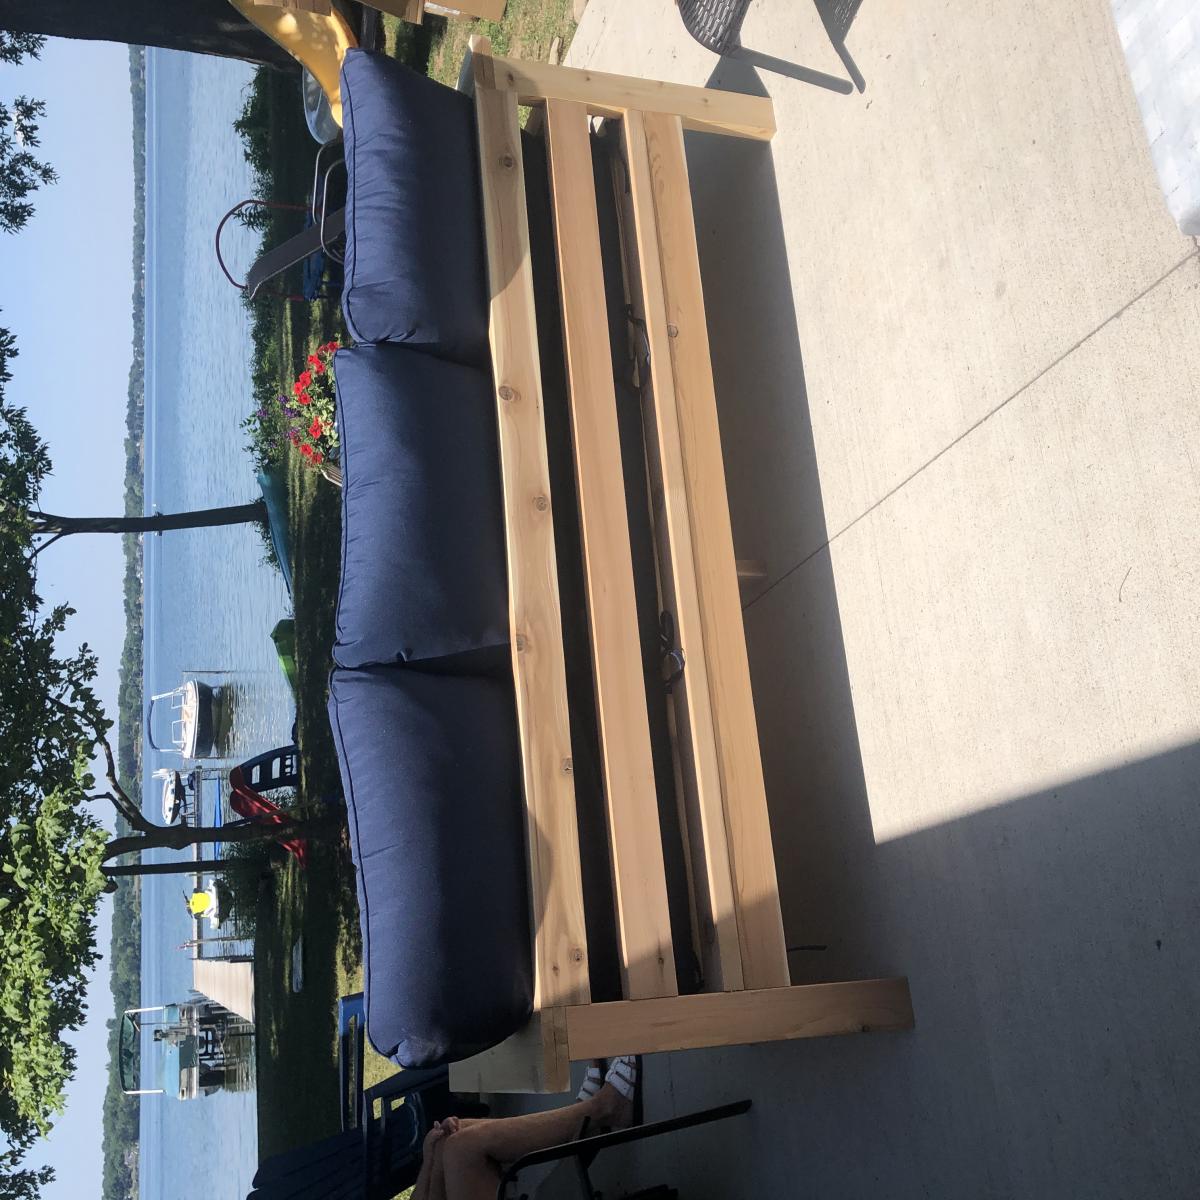
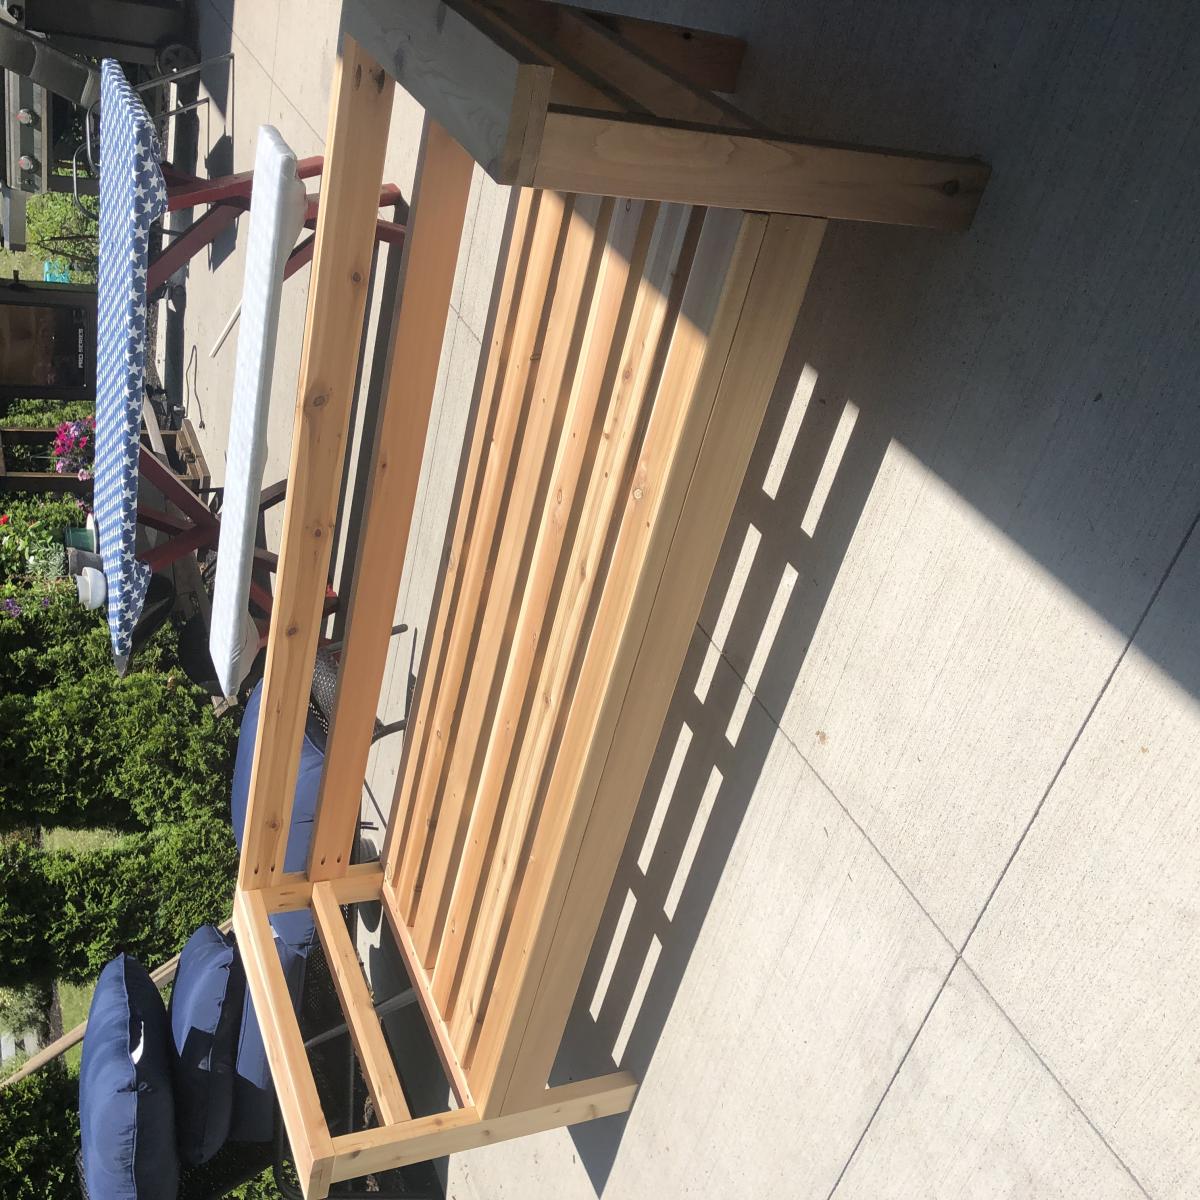
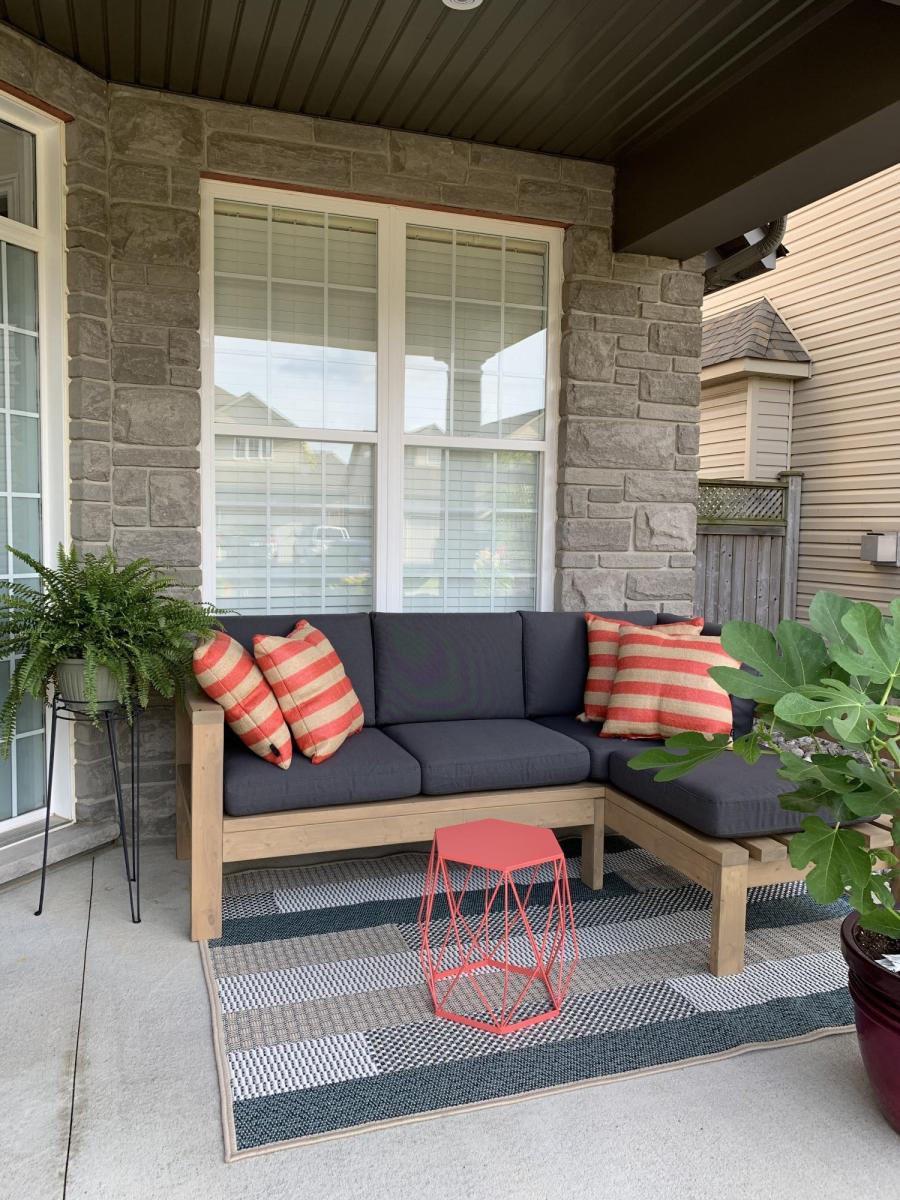
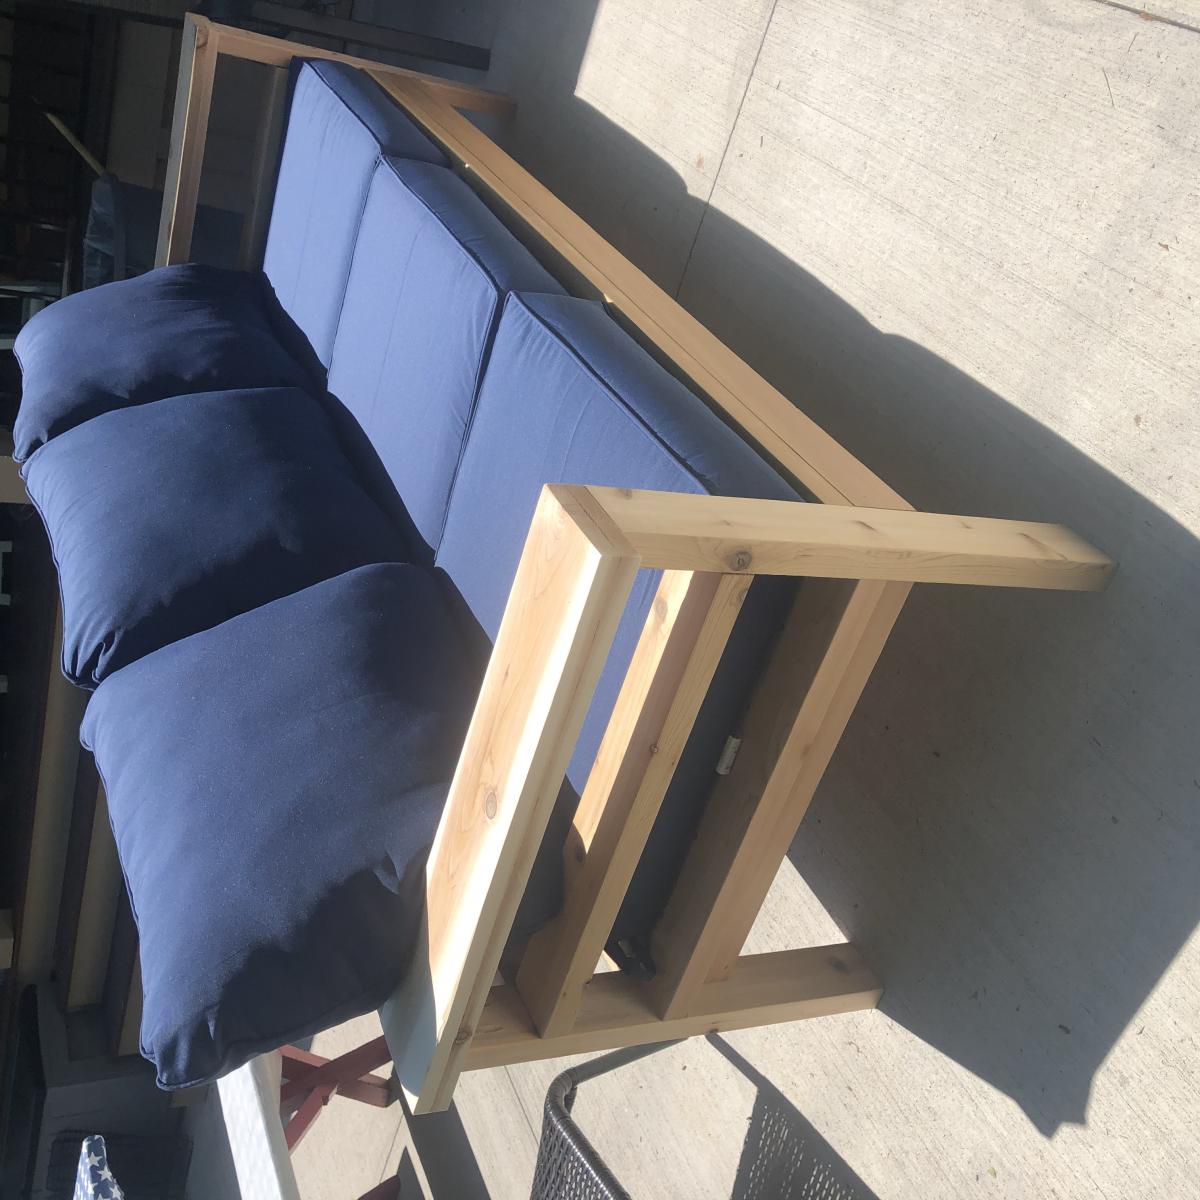
2x4 outdoor couch

Submitted by Anonymous (not verified) on Sat, 07/18/2020 - 18:46

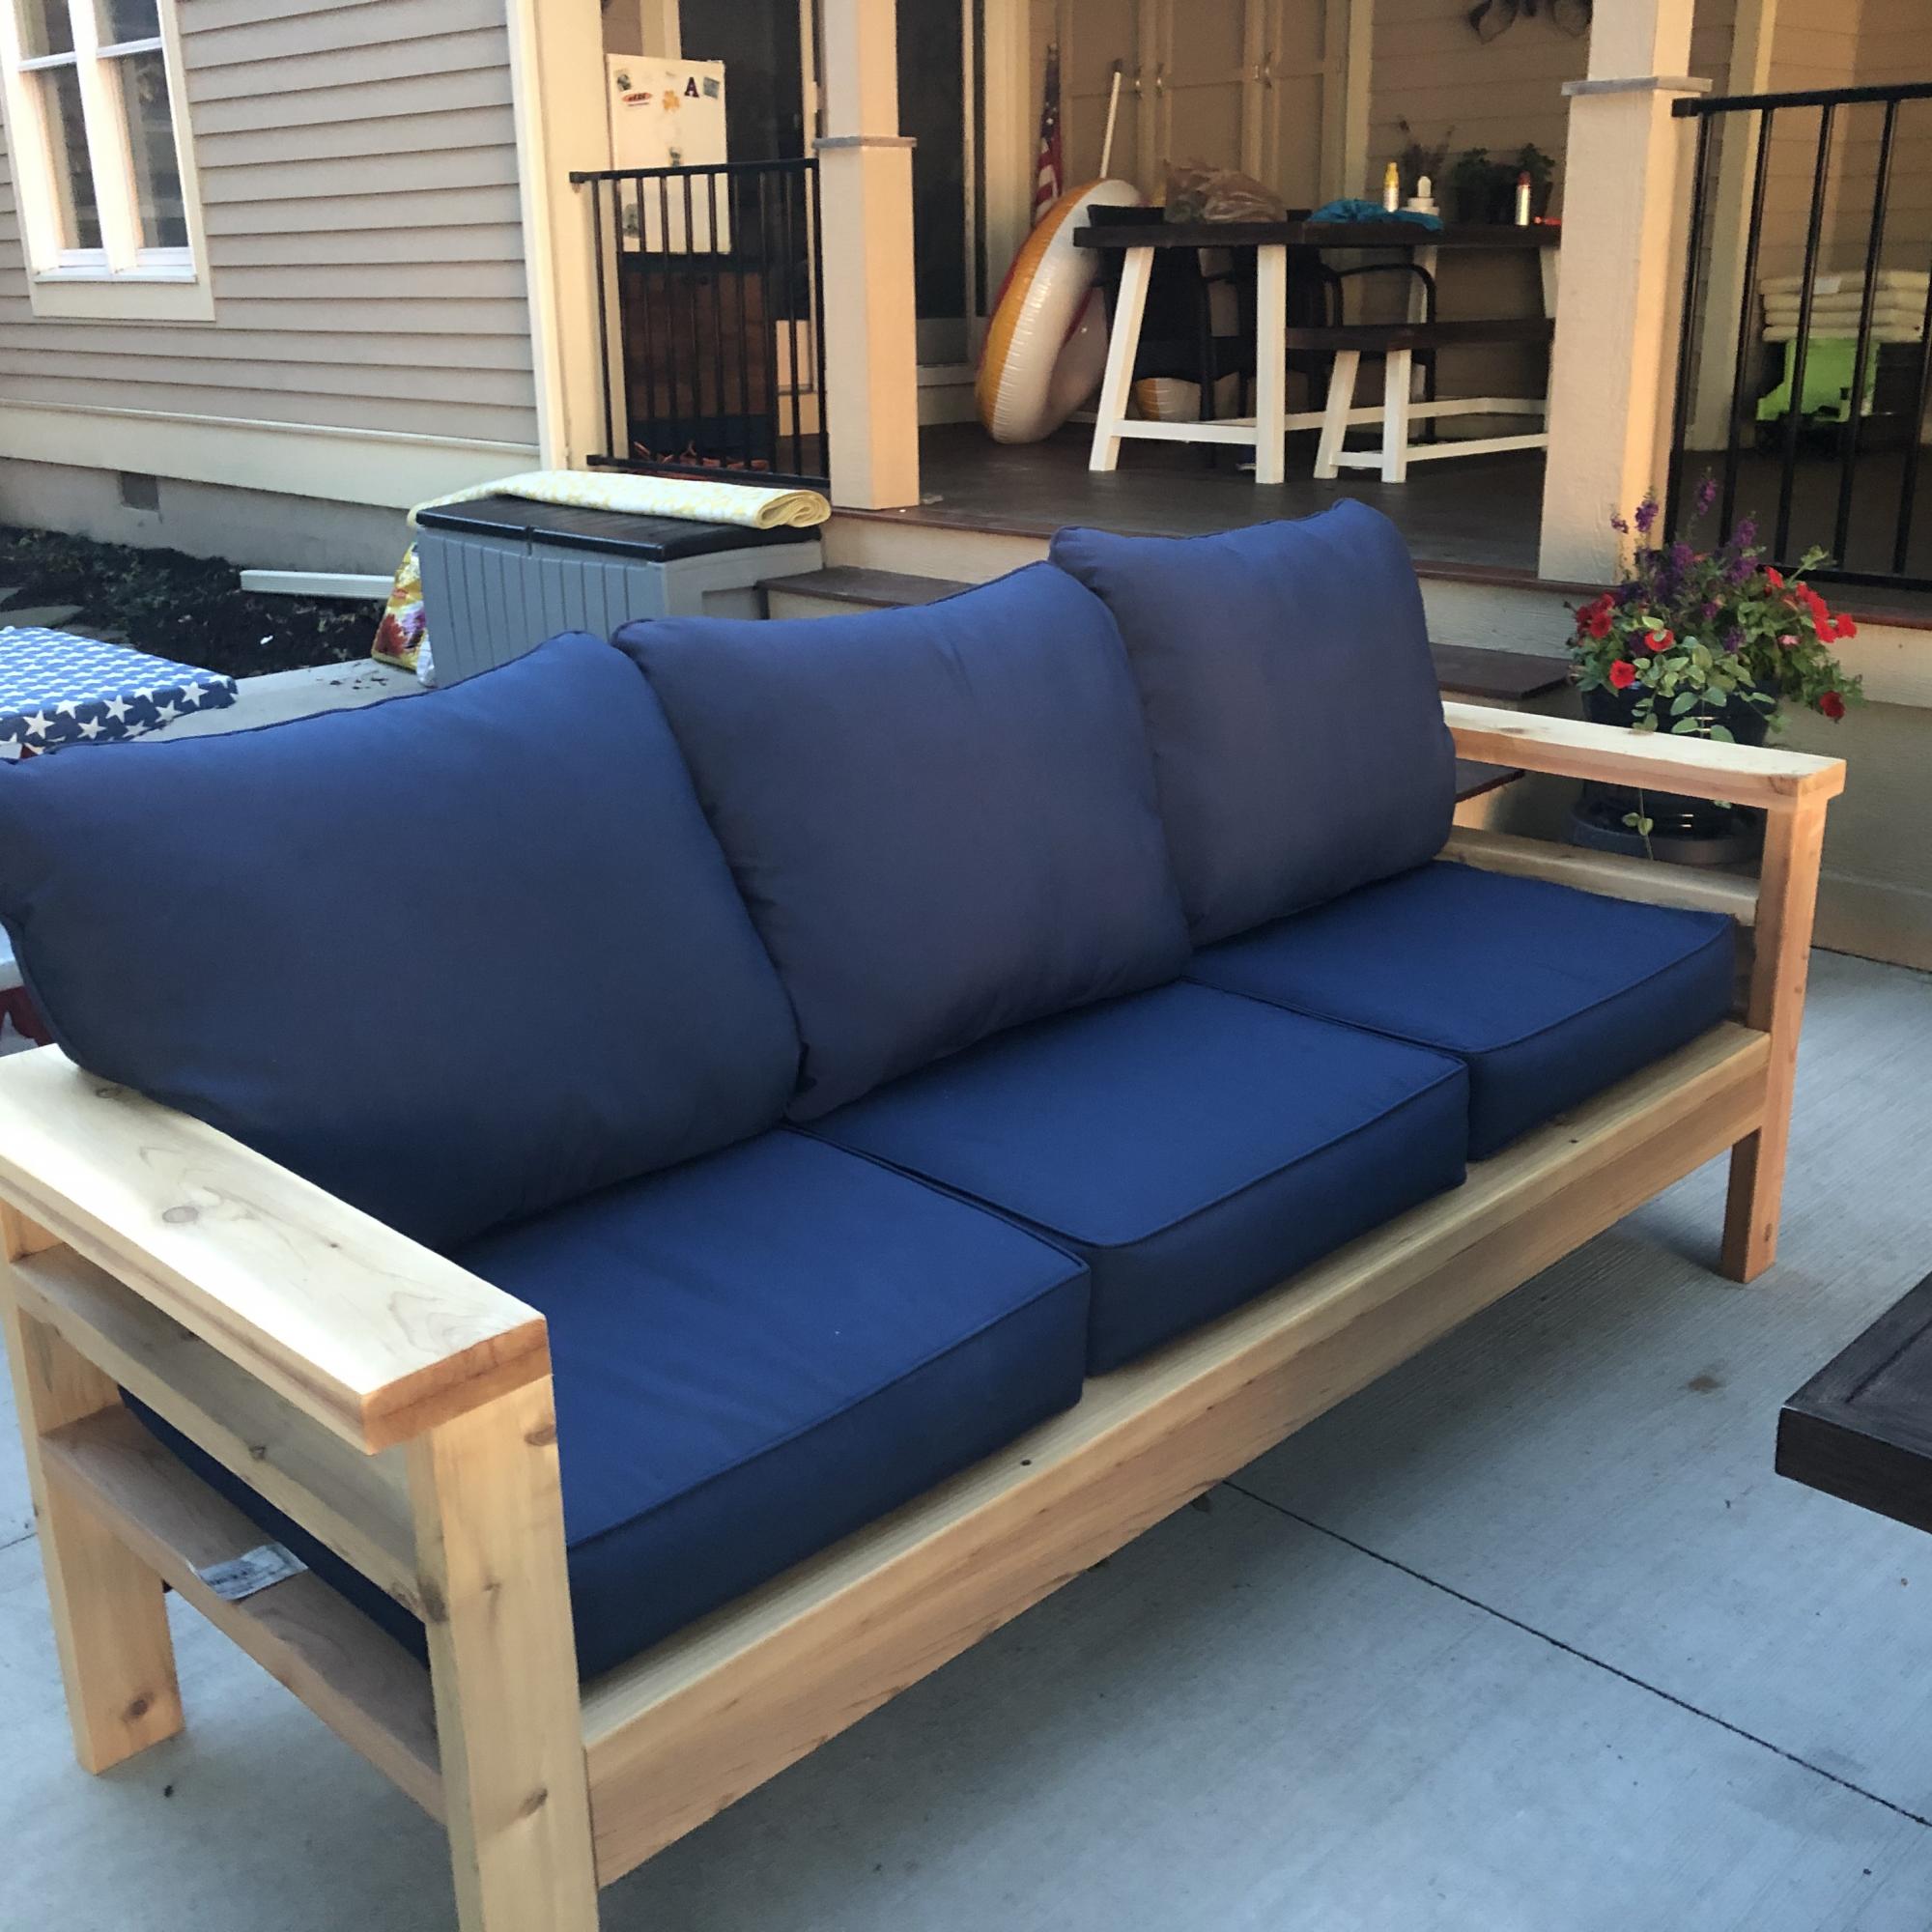
I used cedar and added the extra boards so the cushions would stay put. We also made the arms 2x6 boards so we wouldn’t need end tables for the couch. The plans were super easy to follow. I mostly used pocket holes so the screws wouldn’t be visible. Love how it came out! Thank you for the plans, Ana!!

Built from Plan(s)
Estimated Time Investment
Day Project (6-9 Hours)
Finish Used
Nothing yet. Deciding on whether to let it grey on its own
Recommended Skill Level
Beginner

Folding Workbench

Submitted by MrsCordz on Fri, 10/11/2019 - 07:47

We chose this project because we have a small garage and space is at a premium.  The dimensions of this build fit well in our limited space and allowed us to organize items such as paint, stain, screws and nails into one central location. I chose 2x4's on the sides to give it a more stable feel. Our garage and parking lot are all sloped and with the 2x4's this prevented the twisting. It feels solid and the wheels are smooth. We picked everything up at Home Depot. The screws that came with the hinges are to long and my husband used the Dremel to grind them down. You could just buy shorter screws.  This is one of my firsts builds and I've definitely learned a lot of lessons along the way. Measure, measure, then measure again before you cut a piece and use a level surface to make level pieces. Overall, everyone in my family played a part in helping me build this piece and so I love it and will cherish this piece and the memories always. Thanks Ana for all your fun videos, sharing your life with your family, and providing resources like this plan to us for free. I'm thankful for my son who bought me a compound miter saw for Mother's Day and other family for buying me a Ryobi circular saw. I'm truly blessed and loved. Thanks

Built from Plan(s)
Estimated Cost
120
Estimated Time Investment
Weekend Project (10-20 Hours)
Finish Used
I'm leaving it in the raw due to the nature of the piece. I may put a clear coat on it later.
Recommended Skill Level
Beginner

Comments

Farmhouse Storage Bed With Hidden Drawer

Submitted by Beekeeper on Wed, 12/10/2014 - 17:35

Ana, thanks for these plans! They inspired me to make my first bed build. I also want to thank all of you that added brag posts! They gave me ideas for some of the modifications that I made. I did this build by mixing your Queen Farmhouse and Queen Farmhouse Storage bed plans. I also added a number of modifications to suit my own preferences. The drawer boxes I changed by building a faceplate (I didn't want the plywood ends exposed), and by increasing in depth to maximize some additional storage. Since I increased the drawer sizes, I went with the euro roller bearing slides. I increased the foot-board height to be slightly higher than the mattress. I also designed the footboard to have a removable inner section with hidden latches on the inside. I did this because I wanted to make use of the "dead space" between the drawer boxes. I then used this space to house a hidden drawer, that is approx six feet deep (I couldn't help myself-I love hidden drawers wink). Because I added the hidden drawer, I changed the opptional center support to 4X4 blockes that were pocket screwed under the center of the boxes. I ended up using birch plywood and fir for this build. For my first bed build I'm fairly happy with how it came out. Thanks again!

Estimated Cost
I didn't keep exact track of the cost of this bed, but I think it was about $800.
Estimated Time Investment
Week Long Project (20 Hours or More)
Finish Used
I haven't got there yet, but I am planning on putting a mahogany stain and then a polyurethane. All
Recommended Skill Level
Intermediate

Comments

spiceylg

Thu, 12/11/2014 - 07:41

This is your first build and you did all of those awesome modifications?! Really impressive and it looks perfect! Congrats and welcome to the community!

In reply to by spiceylg

Beekeeper

Sun, 12/14/2014 - 06:03

Thanks for the compliments! It was a fun learning experience. Making all the modifications definitely slowed down the build, but also made it more rewarding!

beckbg

Fri, 12/12/2014 - 13:18

I just started my bed (mostly out of Baltic Birch) and am wondering where you were able to find such nice 4x4s. Your bed is gorgeous! No luck here. I bought redwood, but really wanted fir for the sharper edges. It's my first project, too. I also bought same drawer slides, but the soft close. Didn't want the slam. I figure building it will be the easy part compared to procuring nice 4x4s! Hope you can help!

In reply to by beckbg

Beekeeper

Sun, 12/14/2014 - 06:01

Thanks! The 4x4s I found at a place called Better Living Building Supply. They had a pretty nice assortment of fir, including the 4x4s, so that is why I chose it for the build. Finding the 4x4s slowed down my start on the build. Our local Lowes only had them in treated pine.

athingvall

Sat, 09/05/2015 - 20:47

Thank you for the pictures, the bed turned out Awesome.  I was wondering about the latching system for the foot of the bed.  Do you think a piano hinge on the lower would work too?  Also on the center drawer did you use rollers or is it just friction?  Can't wait to start the build.

Thanks

Codding58

Mon, 02/15/2016 - 14:11

This is excellent!!!   I really like this, so much in fact that the wife is going to have to get used to it too. lol   But really, GREAT work!    Any chance you could post a pic and or comment about how you attached that removeable end?    i think this is the best part!    Cheers!

Kmaynard19

Tue, 12/10/2019 - 08:42

Beekeeper,  Awesome build!!!  Have you posted your altered plans anywhere?  I'm very interested in your build, I was wondering about some aspects of it and how you approached it.  Plans would clear it up instead of bothering you with all my questions.

NinjaPinky

Sat, 06/20/2020 - 09:06

I, like many others, have been wondering if you'd share your plans for this modification. It just looks so great!

tammis50401

Mon, 11/16/2020 - 15:42

Bed turned out awesome. I was wondering if you have the plans for the bed with a list of supplies it took to make this bed. I so want this bed it's just what we are needing

Great job

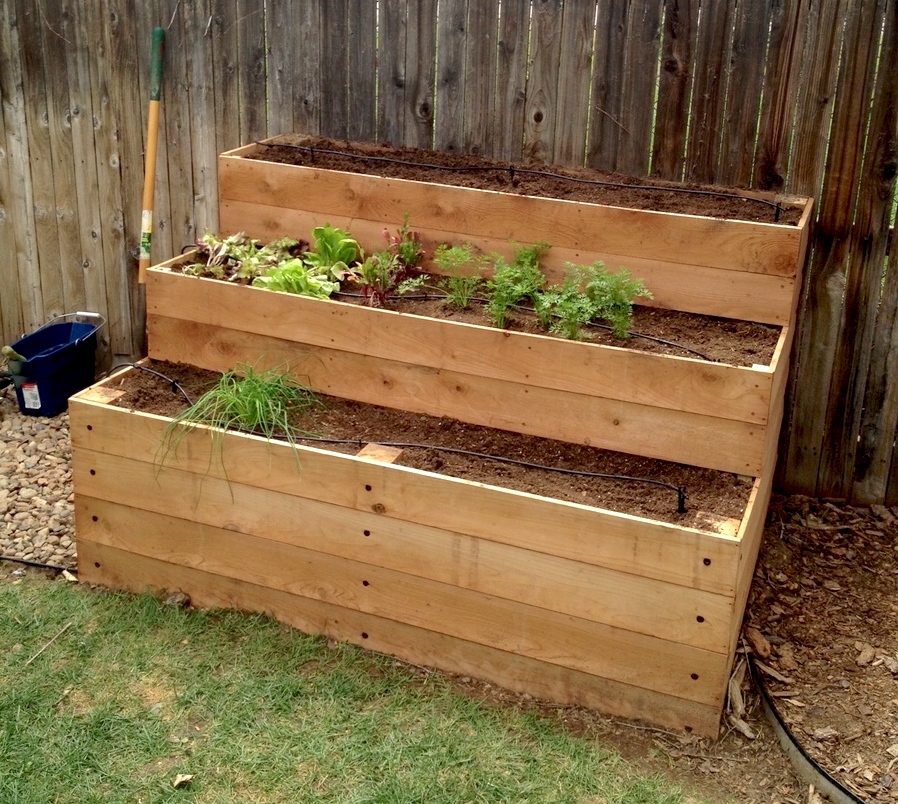
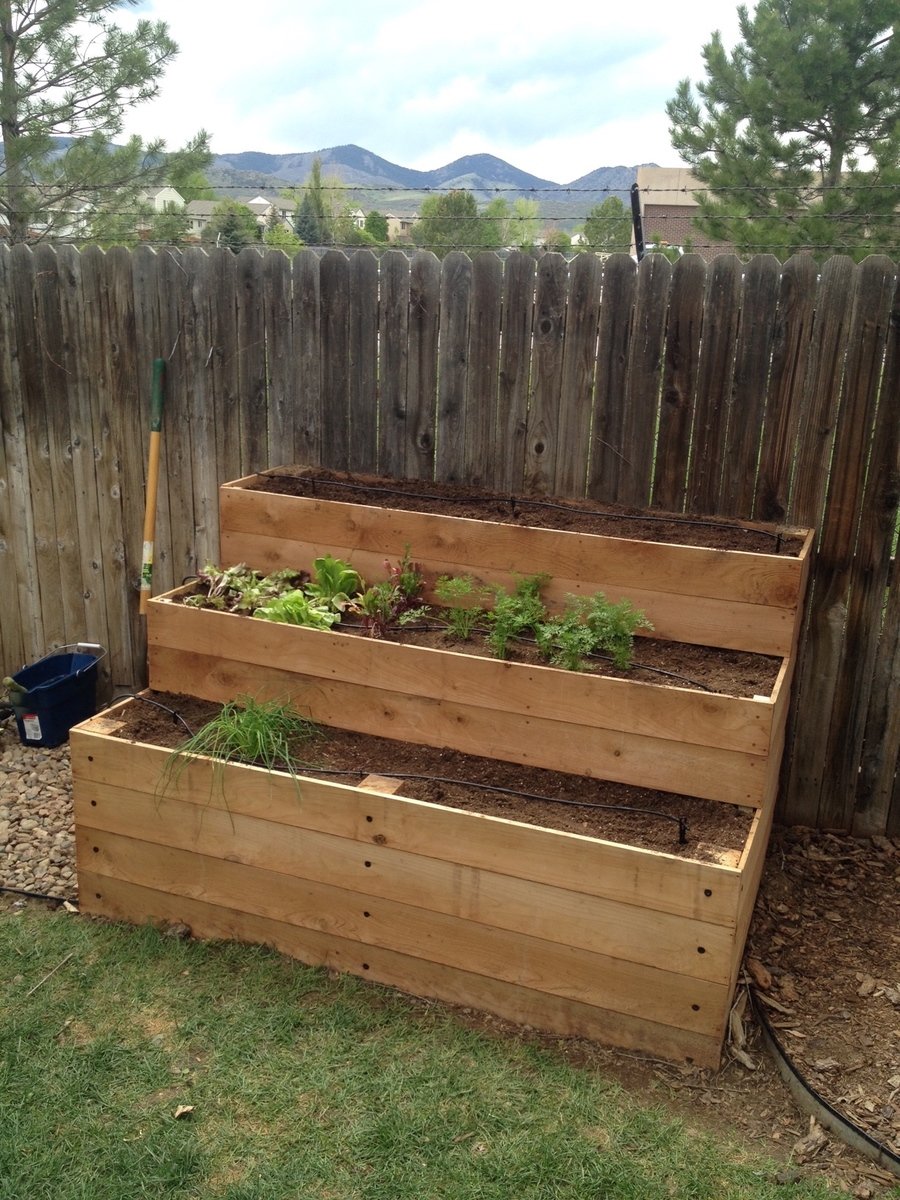
Cedar Raised Garden Beds - 3 Tiers

Steps:

1) Cut the boards to the specs below or adjust to your space

2) Kreg Jig the cut boards along each of the sides (length wise and on the ends) for attaching and making a box.  

3) Make 3 separate boxes, don't assemble until you move to location.  I used 4x4 cedar posts in the corners of the base box to add stability.  I used 2x2 pine in the front corners of boxes 2 and 3 for stability.  Install these after the dirt has been added so you can hammer in as a stake, attach with screws on front and sides.  I created 2 stakes for boxes 2 and 3 and added to the front to prevent bowing when the dirt is added.

Box Dimensions:

1) (base) 70.5" L x 46 W x 4 cedar boards high

2) 70.5" L x 32 W x 2 cedar boards high

3) 70.5" L x 16 W x 2 cedar boards high

Estimated Time Investment
Day Project (6-9 Hours)
Recommended Skill Level
Beginner

Headboard

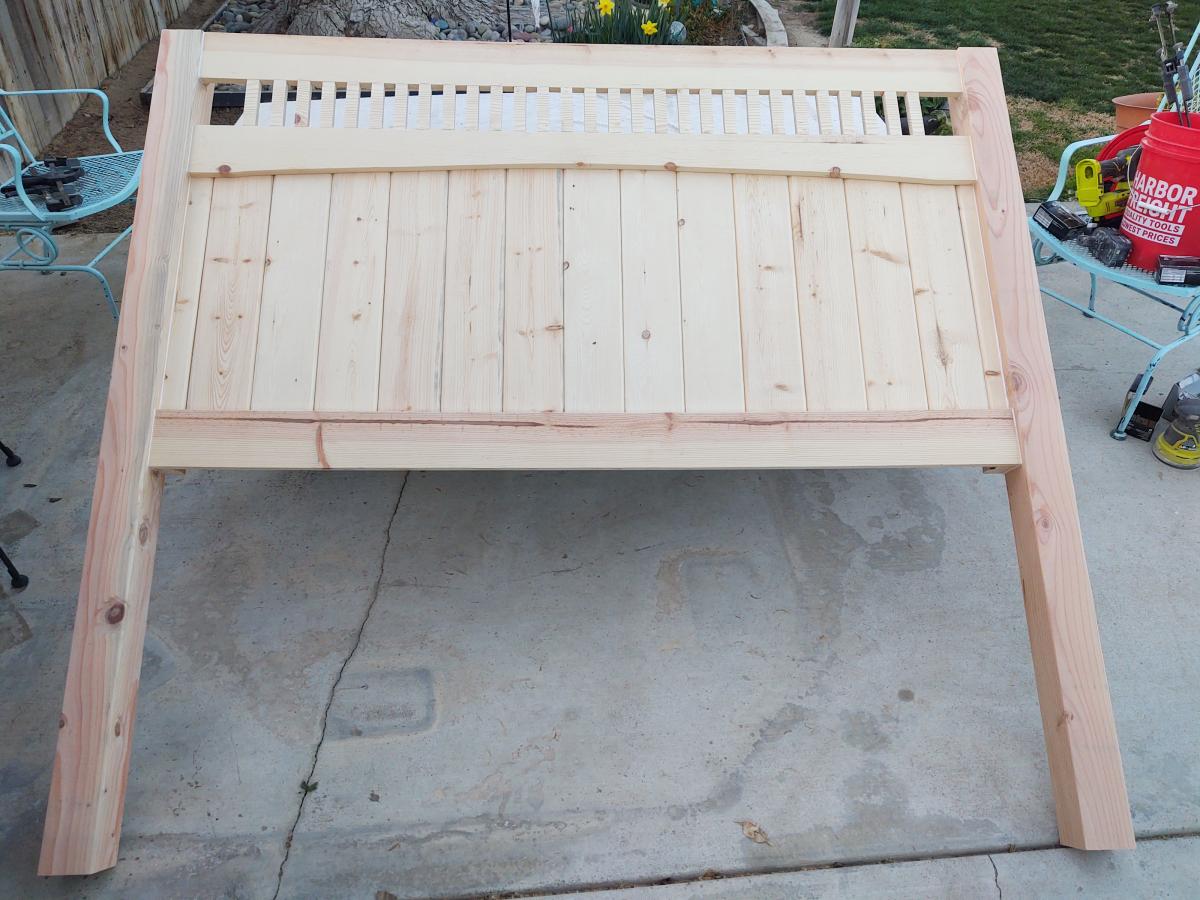
Submitted by Anonymous (not verified) on Fri, 02/24/2023 - 09:17

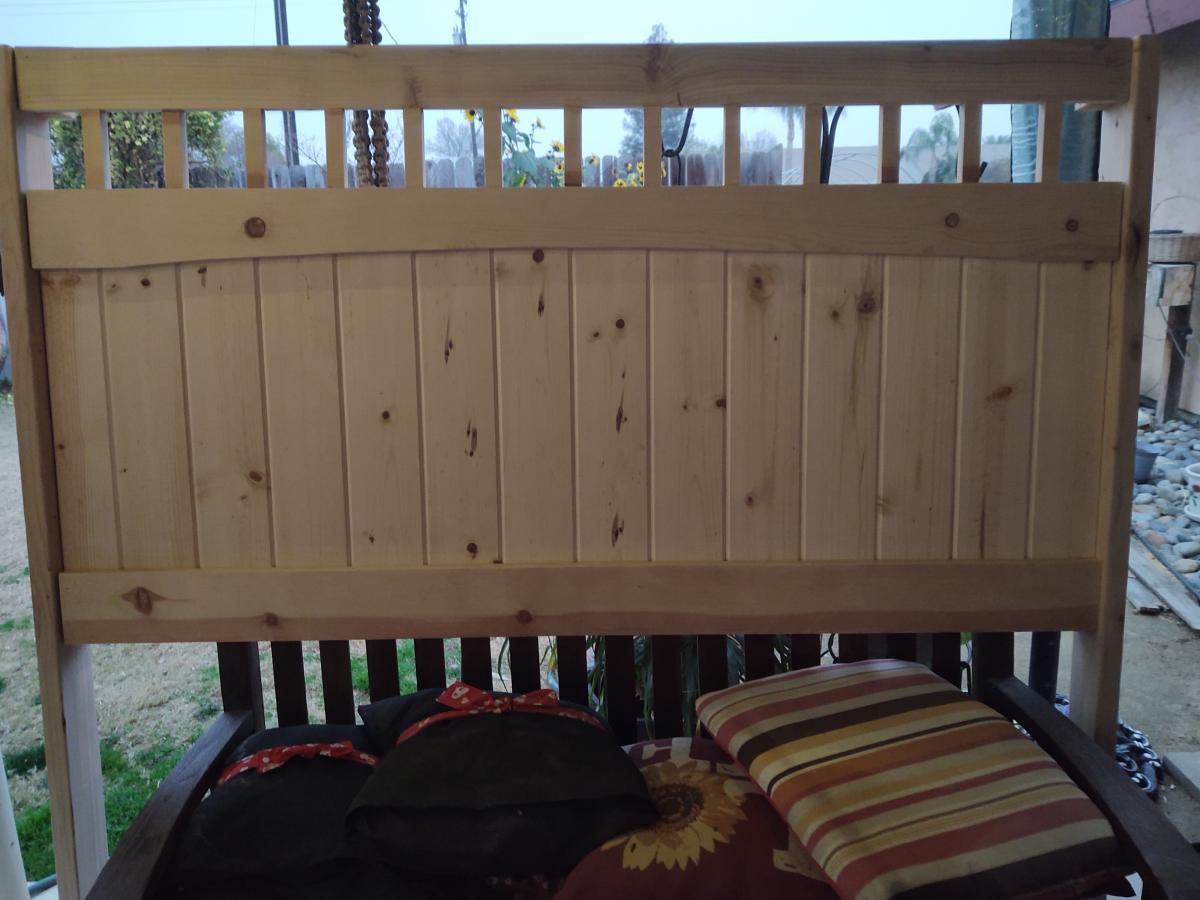
I followed your basic farmhouse bed plans and modified them. I have made three headboards now. Each time someone sees them, they want me to build one for them!

Built from Plan(s)

Farmhouse storage bed w/drawers (king)

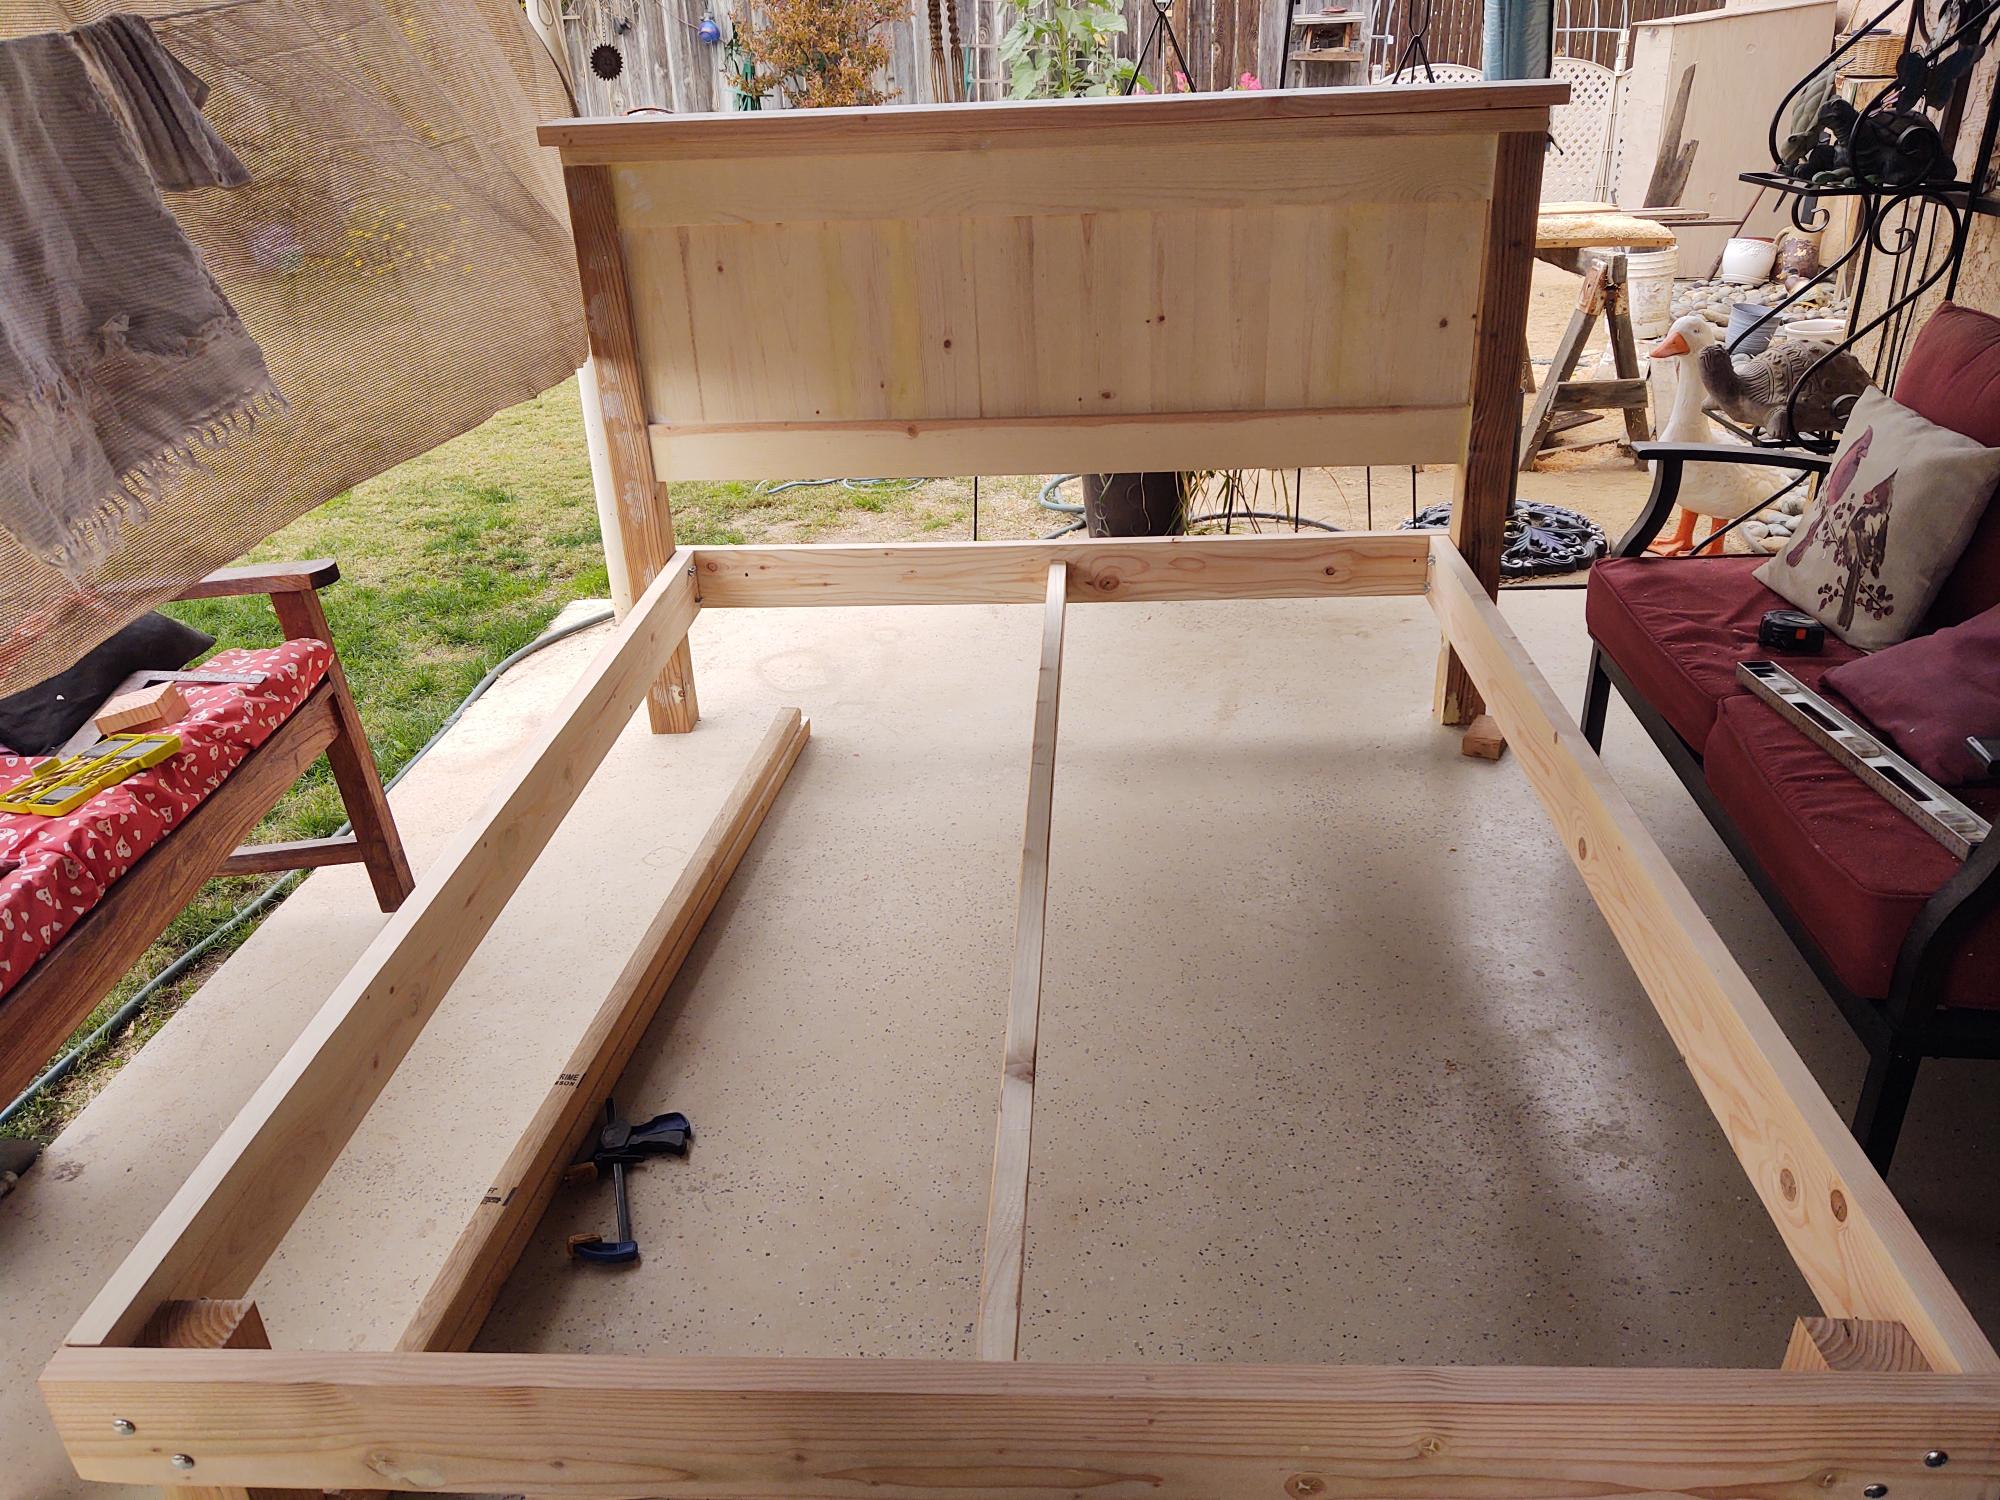
Submitted by Anonymous (not verified) on Fri, 03/10/2023 - 11:51

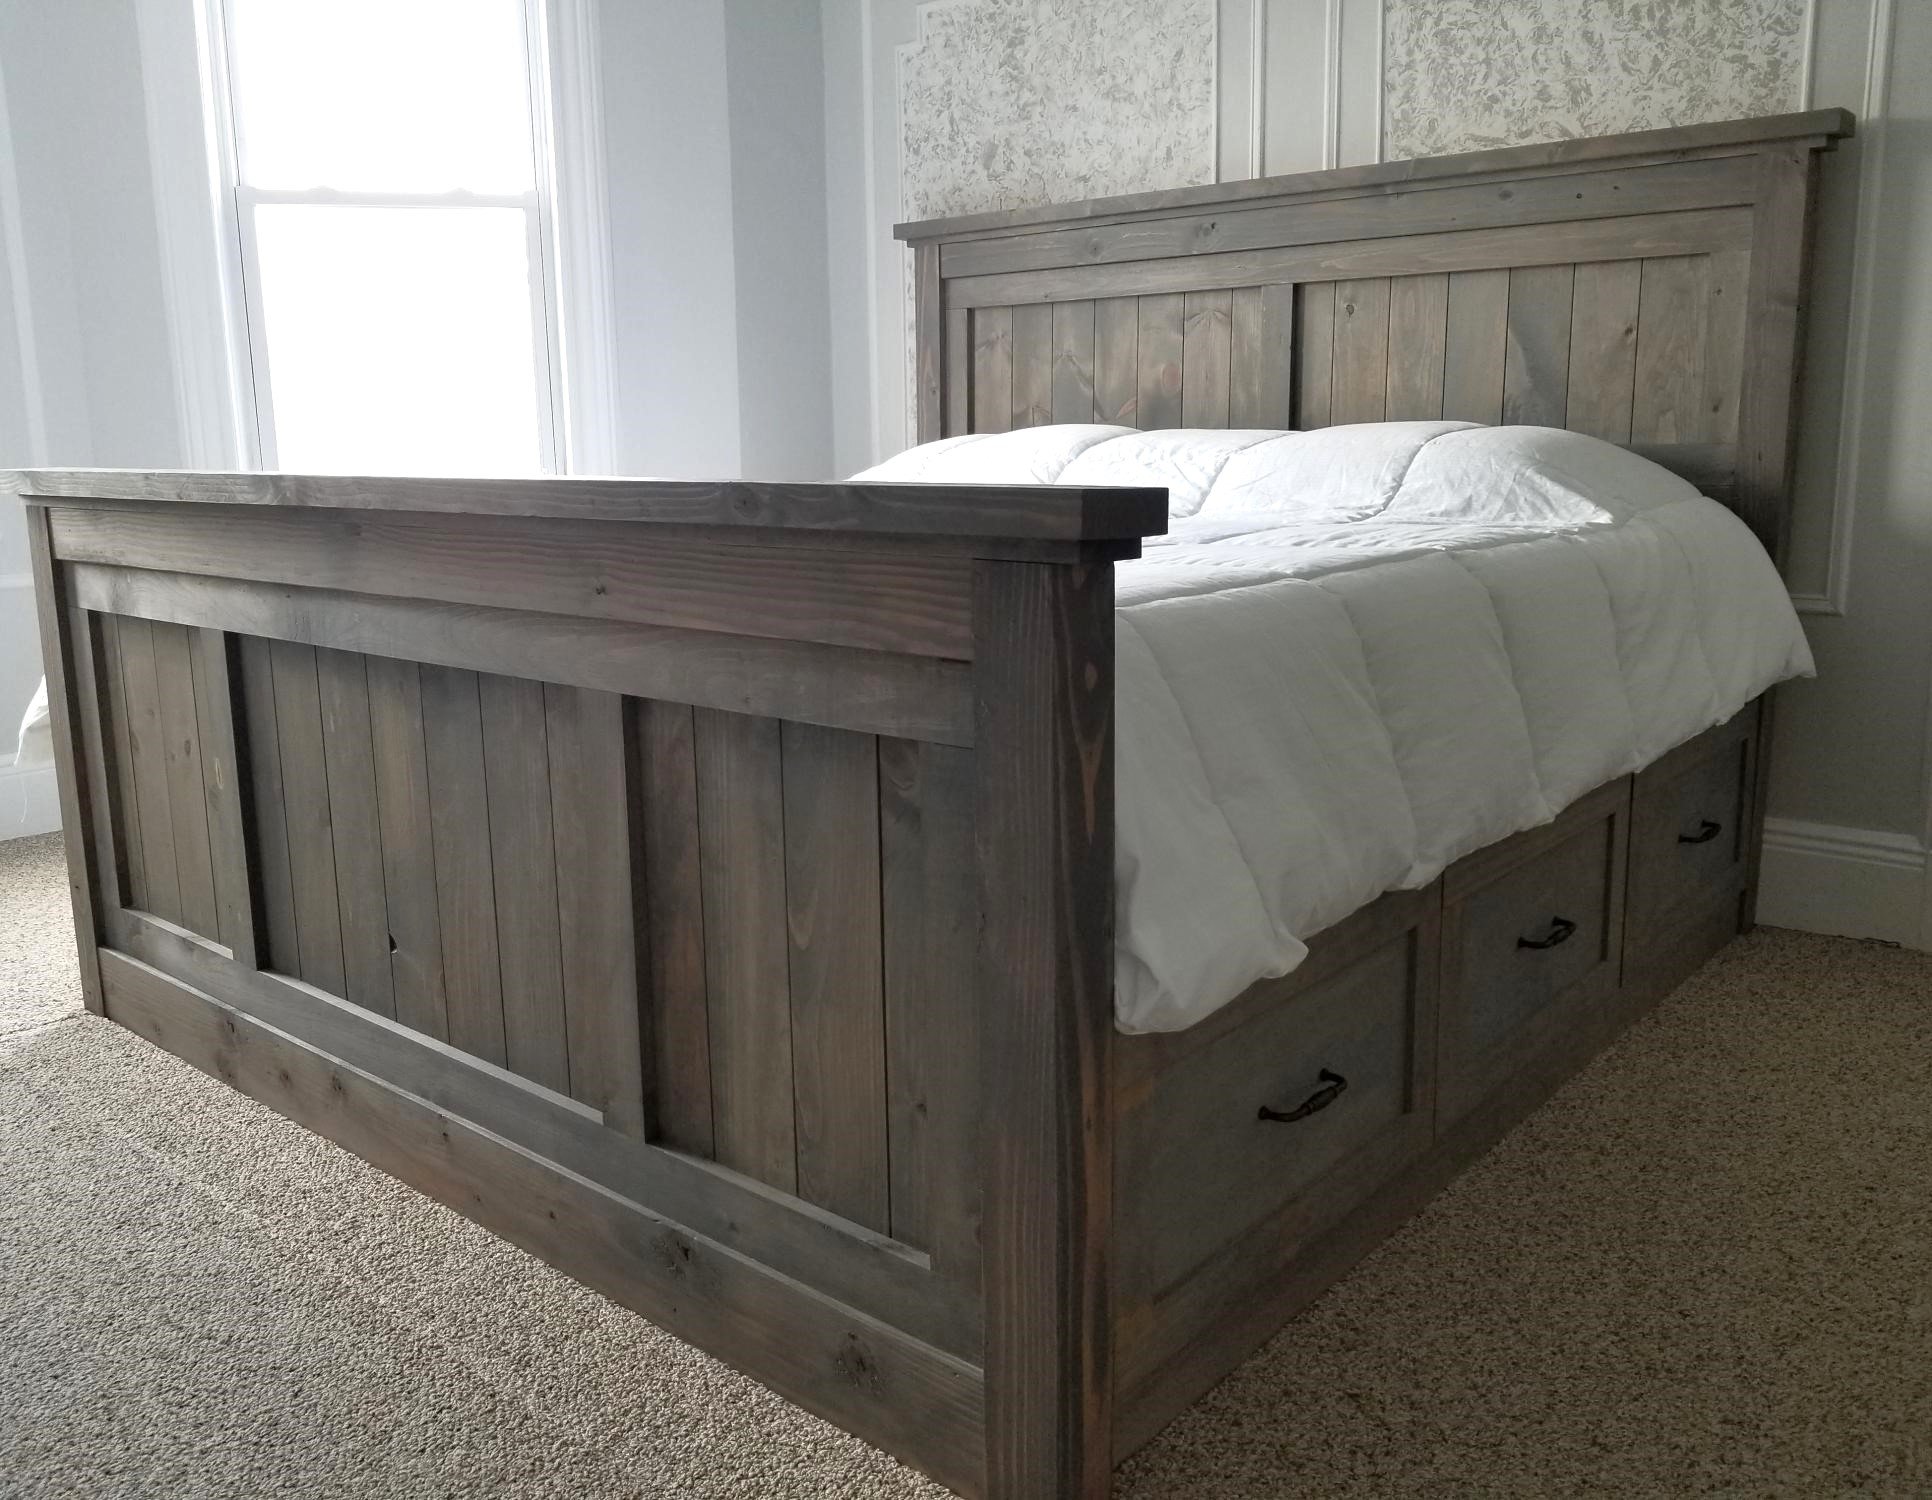
Seen this awesome plan on Anas site and had to build it in KING SIZE. The drawers are enormous, the bed is rock solid. I love it

Comments

Porch Swing

Submitted by jcole32010 on Tue, 10/18/2016 - 11:58

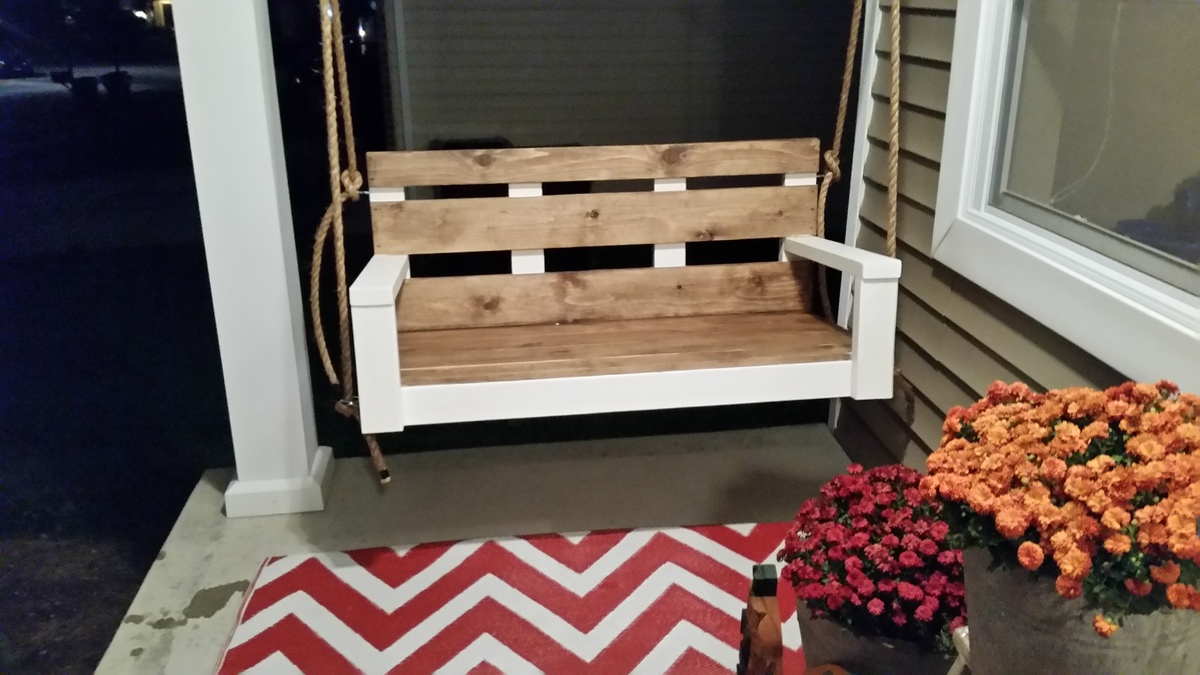
Loved building this one.

Estimated Cost
100
Estimated Time Investment
Afternoon Project (3-6 Hours)
Finish Used
Custom stain, dove white paint, general finishes flat out flat, and chunky rope.
Recommended Skill Level
Beginner

Just My Size Closet

Just My Size Closet!

Built this from Ana's plans with a few modifications.

Started with a big empty box after ripping the old stuff out and finished with this look.

Adjustable shelves and all !

Built from Plan(s)
Estimated Time Investment
Weekend Project (10-20 Hours)
Finish Used
Whatever white paint my wife bought !!
Recommended Skill Level
Beginner

Octagonal Picnic Table

Submitted by frmoody on Fri, 05/28/2021 - 15:08

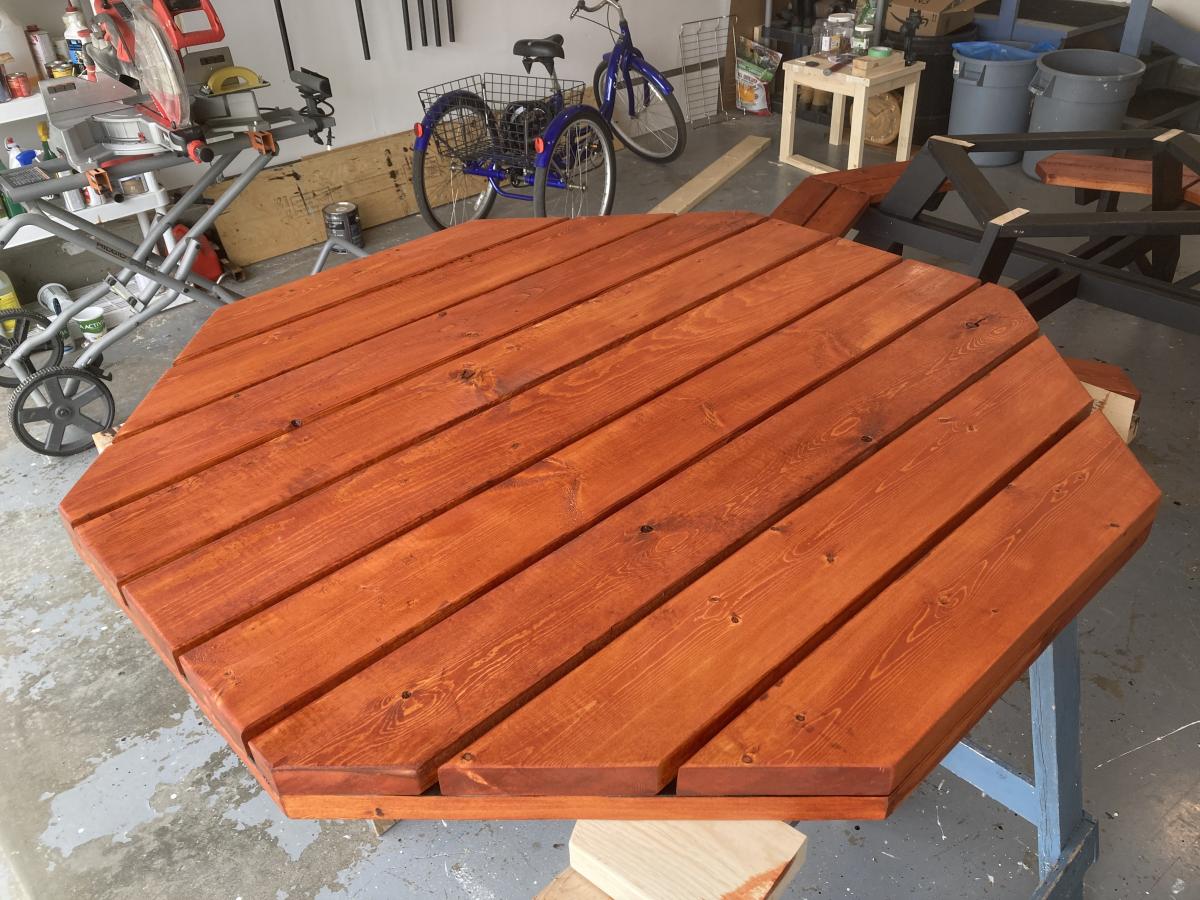
To say this was a complicated build is an understatement. Lots of pieces, lots of different angles and lots of screwing it together. It was really tough to keep everything perfectly square but in the end it turned out well. It is a very heavy table. I want to get it outside on a sunny day for some photos.

Estimated Cost
The price of lumber is ridiculous right now. Last summer this would have cost me about $200 in materials but I spent about $450 on wood, finish and screws. 2 x 4 x 8's right now are about $10.40 CAD$ and 2 x 4 x 6's are about $15.00
Estimated Time Investment
Weekend Project (10-20 Hours)
Finish Used
I first painted all black parts with Wood Shield Oil Deck & Siding solid stain. I used two coats. I painted most of the boards prior to cutting to save time. The top and seats were stained with MinWax Gunstock Stain. Once everything was together I put on two coats of Helmsman outdoor polyurethane.
Recommended Skill Level
Advanced

Comments

DIY Providence Bench

Hooray! I recently finished building a dining room bench. For this project, I used the Providence Bench plans by Ana White. I started this project in May, and two months later it is finally complete! I am really happy with how the bench turned out! It is pretty sturdy and makes for a nice addition to the dining room!

Built from Plan(s)
Estimated Time Investment
Weekend Project (10-20 Hours)
Finish Used
ECOS Paint Woodshield Stain in Pine Needles and their Satin varnish
Rust-Oleum White Semi-Gloss
Recommended Skill Level
Beginner

Twisty Table

Submitted by stacynabby on Sun, 12/20/2015 - 11:48

Saw this clever side table on Pinterest. It's made out of 1 1x8x8. I was able to figure out how to build a jig for the table saw to suit the project and then it was easy peasy lemon squeezy from there.

Estimated Cost
$20
Estimated Time Investment
An Hour or Two (0-2 Hours)
Finish Used
Minwax Light Walnut
Recommended Skill Level
Intermediate

Comments

Seal

Fri, 10/28/2016 - 08:40

I would love to build this unique table, but can't seem to find some actual plans with dimensions and jigs


Seal

Fri, 10/28/2016 - 08:45

Would you please email me the plans for this table. Thanks so much

Play Structure & Swing Set

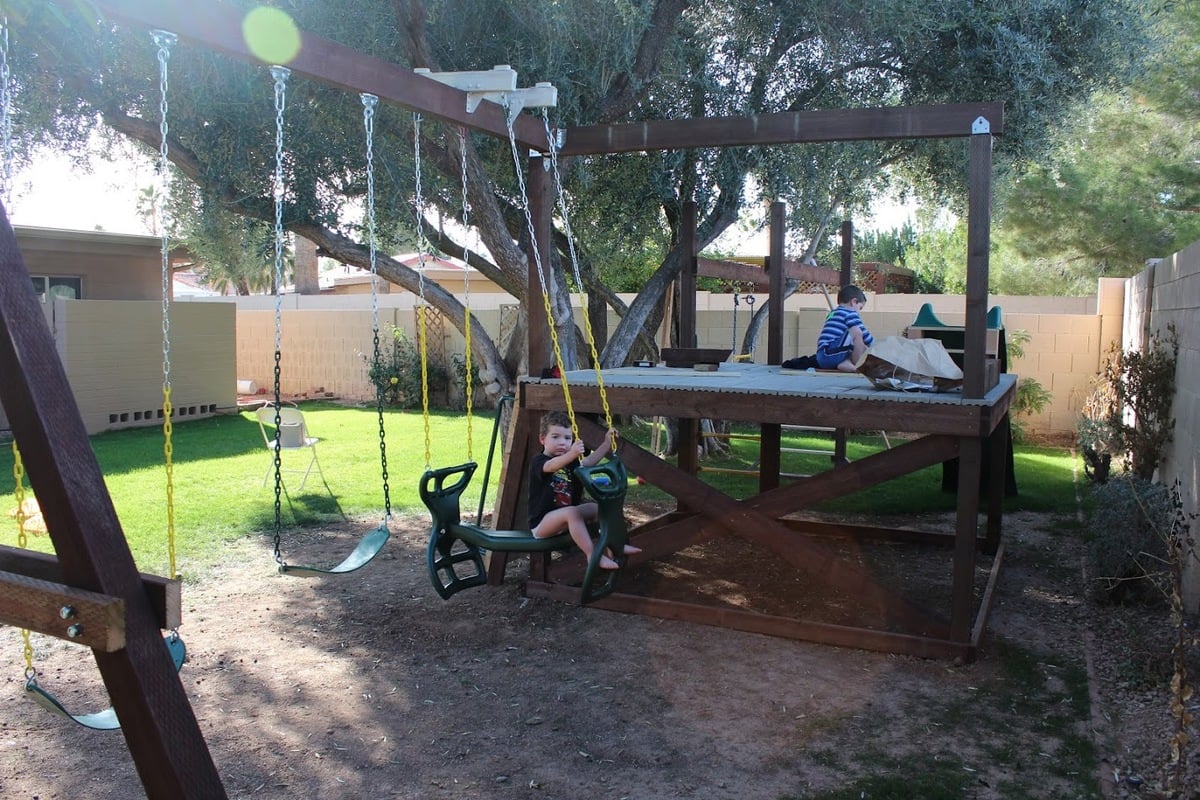
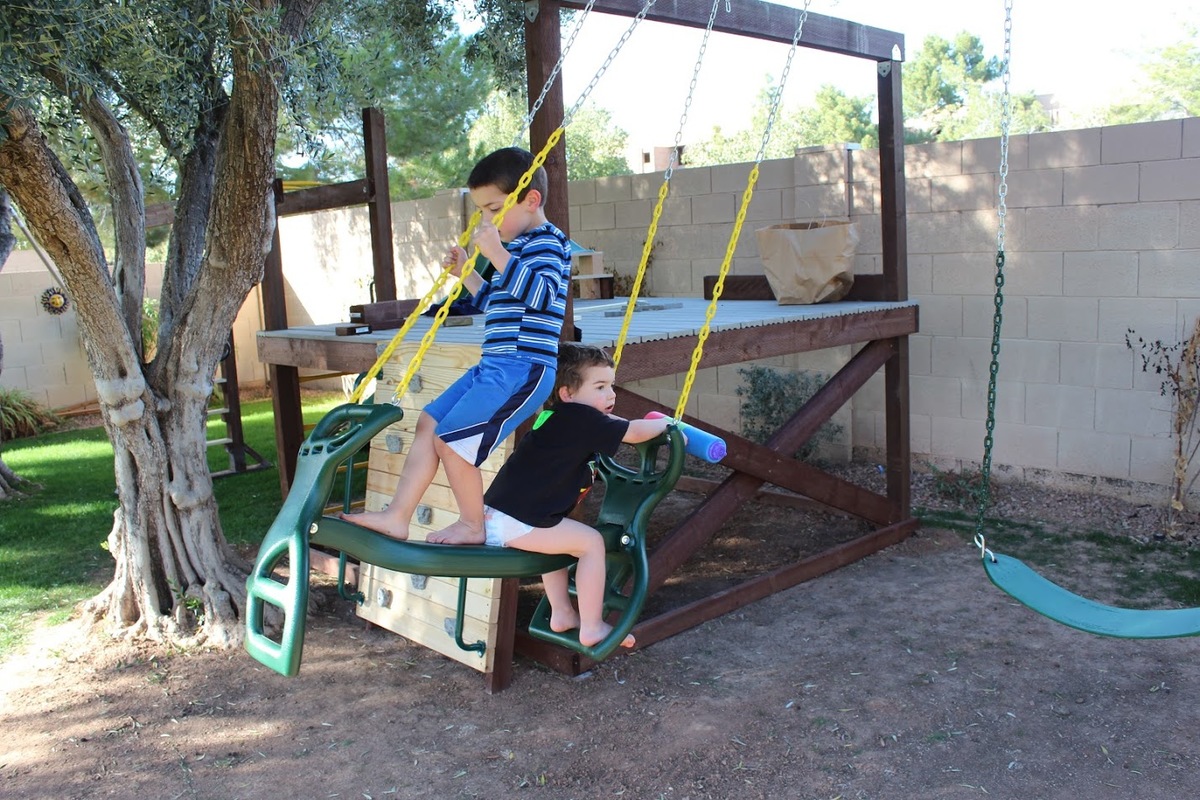
Submitted by Colby032 on Fri, 04/18/2014 - 11:52

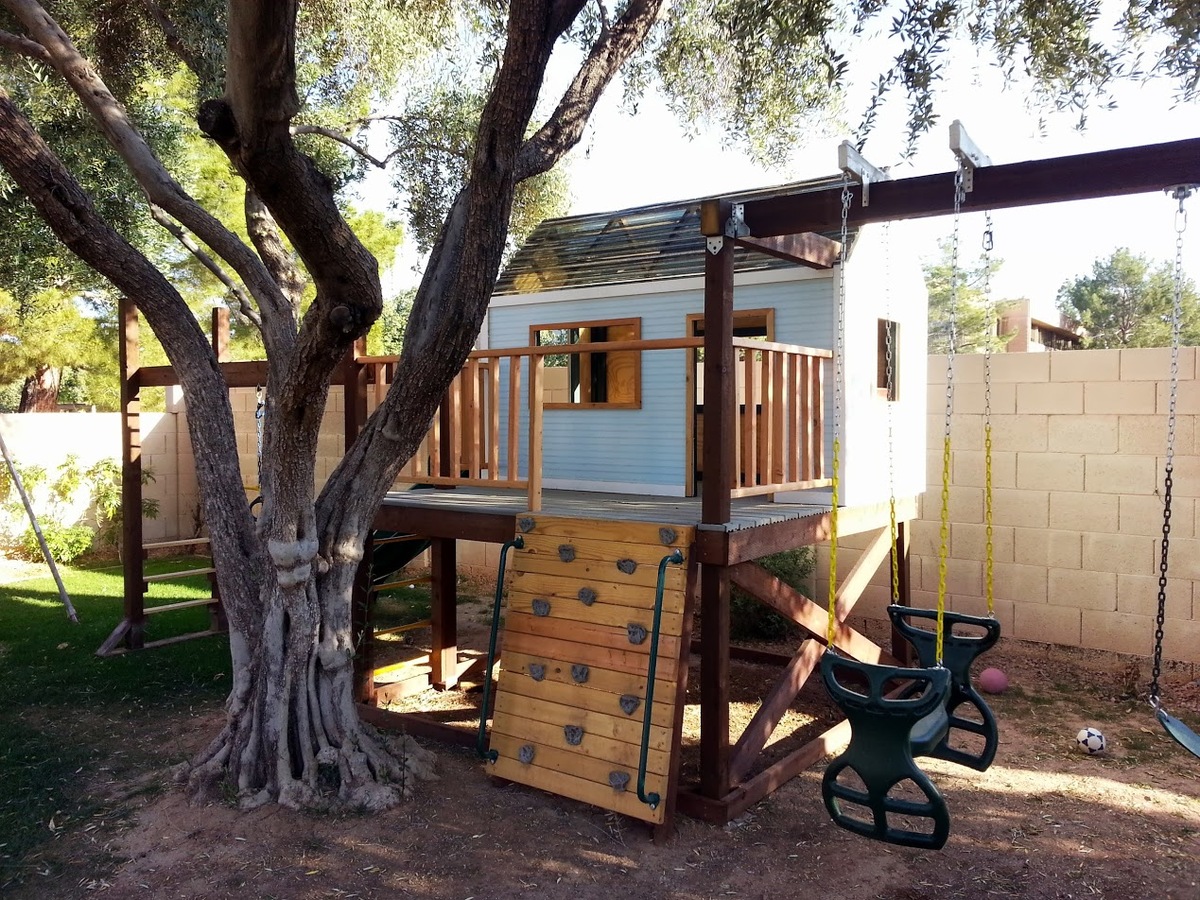
My second building project... this one took quite a while, building in the evenings after the kids went to bed.

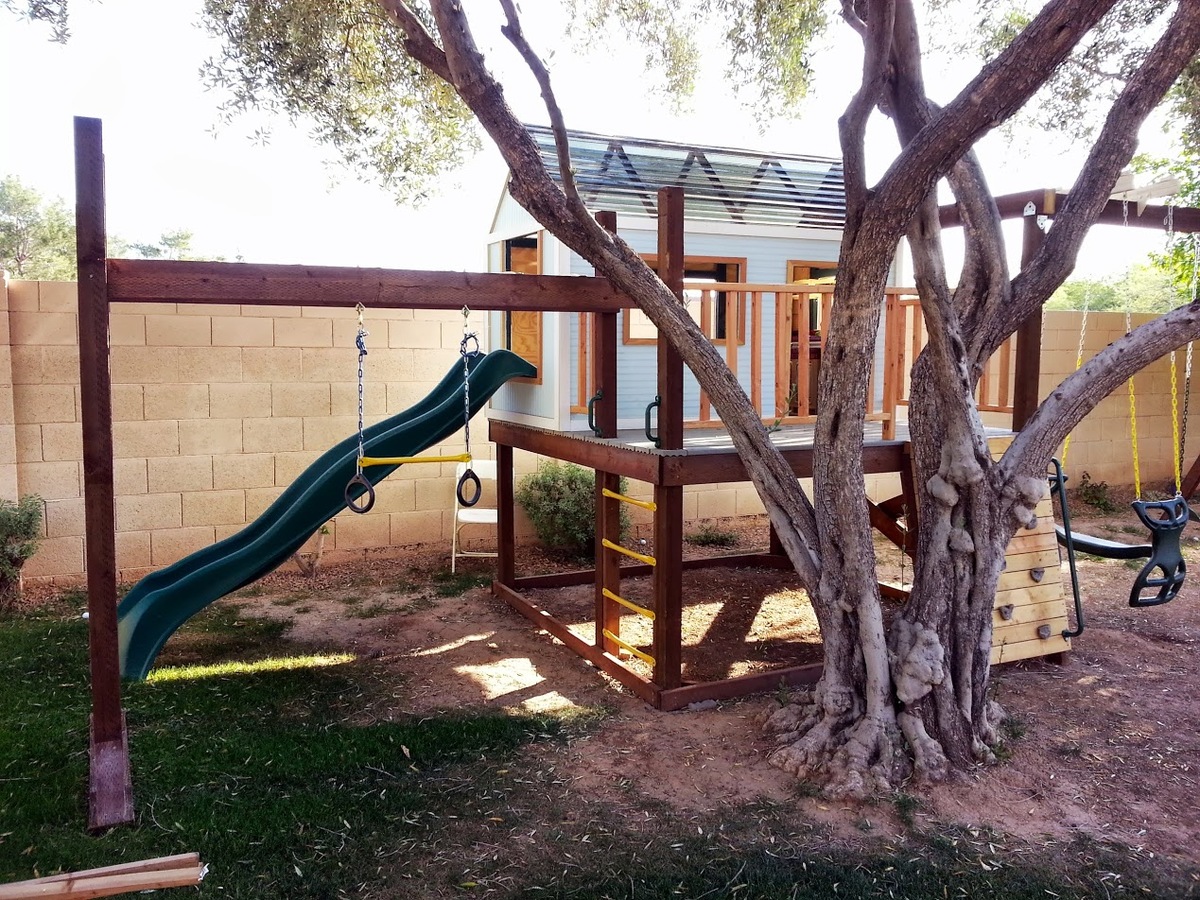
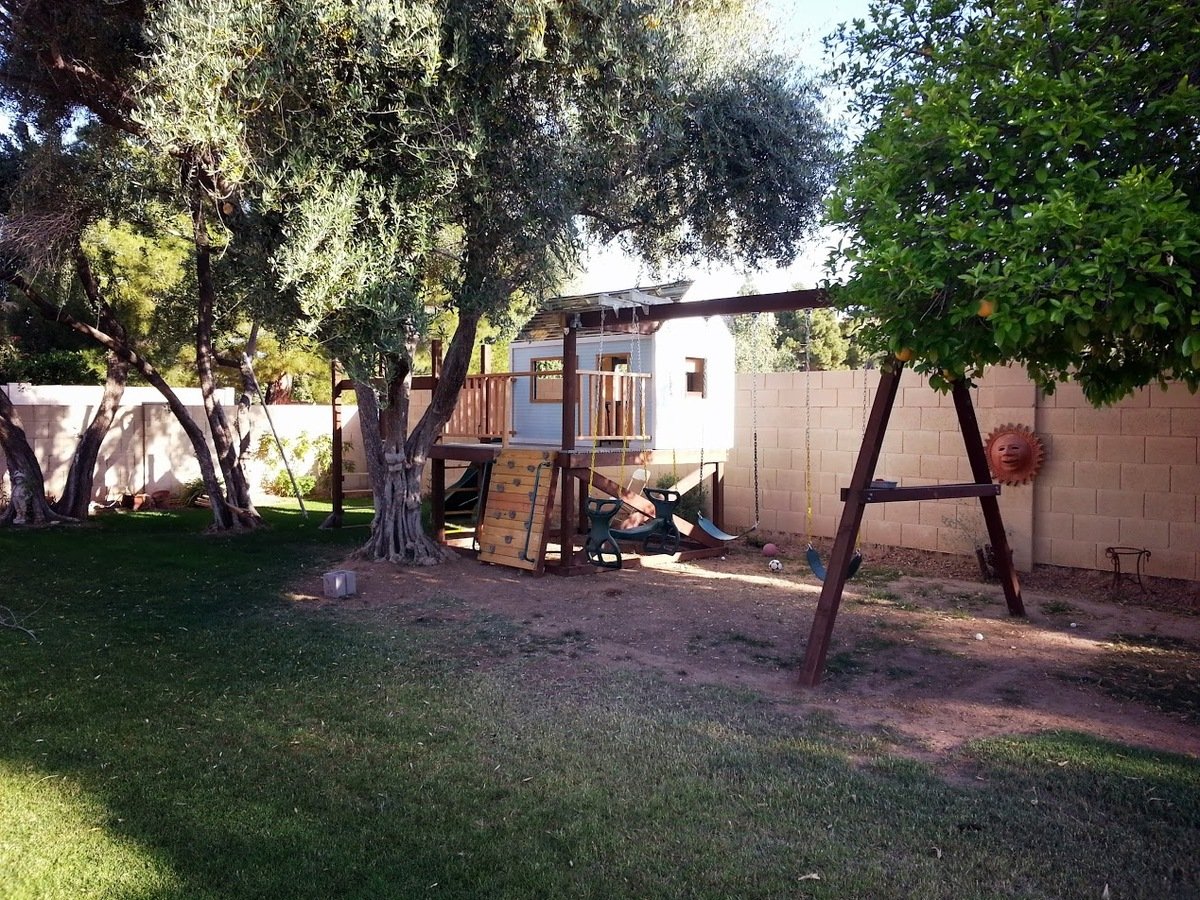
The playhouse is based off of Ana's Playhouse Building series, with some modifications to fit the space in my backyard and accommodate climbing wall, monkey bars, and slide.

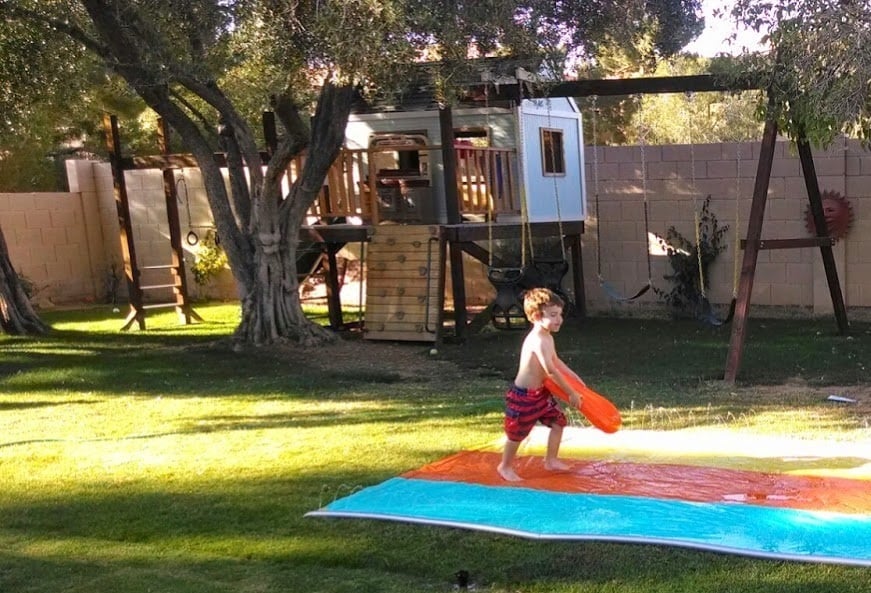
To put the main deck structure into the ground for sturdiness while protecting from moisture, I dug out 5 holes to fit single hole cinder blocks (4 corners plus an extra 4x4 for the monkey bars; you can see an leftover block on the ground in one of the pictures). I placed some brick in the holes, then the cinder blocks on top. I then partially filled the cinder blocks with sand, put the pre-built deck in the cinder block holes (with help - it's heavy!), and then filled the rest of the cinder block holes with sand. It's worked remarkably well - the deck has been up for about a year now. I also sprayed some clear waterproof sealant on the bottom part of each beam near the ground for extra protection (deck, monkey bars, climbing walls, and swingset A-frame). This has allowed me to still run sprinklers near/around the playset and even grow grass underneath the swings!

Materials used:
* Playhouse: pine, plywood, Suntuf solar grey polycarbonate corrugated roofing panels (I live in Arizona, so little rain to worry about but lots of heat - the sheeting lets light in but blocks most of the UV rays, corrugated shape also provides venting at top when placed sideways)

* Deck/Swingset/Monkey bars: treated lumber, composite decking, pine for railings, monkey bars purchased from Amazon

* Climbing wall: pine, treated lumber, handholds/railing bought off ebay/Amazon

* Swings/slide/bongos/wheel, telescope: purchased from Amazon

Modifications:
* Turned playhouse 90 degrees to be in back of the deck, with swingset coming off the side. This meant the support beam for the swingset had to pass through the playhouse - modified the frame for that wall slightly and created a notch for the beam to pass through.

* Slide comes out one end of playhouse - made the "window" on that end larger than the plans called for in order to give room for the slide.

* Monkey bars come off one side of the deck - used extra 4x4 here to create support for the bars, and used extra bars to make a ladder on this side

* Climbing wall instead of ladder for main entrance

* Put large window in back wall of the playhouse

* Added cross bracing to side of decking on swingset end to make it more solid/cut down on sway when swinging
Estimated Time Investment
Week Long Project (20 Hours or More)
Finish Used
Paint on playhouse, water seal on railings
Recommended Skill Level
Intermediate

Comments

yubbie2

Tue, 04/29/2014 - 20:41

This is phenomenal - just the plan & design we've been looking for. Can you upload a few more pictures? Any sketches you can provide? Shopping list? Really great job - I hope your kids love it. It looks awesome.

JeremyFox

Wed, 04/30/2014 - 04:53

Love it! I like the way it sits right next to a tree - I thought it was a tree house at first.

Colby032

Wed, 09/10/2014 - 14:03

Thanks! It's certainly nestled in right behind that tree - I originally was going to place it in between that tree and another one but then decided to just place it behind them in order to take better advantage of shade (critical in AZ) and fit in everything I wanted to put on it (monkey bars, swings, slide, climbing wall)

masons_momma2015

Mon, 07/08/2019 - 00:48

We've  been looking at these type of players for our son, and good grief! Prices are astronomical for playsets that are NOTHING like this. This absolutely an amazing  place for those boys to make memories. You're  amazing!  Do you mind if I ask what it cost once it was finished? I never imagined  that it would cause a tic in my eye to look at the kids from Lowe's or anywhere else for that matter.

Colby032

Tue, 08/20/2019 - 10:14

I don't remember how much it cost in the end... but probably around $900?  That may include getting some tools that I needed but didn't have at the time.  The slide was the most expensive single piece I bought - I think I got it from Amazon.

When it was all done, I remember thinking that what I got for my money was *way* beyond what I would have gotten by purchasing a kit or a pre-built play structure.  Plus, by going my own way, I was able to build it to fit my space and the needs/abilities of my kids.

While the whole thing is big and looks like an intimidating build, it really isn't bad - the platform is a fairly blank base to design everything else off of, and is incredibly sturdy.  Everything else is a discrete part that branches off of the platform and can be planned out as you need.  Adding the monkey bars required putting in a 5th upright (the first 4 are the corners), but that was an easy modification since I knew I wanted it before building the platform.  The playhouse just sat on top of the platform (screwed down, of course).


patelscope

Sat, 08/01/2020 - 20:40

Hello. This is pretty cool, probably the best modification that I am looking for from Ana's default plans. Could you please add some more detail on the right side wall, and how you incorporated the support beam through the playhouse? (with maybe a picture from inside of that wall). And secondly, if you can add the dimensions for the monkey bar setup on the left side of the deck? Thanks, much appreciated

Garden Bench!!

Submitted by Nathan1342 on Mon, 08/06/2012 - 12:09

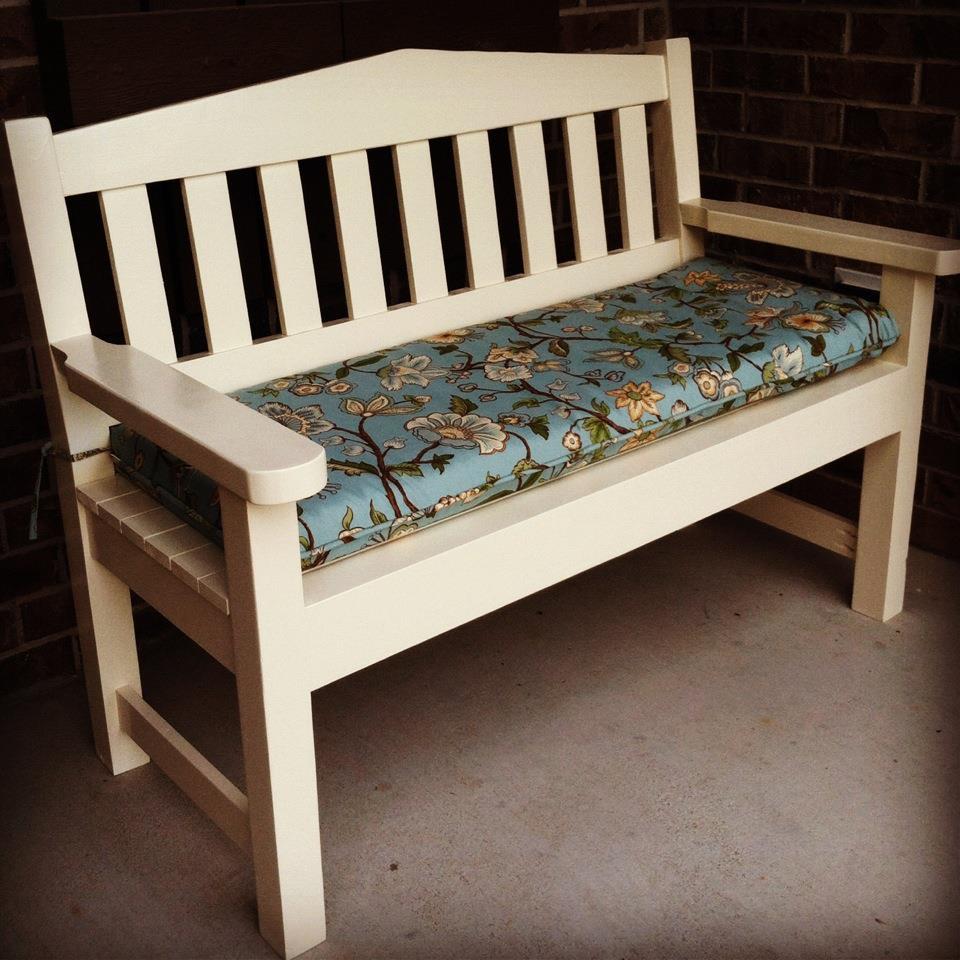
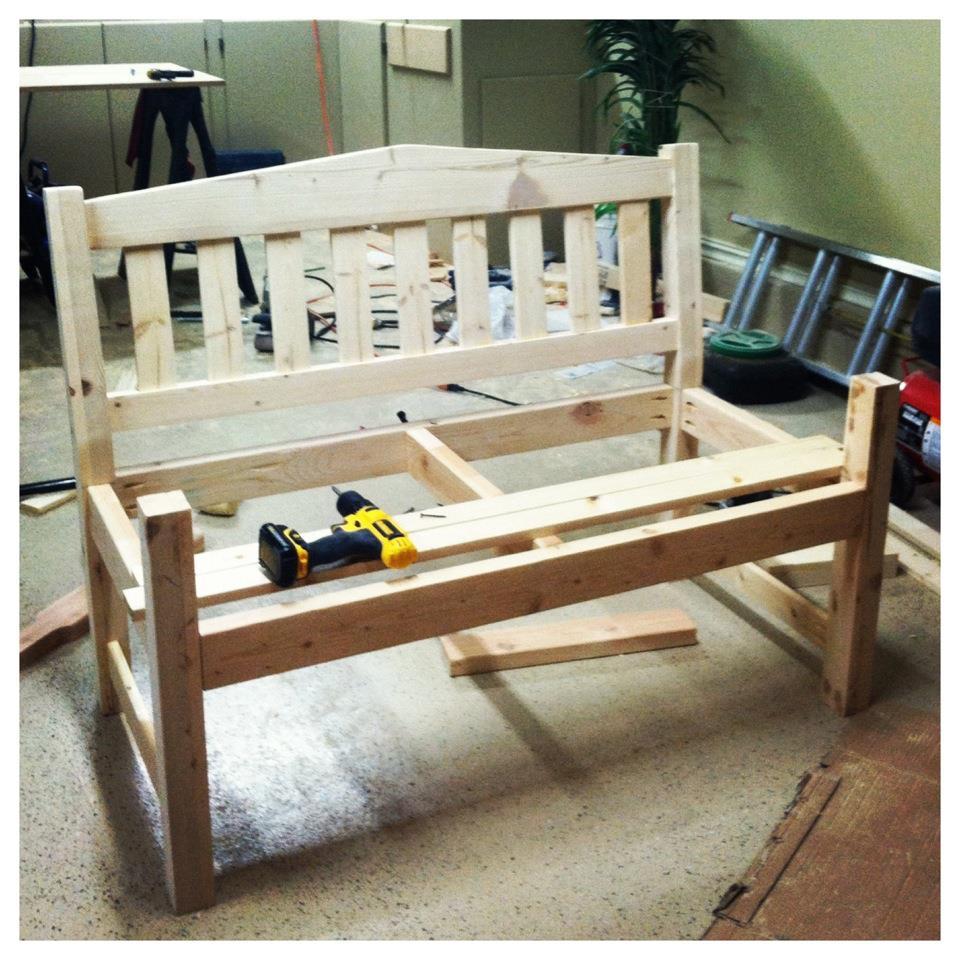
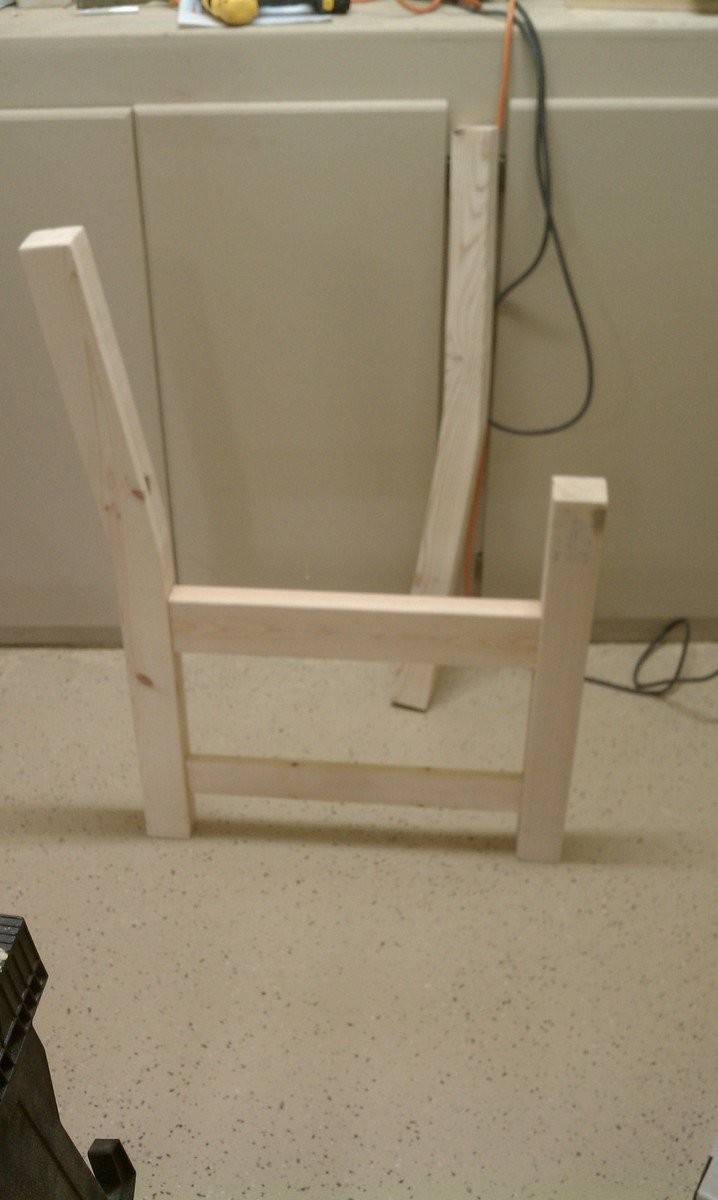
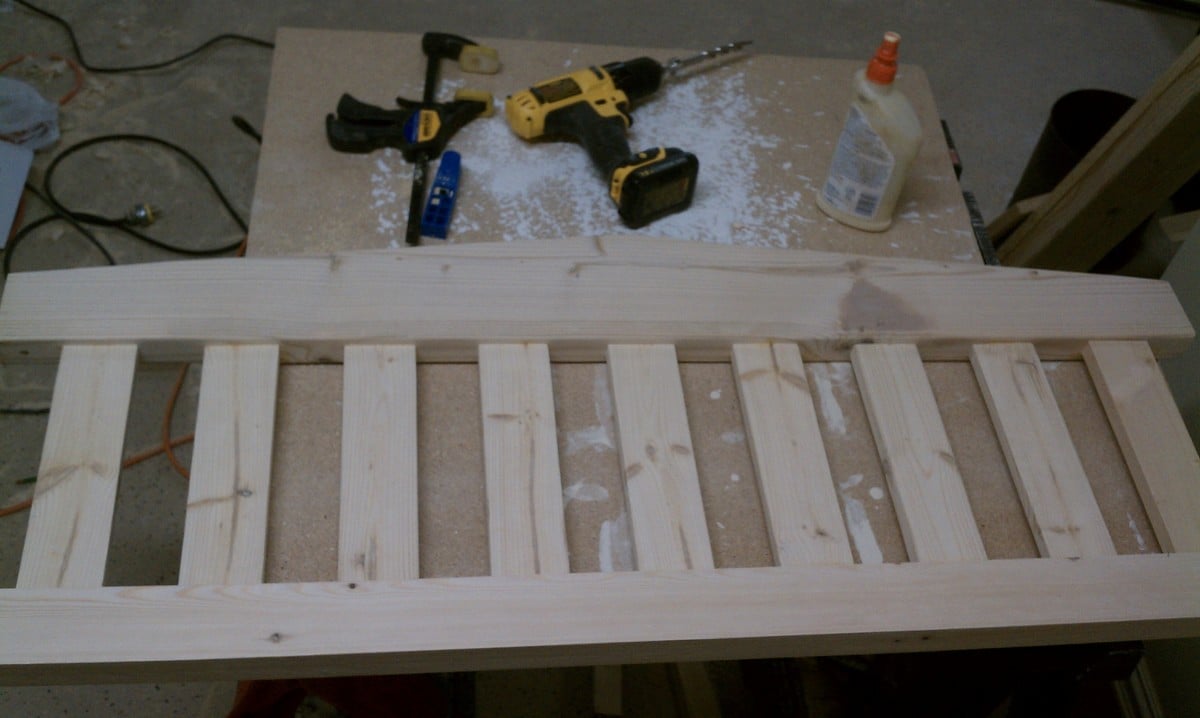
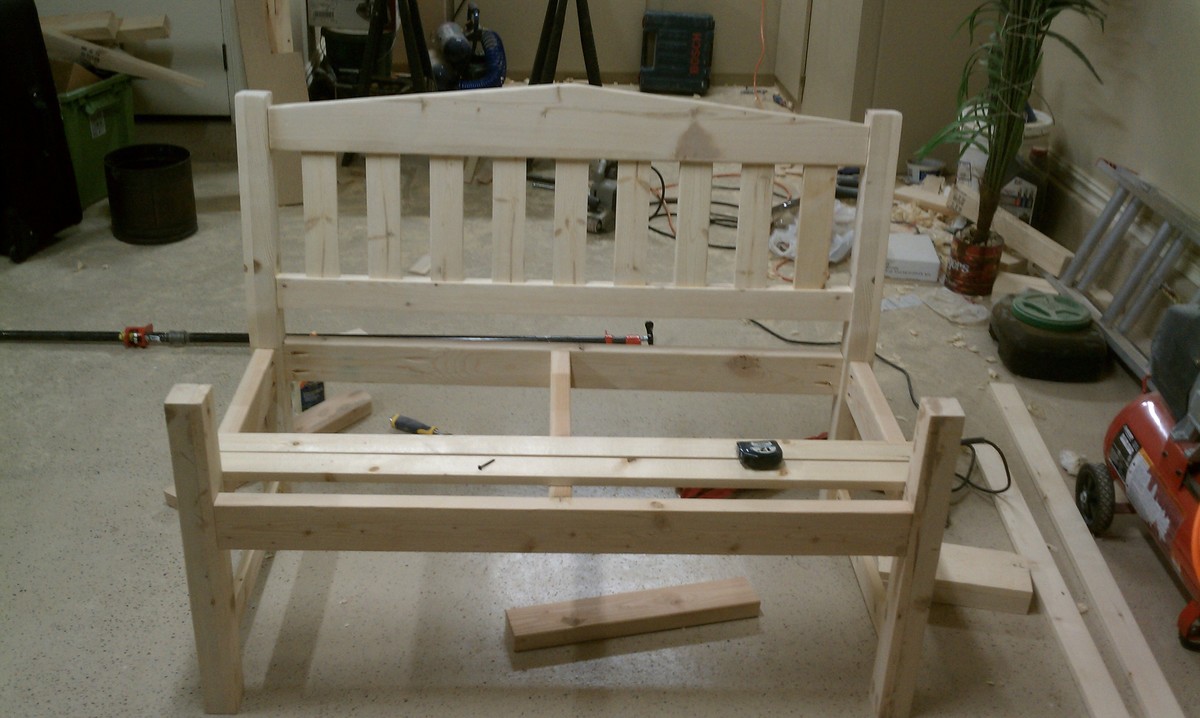
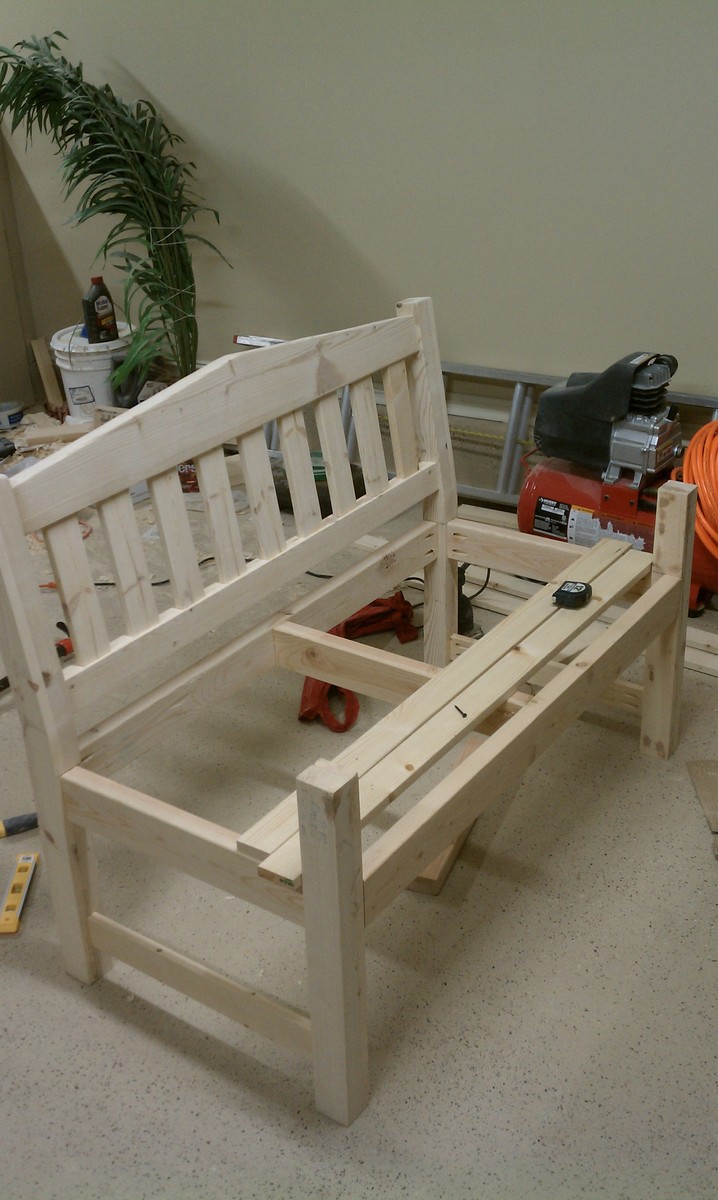
I built this for my wife for an anniversary present. She had wanted a garden bench for some time but the ones that she wanted were between $500-$700 which is ridiculous for this type of bench. So, I did a search on here for garden benches but there weren't really any plans for them and the few brag plans were not really the type of bench I was looking for. I printed off a few pictures of benches that I liked and got to work. The front and back legs a 2x6 and a 1x6 glued together and then cut to be straight. I wanted something thicker then just a plain old 2x6. If I had to do this again though, I would have just glued 3 1X6's together. The reason being, is that 1x6's usually do not have a rounded edge and a 2X6 does. So needless to say when you glue them together you have a nice little gap on either side. Without a table saw to take this off, its pretty difficult to get a straight cut. But I ended up getting it right after sweating for a few hours in the garage. The bench stands 36 inches high, 48inches wide and about 18 inches deep. The seat height is right at 18in also.

In the unfinished pictures I actually had the depth being 24 inches. After sitting on it though it was just way to deep. So I pulled it apart, made the adjustments and its now much more comfortable to sit in.

If anyone has any questions or wants more details feel free to drop me a line!

Thanks!

Estimated Cost
85
Estimated Time Investment
Weekend Project (10-20 Hours)
Finish Used
Oil based acrylic paint
Recommended Skill Level
Beginner

Comments

Torwart13

Tue, 06/16/2015 - 11:25

So legs are about 2 1/4" square? Are the seat supports 2x4's? Back cross pieces 2x4? Slats 1x4"?

smz1919

Wed, 06/17/2015 - 12:39

how did you get the curve on the back legs?

In reply to by smz1919

Nathan1342

Fri, 06/19/2015 - 13:34

I glued a 2x6 and a 1x6 together to get the thickness. Now that i have a table saw and a jointer this entire process would have been much easier but after getting it to look like one solid piece i just outlined the slant i wanted and cut it using a jig saw.

smz1919

Fri, 06/19/2015 - 20:17

So the back slats are just glued in place right? I wonder if it would be easier to use a biscuit joiner or not

Mikeyw221

Sun, 10/23/2016 - 17:46

on the back legs how high up did you go before you started cutting the angle? and was it around 15 degrees fromt he edge?

SawdustMaker21

Wed, 05/26/2021 - 08:32

Hi Nathan
Love the look of the bench. Would you have a list of material requirements. I intend to make a bench like this and would like to know the measurements of the top back spar (the shaped one).
Here in the Uk our timber yards do not always supply the same cuts as the US so I need to have some idea of the pieces I need
Many thanks

Outdoor Sofa - Front Porch

Submitted by mclaudeg3 on Fri, 11/06/2020 - 16:47

This project was quite easy and did not require many tools. The plan allowed me to adjust the measurements easily so it could fit in that space. I used regular 2x4’s and treated the wood with Mountain Ash colour in a semi-transparent stain from Sherwin Williams, I just love the colour! I build 2 - 2 seaters exactly the same. The one side has no arm, as I wanted it to look like a lounge chair. I love to sit in the corner and stretch my legs 😊. I bought the cushion covers from IKEA, and got good quality foam.

Estimated Cost
Wood ~$300
Estimated Time Investment
Weekend Project (10-20 Hours)
Finish Used
2 coats of semi-transparent Mountain Ash stain from Sherwin Williams.
Recommended Skill Level
Beginner

Comments

Seasonal And Holiday

Hanging daybed

Submitted by hponce28 on Sun, 04/14/2013 - 14:24

I wanted to make a large porch swing but just couldn't find the exact design. I wanted to be able to stretch out and take a nap but also be able to have a back to lean against. Most plans that I found were just basically a box you could put a mattress in and then hang. So I found Ana's plan for a basic daybed and chopped off the legs and raised the back just a little. It's perfect!! Thanks Ana. The plans were very simple to follow. This is my first project and I think it turned out great.

Built from Plan(s)
Estimated Cost
$250
Estimated Time Investment
Weekend Project (10-20 Hours)
Finish Used
Colored stain in cocoa. Applied two coats.
Recommended Skill Level
Starter Project

Comments

melimew

Sat, 07/26/2014 - 07:37

Looking forward to do one like this !
Do you still have the measurement for the back you have raised ?
Really nice !

Thanks :-)

jdaybama

Tue, 11/18/2014 - 17:38

We made the bed and it looks awesome!  Thanks for making the plans easy to follow and providing the picture, which was a fantastic reference.  I do have a question for you in regard to how you hung the beg.  We would like to hang this from our porch, but can see that we simply have 2x4 roof trusses.  We are concerned that the weight of the bed (pretty heavy) plus mattress and support plus a person may be too much.  Any additional information you could provide on how you hung the swing would be greatly appreciated!  Thanks!

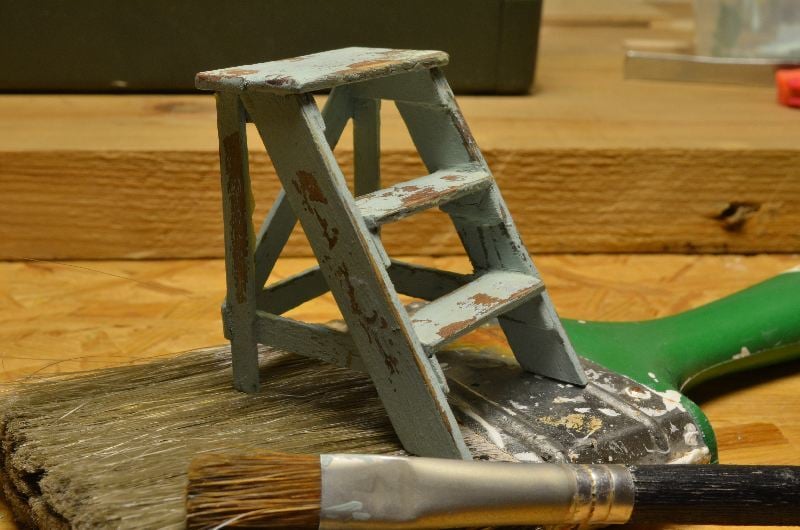
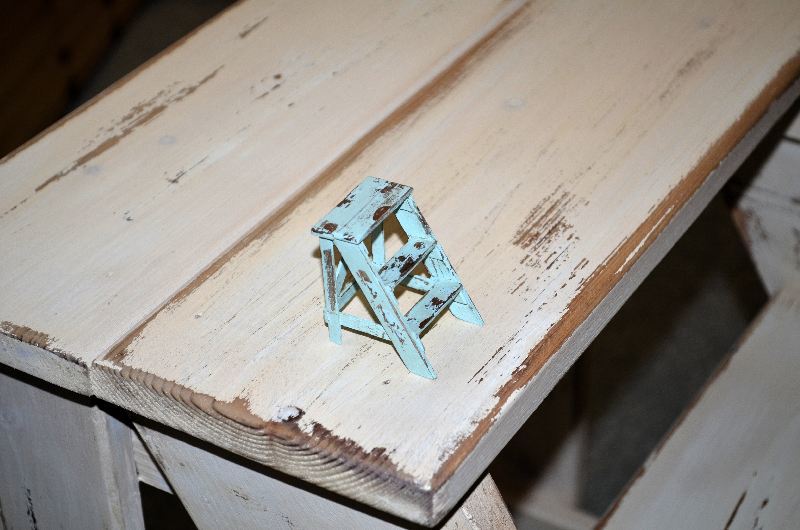
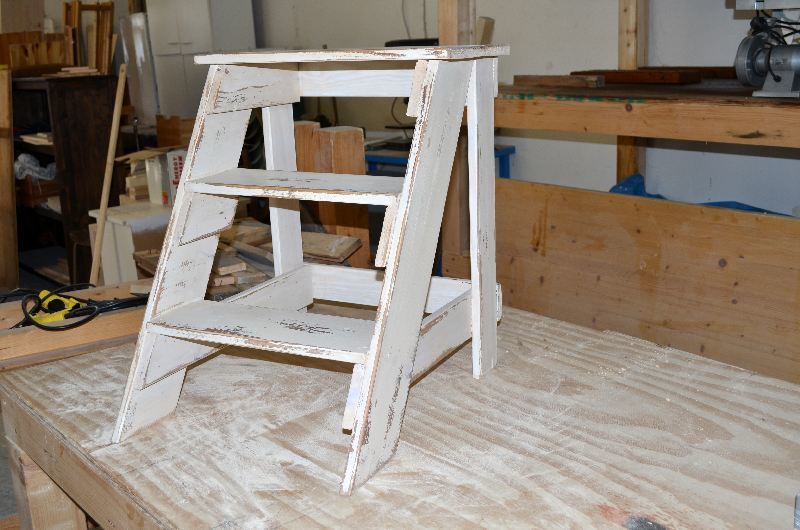
Vintage step stool end table, in 1:1 and 1:12

Submitted by uli on Sun, 06/09/2013 - 09:17

I built this step stool for friend, and a tiny version for my own dolls house. I had expected difficulties with the angled parts, but it went together very easily. I stained both of them with a vinegar/steel wool mix, painted with homemade chalkpaint. At last I sanded them for a distressed look and coated them with brown finishing wax.

Estimated Time Investment
Afternoon Project (3-6 Hours)
Finish Used
vinegar/steel wool mix, homemade chalkpaint, dark finishing wax
Recommended Skill Level
Beginner

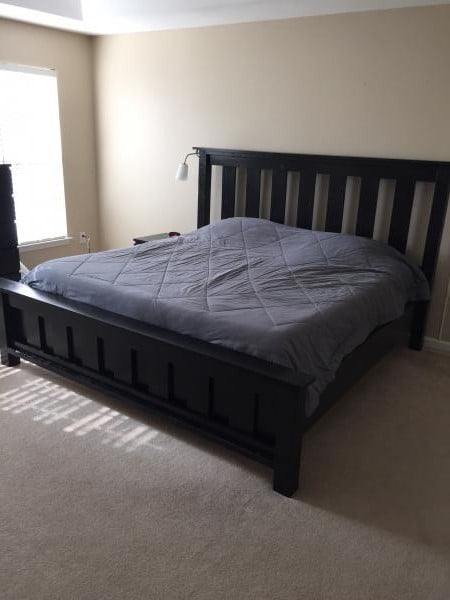
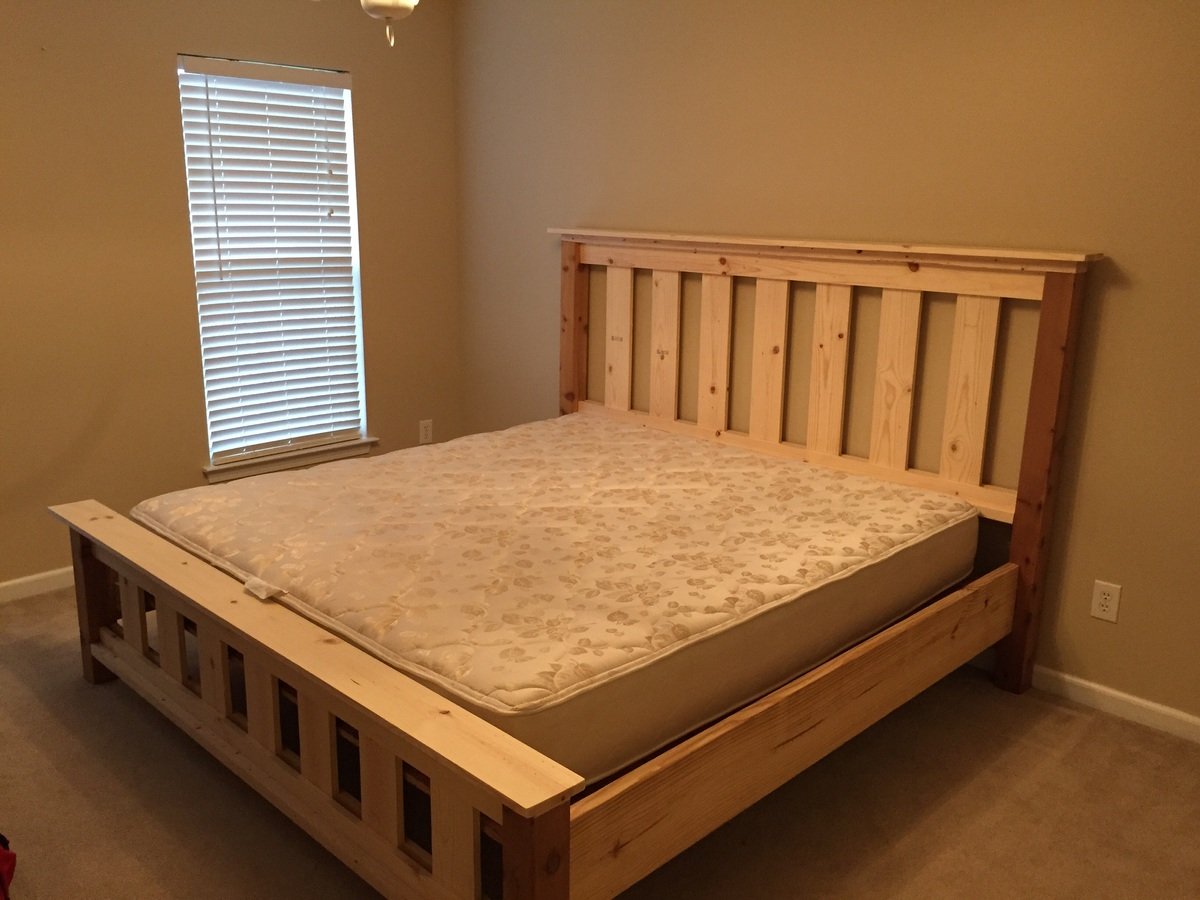
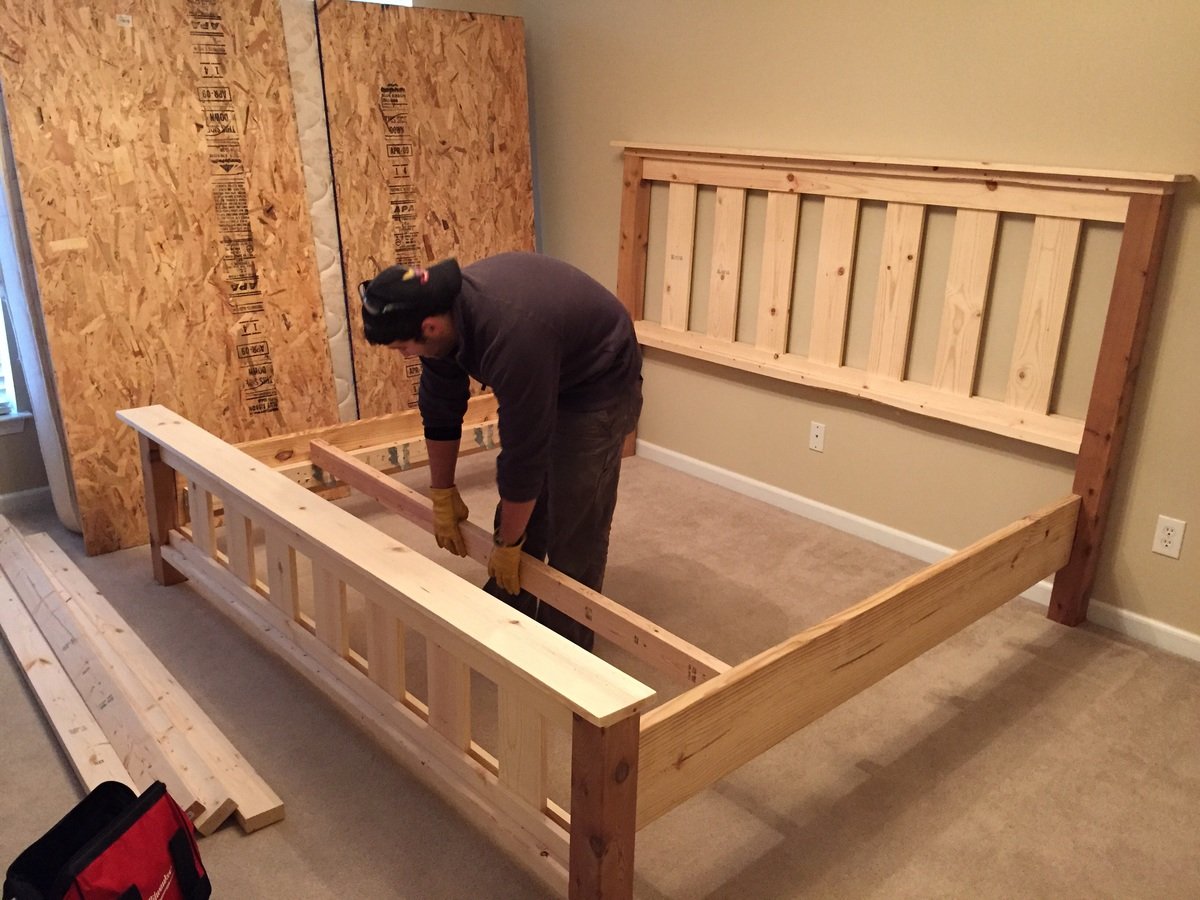
Farmhouse bed

Submitted by jphbgsu on Sun, 09/06/2015 - 19:48

The project went relatively well. Had to readjust in order to fit our king. I used 2x4s and 2x4 joist hangers to support the mattres. 

Built from Plan(s)
Estimated Cost
300.00
Estimated Time Investment
Week Long Project (20 Hours or More)
Finish Used
Rustoleum ebony stain and satin polyurethane.
Recommended Skill Level
Beginner
Back