Community Brag Posts
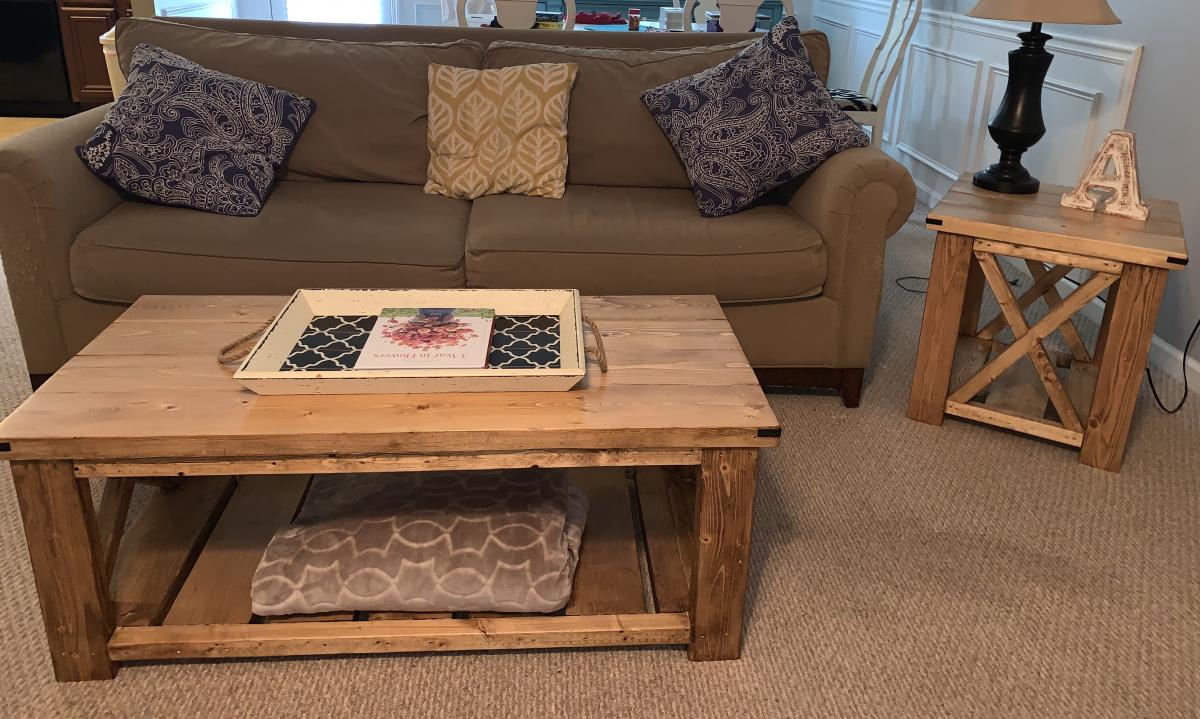
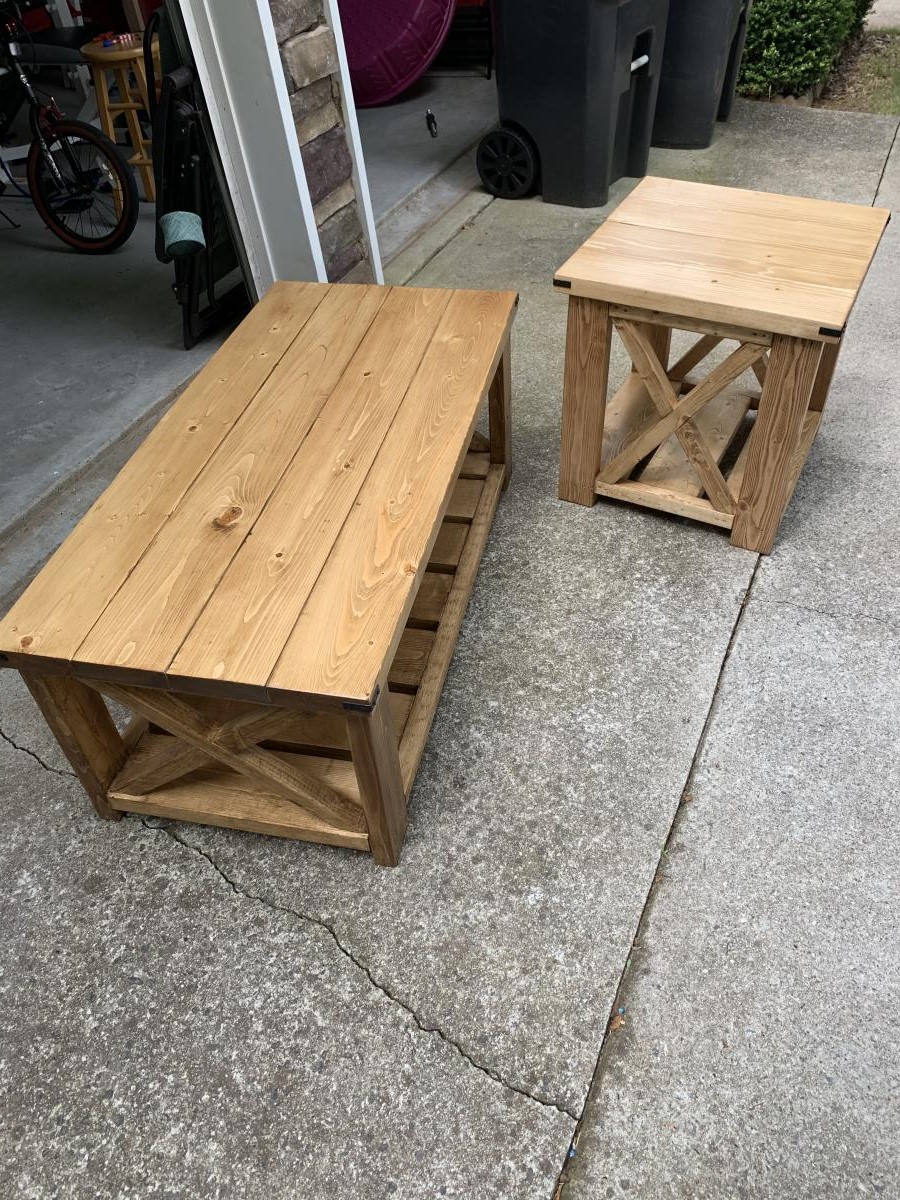
Farmhouse Small End Table
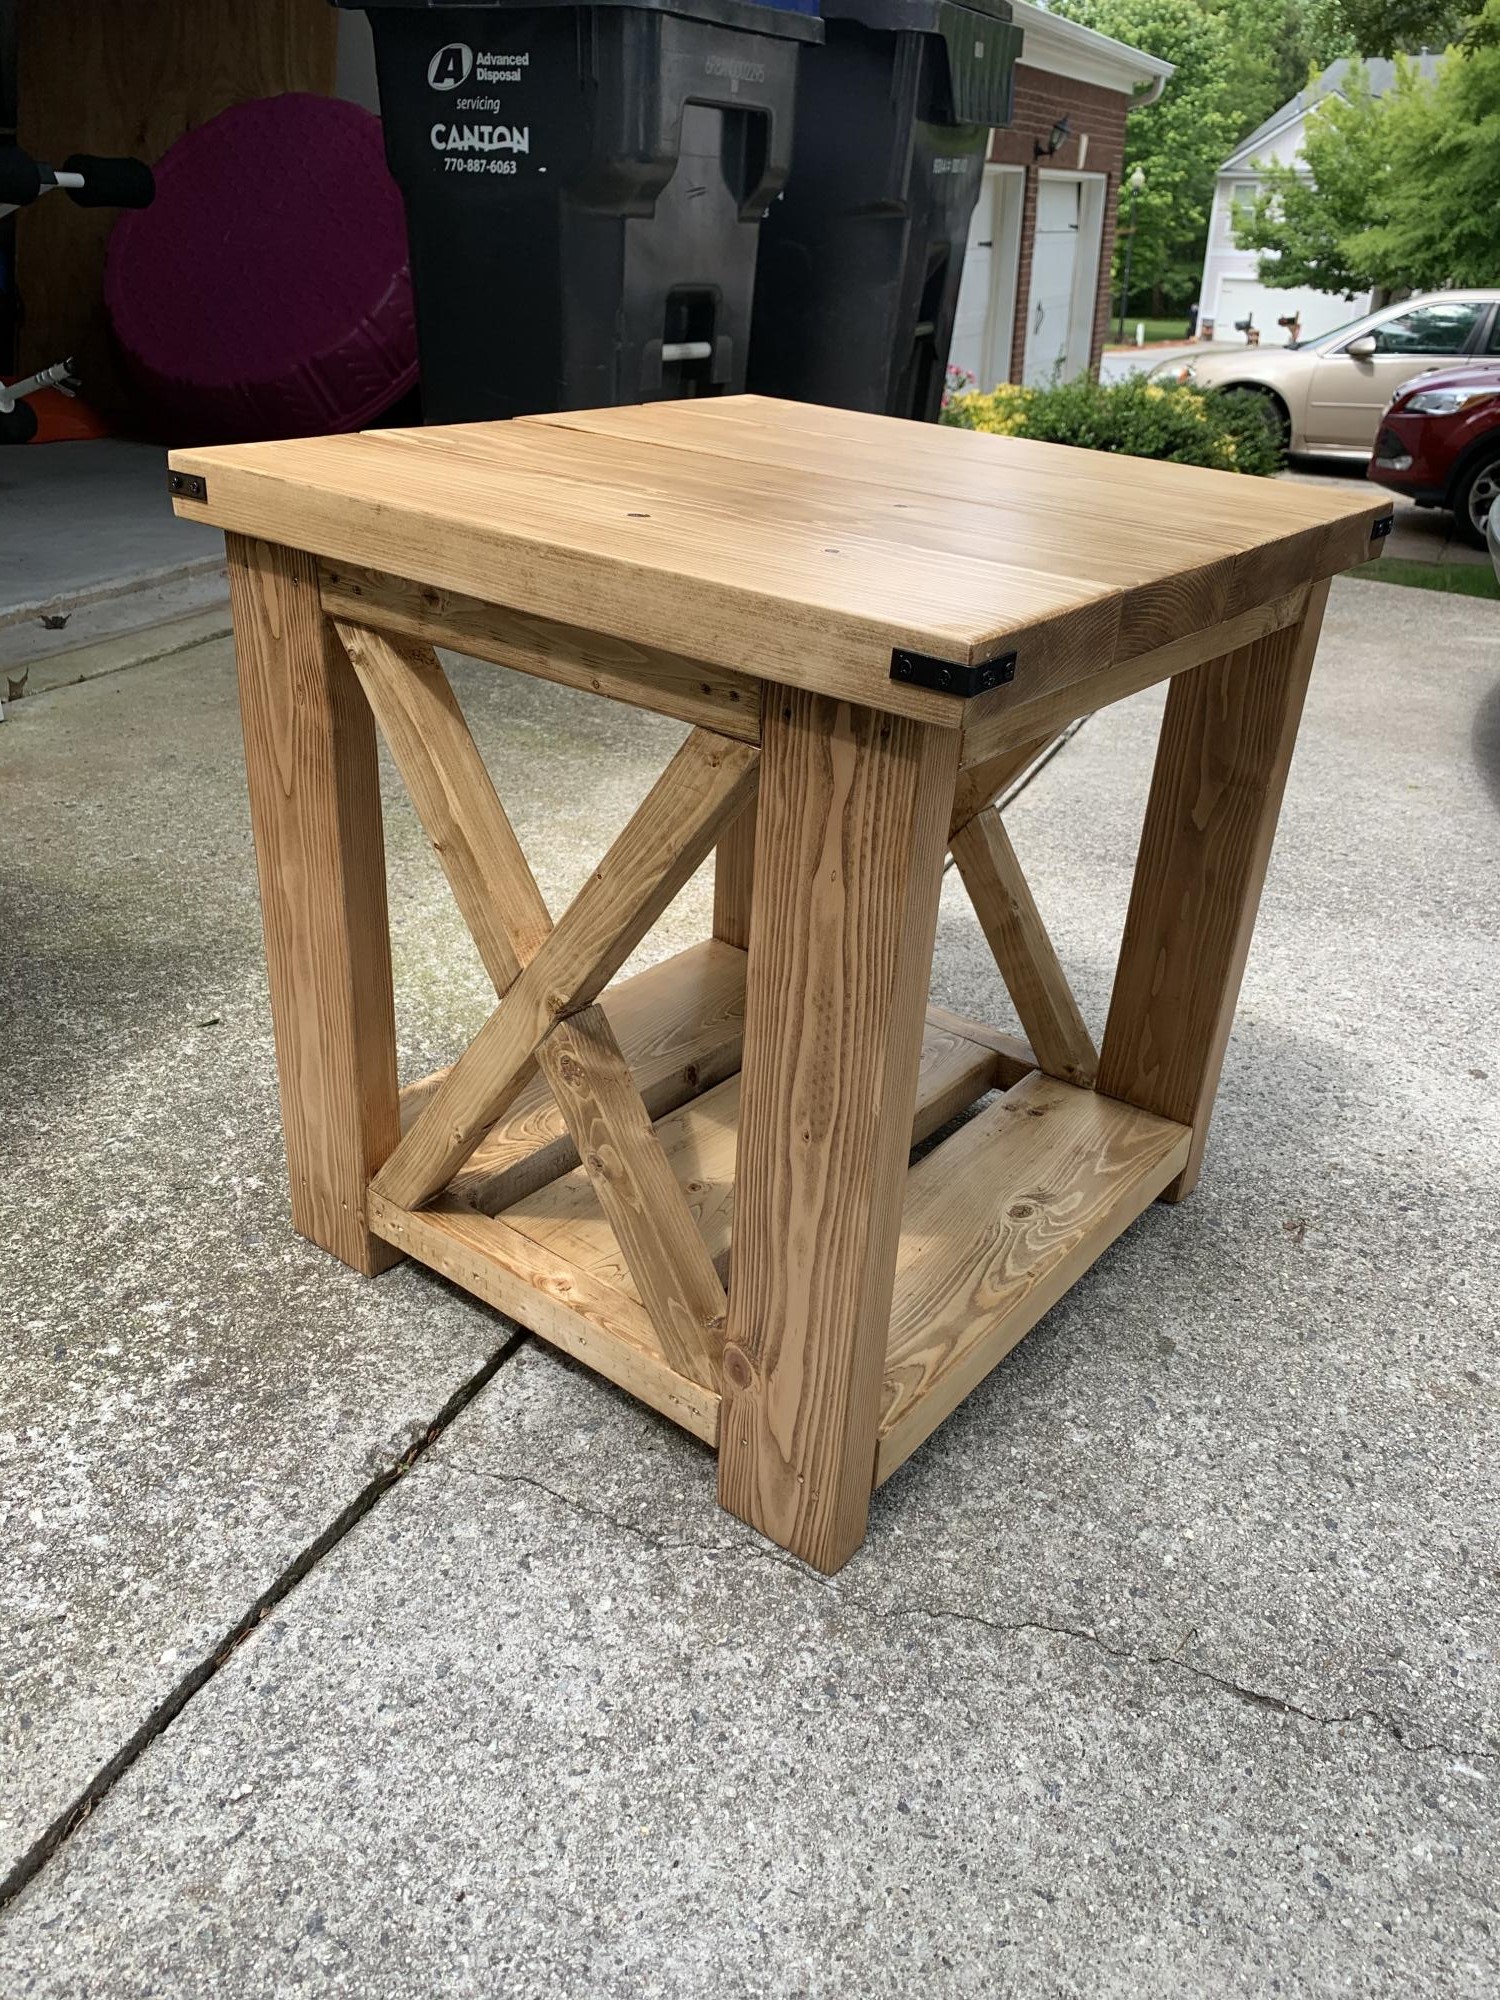
My 2nd ever build! Made to match farmhouse beginner coffee table. This is the smaller size posted. So Easy! Thank you for the plan and for the videos. I love them and am learning so much!
Built from Plan(s)
Estimated Time Investment
Afternoon Project (3-6 Hours)
Finish Used
Varathane golden oak stain, spray shellac, Varathane water based polyurethane
Recommended Skill Level
Beginner
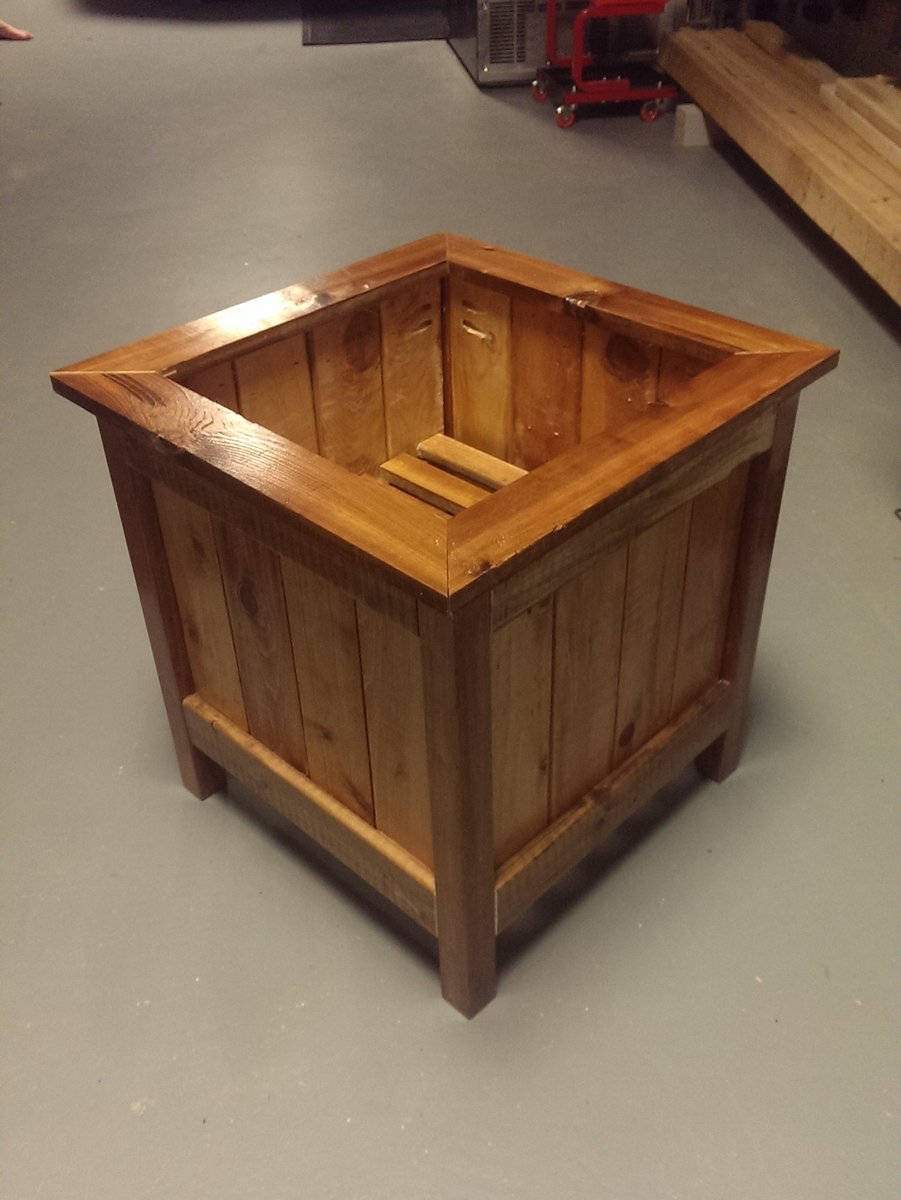
Cedar planter boxes
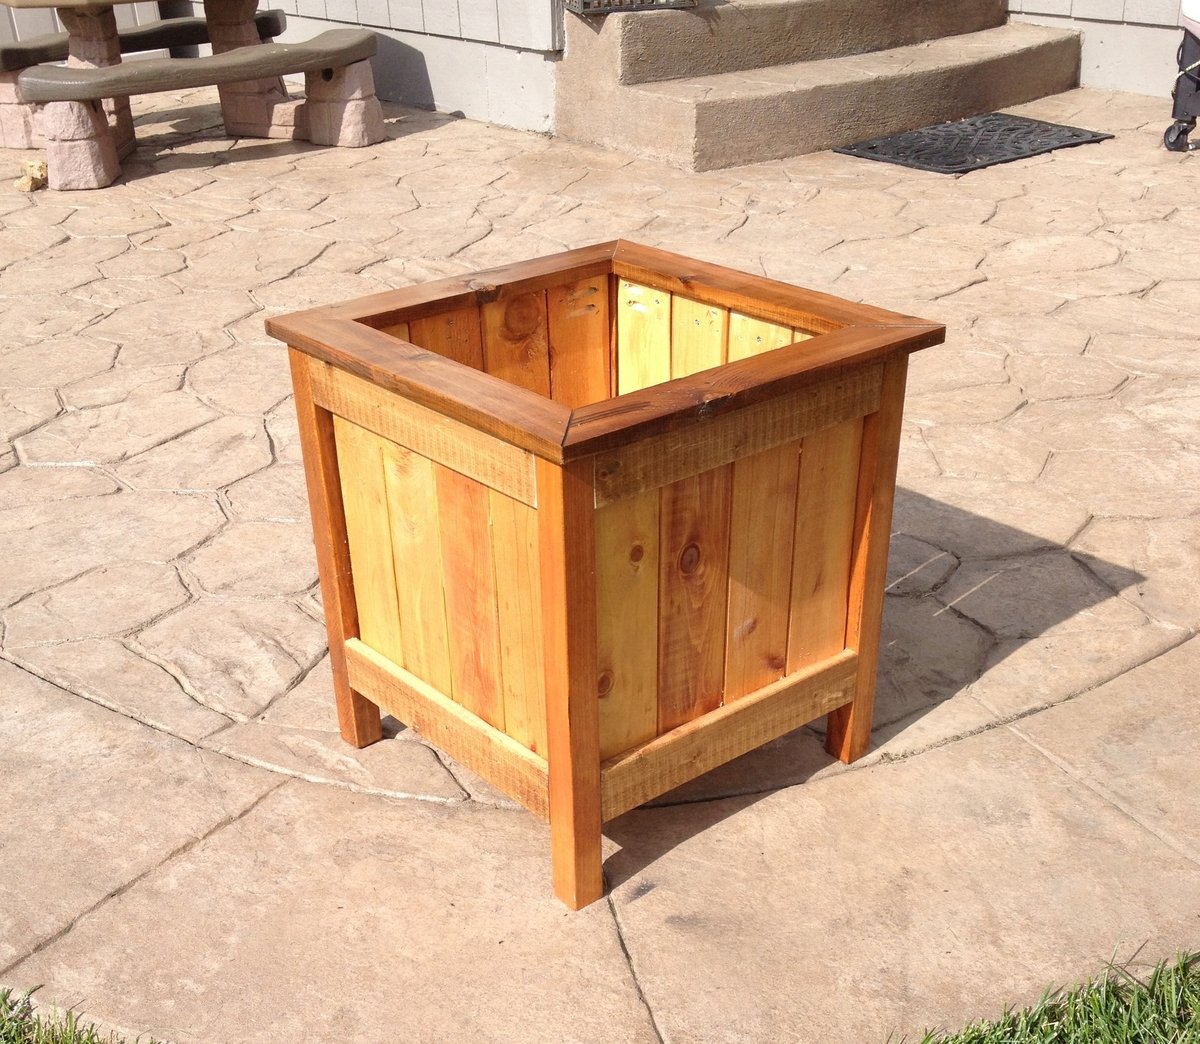
I used the main plan for ideas, but opted to use 3.5 inch pickets instead, which allowed for a smaller planter that wasn't as big. Also chose to miter 1x3s for the top which I think really finishes it off. Sanded everything with a belt sander to 220 grit. Used min wax golden pecan plus three coats of poly inside and out. Finished size was about 17x17. Tile spacers work great to keep the gaps even!
Built from Plan(s)
Estimated Time Investment
Afternoon Project (3-6 Hours)
Finish Used
Min wax golden pecan
Recommended Skill Level
Intermediate
Comments
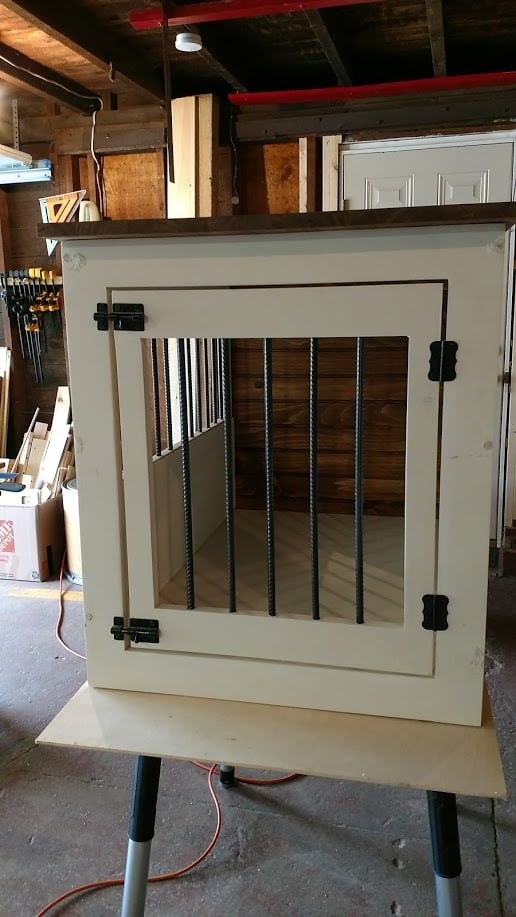
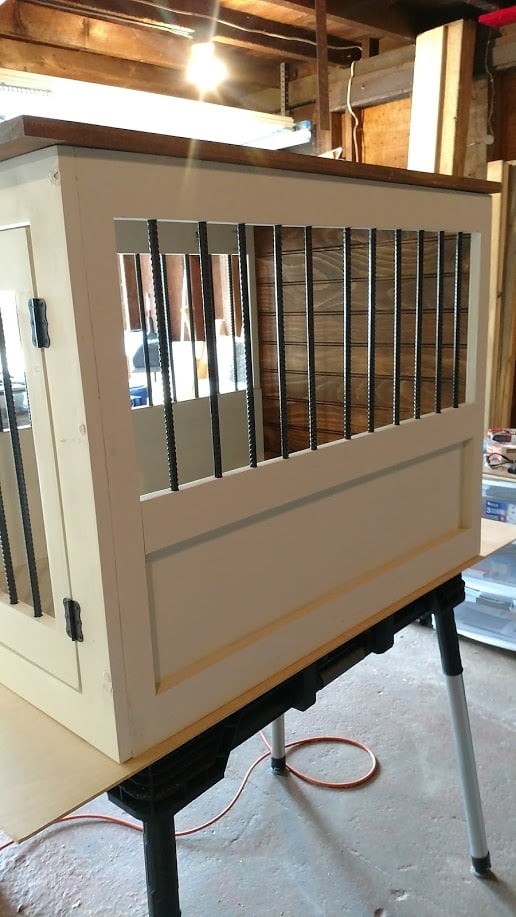
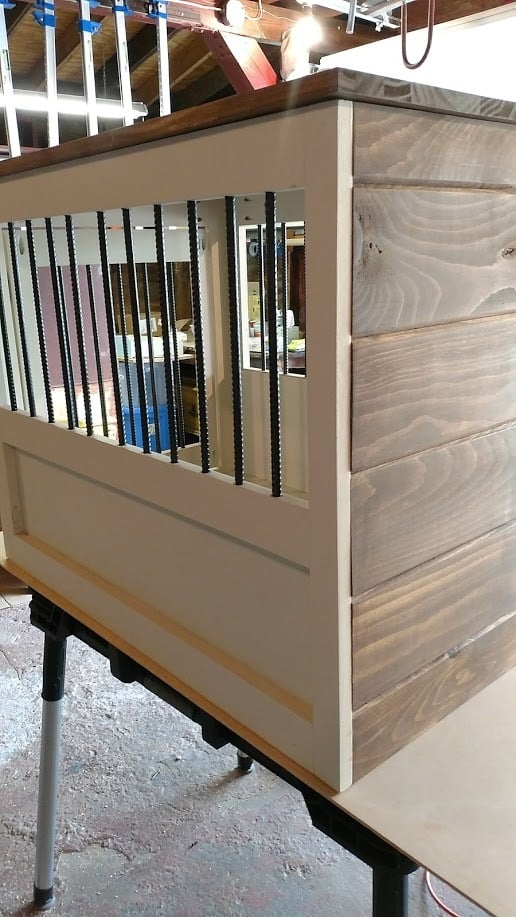
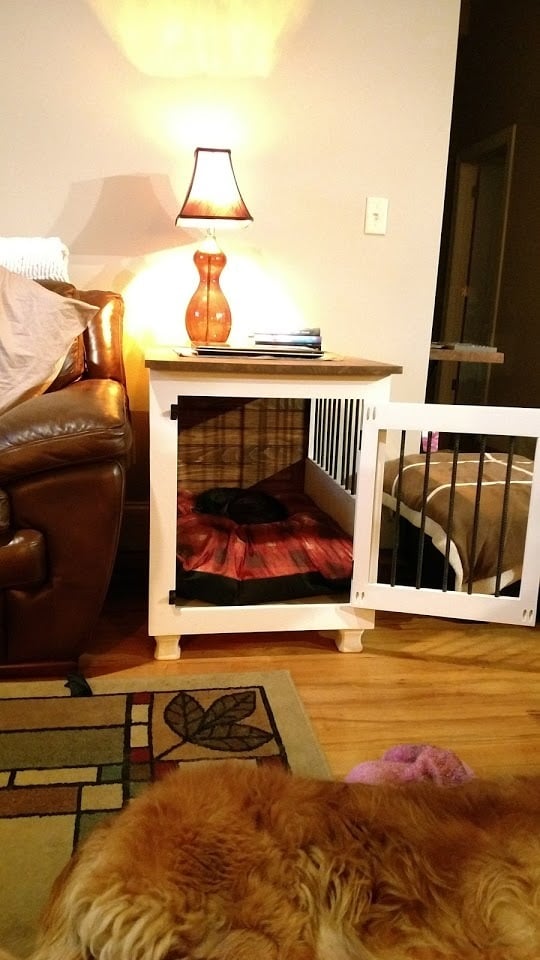
Dog Crate with a twist...
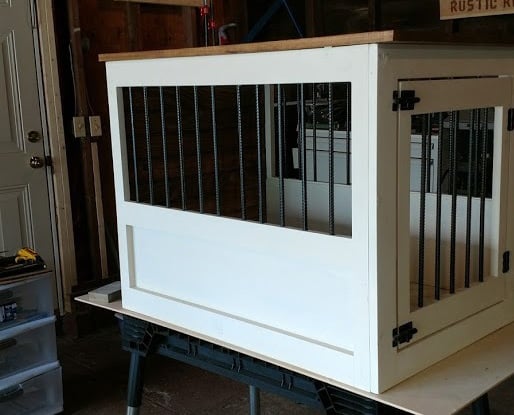
I really liked the Large Wooden Dog crate but wanted the sides to be lower and wanted to make sure there was no easy chew escape. Not sure if you can see from the photo but the cats have taken over... Will need to make a larger one for the dog!
I followed the plan pretty much other than lowering the panel on the side and replacing the wooden bars with rebar. The rebar was a bit of a learning curve getting the holes lined up perfectly but I figured it out and I think it came out pretty good!
Used all pine 1x3 and 1x2s. Picked up a pine panel for the top and the bottom is a 3/4 plywood. Made our own chalk paint for the finish and sealed it with wax.
Oh, forgot, added tongue and groove pine for the back and finished it and the top with Antiguing wax.
Lots of fun and I think I will make a double one next!

Built from Plan(s)
Estimated Cost
Around $100 if you don't count all the practice pieces for the rebar!
Estimated Time Investment
Week Long Project (20 Hours or More)
Finish Used
Chalk paint and antiquing wax
Recommended Skill Level
Intermediate
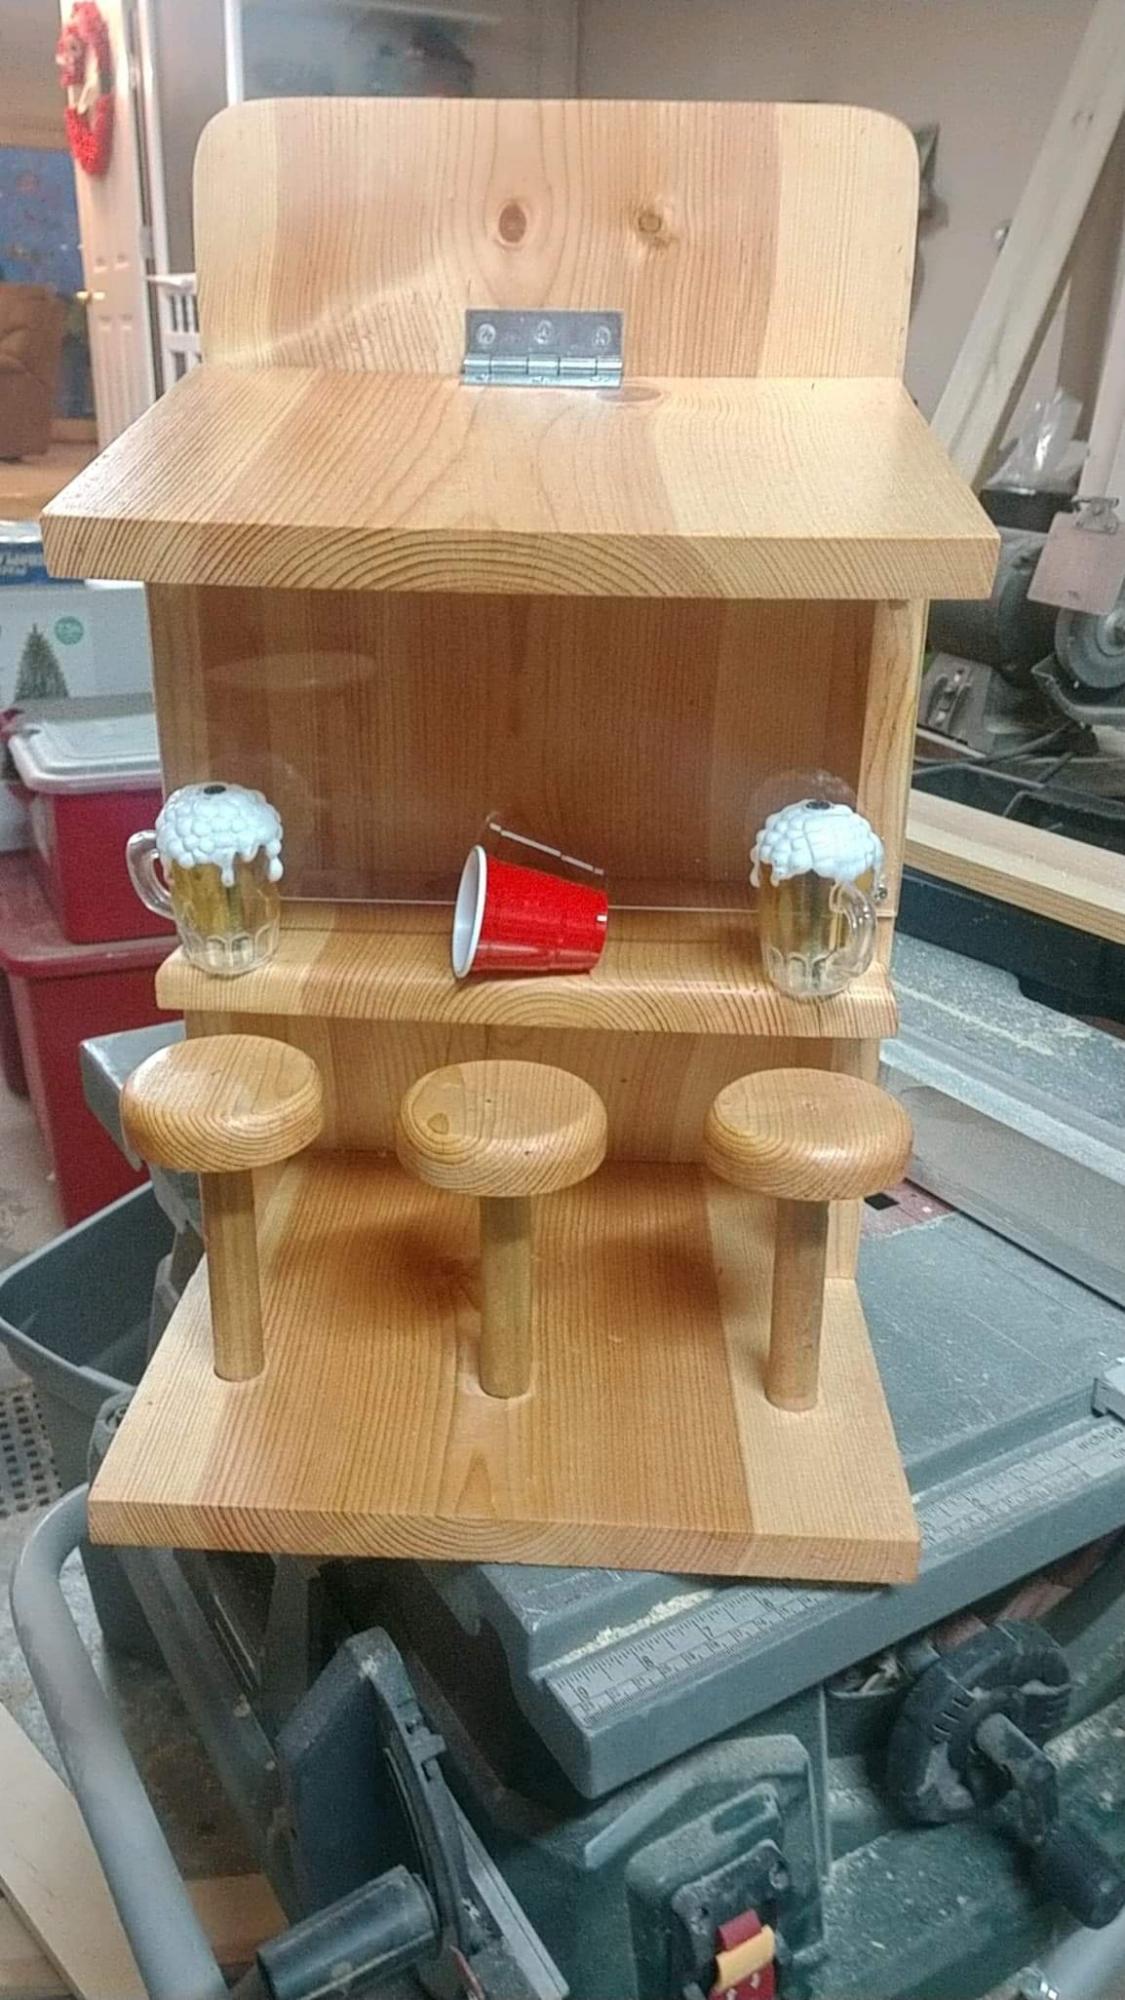
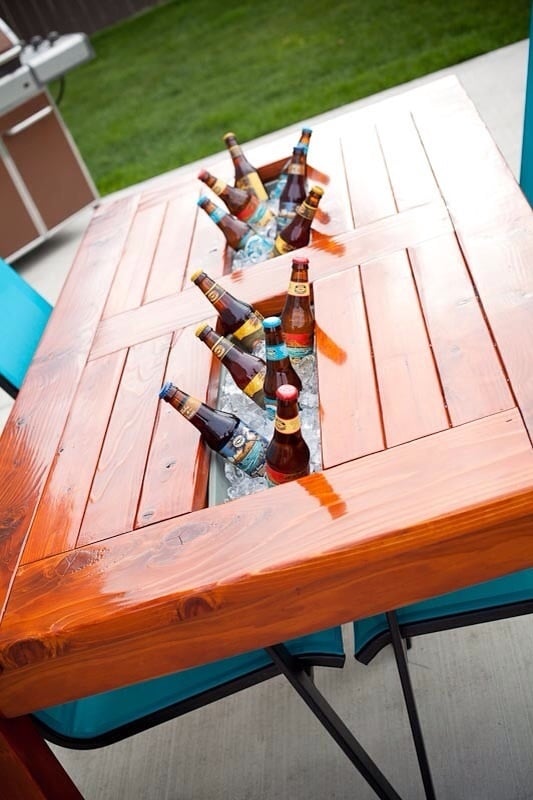
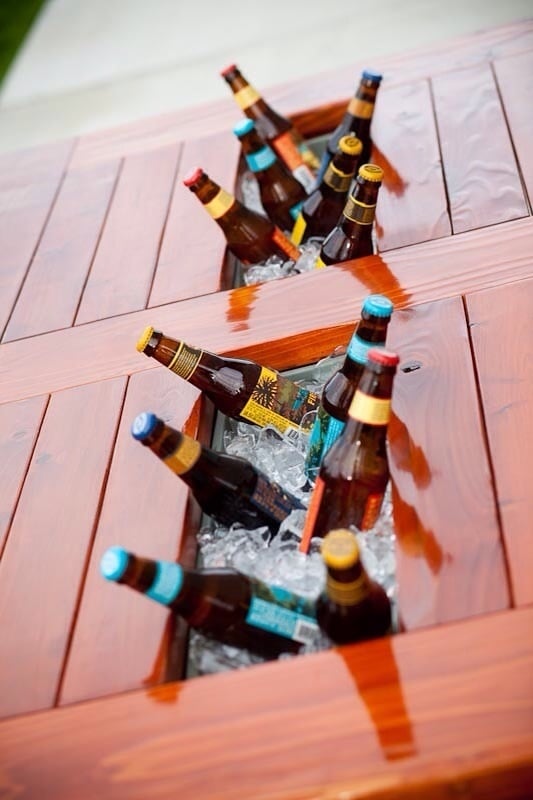
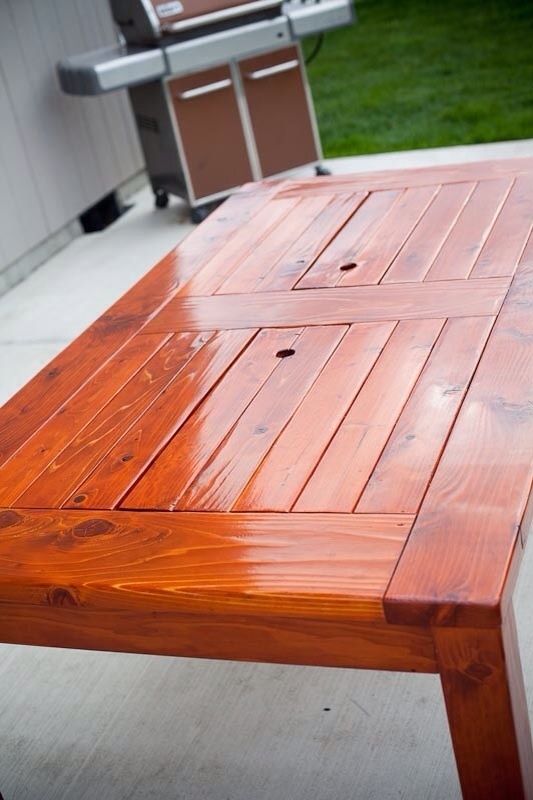
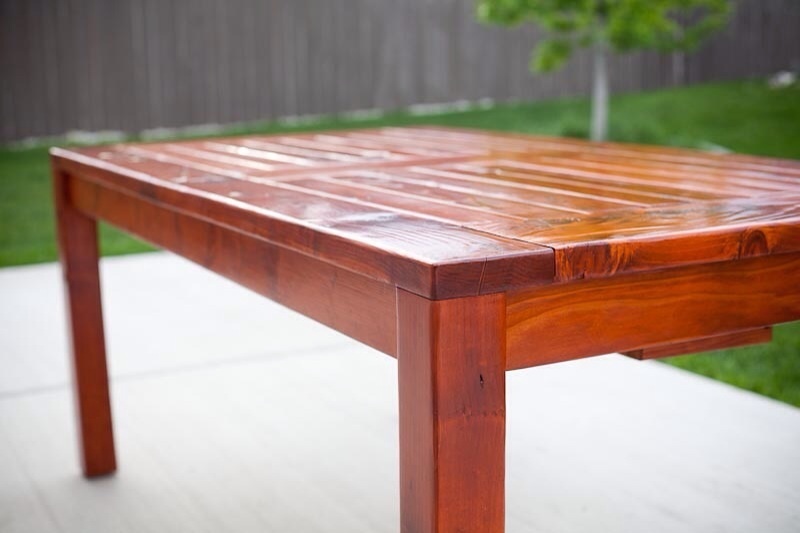
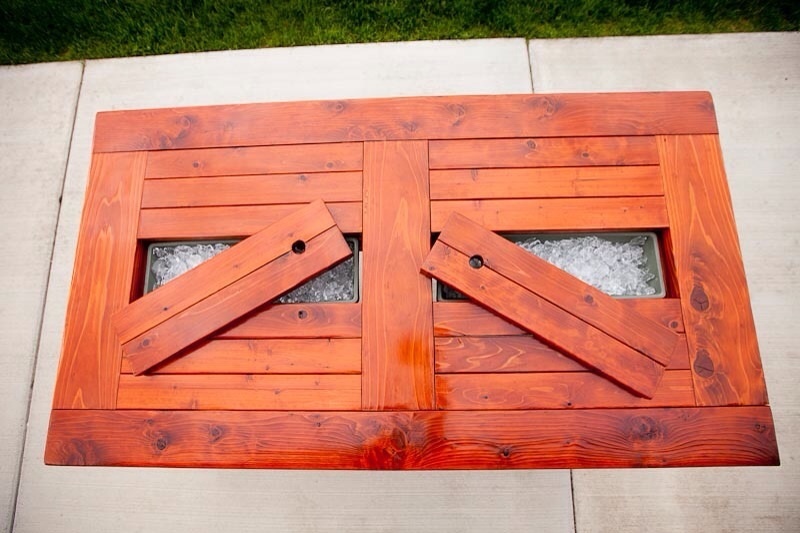
Patio Table w/Built in Beer/Wine Cooler
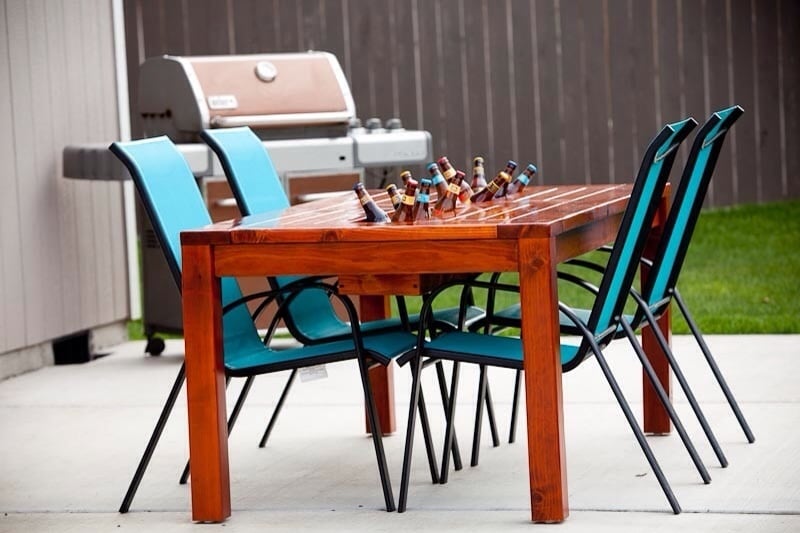
After seeing the patio table with beer/wine cooler, I wanted to build this for my brother and wife who recently bought a house. I asked them if they were interested and of course they said yes. I modified the original plans by adding a 2x4 on each side of the cooler to make the table wider. I also made the legs out of 4x4 vs the 2x4s that were originally called for. I used redwood and then stained it and used a varnish for the final coating. I probably wouldn't use the varnish again for an outdoor table, because it looks like it should be an indoor table vs outdoor. Overall, I'm pleased with the results and the best part about it, I get to enjoy it every time I go over for a BBQ.

Estimated Cost
$225-250
Estimated Time Investment
Week Long Project (20 Hours or More)
Finish Used
Olympic Redwood Naturaltone Toner Exterior Stain
Cabot Spar Varnish Semi-Gloss
Cabot Spar Varnish Semi-Gloss
Recommended Skill Level
Beginner
Comments
Wed, 07/03/2013 - 13:04
Measurements
Awesome table, do you happen to have the measurements you used. I'd like to make the same table but I need the lumber yard to make the cuts.
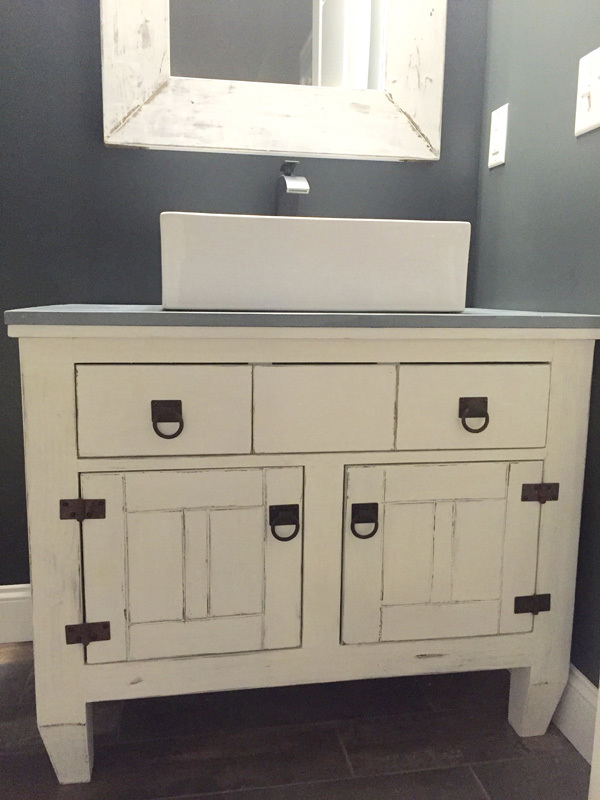
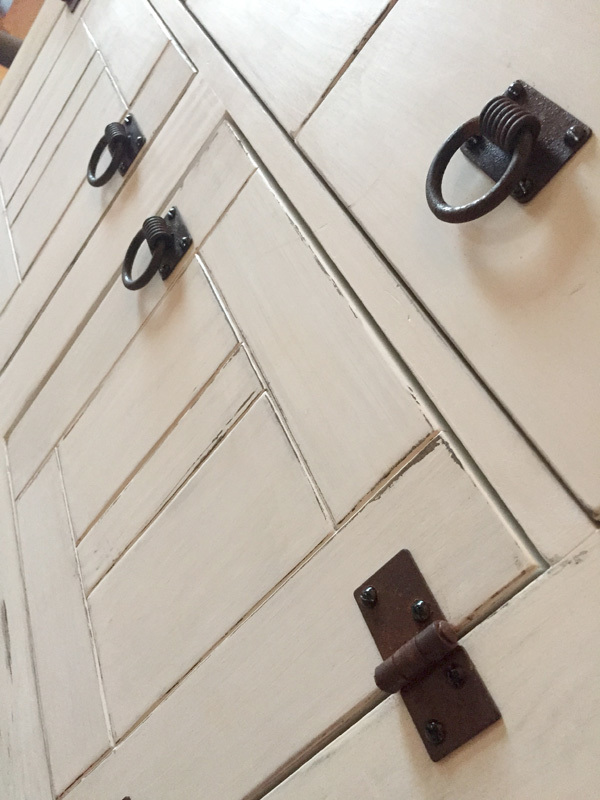
Bathroom Vanity
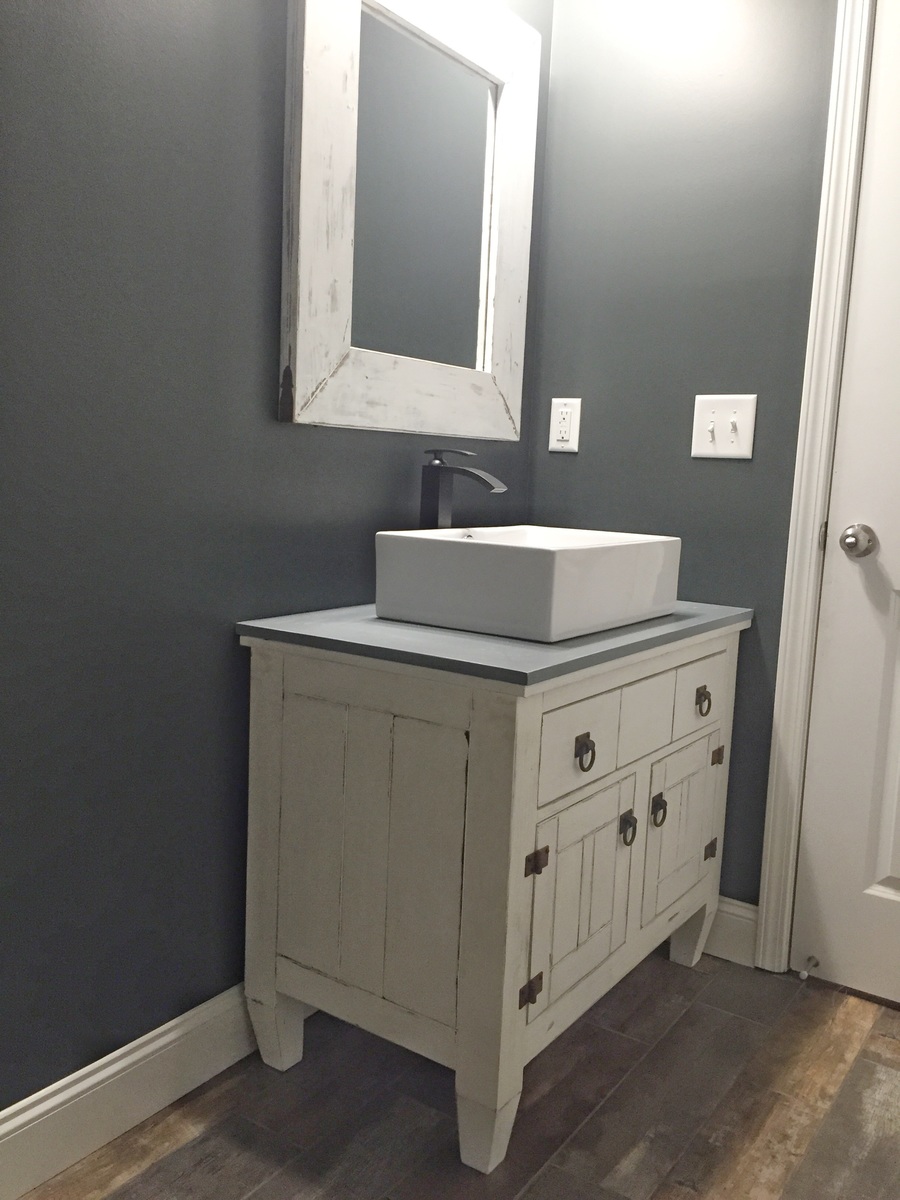
Bathroom vanity with vessel sink. Made 32 inches high to have a vessel sink on top. 37 inches wide and 22 inches deep.

Estimated Time Investment
Week Long Project (20 Hours or More)
Finish Used
Minwax Jacobean without pre-conditioner. Vaseline on areas want stain to show through. Extra white paint. First coat sanded slightly and then second coat sanded smooth with 400 grit paper. Waxed to hopefully protect it.
Recommended Skill Level
Intermediate
Comments
Tue, 07/09/2019 - 18:27
Where to find the plans
Looks really beautiful how can I get the plans to do this for my parents?
thanks
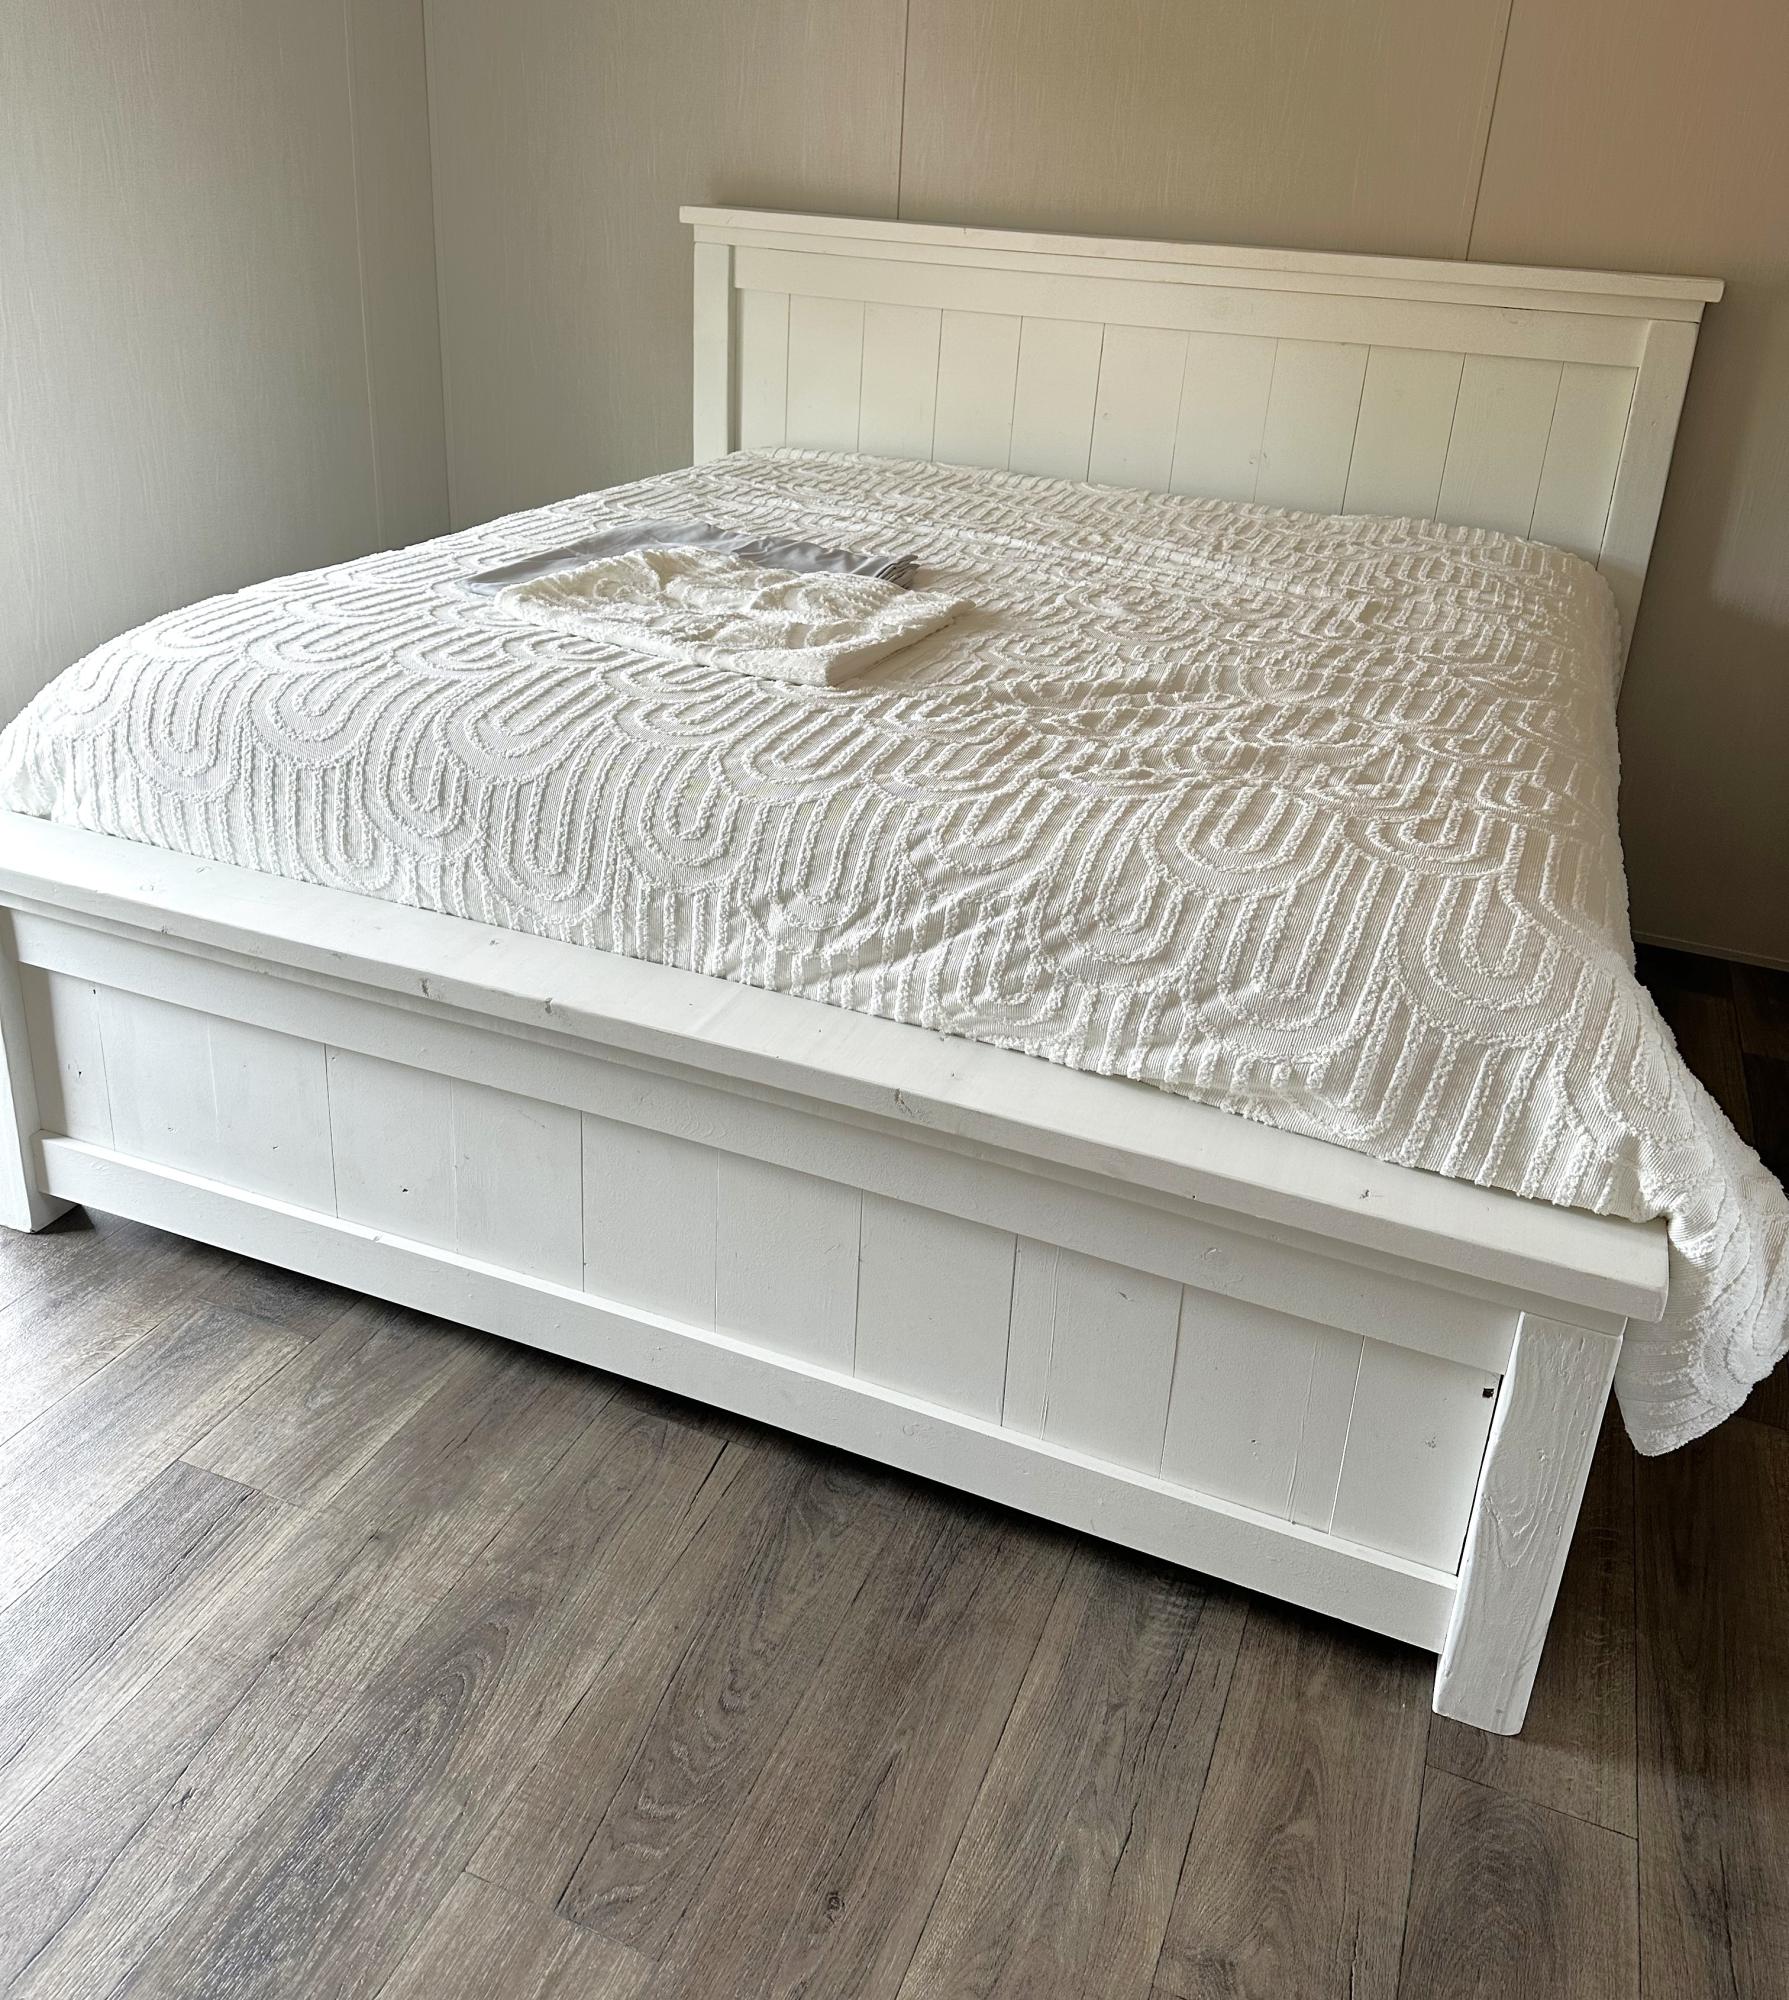
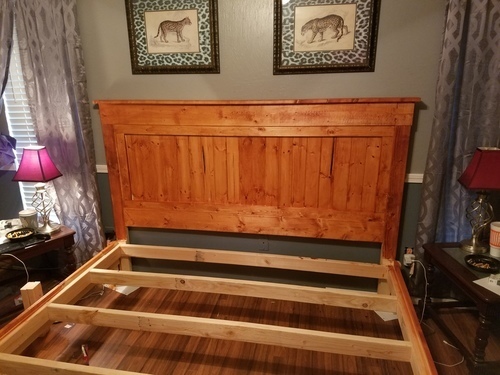
Farmhouse King Bed

This was our first ana white build. Bed build took one Saturday - to finish up took another week or so working nights - most of our time spent on getting the color we wanted and sanding and finishing. Building the 2x4 frame took more time than anticipated as well. We are super happy with how it turned out.


Built from Plan(s)
Estimated Cost
$250 for lumber, stain and lumber for bed frame. We used lag screws on the side and 2x4 hangers for the frame which increased costs.
Estimated Time Investment
Week Long Project (20 Hours or More)
Finish Used
Stain is two coats minwax dark mahogany plus classic grey over the top - wiped off and finished with minwax satin poly.
Recommended Skill Level
Starter Project
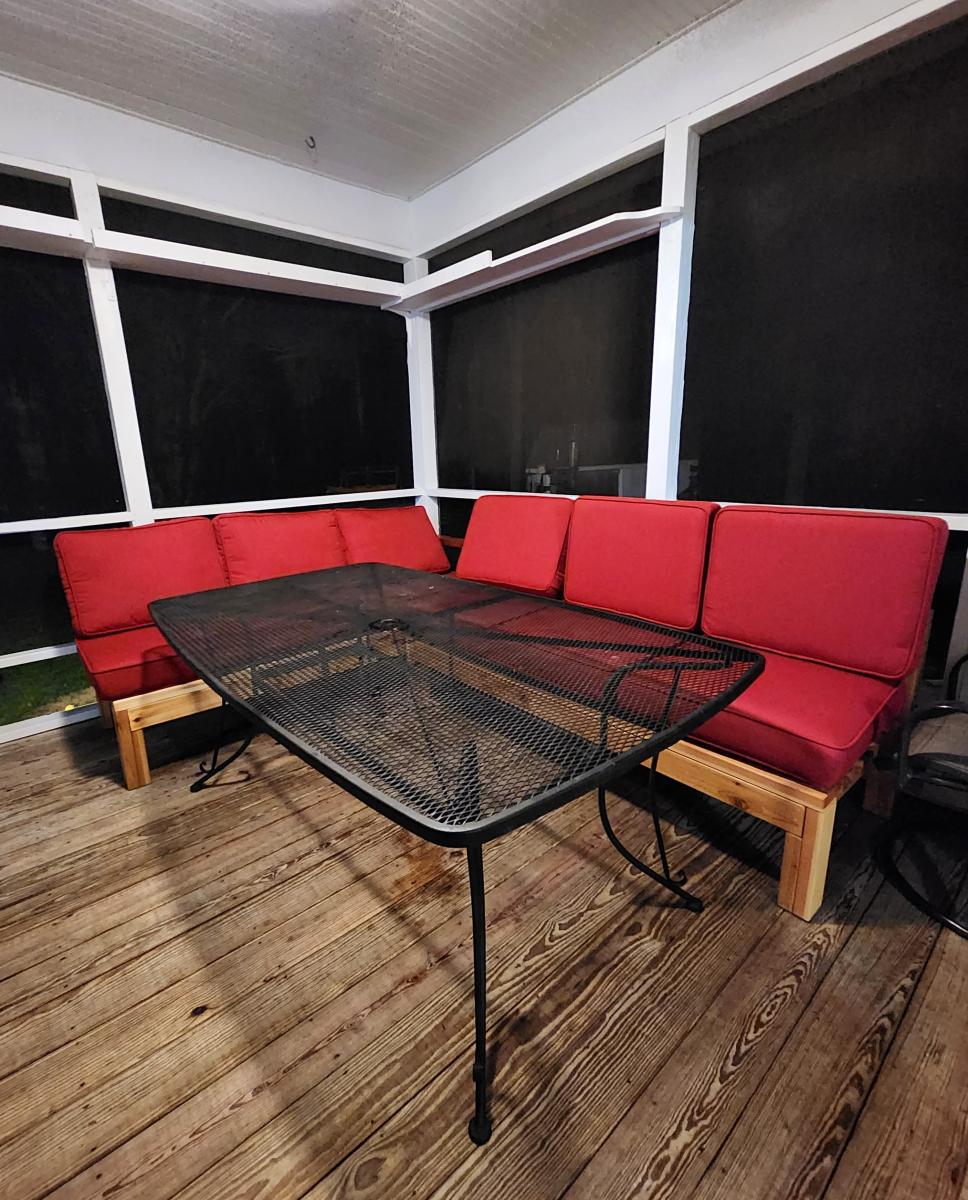
Armless Sectional

A 6' armless sofa & a 6' one arm sofa made of decking cedar and finished with outdoor urethane. Perfect seating for large group for dinner in a screened in porch! This is my first project using Ana White plans and it came out perfectly!! Thank you.
Michele V.
Hanging Bookshelf for Toddler Bedroom
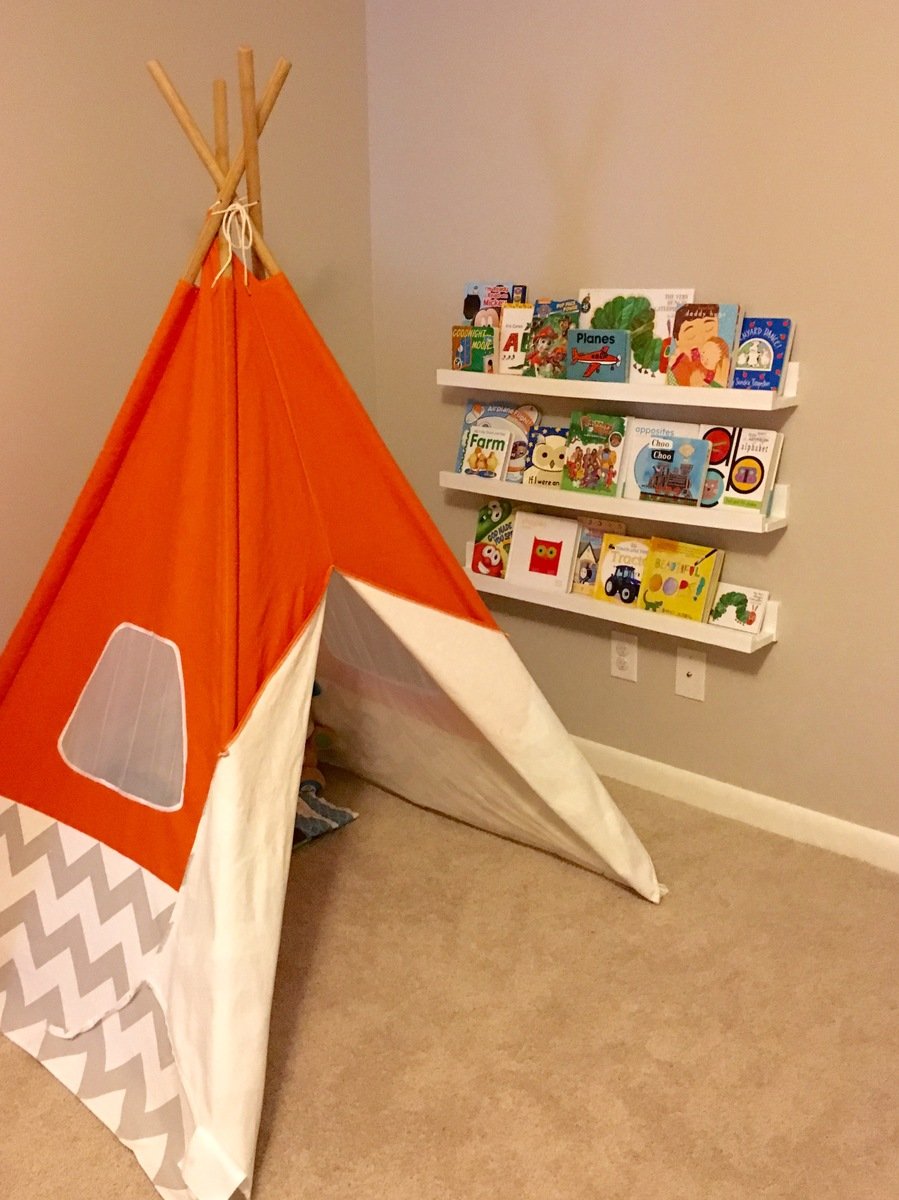
this was super easy and a quick project! used some wood I already had and it worked perfect for my toddler son's bedroom!
Built from Plan(s)
Estimated Time Investment
An Hour or Two (0-2 Hours)
Recommended Skill Level
Beginner
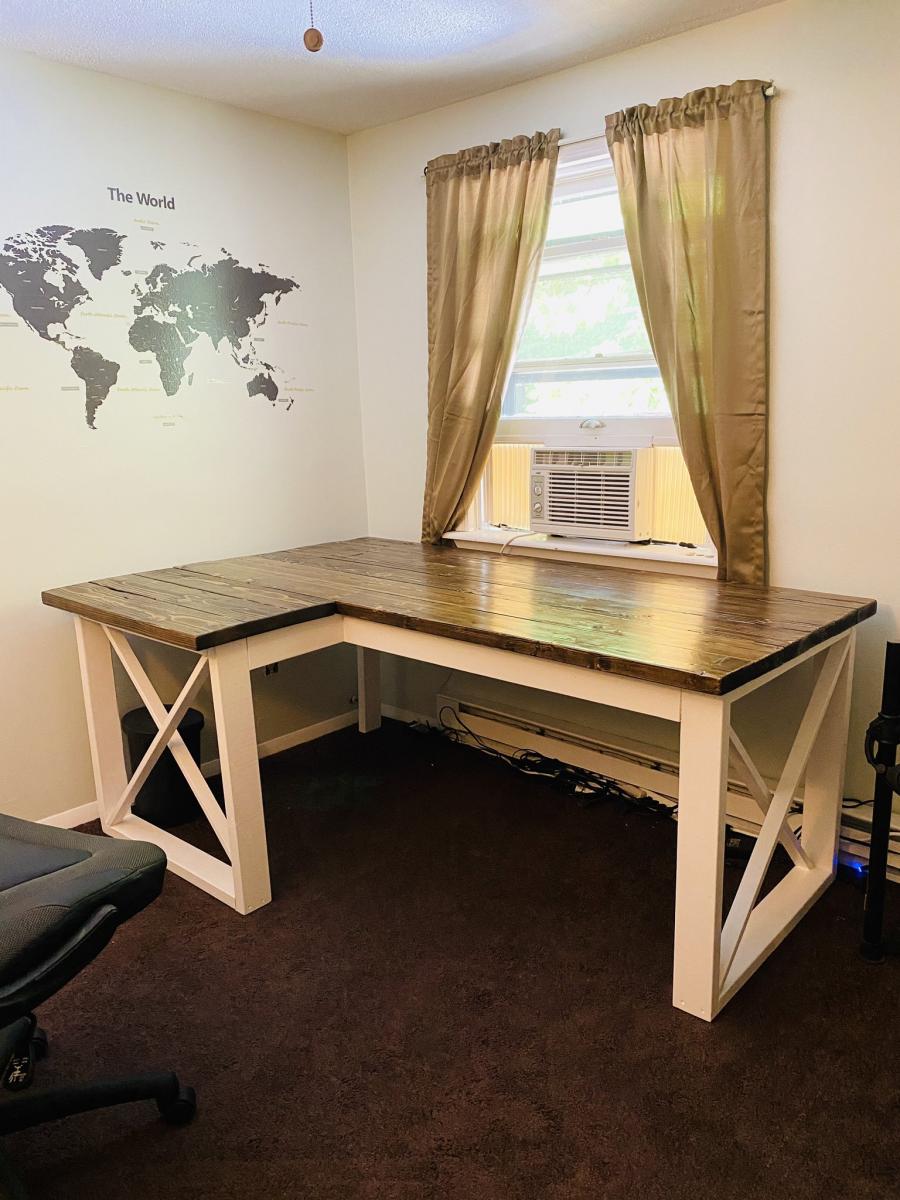
L Shaped Double X Desk
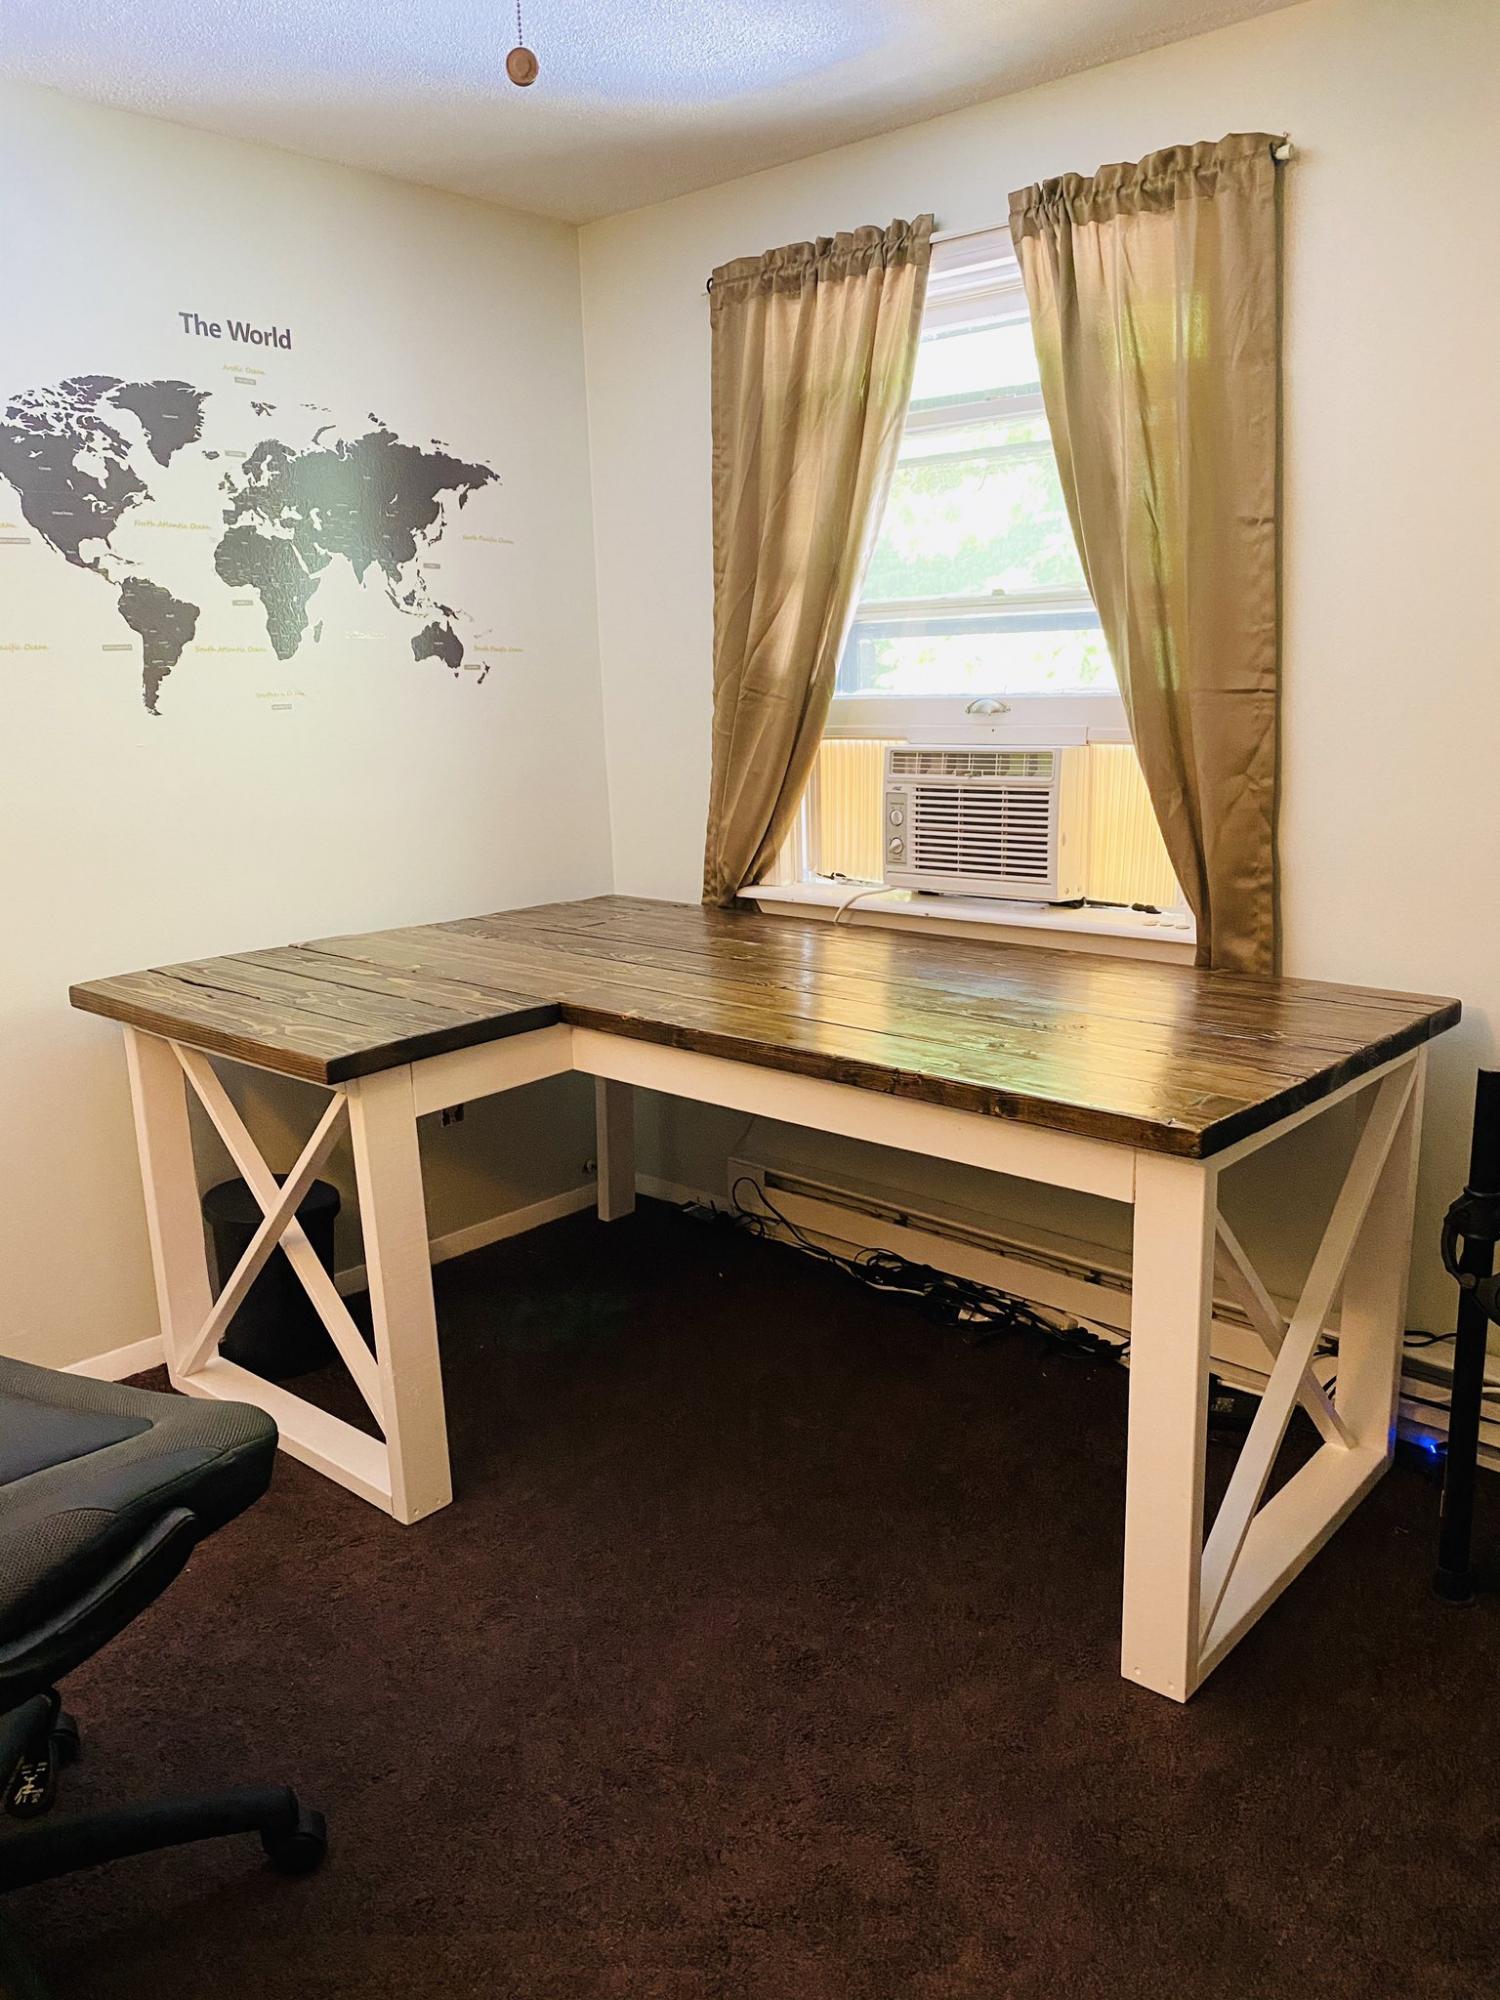
Made the move to working from home because of the pandemic. After 2 months and no end in sight, I decided I needed a better workstation. Built this in about 5 days. Really nice sturdy desk but make sure you measure how big it is first, I think I could have shrank this down by one less 2x6 on the top. It's a very large desk from the plans.
Built from Plan(s)
Estimated Cost
$40
Estimated Time Investment
Weekend Project (10-20 Hours)
Finish Used
Jacobean stain
Recommended Skill Level
Beginner
Fancy Farmhouse King Bed
Fancy Farmhouse King Bed
Heather Kay
Built from Plan(s)
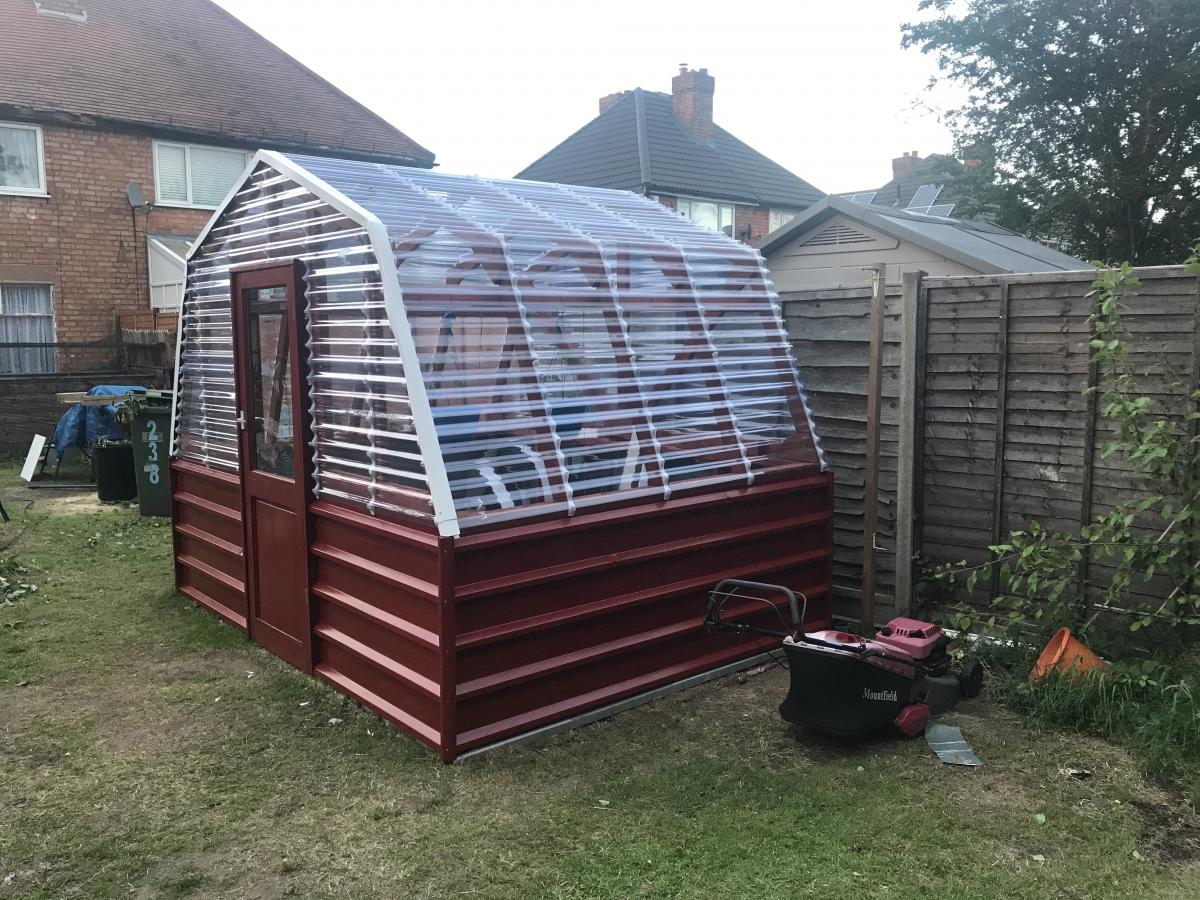
Barn Style Greenhouse
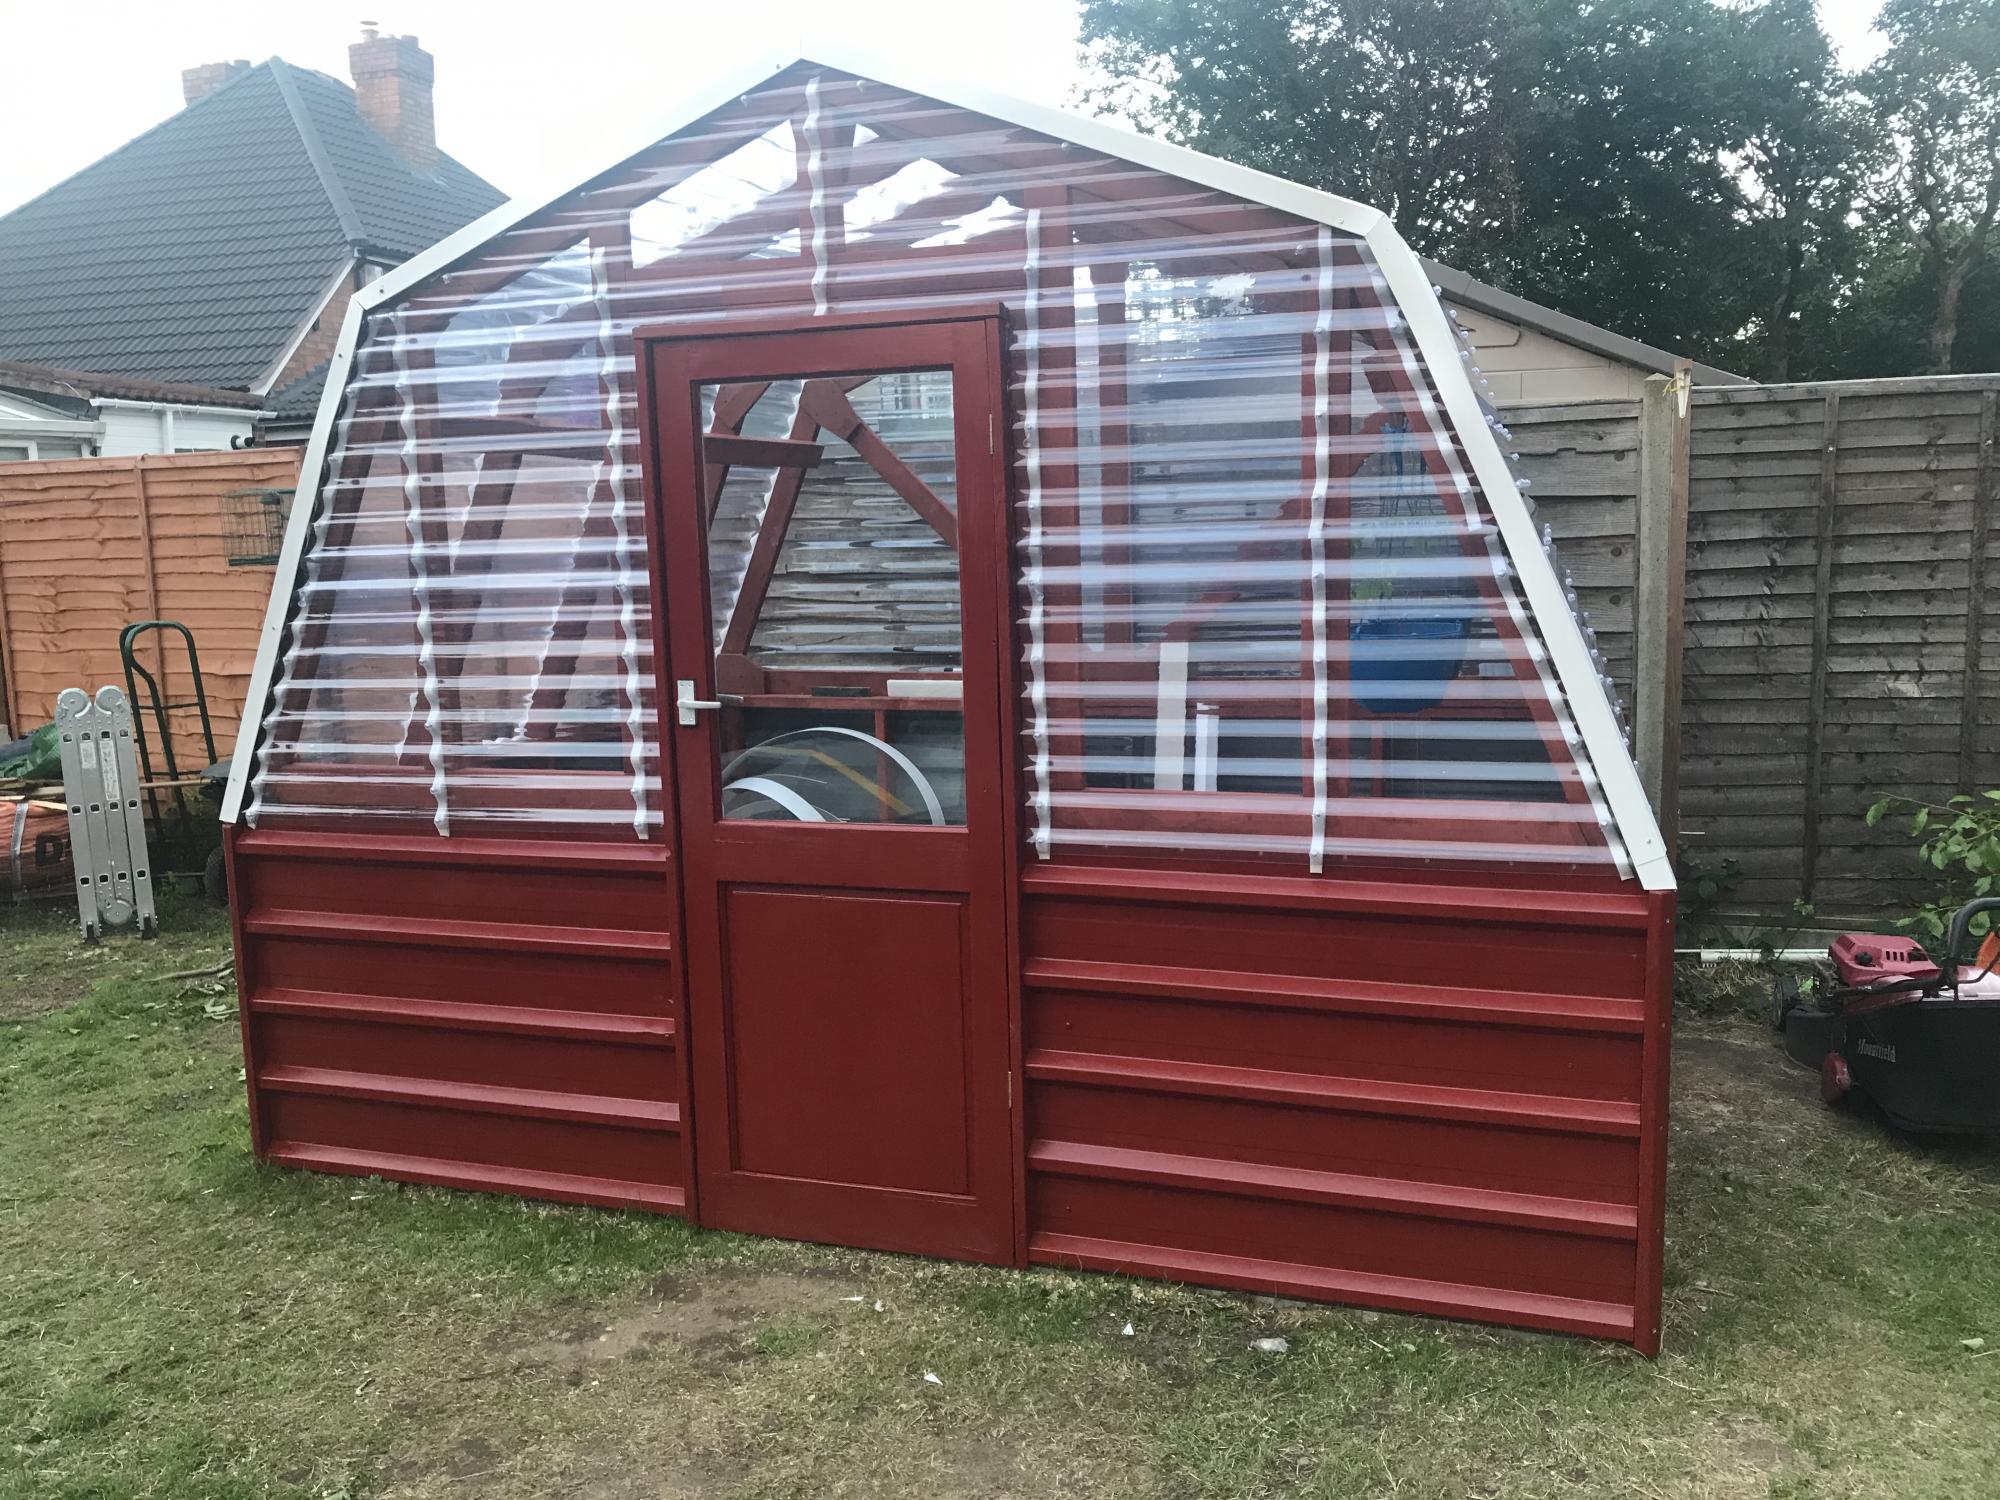
Followed your excellent plans, thank you.
Adapted to make smaller...approximately 10ft X 8ft.
It gave me a very enjoyable project to complete during 'lock-down ' and with Greenhouse.
Built from Plan(s)
Estimated Cost
£800
Estimated Time Investment
Week Long Project (20 Hours or More)
Finish Used
Treated all wood with preservative.
Steel panels (old roofing) were obtain from a kind neighbour for free and all external metal/wood was given several coats of 'Red Oxide' gloss Barn/agricultural paint.
Adaptions made by myself were :-
I put self adhesive 'Flashing' on the bottom wood of the vertical sides...to attempt to protect the wood in contact with the floor from getting over wet......time will tell if it works.
I made additional gussets to support the top piece of wood (attached to each end).
I had trouble with keeping the corrugated roof running parrallel....but the reason for this was that it was not manufactured with straight@right angle ends (when I held a level/straight edge along end - there was a quarter of an inch gap in the centre).
Recommended Skill Level
Intermediate
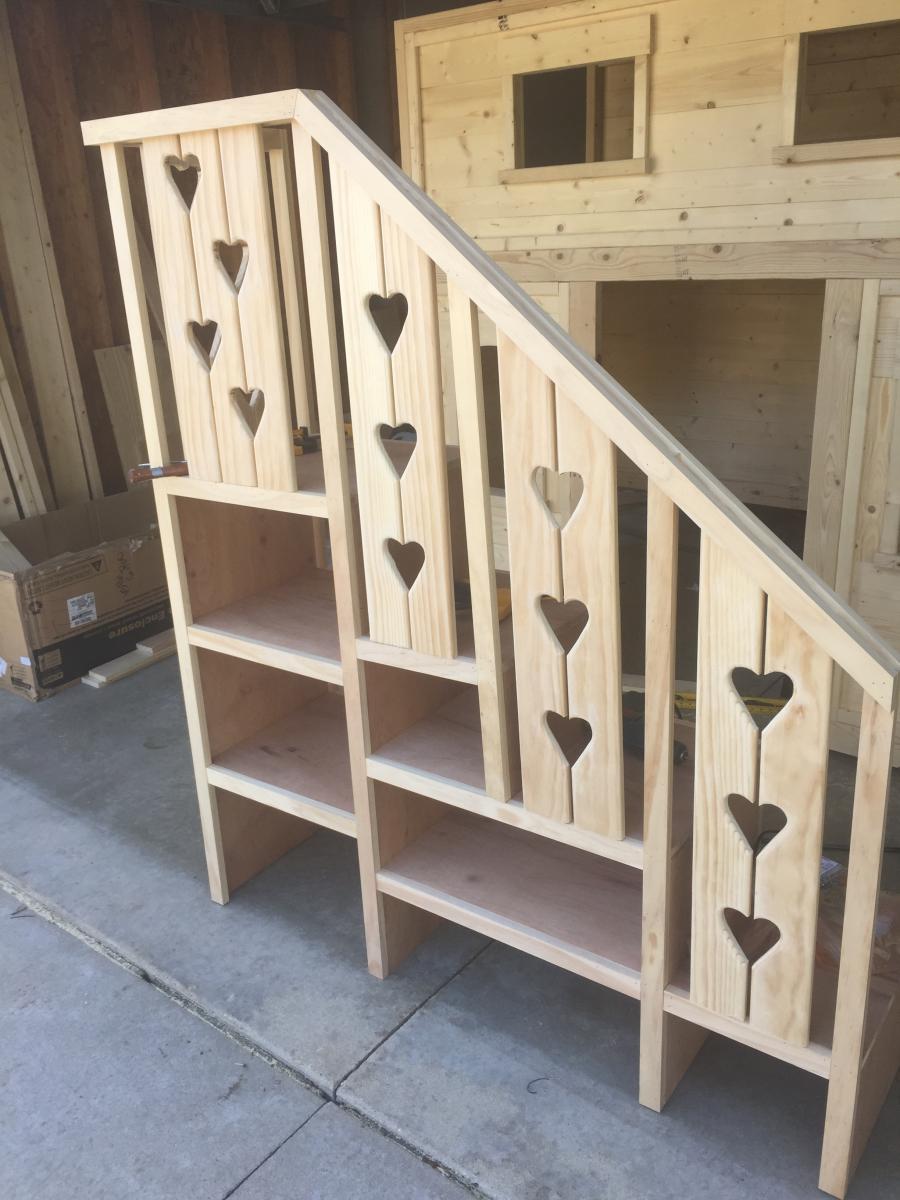
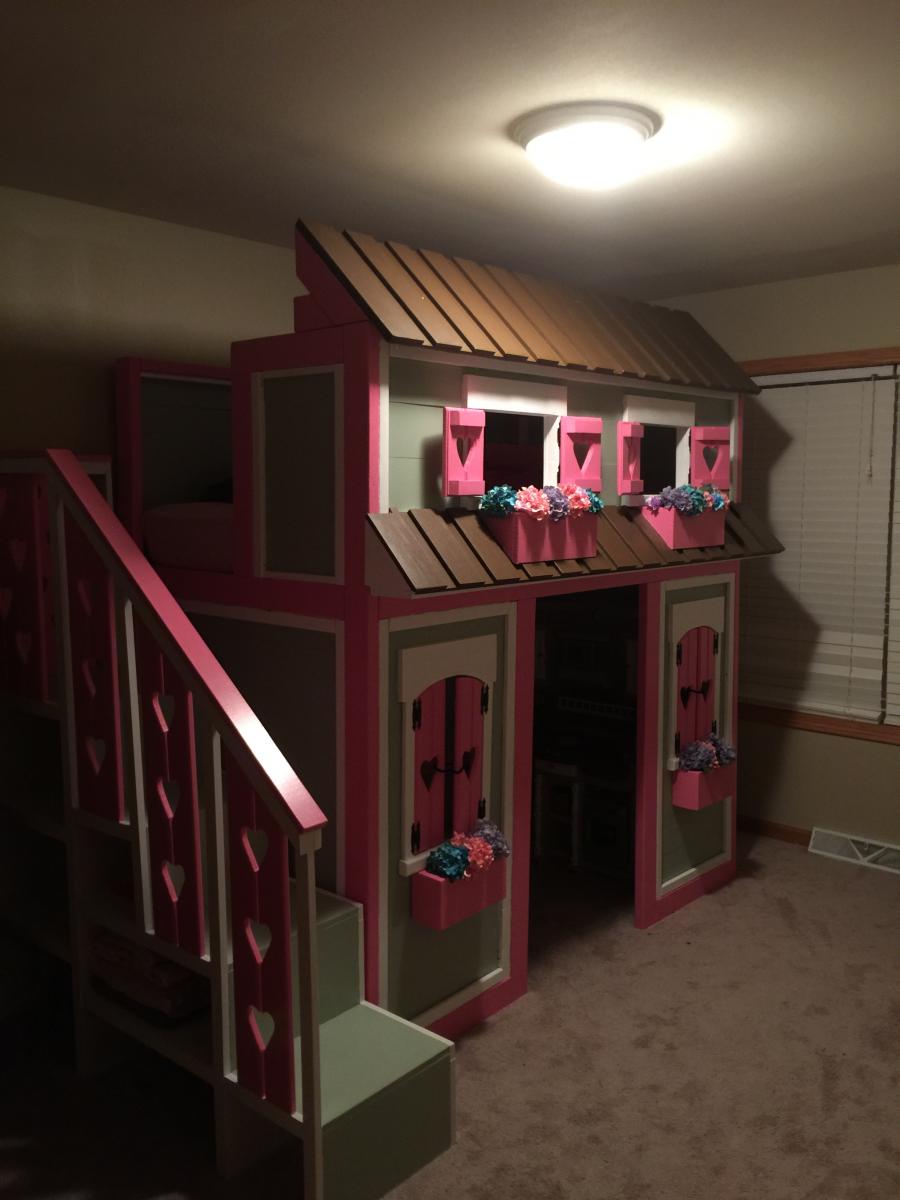
Sweet Pea Bunk Bed
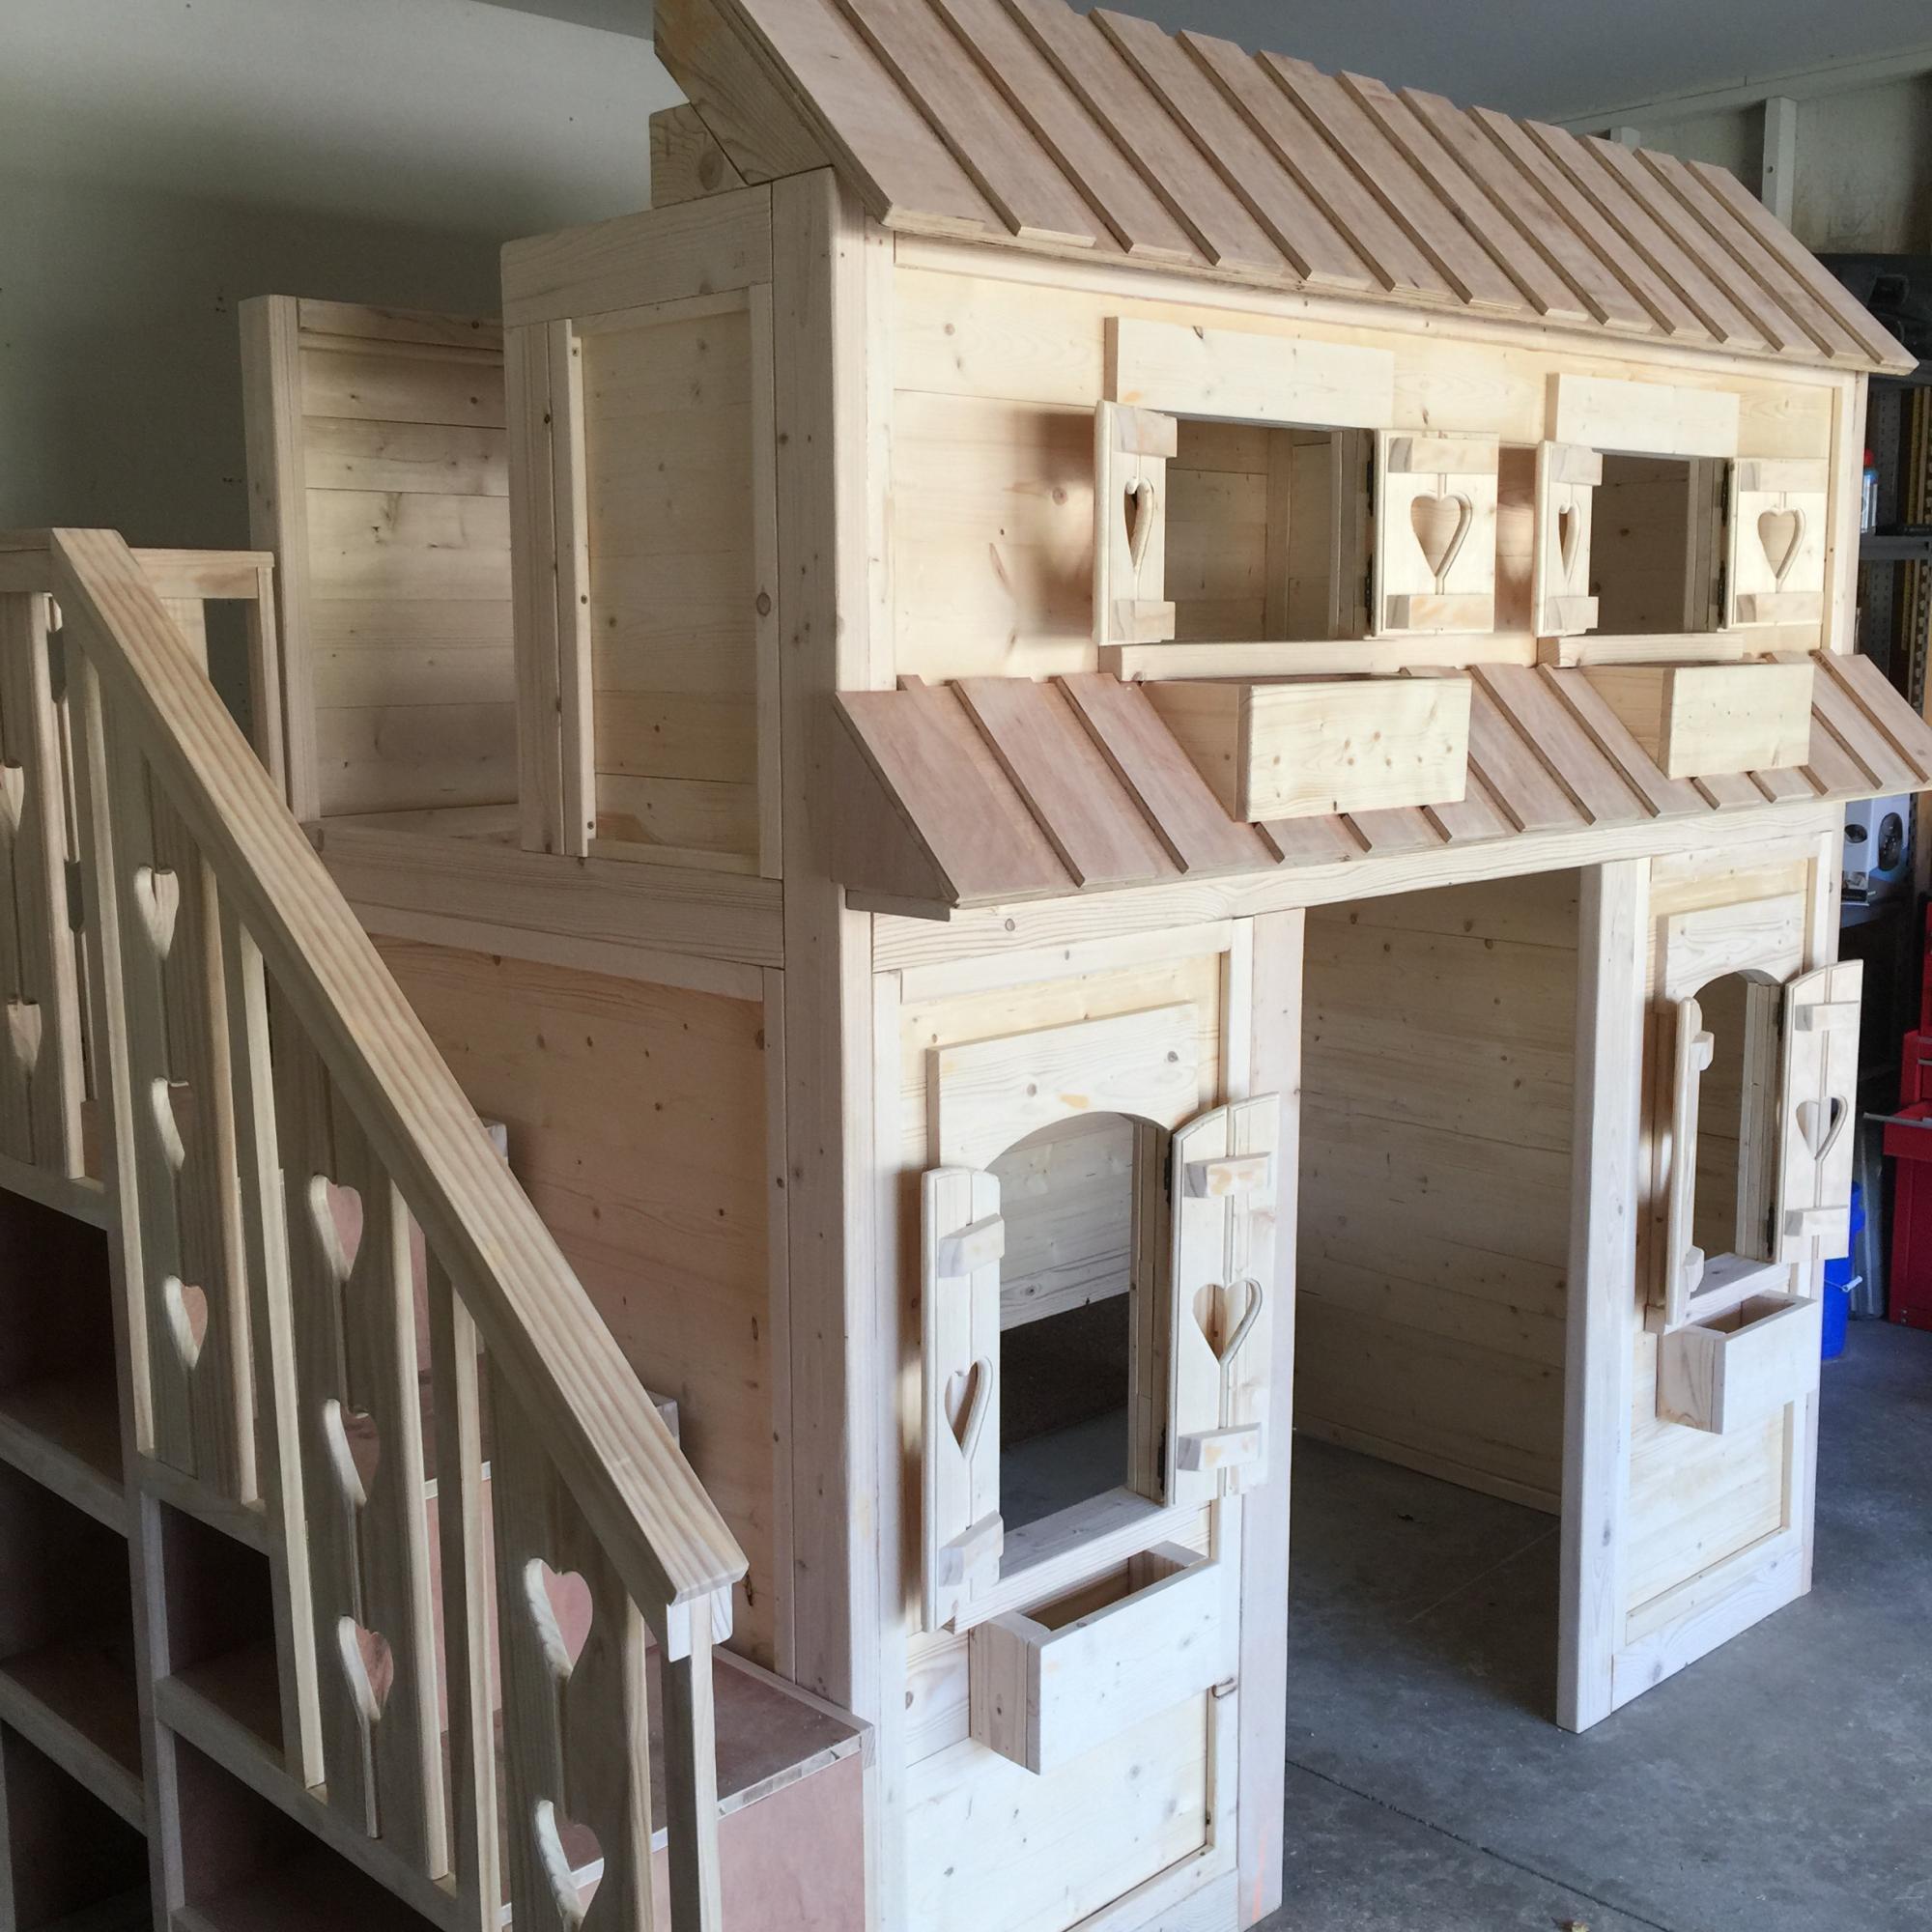
Sweet Pea bunk bed! I ended up making the lower half a playhouse since we had a play kitchen that fit perfectly inside.
Built from Plan(s)
Estimated Cost
350.00
Estimated Time Investment
Week Long Project (20 Hours or More)
Finish Used
Acrylic primer and semigloss paint
Recommended Skill Level
Intermediate
Comments
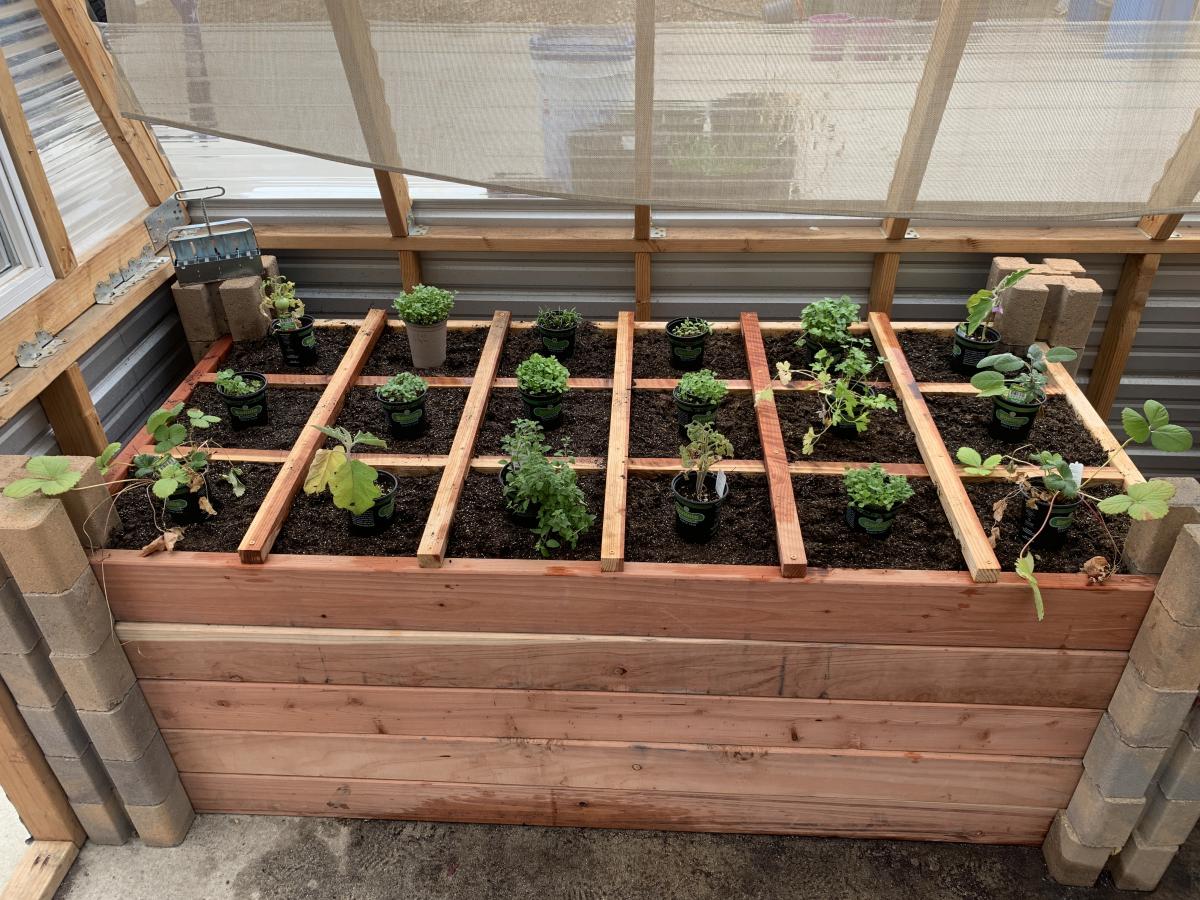
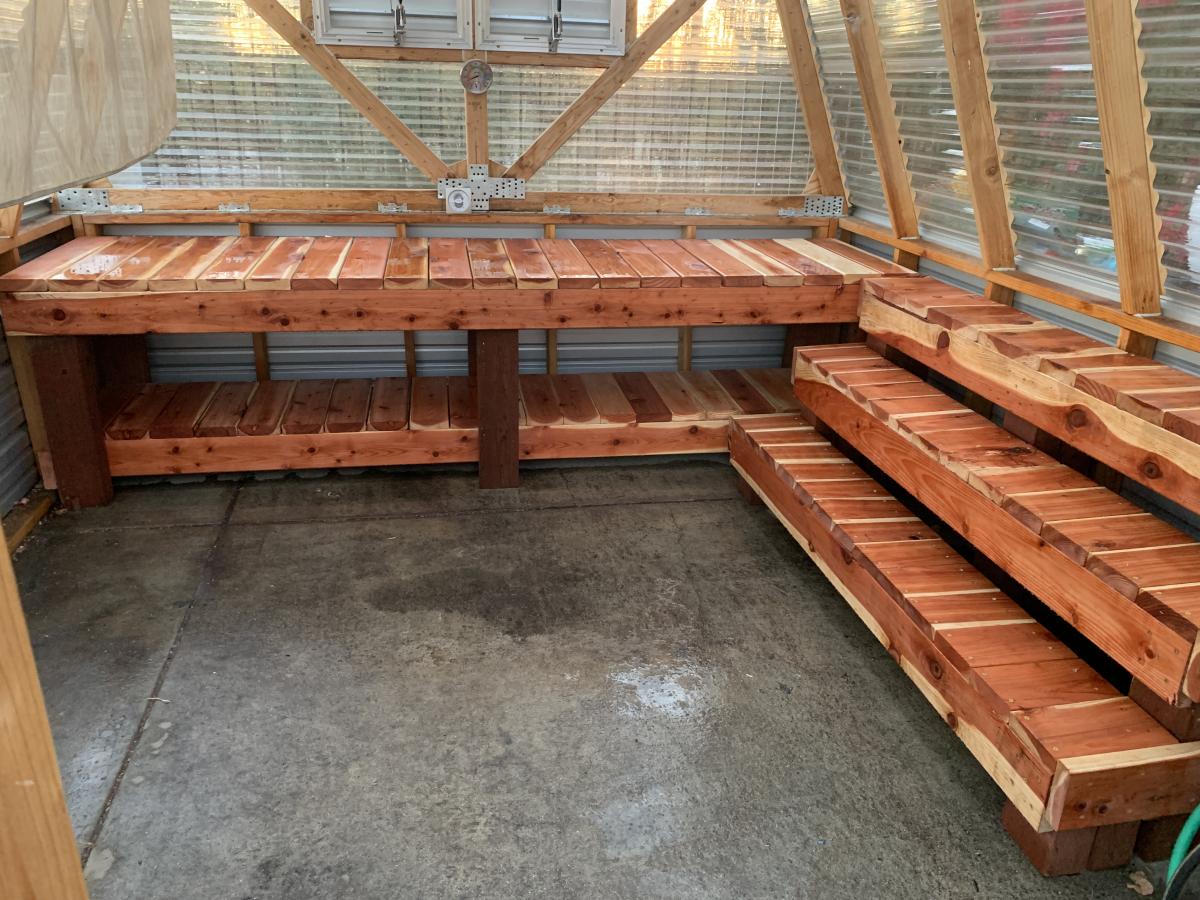
Greenhouse
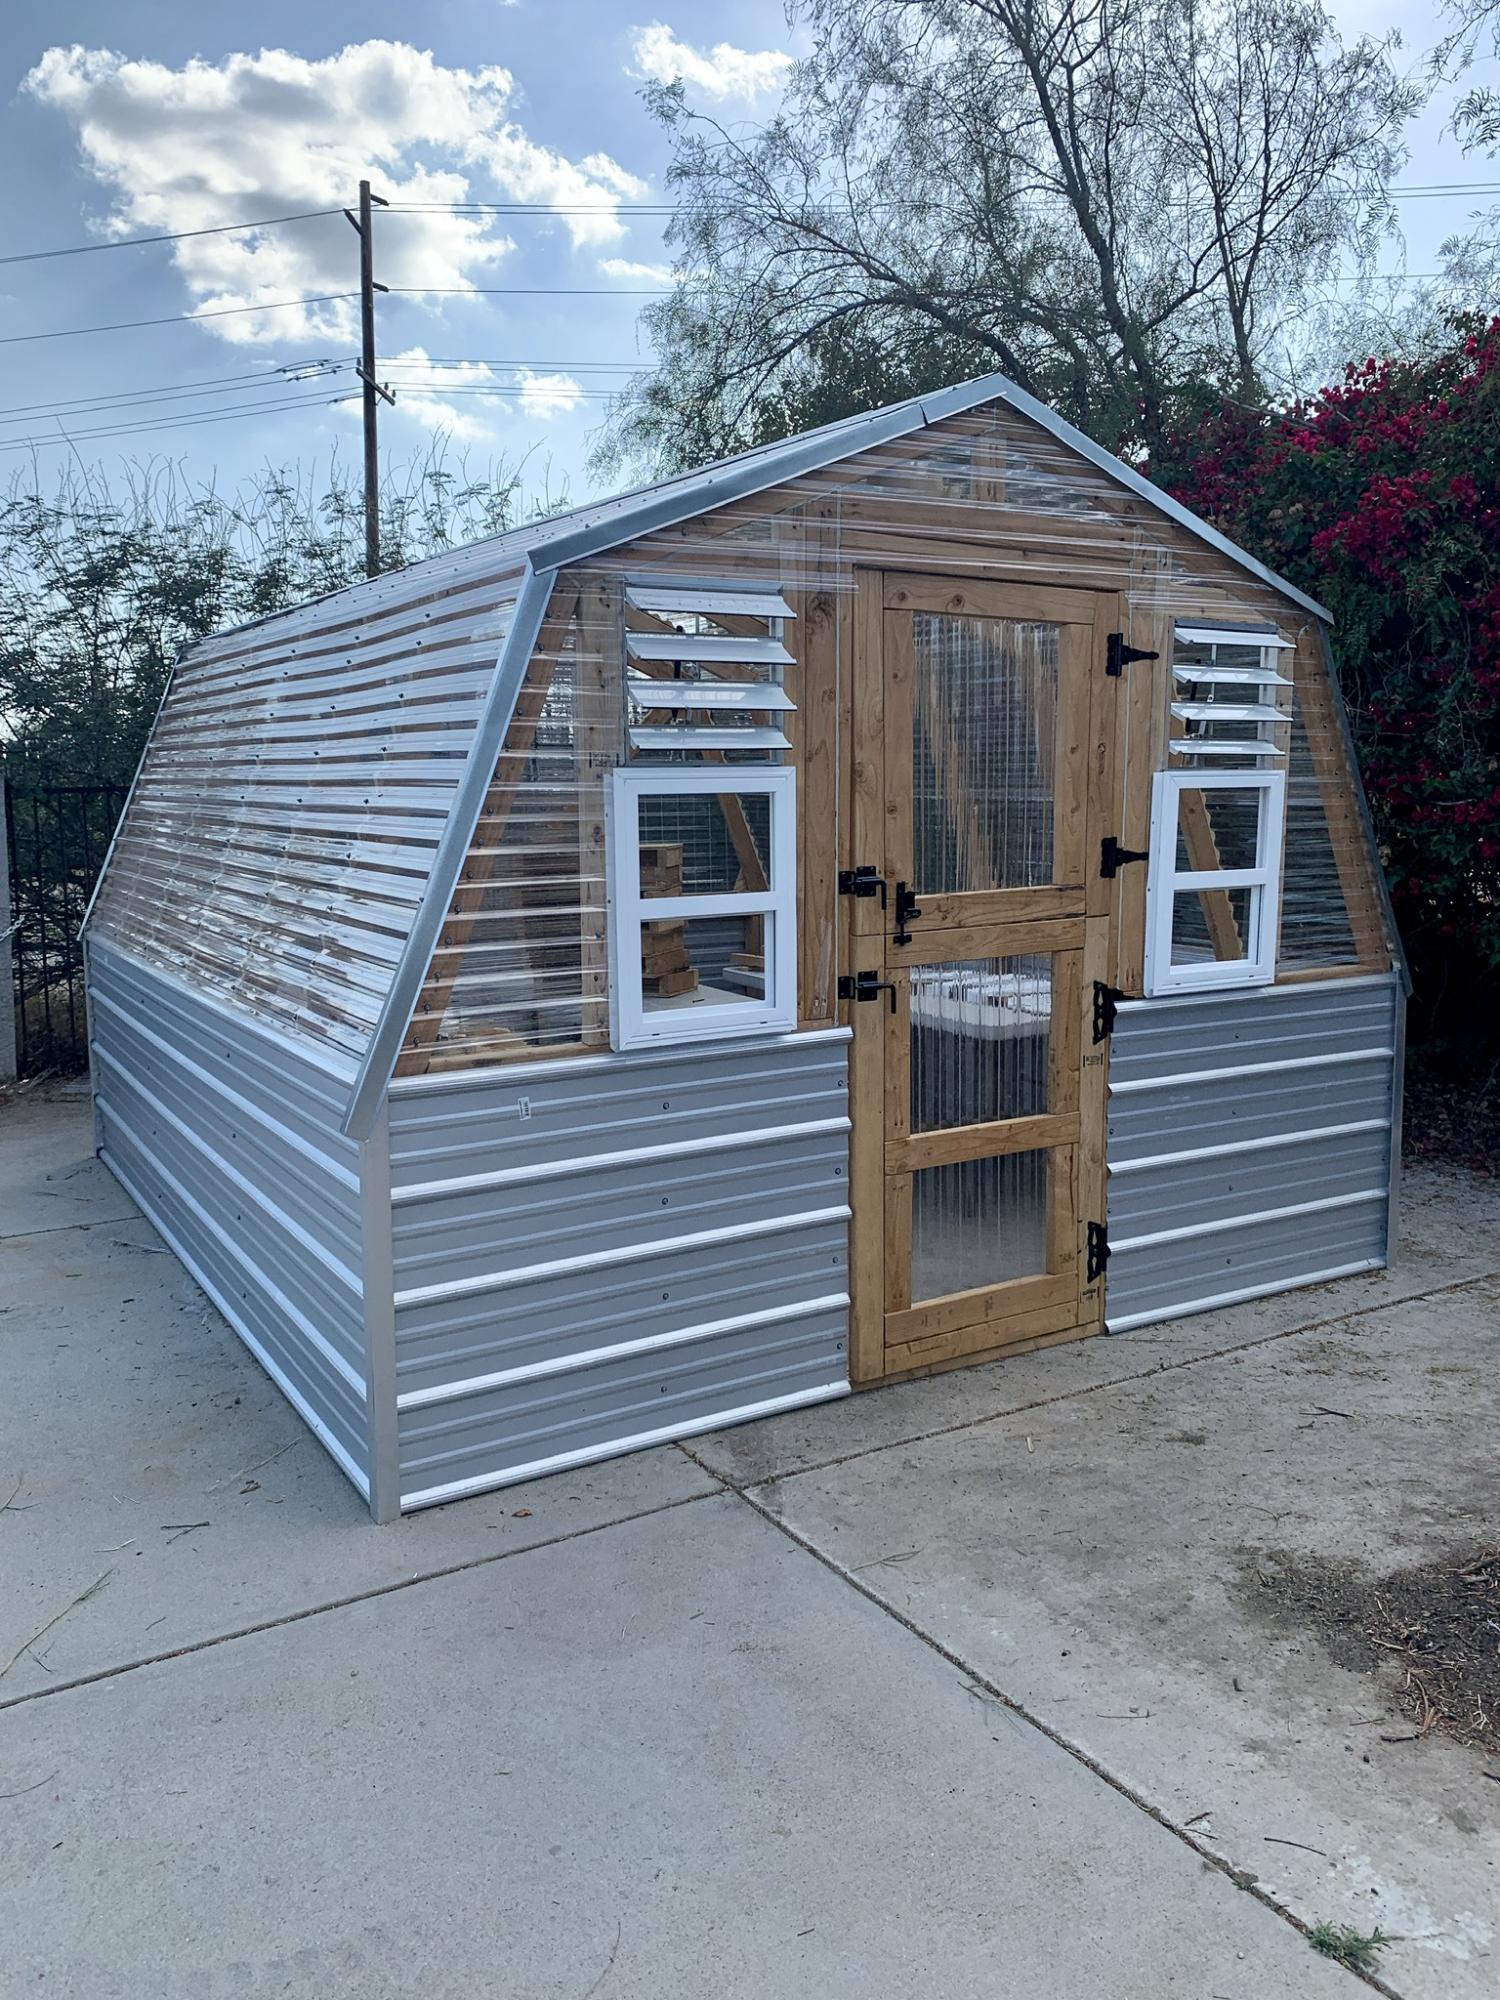
We made some modifications to the greenhouse to include a bench with three levels, a working bench and a square foot garden. We also put it on concrete to keep all the weeds out from the bottom as well.
Built from Plan(s)
Estimated Cost
2500.00
Finish Used
We start our own seeds and plan to grow 15 different varieties of vegetables inside this greenhouse all year long.
Recommended Skill Level
Intermediate
Comments
king size bed
I started this just for fun and ended up doing so much more
Built from Plan(s)
Estimated Cost
$100
Estimated Time Investment
An Hour or Two (0-2 Hours)
Recommended Skill Level
Intermediate
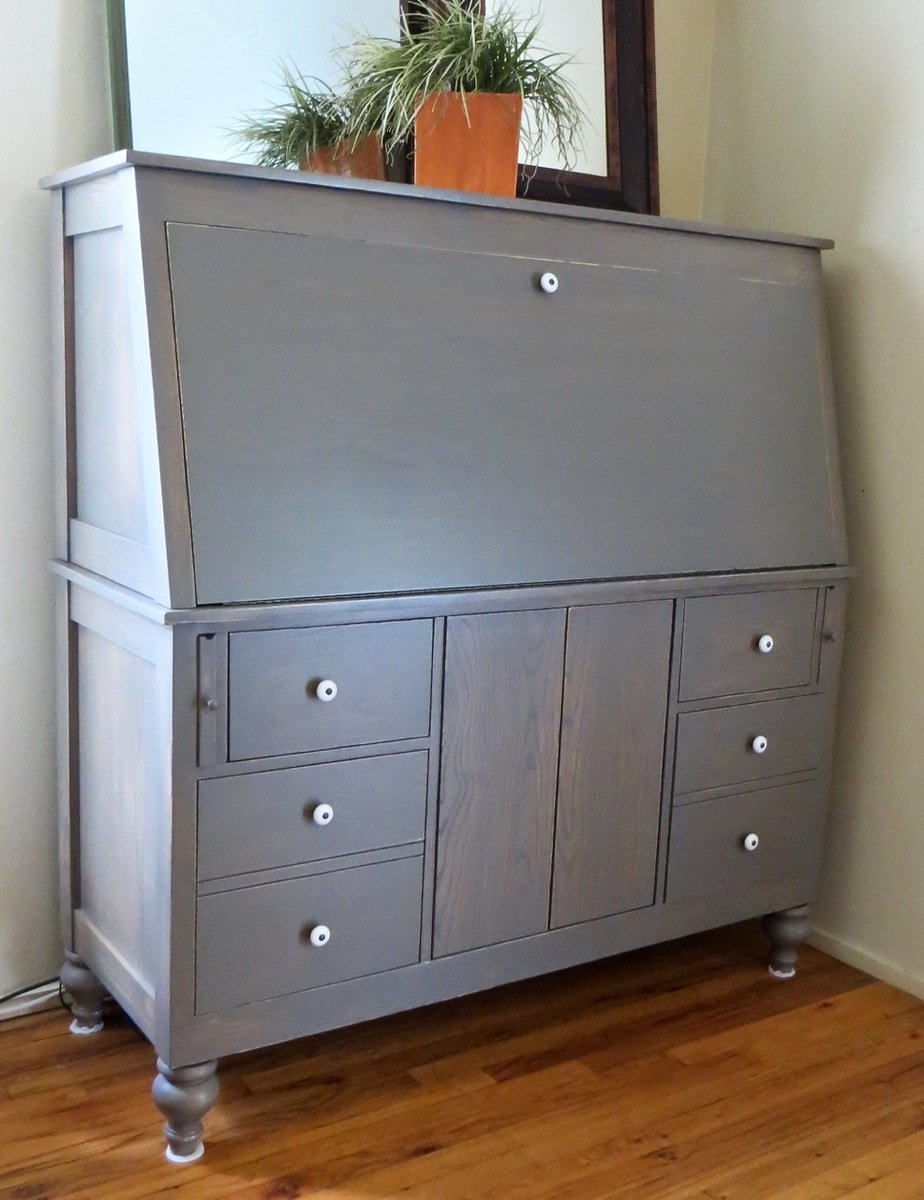
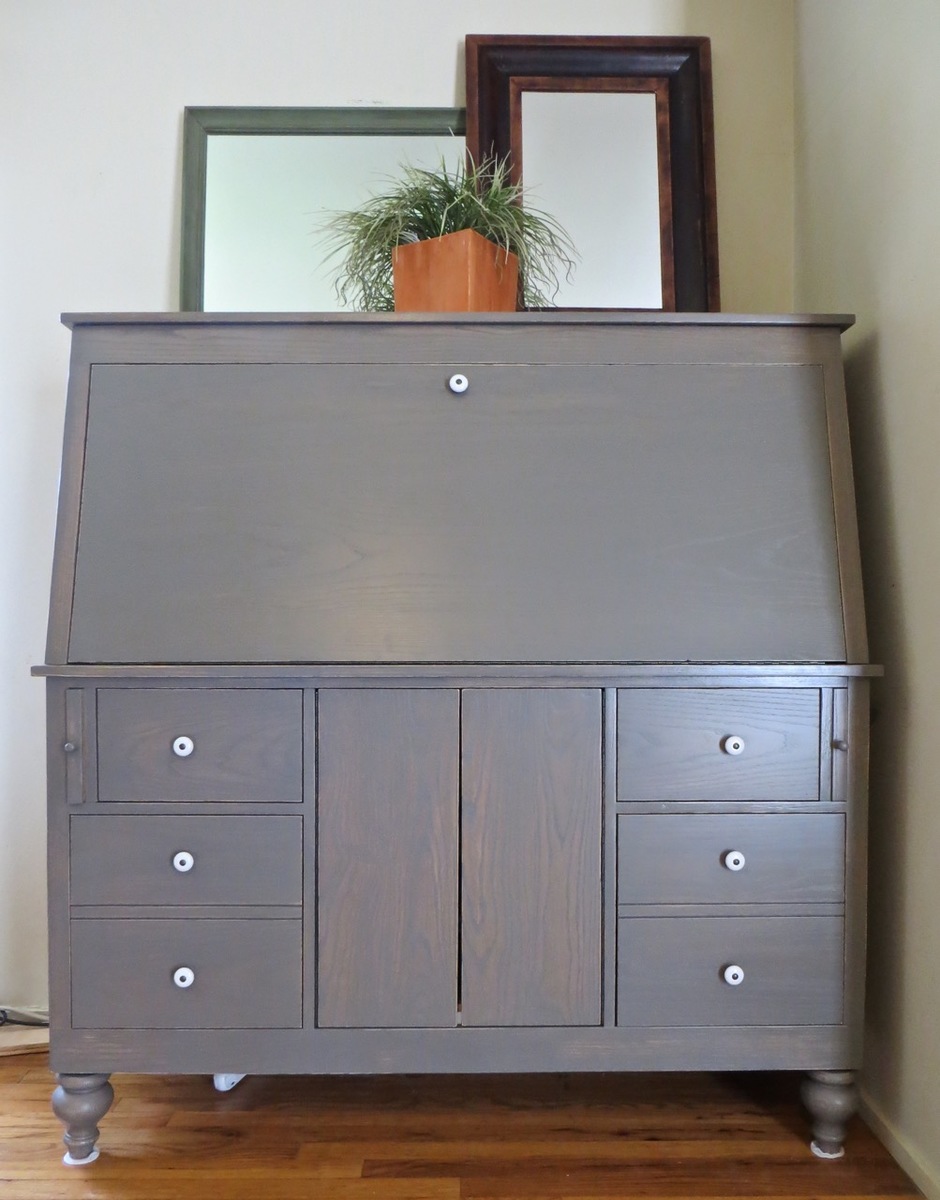
Drop-Down Door Hutch Desk
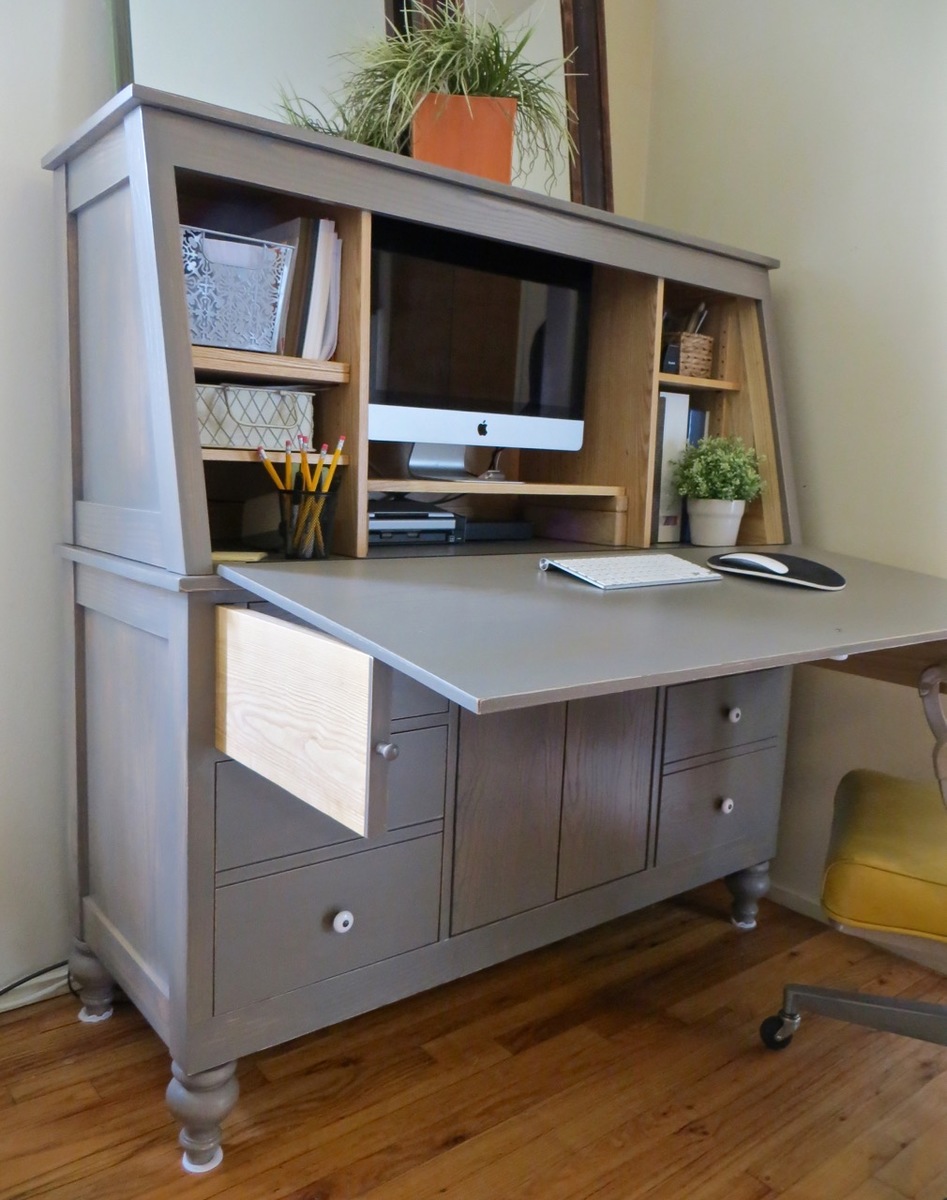
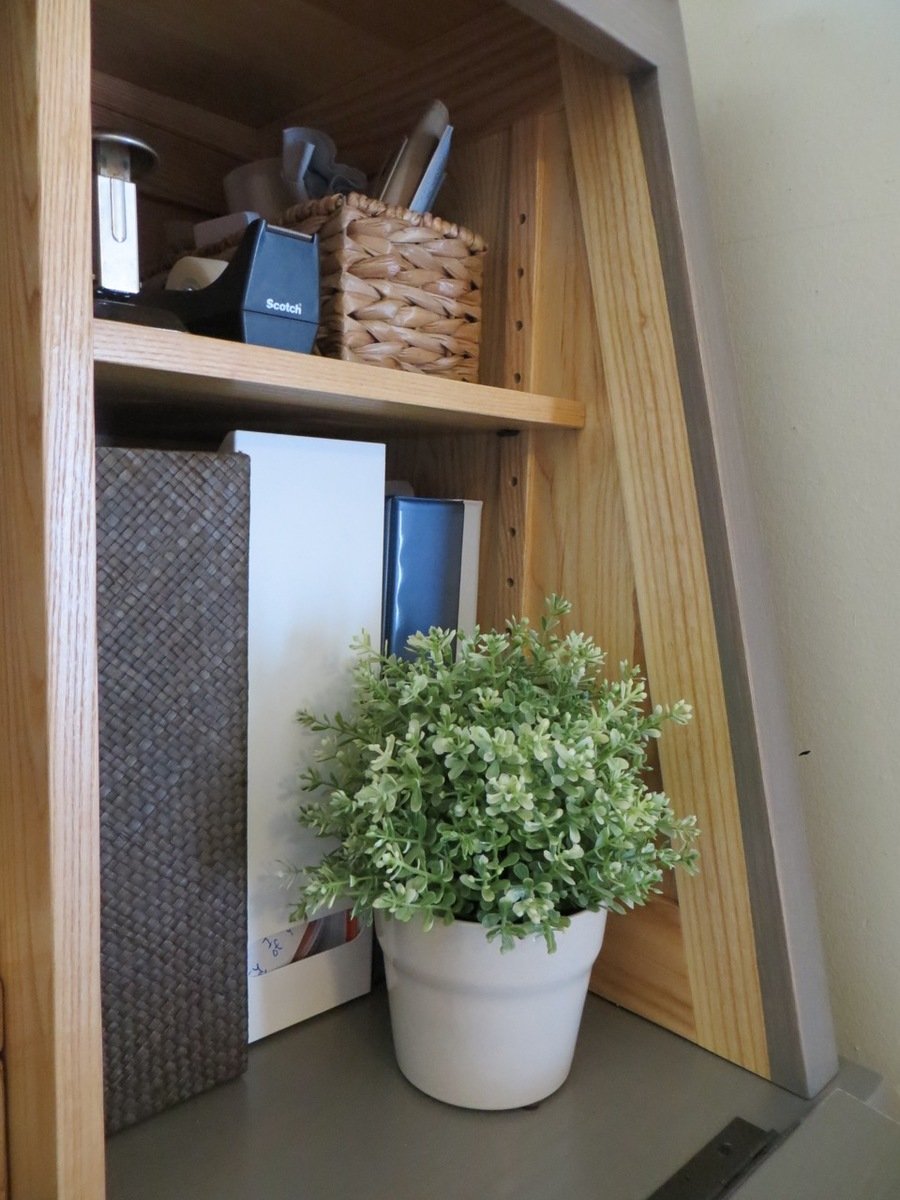
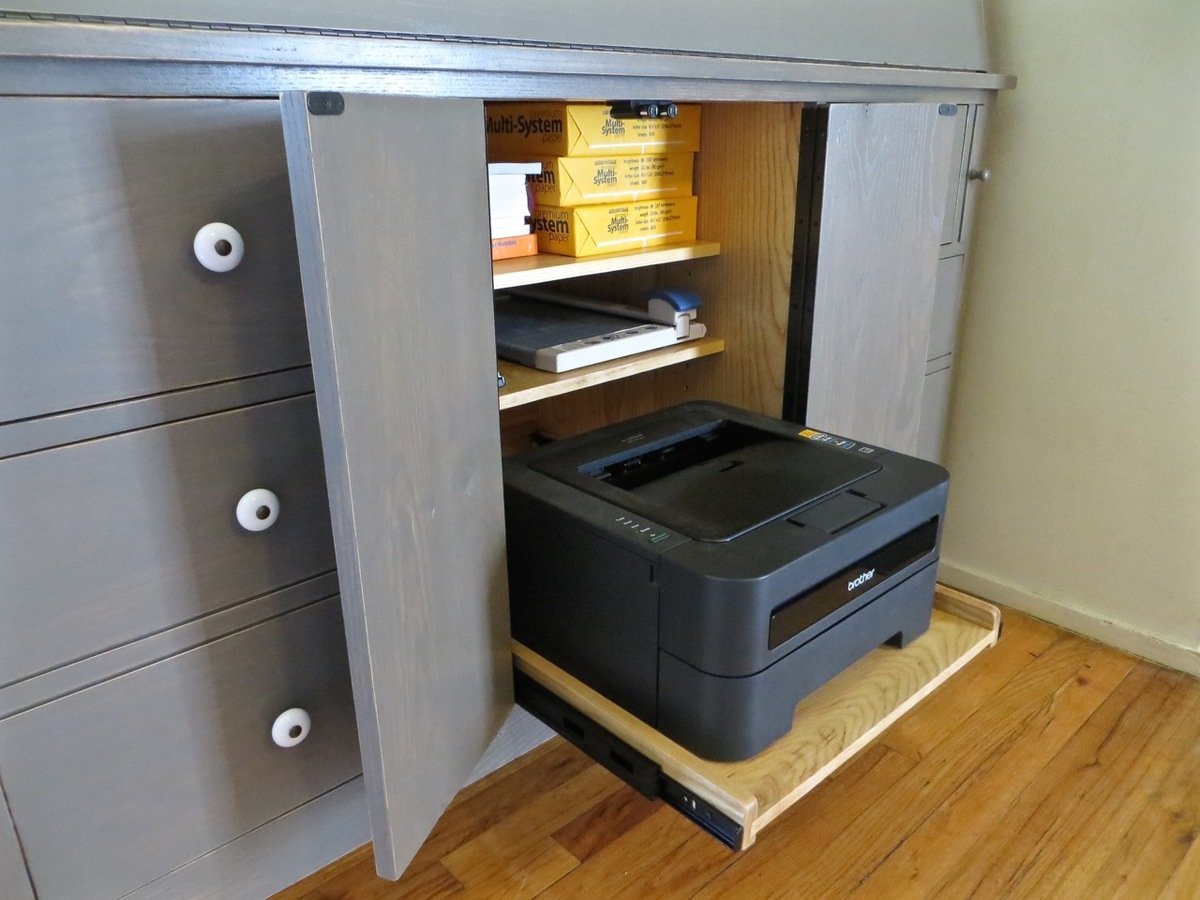
I designed this desk from another desk I built. With this one, I wanted the overall foot-print smaller but still something that was able to organize all our office stuff and be able to close everything to keep it clutter-free. We have a small apartment, and although this desk is about the size of an up-right piano, it works perfectly into our living space!
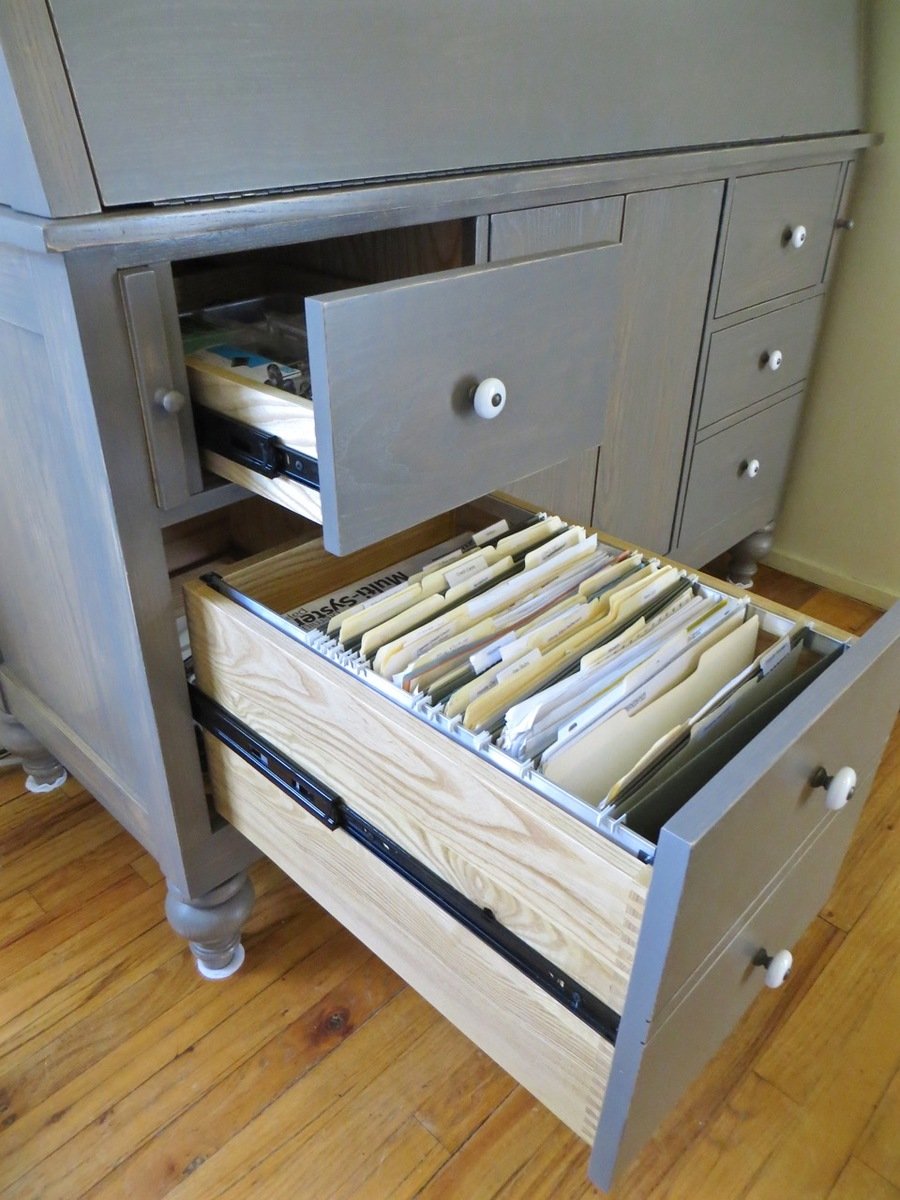
I made it out of raw hardwood (Ash) and because I knew just the wood alone would make this desk heavy/bulky to move I made the top hutch removable. It's held in place by wood pegs (dominos). All the shelves are adjustable and the drawers are full-extension (something I've never had - wahoo)! The drop-down door is help up by 2 pull-out boards on each side (my first desk had chains). I spend a lot of money on this desk because I knew it was a chance in a lifetime to make and wanted it to be perfect and something that would last generations.
I built the main carcass off of plans/measurements I designed, but then all the insides, drawers, shelves, doors, etc where made as I built (because just a millimeter difference in building changes everything)!
If you want more pictures/descriptions of the building process I wrote about it in a 4-part series on my blog.
Estimated Cost
$1,000 for all wood & supplies
Estimated Time Investment
Week Long Project (20 Hours or More)
Finish Used
To achieve the ash gray color I used "General Finishes" brand water-based stains (equal mixtures of Walnut, Antique Oak & Whitewash) with 1/2 ratio of Pre-Stain Conditioner (bought from Woodcraft). I did 2-3 coats stain, lightly sanded and sprayed 2 coats of Ceramithane clearcoat using HVLP sprayer (sanding with 550 grit paper in between).
Recommended Skill Level
Intermediate
Comments
Wed, 09/23/2015 - 11:22
is there plans available for this project?
is there plans available for this project?

In reply to is there plans available for this project? by Nsmjc
Tue, 09/27/2016 - 12:20
No plans :(
Hi there! I'm sorry but I don't have plans put together on it! I designed it in Google Sketchup and have some 'screen shots' I could send you for basic measurements if interested. You can e-mail me at [email protected]
Mon, 06/15/2020 - 09:08
drop-down door hutch desk plans or dimensions?
Hi. Do you happen to still have those 'screen shots' or any other info/dimensions from this build? LOVE LOVE LOVE it!!
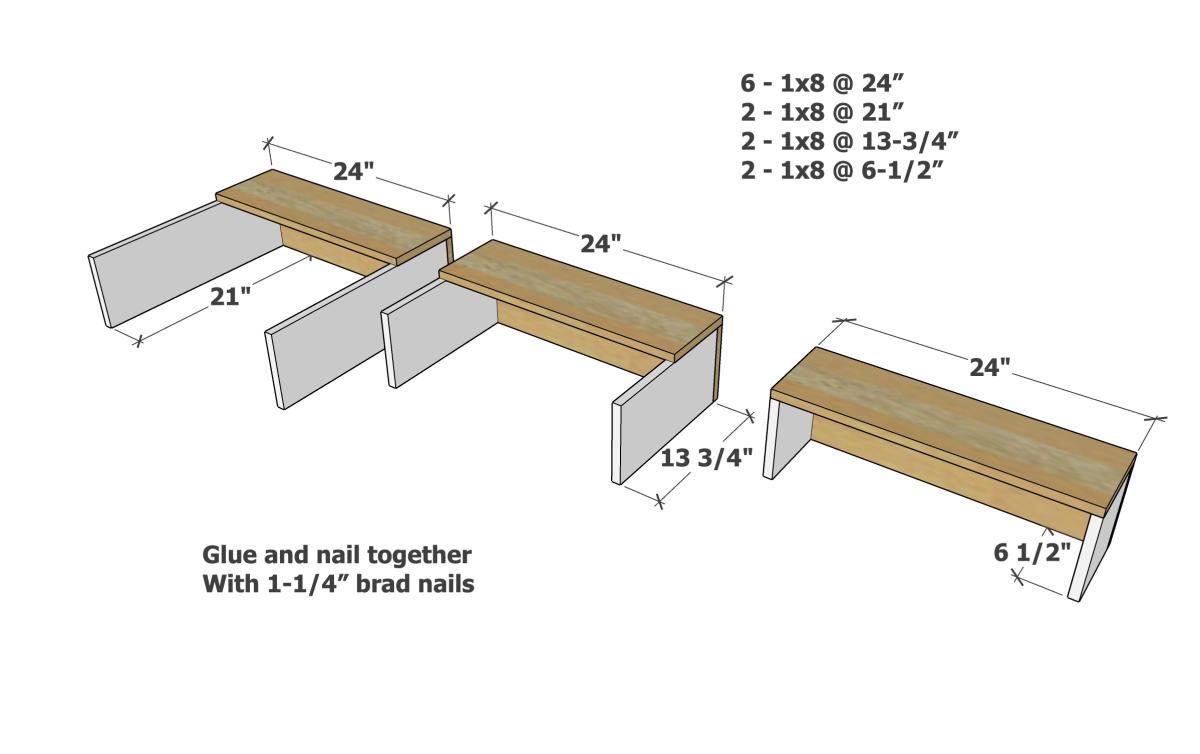
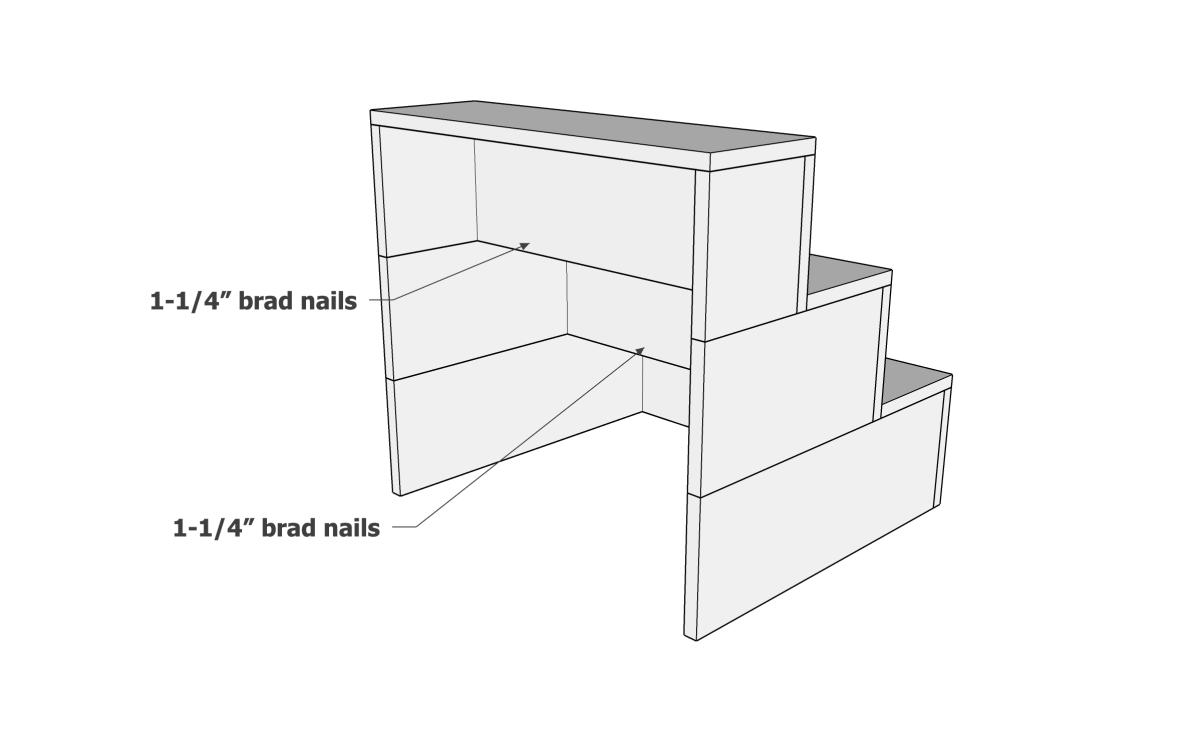
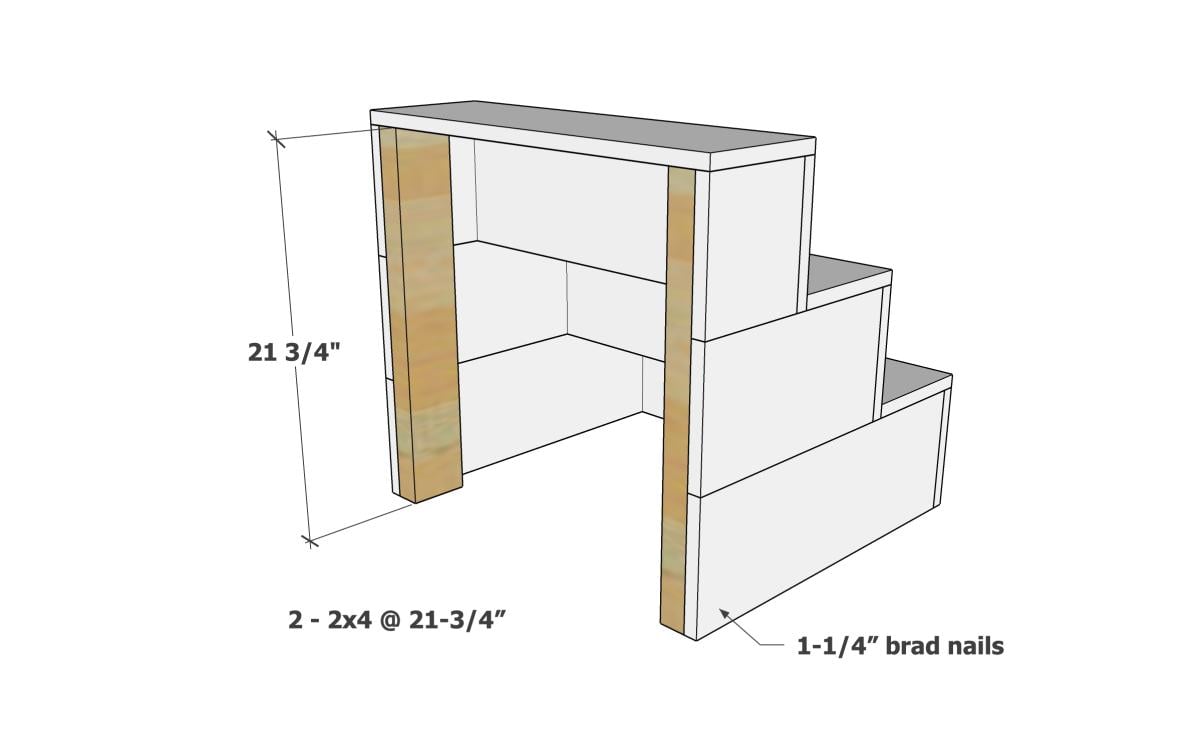
Pet Stairs
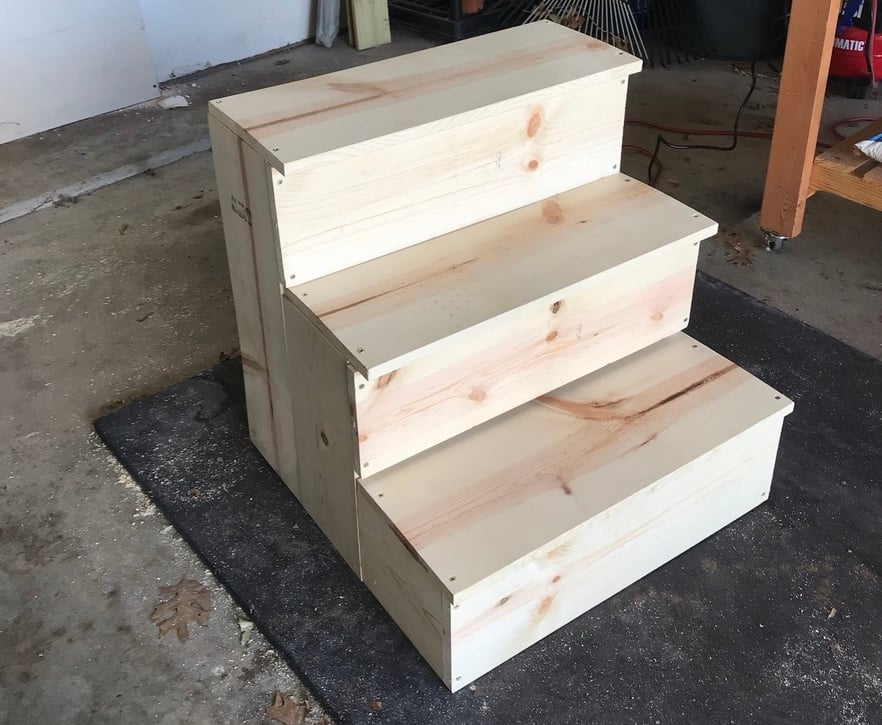
I needed sturdy stairs for my 2 60lb dogs. My bed is 33 inches from floor to top of mattress. So, this is my very first project completed by myself! Custom size pet stairs 24inx24inx24
Estimated Cost
$40-50
Estimated Time Investment
Afternoon Project (3-6 Hours)
Finish Used
Minwax polyshades Espresso gloss (3 coats)
Recommended Skill Level
Starter Project
Comments
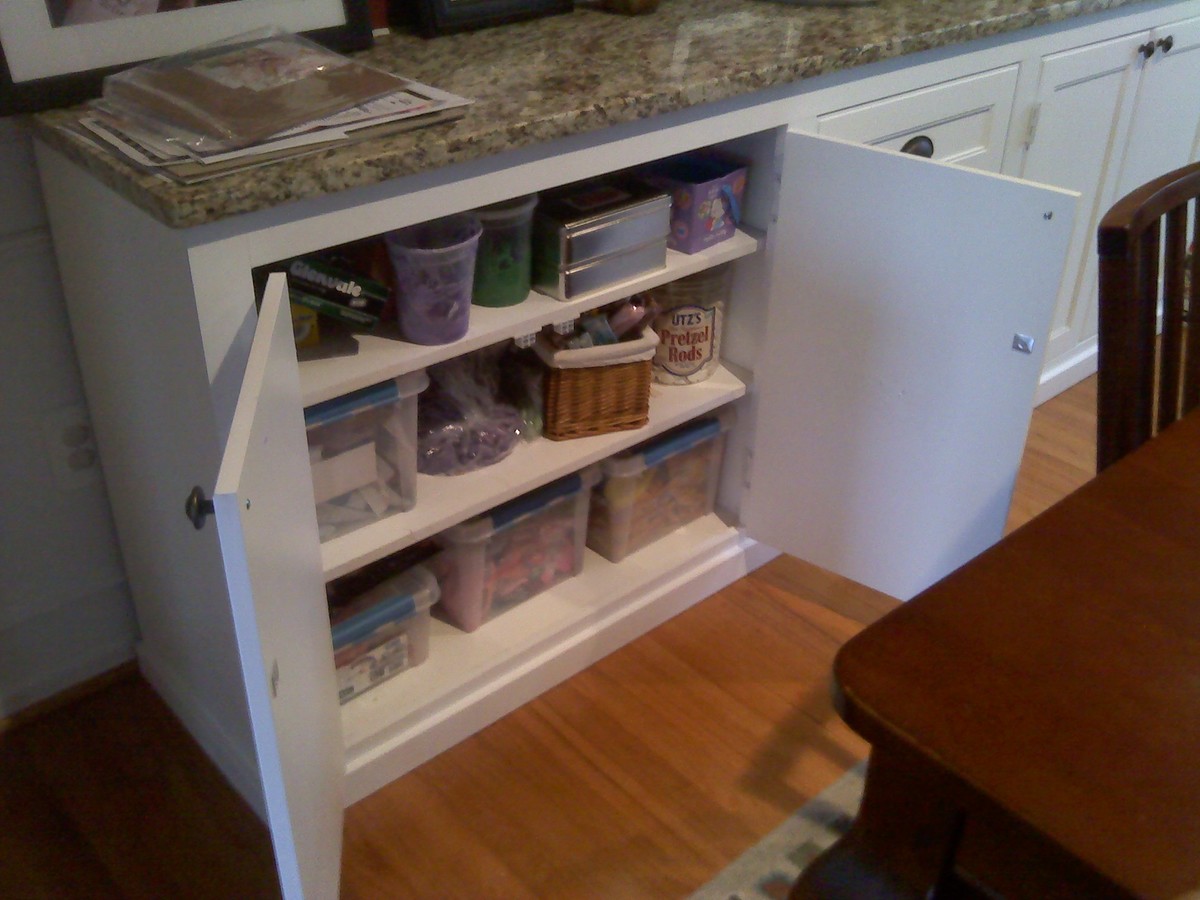
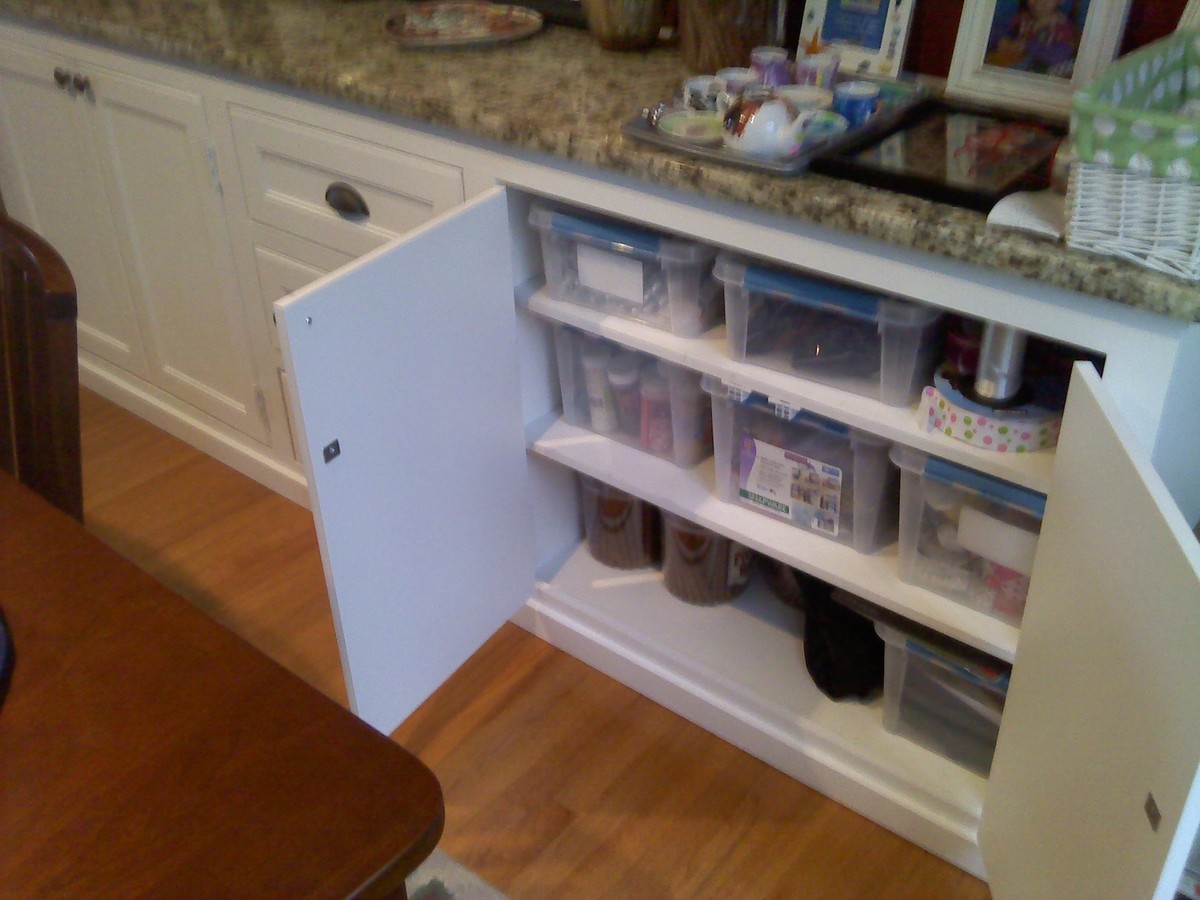
Boys Room Display Shelves
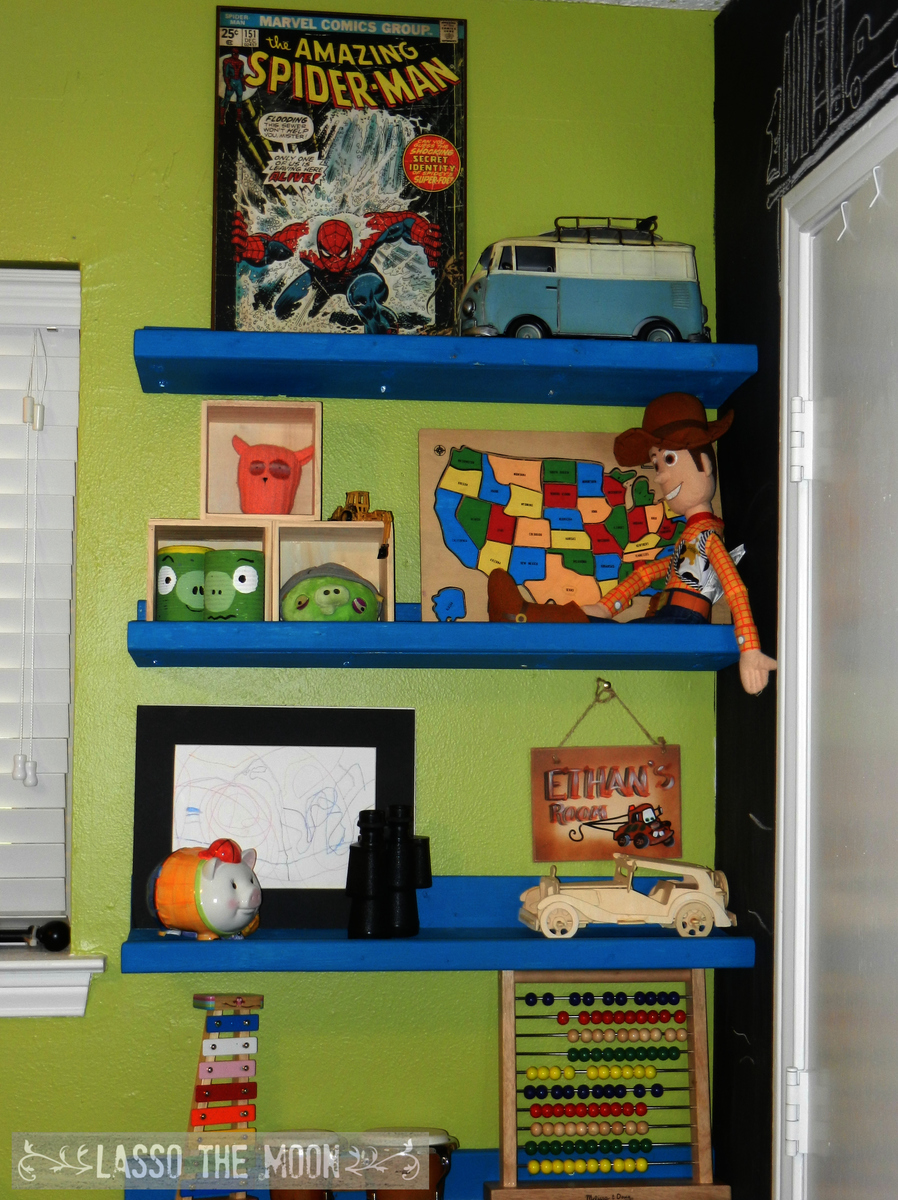
My new thing is hiding a stack of shelves behind an open door. There are so many rooms in my house that have this little piece of wasted space!
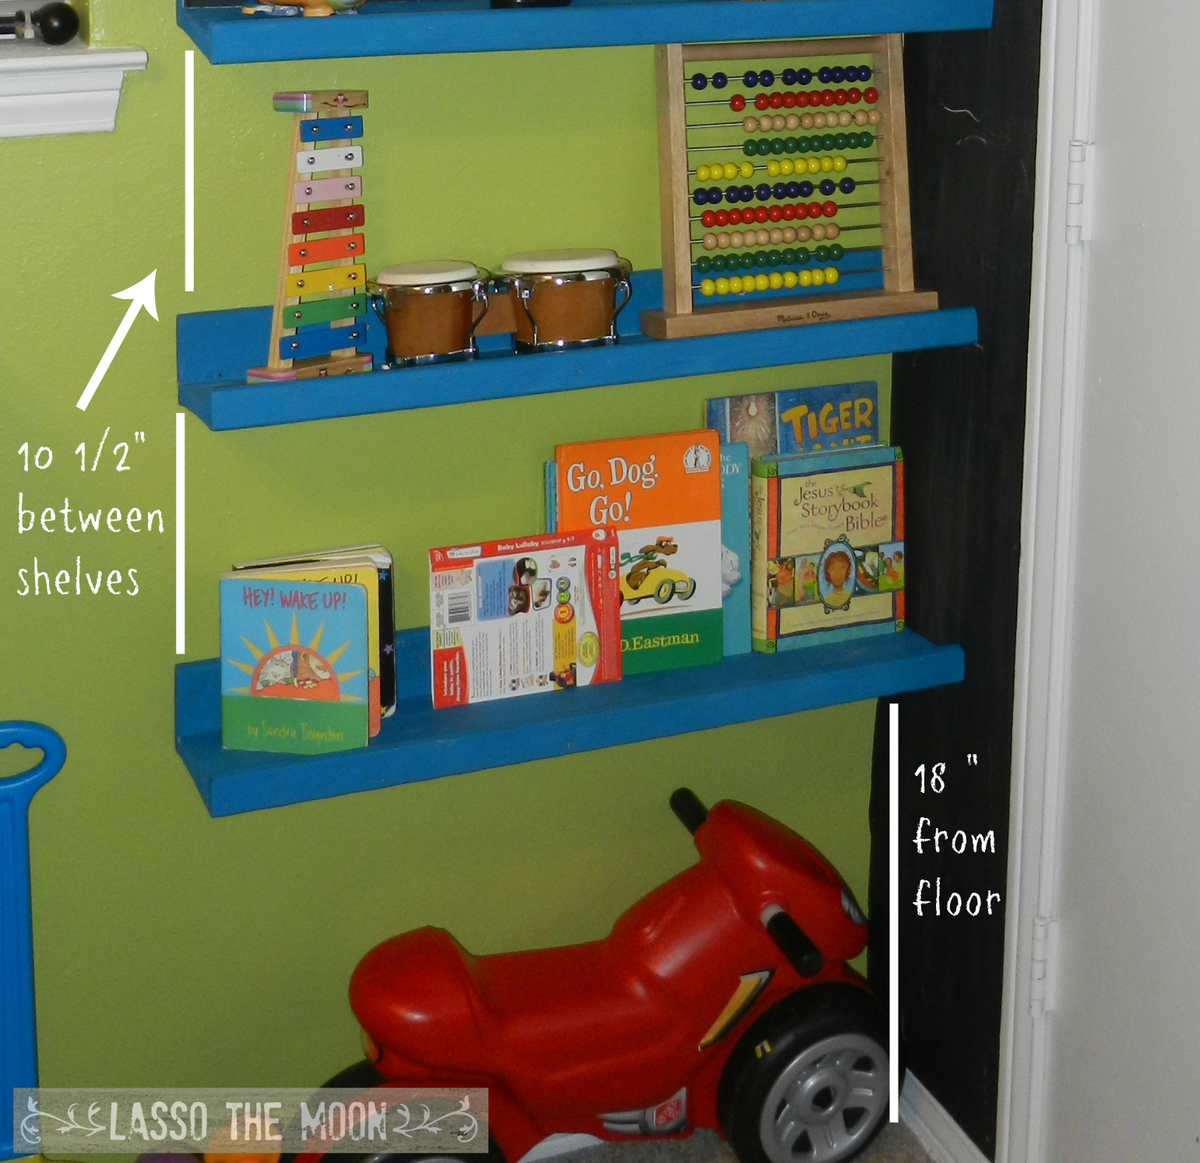
For my son Ethan's shelves, I made the 10-dollar ledges, but only 30 inches long. Also, because I used pocket holes to put them together, I made the "shelf" part from a 1x6, so they would have a little extra depth for showing off his treasures and lego projects.
These changed the entire look of the room. I love how they are out of the way, and are adding design to his room as well.
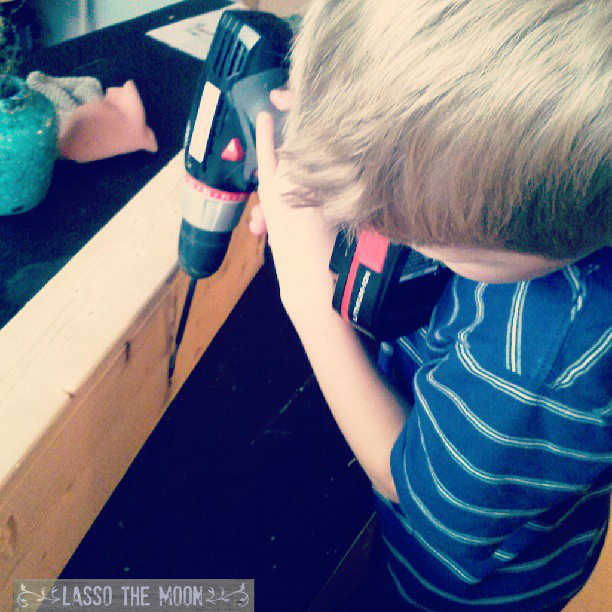
These were so easy to build!
Learn more on the blog post:
http://lassothemoon.typepad.com/lasso_the_moon/2013/08/boys-room-behind…
--Anna
Built from Plan(s)
Estimated Cost
$20
Estimated Time Investment
An Hour or Two (0-2 Hours)
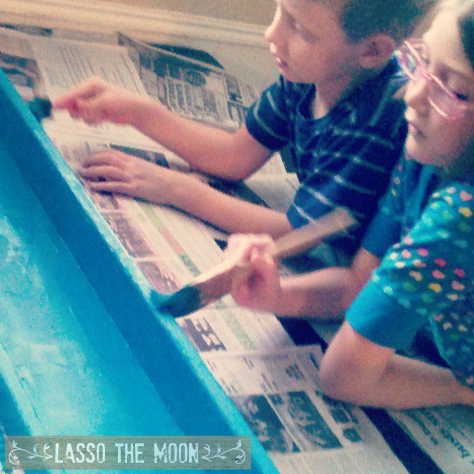
Finish Used
behr havasu blue paint
I didn't need it to be smooth or shiny, so I used a $3 pot of test paint for all five shelves. A great way to save some cash!
I didn't need it to be smooth or shiny, so I used a $3 pot of test paint for all five shelves. A great way to save some cash!
Recommended Skill Level
Starter Project
Dining Room Buffet Cabinet
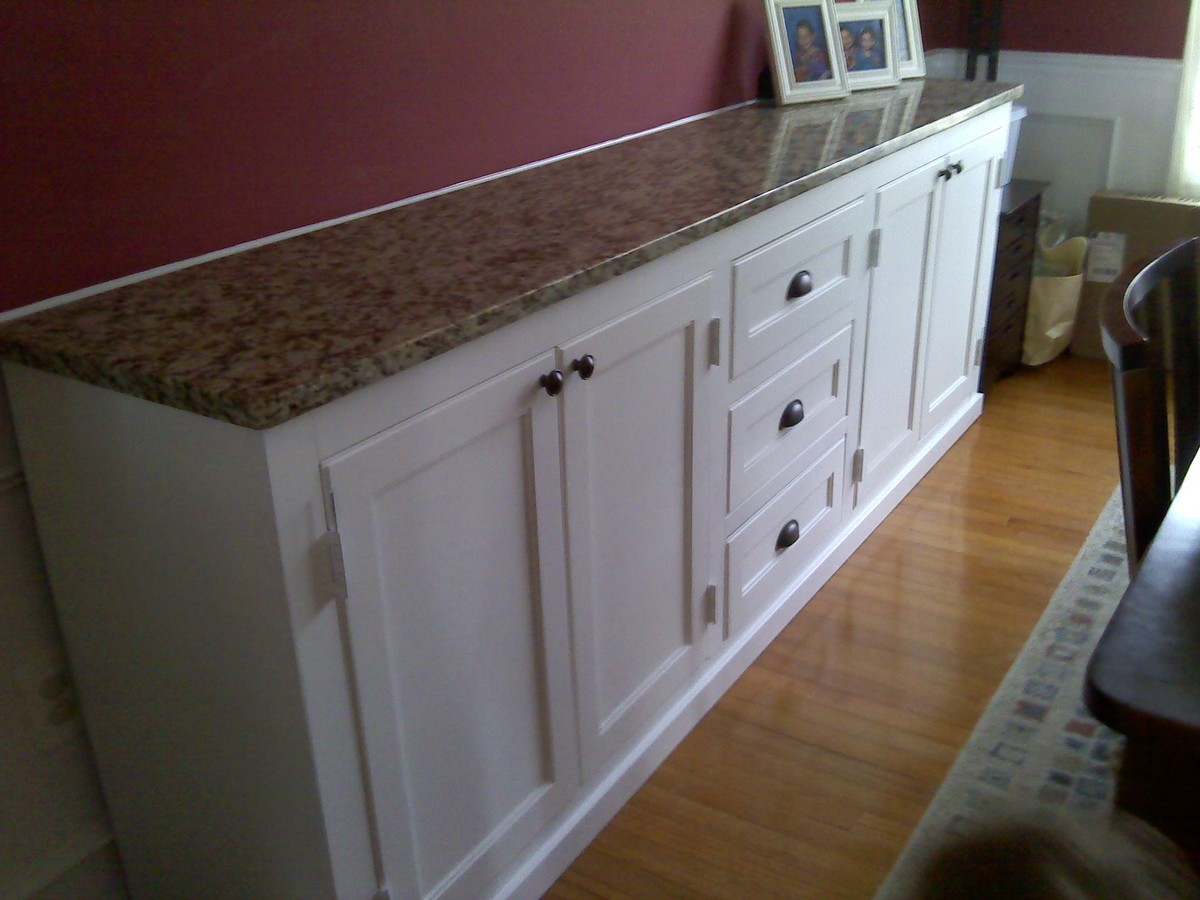
I scoured the web unsuccessfully for months trying to find a cabinet big enough to store everything we needed to store. I wanted something huge and bright and simple, and so I decided to just build away. It's 8'4" long, 18" deep and 36" tall. Topped with a slab of Giallo Napoleon granite and painted a nice plain white. Took me only a few nights to build and paint, thanks to my power nailer and power paint sprayer. Thanks to a great deal on a remnant granite slab, this was just about $400 total start to finish. I winged the entire plan and didn't really use any plans in particular, though I have gathered many great ideas and tips from this site.

Built from Plan(s)
Estimated Cost
$450-500
Estimated Time Investment
Weekend Project (10-20 Hours)
Finish Used
Satin white, nothing special!
Recommended Skill Level
Intermediate
Comments
Sat, 08/13/2011 - 14:51
Beautiful!
Wow - looks great! You would think it was done by a pro! You should be very proud of your finished product.
Tue, 12/04/2018 - 06:43
Where did you find these cabinets ?
Trying to find cabinets like this. Did you buy them or build them?
Little Kids Picnic Table with Umbrella
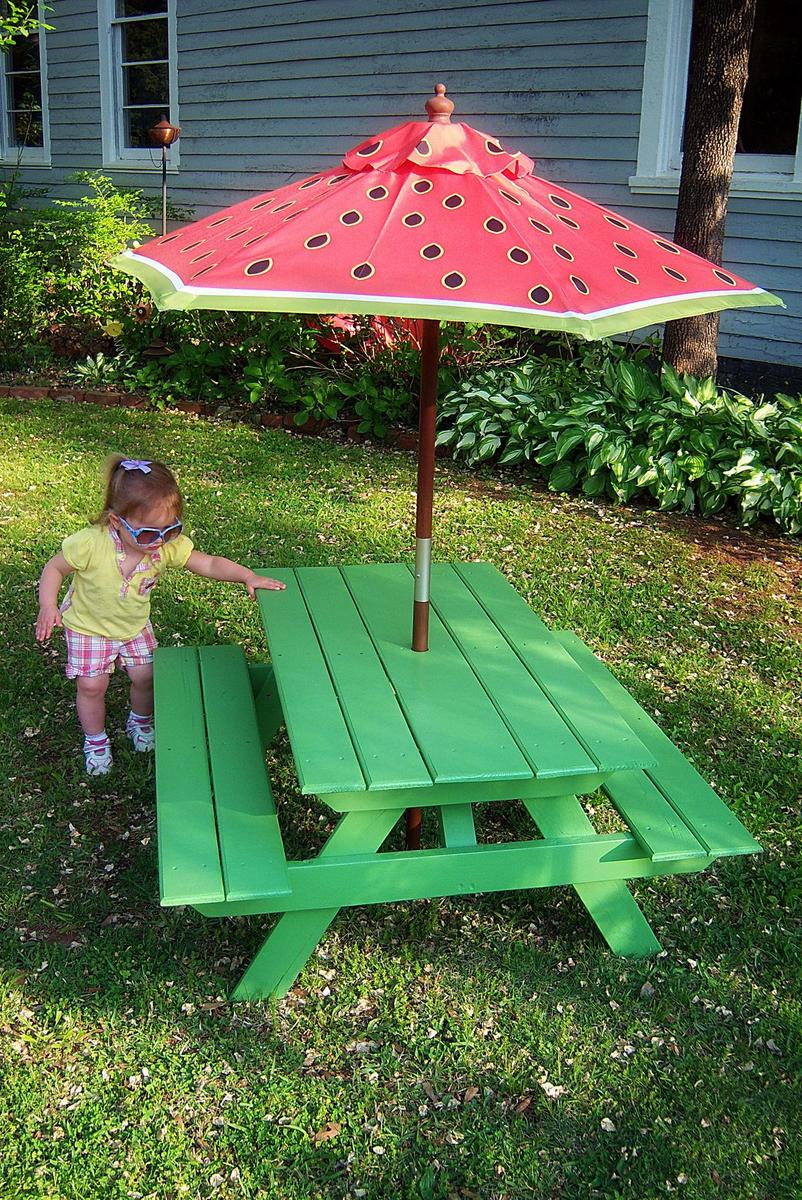
My daughter was given this umbrella at Christmas, but needed a table to go with it. Ana's plans for the preschool sized picnic table worked perfectly. I built it using one standard sized shipping pallet and even got to try out my new router! Thanks Ana!
Built from Plan(s)
Comments
Tue, 04/04/2023 - 13:58
So cute - love the added umbrella!
Looks like the perfect solution, love the fun finish! Thanks for sharing.
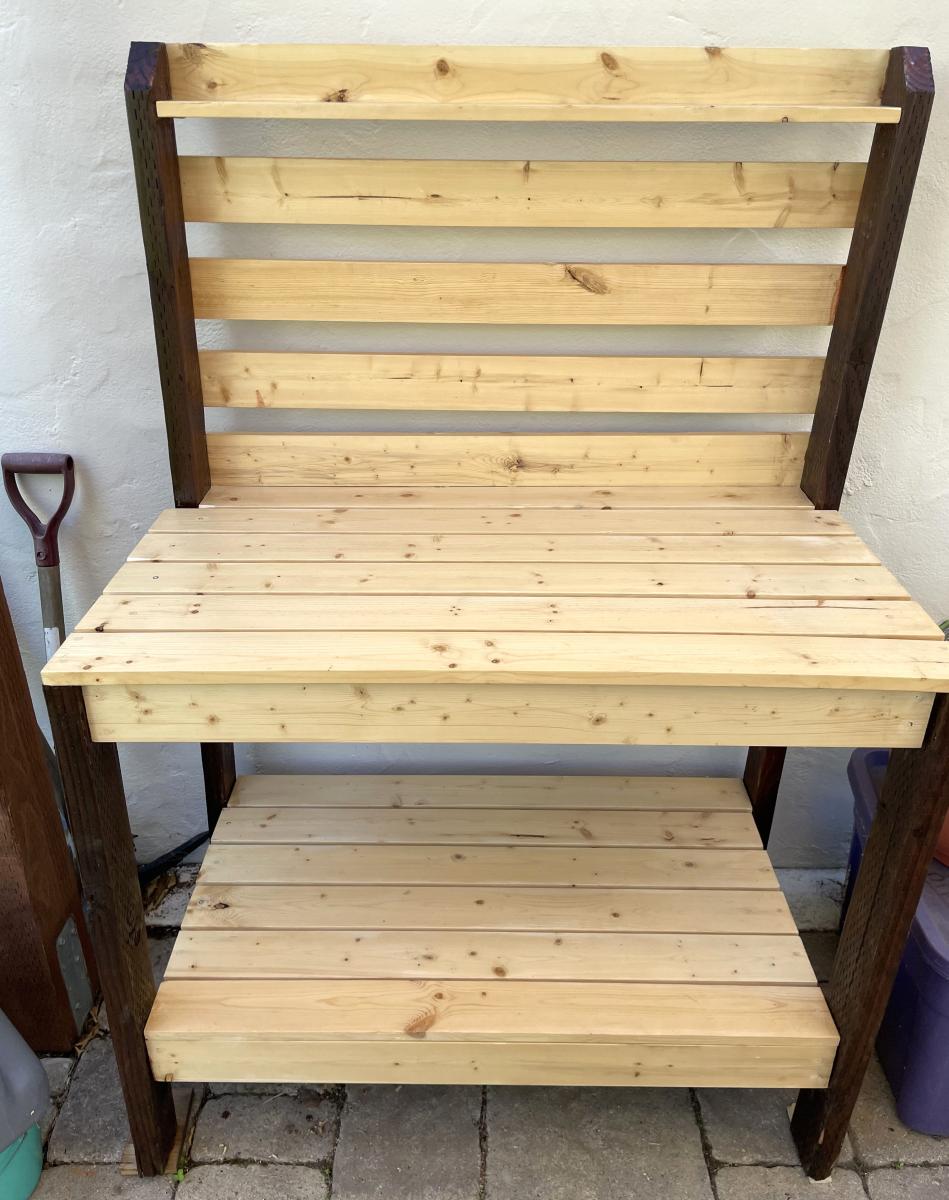
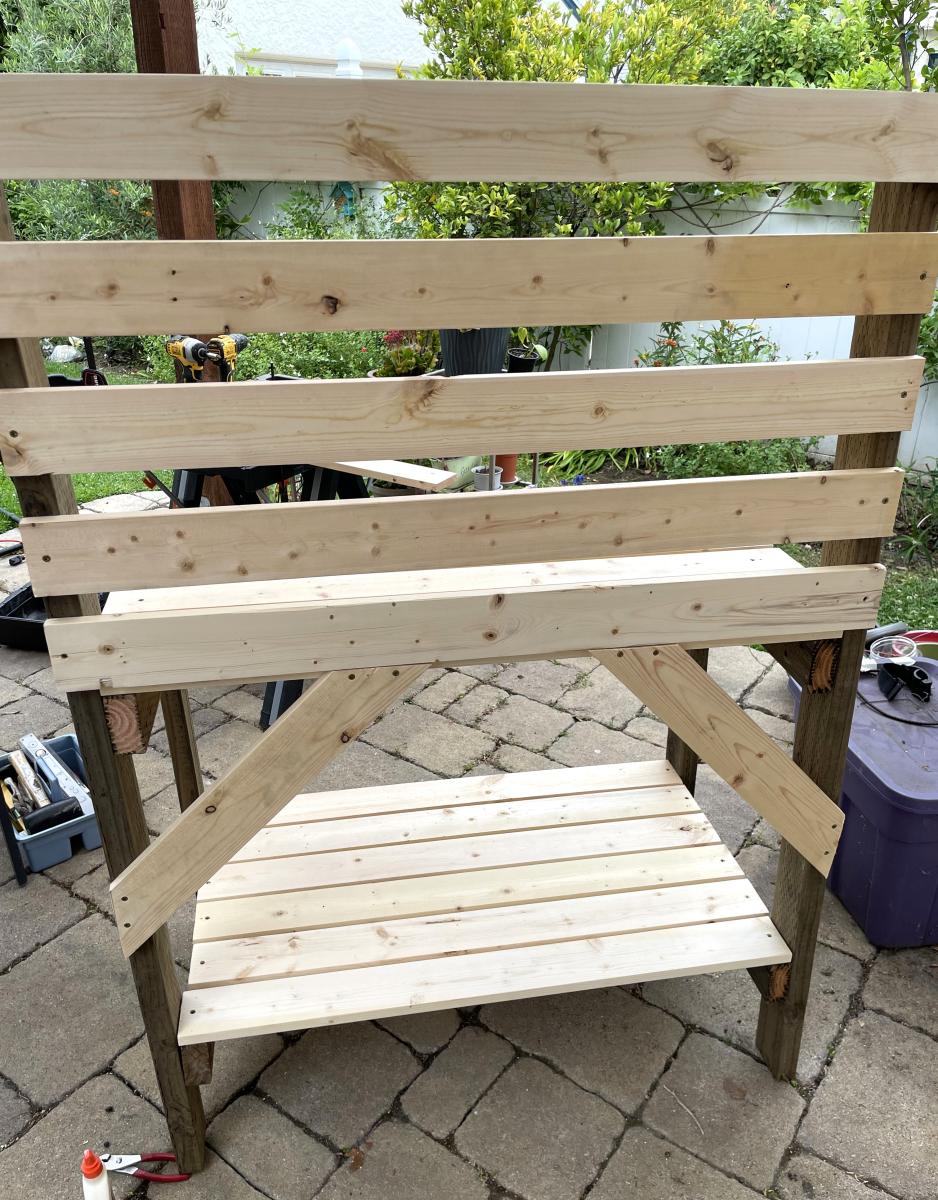
Garden Potting Bench
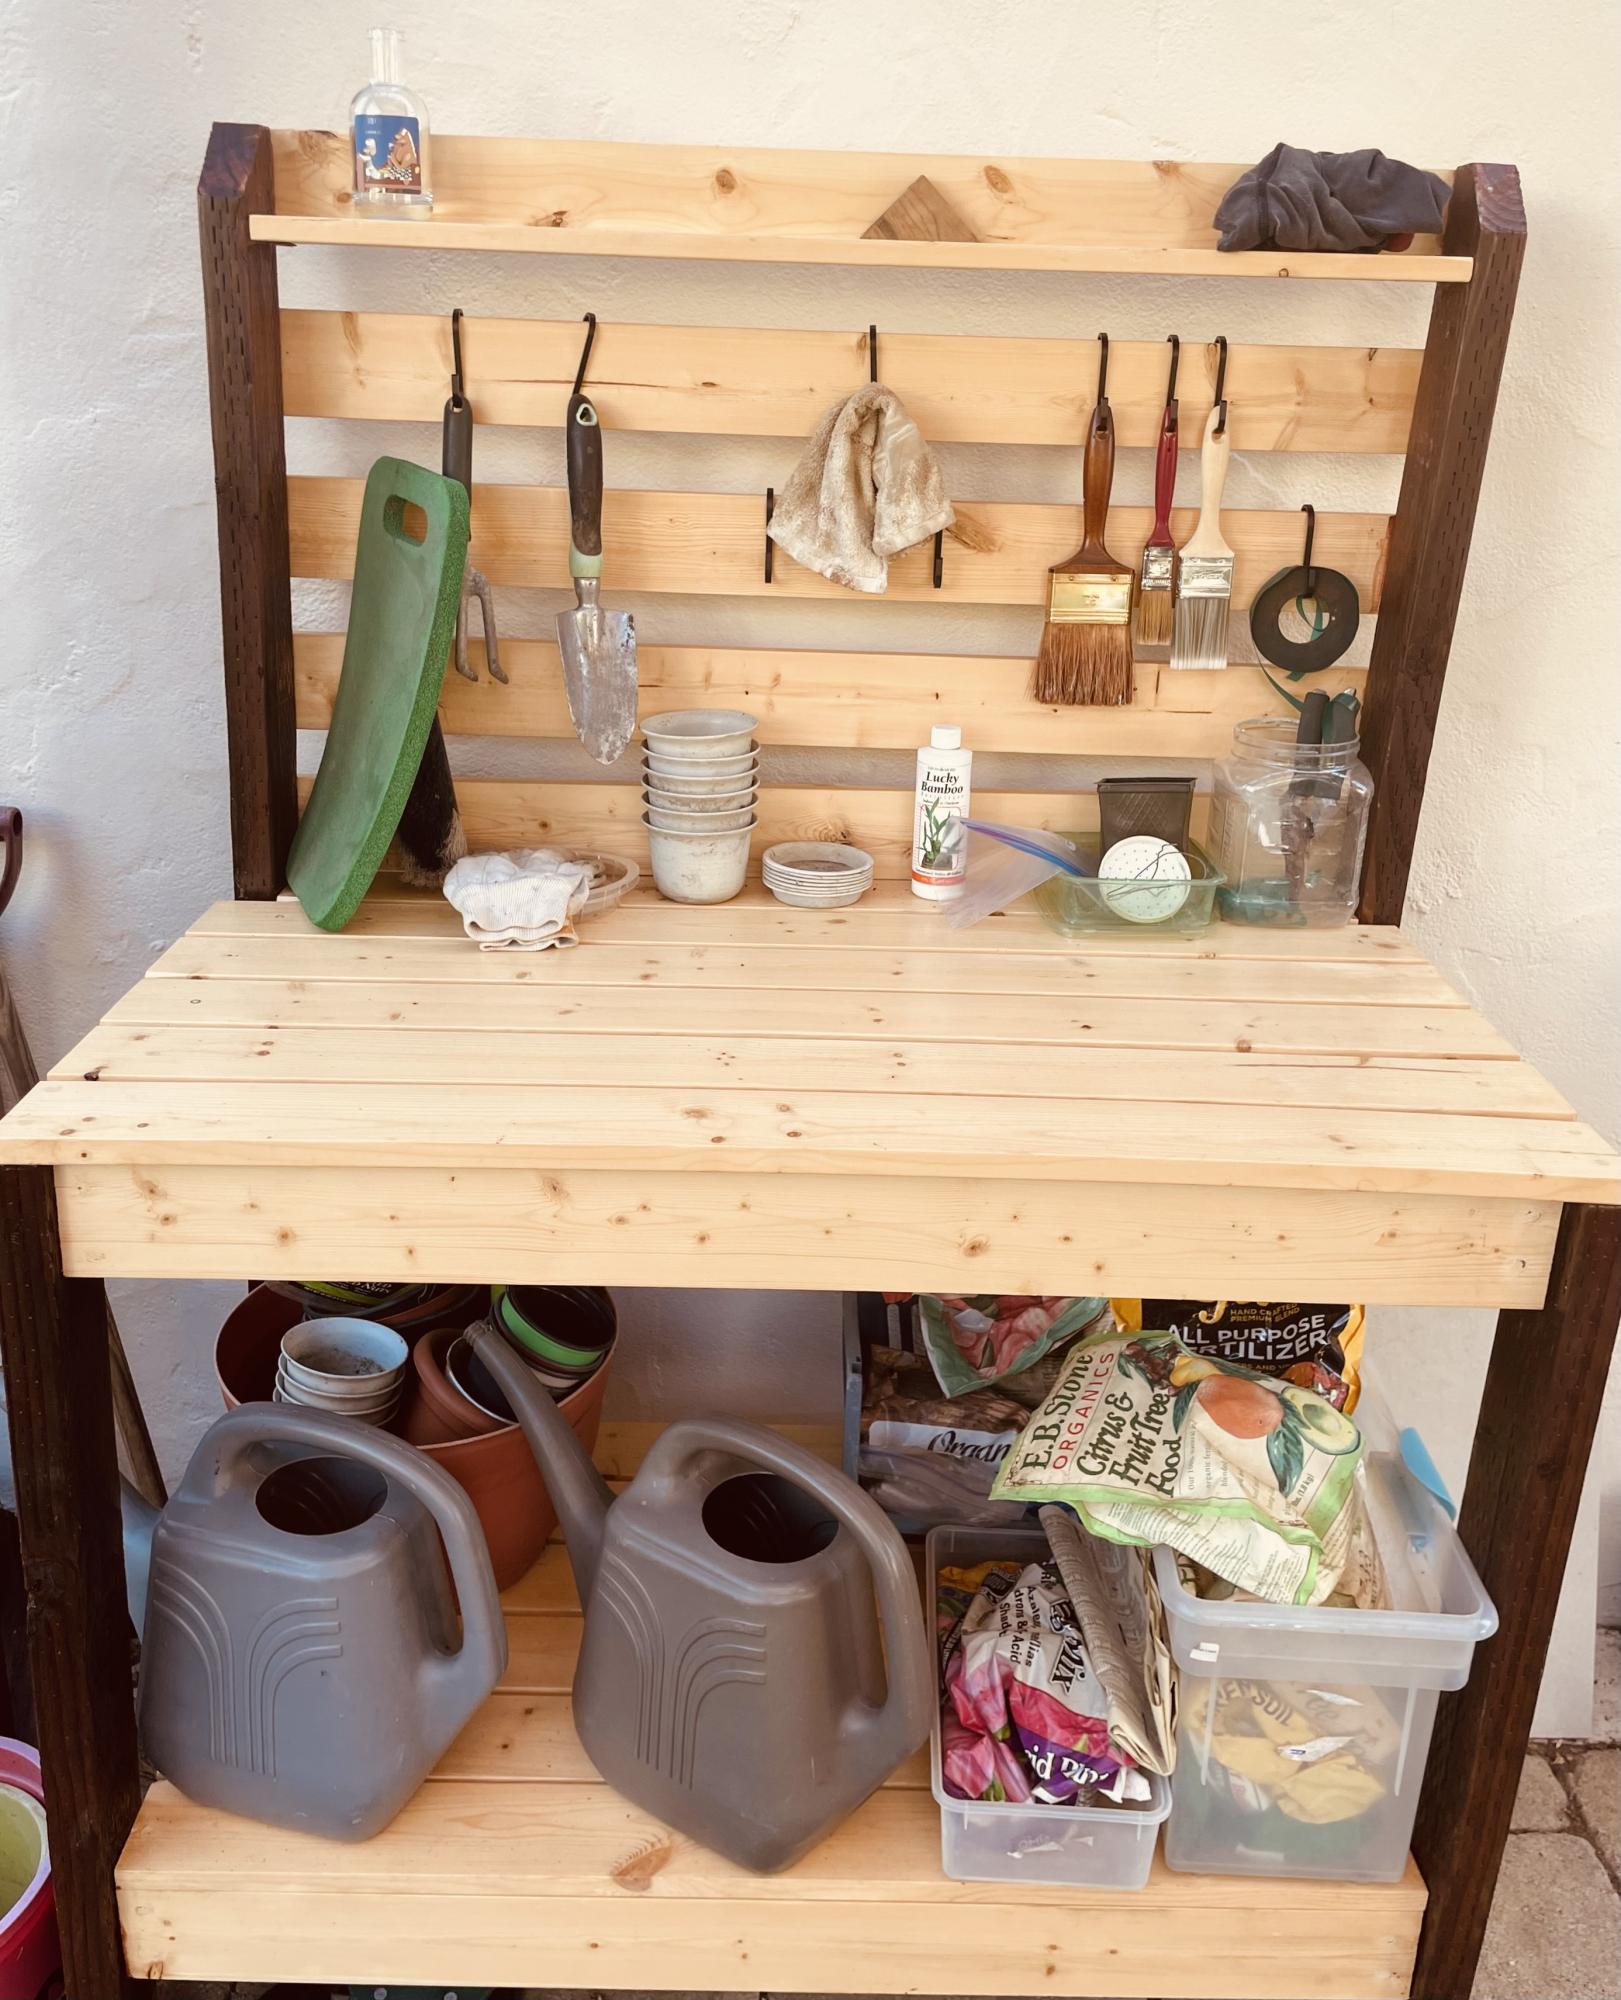
Potting bench. I had some pressure treated darker wood around and used that for the legs and frame. Pine for much of the rest. Stained the frame cherry. Polycyclic for the pine and the frame. Three times. Lots of compliments. Highly functional as well!
Built from Plan(s)