Planter
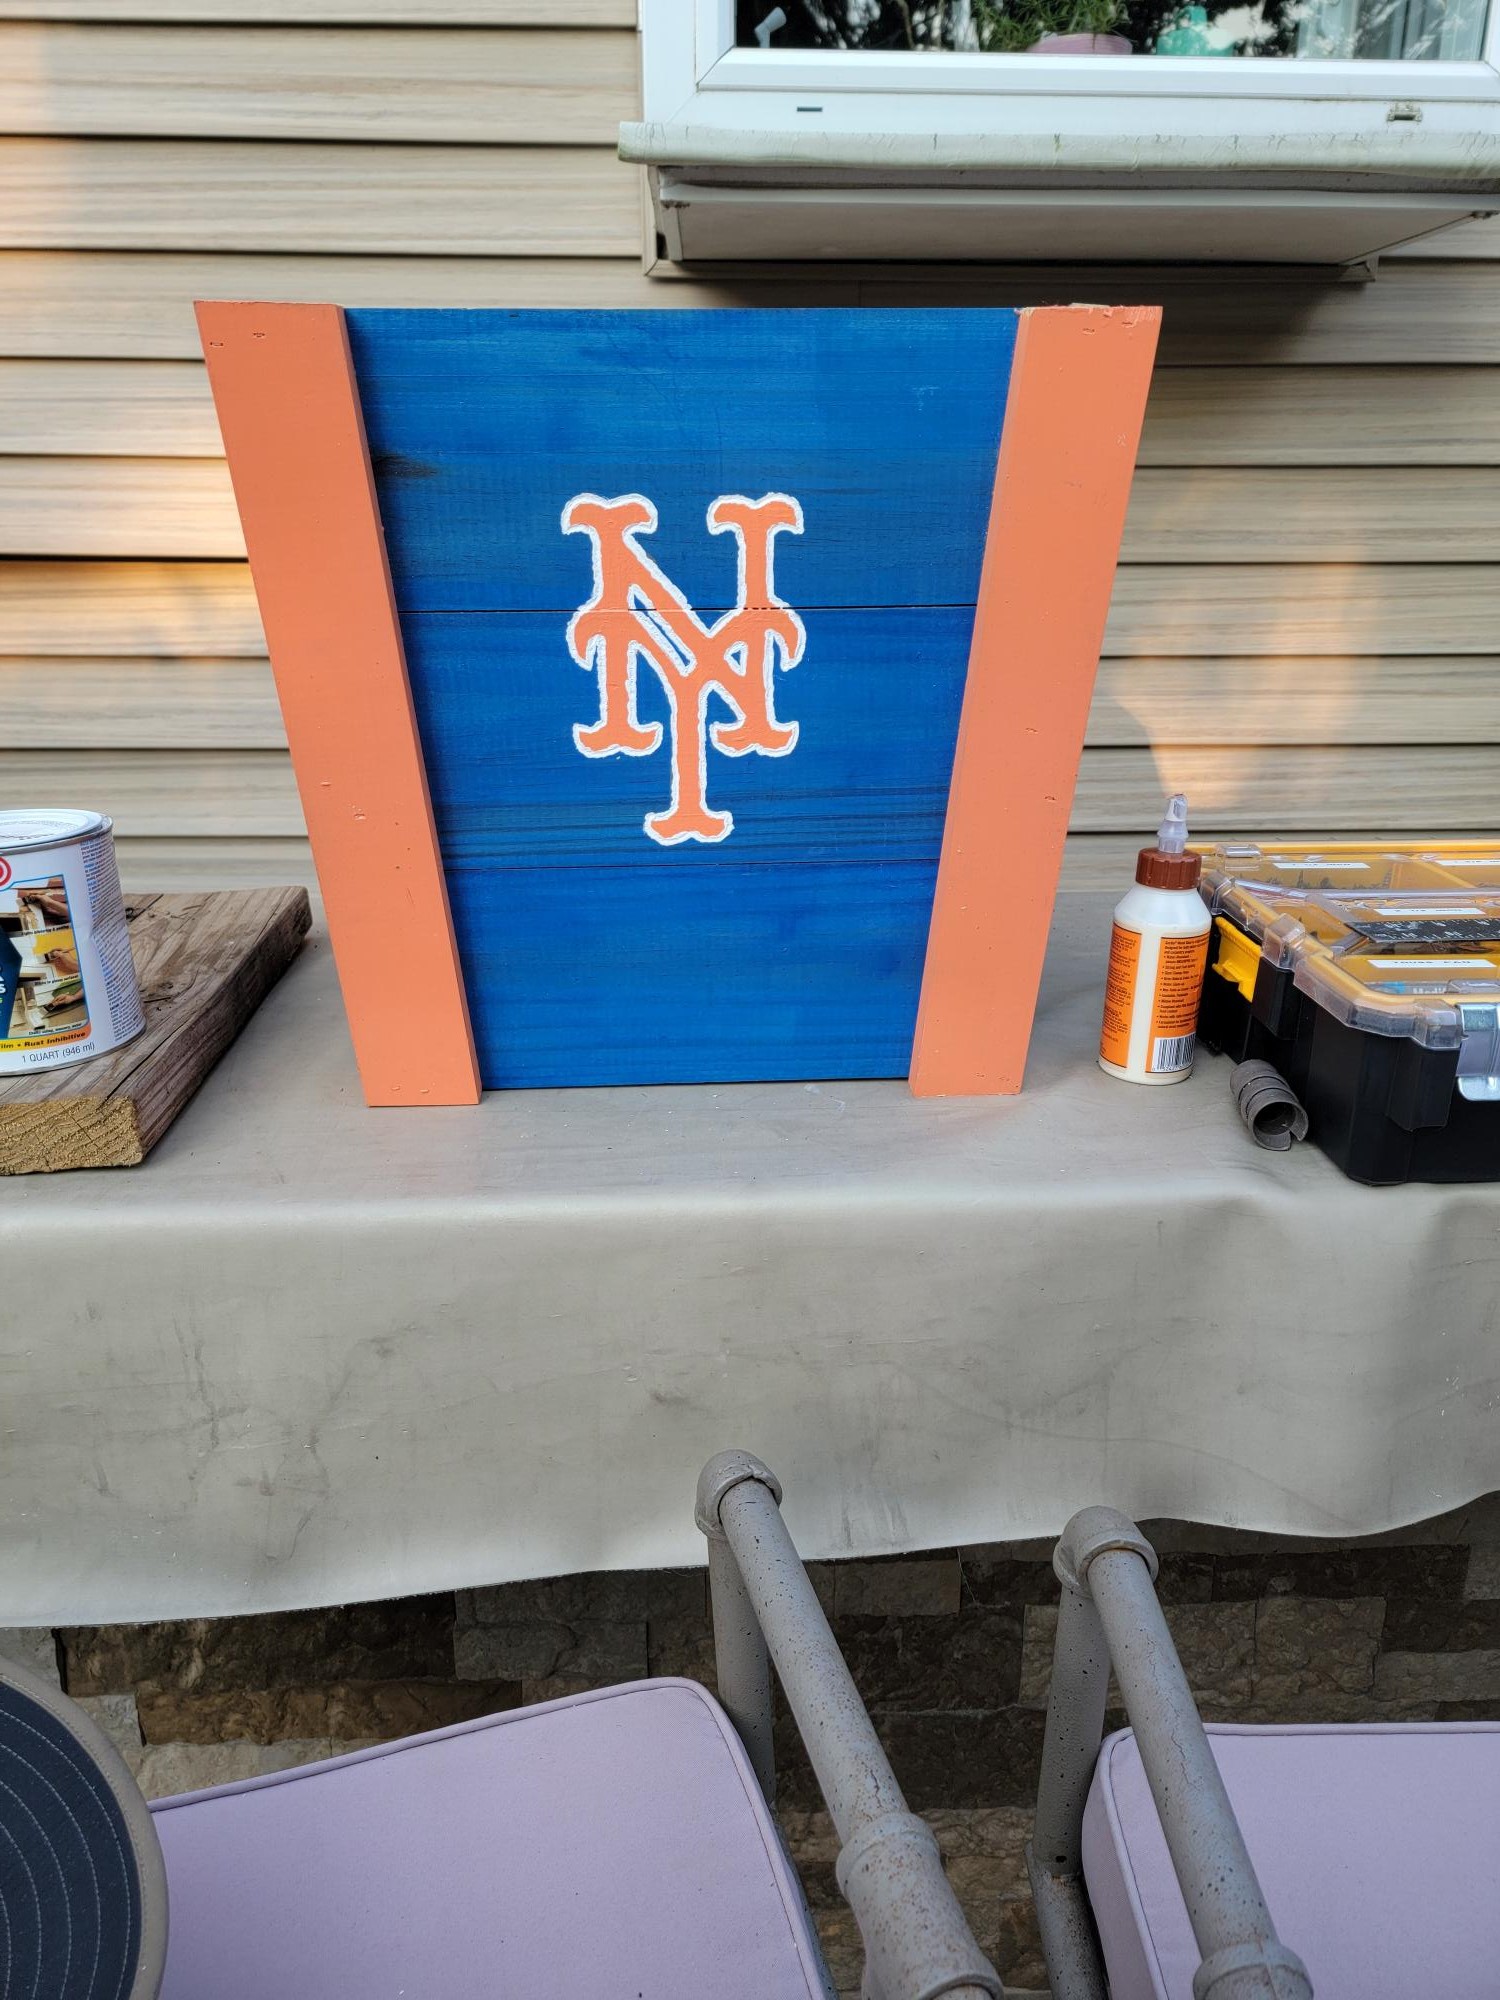
Started with the 3 plank plans from Anna's project, then dremeled the logo.
Built from Plan(s)
Started with the 3 plank plans from Anna's project, then dremeled the logo.
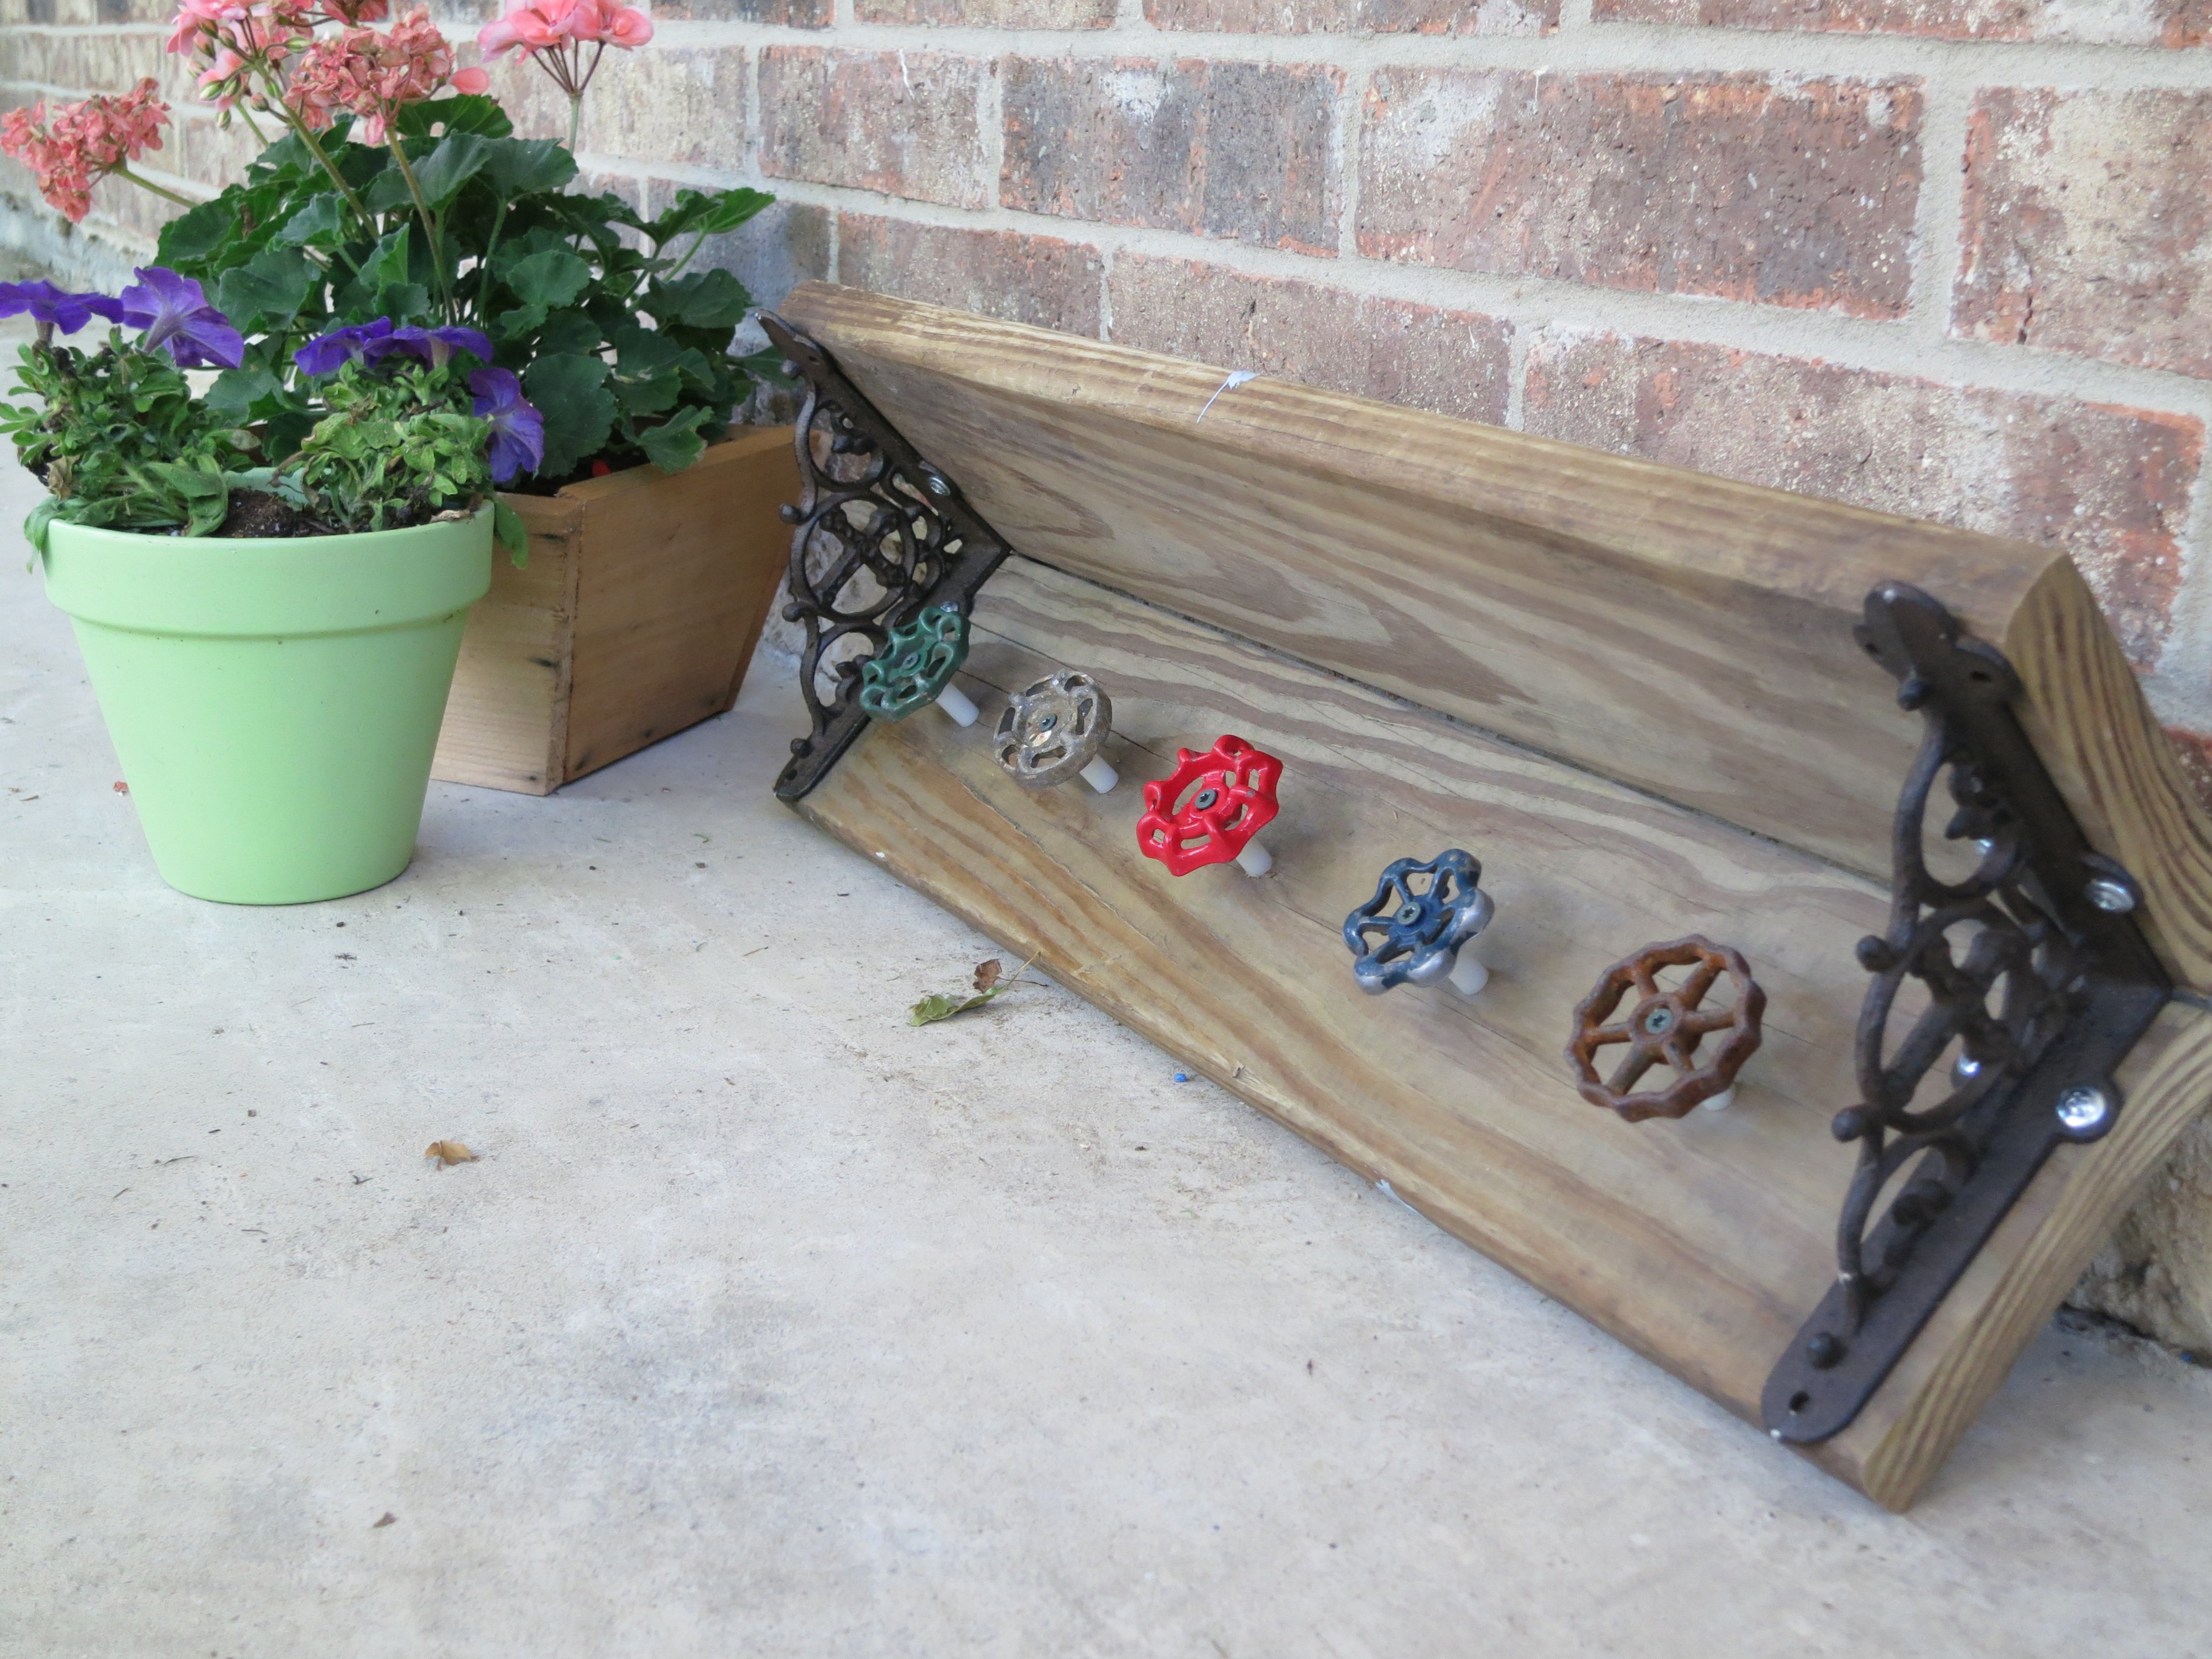
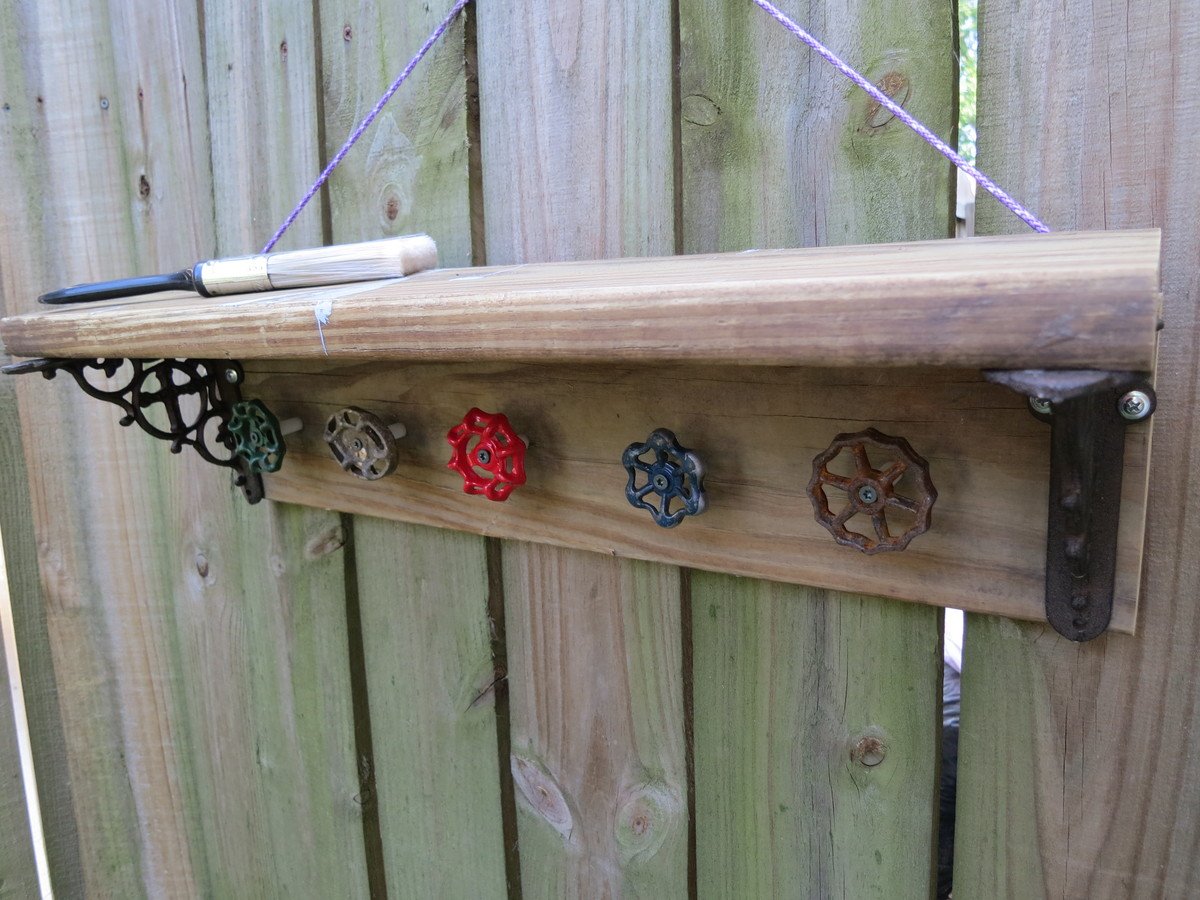
I wanted a gift for my mom. Something special and unique I think she would really like. Once on a guest post Ana posted a jewelry holder using a board, and some mismatched knobs.
My mom likes to garden. She works so hard on her back yard, and spends a lot of her time there. How could I make this outside proof? A few Pinterest finds later I found my answer: Water Spigots.
Voila! This is what we came up with.
** It's not going to hang by a string. It will be attached to her fence. This is just for picture purposes.
http://www.countryliving.com/homes/makeovers/fast-makeover-projects?src…
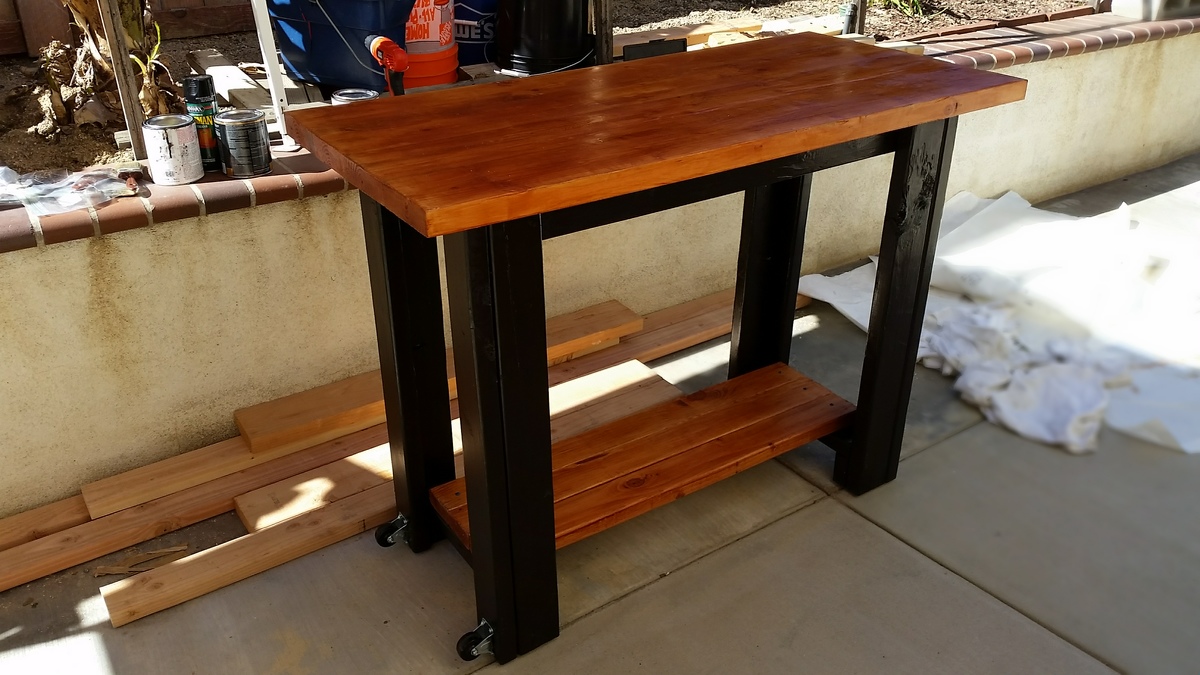
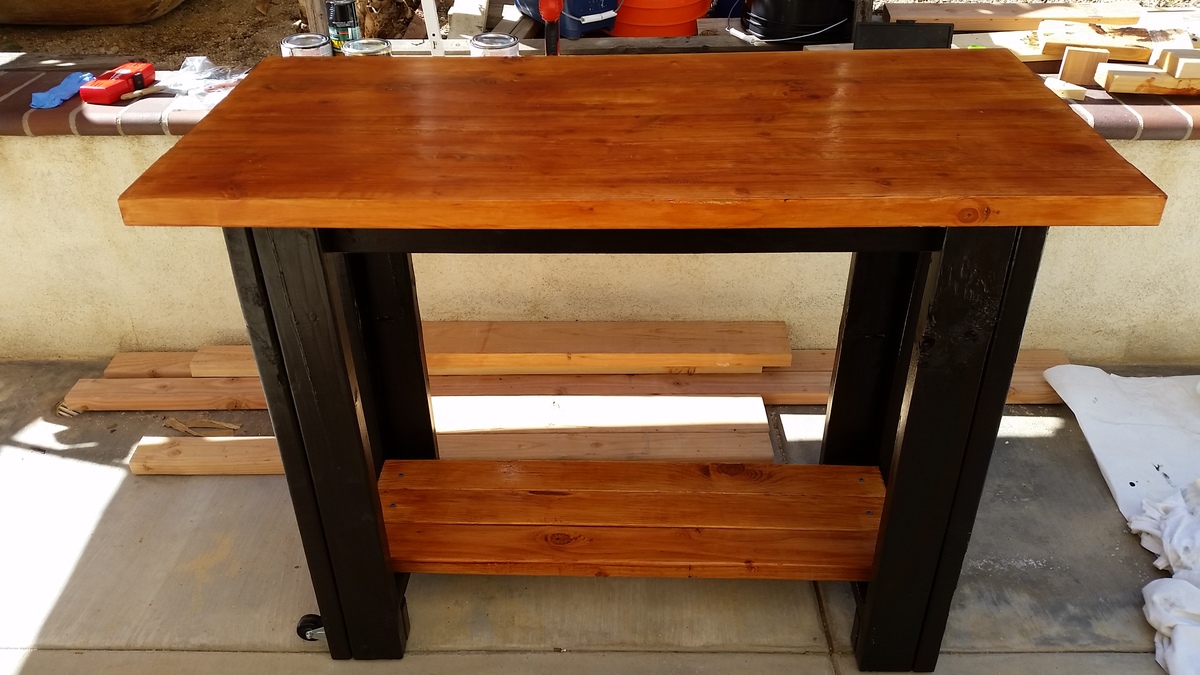
Built this over a week because the table top needed to dry and harden. I decided to paint the whole thing to make it look decent. I Kreg jigged four 2x6's together and added wood hardener to the table top. It was pretty weak because the wood was still wet so I had to dry it out for a few days. I also filled in the gaps with wood filler and then used a belt sander to smooth everything out. Everything else were just 2x4's. I knew it would be heavy so I added wheels to move it around and as a final touch I am adding 90 degree iron accent brackets to the table corners but I haven't got those delivered yet. I also added rubber screw-in feet so that the bottom doesn't chip when you move it around. Got those from Home Depot for $3

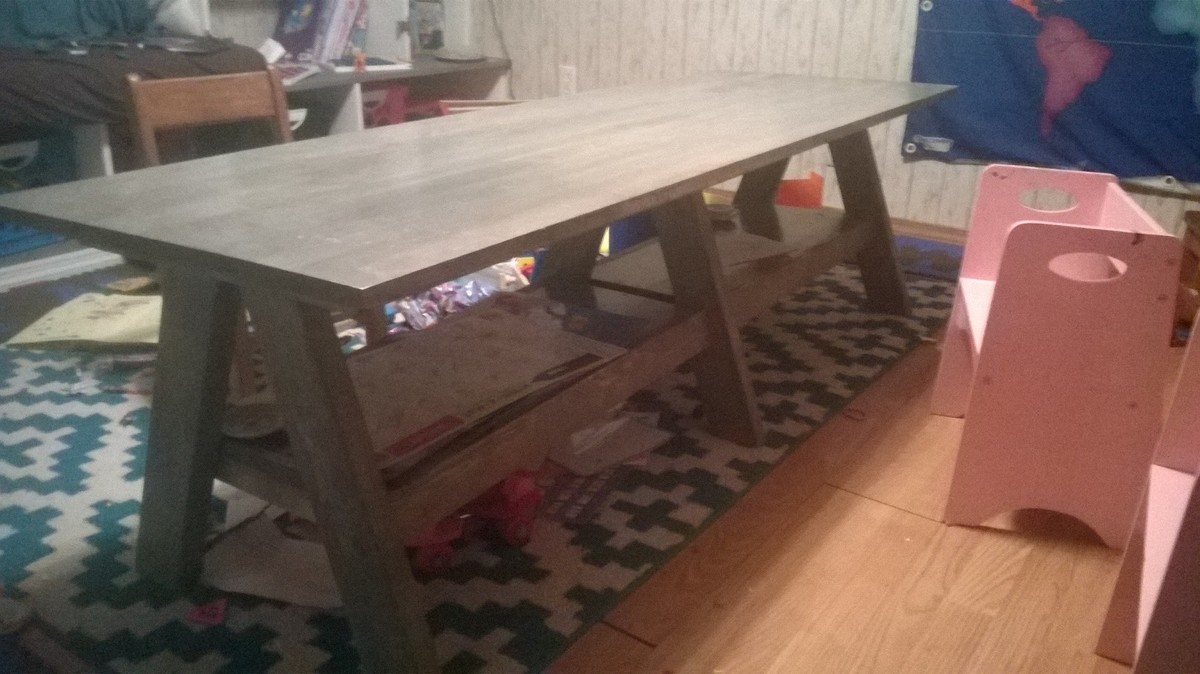
This one was fun to build. I feel in love with it when I saw it. I used weather grey stain from rustoleum and I love how it turned out.
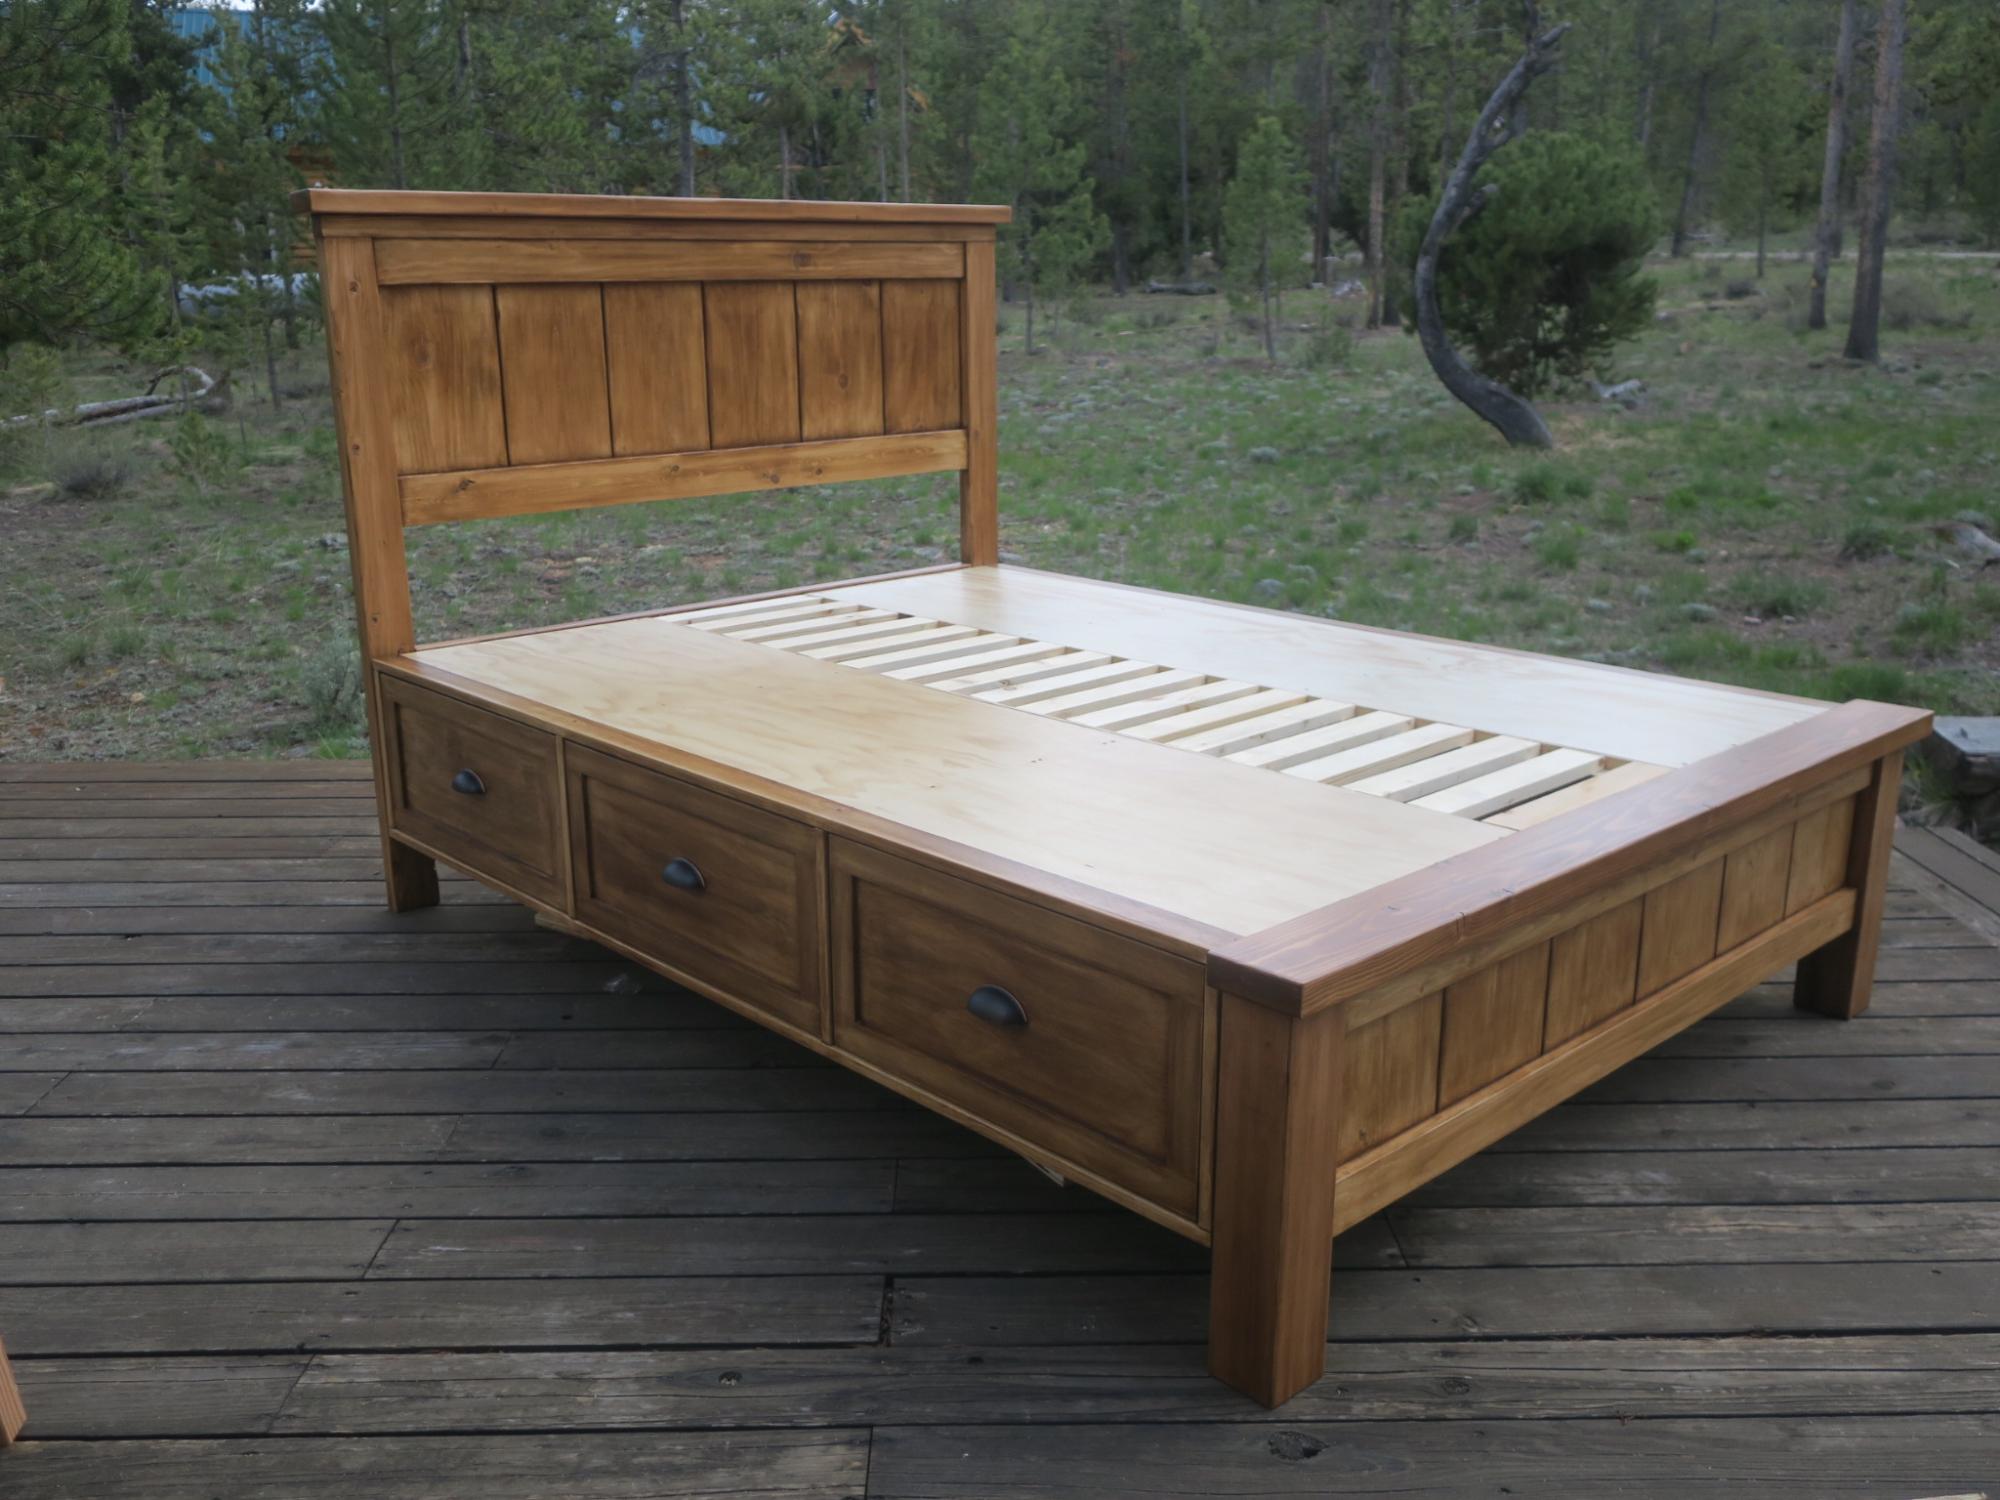
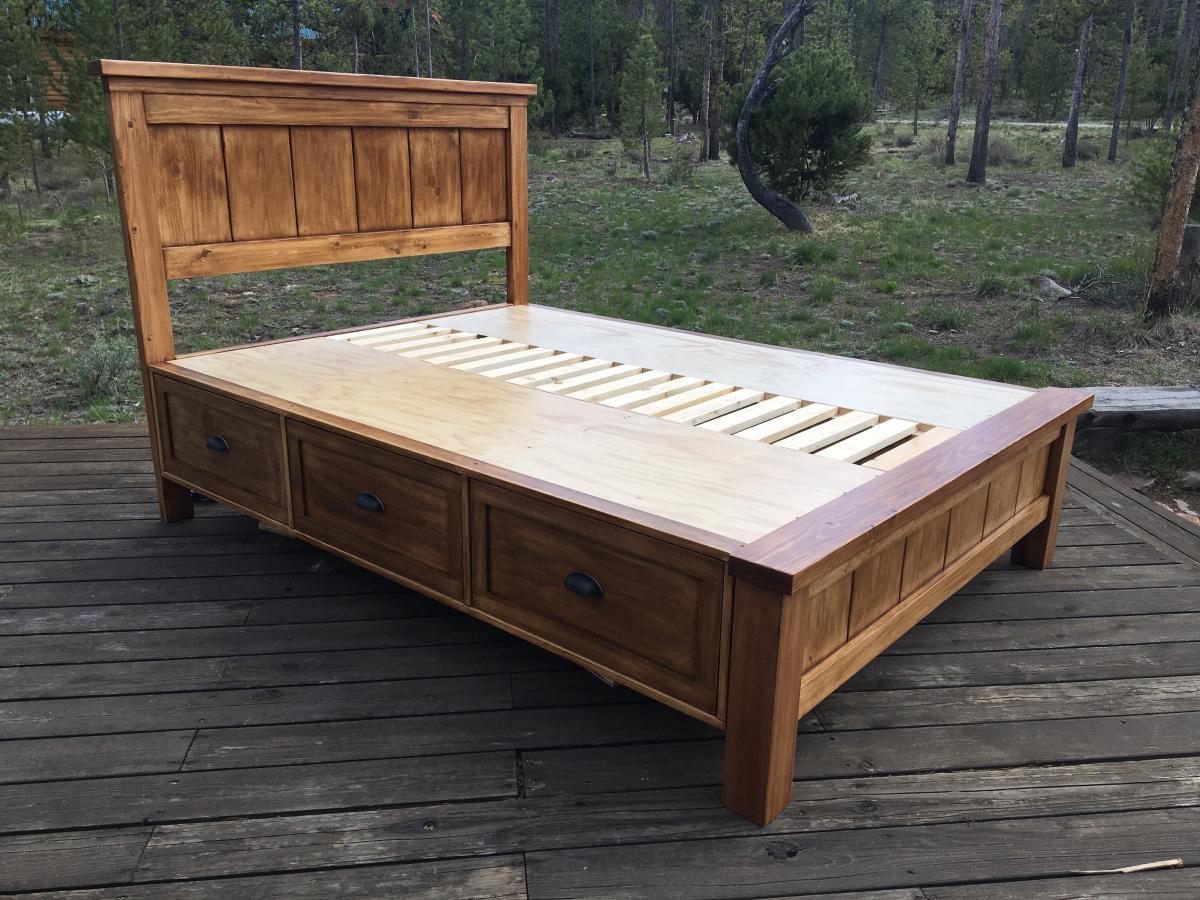
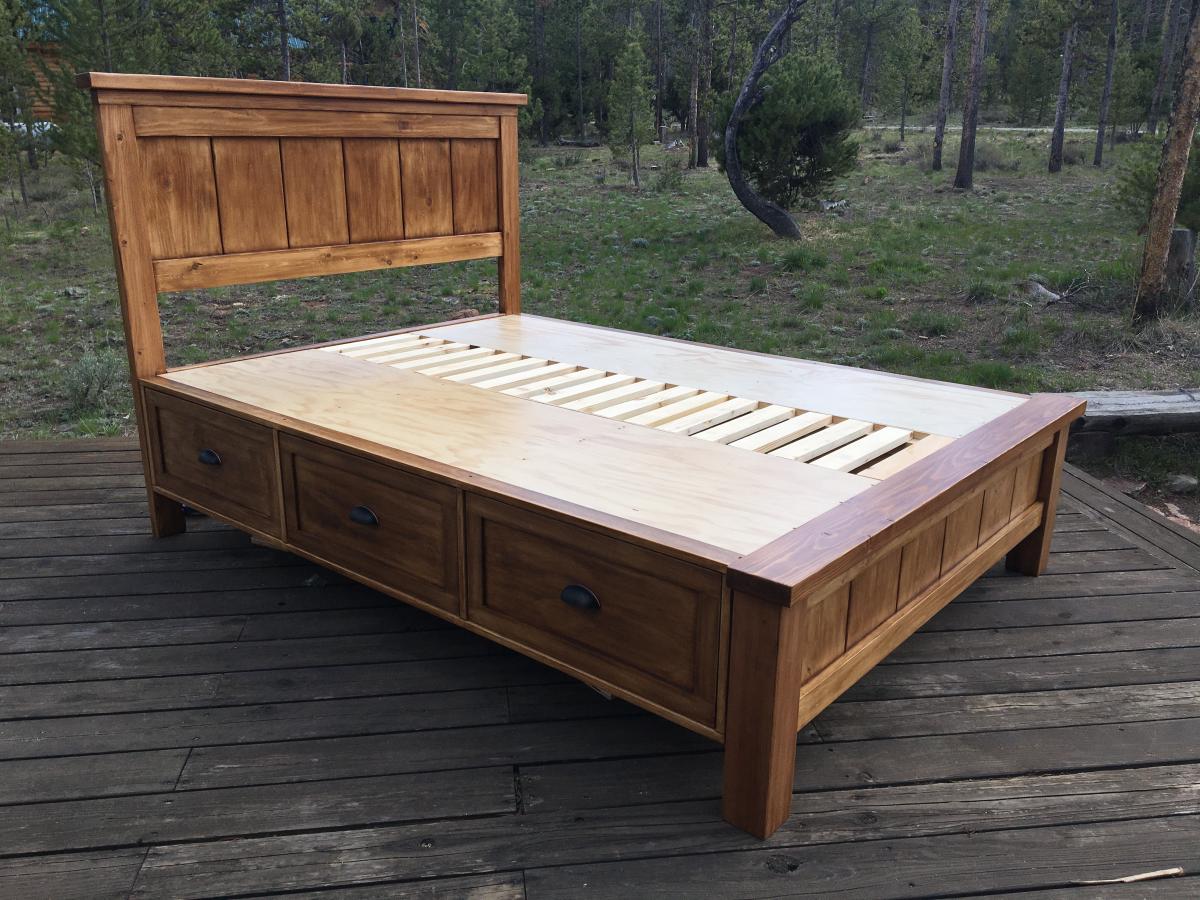
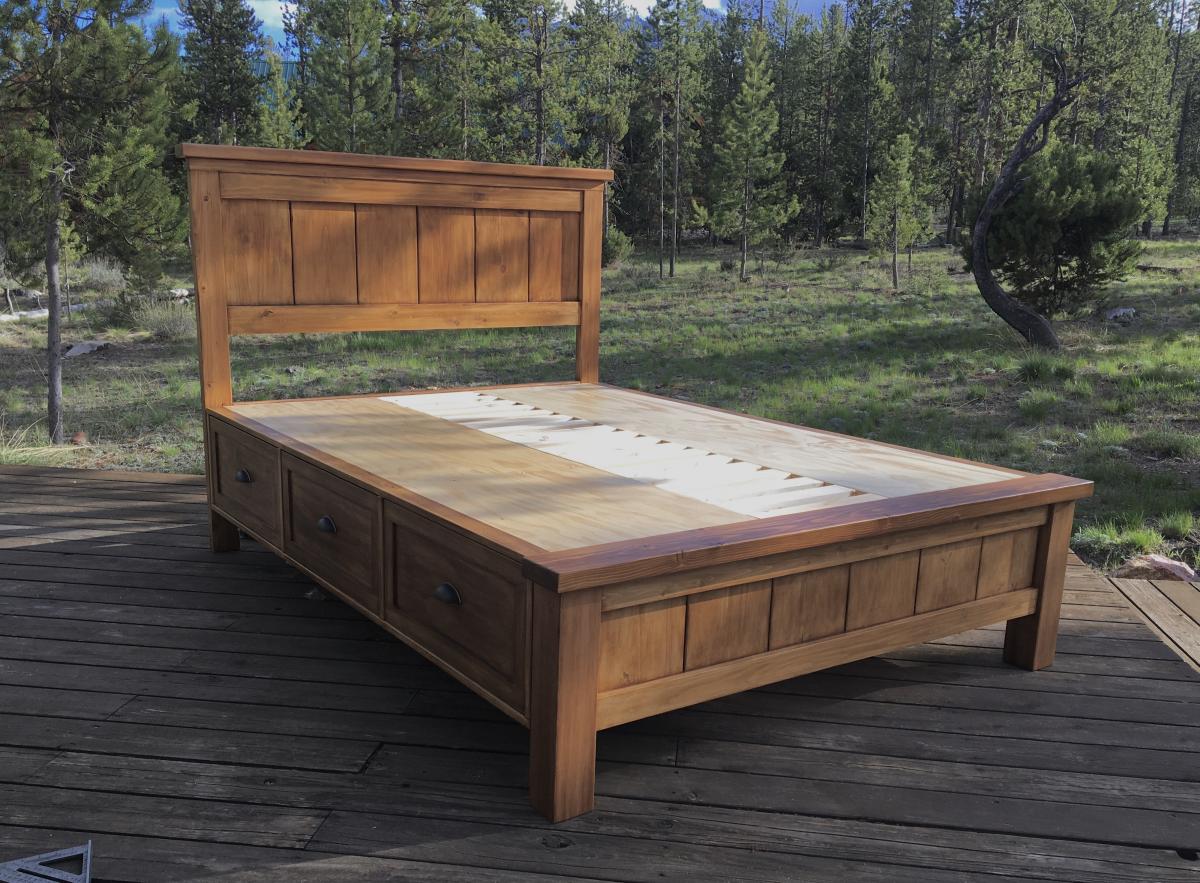
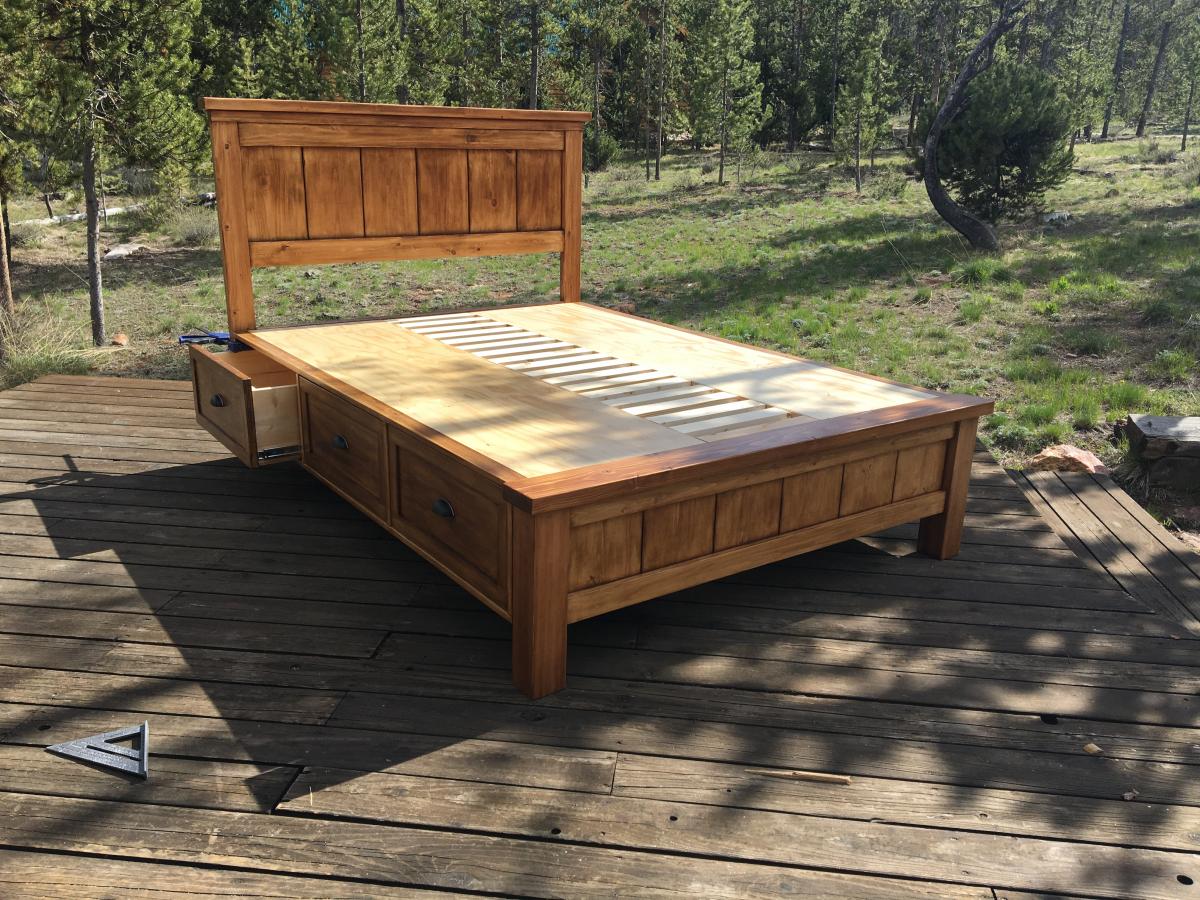
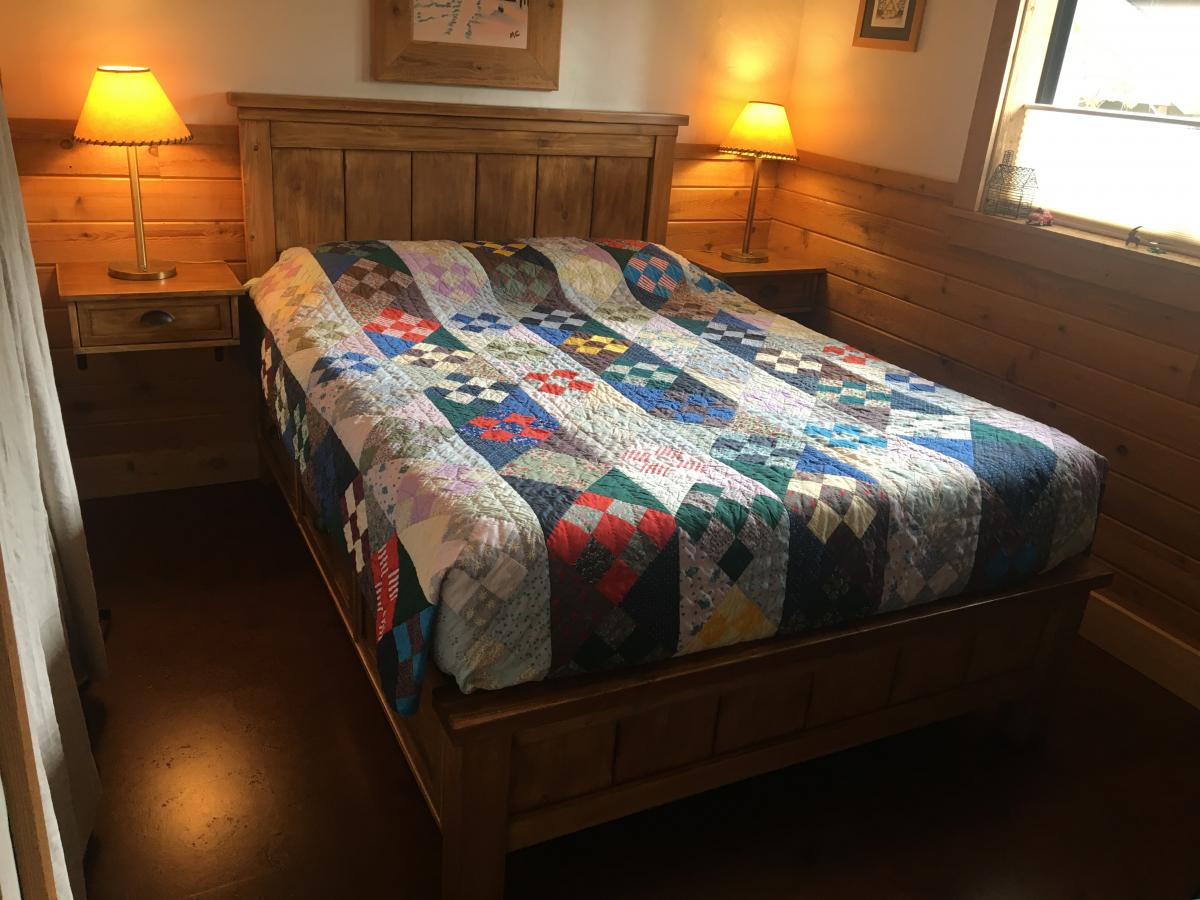
Hi, I’m Joe and love working on my cabin in Stanley Idaho. I needed a queen size bed on the ground floor but the room is small so I incorporated the footboard into into the platform to gain 6 inches of space in the room. It took a couple months working off and on but all fun. I also made the drawers deeper front to back to maximize storage. I did this at the peak of lumber prices and spent like $900 on lumber. It came out great, my Airbnb guests love it!
Wed, 10/06/2021 - 14:28
I could not get logged in to Ana-white.com on my phone where my pictures were, but now an logged in on my laptop. Is there any way to register this brag post on my account? This is Fitzanthony, [email protected]
Joe
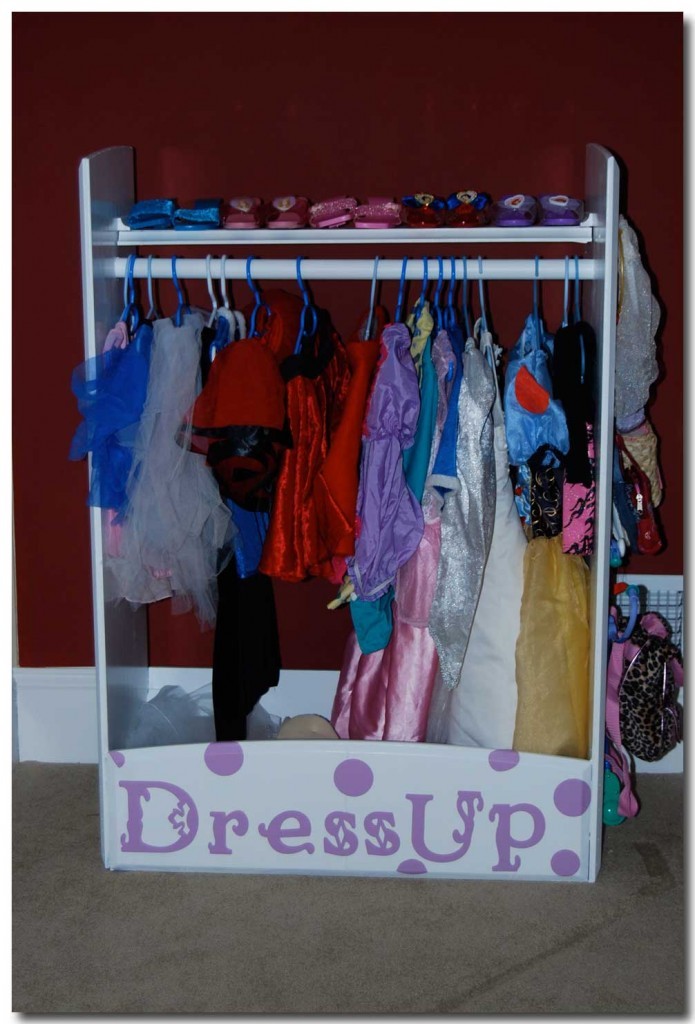
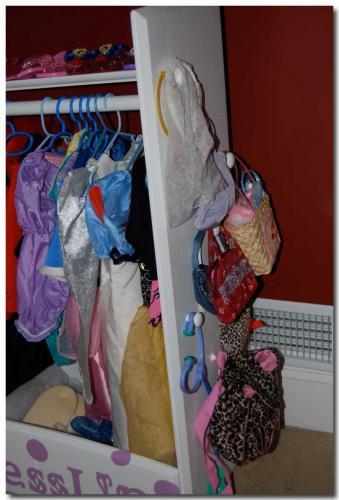
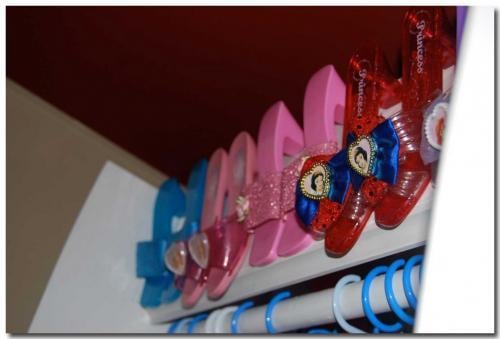
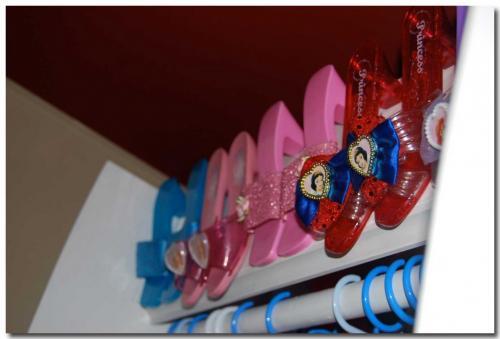
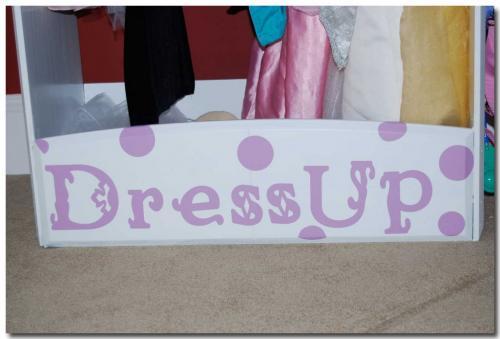
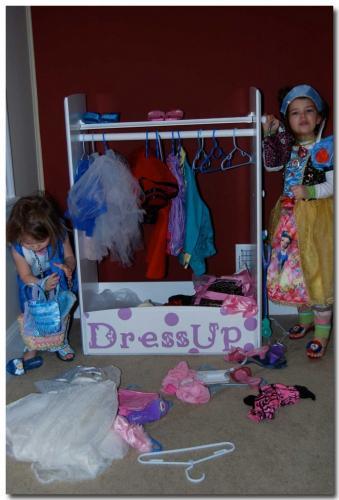
I used by kids baby armoire that was headed to the trash, and turned it into a dress-up center for my 3-year olds birthday gift. The best part is it was virtually free! The only thing I purchased was the pole. It was a lot of hit and miss, measuring, re-measuring, pulling nails out – but – it worked!! And it is awesome – and it only cost me a few bucks!!! As you can tell from the last pictures I took a lot of time getting it ready – and you can tell from the last picture it didn’t take them long to mess it up.
The best part was that the girls were so excited. Hayden – the birthday girl – looked at it with her eye’s wide open – walked slowly too it – looked at me and said “Mommy – It’s beautiful!” It was the sweetest most heart warming thing! I love that now my kids look at something and either ask me to make it – or did I make it.
Love for you to see all the before and after pictures over at my blog: http://mycreativeescapes.blogspot.com/2011/02/dress-up-center.html

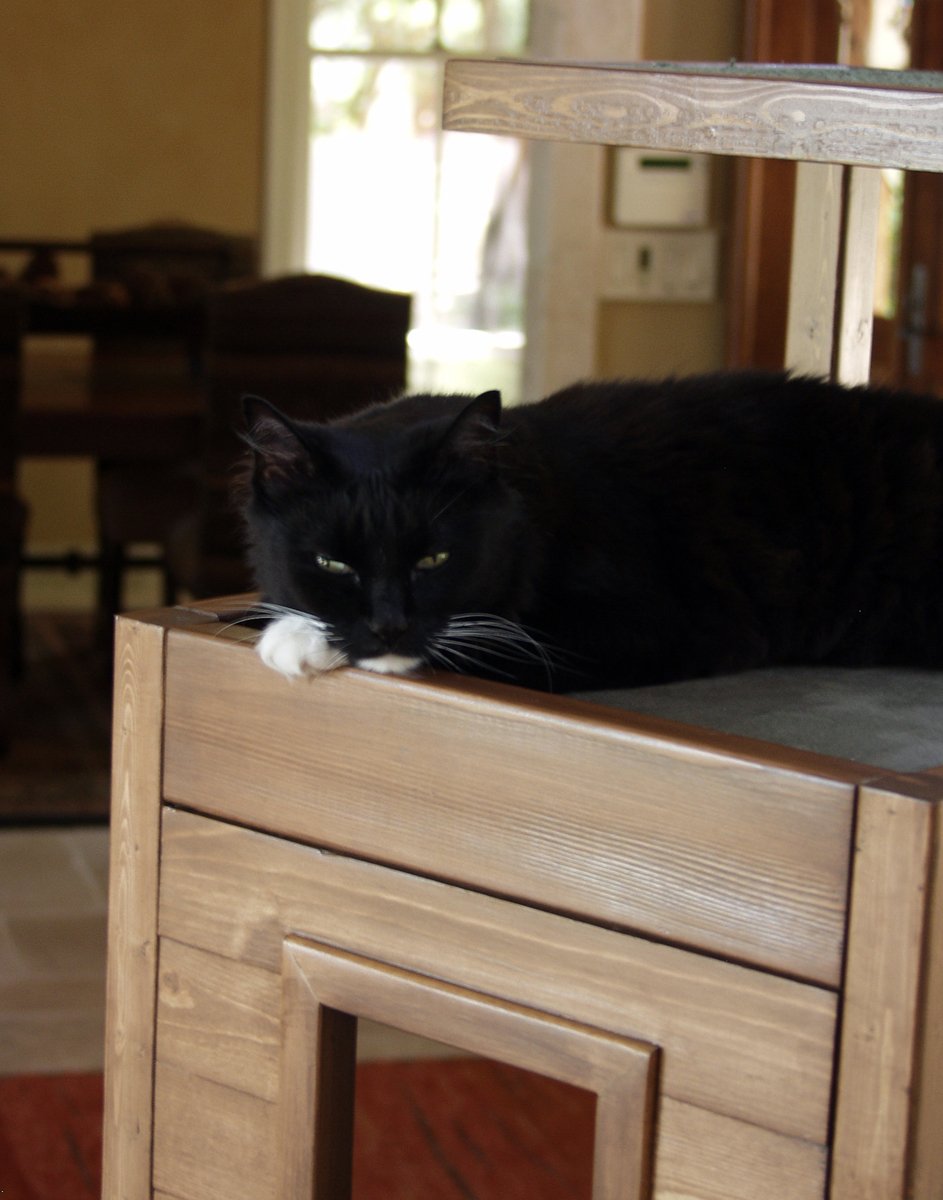
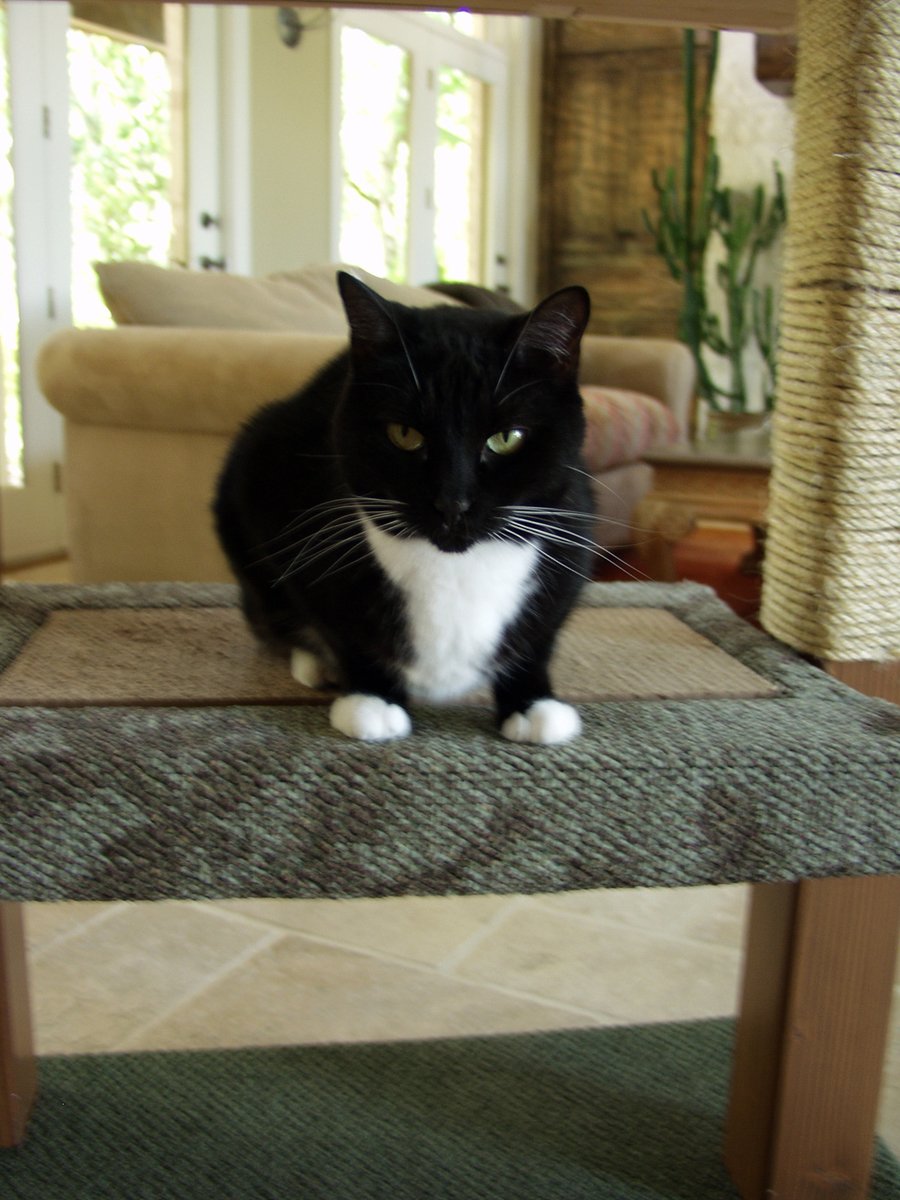
I always wanted a cabin-type cat tree where my cats could crawl in and feel safe, but still have a great view of the birds out of a window. I tried to draw my vision on paper, but that had a hideous result. Learning Google SketchUp (at least the basics) was an absolute necessity. I could never have built this without drawing it in 3D first, and seeing how the boards would connect, etc.
For the scratch pad, I built a frame out of 2x4s on top of plywood, covered it with carpet, and dropped the standard size scratch pad in place. This is the cat's favorite feature. I put barn doors on the window with tiny hinges so that I can close for added privacy. The tree sits against a window so that the back side is totally open. I made cozy zippered cushions for the platforms (that can be taken off and washed). I covered the carpeted areas with spare carpeting.


Fri, 07/12/2013 - 09:36
Would you mind sharing your dimensions for this? It is absolutely beautiful!
Sun, 08/25/2013 - 08:10
Do you have the plans somewhere? I really want to build this (even got the okay from the hubby!) but I don't think I could do it without some serious guidelines...

Fri, 08/30/2013 - 15:55
First, sorry for the late notice; I just happened to look and saw the comments/questions.
I don't have plans...all I have is a google sketchup diagram that I created as a guideline for my construction (which is included in the photos), which is not to scale. Actual measurements are:
* Base (green carpeted base): 33.5" x 19"
* 4x4 legs: 35" tall
* 'Mezzanine' scratch pad level: 22" x 17.5"
* Mid-level base: 18" x 32"
* Enclosed cabin: 18.25" x 22.5" x 17" high
* Highest point: 56"
This has turned out to be a fantastic hit with the cats. They use all 5 levels, but the scratch pad and cabin are their favorite spots. If you need anything else or additional pics, please contact me.
Fri, 08/30/2013 - 18:15
Thanks for the dimensions, Joni! I'm trying to learn SketchUp so I can draw up my own plans, also. If I can't figure it out, I'll hand it off to my 12 year old, who is a pro at it (go figure). I know my cats will love it if I can manage to get it built!
Fri, 09/27/2013 - 10:15
I used your pictures and diagram Joni and made one for my friend for her cats! I used 2x4's for the cabin which makes this thing so heavy but so sturdy! It holds my 60 lb child without budging... here's a pic of it almost done. My friend was not finished wrapping the posts with sisel rope though.
https://www.facebook.com/stephanie.brooks1975#!/photo.php?fbid=10151788…
Thu, 10/31/2013 - 14:30
Bhoppy -- I looked at your cat tree on facebook. It's awesome! The sturdiness of it shocked me too. And I was initially worried that my cats might knock it down!!
The worst part of building it was getting that lower scratch pad level on straight with the 3 posts. I'd never want to do that again!
Thanks for sharing, Joni
Fri, 01/02/2015 - 01:18
Funny, almost every time I'm looking for ideas or inspiration when I want to build something, I end up back on this site. I was searching for pictures of cat trees and this was the only one that made me say "Holy crap, that's EXACTLY what I want!" My cat will love it!
Mon, 04/27/2020 - 20:41
Not sure if anyone is still around to see this, but I fell in love with this tree the second I saw it. Wondering if anyone created a detailed plan and might have it handy or possibly a detailed sketchup and wouldn't mind sharing the save file?
In the event nobody has either... I'm planning on having someone else build this for me as I don't have the tools nor skill to do it myself. I have a few questions:
1. The tree base/platform, what's a good recommended thickness?
2. The platform for the scratchpad... is there any certain reason it's so much thicker compared to the other platforms?
Thanks.
Sun, 09/12/2021 - 11:51
Reverse engineering this project, using just 2x4s. None of the photos show the undersides. How are the plywood pillow bases attached for the top and bottom of the cabin? and the base of the top viewing platform?
Sun, 09/12/2021 - 16:42
There are no Minwax water based stain colors with those names that I can find.
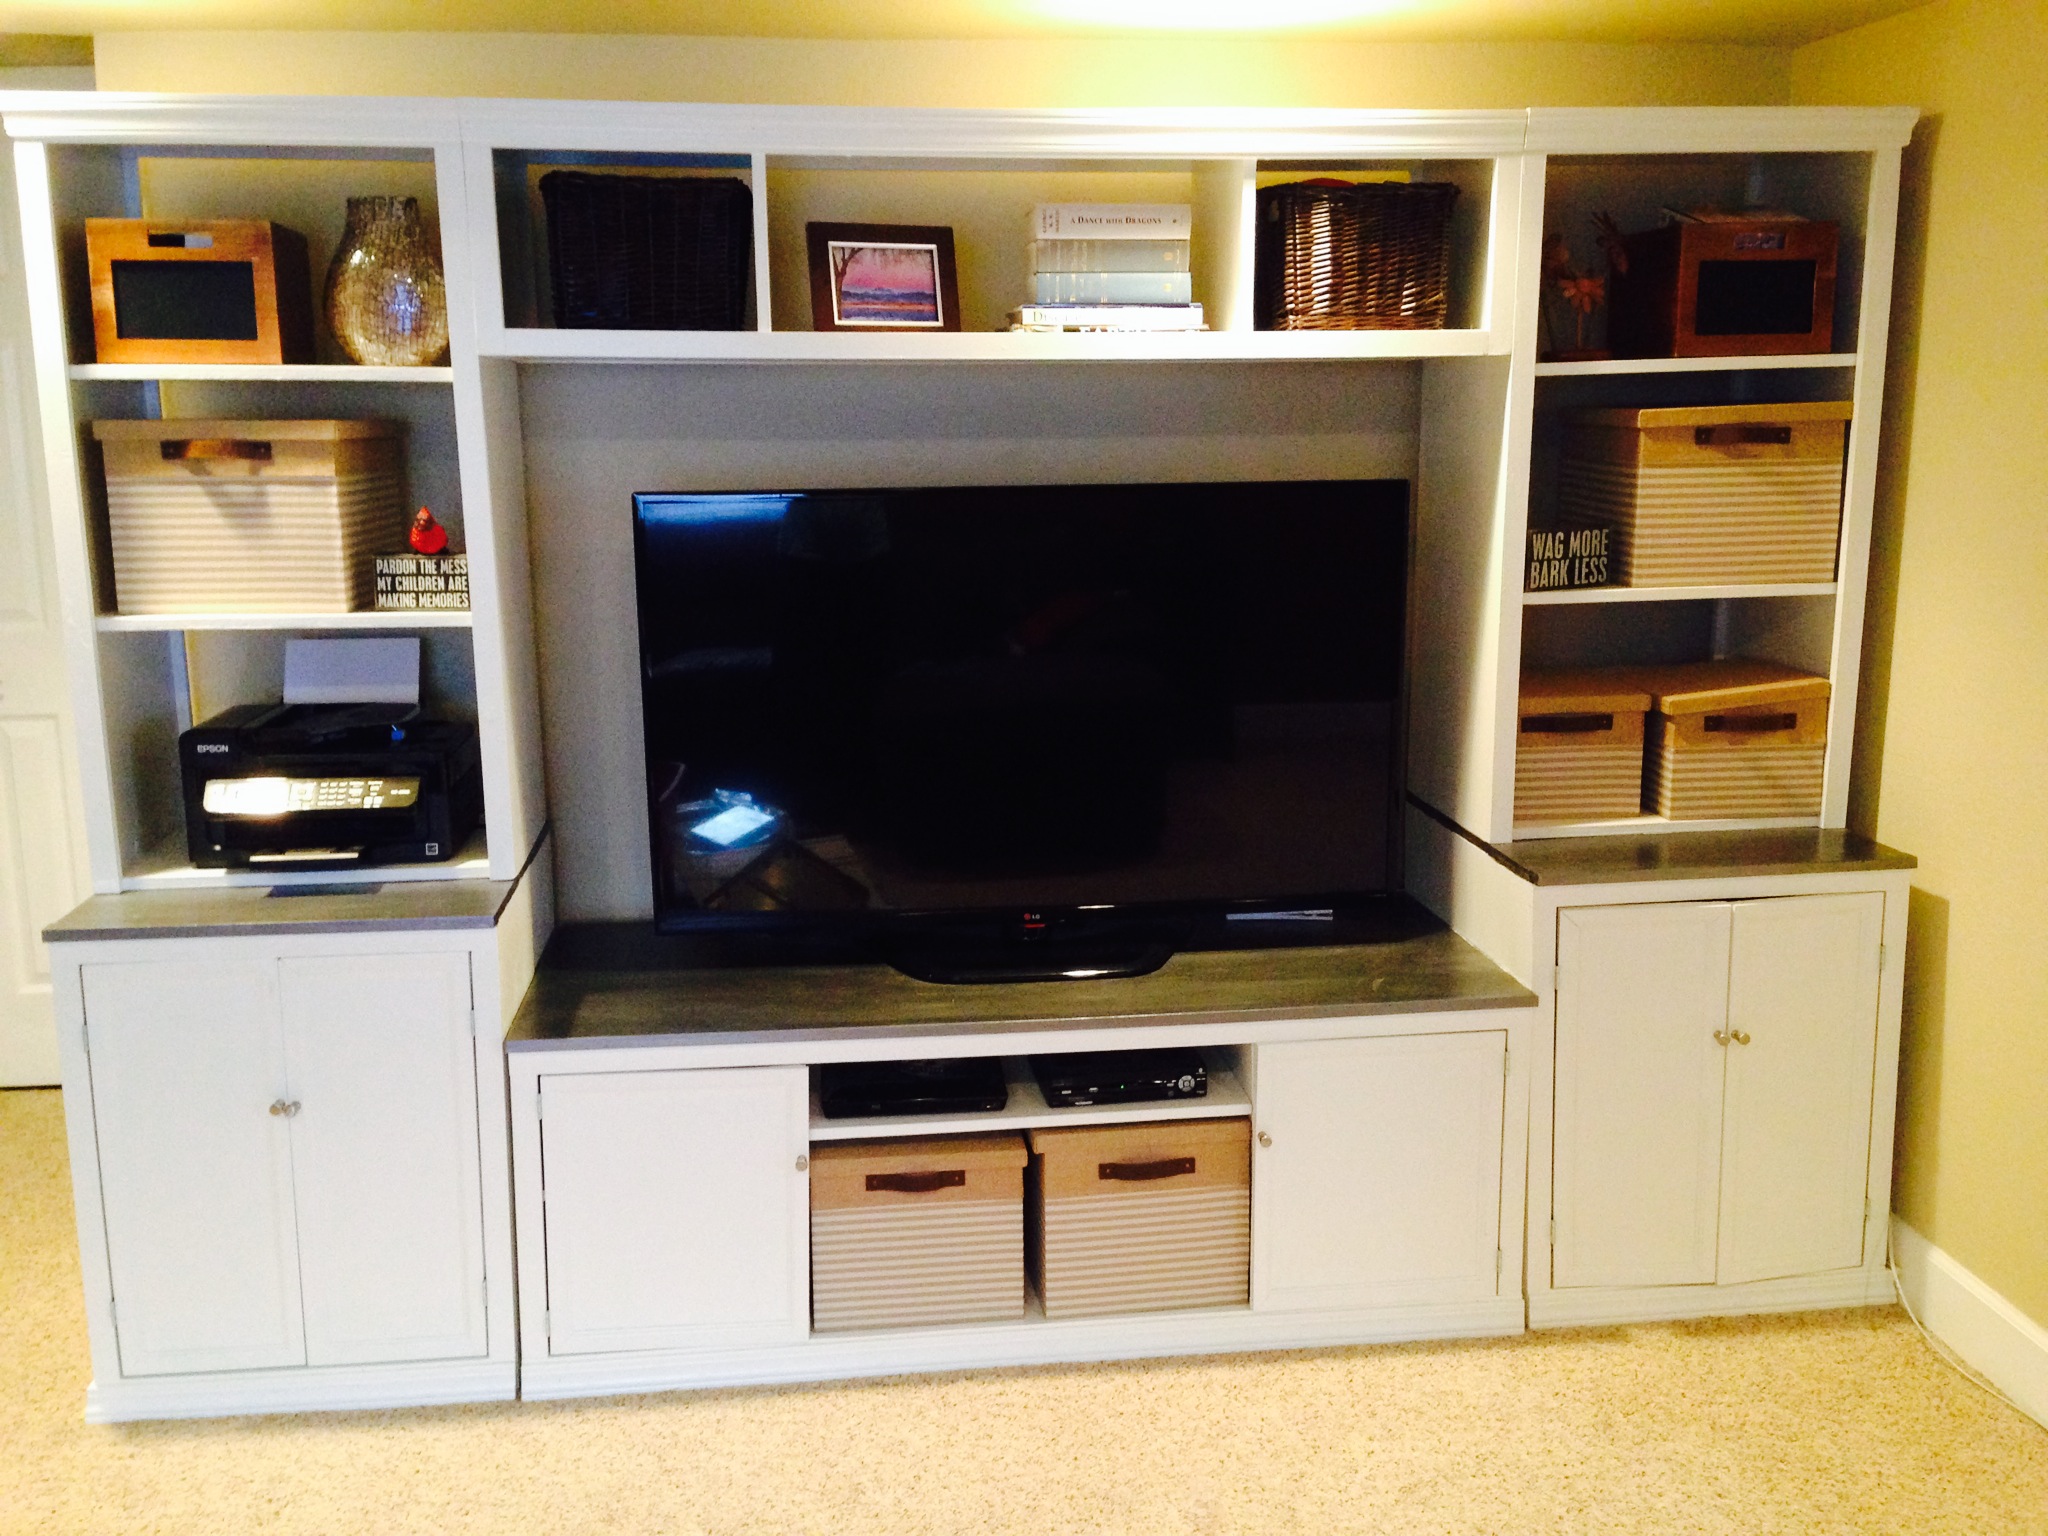
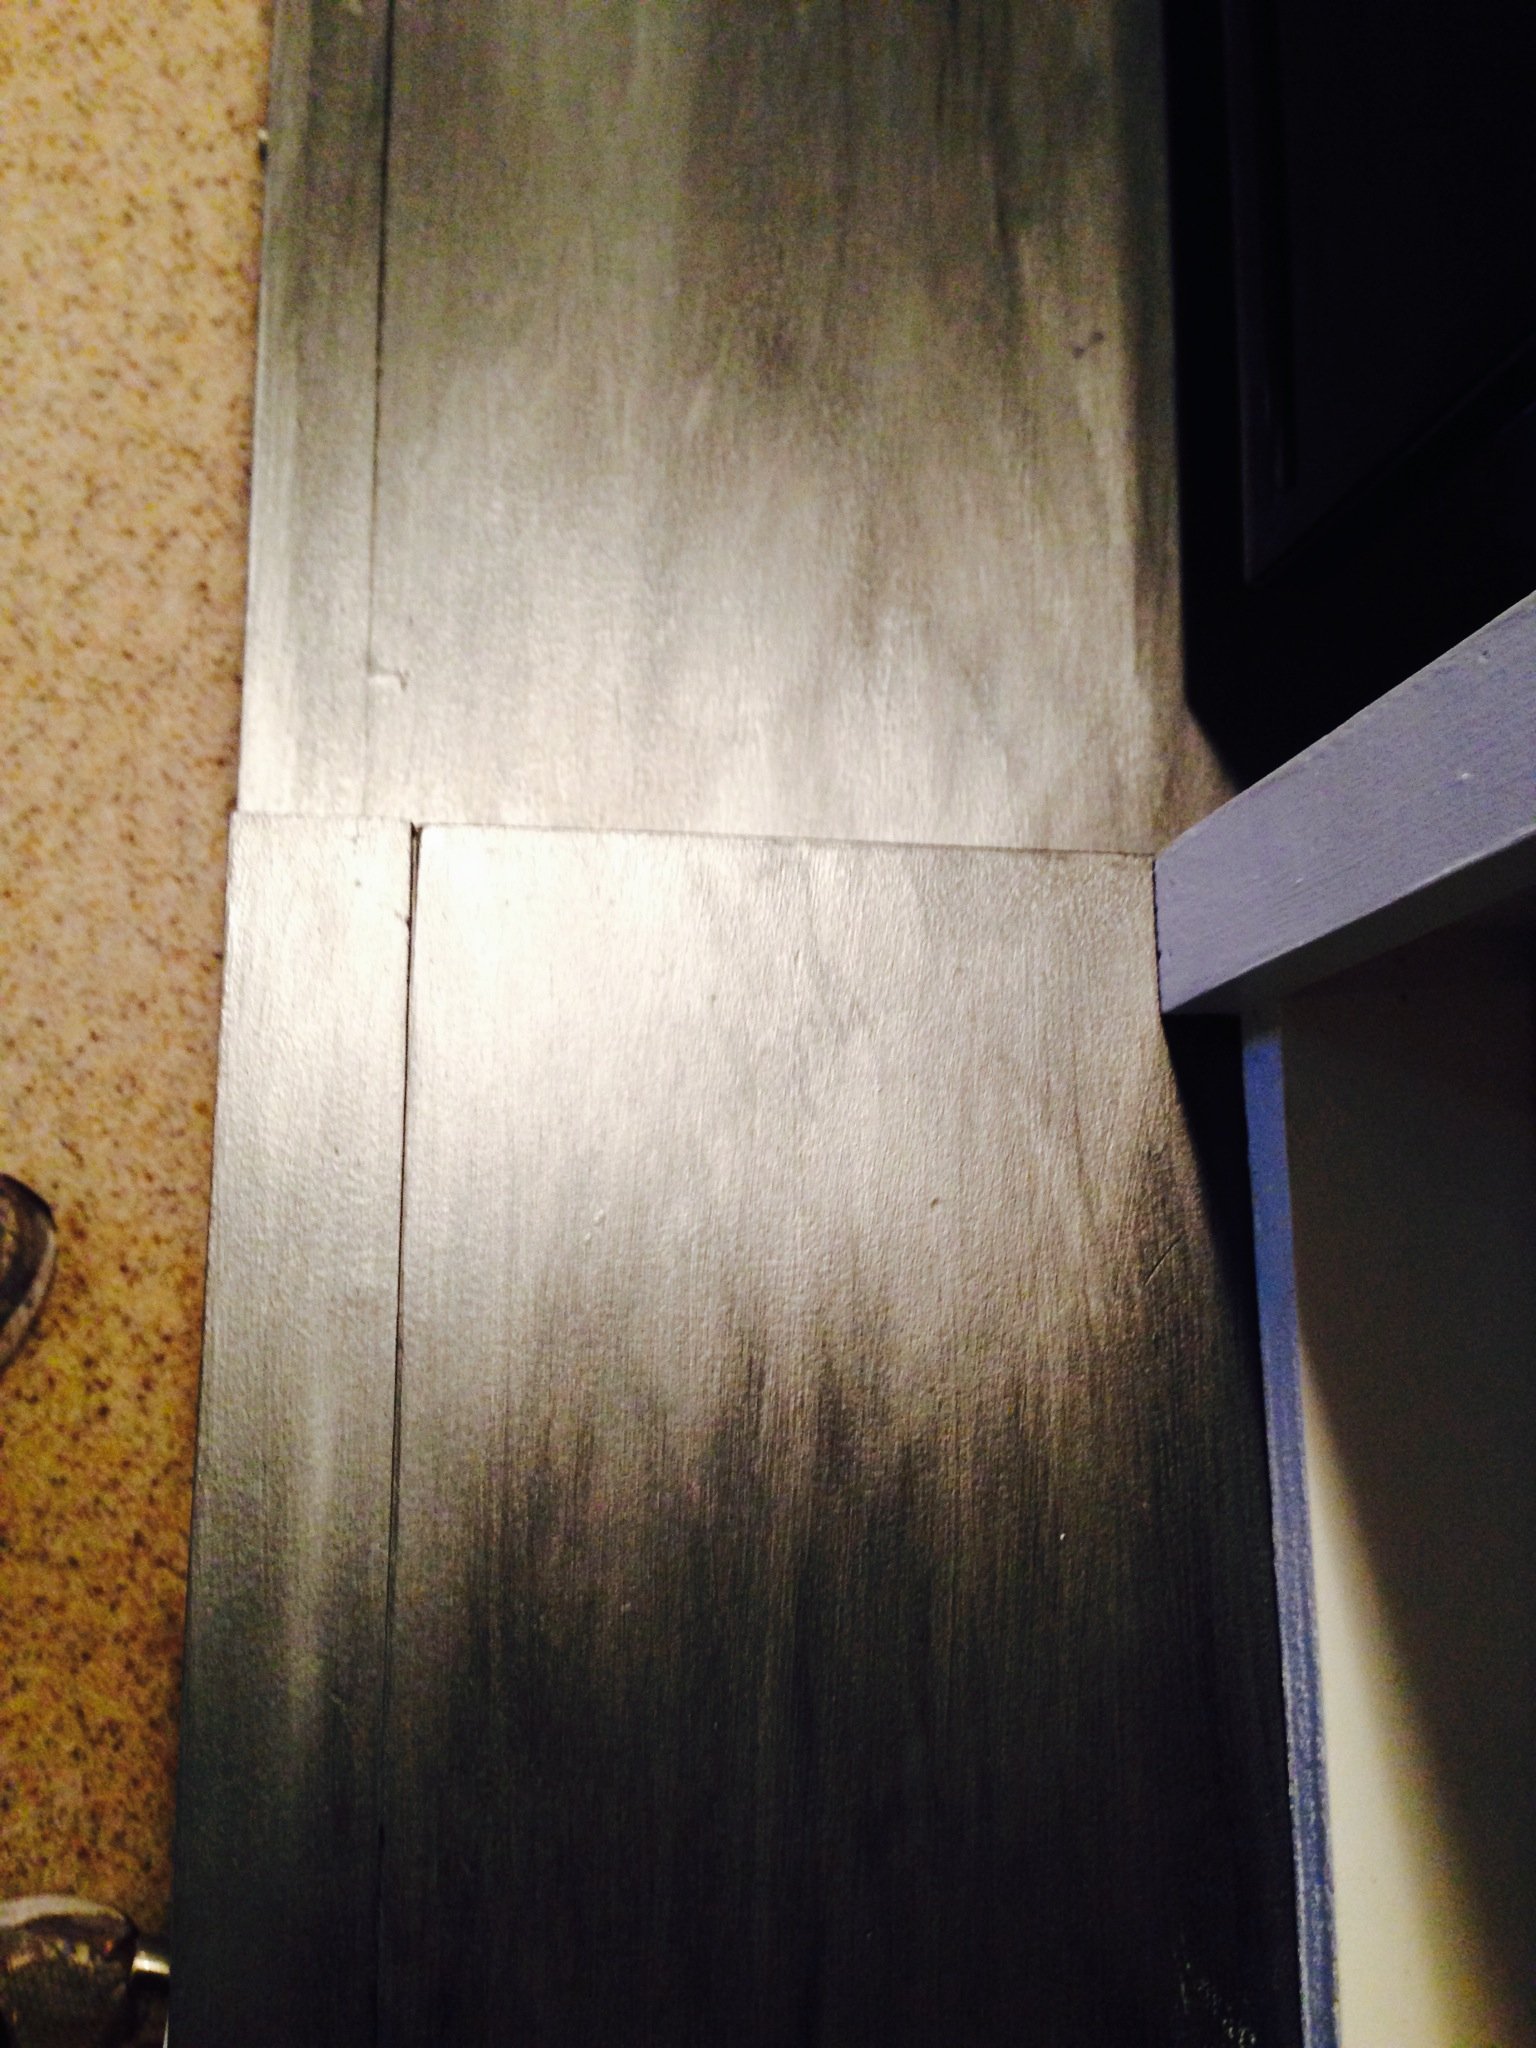
This was one of our early builds. I"ve learned a new way to do doors since then so hope to replace these before we move. I love all the storage on this unit! The finish on the tops is a metallic glaze I made.
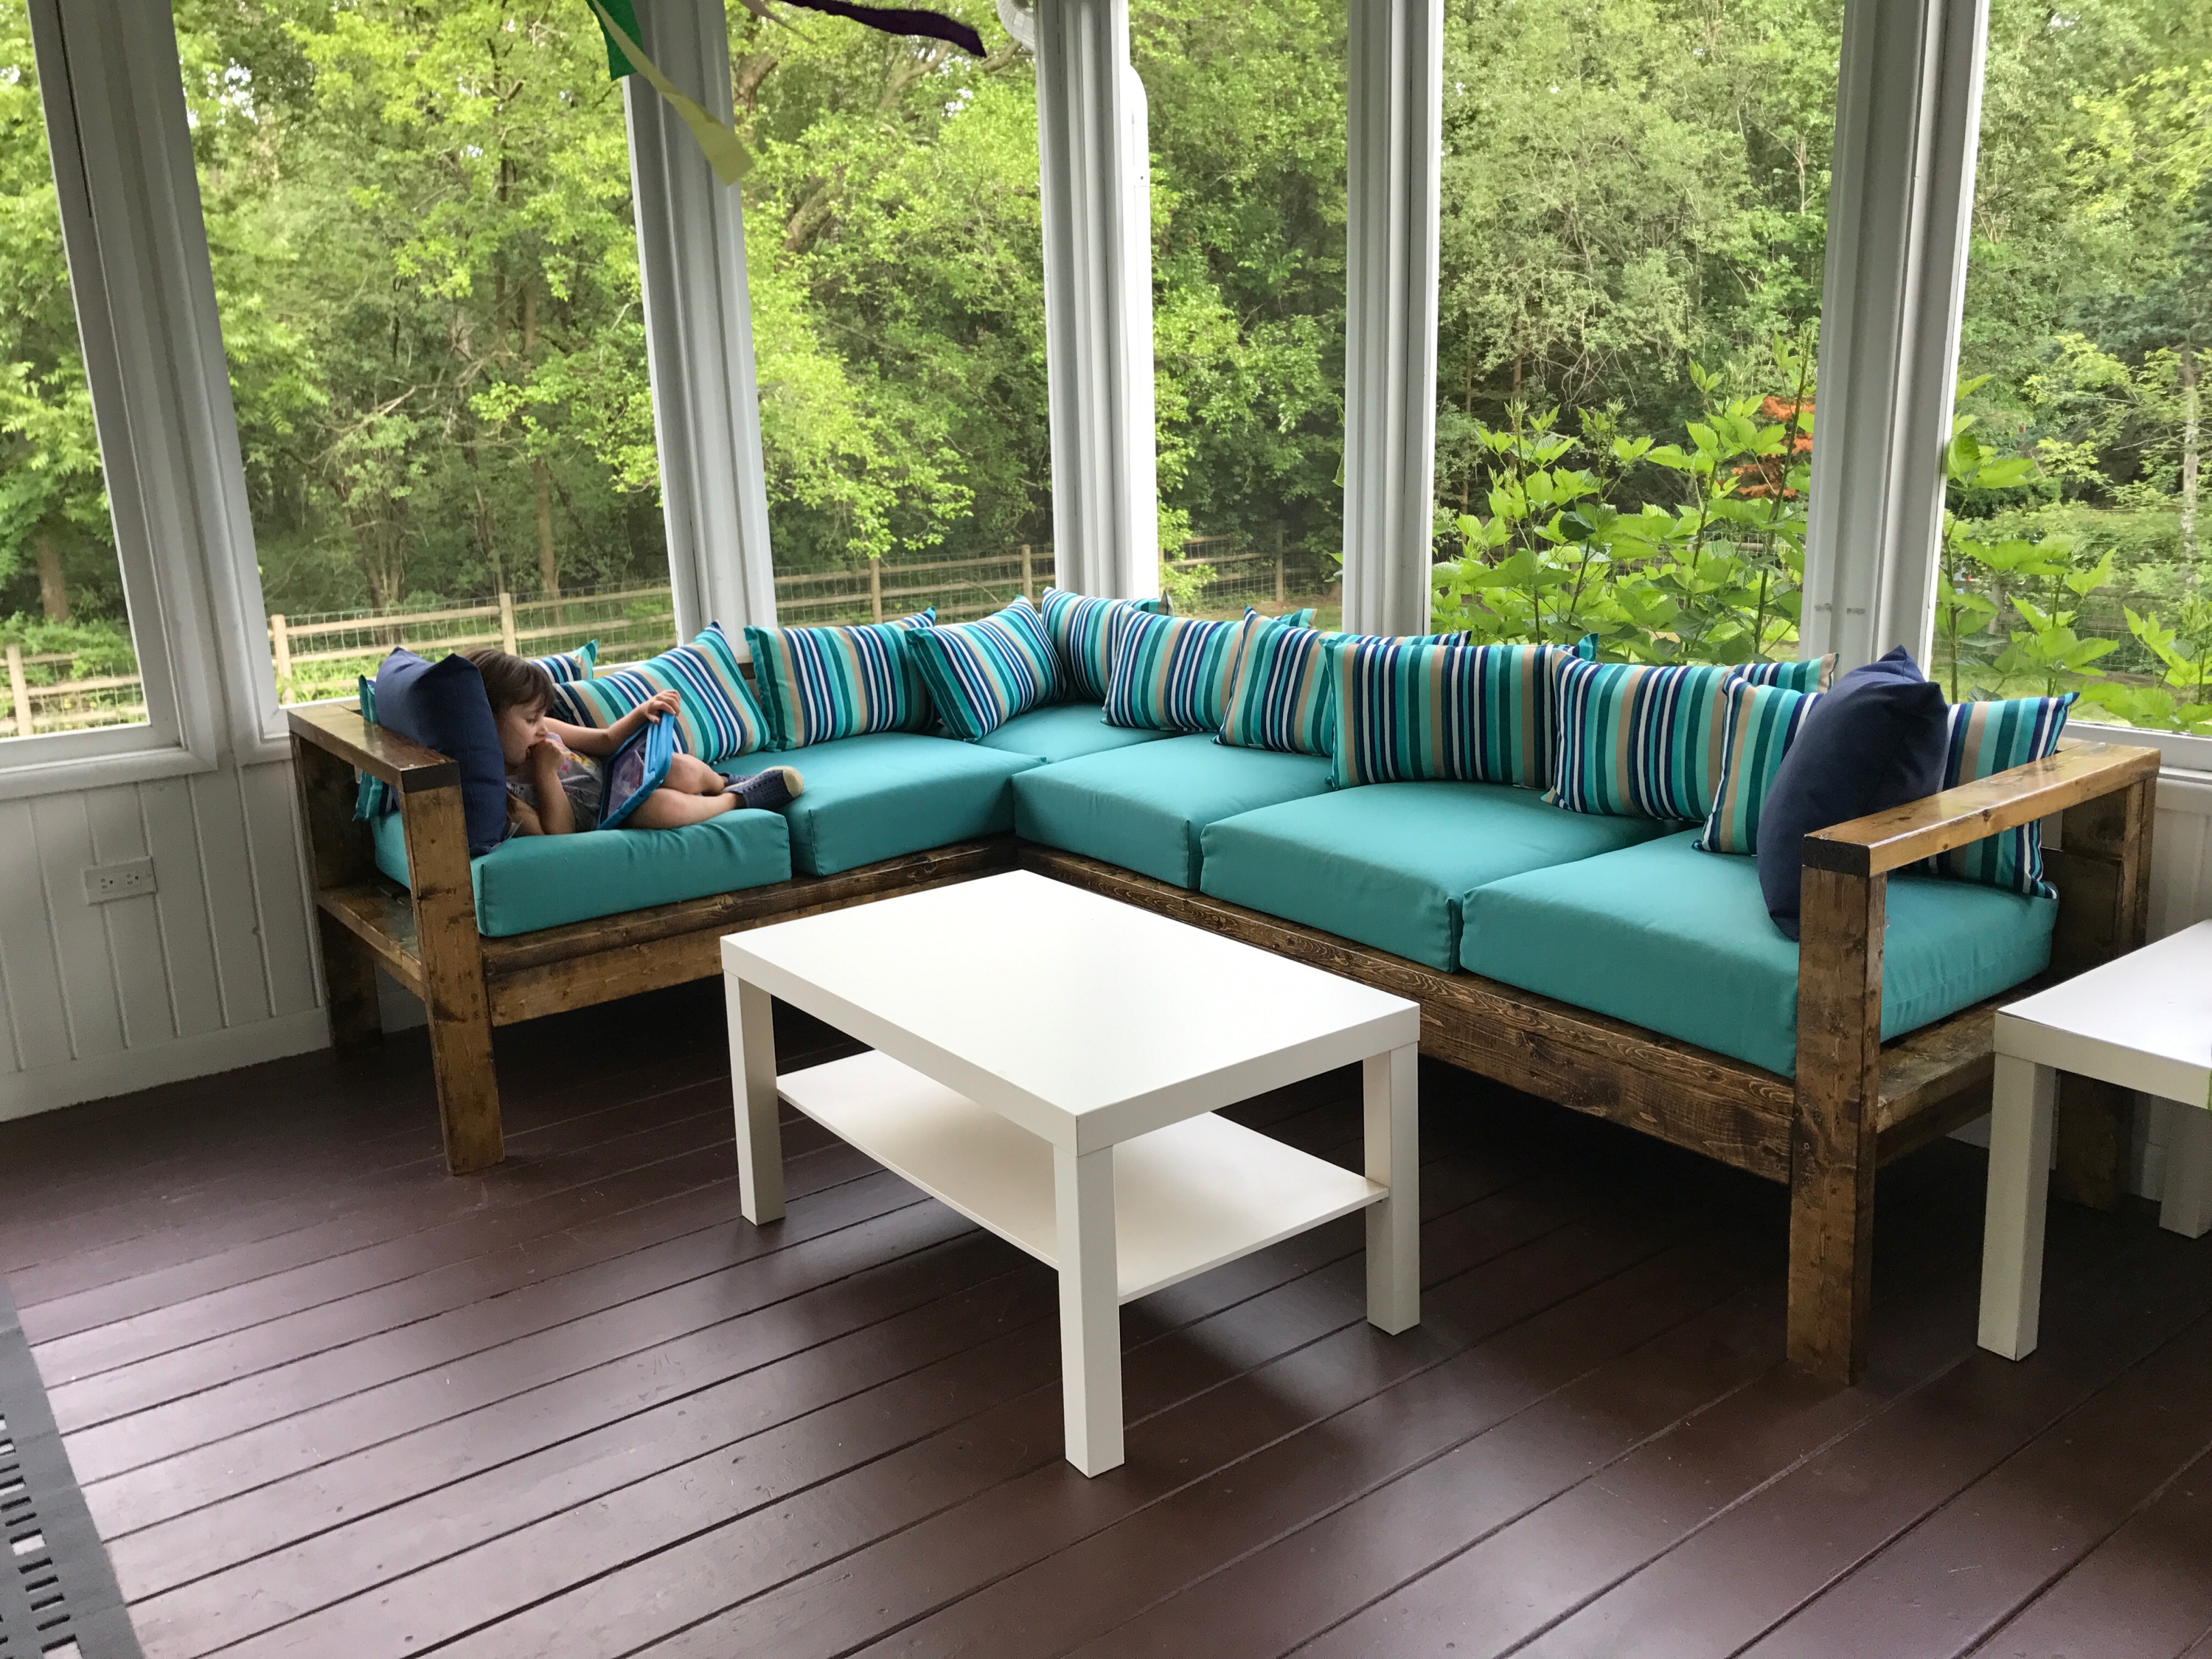
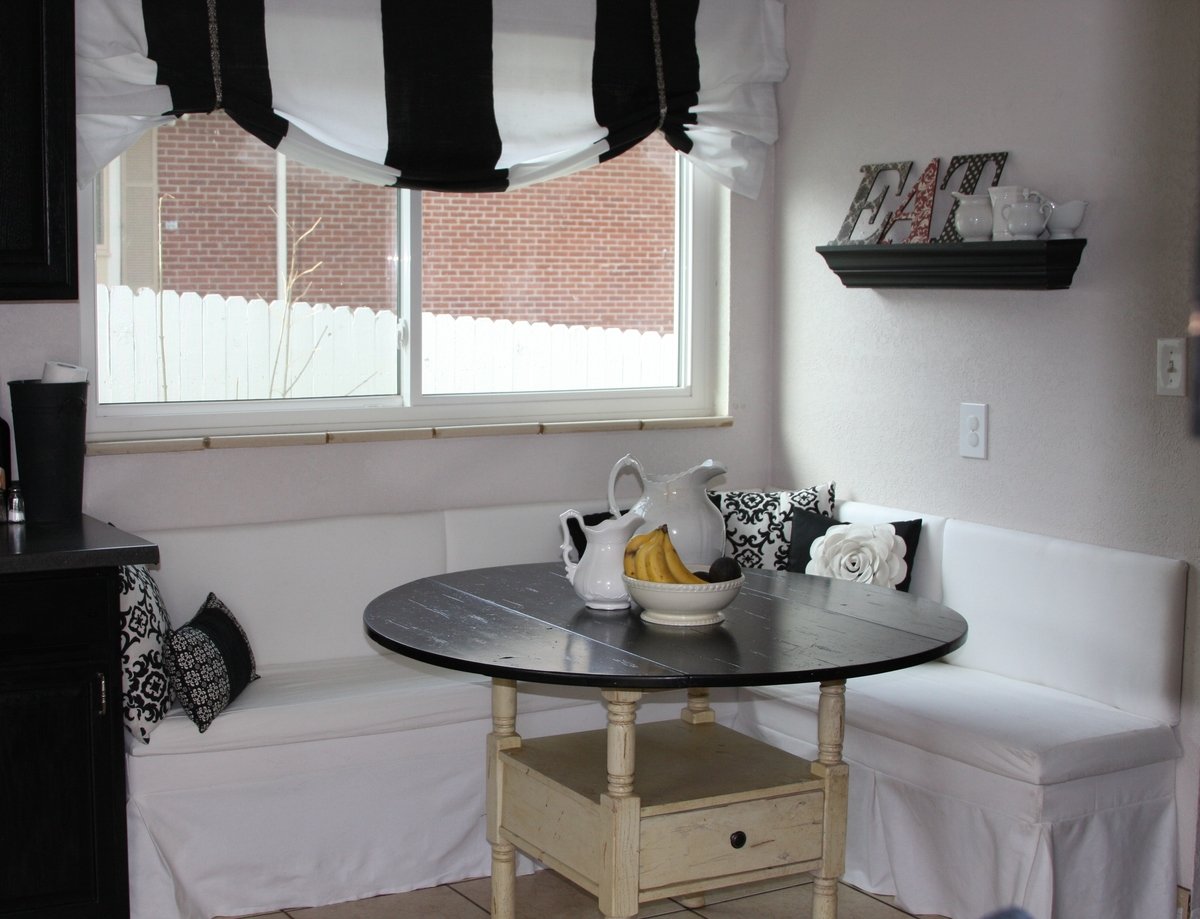
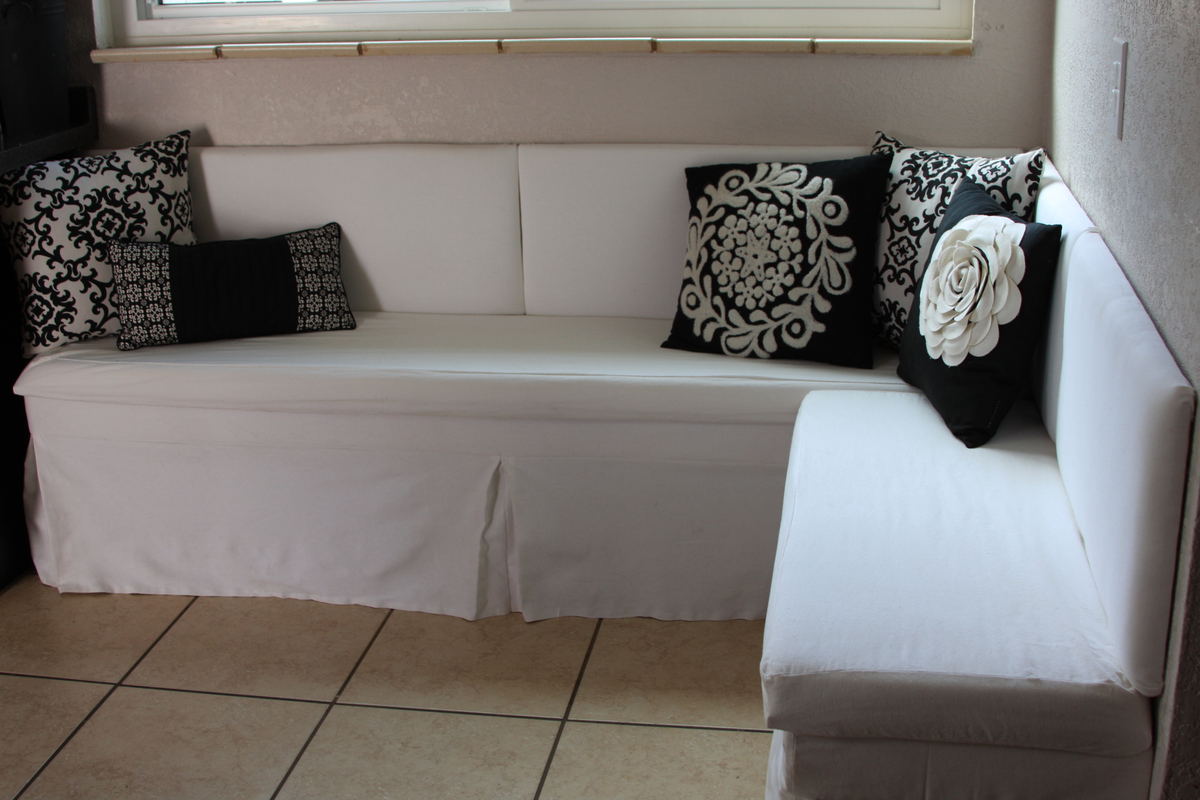
Our version of the outdoor sectional. We couldn't find 24" wide pillows so we modified the design to accommodate 22"x24" ones. We also added a 1x8 held on with pocket screws to provide some additional support on the back and help keep the pillows from falling through.
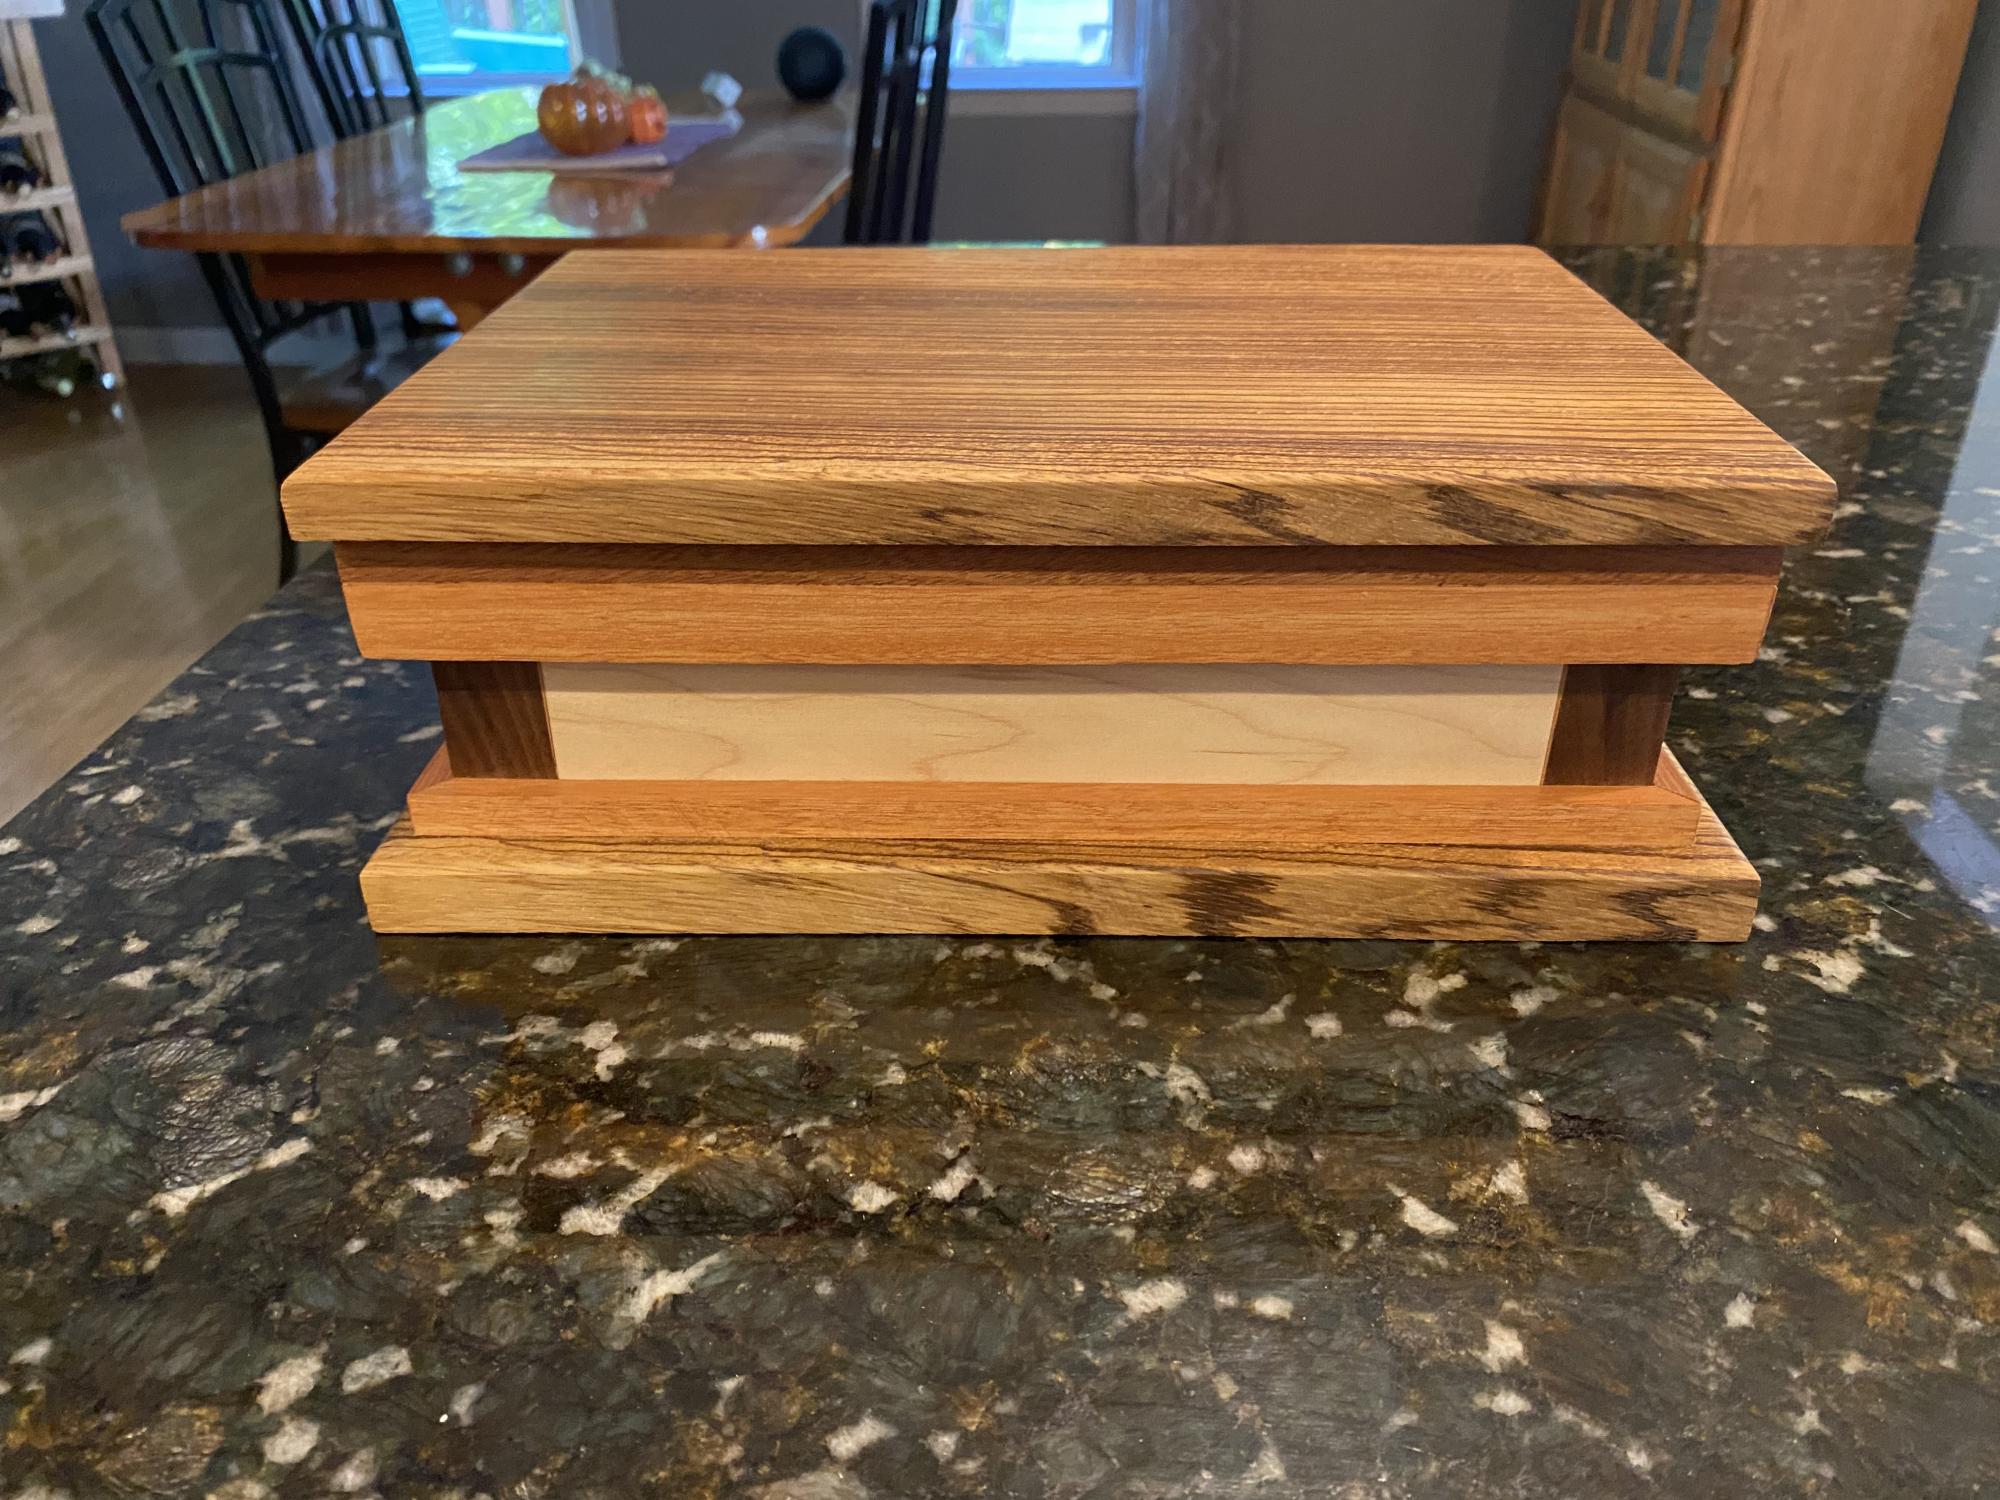
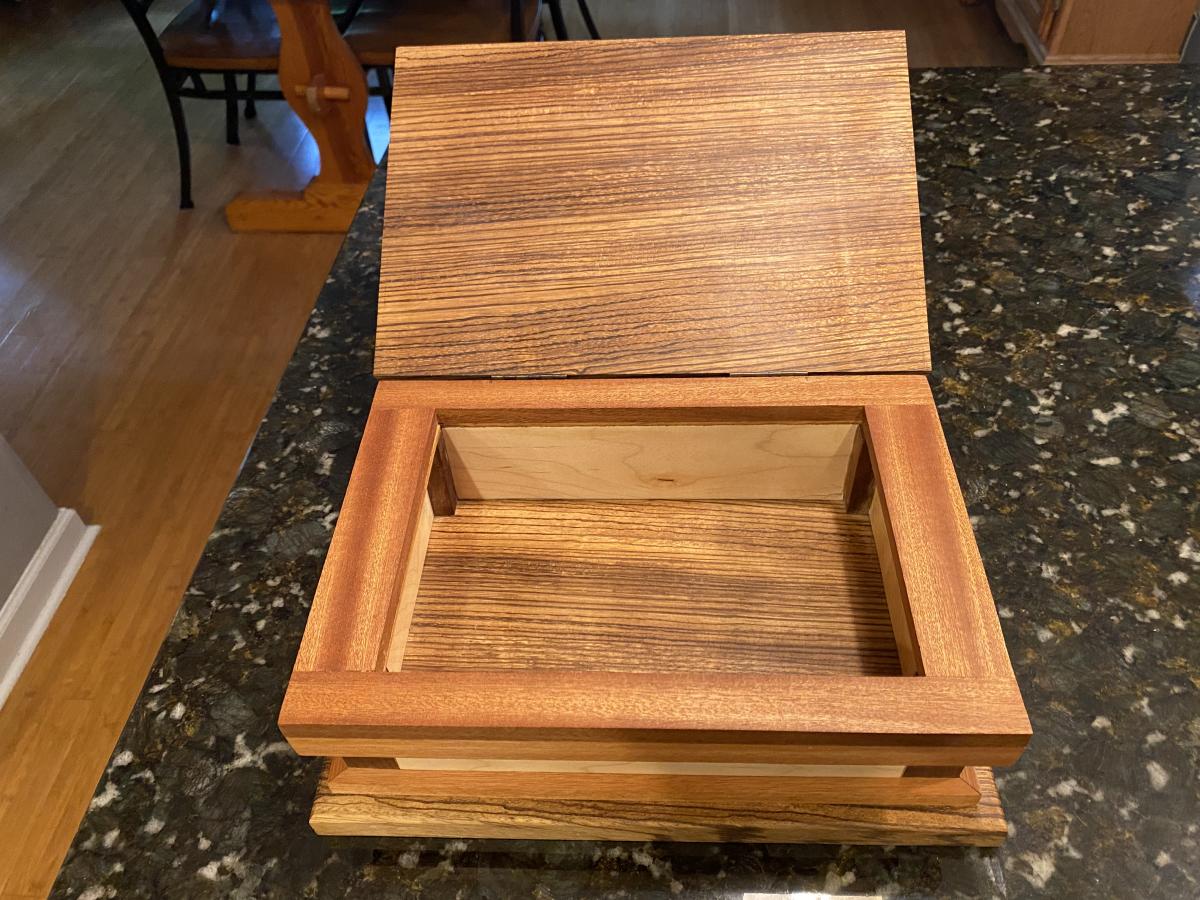
Keepsake box made of maple, black walnut, mahogany and zebra wood.

When I was given a stack of MDF sheets from a friend, I knew this was the desk I wanted to build with it first! We recently moved into my husband's grandmother's house, and have been making some improvements. We took out the dark old built in, and I replaced it with three 4' long gallery shelves, and the Parson's Desk modified to 4' long. It fits perfectly in my space, and looks so chic and modern against our teal walls. It's the perfect craft nook and workspace! I added a mason jar pendant light I DIY'd from the IKEA bulb kit, and also sewed a reversible runner to match my handmade duvet cover. The fabric is Deer Valley, from Free Spirit. I also had the glass top from the original desk cut down at Lowe's for free, and it's a perfect fit.

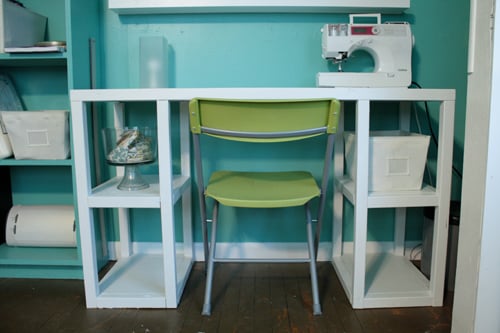

This project was amazingly simple and fun, and I love the outcome!
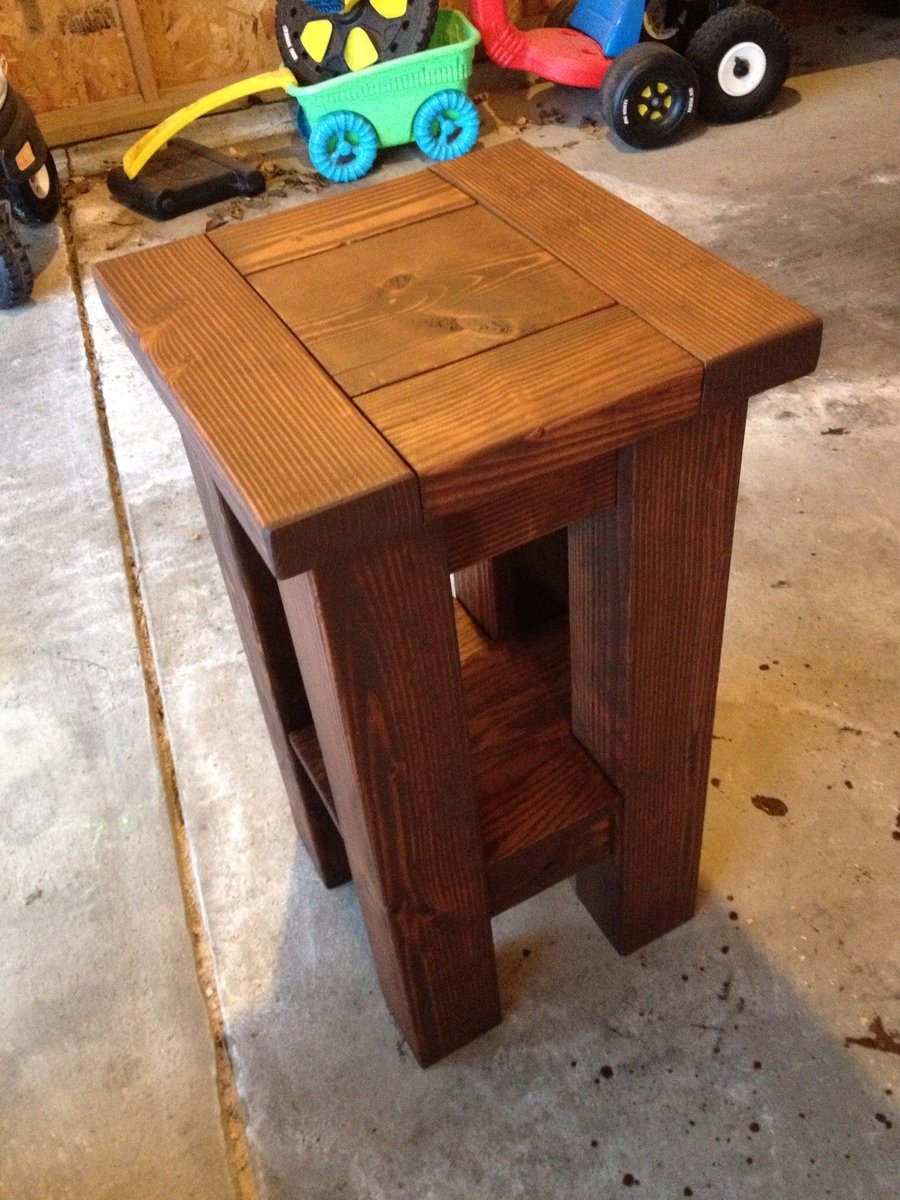
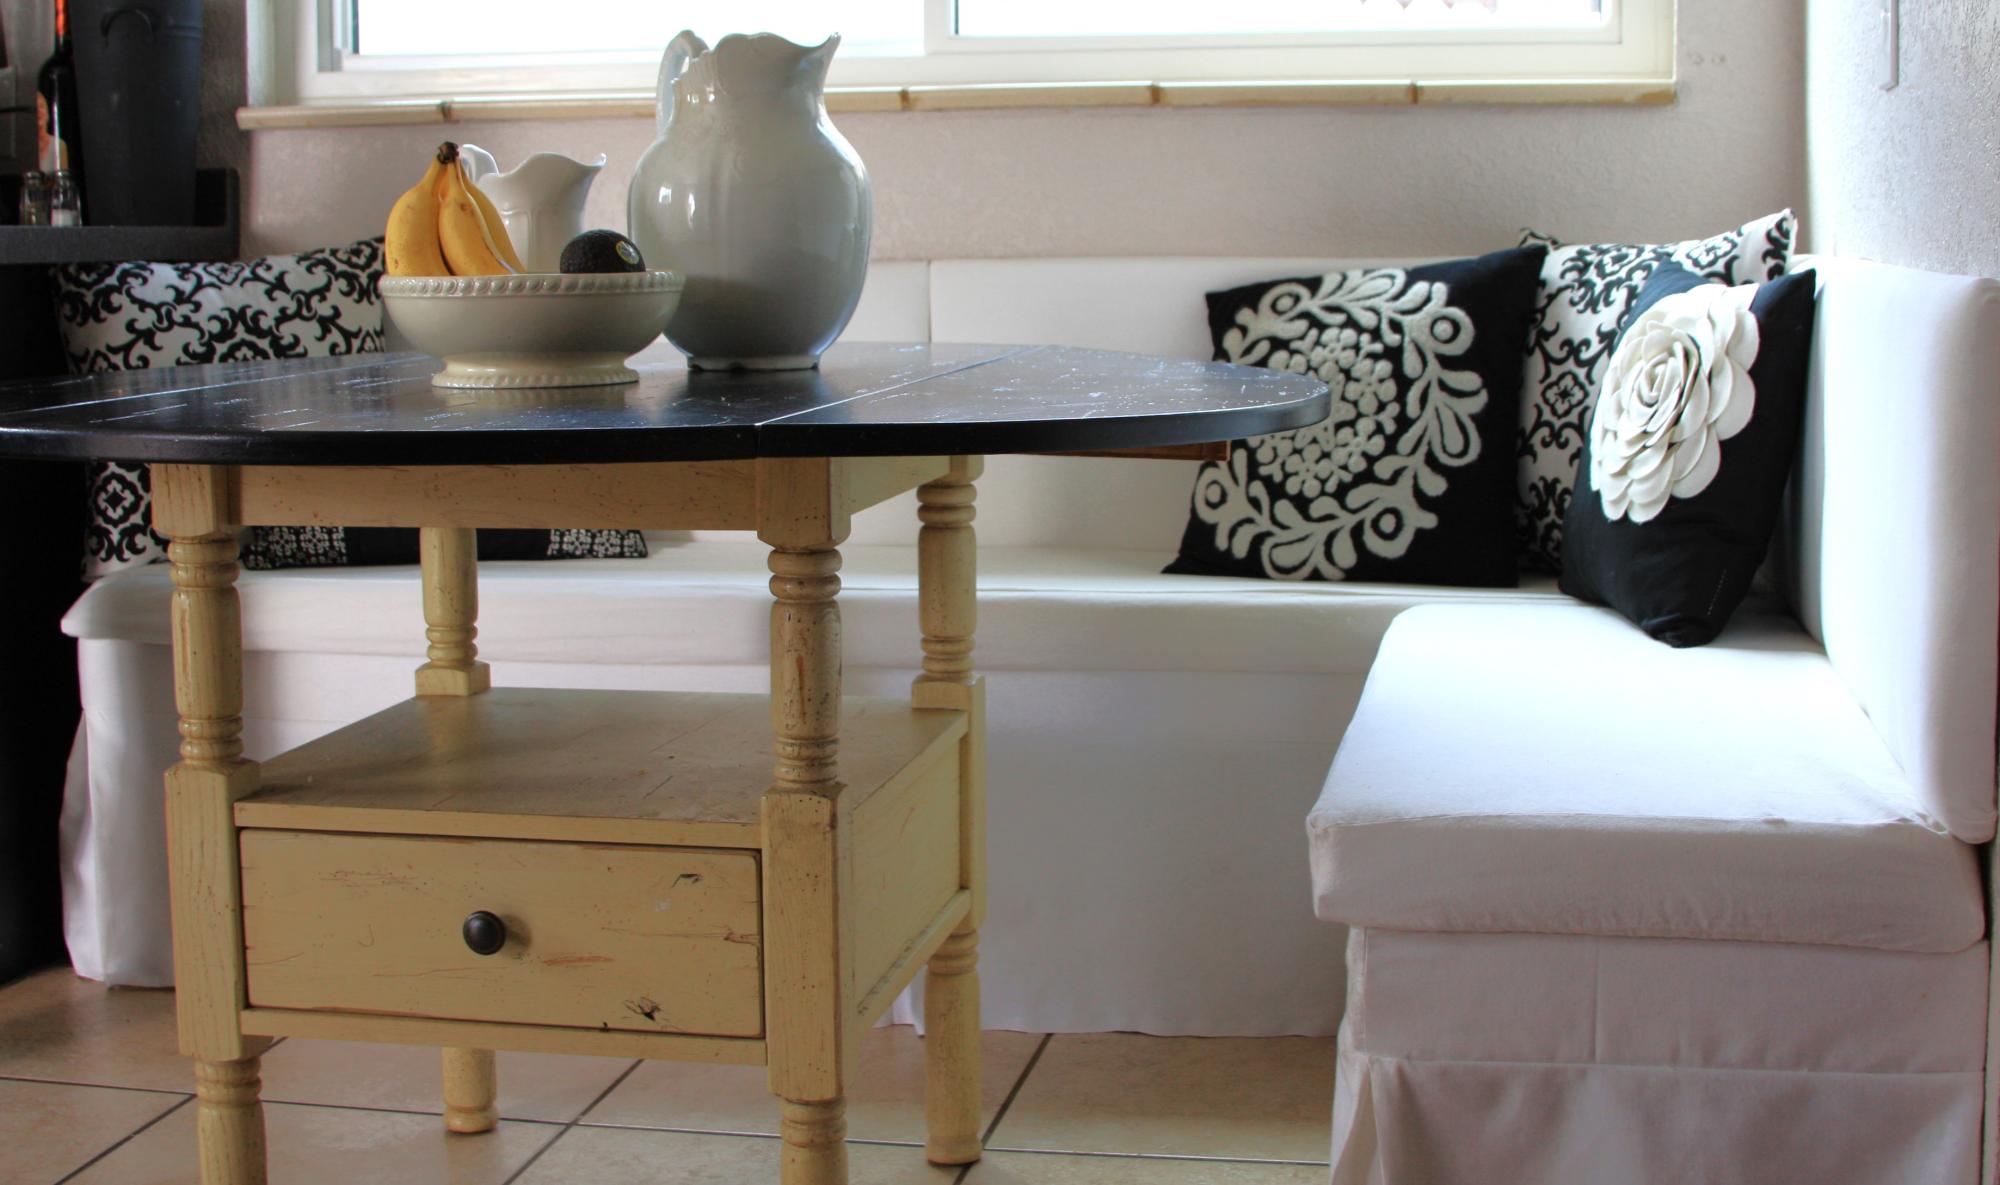
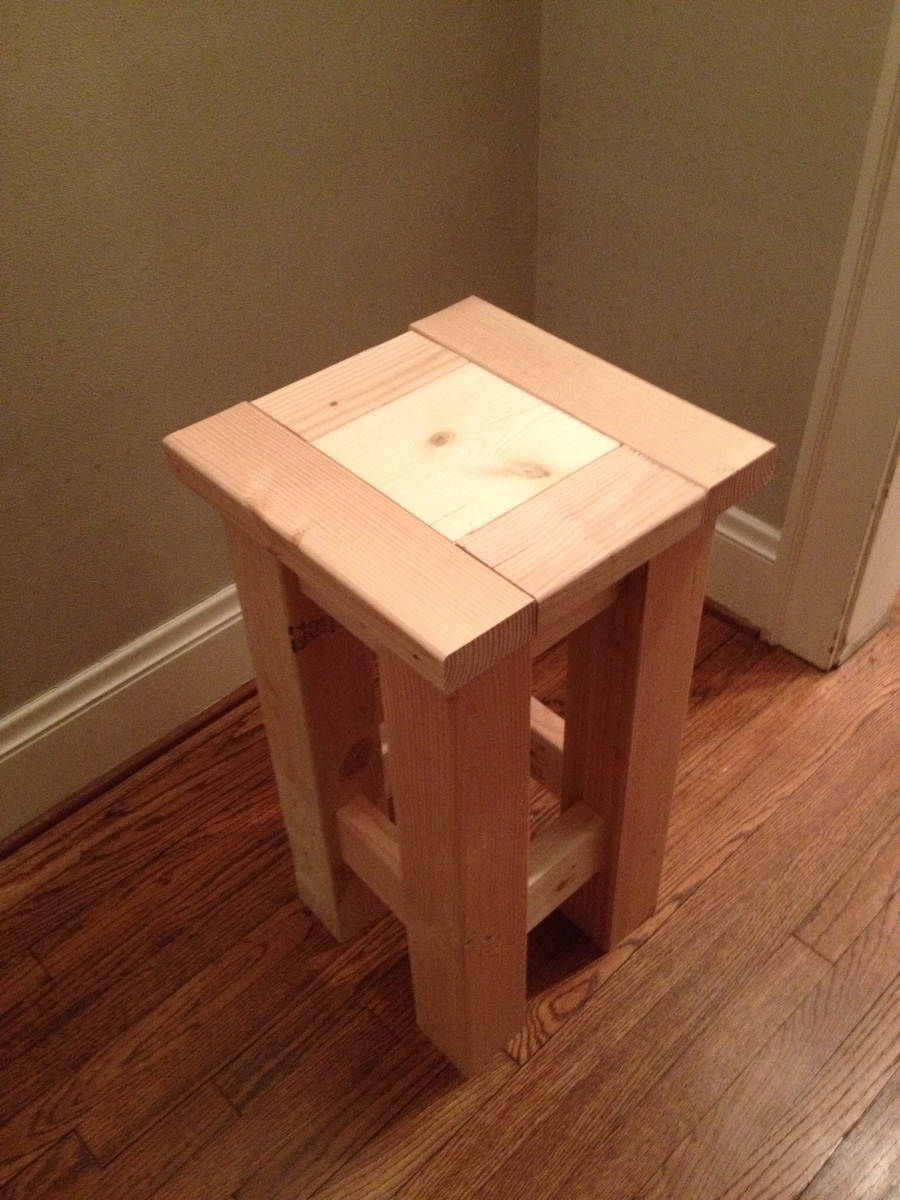
I needed a small nightstand and was able to build this with wood left over from the Farmhouse table project, it's not perfect but I love it.
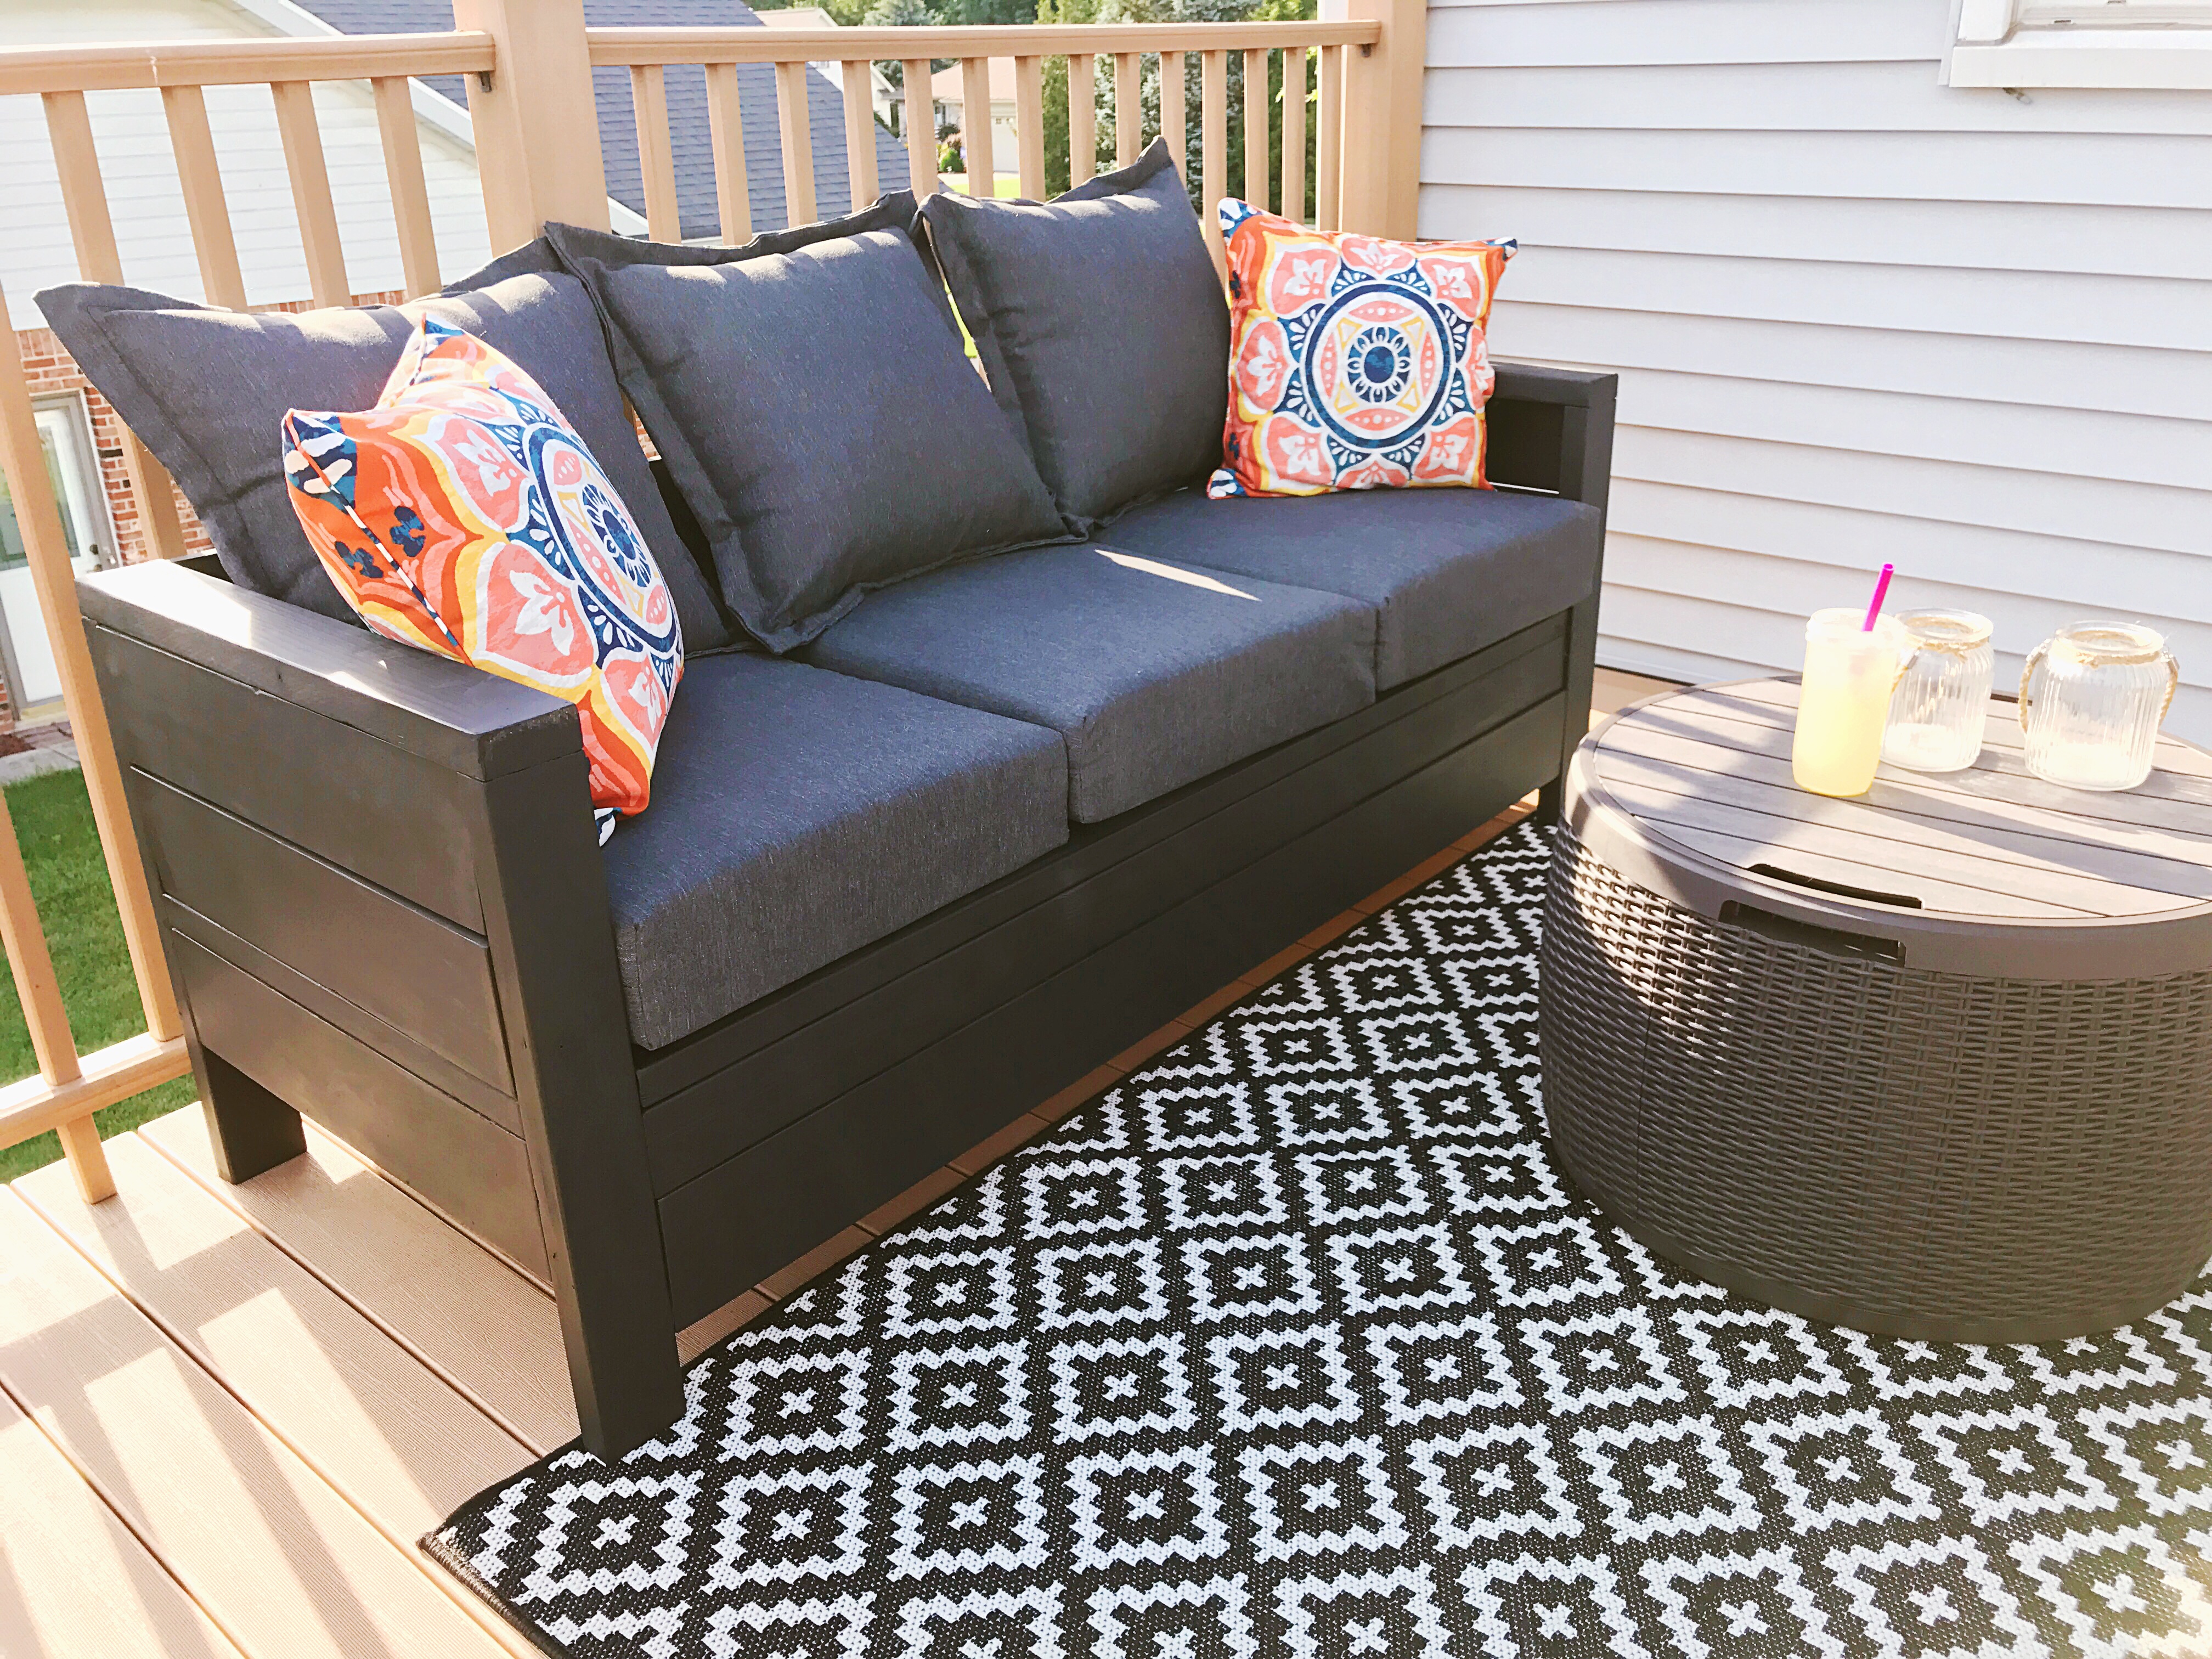
I used the Outdoor Sofa plans and added an outside frame.
I used scrap wood from a squat rack I built. In the process of making 2 benches for it
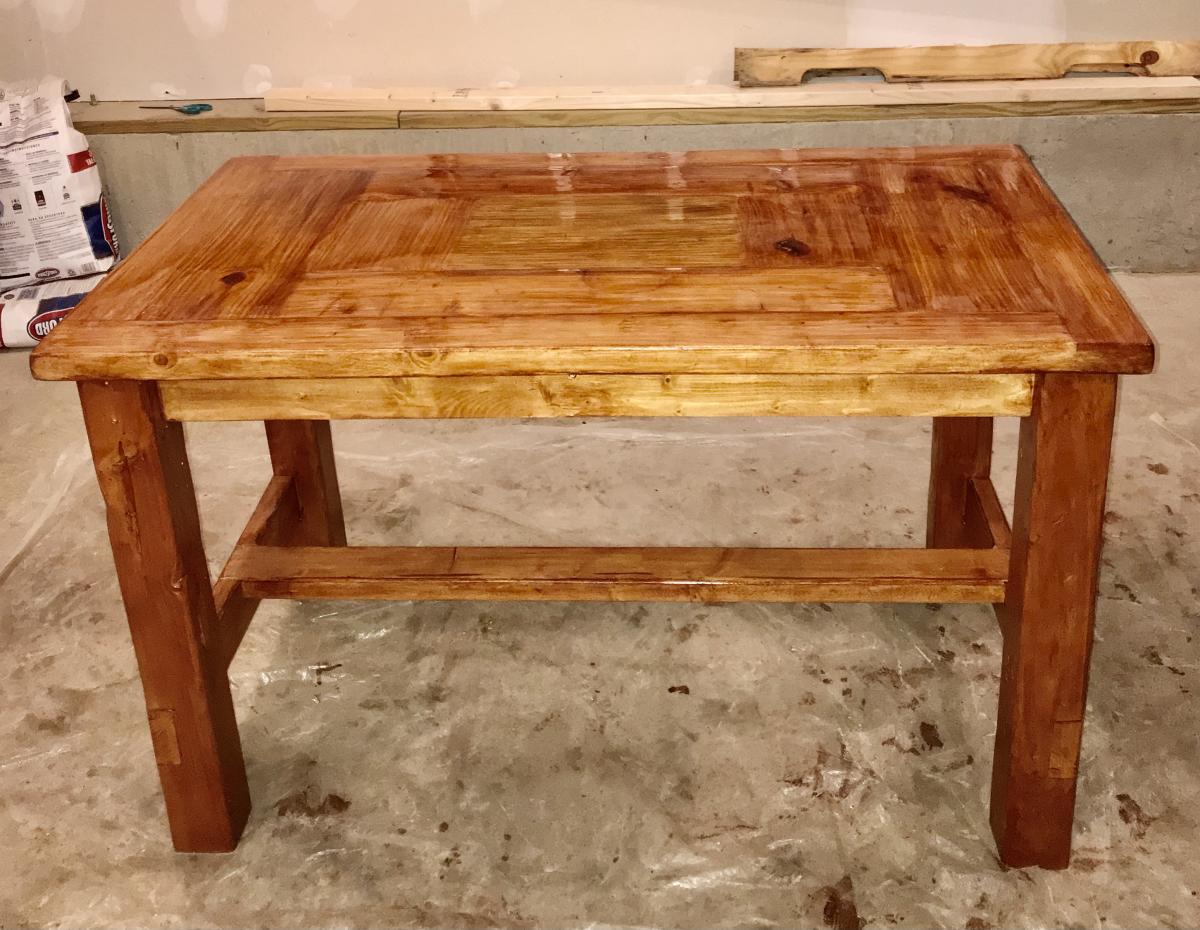

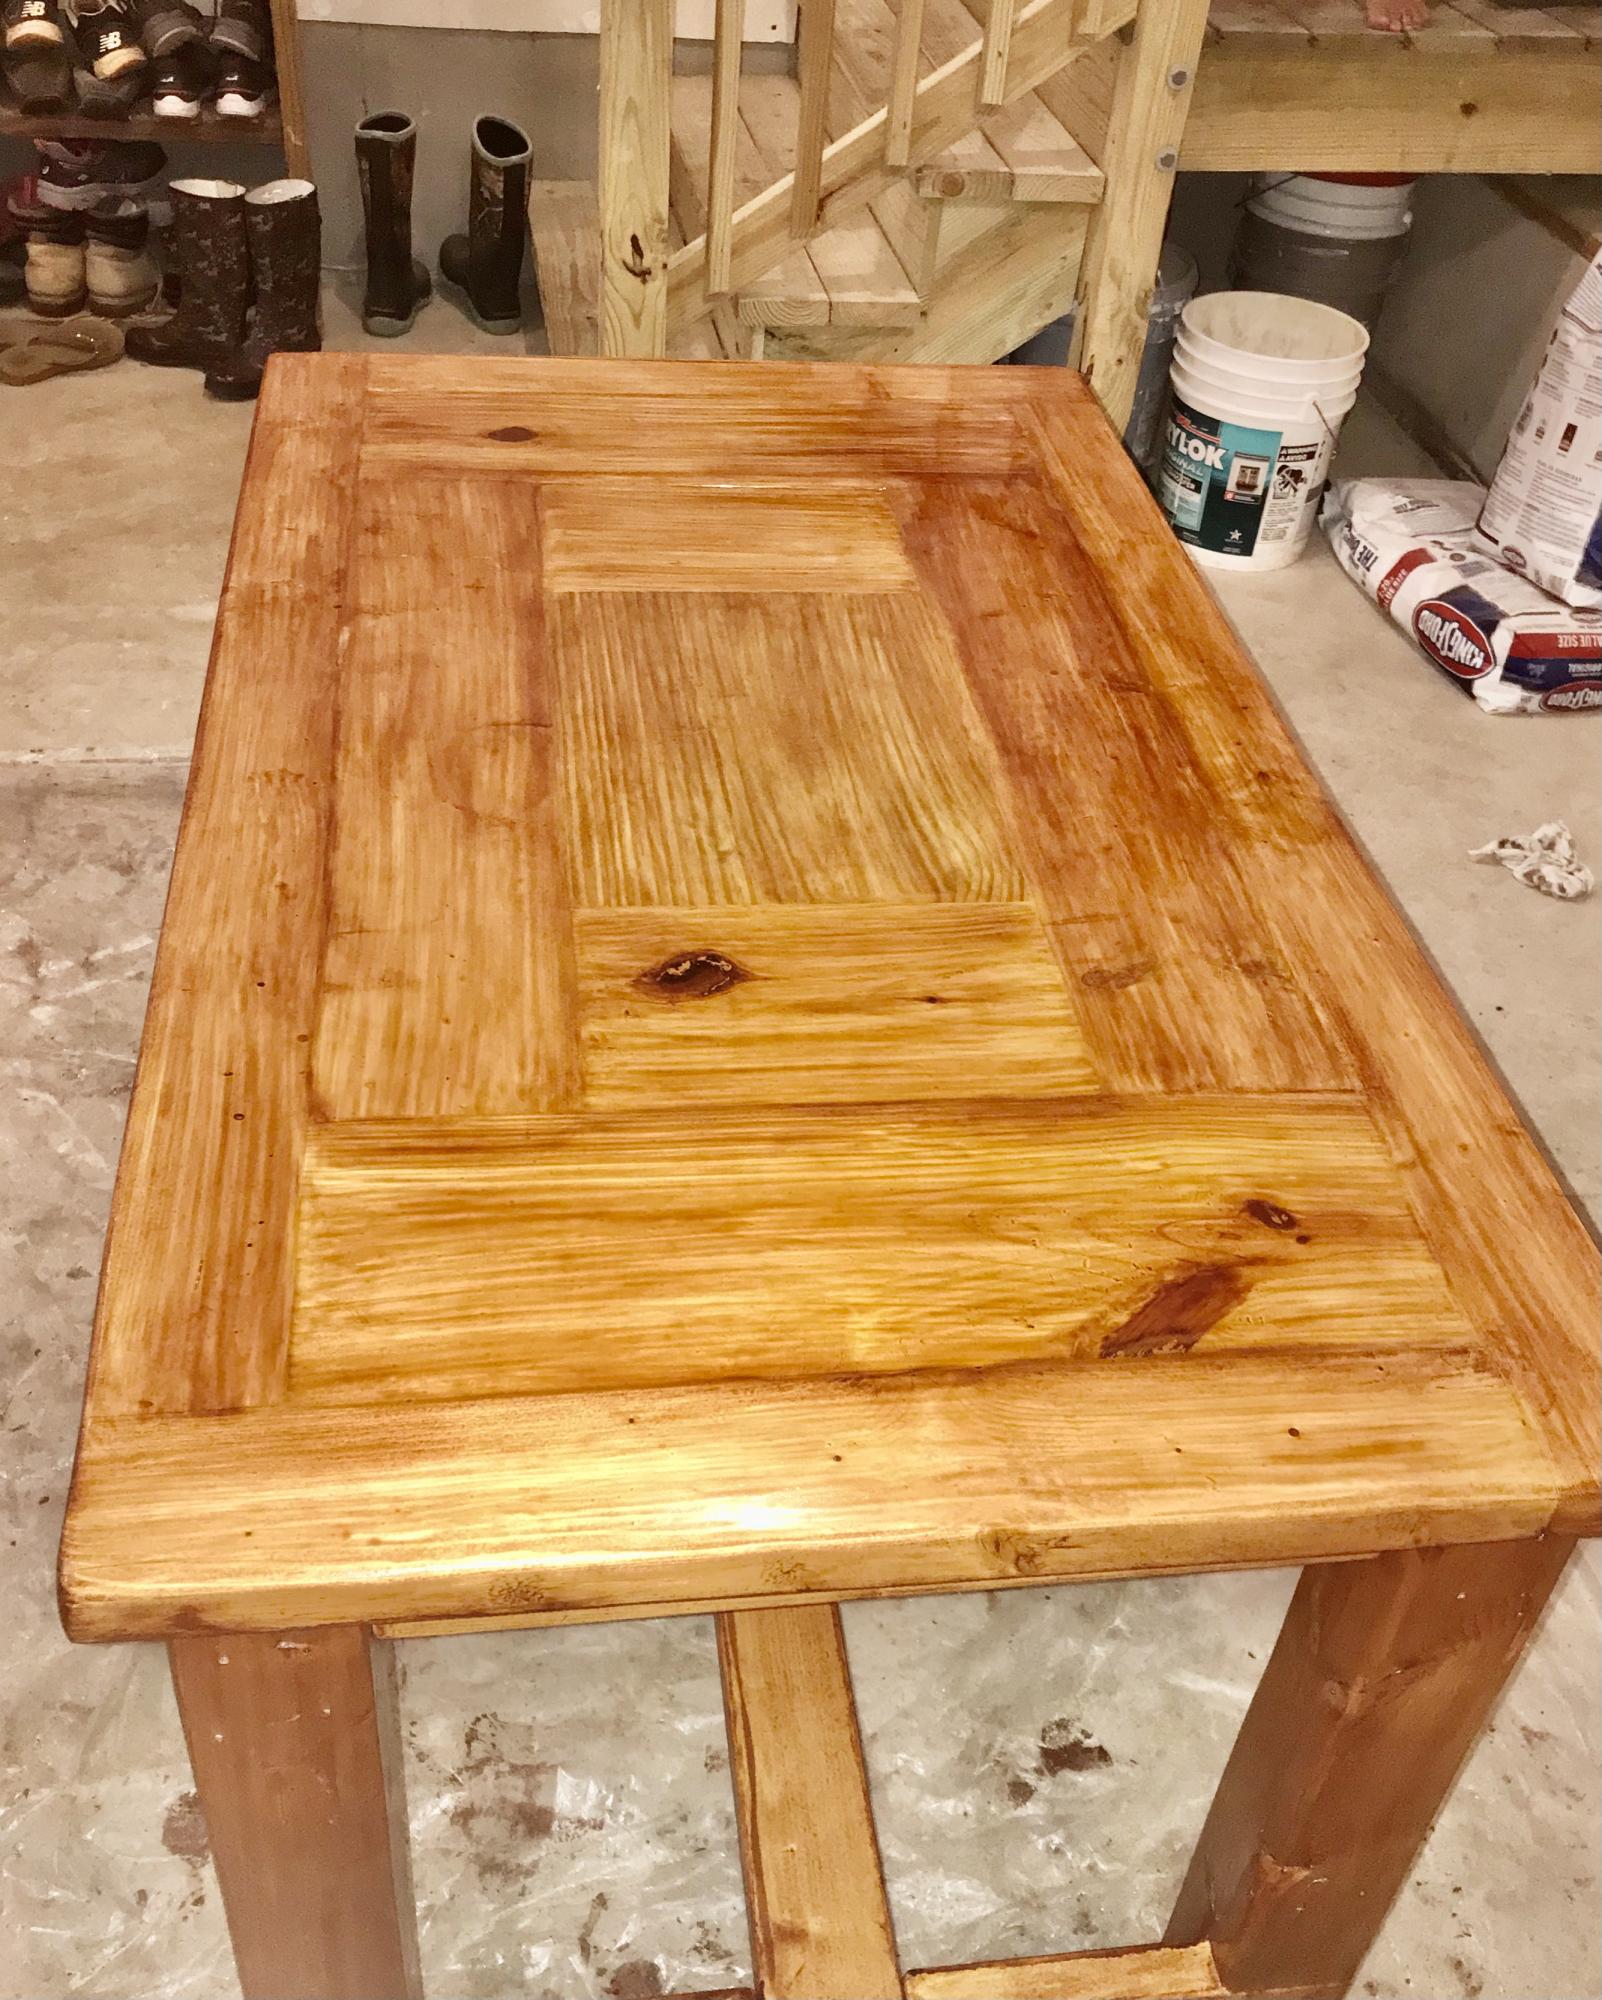
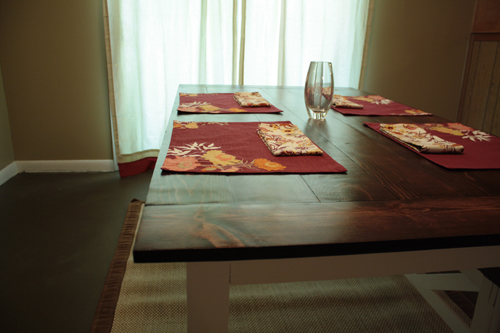
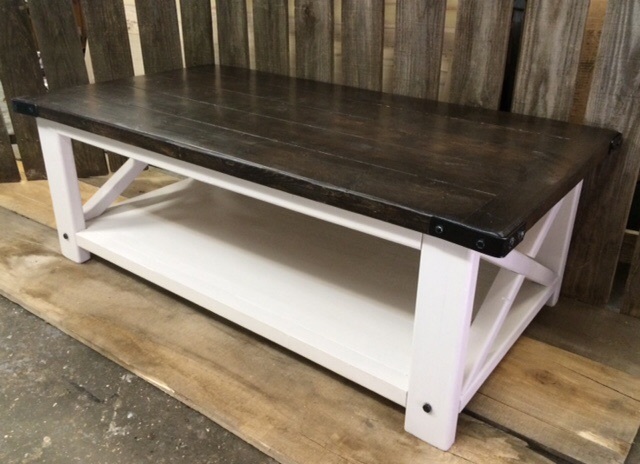
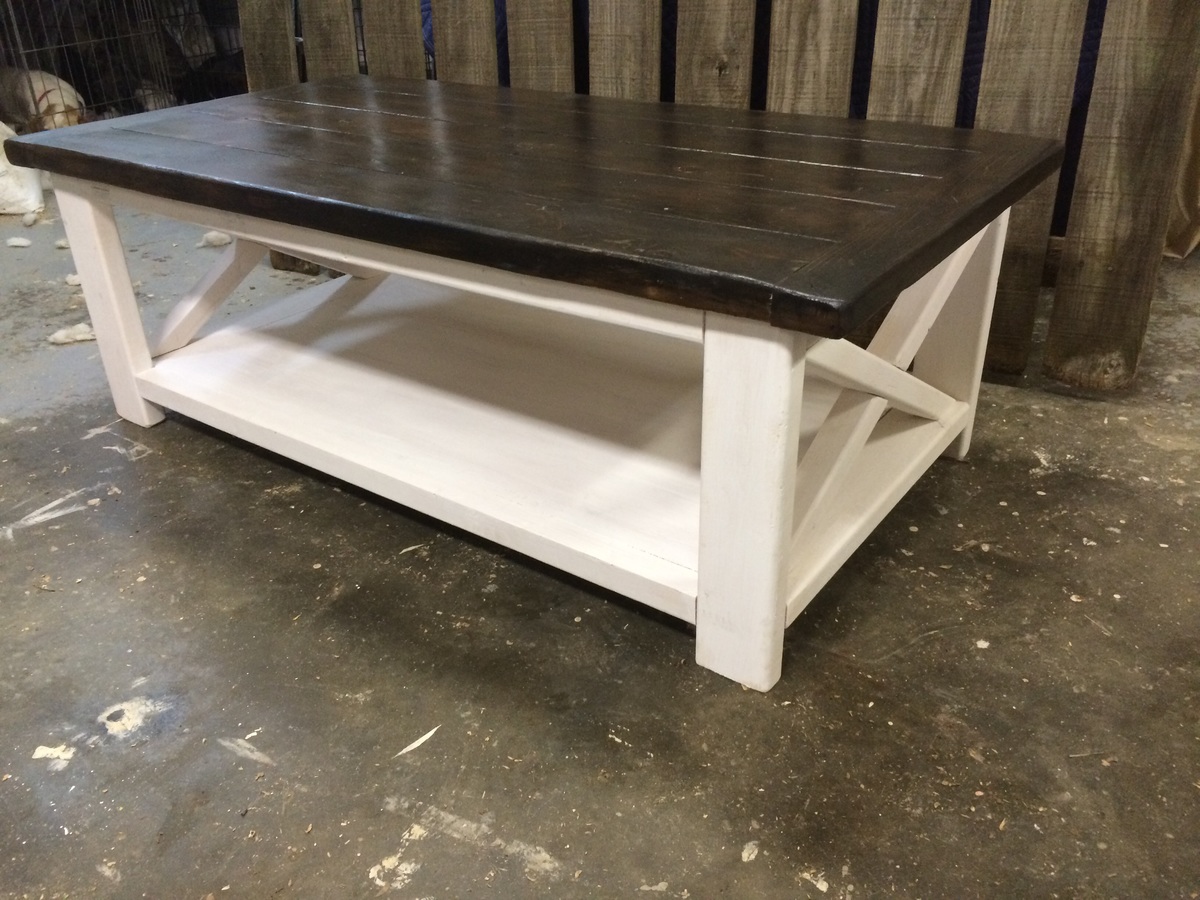
With a couple of projects under our belts, my husband and I decided to tackle the Farmhouse Table. We shortened it to 6' to better fit our dining room, and also chose 1x6's instead of 2x6's to give it a lighter look. We also nixed the stretcher, and opted for 3x3 poplar table legs, that made the overall cost jump quite a bit. I absolutely love how it turned out, and the bench really fits well. It's stained and painted to match.

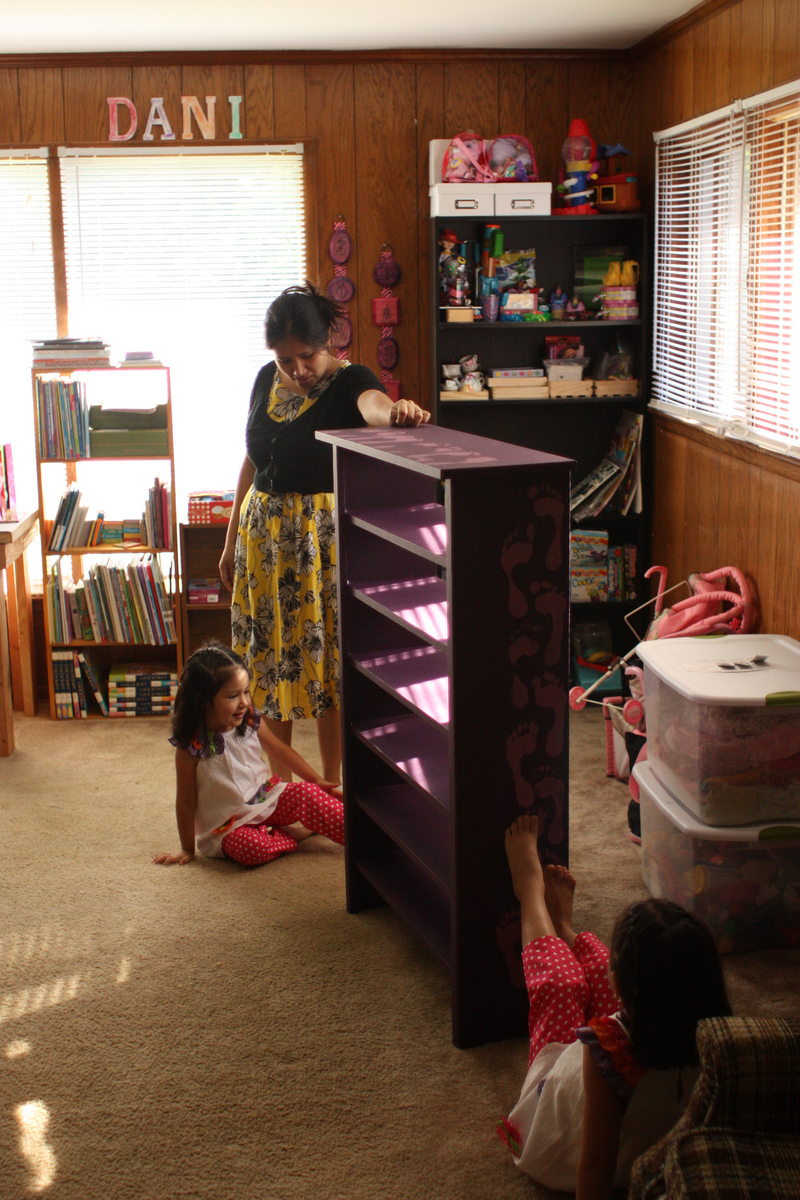
A pretty simple shoe rack. My wife wanted something to hold a LOT of shoes that could go in our garage by the door to the kitchen. Girls helped with the painting :)
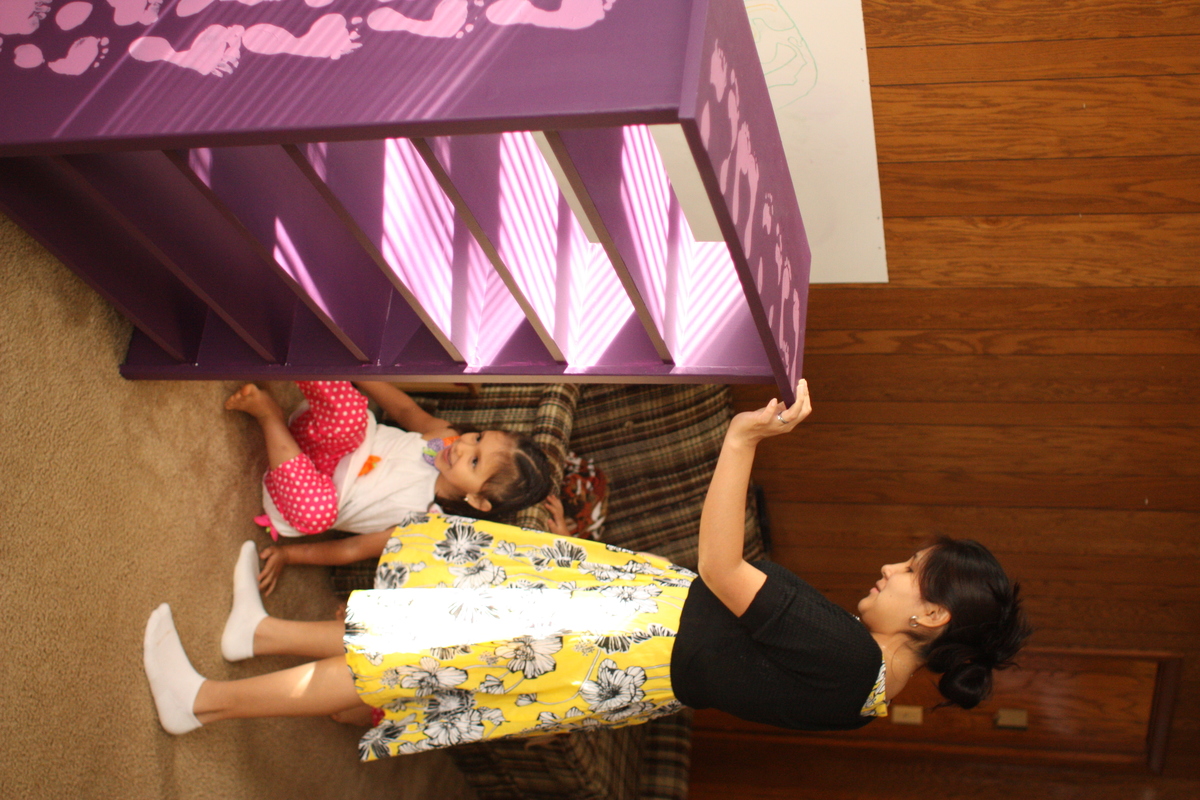
I added metal corners made by bending 1 1/4 x 1/8 inch flat bar and attached with 1/4 x 1 inch lag bolts
Hello,
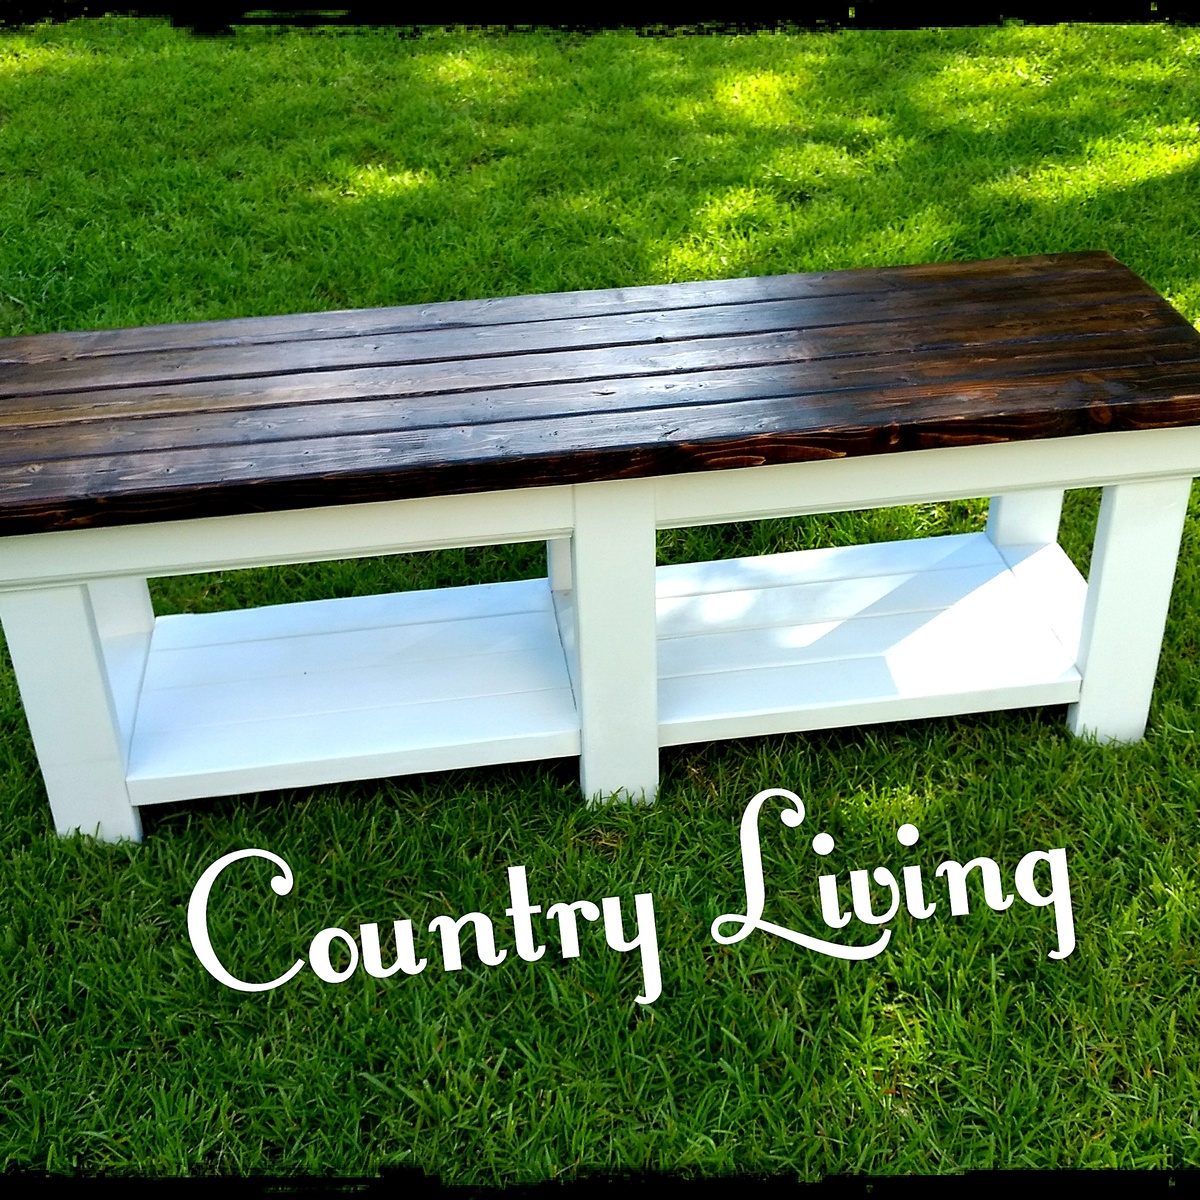
I had some downtime at my furniture business, so I built this to sell. It's just a basic bench with base board. People in southeast GA are loving this piece!!
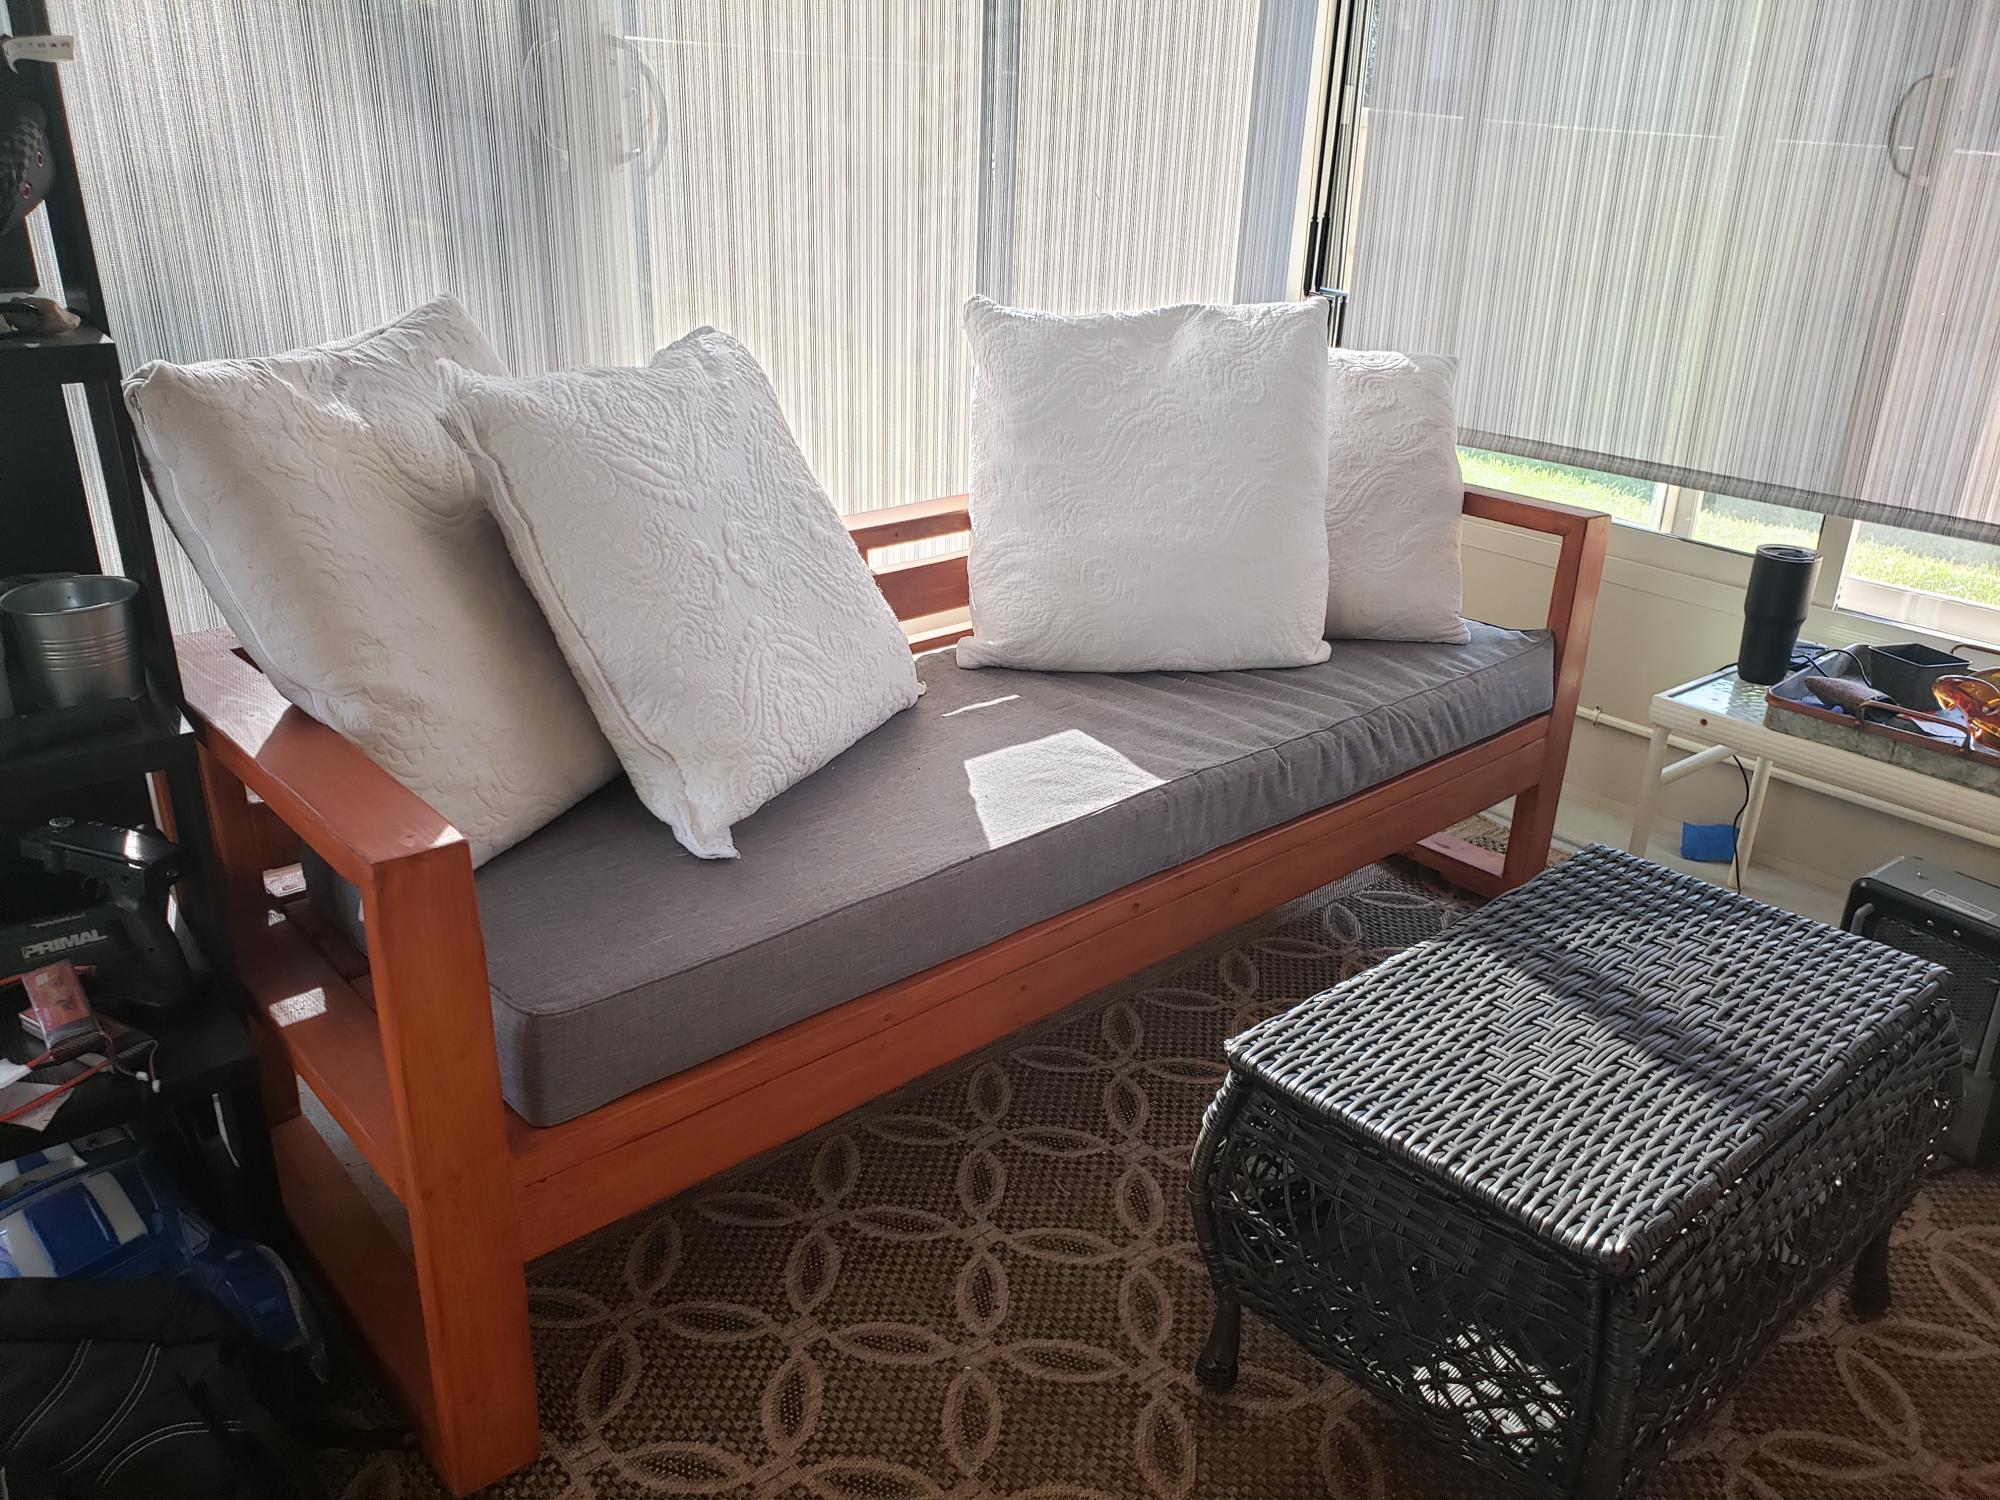
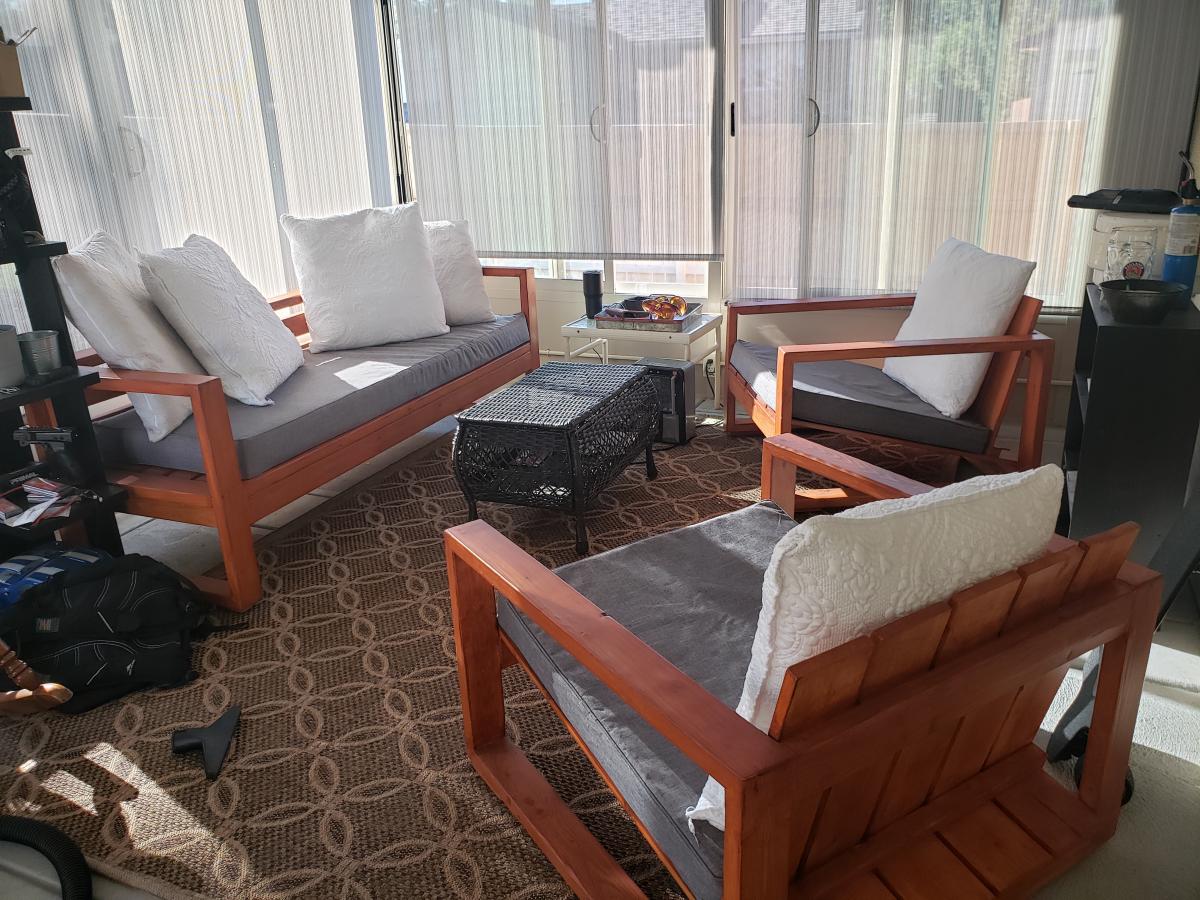
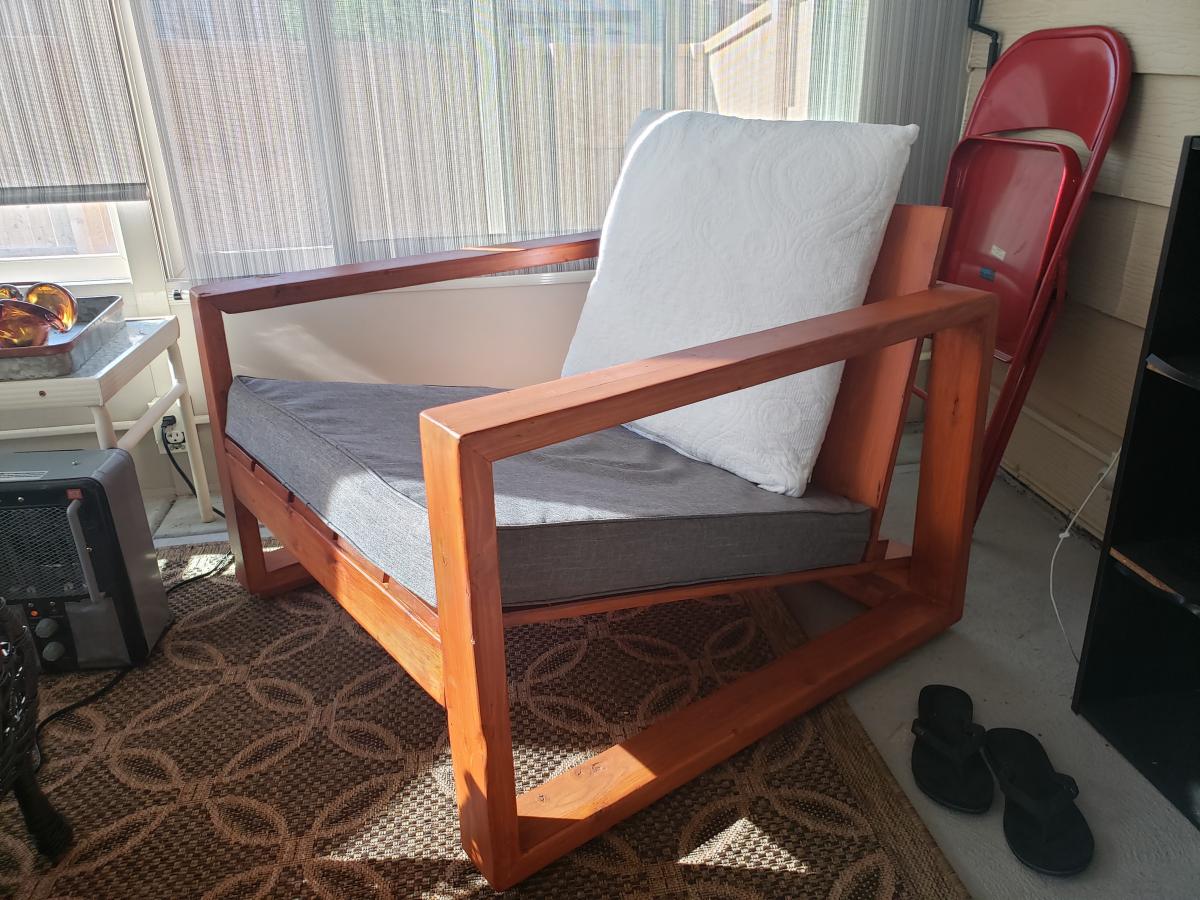
Well, I had just bought a house. We had no furniture for our sunroom, so I took it upon myself to build some while materials were still cheap.
Hindsight, the chairs rear end should have been a level seat instead of trying to build an Adirondack style club chair. I modified the ends to match the modern style so they would match the chairs.
The sofa turned out great, all are solid and built with pocket screws. Sealed with redwood deck sealer, should last forever!
For the covers, we had them made from covers and all, and went to the local Joann and bought 4" thick foam.and wrapped it with with polyfill. Can't tell that they were made in a backyard, but they've been great for 18 months so far!
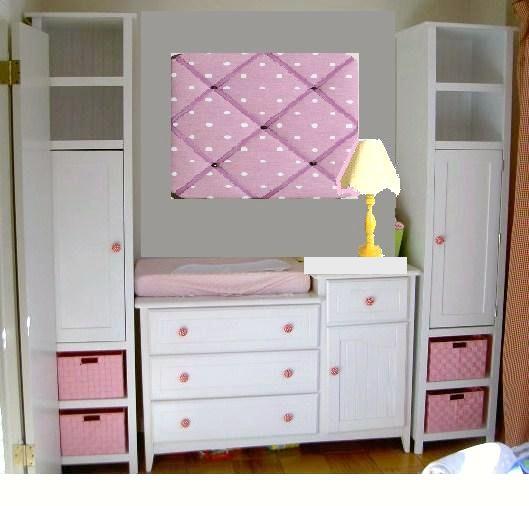
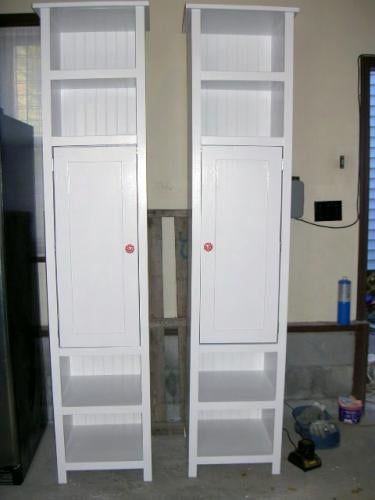
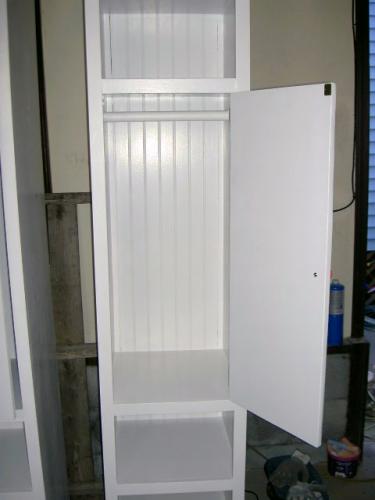
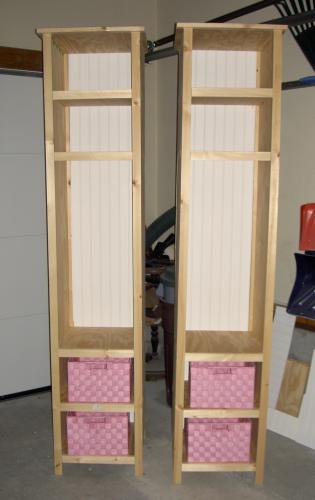
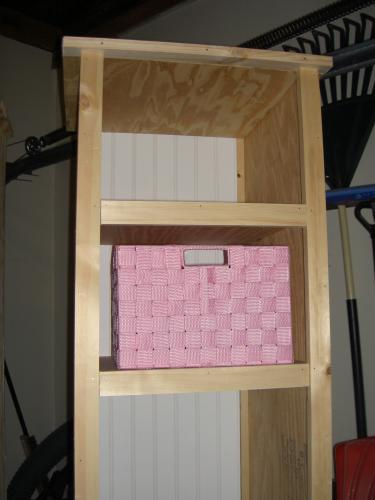
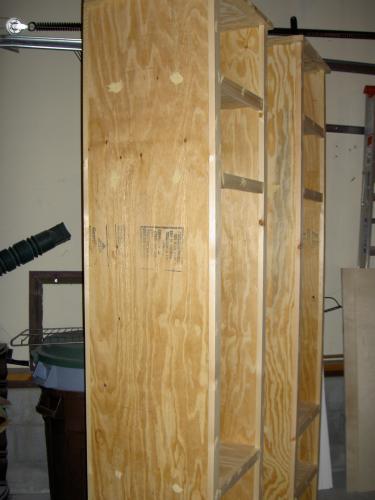
Custom tower shelves with hanging space and four shelves.


Comments
Ana White Admin
Tue, 10/05/2021 - 11:32
COOL PLANTER!
Fun project, thank you for sharing!