Community Brag Posts

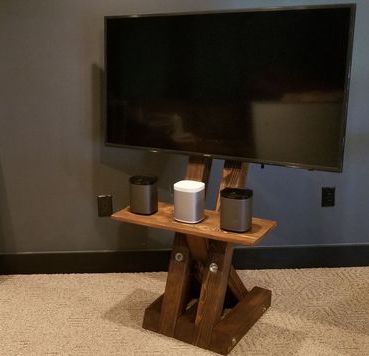
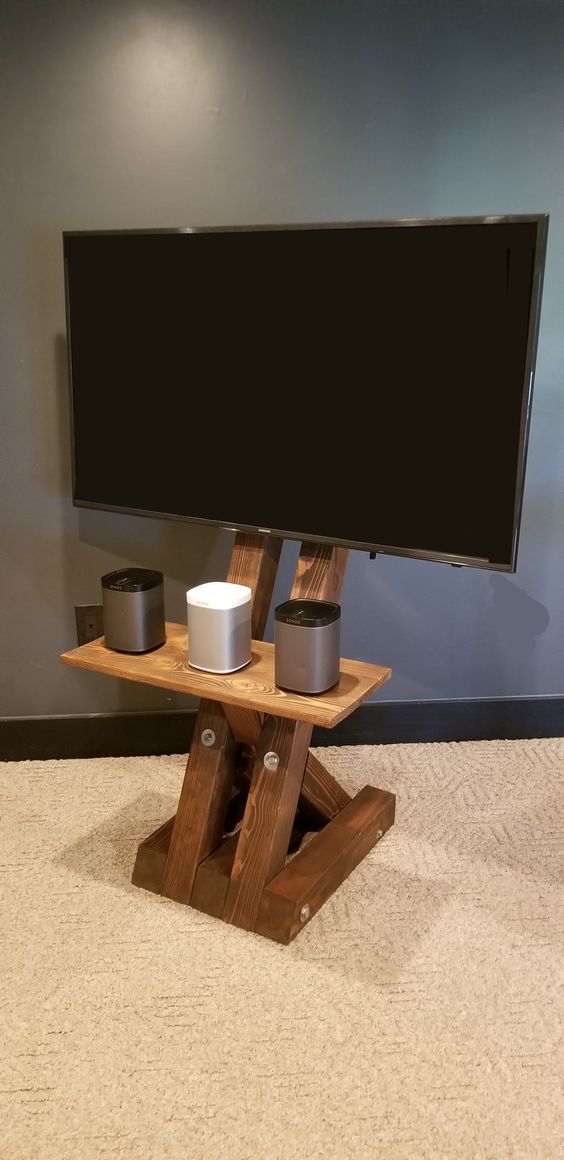
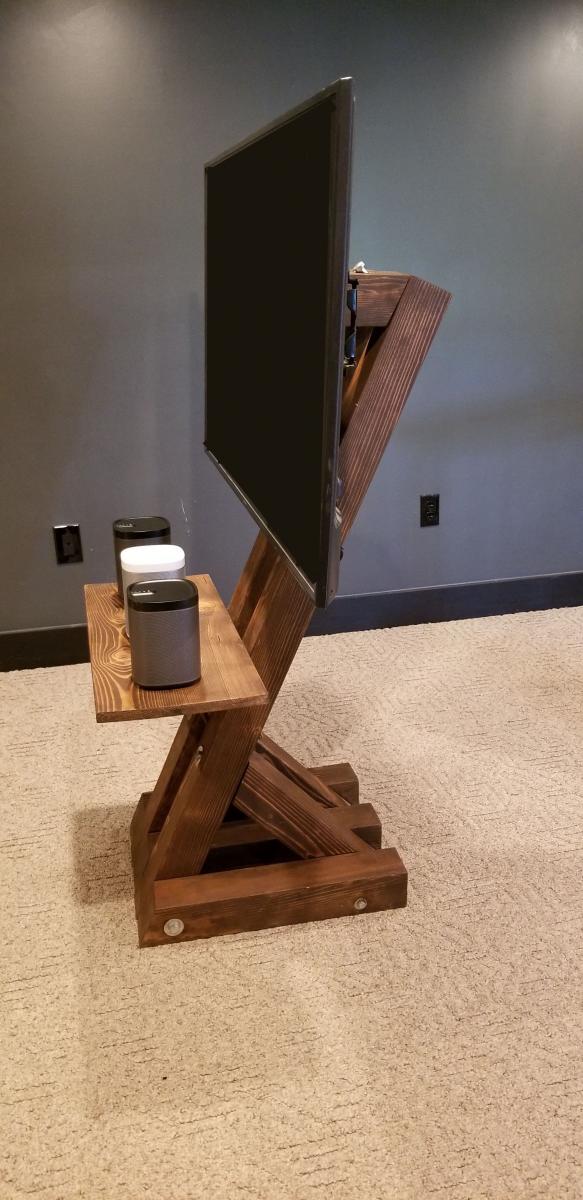
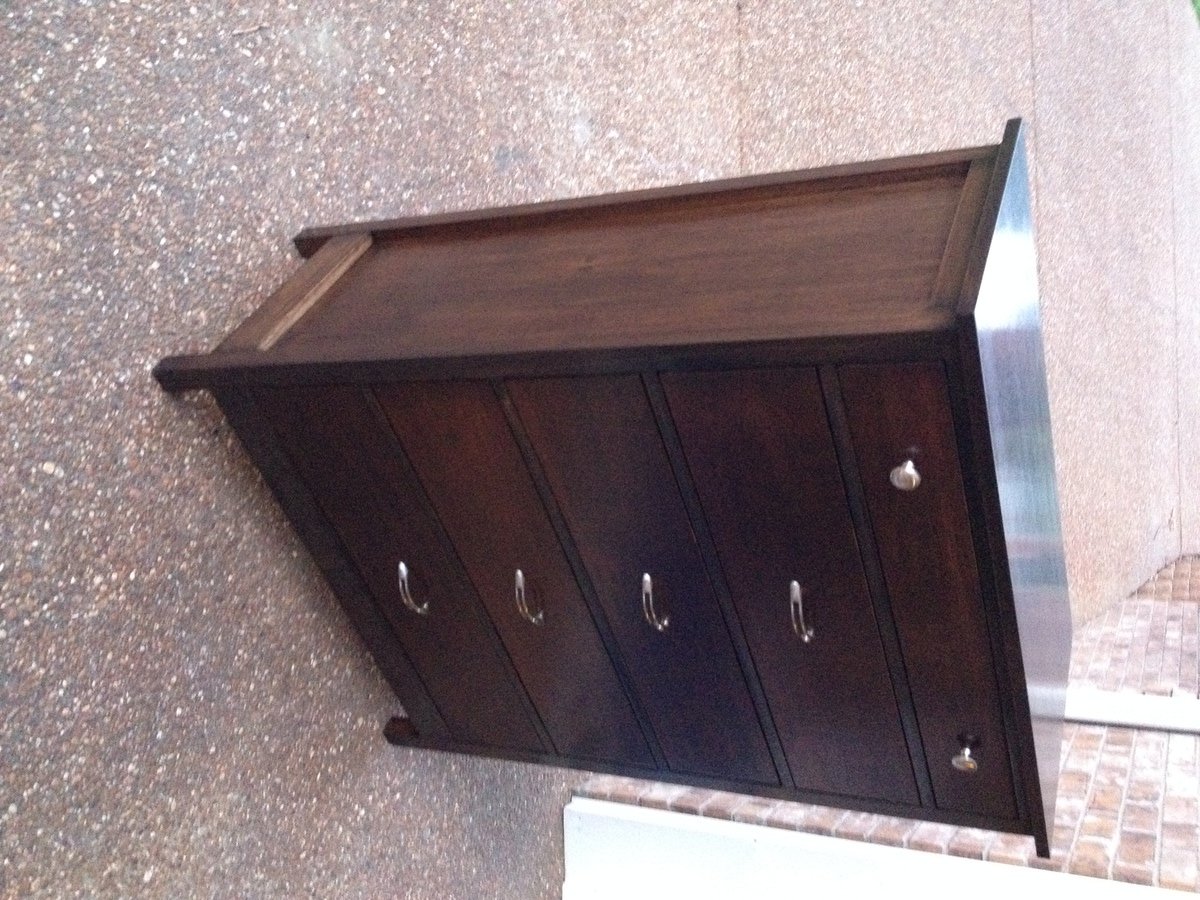
The Gíaffe TV Stand
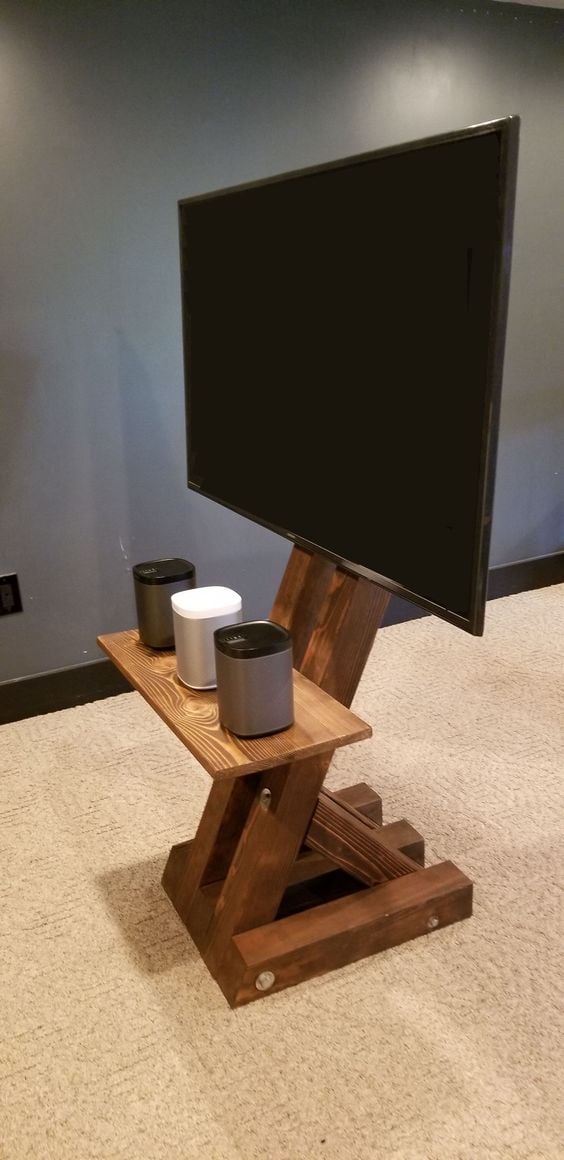
The Gíaffe Free Standing TV Mount. Handcrafted and engineered to use its center mass to deliver strength and balance for tv sizes 30-60". Display your television without detracting from your home's decor. The Gíaffe Free Standing TV Mount is the perfect solution and its rich finish will be perfect for any house/office room.

Estimated Cost
$109
Estimated Time Investment
Day Project (6-9 Hours)
Finish Used
Stain - Dark Walnut - Varathane - 2 Coats
Finish - Water Based Polyurethane - Varathane - 3 Coats
Finish - Water Based Polyurethane - Varathane - 3 Coats
Recommended Skill Level
Intermediate
Comments
Wed, 03/11/2020 - 07:16
I absolutely love this!! Are…
I absolutely love this!! Are there plans available?
Happier Homemaker Outdoor Firepit Benches
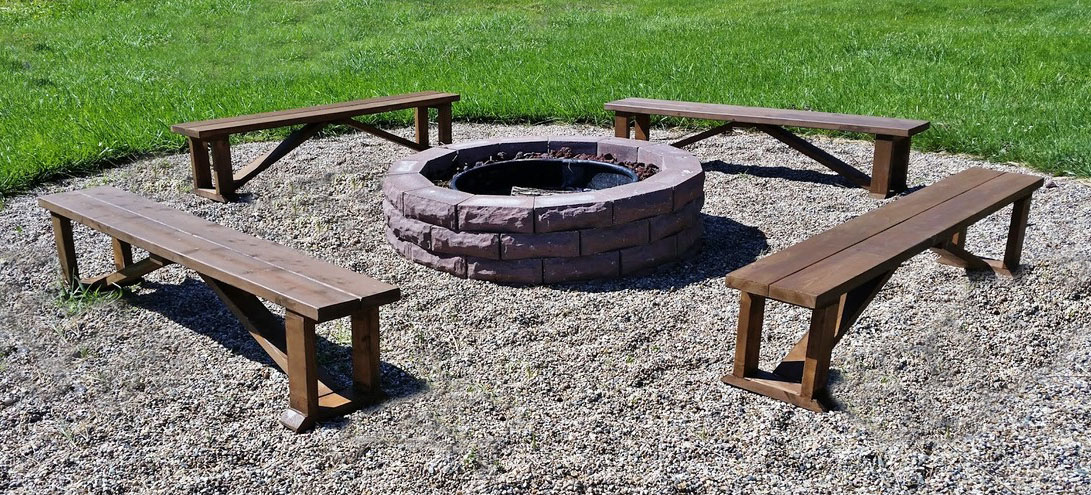
I built these benches out of cedar, which added considerable cost to the job. The total cost for four benches (including stain) was about $240. I used clear cedar and Sikkens outdoor stain in chocolate brown. I also modified the plans slightly to create stronger joints, using rabbet and mortise joints and Titebond III (waterproof) glue. This only slightly changed the dimensions, but I think it will make the benches last for years to come. It did add some time to the plans, as I think butt joints would've taken only 2-3 hours total before sand and finish.
Built from Plan(s)
Estimated Cost
$250
Estimated Time Investment
Afternoon Project (3-6 Hours)
Finish Used
Sikkens ProLuxe Semi-Transparent Chocolate Brown
Recommended Skill Level
Beginner
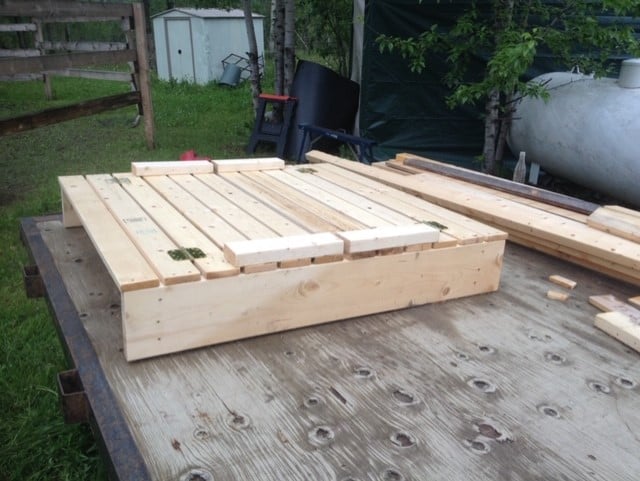
Sandbox with Seats
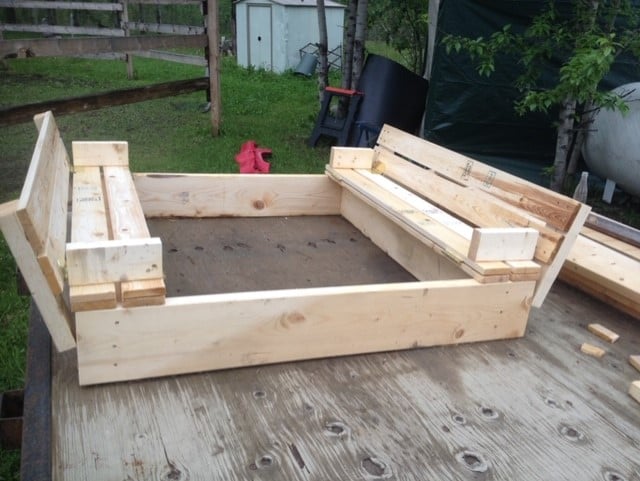
I built this sandbox for my kiddo's because we have cats! It was great. Easy to build, great plans for it.
Built from Plan(s)
Estimated Cost
$50 CAD
Estimated Time Investment
Afternoon Project (3-6 Hours)
Finish Used
Minwax 2-in-1 in Natural
Recommended Skill Level
Beginner
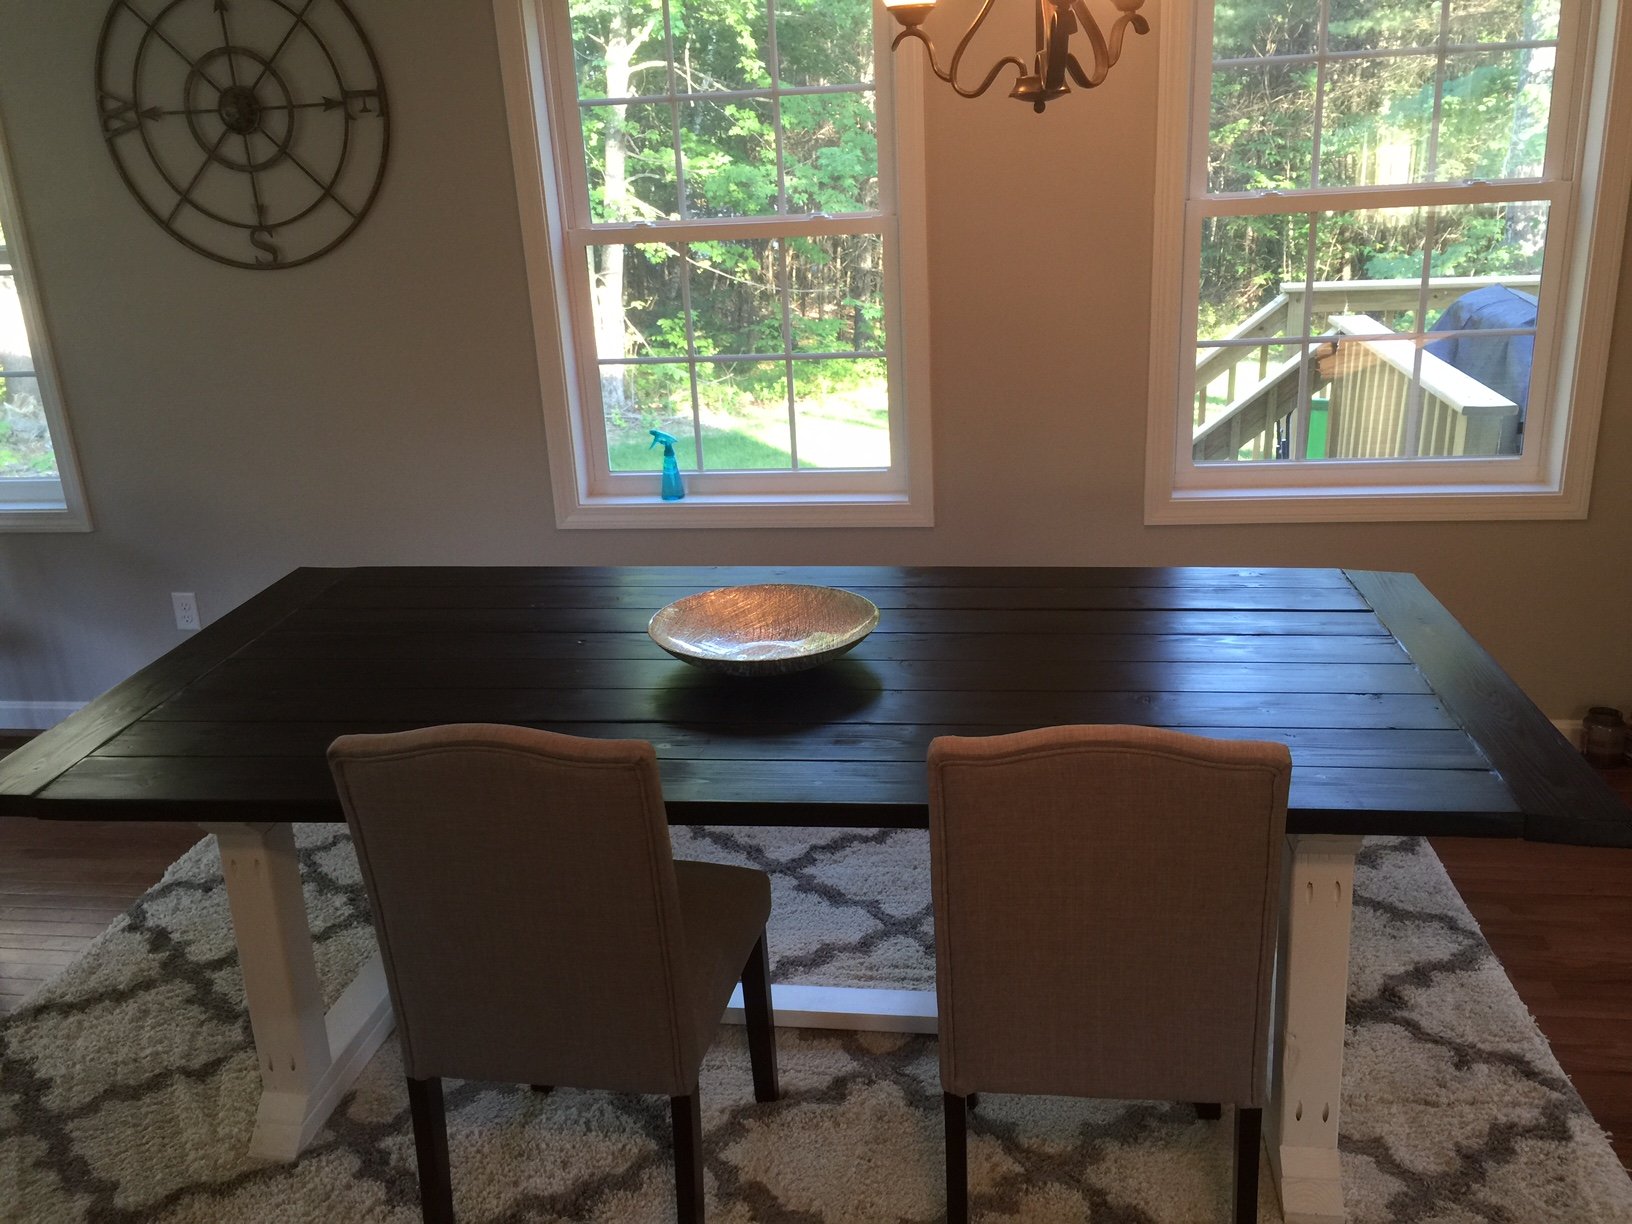
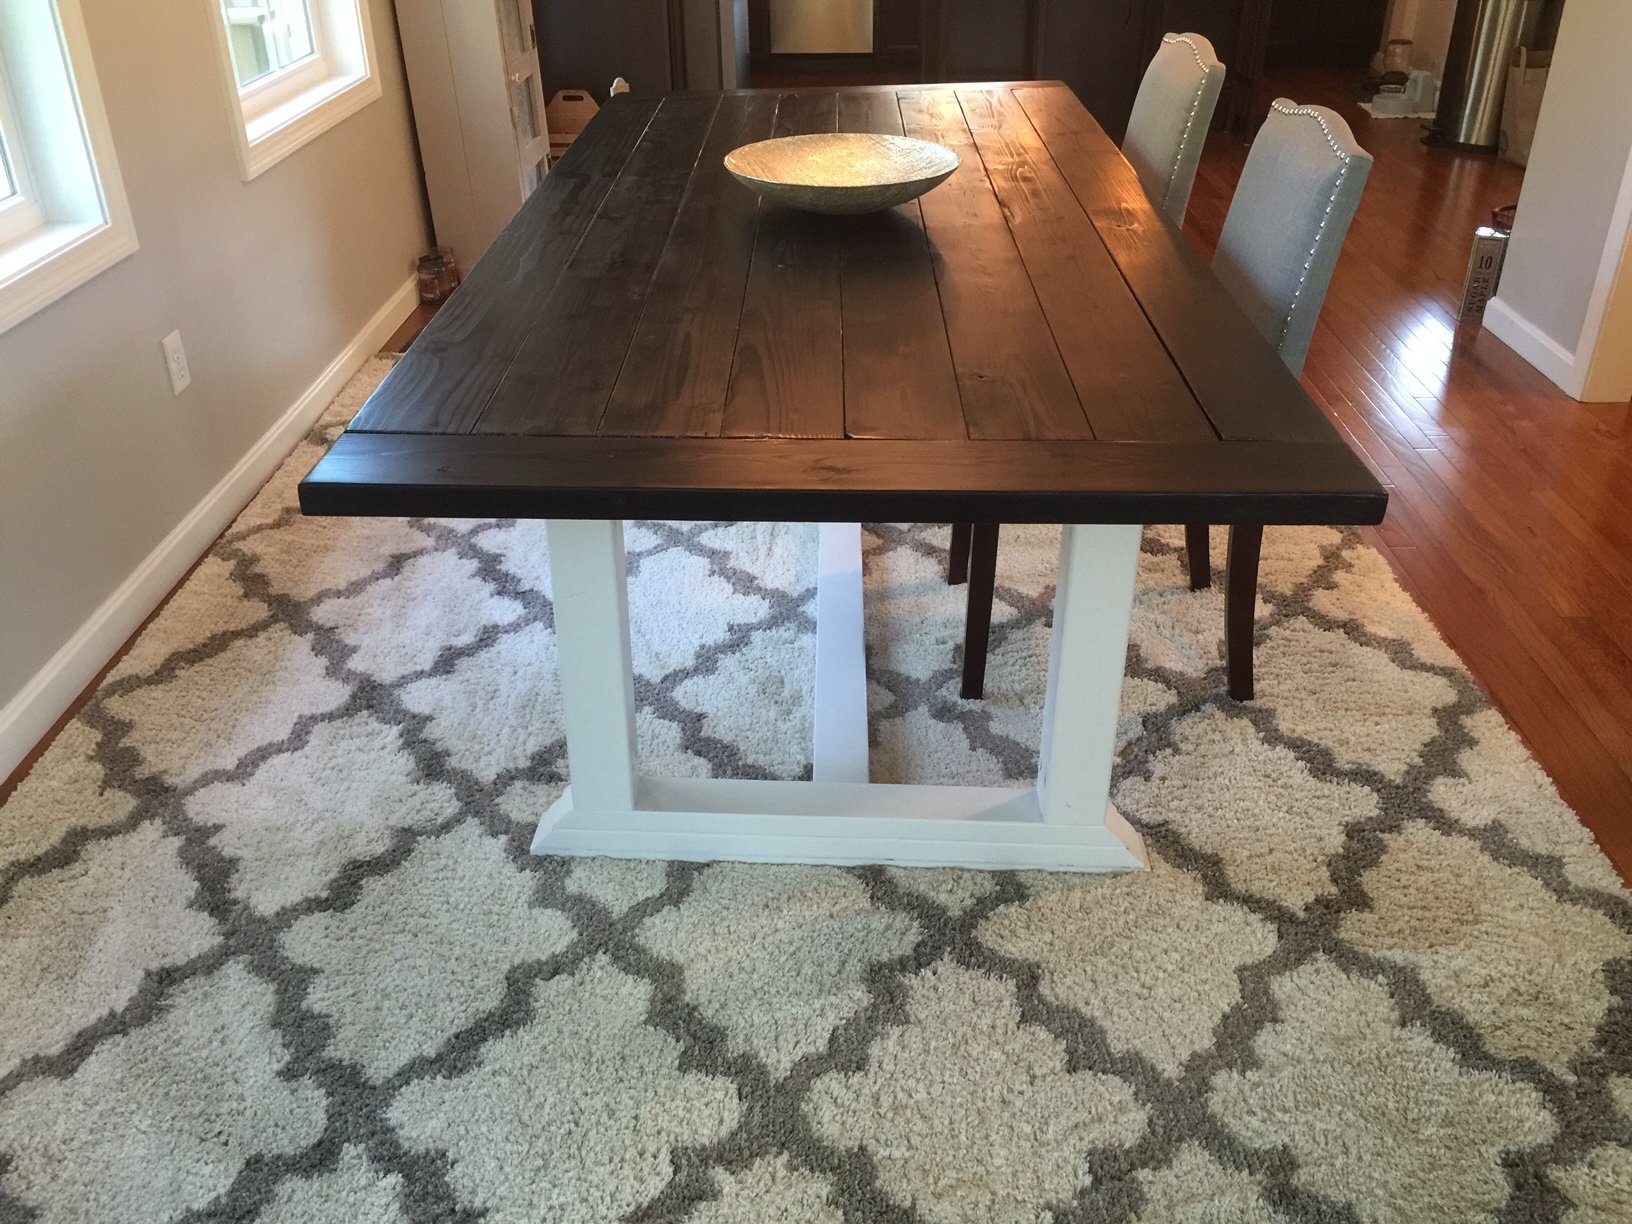
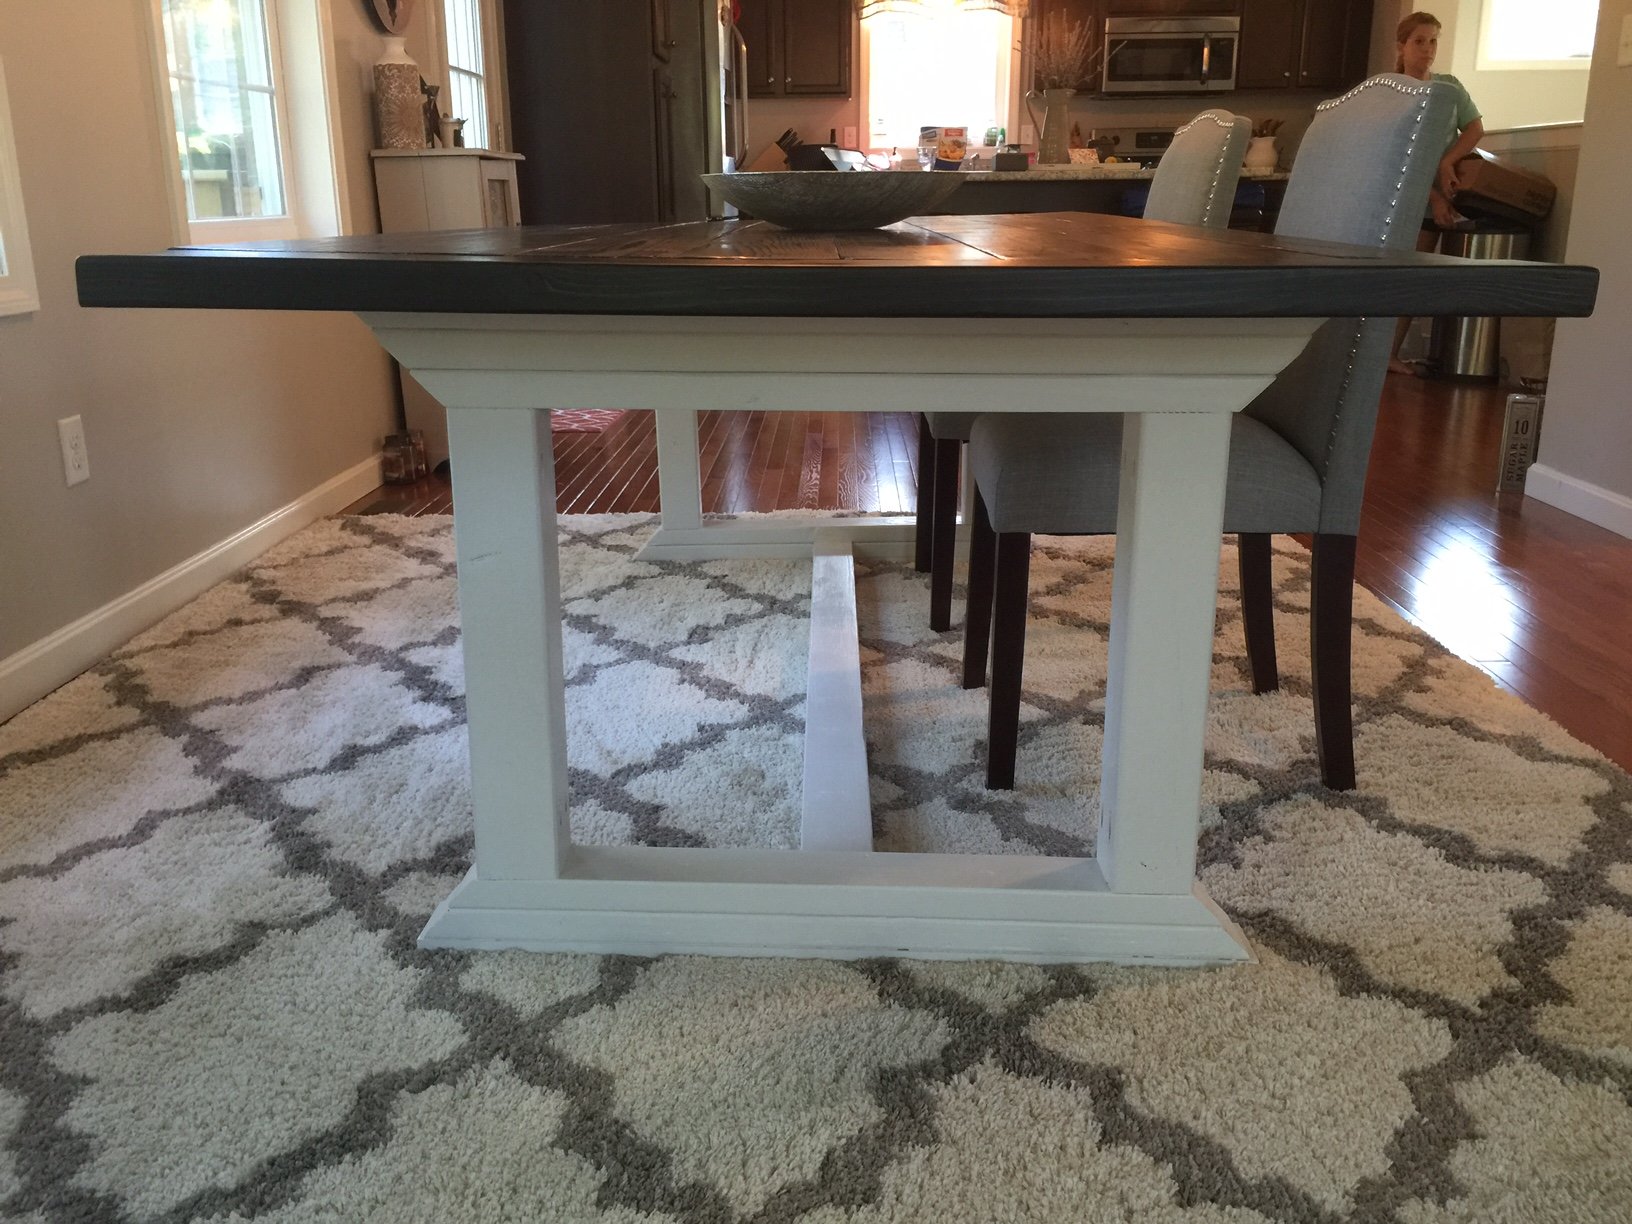
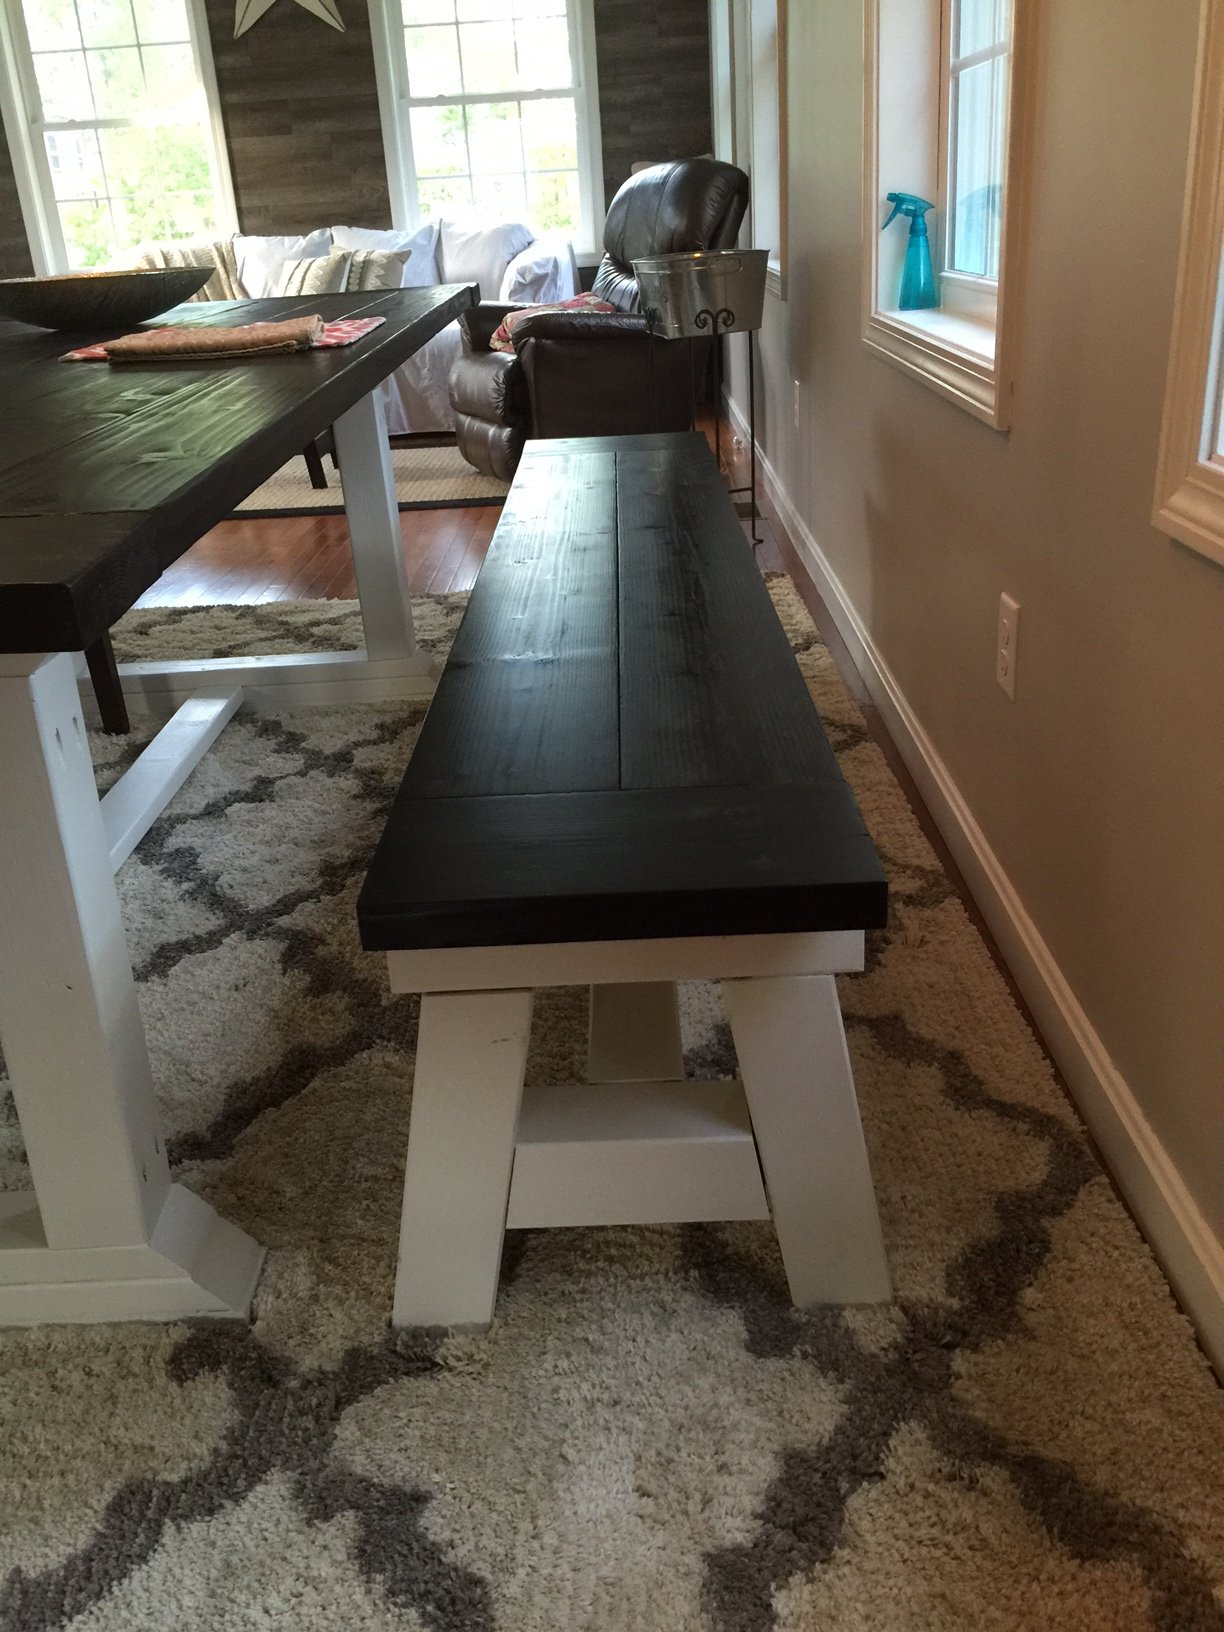
Farmhouse Dining Room Table and Bench
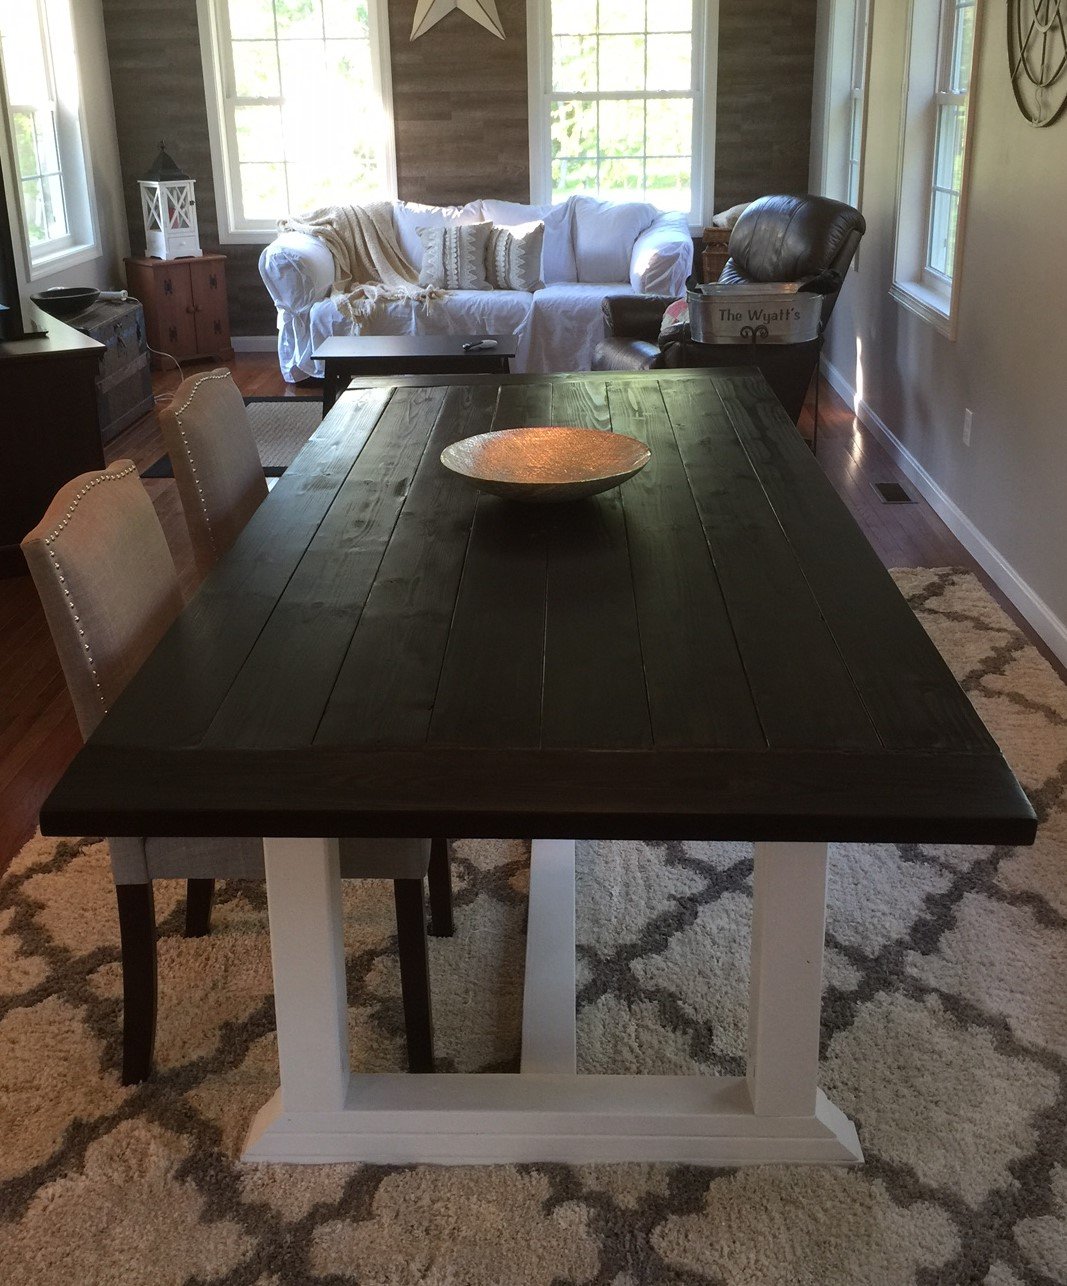
This was my first ever DIY project as I wouldnt consider myself a handy man, but I had alot of fun making this table and bench. I modified the design as I wasn't confident in making the necessary cuts for the X but I added a long support underneath the table top so that the top wouldn't sag (hopefully!). Since completing the table, I've grown more comfortable with my carpentry "skills" and all I want to do on the weekends is build things! I'm sure I'm driving my wife insane!
It took me a lot longer as I had a couple weekends where I could only work on the table and bench for an hour or two but you can definitely do it in a weekend.
Thanks Ana!
Built from Plan(s)
Estimated Time Investment
Week Long Project (20 Hours or More)
Finish Used
Miniwax Expresso Polyshades
Recommended Skill Level
Intermediate
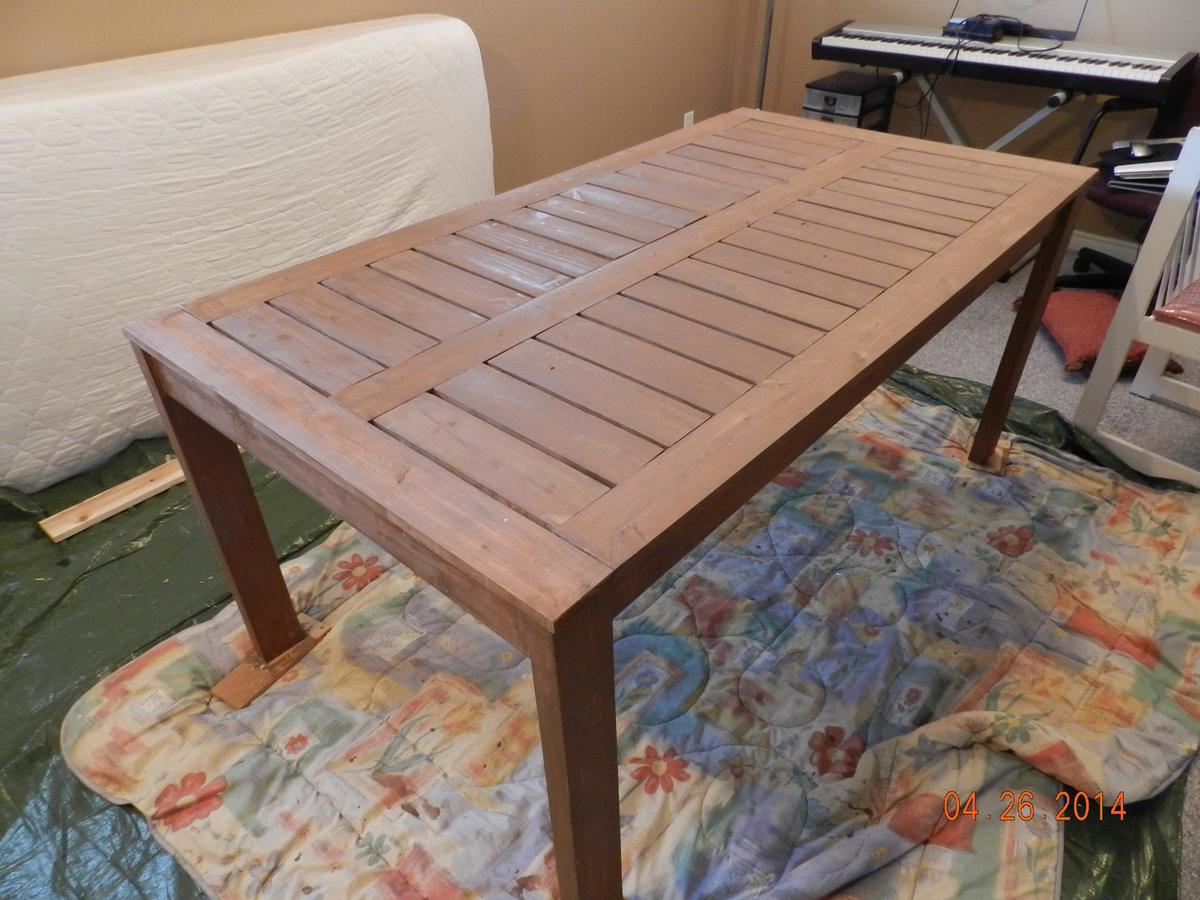
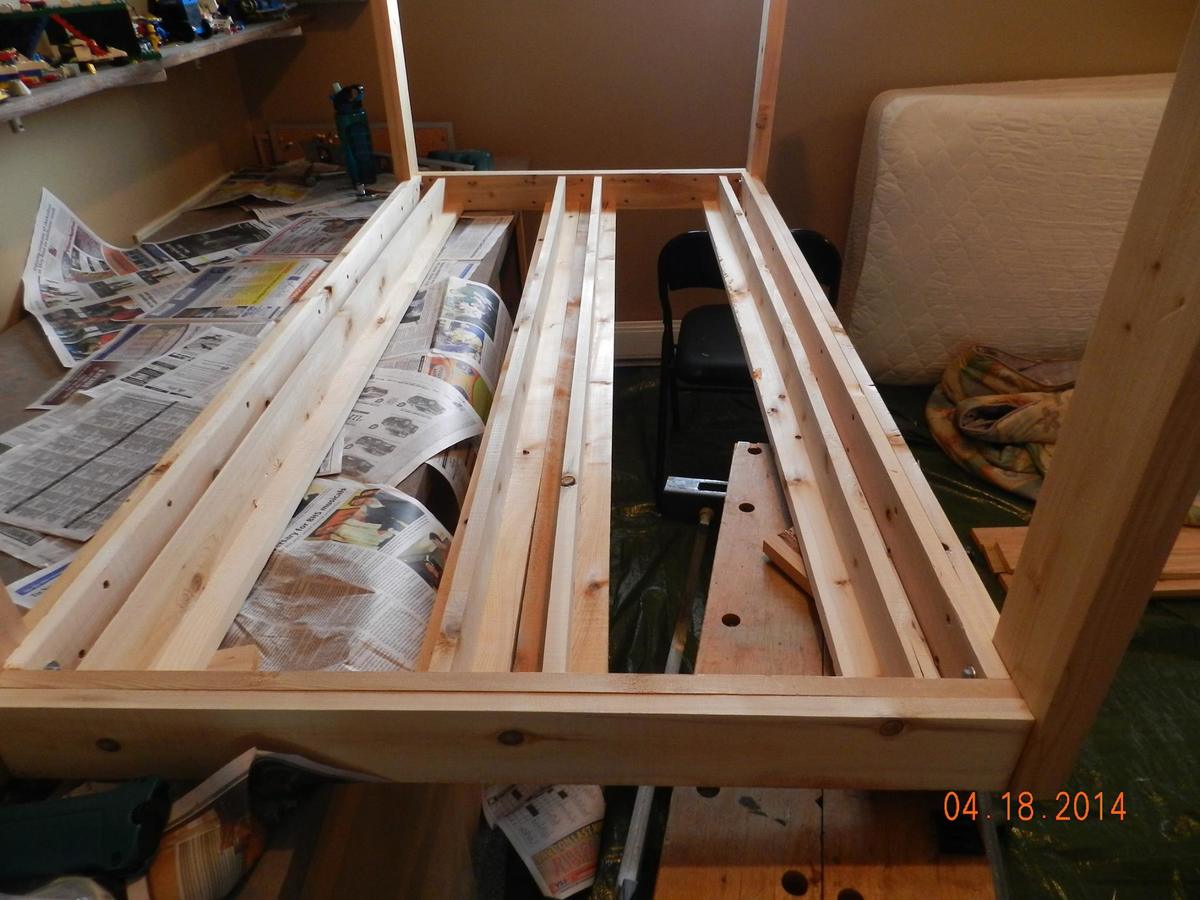
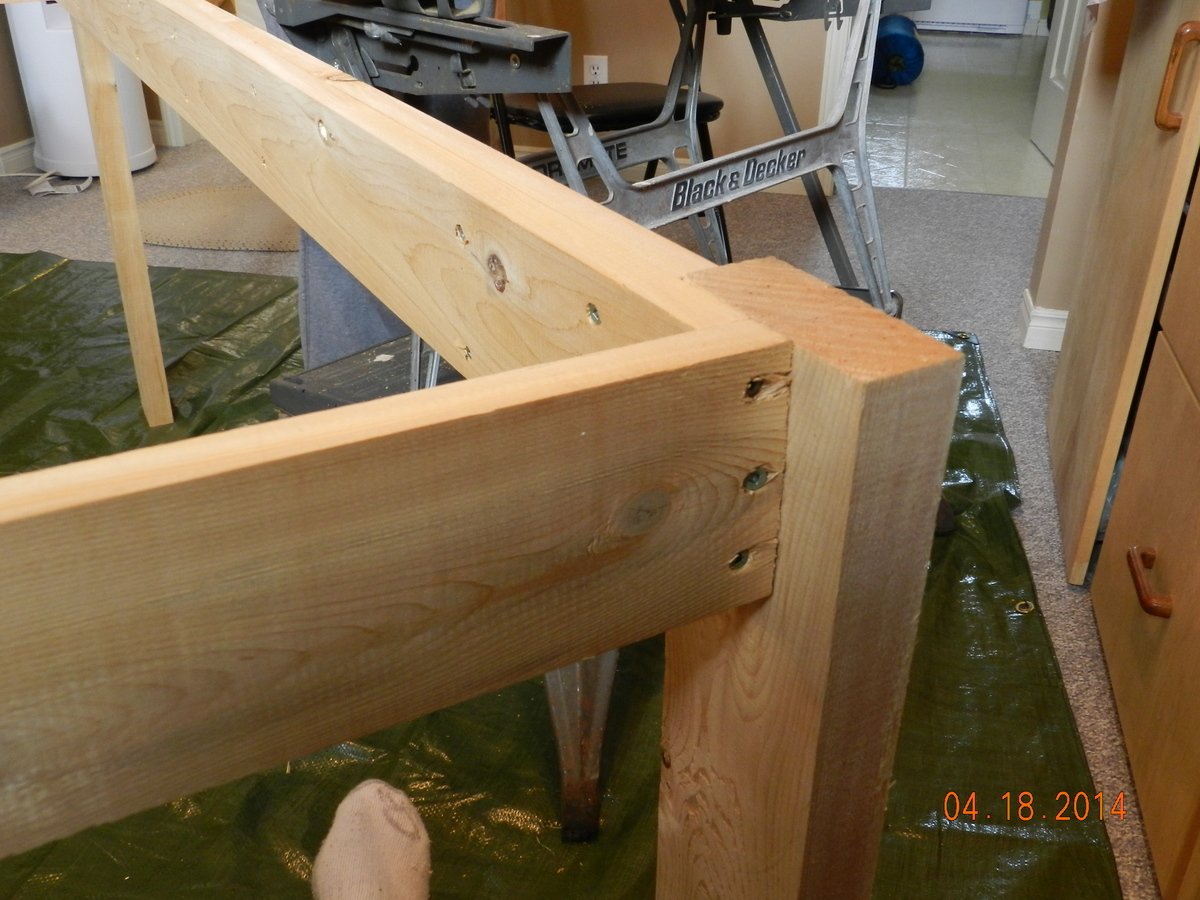
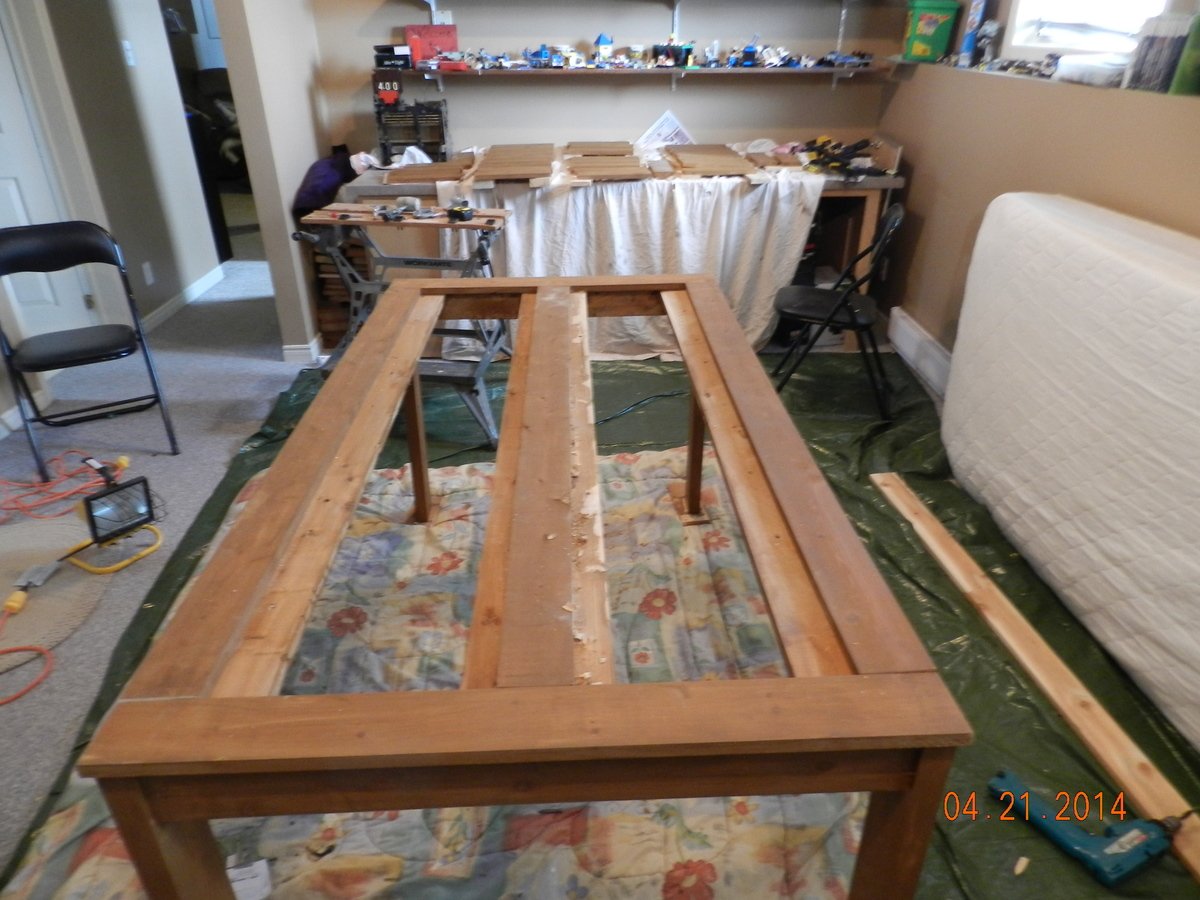
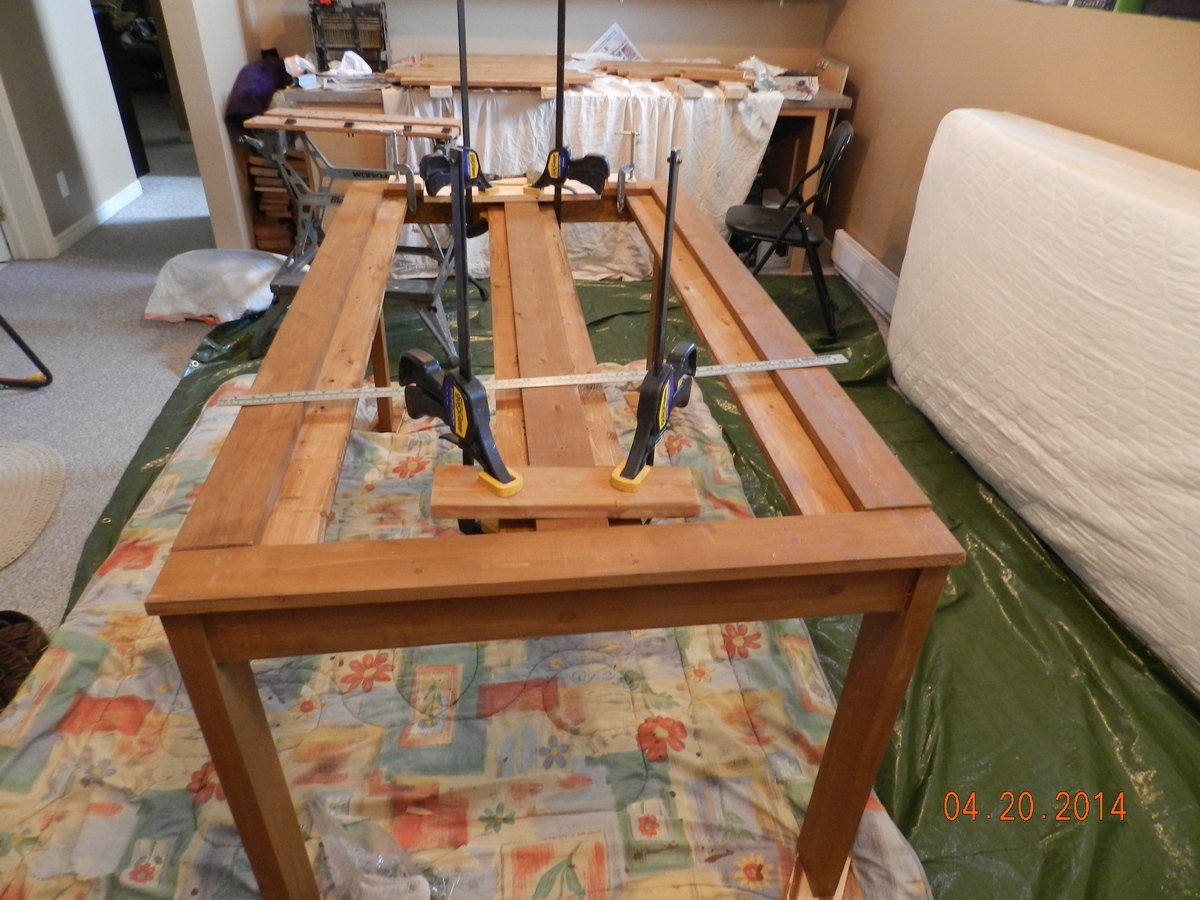
Modified Simple Outdoor Dining Table

I didn't make any changes , his orginal design was great. Hope these pictures help others. I tried to link to the modified-simple-outdoor-dining-table but wasn't able too.
Built from Plan(s)
Estimated Cost
120
Estimated Time Investment
Weekend Project (10-20 Hours)
Finish Used
make sure you stain as you go
Recommended Skill Level
Beginner
Comments
Sun, 04/27/2014 - 14:06
Found the plans
Found the plans "modified-simple-outdoor-dining-table" and I built it. Very nice table, I posted more pcitures to help others
Sun, 04/27/2014 - 14:06
Found the plans
Found the plans "modified-simple-outdoor-dining-table" and I built it. Very nice table, I posted more pcitures to help others
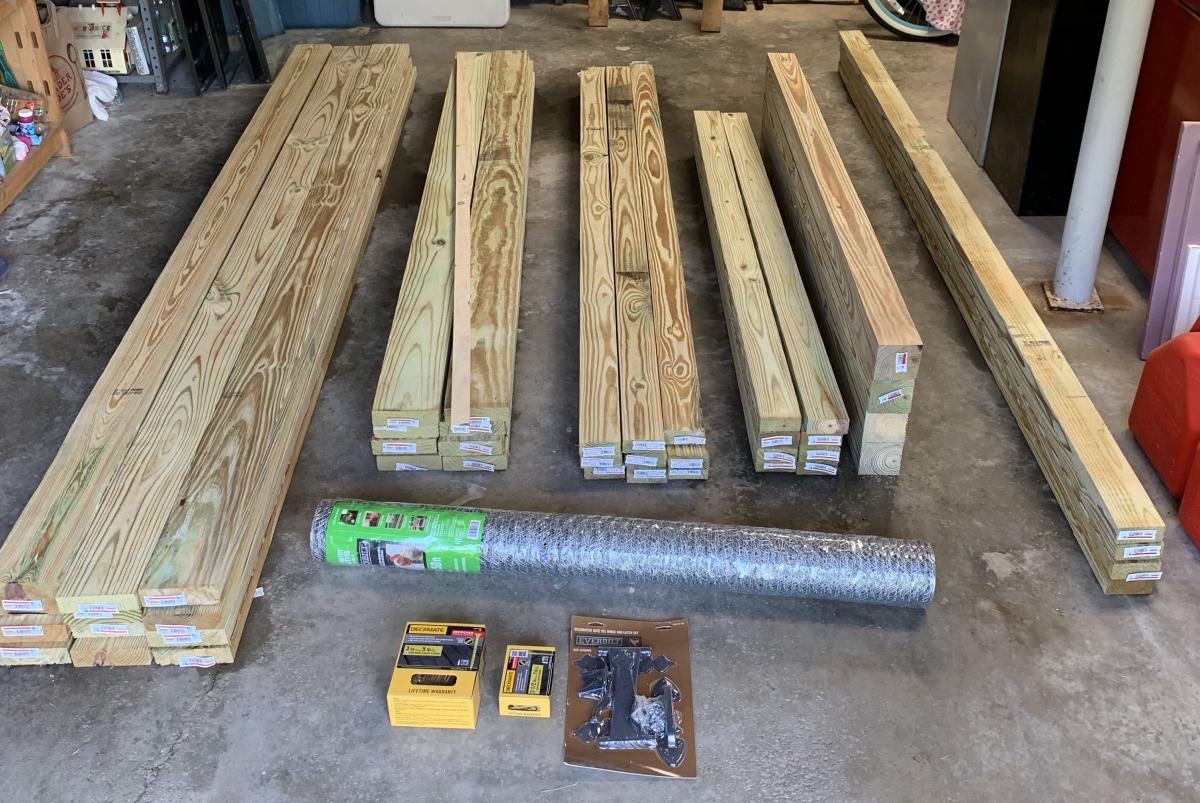
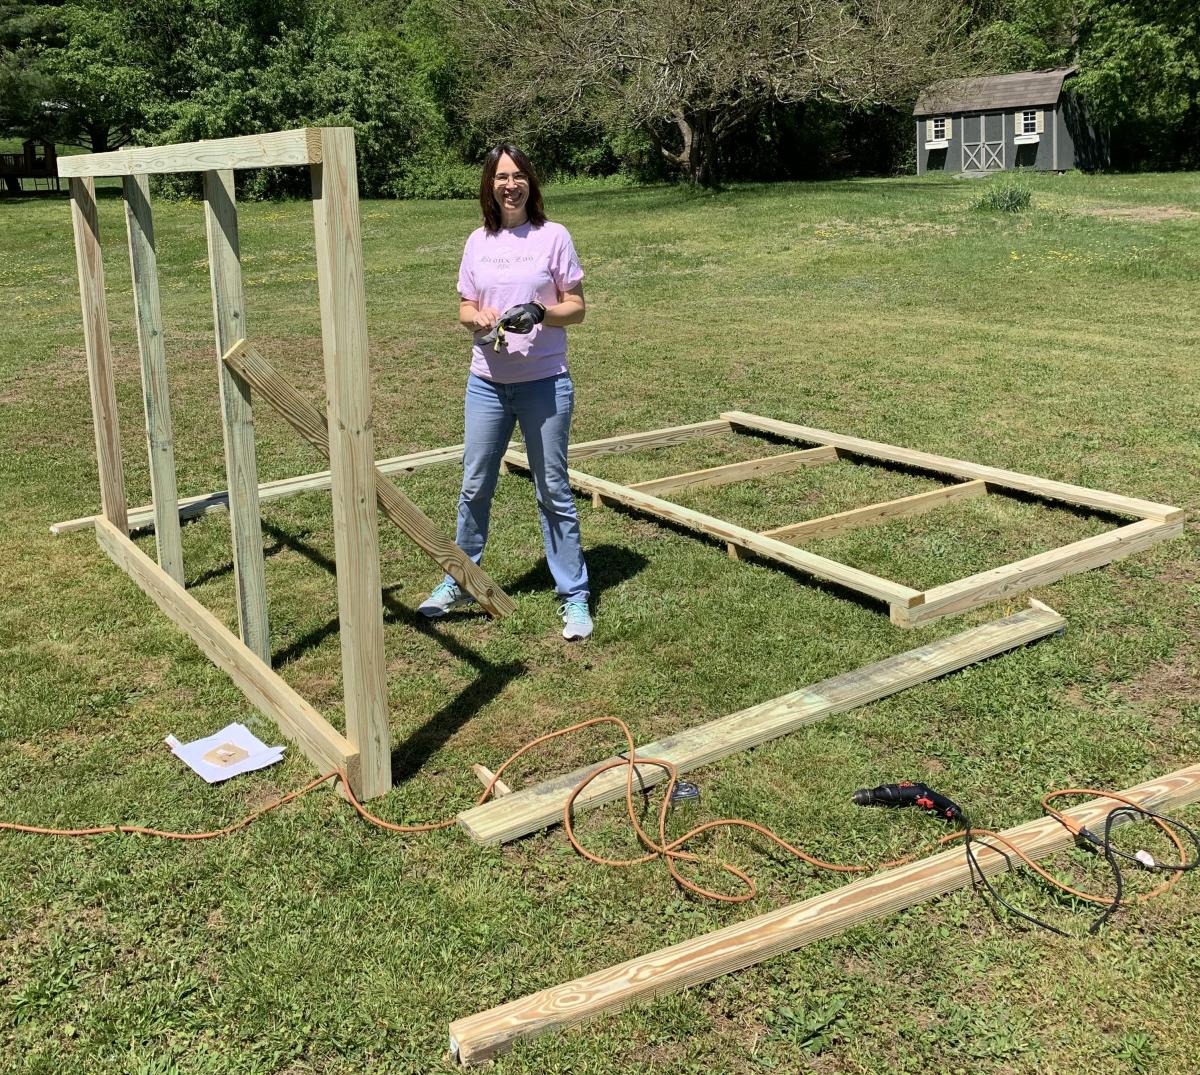
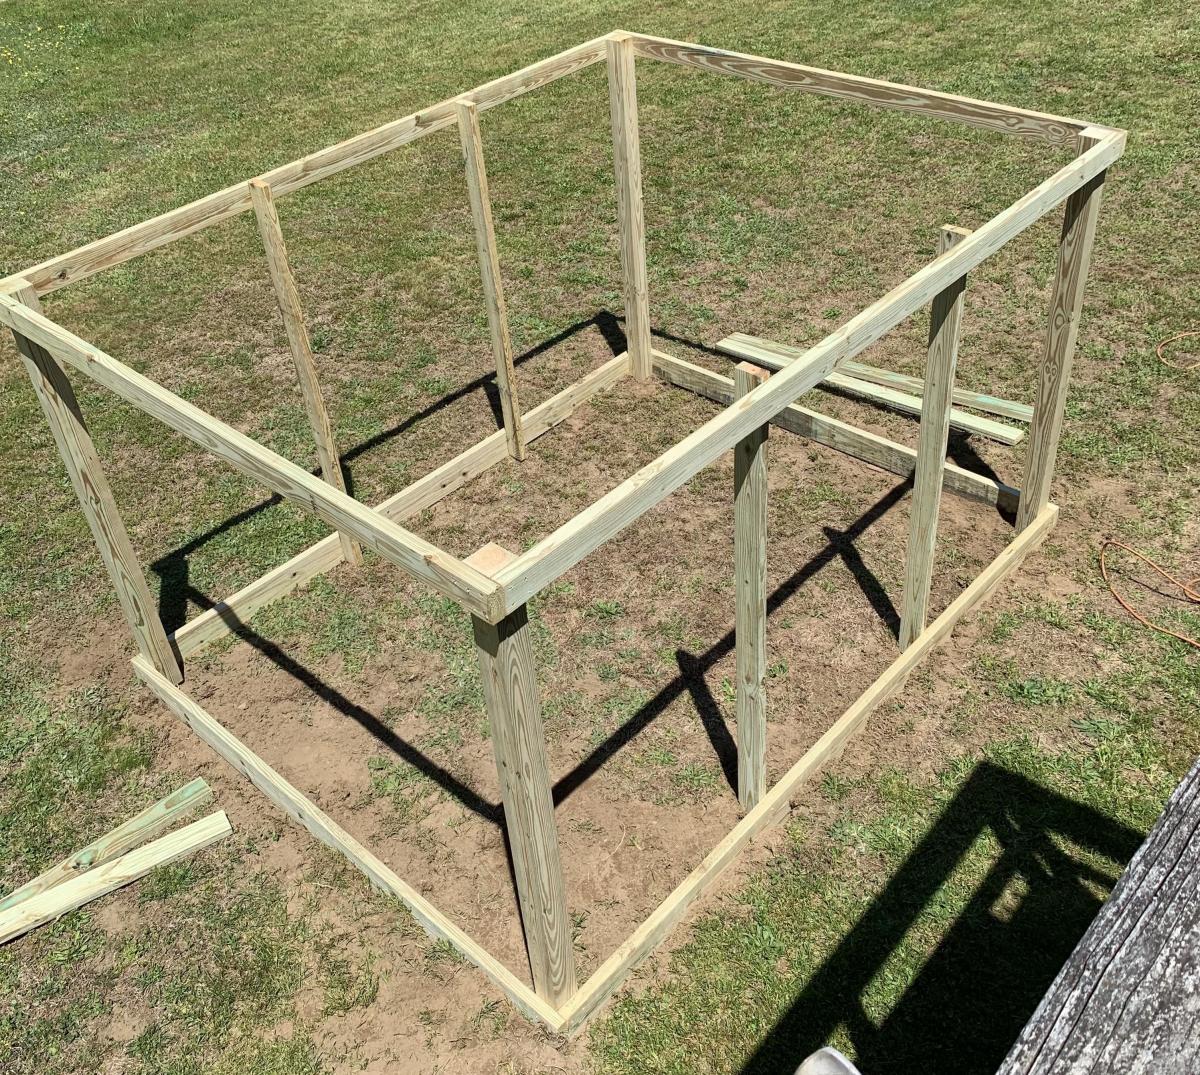
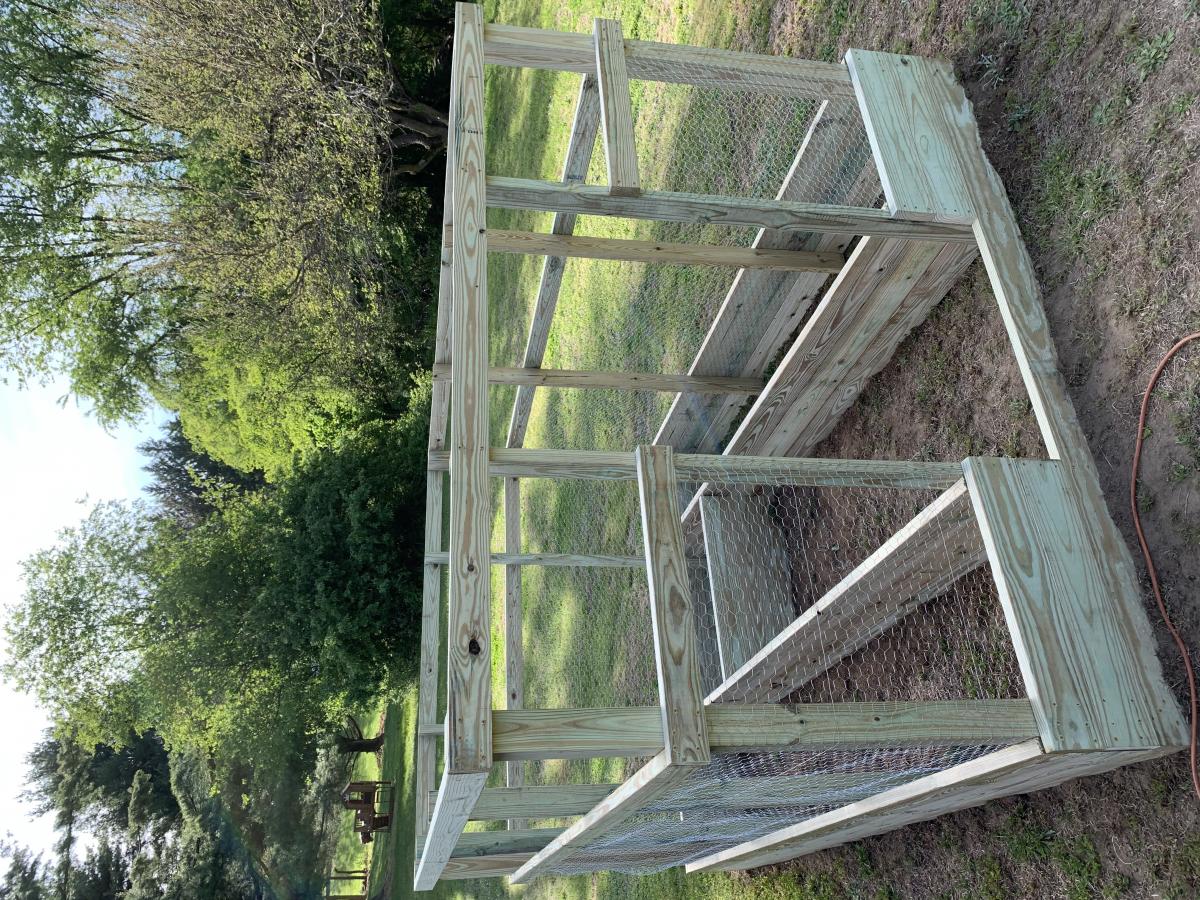
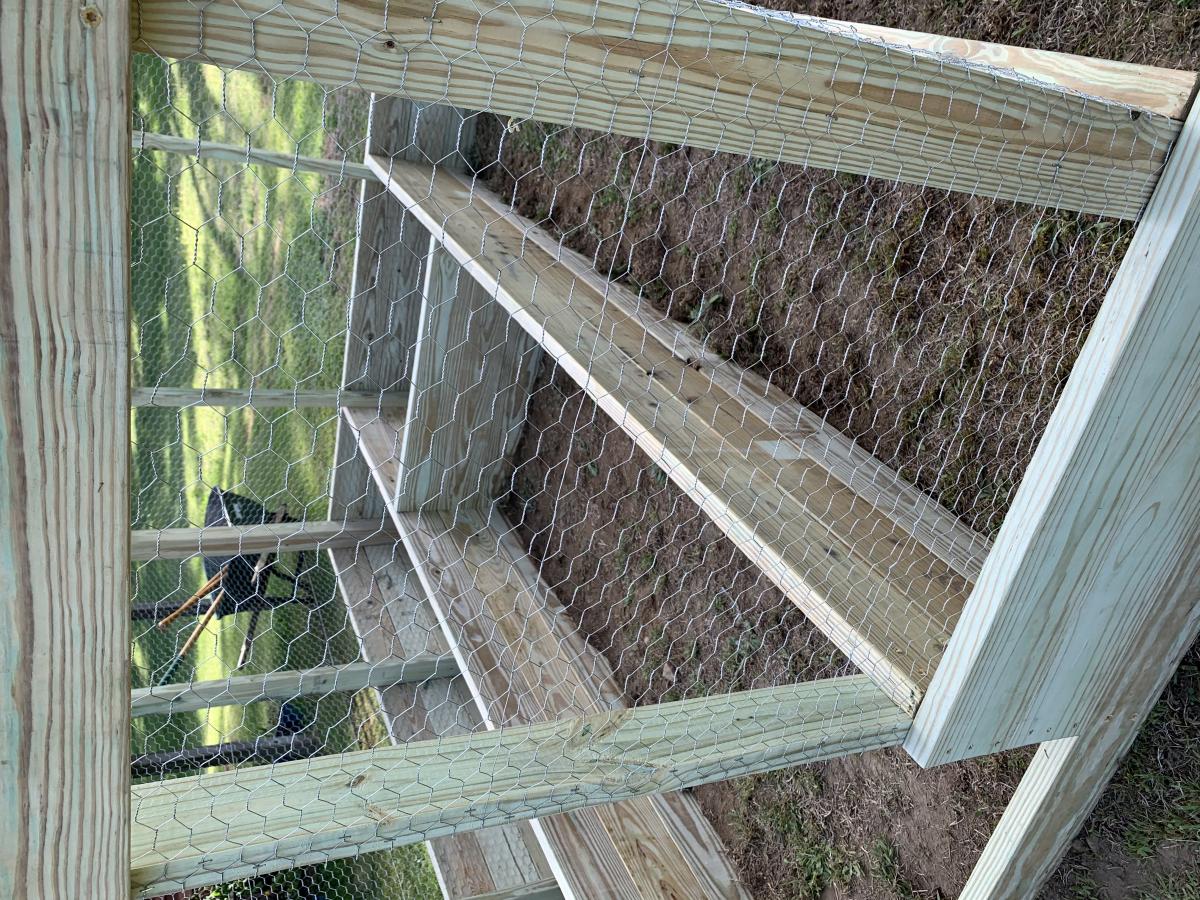
Raised Bed Garden Enclosure

We perviously had a larger garden farther back in the yard, it was on the ground which is very hard and rocky. It was tough to till and maintain, so it was taken down a few years ago.
My wife and teenage daughter have green thumbs and have planted herbs and tomatoes in pots over the past few years, but this year they wanted something more substantial. After an online search we found this plan.
It was a bit small for what the girls had planned, so with a little bit of tweaking, we changed the depth of the enclosure to 10'. It was pretty easy to do. Also the girls wanted the beds to be a bit deeper, so we made them three 2x6's deep instead of two
It was built by my wife and I in one weekend, well actually the truth is we built the entire enclosure, minus the door on Saturday about 10am and finish up about 5:30pm. I built the door the next day and we hung it together.
Just an FYI, I have quite a bit of woodworking experience and have a workshop with table saw, band saw and much, much more. I did use the table saw for most of the cuts, with the exception of the gate support which I cut using the band saw.
One caveat, if you have the lumber yard cut any pieces for you, make sure all the lumber is the same length. It's kind os a nit picky thing, but none of the lumber was exactly the length shown on the labels. If you want all the joints to be "perfect" I suggest measuring and cutting all the pieces to the correct length to match the plans.
We also used an industrial hand held staple gun to fasten the chicken wire.
The cost of all the materials, including two sets of work gloves came out to $447.92 from Home Depot in 2020.
We are now waiting for a delivery of the top soil to fill the beds. Since we used weatherguard lumber, we are going to gat plastic sheeting and line the beds.
It was a fun project and my girls are looking forward to planting all their seedlings.
For fun we made a time lapse video, which I have uploaded to Youtube. If you watch closely, you will see that we started the build in one area of the yard and moved it because the ground sloped much more than we originally thought.
https://www.youtube.com/watch?v=h7vvBLy034U&list=WL&index=112&t=0s
I hope that our experience may help others in some small way.
Thank you Ana for making these plans available!!
Built from Plan(s)
Estimated Cost
$447.92
Estimated Time Investment
Weekend Project (10-20 Hours)
Finish Used
None.
Recommended Skill Level
Intermediate
Comments

Sat, 05/30/2020 - 18:27
Love the added length! …
Love the added length! Thanks so much for sharing photos of your build!
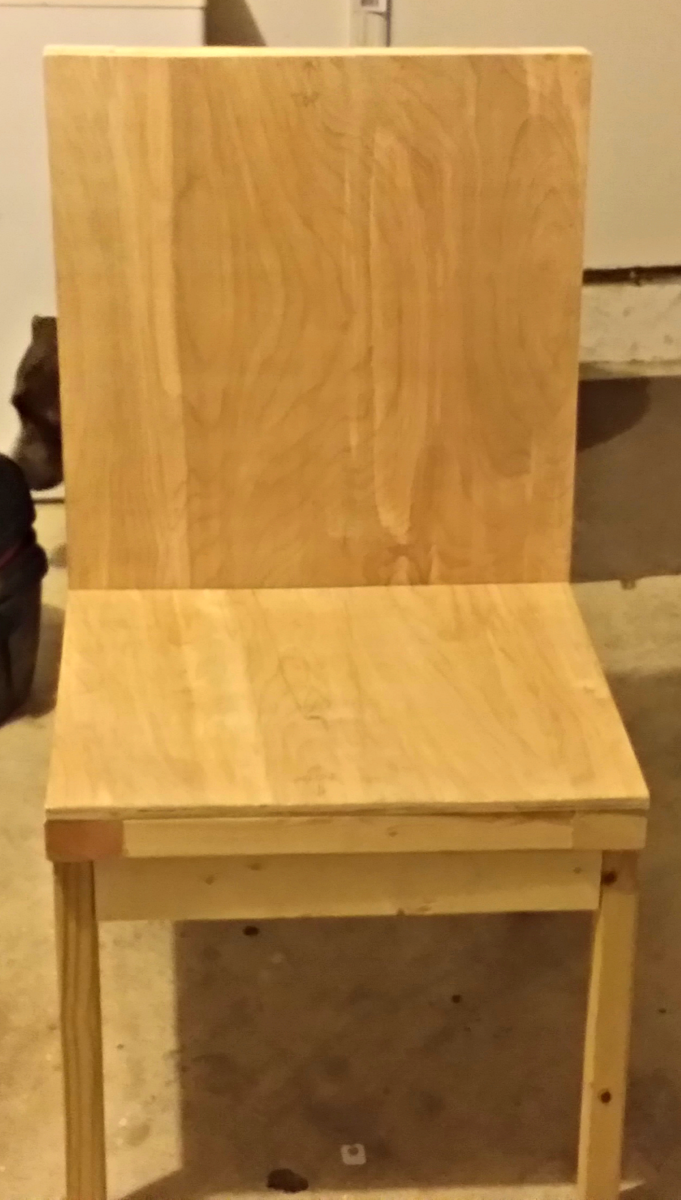
Our modern take on the Modern Outdoor chair
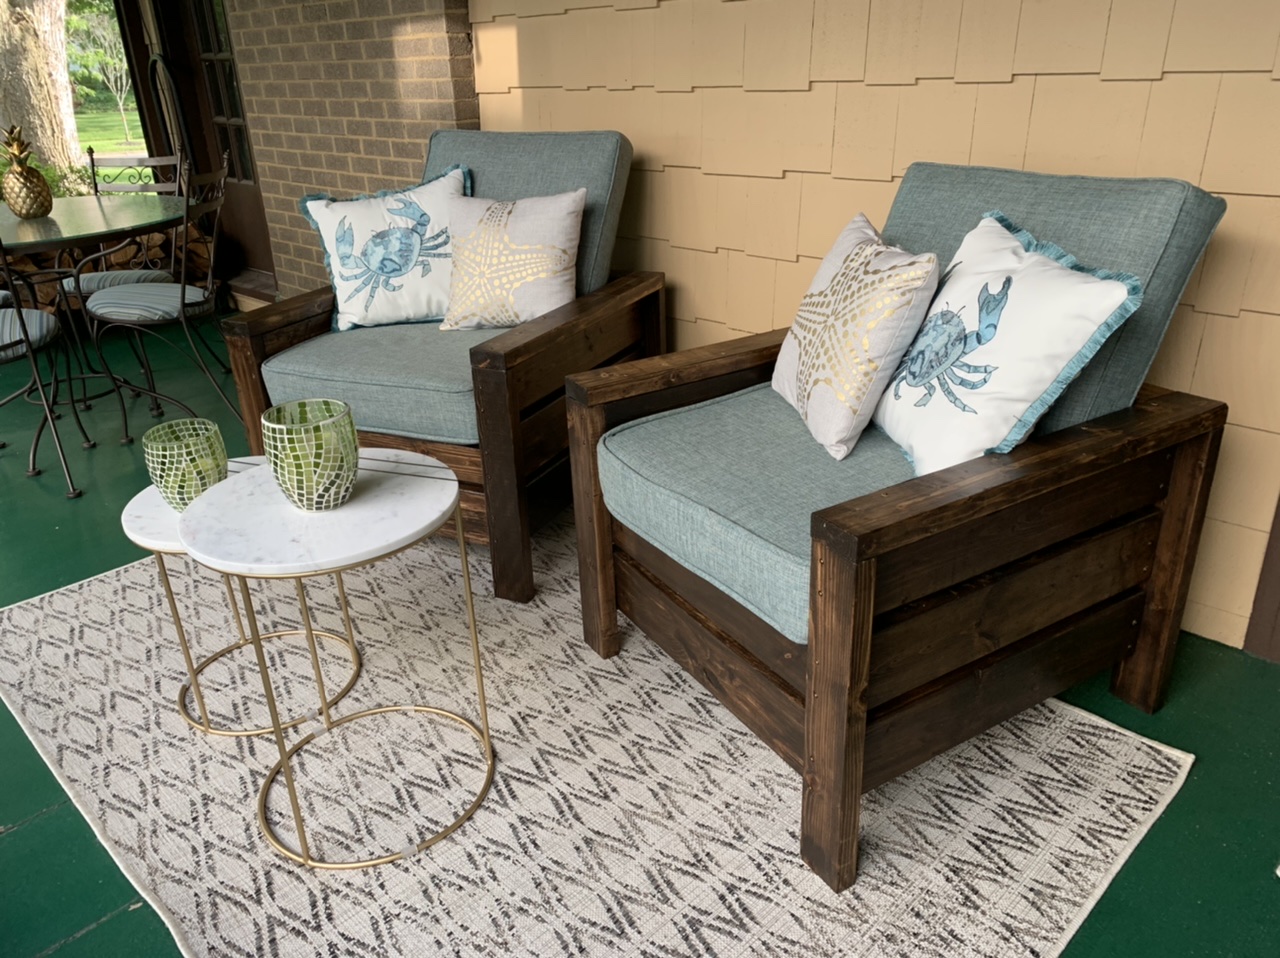
When I told my husband we were going to make patio chairs instead of buy them - he thought I was crazy!
I started looking for chairs during the tail end of the pandemic’s stay-at-home order, but after looking for something that was a nice quality yet reasonably priced, we soon realized the options just weren’t there. In my 20’s, I had made a dining room table when I could really afford anything nice! Man I loved that table! So I decided to google DIY patio chairs and found your site! OH. MY. GOODNESS. I want to make all the things. In addition to these beauties, we’ve also made counter height garden boxes, and are getting ready to start on the Farmhouse Potting Bench. Your videos are great - and make everything look incredibly easy. I stained and polyurethanes before assembly, but in hindsight might have opted to wait until the end! All accessories, including cushions are from at home. Make these chairs! You will love them!!
Built from Plan(s)
Estimated Time Investment
Weekend Project (10-20 Hours)
Finish Used
Kona stain with Satin polyurathane finish
I presaged wood with a pre-stain, then did one coat of stain (wipes down so it wasn’t so dark), and two coats of Varnish. I sanded prior to staining, and in between varnishes. We made two chairs at the same time - so stained roughly 50 boards - which was the most time consuming part as the varnish takes the longest. It is helpful to have this on a tall surface for assembly
I presaged wood with a pre-stain, then did one coat of stain (wipes down so it wasn’t so dark), and two coats of Varnish. I sanded prior to staining, and in between varnishes. We made two chairs at the same time - so stained roughly 50 boards - which was the most time consuming part as the varnish takes the longest. It is helpful to have this on a tall surface for assembly
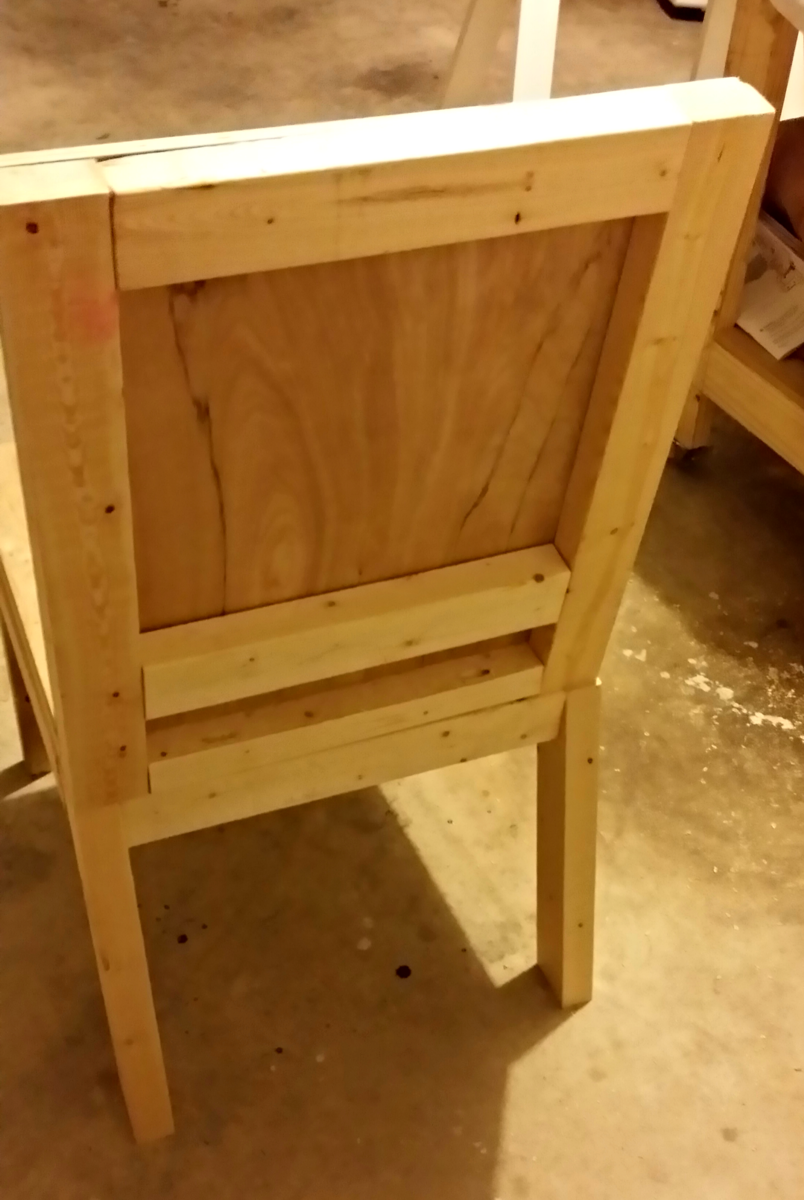
Modern Outdoor Chair with Round Backrest
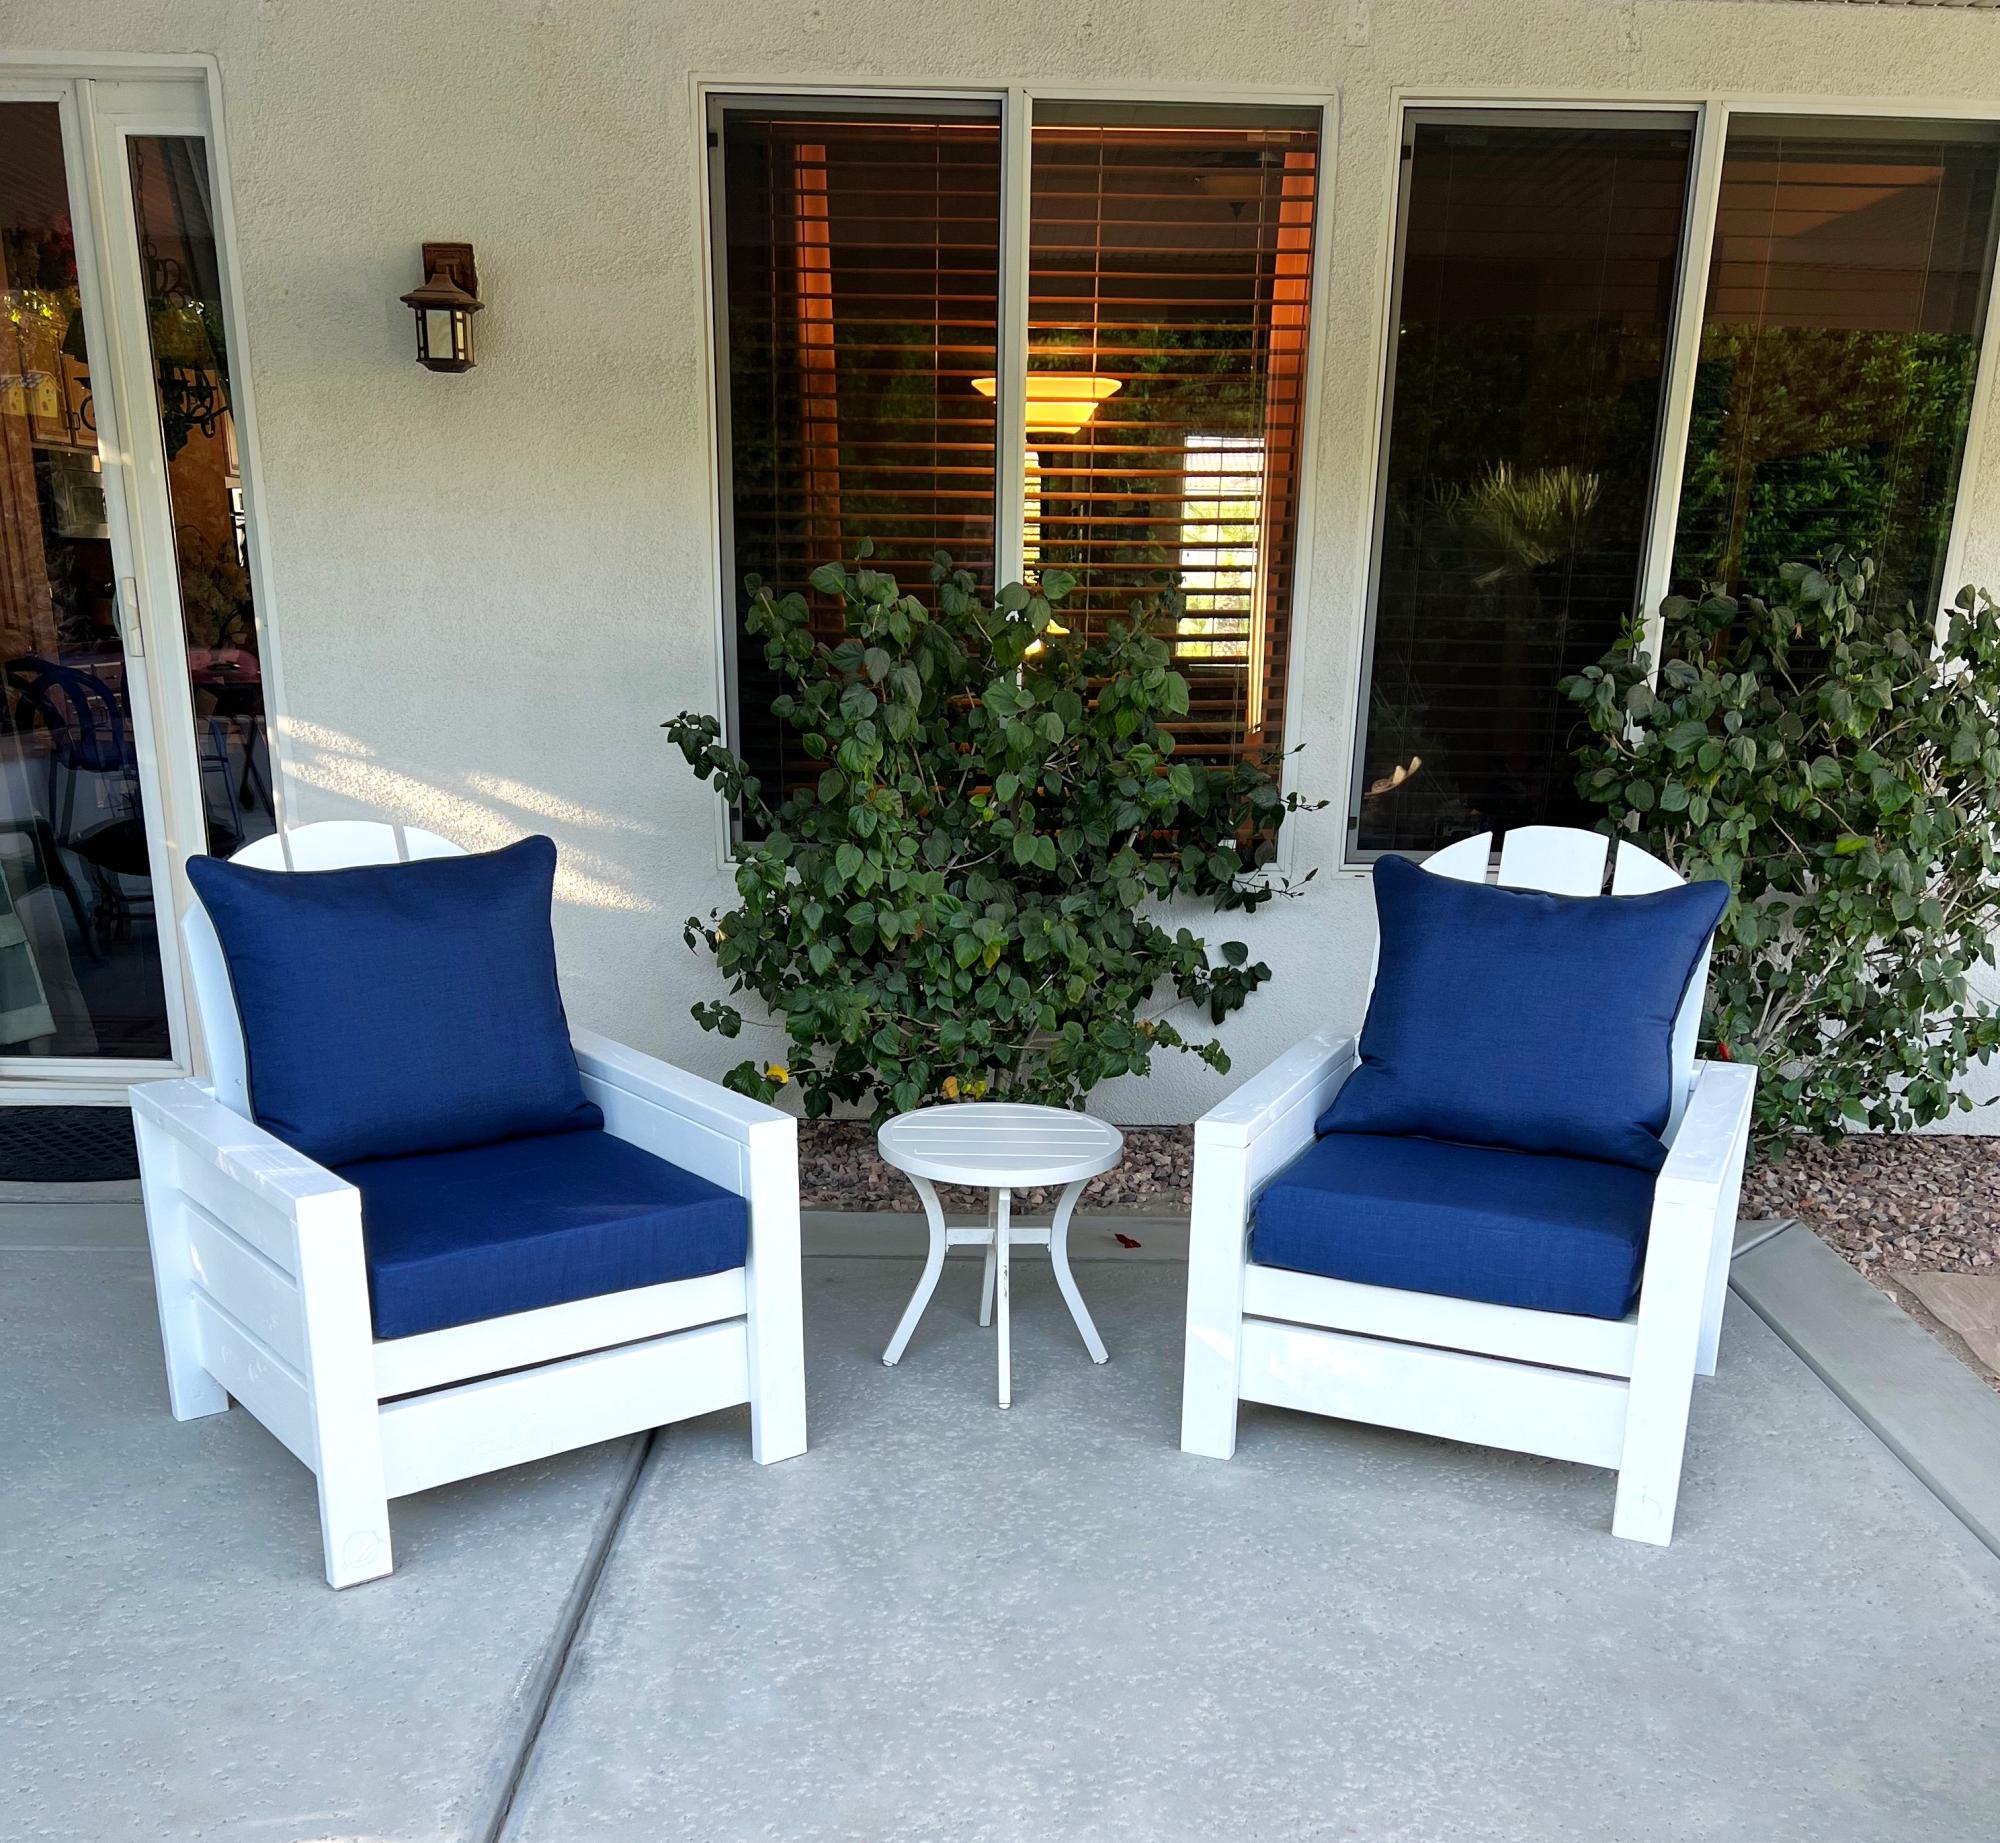
I made the Modern Chairs with a vertical rounded back for more back support. I love these chairs so much and was such a good experience making rounded cuts.
Michelle H.
Built from Plan(s)
My work table
Started to renovate hubby’s bathroom, got annoyed with lack of space on his work bench, built my own. Since this pic, I’ve added locking casters, a power bar up one leg, and a plain metal tool holder on one side. Still have some thoughts rattling around in my head about various other upgrades. Super plans, easy one-woman job.
Built from Plan(s)
Estimated Cost
$100
Estimated Time Investment
Afternoon Project (3-6 Hours)
Finish Used
No finish. I want to add a 1/4 or 1/2 MDD top, but that’s the only not-naked original wood.
Recommended Skill Level
Beginner
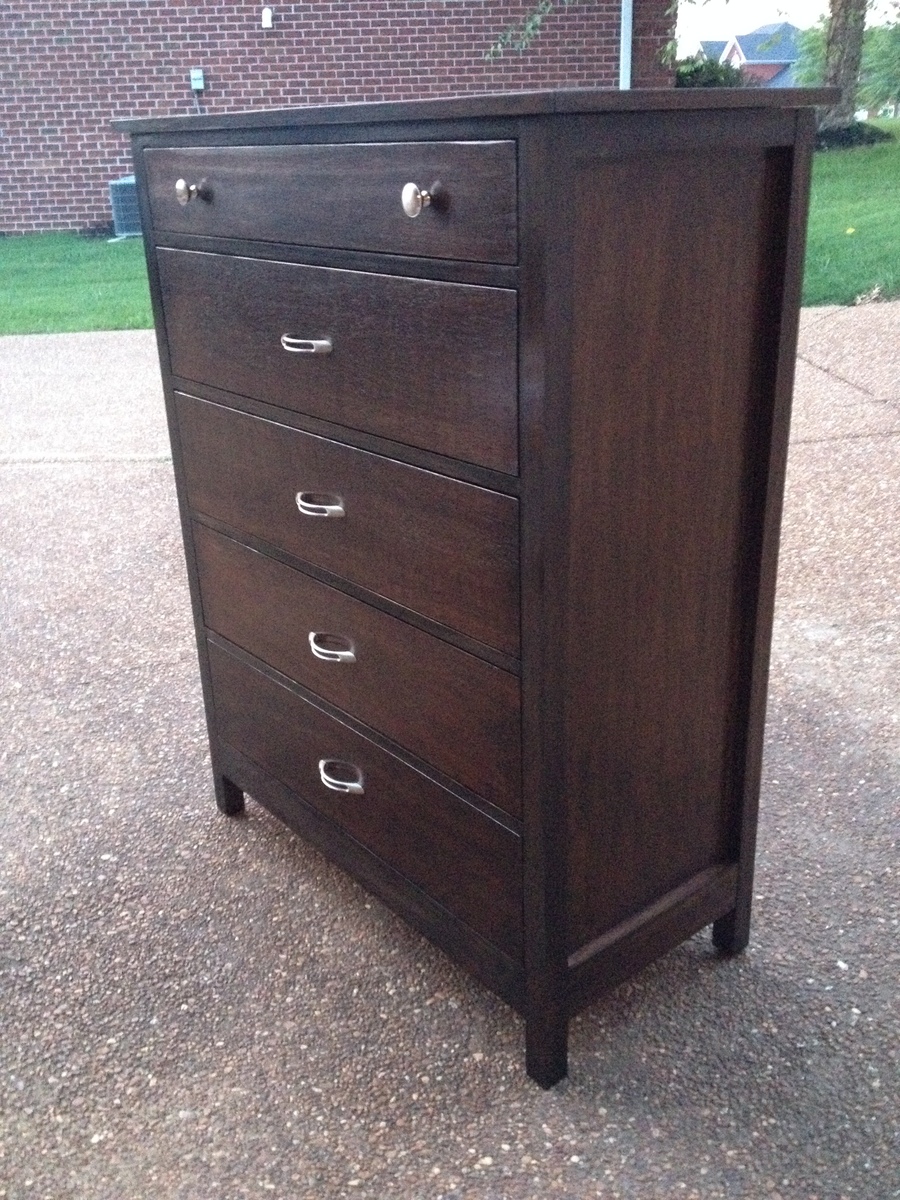
Chest of drawers
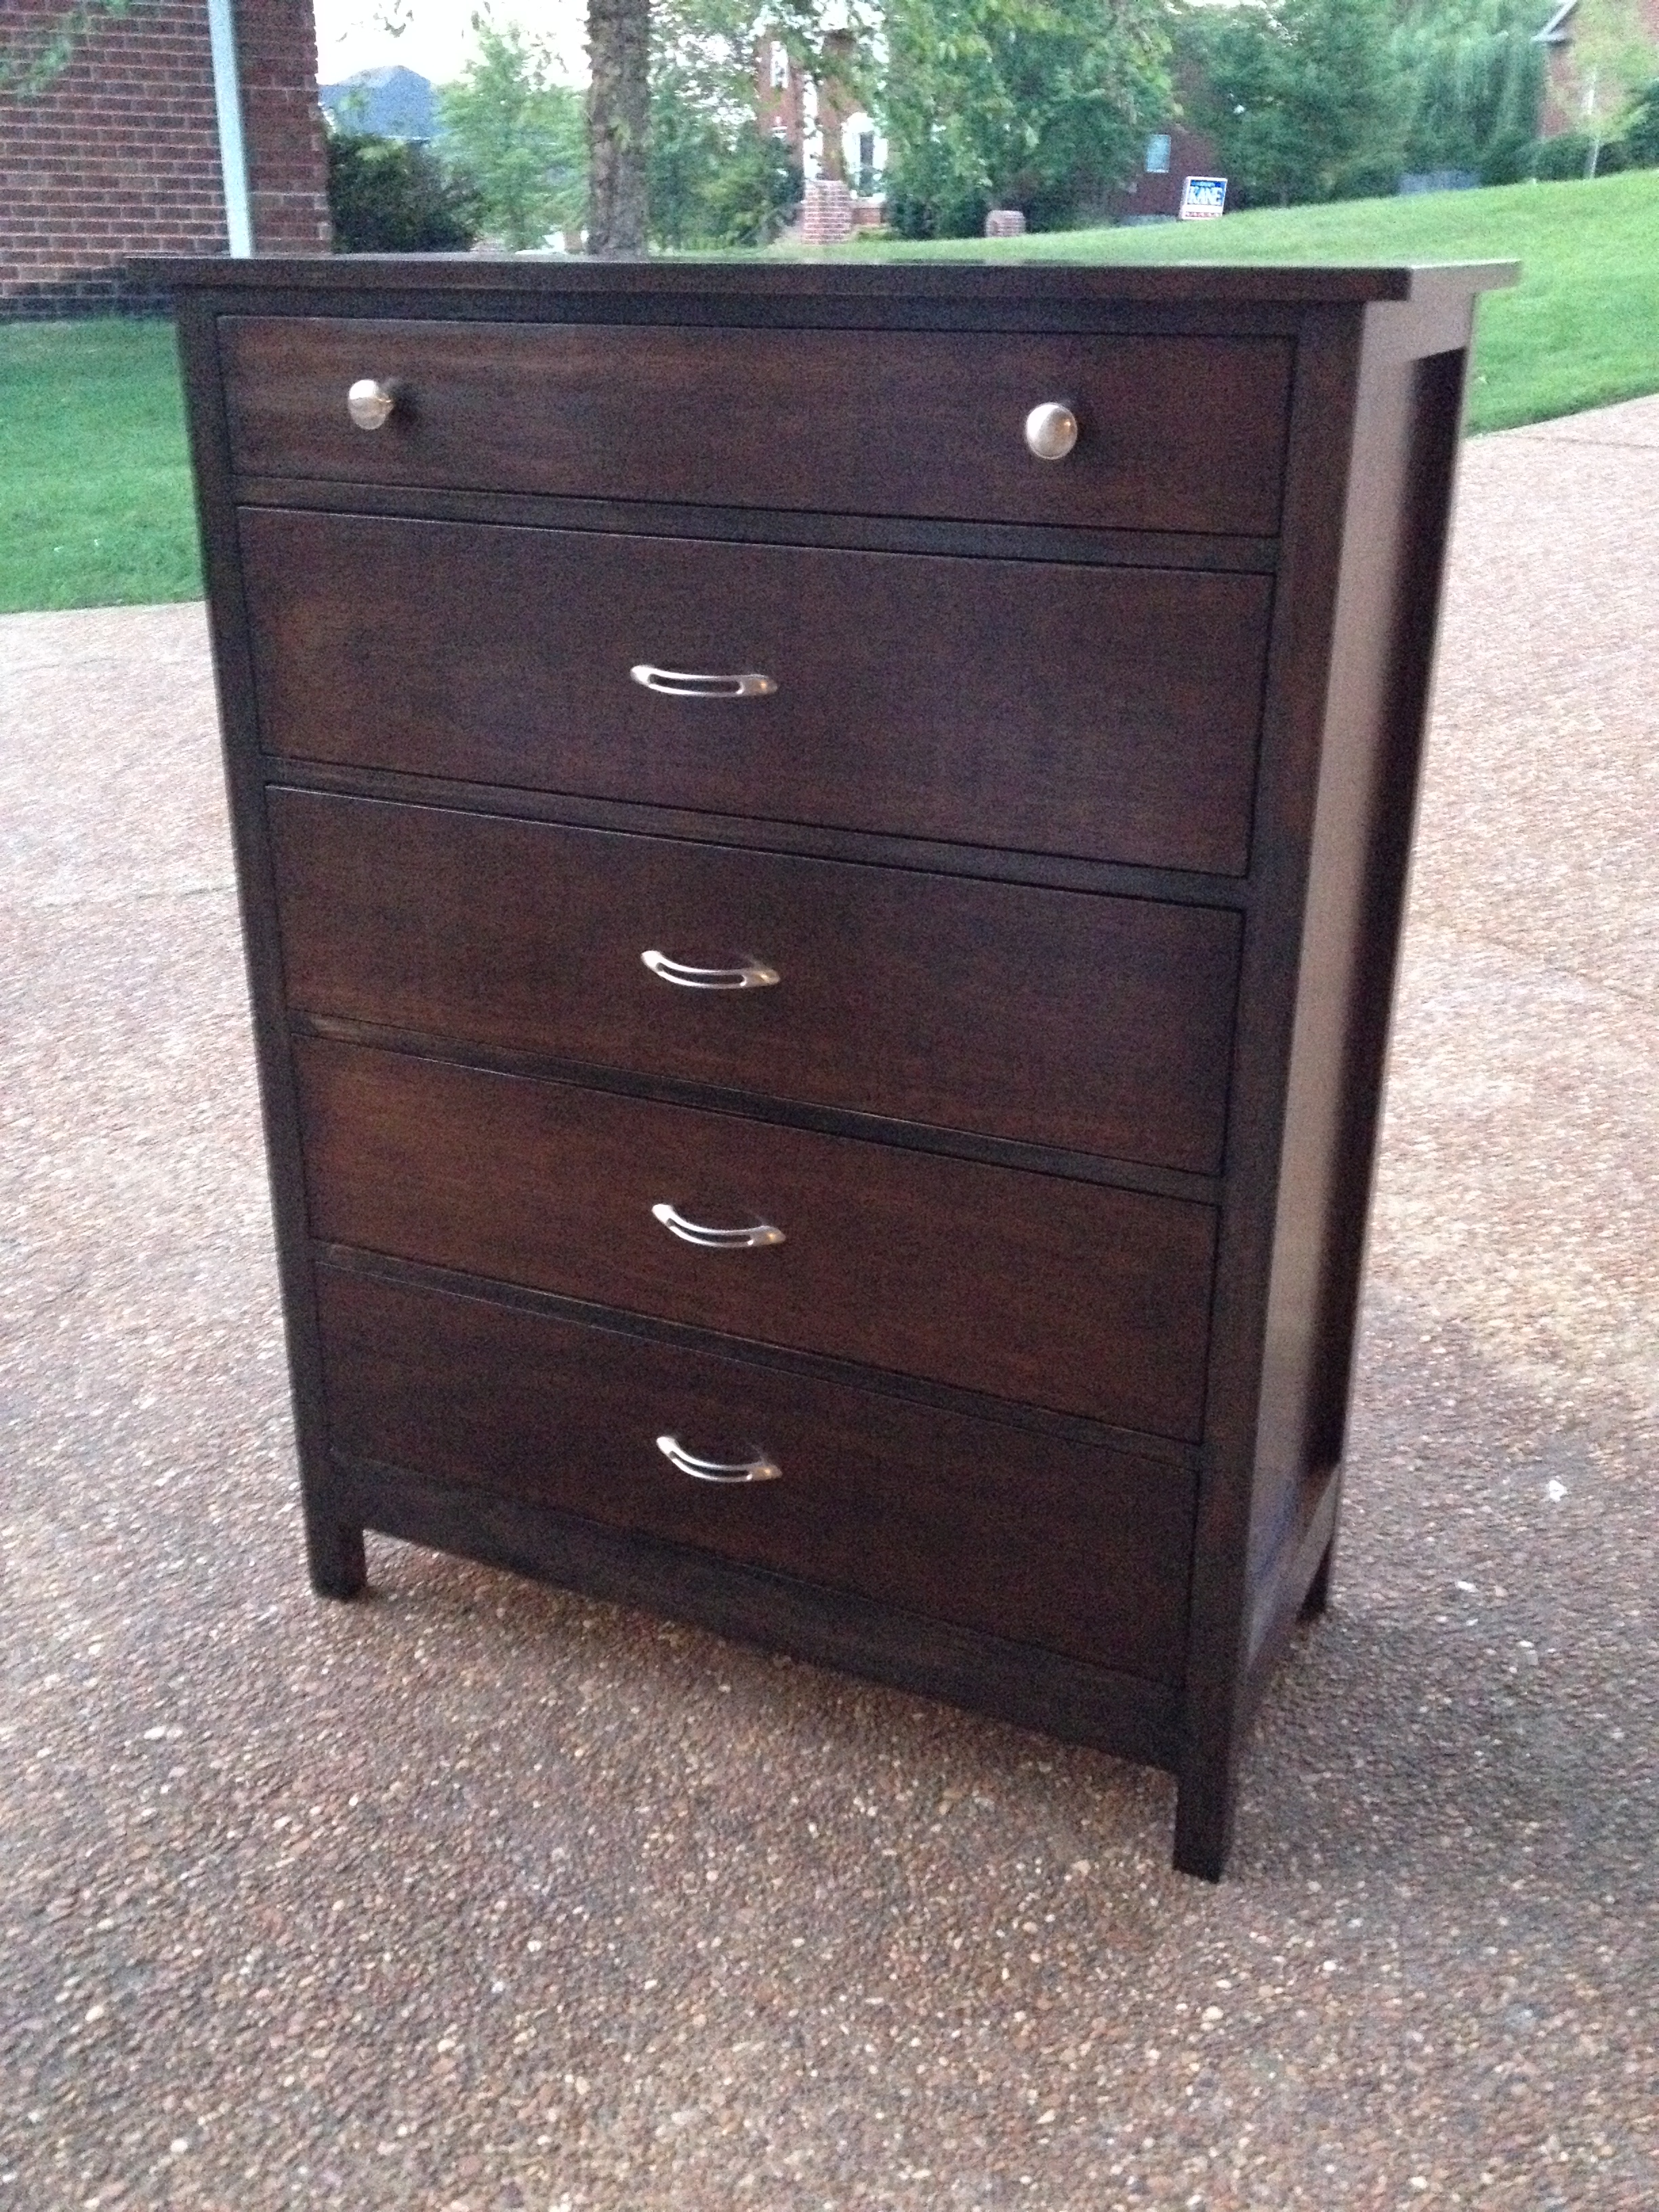
I needed this to be a little taller, so I added another drawer. Other than that, all the other dimensions were the same. I built it in one weekend, but the finishing took about 5 days (for drying time between coats). I was trying to match a baby bed (expresso) so I stained it dark. I also used plywood on the sides, top and drawer fronts instead of pine boards. It really turned out great and matched the bed perfectly.
Built from Plan(s)
Estimated Cost
$90
Estimated Time Investment
Week Long Project (20 Hours or More)
Finish Used
Minwax Wood Conditioner, 3 coats of English Chestnut, 2 coats of Ebony (Minwax), 3 coats of Minwax Wipe-On Poly.
Recommended Skill Level
Beginner
Comments

Mon, 08/04/2014 - 08:52
Beautiful finish!
This turned out so nice, and the finish looks exceptional.
Mon, 08/04/2014 - 08:52
Beautiful finish!
This turned out so nice, and the finish looks exceptional.
In reply to Finish by sharshar1960
Mon, 08/04/2014 - 11:43
Finish details
No, I didn't alternate. I needed the base color to be a deeper brown so it took 3 coats of English Chestnut. Then 2 coats of Ebony over the English Chestnut, to get the black, layered look. I put each coat on, then wiped it off after a few minutes. On the last layer of Ebony, I only lightly removed the stain. The brown shows through in some areas which is exactly what the bed had. I used the oil-based Minwax.
Sat, 12/06/2014 - 18:40
Finish details
I used Minwax poly (in the can), satin finish. I brushed it on with a foam brush.
Wed, 10/21/2015 - 11:44
sandeply experience
can you comment on the stain with sandeply. did you use sanding sealer?
i have read many a comment on issues with staining sandeply but yours looks awesome.
i like the approach.
Thu, 08/08/2019 - 19:48
5 drawer plan?
hi where is the plan for the taller version of this - looks great!!
Complete Diningroom Set
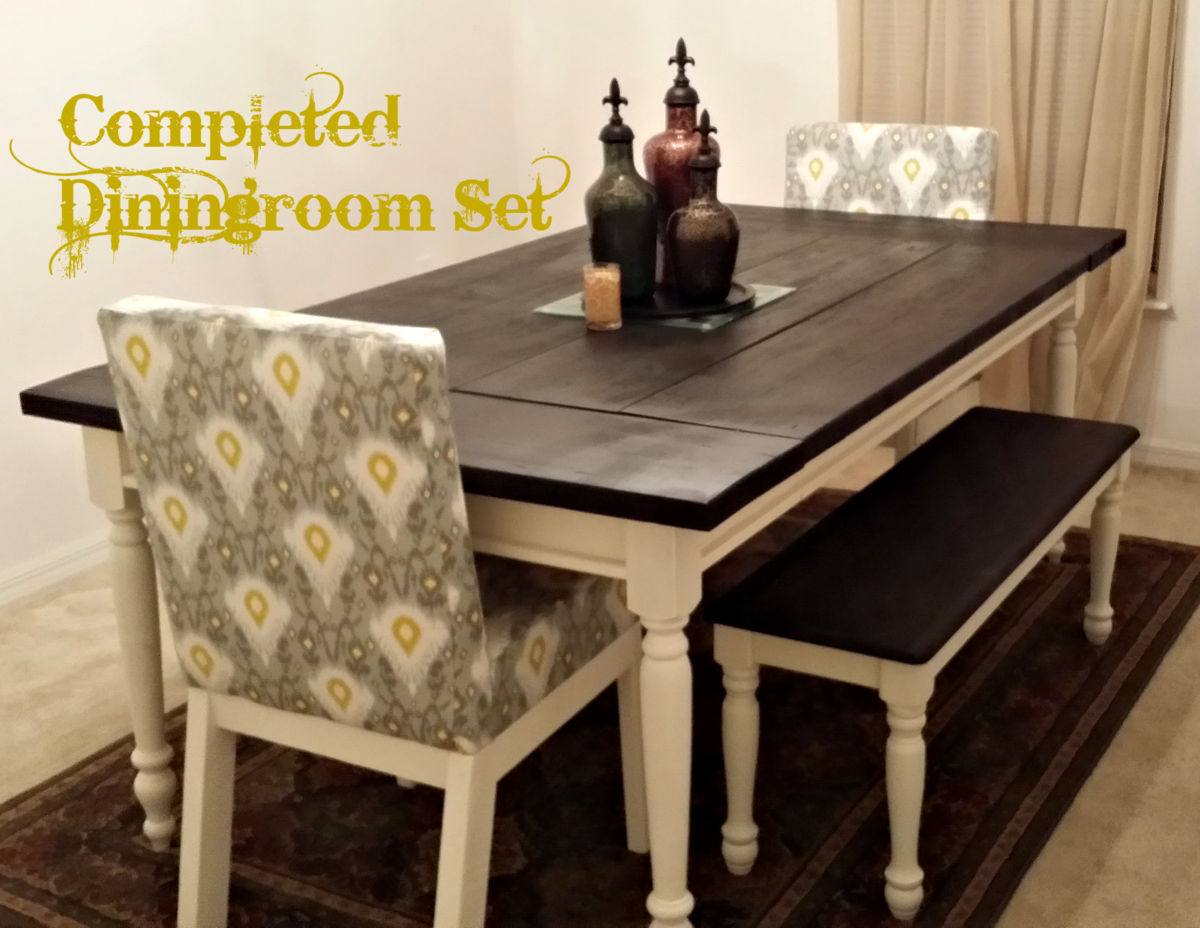
I have lived in my house for over 9 years and have never done anything to it until recently. I have made the commitment to move away from plain white walls and boring "plug-n-play" furniture. I discovered Ana's site a few months ago and have been a daily visitor. I made this dining room set with the confidence Ana's instructions gave me and I am forever grateful.
I made a few adjustments to the Parson Chair, making it longer in the back and used 5 degree angle instead of 15 and made the seat wider for our hefty hips and I used all 2x3s for the "chair bones".

Built from Plan(s)
Estimated Cost
A little over $350 for everything including fabric
Estimated Time Investment
Week Long Project (20 Hours or More)
Finish Used
Rustoleum Kona, Olympic Milk Paint White, Satin Poly
Recommended Skill Level
Intermediate
Comments

Fri, 08/29/2014 - 10:42
Awesome project!
You did such a beautiful job on these! The chairs, bench, table, and finish all look spectacular!
Sun, 04/03/2016 - 17:33
Bench question
I really like the matching bench. I am going to make this table for my daughter and she wants a bench with it. I am wondering where you found matching legs short enough for the bench? I have been looking but what I find are legs for end tables but they are too long. Seems the bench-top height should be a standard 18 inches. Thanks for any help.
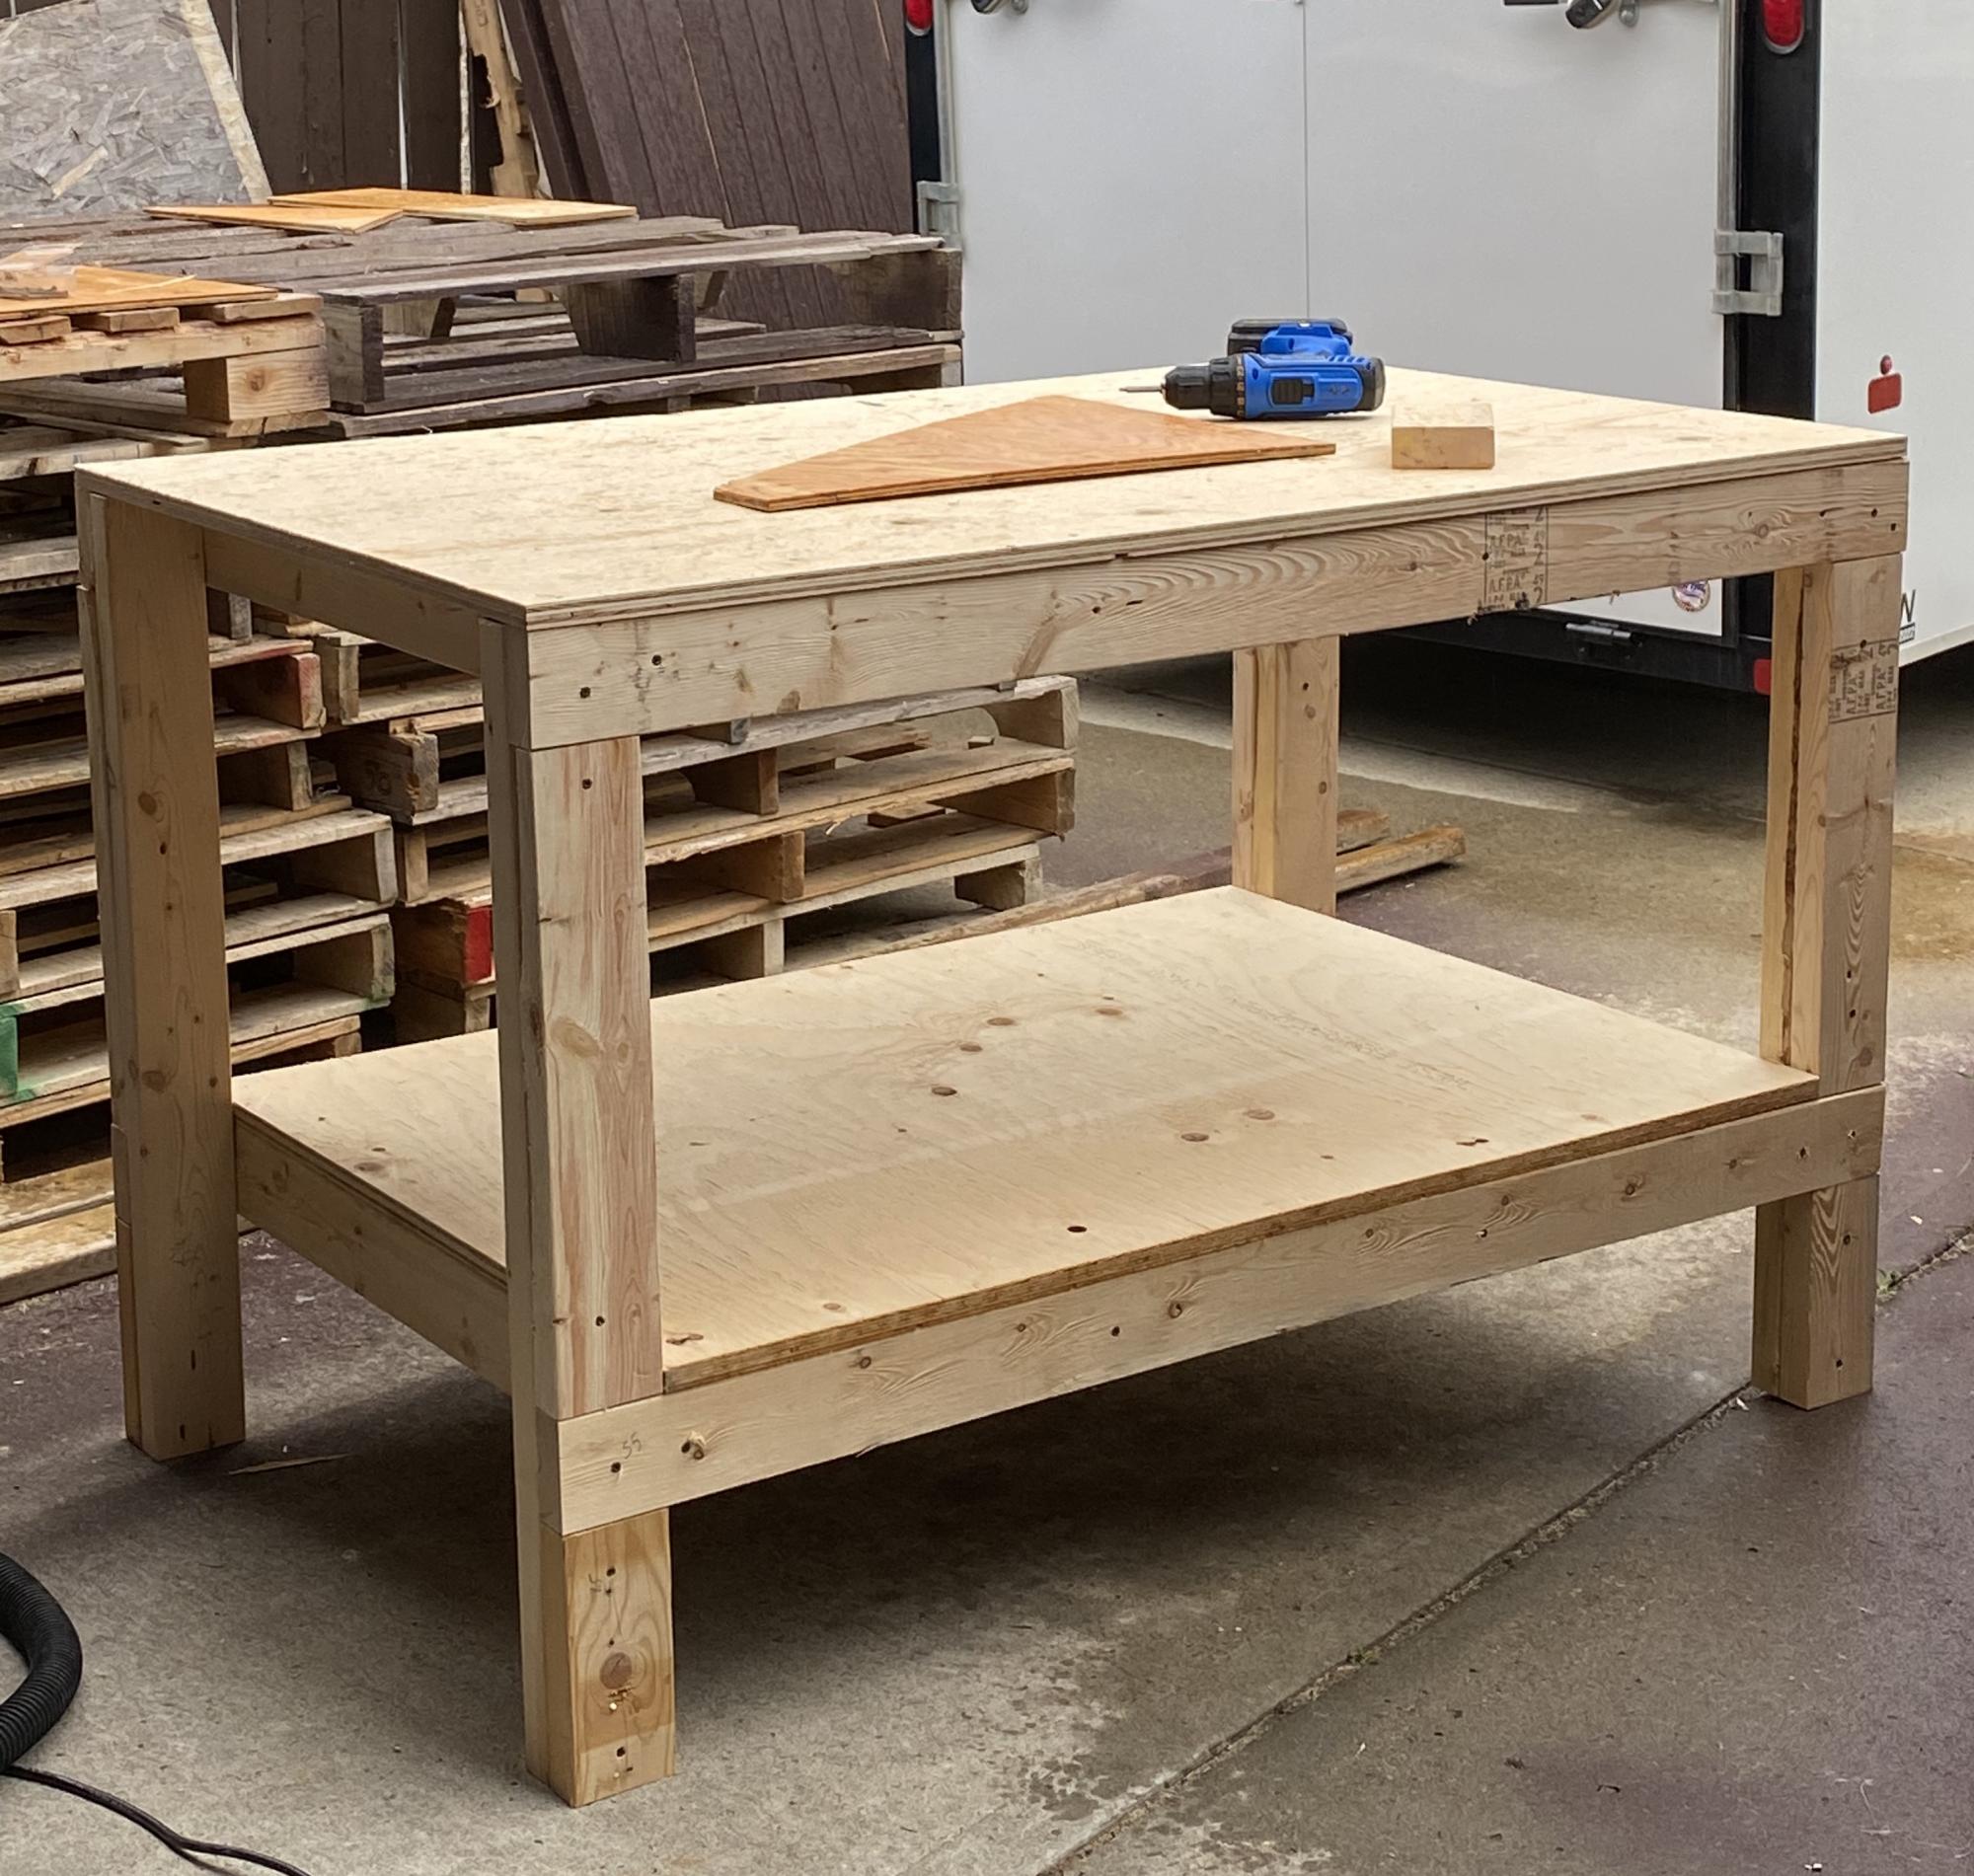
Do-It-All Mobile Workbench
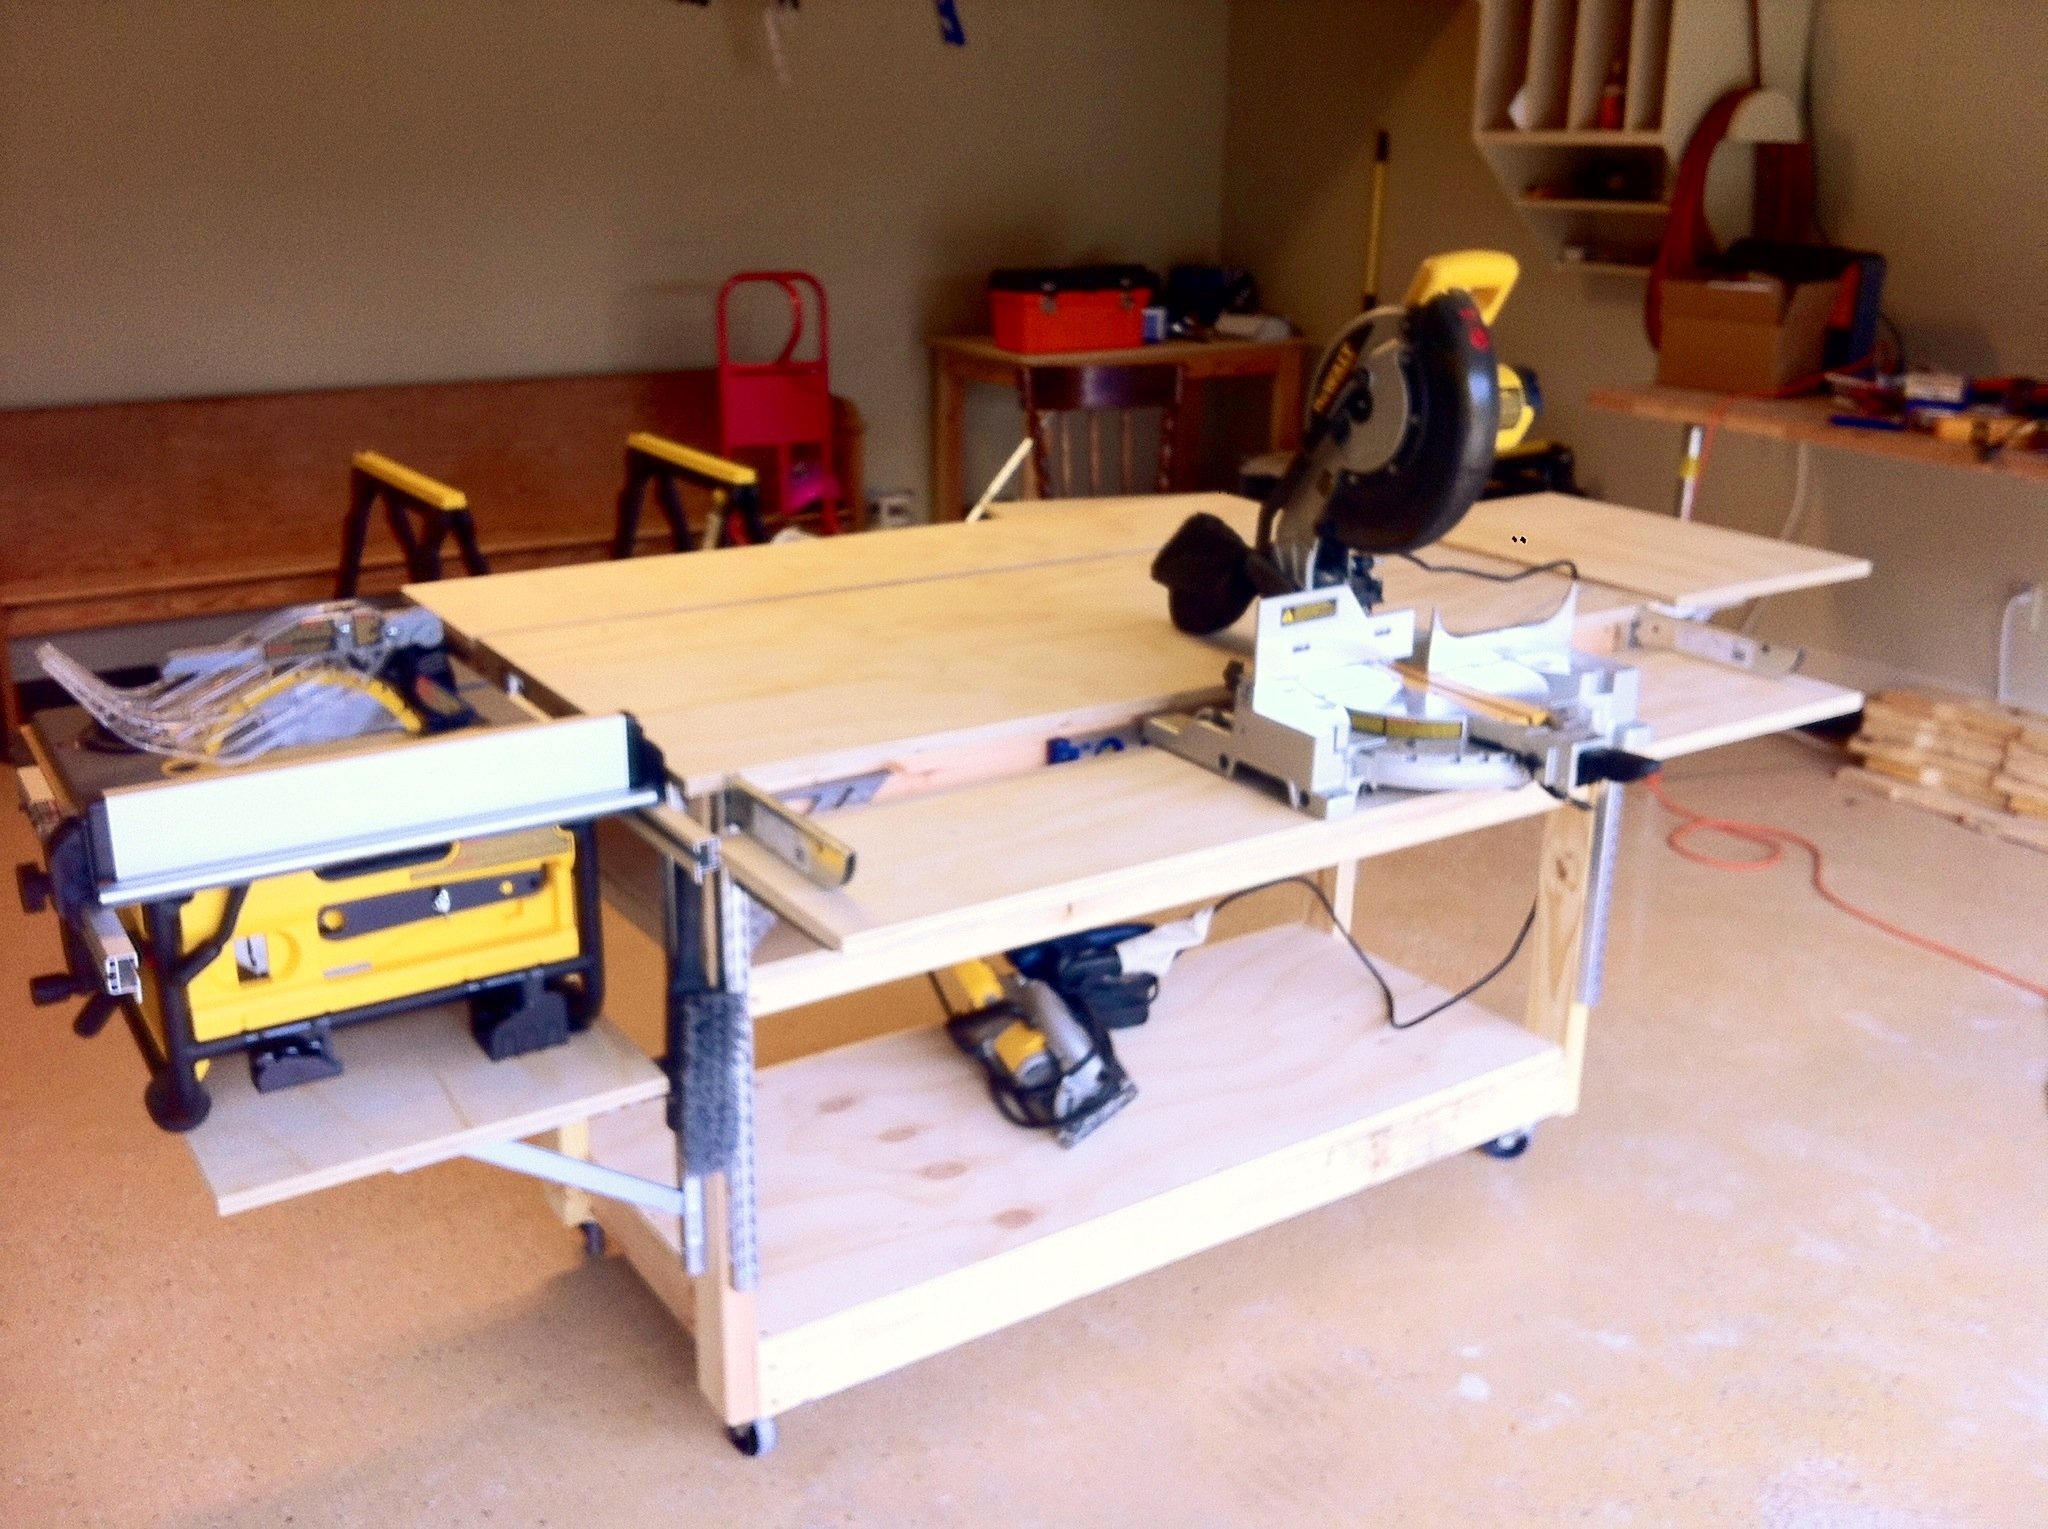
The need for a proper workbench in my garage/shop is a must, but. So is space! I already have a fold down workbench I’ve made with ¾ inch pipe & a door, but. I just need something that can handle all my tools. So, I stumbled upon these plans from the Family Handyman & couldn’t find a reason why this wouldn’t work in my shop. It has room for storage, can easily accommodate my tools & most importantly fold up to store. Easy to build too! Make sure you read all the plans first as some of the materials could be pricey, but well worth it. Technically it’s taken 2 months to build this bench, as I operate on a firefighter/teacher’s budget & during the holiday season no doubt. I ordered all the shelf standards & brackets through Amazon, $210.00 for those alone, but they hold so much weight to support your tools I figure it’s worth it. The rest materials (wood, screws) were purchased at Home Depot for around $150.00. The plans called for ¾ inch ply & it was $45.00 per sheet. However they did have a smaller thickness for $22.00 per sheet & was only a 1/32 inch thinner. I plan on topping all my surfaces with some ¼ inch tempered hardboard later on so I knew it would work. That also left me adjusting my screw size to mount my brackets. Due to the reduction in thickness of the plywood all my #8-1 inch screws needed to be adjusted to ¾ inch so to not screw through the ply. I also hit the molding isle to nab some pieces to use as furring strips to use under the shelves before attaching the brackets. This way I can sand each strip to match before mounting to make sure it lined up flat with the center top. One more thing; where it says “drill 1/8 inch hole in brackets make sure you use 1/8 inch pop rivets. I barrowed a pop rivet gun & was handed some rivets as well. Popped two & they had to be trashed because the rivet size turned out to be 5/32. So I stepped up in drill bit size & it all worked out. As I said, I’ll be topping it with some ¼ inch hardboard. I also plan to run it’s own electrical with an outlet on each post. I hope you all enjoy & this can help!
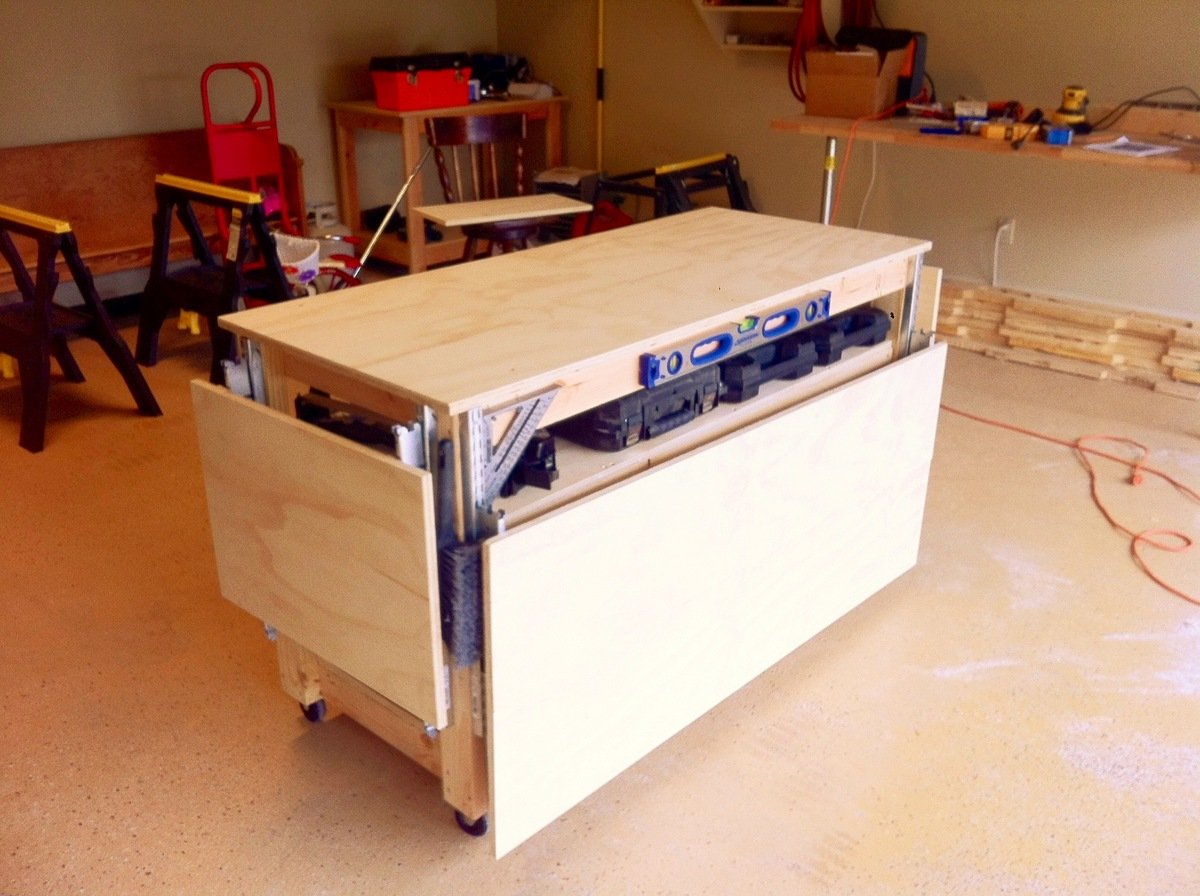


Estimated Cost
$350.00
Estimated Time Investment
Weekend Project (10-20 Hours)
Recommended Skill Level
Beginner
Comments
Thu, 11/29/2012 - 07:03
That is awesome!
This is by far the best workbench I have ever seen!!! Thanks for sharing. And excellent choice of table saw and miter saw.
In reply to That is awesome! by Rusty Cottage
Thu, 11/29/2012 - 14:59
Small rip saw
If I had it to do over I'd had gotten the contractor grade portable saw from Dewalt. The smaller version I have is the same 10" saw, but. It's maximum rip capasity is only 16. The other will at least rip a sheet of ply in 1/2.
Thanks for the kind words on the bench! I hope everyone that may find this valuable will. The plans came out of a 2005 issue & were hard to find on the internet.
Thu, 07/04/2013 - 18:28
Need Plans
I love this work bench and would love to build it but i cant find them. Could you post them or email them to me please. uniquetrio2000 [at] gmail [dot] com
Thu, 10/23/2014 - 09:04
Work Bench Plans
After some searching, found the plans at http://us.readersdigest.com/images/offer/fh/project_plans/pdf/FH05DJA_W…. Hope that helps. This is on my list of things to make very soon.
Wed, 10/22/2014 - 13:31
Standards & Brackets for Bench
I bought all the standards and brackets at Menards for $87.58 and this price included tax and shipping.
Mon, 12/10/2018 - 16:55
Do it all workbench plans
Thanks for sharing! Good job! Any chance you'd share palns? No luck on inet or with provided link. Thanks!
Wed, 08/07/2019 - 12:48
perfect workbench
This is the perfect workbench that I’d like to build. Could I get the plans for it?
Thu, 03/12/2020 - 12:46
Were you able to locate the…
Were you able to locate the plans?
The link in this thread doesn’t seem to be active.
Sun, 07/12/2020 - 17:59
I found the PDF download for…
I found the PDF download for these plans, here is the link:
https://docplayer.net/28130746-Do-it-all-mobile-workbench.html
The only place where I could find them, FH doesn't have them online any more.

Tue, 12/08/2020 - 17:57
Future Instructable?
Great build. I would love to see an instructable on this. :) Thank you for sharing..
Plant Stand
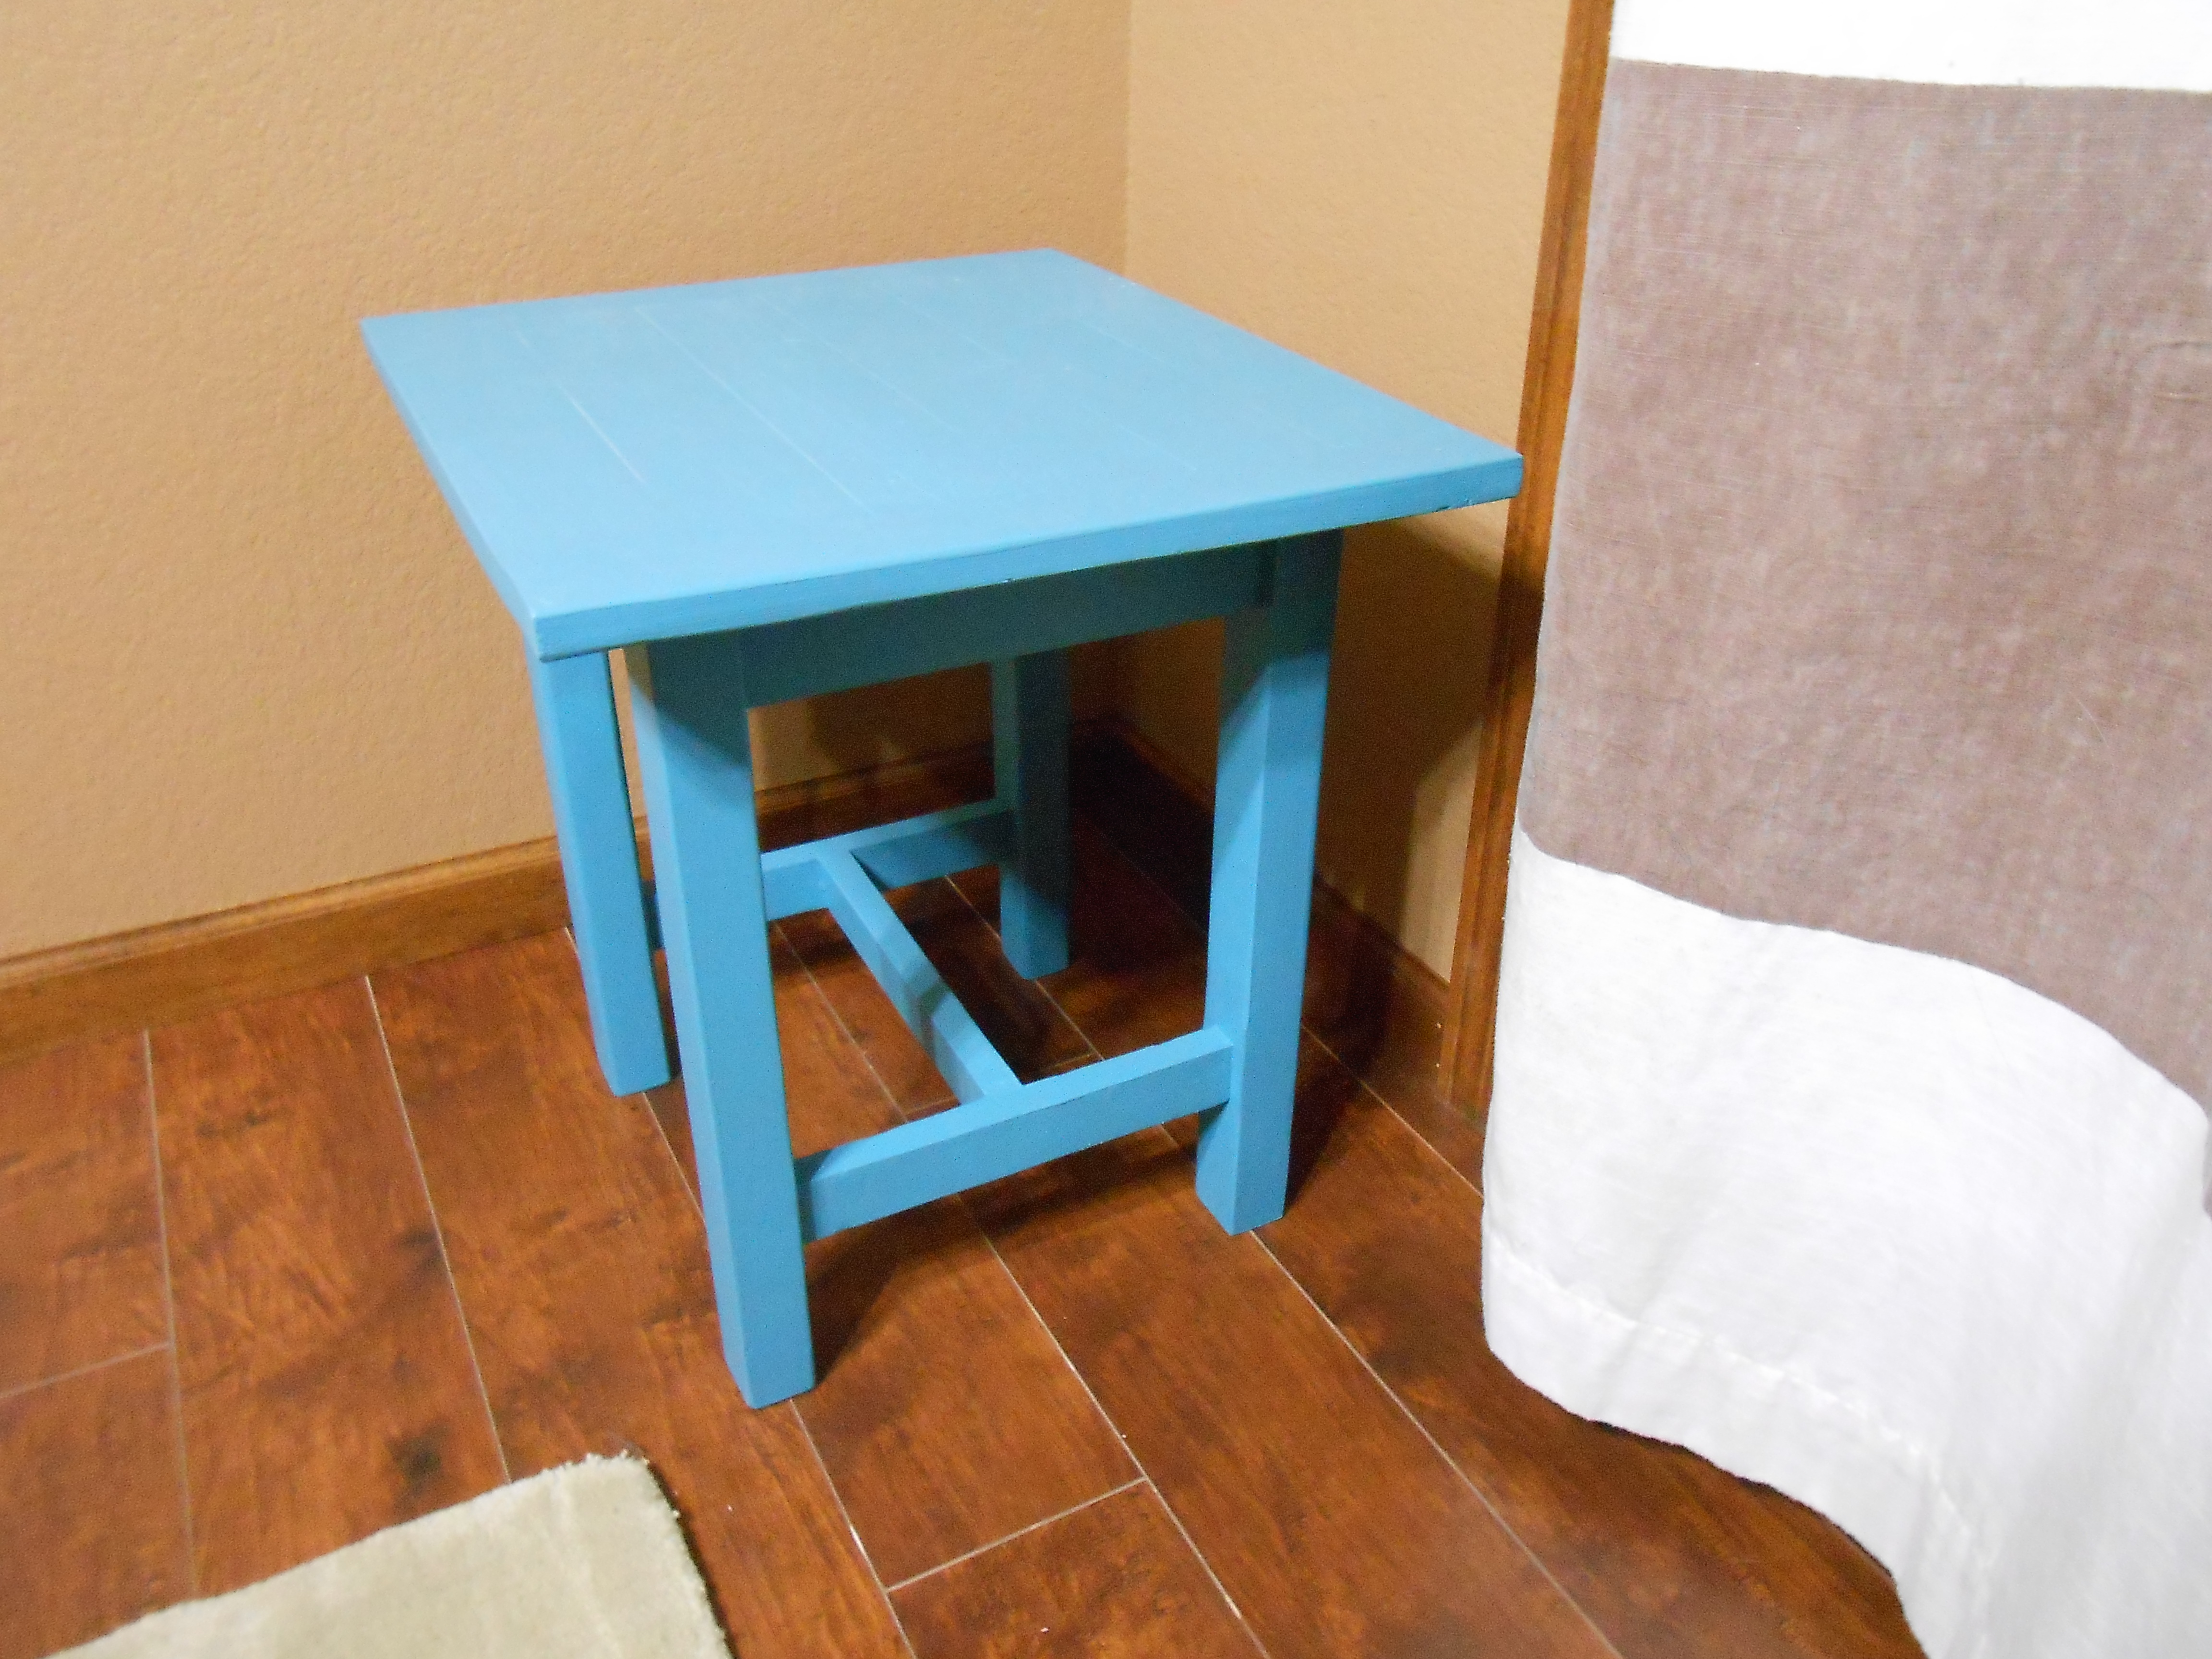
I made this plant stand using the adirondack stool plans. I did not leave spaces between the boards on the top, and I added breadboard ends.
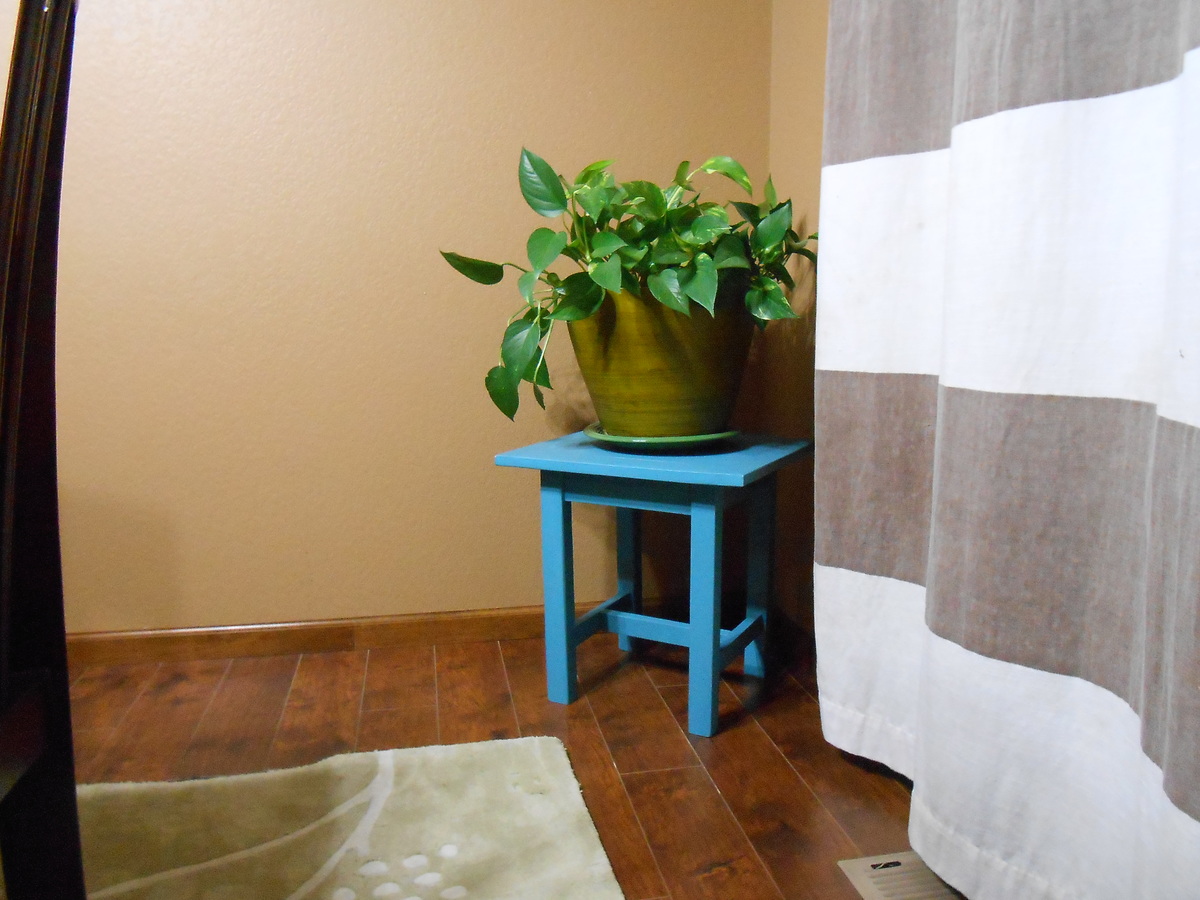
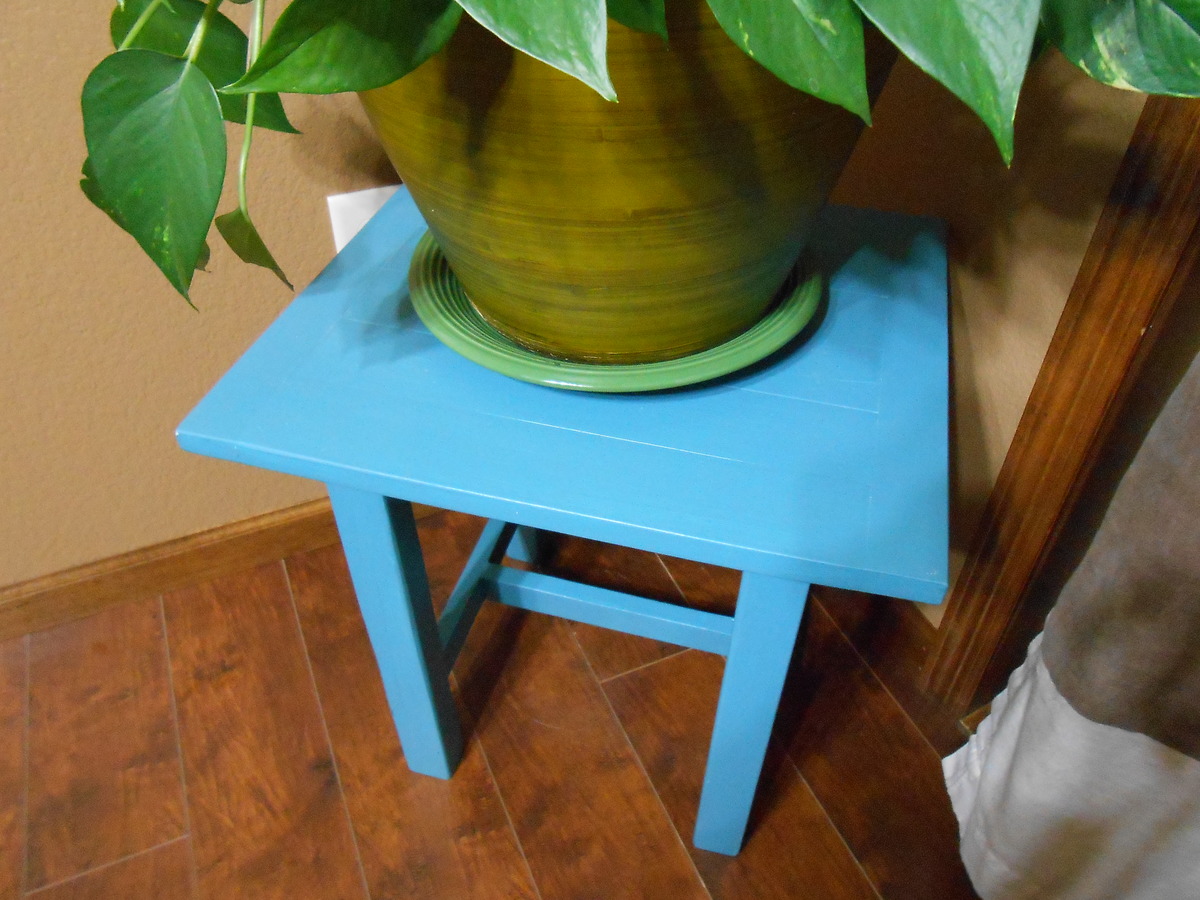
Built from Plan(s)
Estimated Time Investment
Afternoon Project (3-6 Hours)
Finish Used
Paint
Recommended Skill Level
Beginner
My very first wood project- 6 foot farmhouse desk with modifications
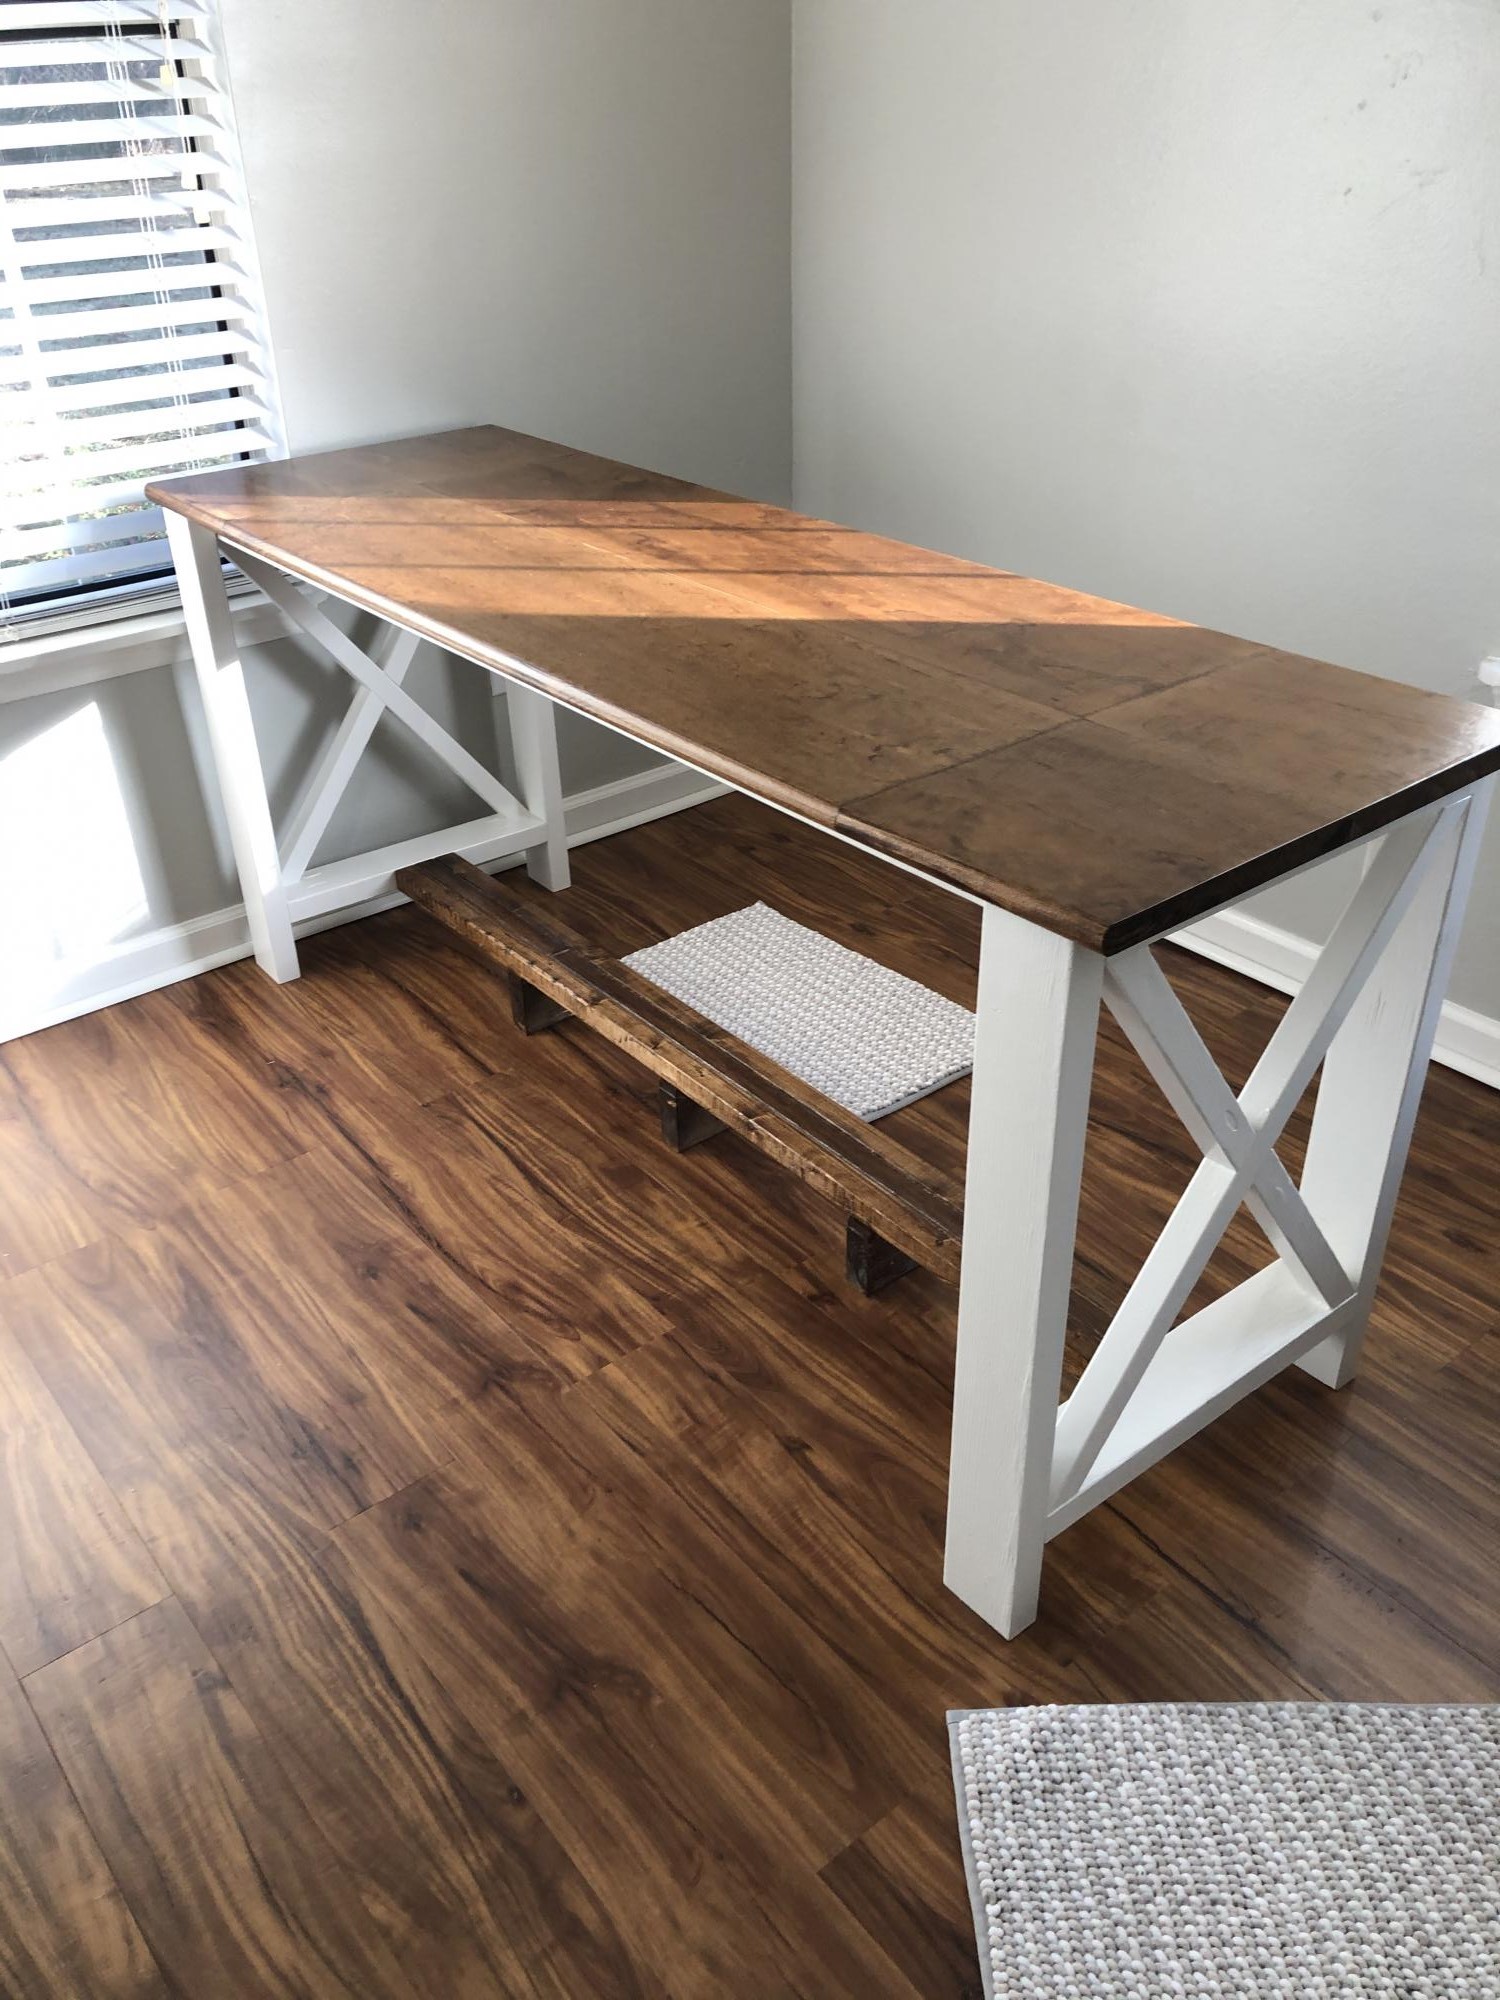
I needed a 6 foot desk, but could not find one online that I liked that was within my budget.. I decided to make this desk and modified it to a 6 foot with a foot rest in the middle so I can have both sides functional and have a spot to put my feet up... I also added 8 shaped fasteners to attach the top to the base.. I was so inexperienced when I started this project that I had to watch videos on how to use a drill and the pocket hole jig...So if I can do this, anyone can, Thanks Ana for inspiring me!! I am on fire to do so many more... !! I need so much more tools now!!!
Estimated Time Investment
Week Long Project (20 Hours or More)
Finish Used
Used American stain by MinWax
Recommended Skill Level
Starter Project
Comments
Mon, 01/04/2021 - 09:54
WOW! Amazing first project!
I am so happy to see your first project, I'm sure there will be more to come! Thanks for sharing:)
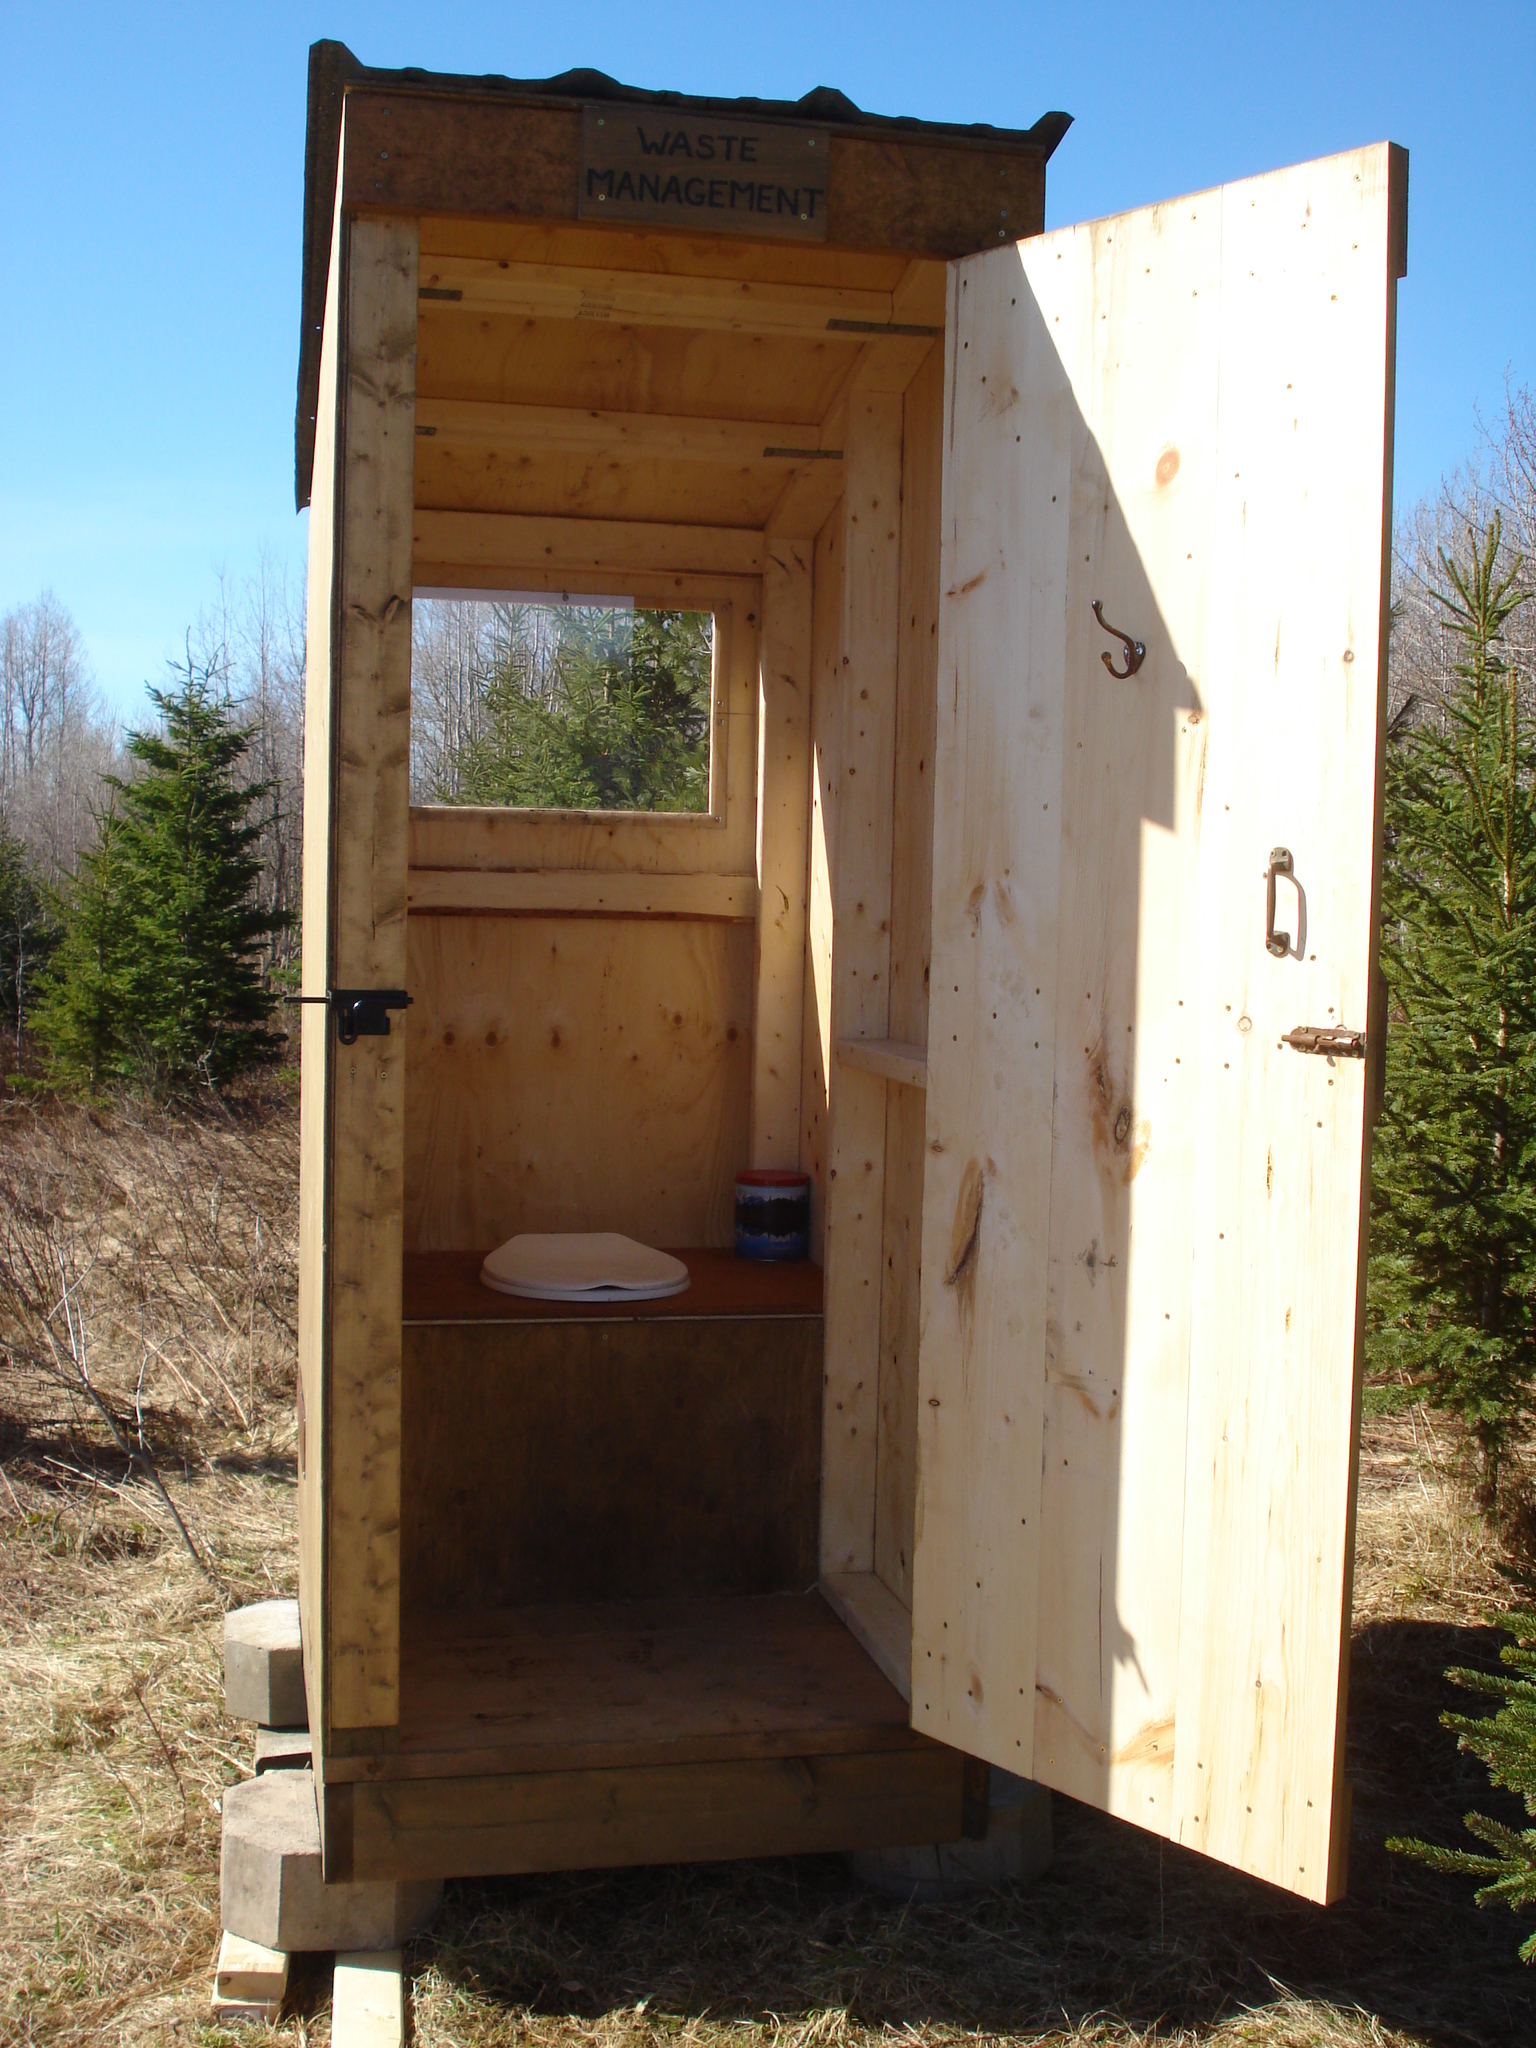
Simple Outhouse
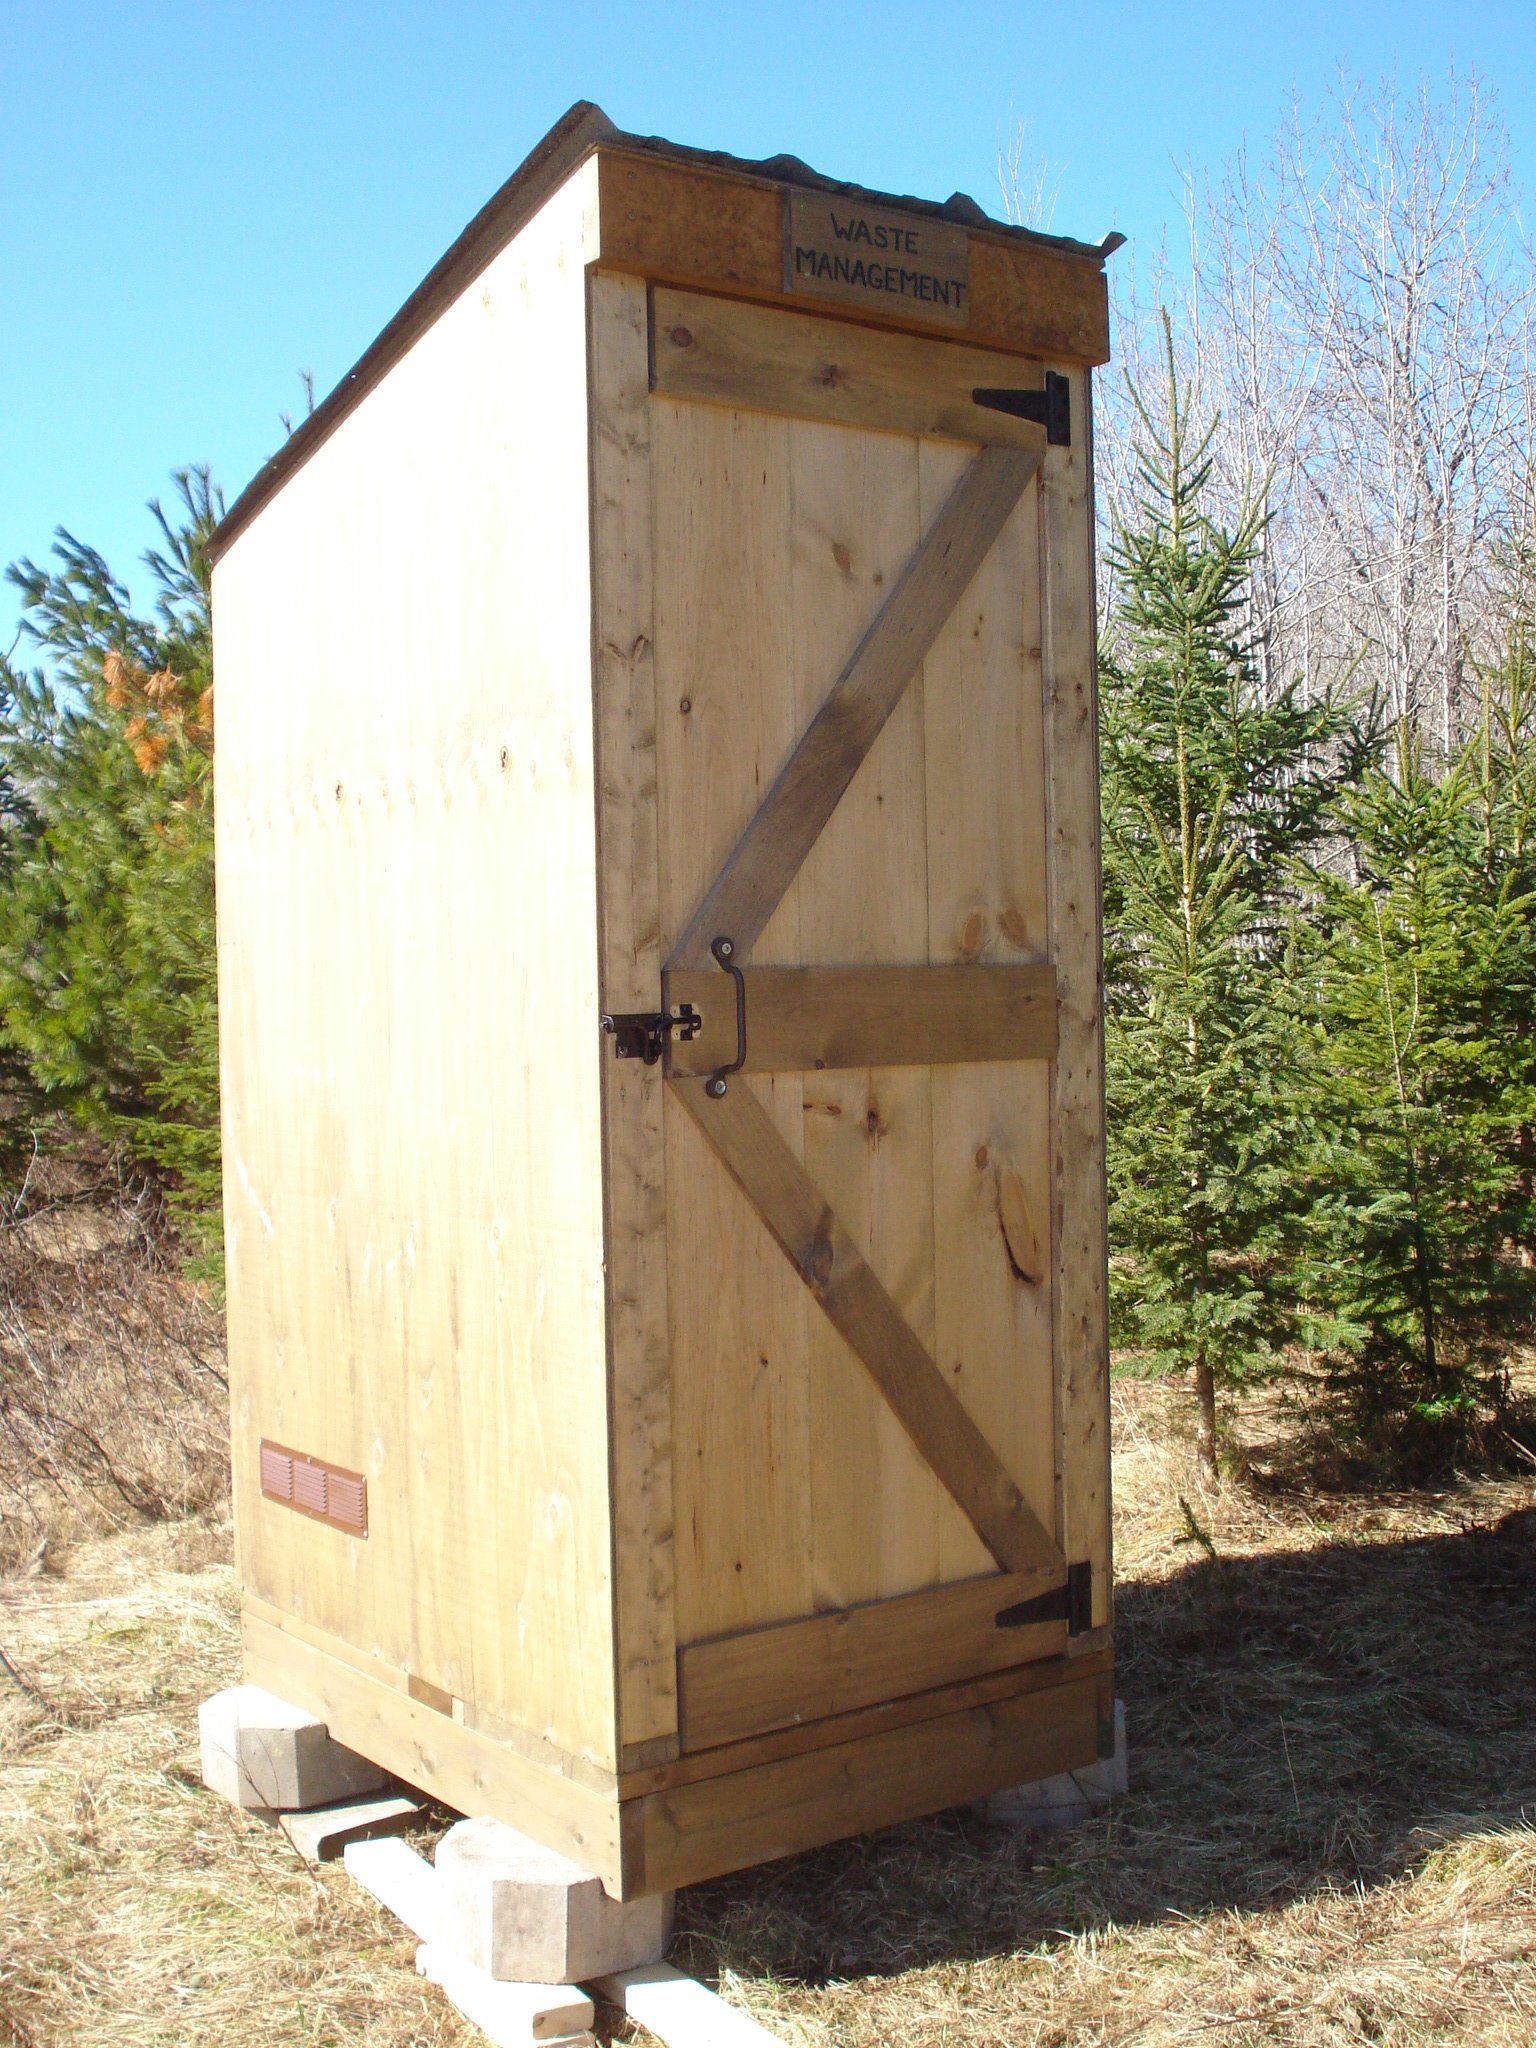
I had my nephew build this outhouse for our new 70 acre lot - no neighbours in sight so I had him put in an acrylic window (with a view). I left off the deck and had him put the boards tight together so 'critters' didn't get in as easily. I made a sign for above the door - 'Waste Management' for a touch of humour. The plans were easy to follow and I love it. Thanks, Ana.
Built from Plan(s)
Estimated Cost
Approx. $300 for material and $250 for my nephew's labour.
Estimated Time Investment
Weekend Project (10-20 Hours)
Finish Used
sealer
Recommended Skill Level
Beginner
Comments
Thu, 04/20/2017 - 16:45
So excited to see this one
So excited to see this one built! Your nephew did a great job, love the window in the back!
Coffee table bench
This design was straight forward and easy to modify - made the bench deeper and shorter, and added a shelf.
Built from Plan(s)
Estimated Cost
90 CAD
Estimated Time Investment
Weekend Project (10-20 Hours)
Recommended Skill Level
Beginner
Farmhouse King Bed
We finally built the #1 Project on my to do list. Took about 3 Days total with finishing and all. Love it so much, defintately my fave project to date! Have to do nightstands next!
Built from Plan(s)
Estimated Time Investment
Weekend Project (10-20 Hours)
Finish Used
One Coat Minwax weathered oak ( Canadians can find it at Rona) One coat Special Walnut
Recommended Skill Level
Intermediate
Comments
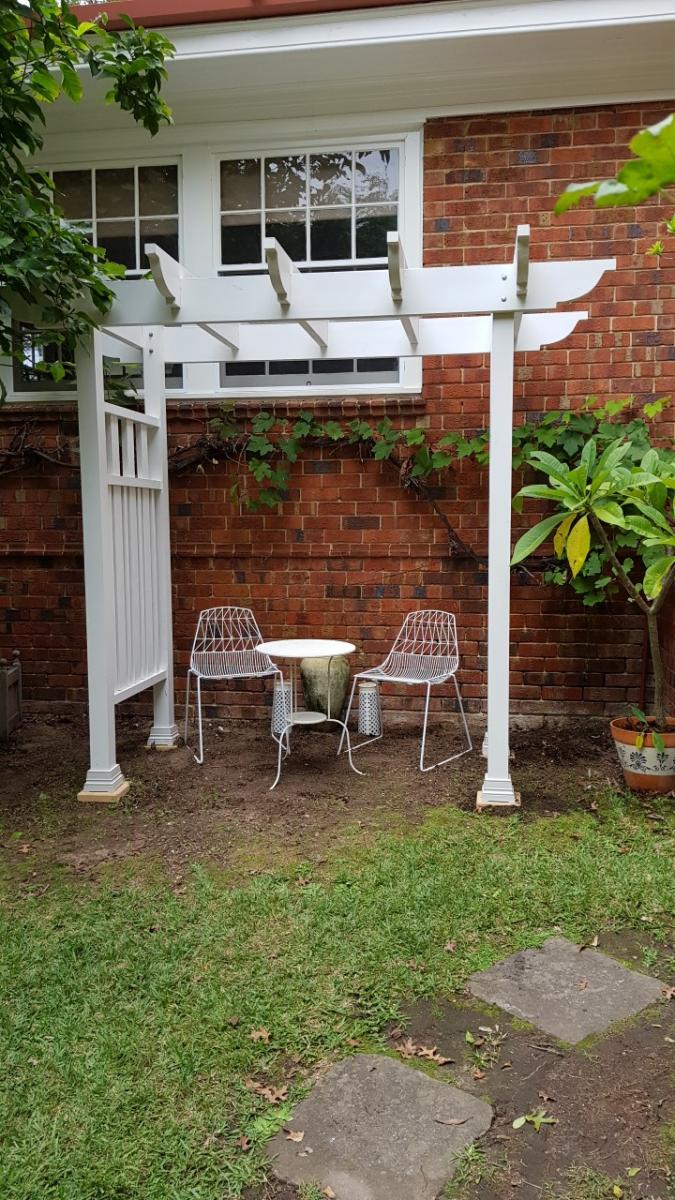
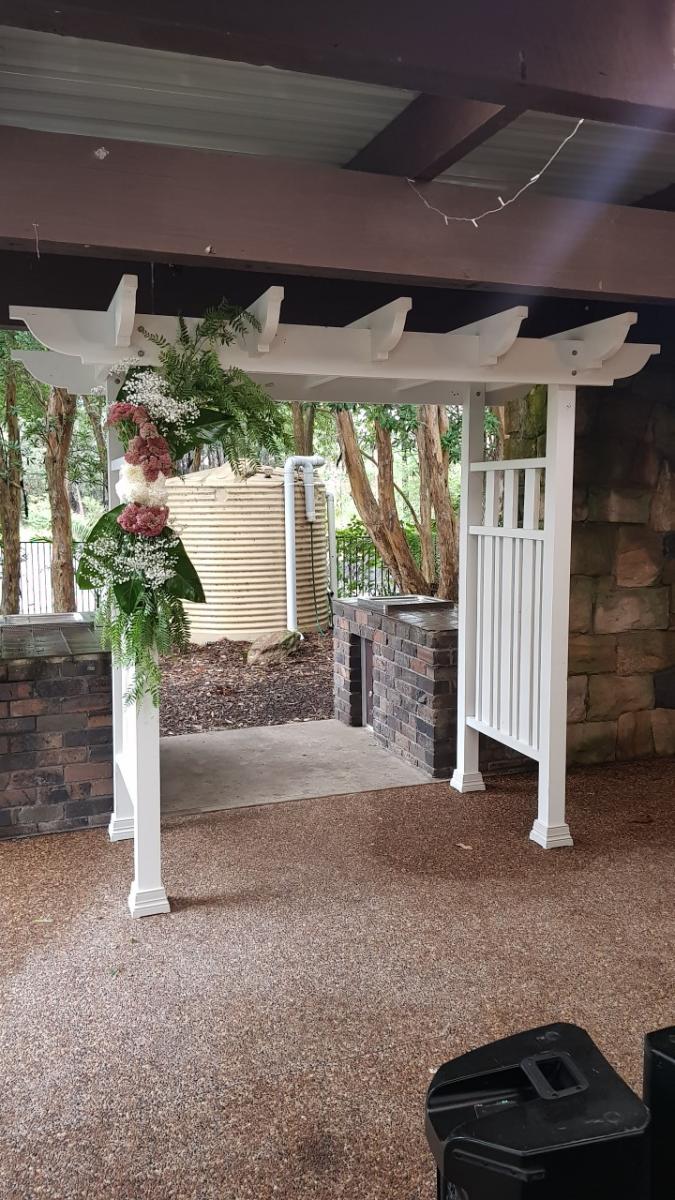
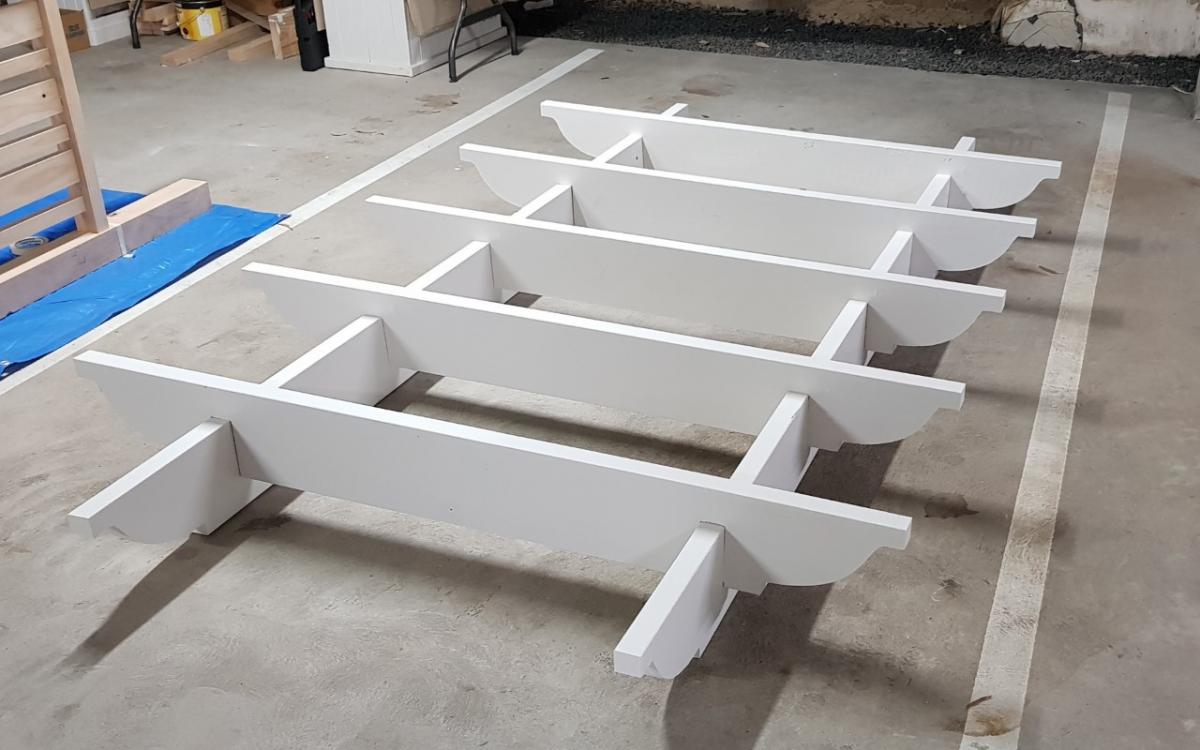
Wedding Arbour
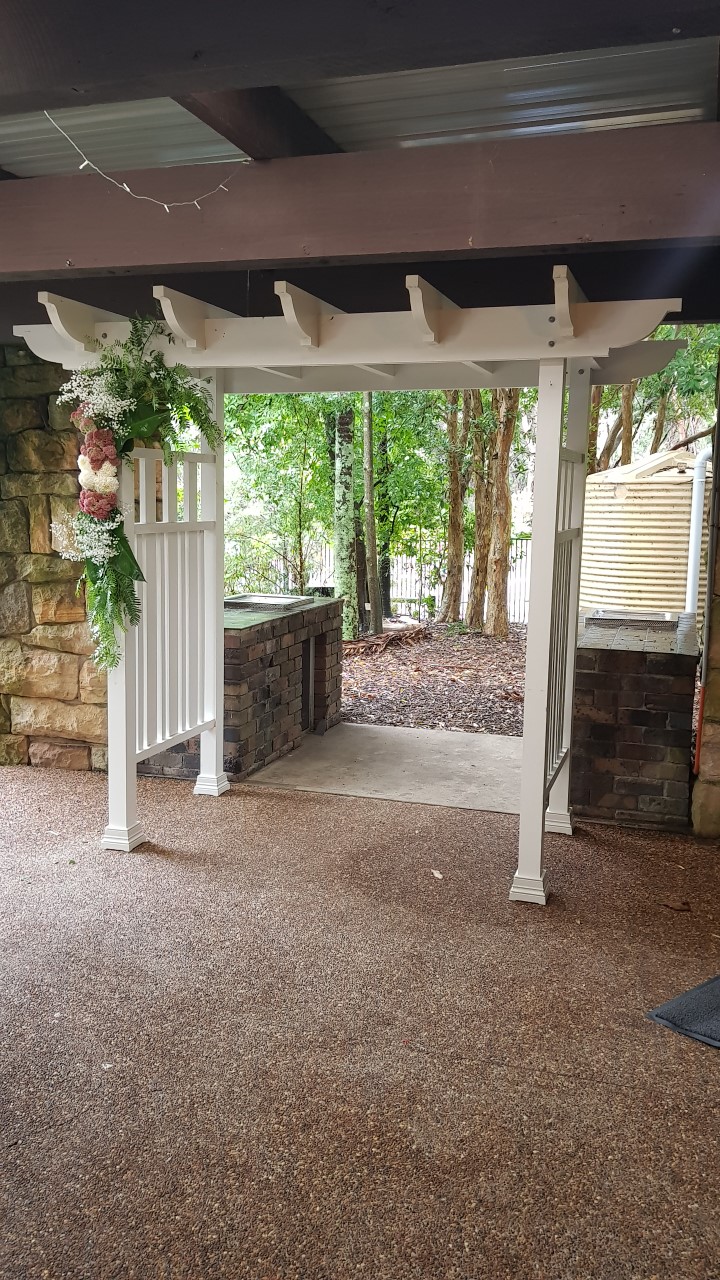
Hi, I built this wedding Arbour for my daughters wedding a while ago and unfortunately, I have no plans as I built from my head. It now sits in pride of place within thier garden as arch for thier garden.
I built this with a drop saw, hand saw, router, drill and hammer only.
I follow Ana's plans every release and save her plans for when I retire in two years to build for our house as well as try to run a small business from my shed.
Thank you Ana for you continued plans and wonderful advice.

Built from Plan(s)
Comments
Tue, 10/05/2021 - 10:40
Loving tribute!
WOW, such a sweet gift and reminder of their special day! Thanks for sharing:)
Easy DIY Workbench

Ana I’m new to wood working and I really love your plans. They are so much easier to follow than a lot of other plans that I’ve seen. It makes me feel like I can build almost anything. Thank you.
Brandy
Built from Plan(s)
Comments
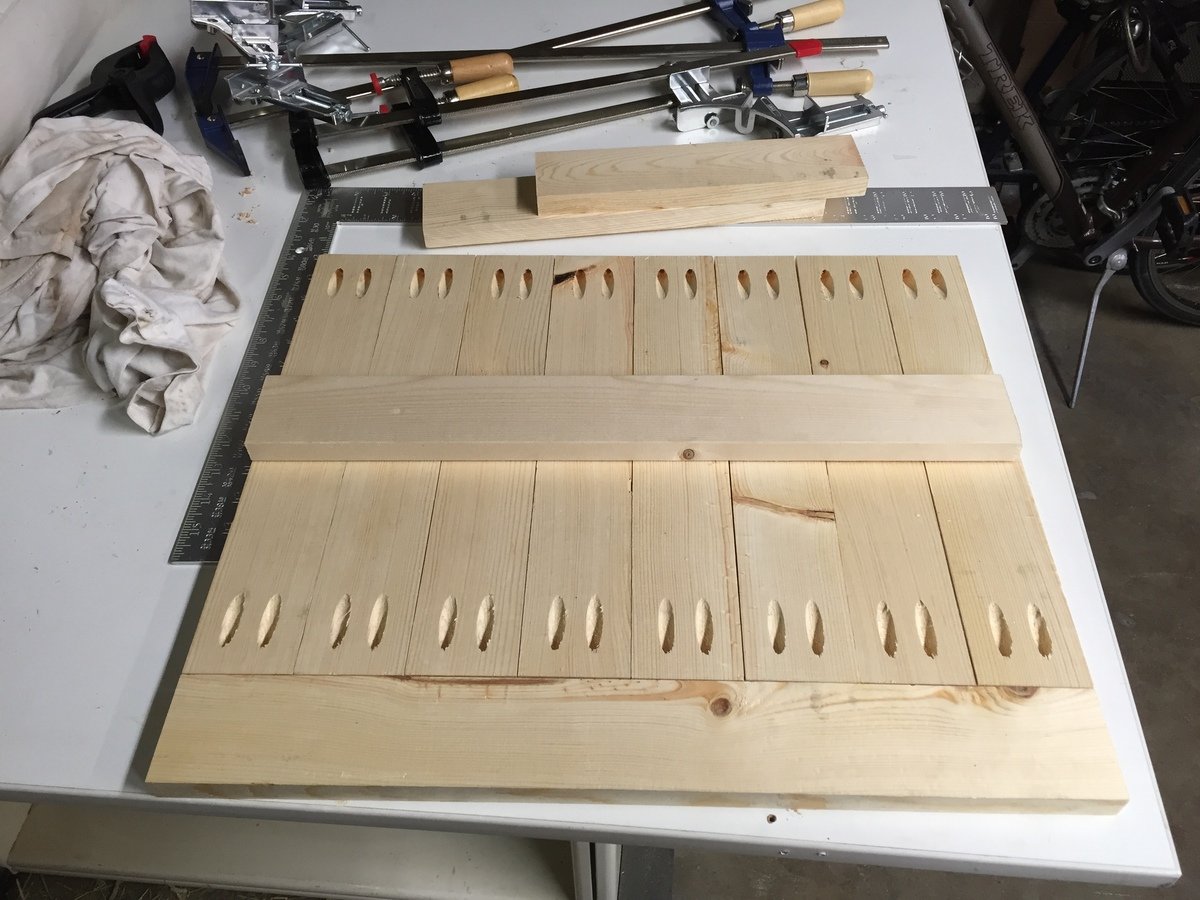
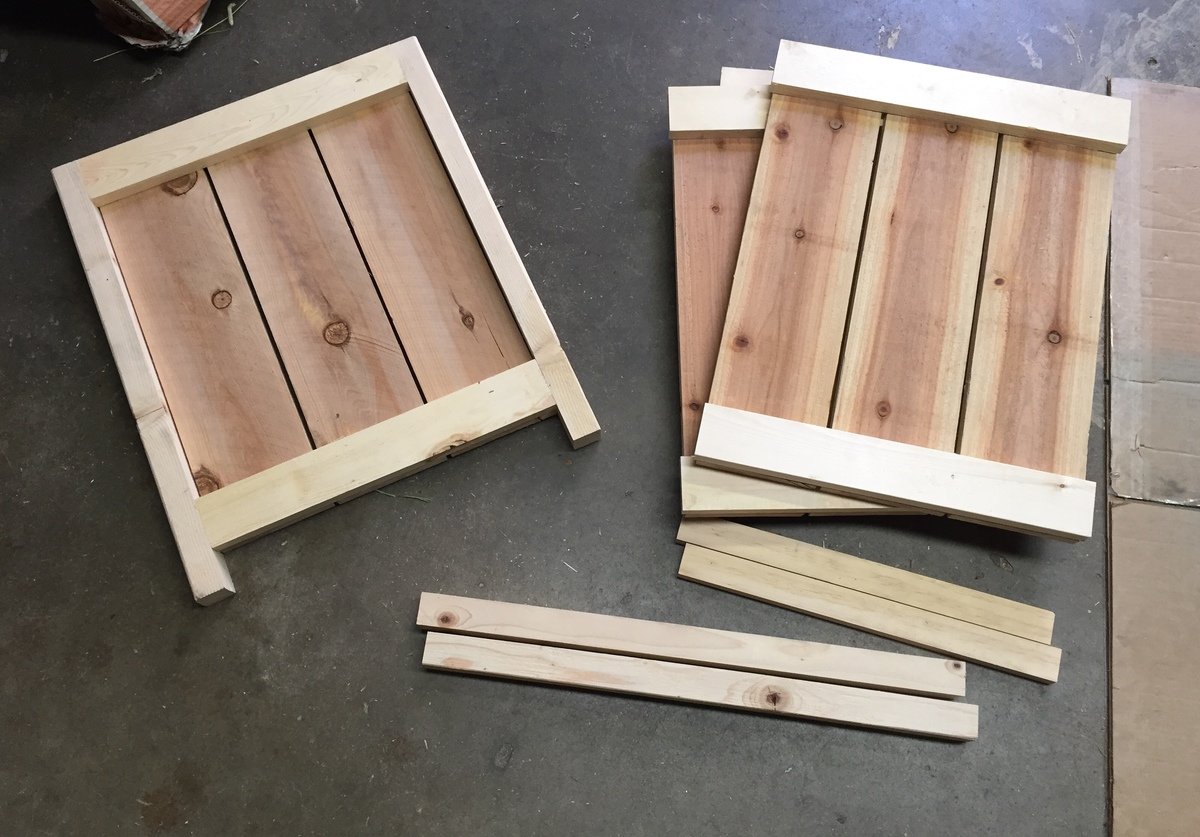
Outdoor storage box
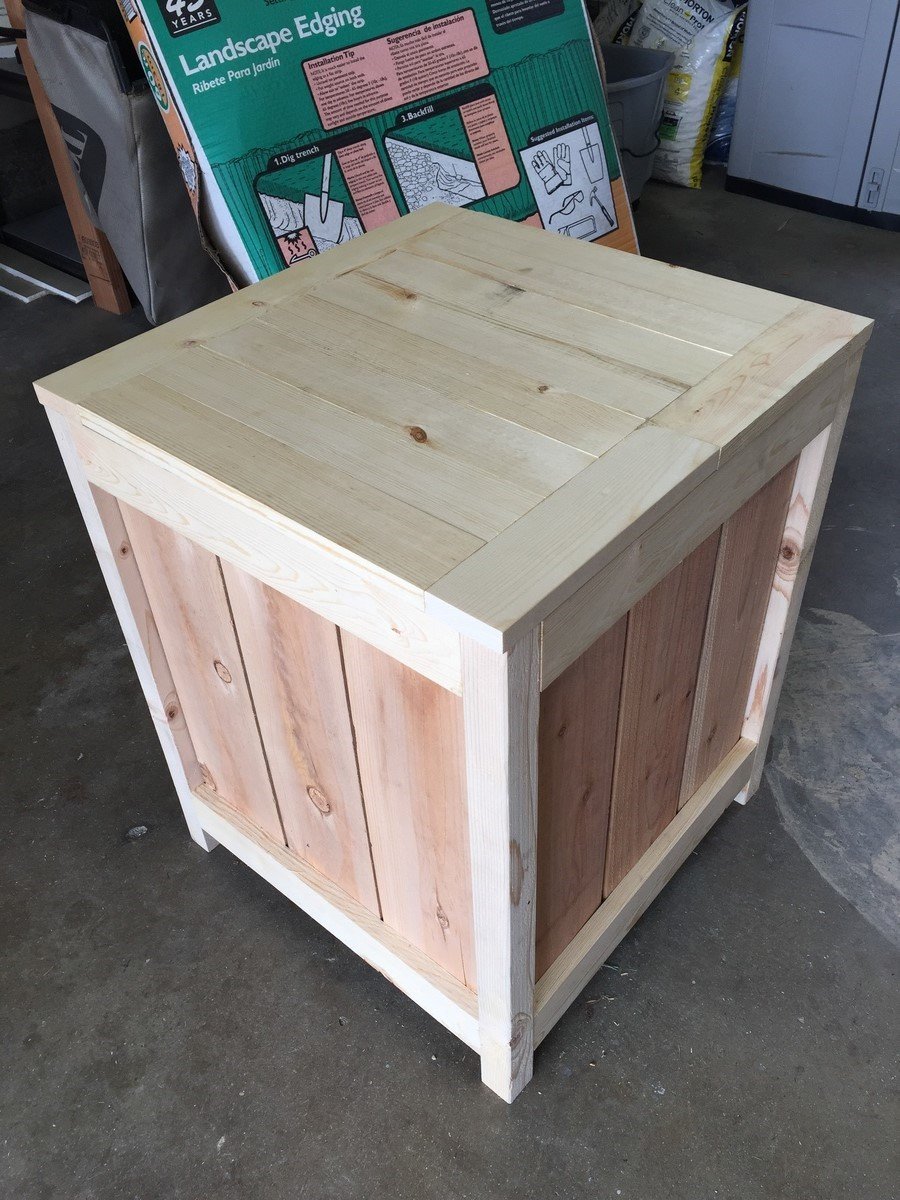
I modified the plans slightly to go taller so it could fit a standard propane tank. I also added a hinged lid based on an image I found on Pinterest that did something very similar. I still need to sand and stain it next weekend.
Like others, I had a little trouble keeping the fence planks from splitting when screwing them to the 2x2 legs, since there was about an 1/8” gap between. I tried to find some scrap to fill in the gap and didn’t overtighten the screws. The lid was made entirely of 1x3”.
Built from Plan(s)
Estimated Cost
$35
Estimated Time Investment
Weekend Project (10-20 Hours)
Recommended Skill Level
Intermediate