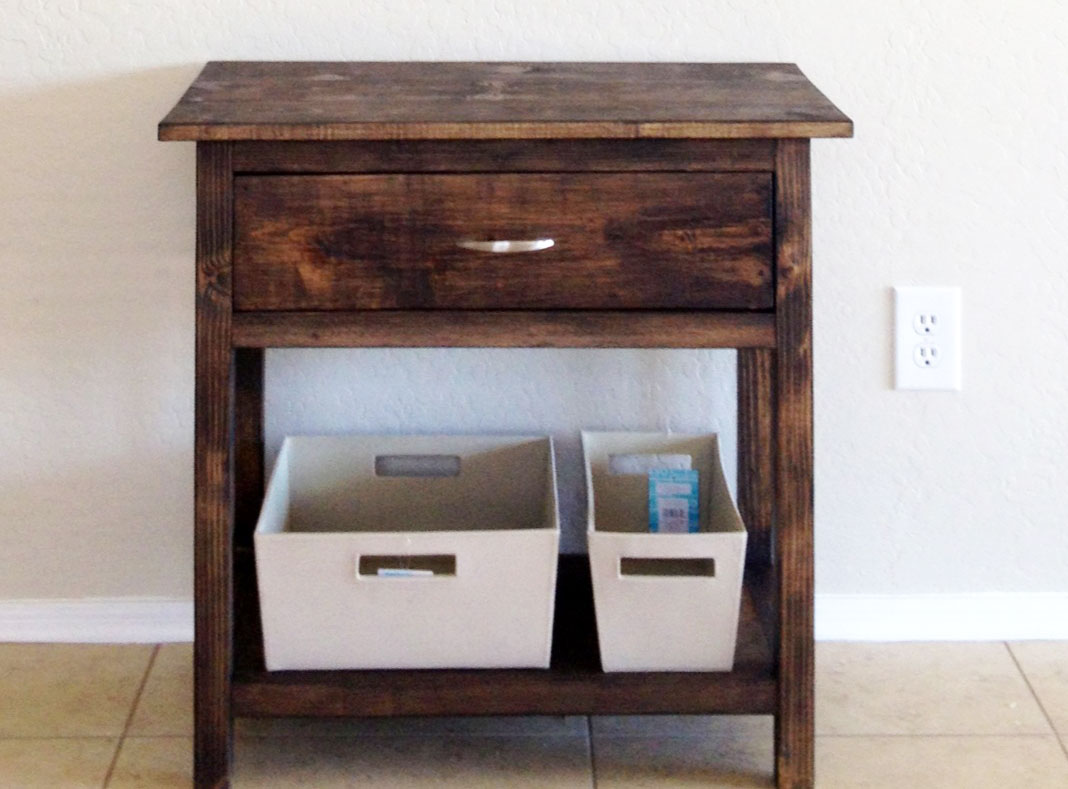
Modified Ann White Table
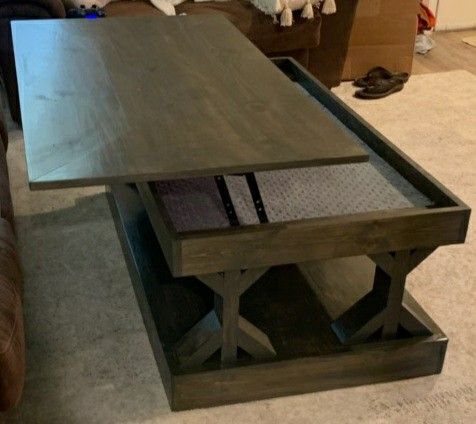
This is a modified version of your Farmhouse Coffee Table.
Built from Plan(s)
This is a modified version of your Farmhouse Coffee Table.

A frame chicken coop with a few modifications- metal roof, insulation and slightly larger second floor.
By Chrystal

I tackled the Farmhouse Table over a long weekend while my boyfriend was away - he was surprised needless to say!
I have not attempted any woodwork projects since grade 8, but this was alot of fun - I did not find it very difficult and loove using power tools :)
I made the matching bench, however I guess I did not stir the bottom of the can well enough and my bench is now red :/ soo I am going to either stain it dark or paint it white and use it as a mudroom seat!
*I also made mine shorter - 7ft long to fit in our dining room and adjusted the bench to fit.


Fri, 10/07/2011 - 17:15
Thank you so much Ana! We are in the process of renovating our house and your website has inspired me to take on so many more projects now!! :)
Wed, 11/02/2011 - 04:52
I built a similar table and I am having problems with my kids getting food in between the pieces of wood. Do you have this same problem, is anyone having this same problem? Does anyone have any suggestion as to how to fix it, how to keep food and other particles from getting trapped between the cracks? Thanks! You did a great job!!
Wed, 11/23/2011 - 15:00
I am building this table as we speak. The thought occurred to me as well concerning the cracks attracting crumbs. I believe using clamps to make the fit as tight as possible will help. Also some poly finishes may be appropriate with children which may even seal the cracks... if sanded and clamped well.
Wed, 11/23/2011 - 15:11
I did try my best to clamp the wood together as tight as possible - due to the pieces of wood not being completely straight, they are there.
I haven't had this problem yet. I do use place mats when eating at the table, that generally stops any crumbs etc.That's probably the easiest way to avoid it :)
Thank you for your comments!
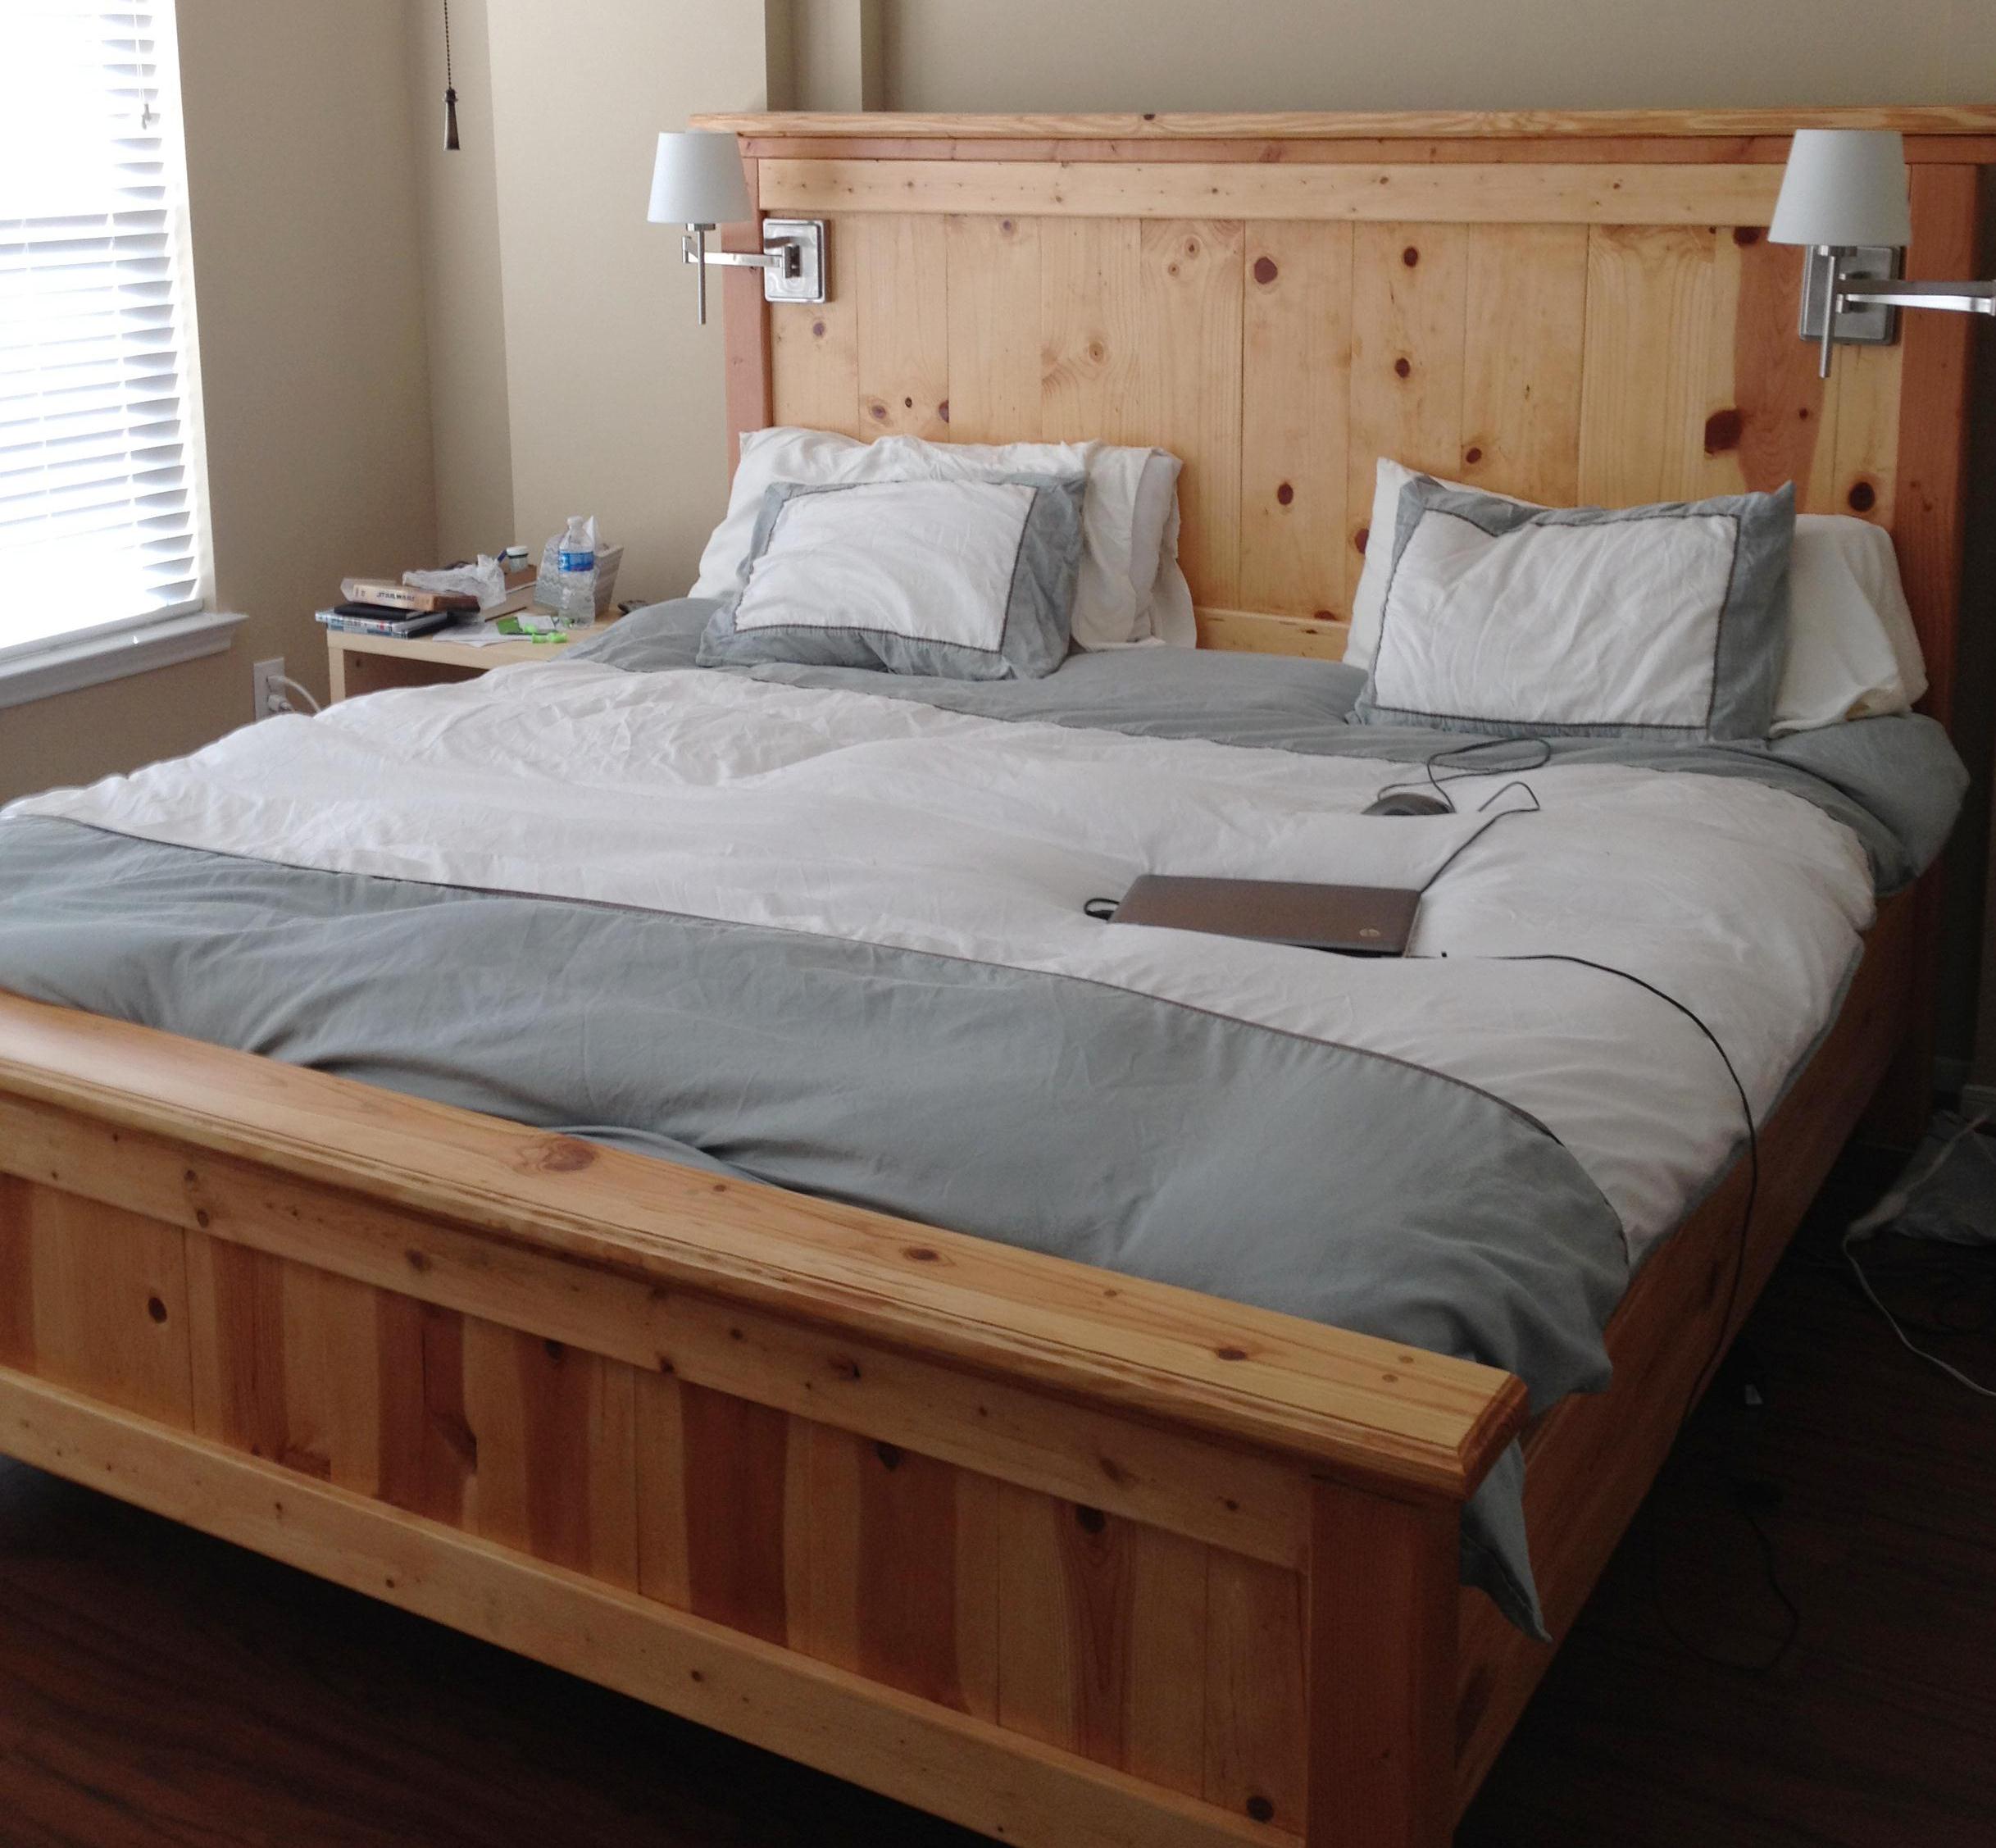
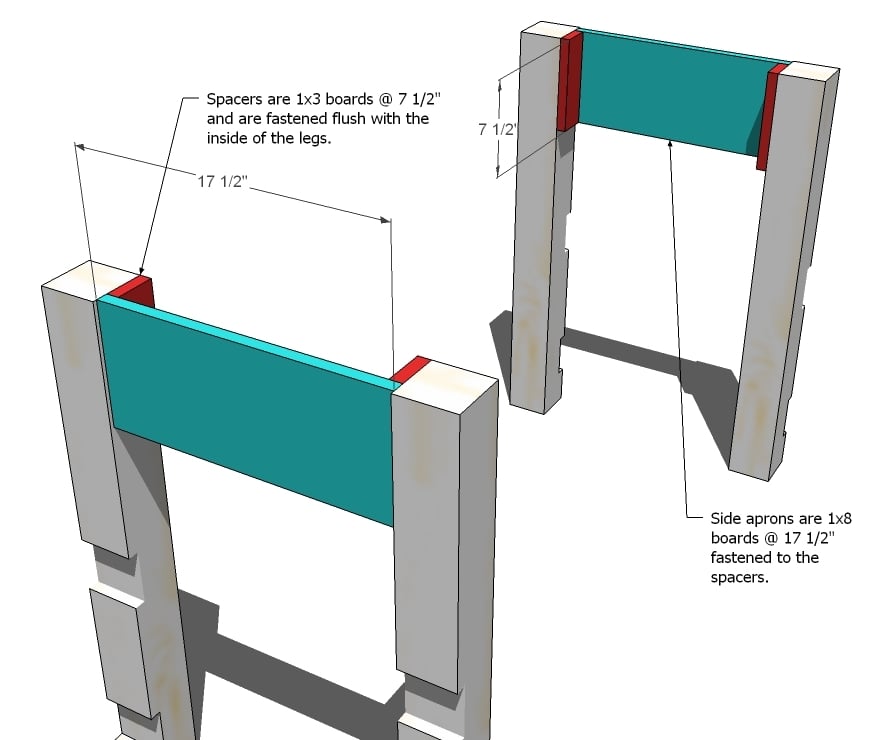
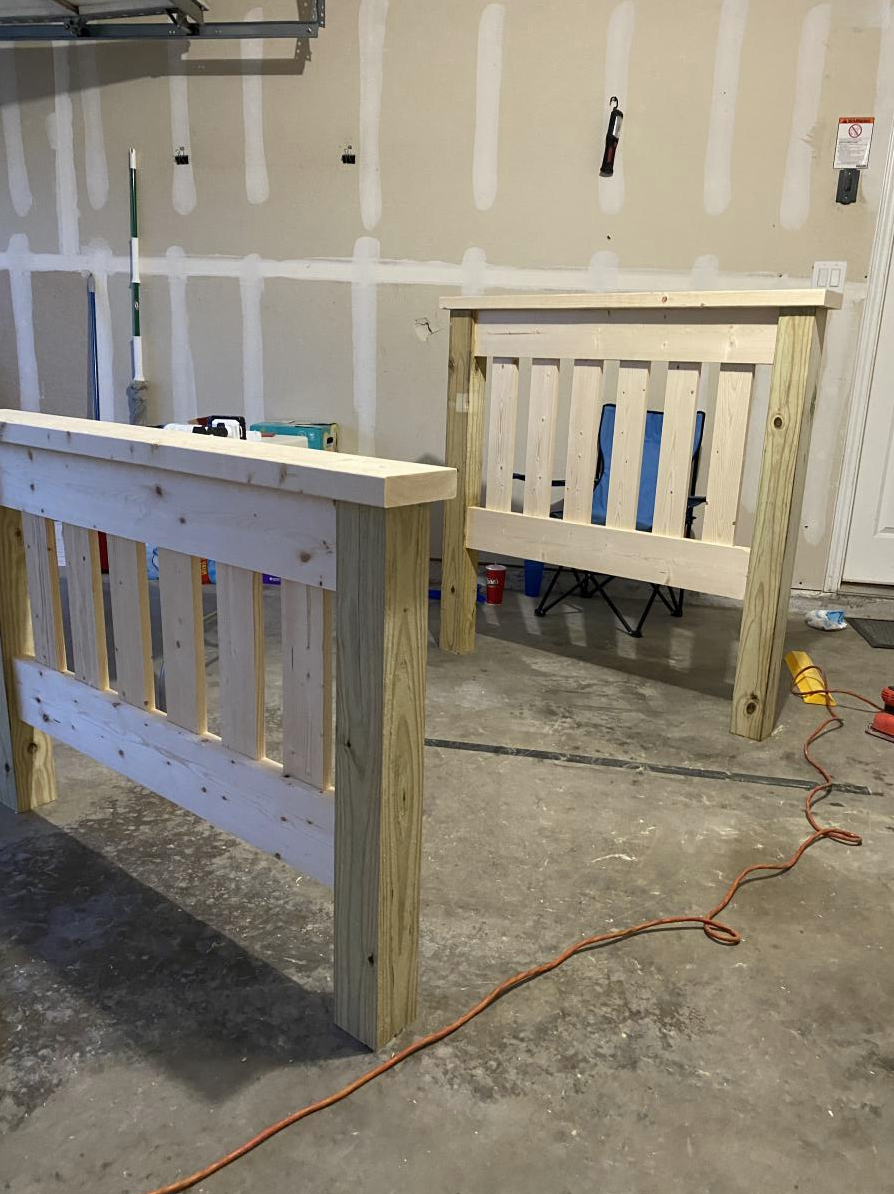
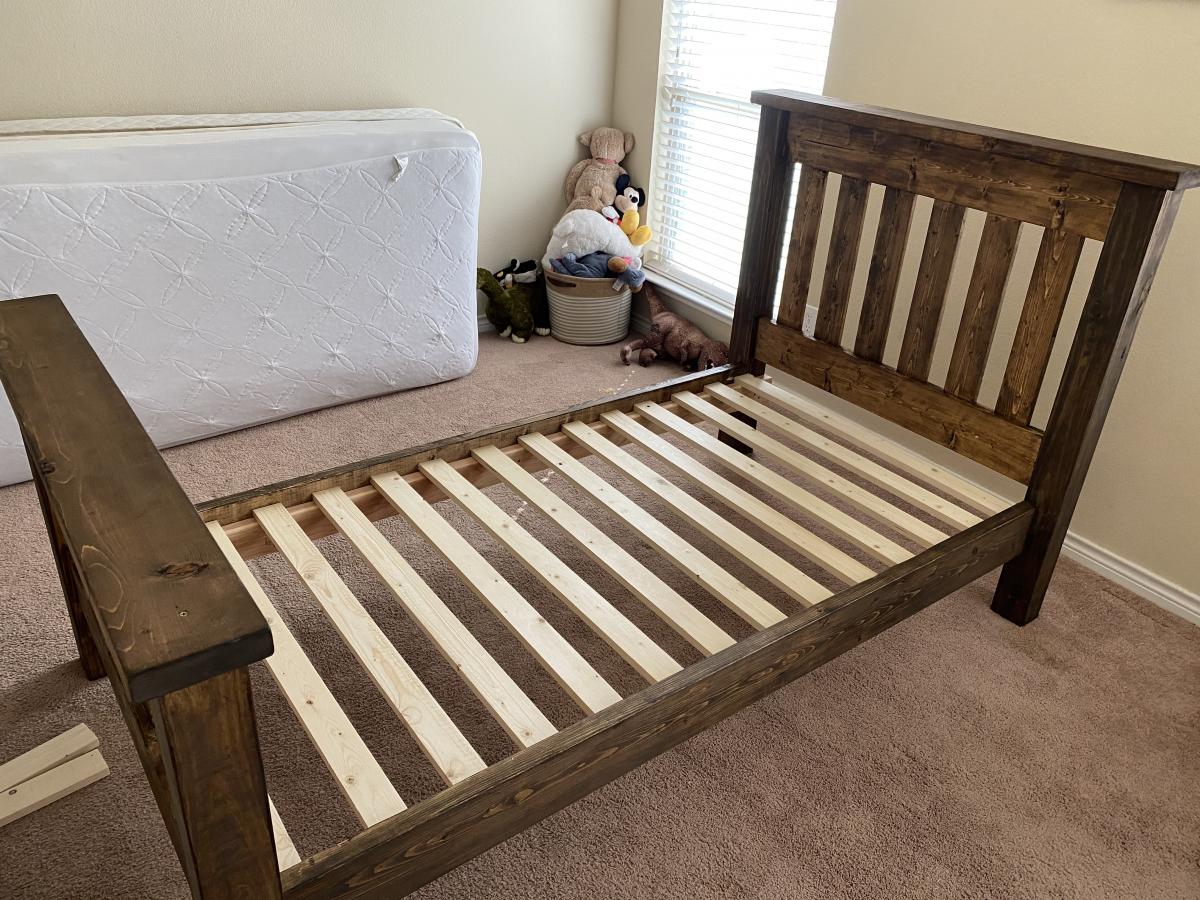
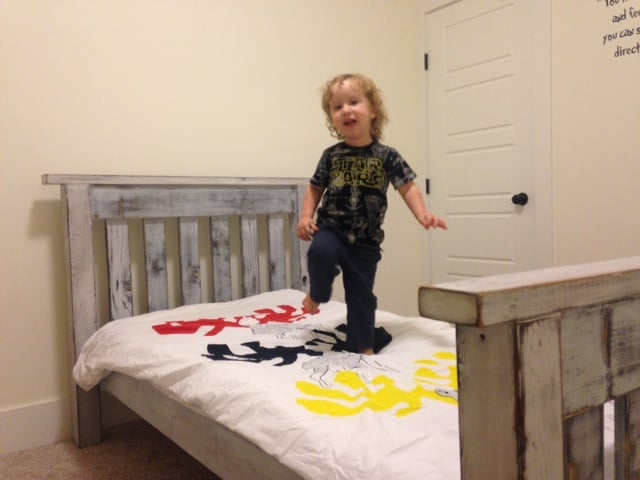
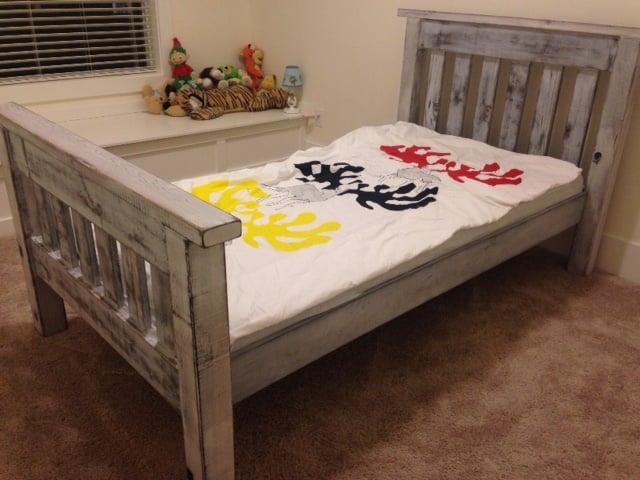
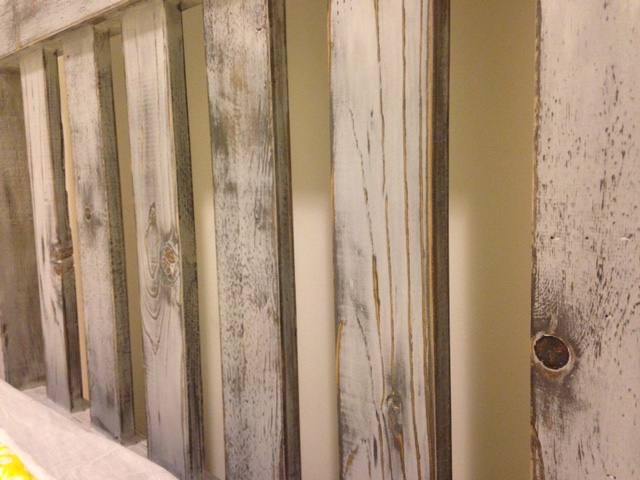
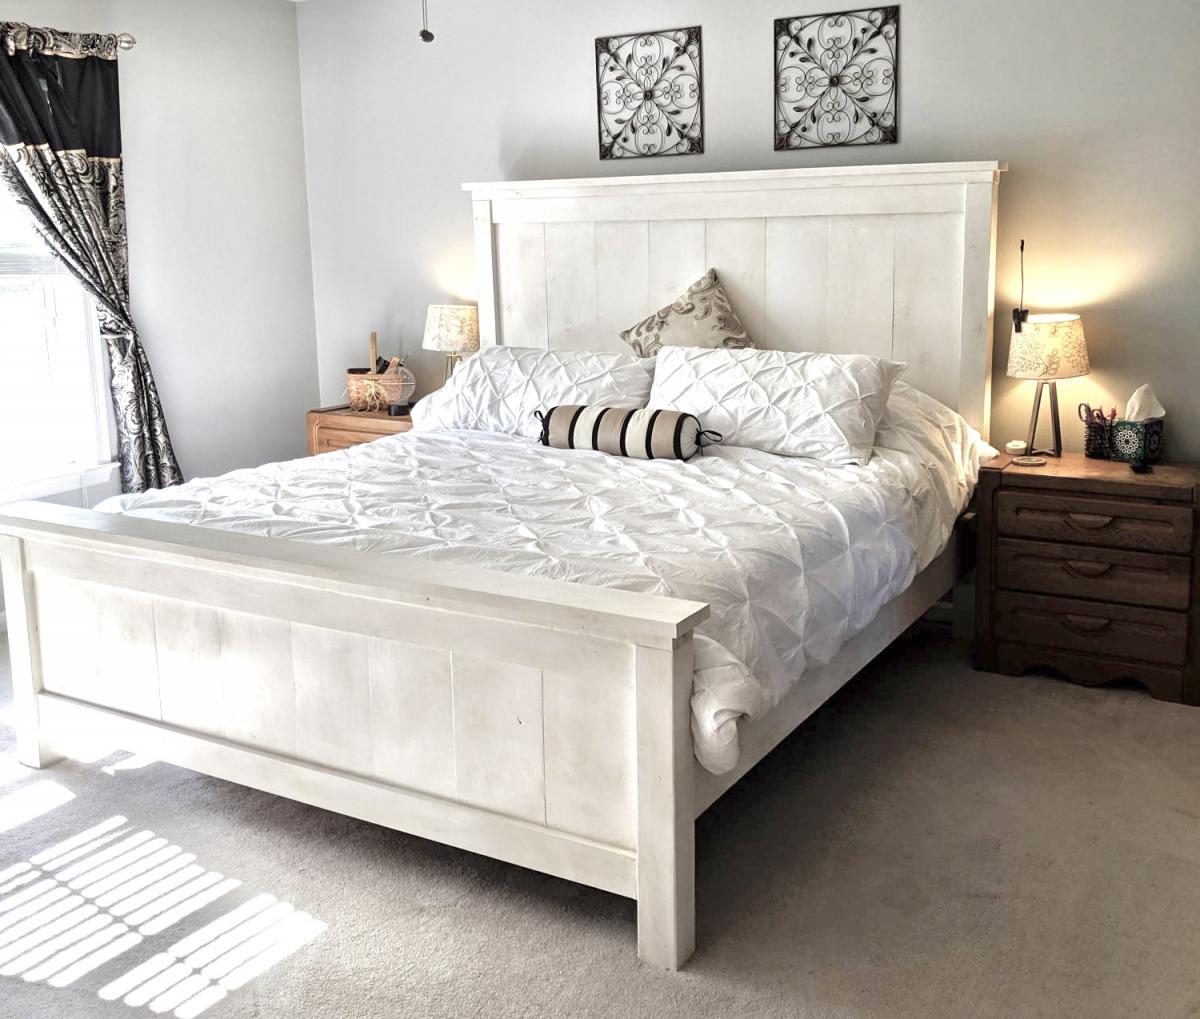
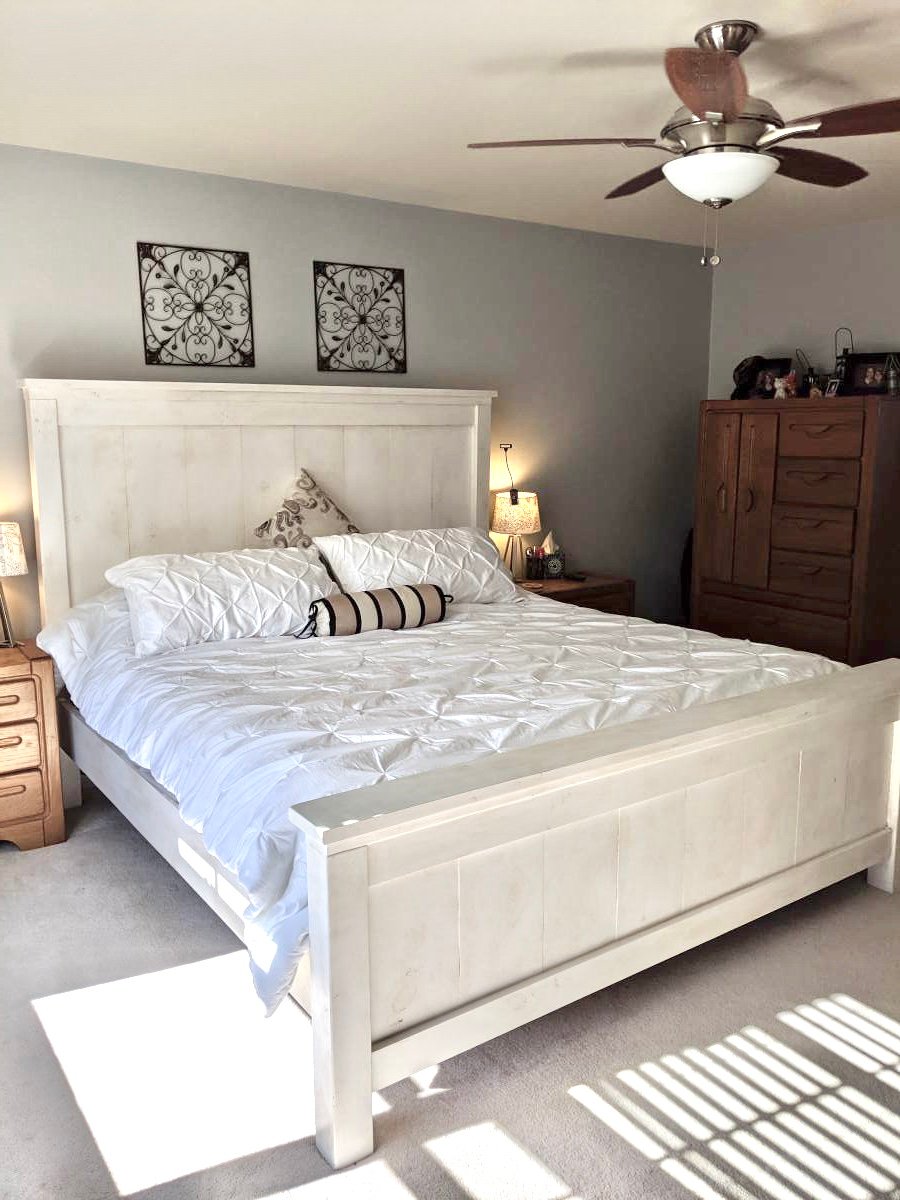
This was the plan that started my addiction! We had just gotten new mattresses, and we needed a new bed frame. All of the furniture stores have dark stains, and we wanted something natural and bright. I was searching one night found your site, and that was it. A few changes, increased the height of the headboard and footboard, wanted a slight overhang on the top of each as well. Also added an additional 2x4 between the legs of the headboard for support.
Wed, 01/11/2012 - 17:15
That looks great! The natural finish looks really great with your bedding. I love the higher headboard - we're planning to do the same with the farmhouse bed I'm planning so that my husband will be able to sit up in bed without hitting the back.
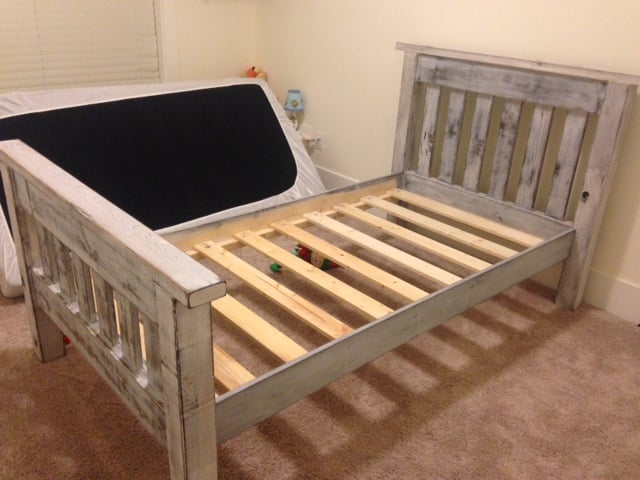
Did you end up using the boxspring, or is the mattress just in slats? I couldn't tell from your picture.
Wed, 01/11/2012 - 18:23
Hi, thanks for the positive response :) The mattress and box spring both are on here. In fact, I kept the bed itself on the original metal frame below, and added the side rails to hide it. Purchased the hardware for the side rails from Rockler
Fri, 01/13/2012 - 08:42
All I can say is wow. Definitely showing this to my wife today. We had plans to do something like this but yours is up up and away! Excellent job!
Fri, 01/13/2012 - 15:48
I'm glad you like the lights. I go back and forth on them. I hated that I had to drill holes into the wood to run the cord, as it does not give us the option to remove later on. Also, if you go with the lights, you might want to put some double sided tape on the back. Thanks!
Tue, 04/03/2012 - 09:41
My husband just forwarded me a link of your bed.
It is SO SO beautiful!!! Love the reading light. Where did you get that by the way?
The bed is so pretty. Love the natural wood look and the knots.
We too have mostly dark wood stain in the house and love this light color look. Did you stain it or coat it with something?
Sat, 04/28/2012 - 15:26
Hi Moldah,
Very impressive and great addition with the lights. Can you tell me how tall your final headboard and footboard are? Thanks.
Sat, 06/16/2012 - 04:46
LOVE IT! I love doing things like this and I am inspired by seeing your pictures!! I am especially impressed with the Star Wars case noted on your endtable LOL Right there I know you have great taste in films, too!!! I am going to do this project! Great job!
Wed, 09/04/2013 - 17:10
Wow, this is so beautiful! Great Job! We are very amateur builders and I had a couple questions. Do you have a blog with more details? How did you achieve the routered edges? And also, do you mind sharing the cost of the project? Thanks!
Sun, 11/03/2013 - 08:44
By how many inches did you increase the height of the headboard and footboard? I am thinking about doing the same when I build this bed and was hoping for some guidance.
Sun, 12/18/2016 - 06:00
We don't have boxsprings. How would you modify this plan for that?
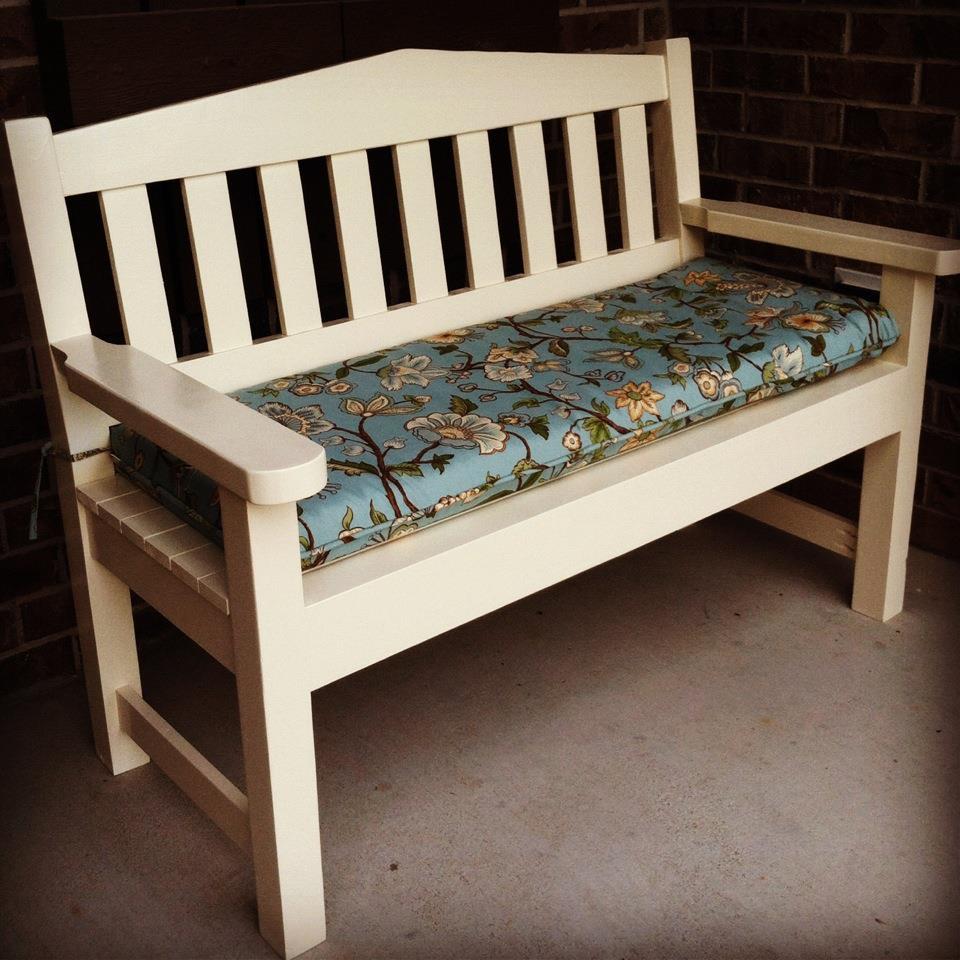
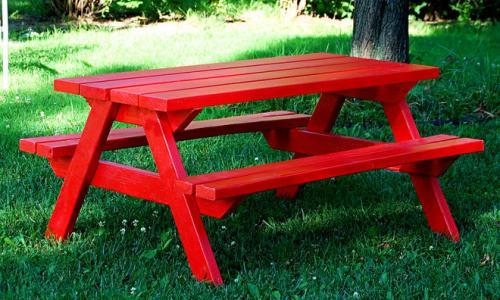
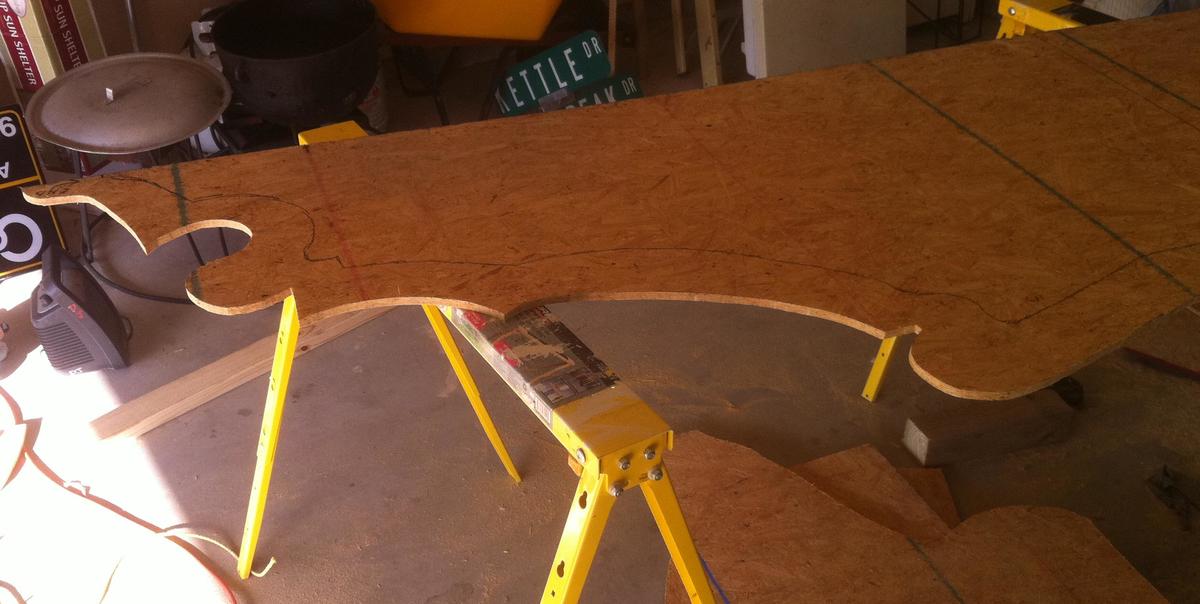
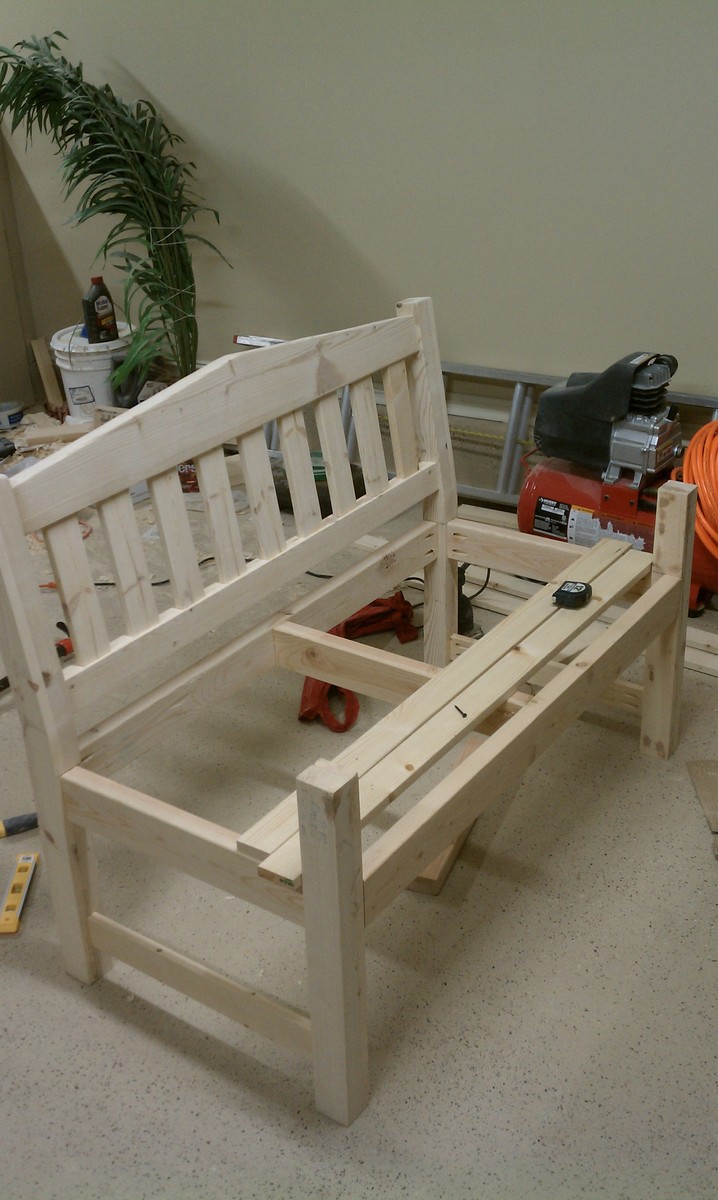
I built this for my wife for an anniversary present. She had wanted a garden bench for some time but the ones that she wanted were between $500-$700 which is ridiculous for this type of bench. So, I did a search on here for garden benches but there weren't really any plans for them and the few brag plans were not really the type of bench I was looking for. I printed off a few pictures of benches that I liked and got to work. The front and back legs a 2x6 and a 1x6 glued together and then cut to be straight. I wanted something thicker then just a plain old 2x6. If I had to do this again though, I would have just glued 3 1X6's together. The reason being, is that 1x6's usually do not have a rounded edge and a 2X6 does. So needless to say when you glue them together you have a nice little gap on either side. Without a table saw to take this off, its pretty difficult to get a straight cut. But I ended up getting it right after sweating for a few hours in the garage. The bench stands 36 inches high, 48inches wide and about 18 inches deep. The seat height is right at 18in also.
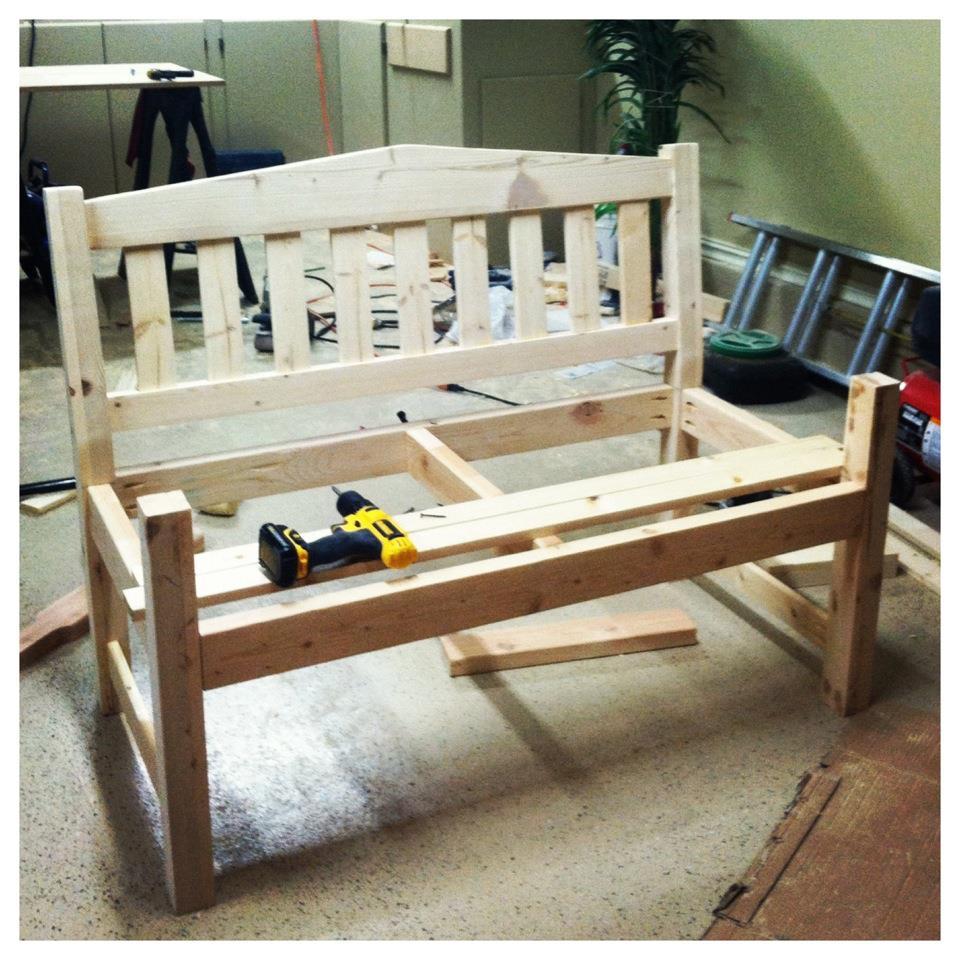
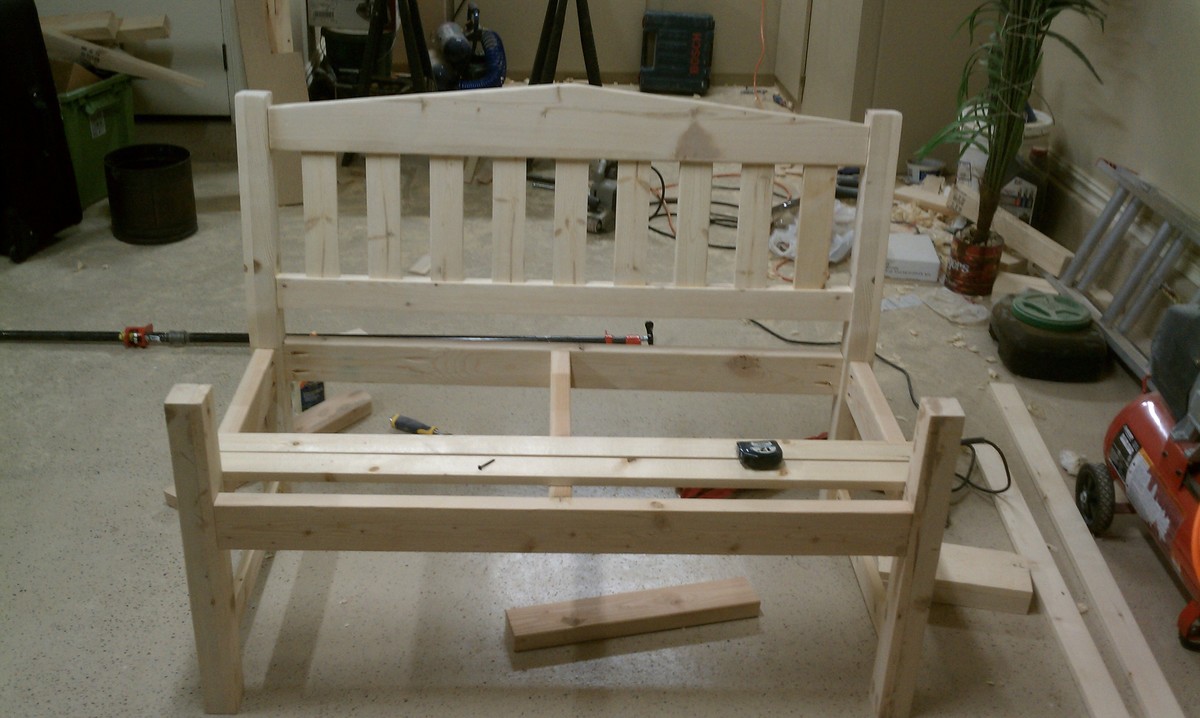
In the unfinished pictures I actually had the depth being 24 inches. After sitting on it though it was just way to deep. So I pulled it apart, made the adjustments and its now much more comfortable to sit in.
If anyone has any questions or wants more details feel free to drop me a line!
Thanks!

Fri, 06/19/2015 - 13:32
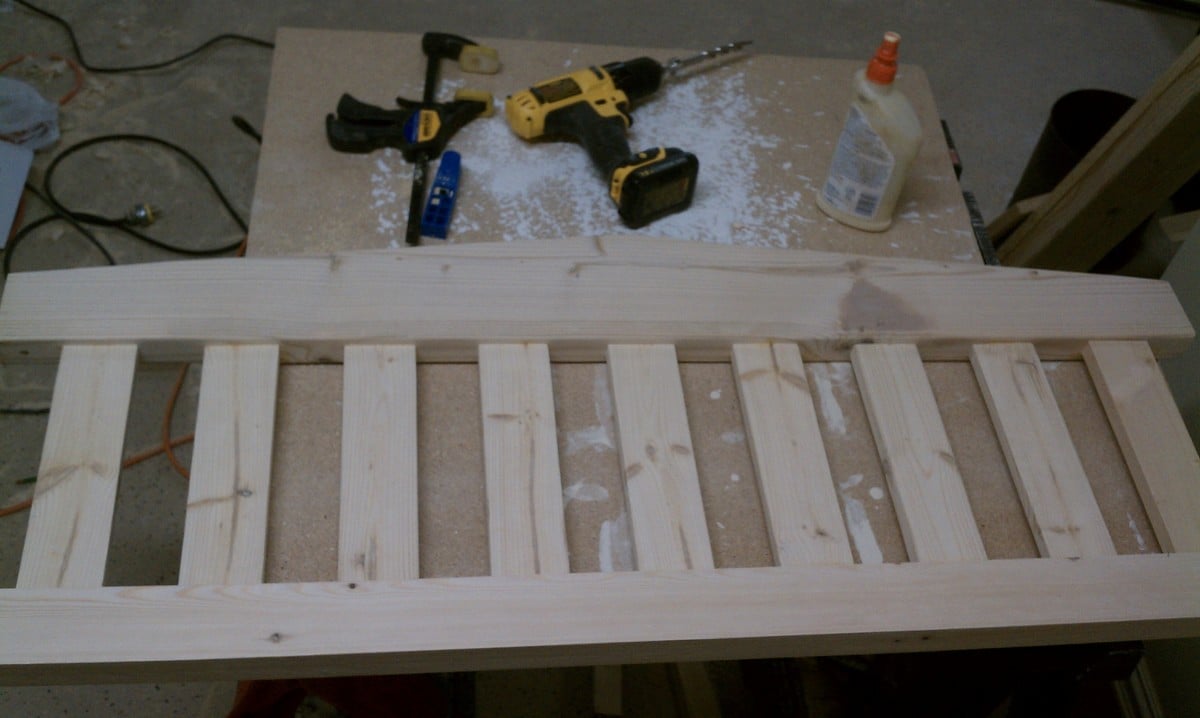
Yes I think thats what they came out to be. yes the cross pieces are 2x4 and the slats are 1x4's

In reply to back legs by smz1919
Fri, 06/19/2015 - 13:34
I glued a 2x6 and a 1x6 together to get the thickness. Now that i have a table saw and a jointer this entire process would have been much easier but after getting it to look like one solid piece i just outlined the slant i wanted and cut it using a jig saw.
Fri, 06/19/2015 - 20:17
So the back slats are just glued in place right? I wonder if it would be easier to use a biscuit joiner or not
Sun, 10/23/2016 - 17:46
Wed, 05/26/2021 - 08:32
Hi Nathan
Love the look of the bench. Would you have a list of material requirements. I intend to make a bench like this and would like to know the measurements of the top back spar (the shaped one).
Here in the Uk our timber yards do not always supply the same cuts as the US so I need to have some idea of the pieces I need
Many thanks
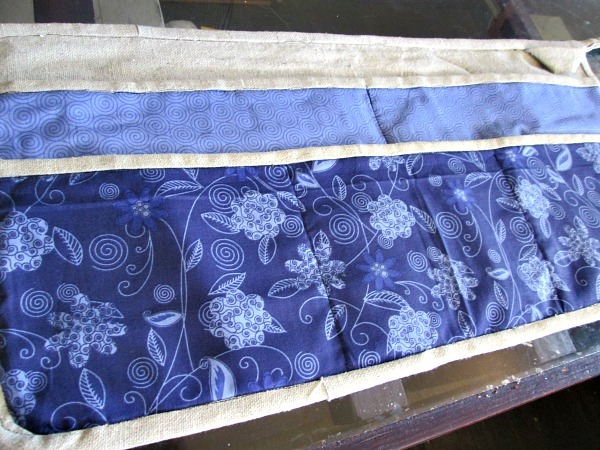
Thank you soo much for the apron plans. I've used a sewing machine about 5 times in my life, and I didn't know what "stitch in the ditch" or bias tape or trim was, but with the plans and some web searching, I was actually able to sew this apron. It took me considerably longer than others, especially because I don't have an iron, pins, or a seam ripper (ripping a seam took me over an hour). Again, thank you sooo much! I hope to never lose my pen and tape measure at the lumber yard again with this handy creation :)

Sun, 06/15/2014 - 05:27
Great job on the work apron, Yvonne! Congrats on conquering the sewing machine!

In reply to Looks great! by JoanneS
Tue, 06/17/2014 - 00:27
Thank you, Joanne. :) There is so much I want to learn, and for some reason, I feel like I need to learn it all now, when my life is busier than ever. Hah!
In reply to Amazing job by spiceylg
Fri, 06/27/2014 - 10:55
Thank you so much. It reminded me of using a jigsaw, and vice versa. :)
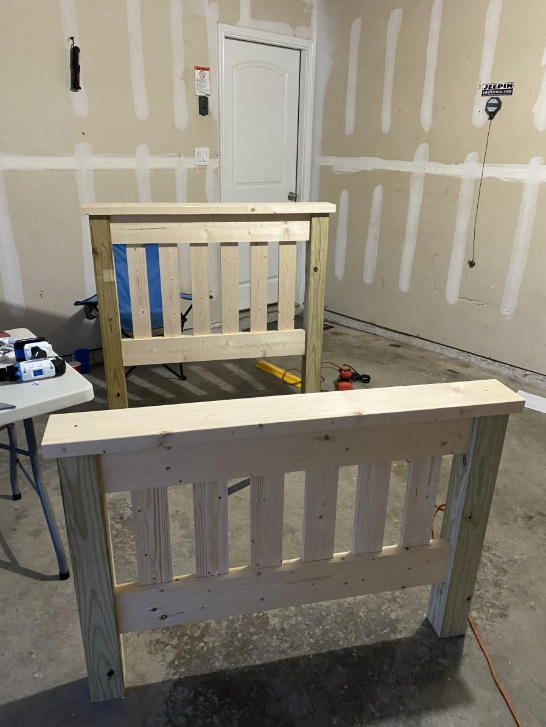
Yesterday I built two of these for my wife and I's room, we just moved from Hawaii to Arizona. The plans were clear and simple, and the end product turned out awesome. Next I will tack the dresser/tv stand. Thank you Ana

I love how this bed frame turned out! Everywhere that has stain is cedar and the rest is all scrap spruce. Thanks for another great plan Ana!

Really enjoyed making this! Thank you for the plans Ana White!

Thu, 08/22/2019 - 10:05
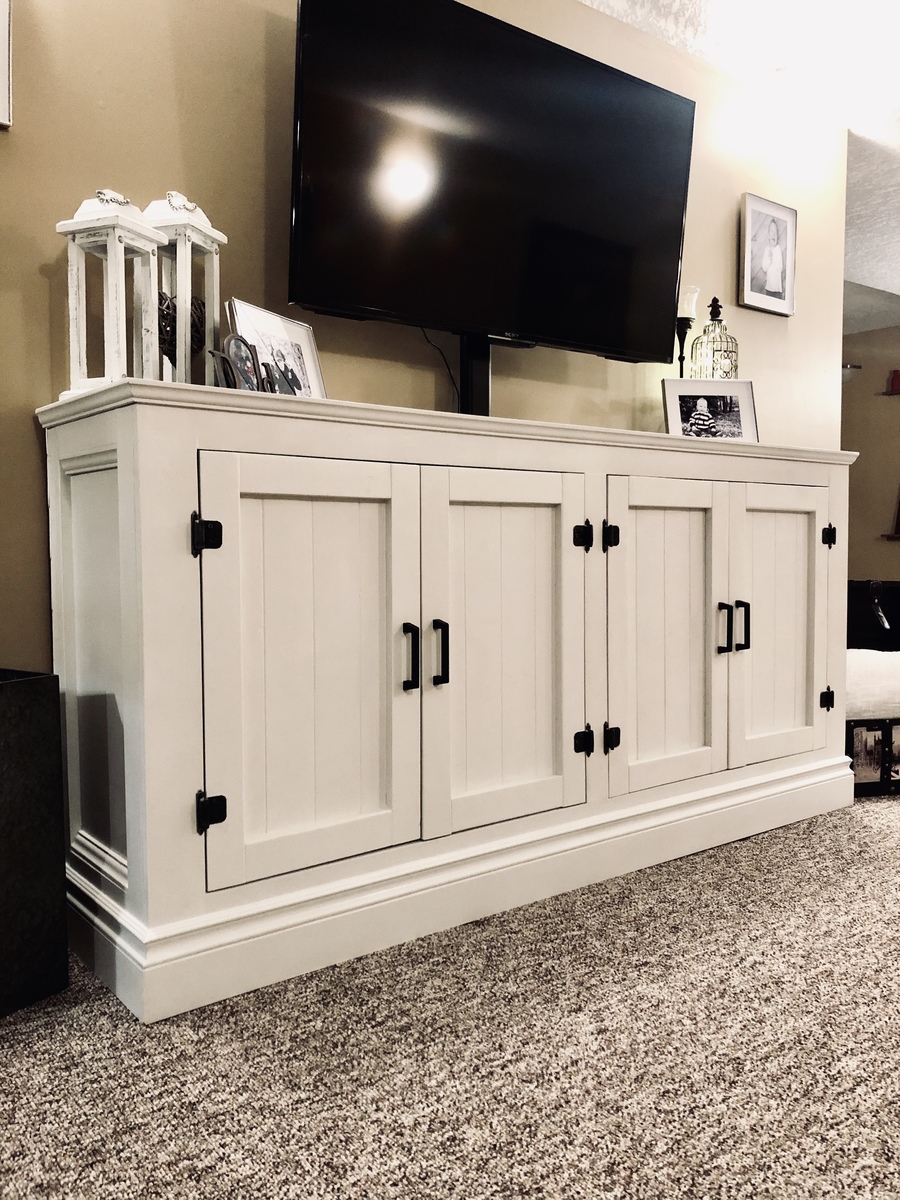
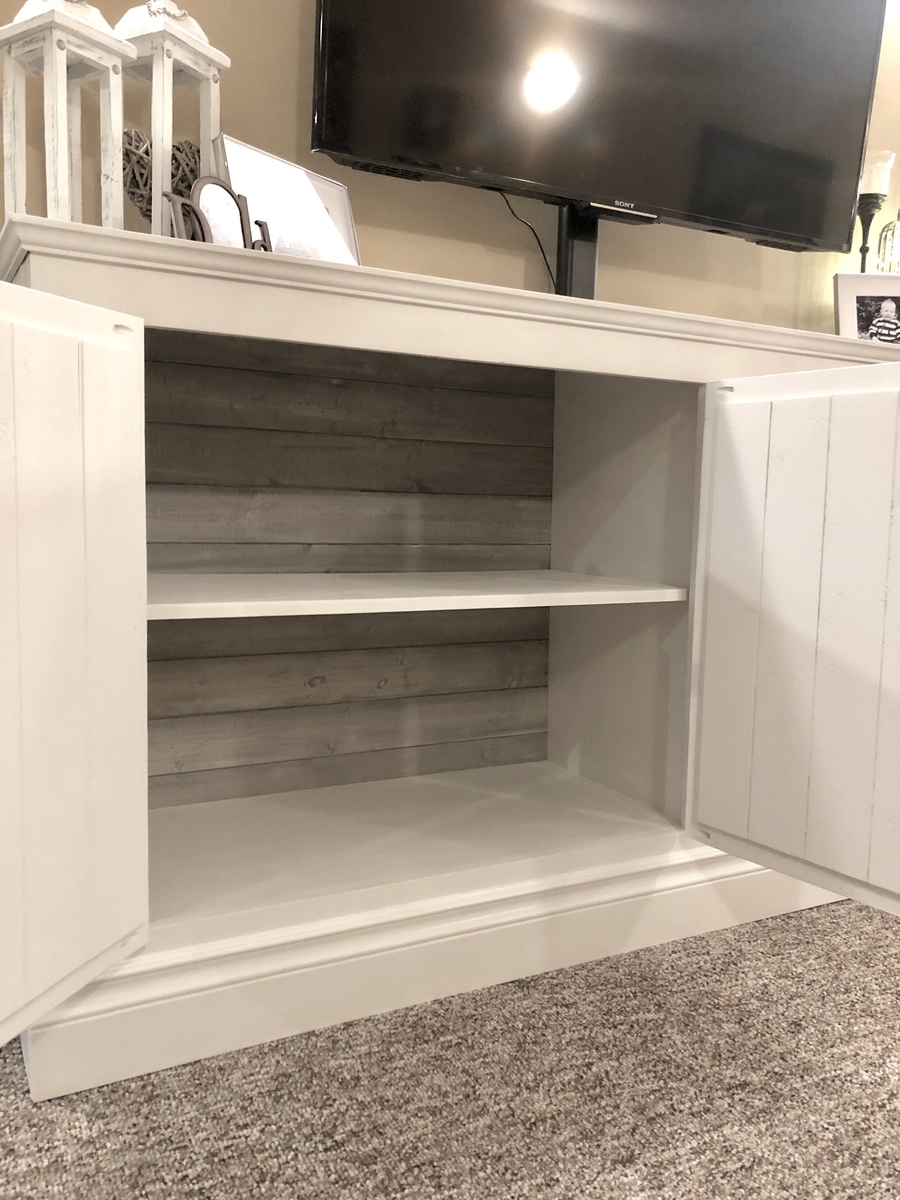
What a gorgeous sideboard! Thank you so much for sharing photos!
Thu, 09/05/2019 - 16:39
I love the backing vertical board you used for cabinet door. Is that shiplap, beadboard, or 1x’s? Thank you!

This is my first wood building project and I love the way they turned out. Took my about a week of work here and there on the first one and the second one I built from start to finish in two days. This is called the Simple Twin Bed and it's a great plan, very sturdy. Pocket holes work GREAT on this build. I added pocket holes to the side rails in to the posts for extra support.

I built a big kids see saw using 2x6's all around with a 2x8 seat. The center post is 30"h.


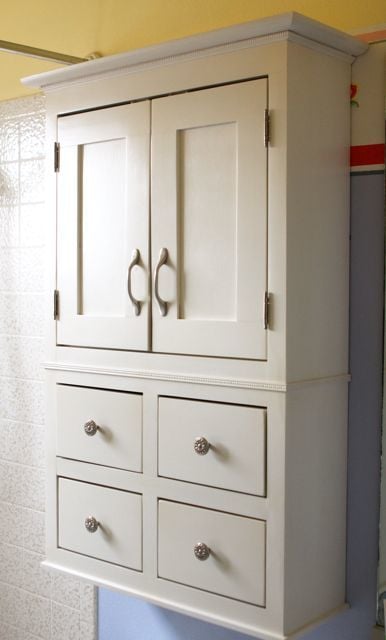
Overall measurements: 24x40. I followed the same basic steps as the nursery armoire, but on a much smaller scale and with a 1x3 added to the back for hanging the cabinet on the wall. I sketched this out on my own and built it to fit above the toilet in my girls' bathroom.
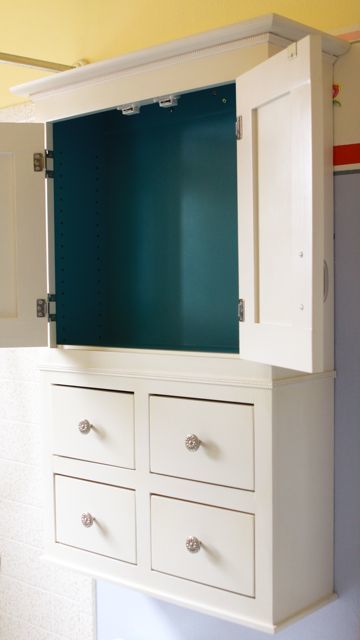
For the first time, I used my table saw to route a space for the 1/8" MDF cabinet backing and drawer bottoms. I will probably use the same method again, but the MDF has to be absolutely square for it to work.
Also a first for me, I used a shelving jig to drill perfectly spaced shelf pin holes on the inside of the cabinet. I love the jig and the accompanying drill bit (from Woodcraft -- orange and blue do not carry it) and I'm looking forward to using it a lot more in the future.
The white latex paint finish is covered in Krylon "crystal clear" spray, which is (sadly) not actually crystal clear. I really like its durability and ease of application (re-coat after only one minute!), but will only use it on darker colored projects in the future. I'll have to sand, paint again, and recoat with my old standby, Minwax Polycrylic, to get rid of the yellow tones in the "crystal clear" Krylon spray.
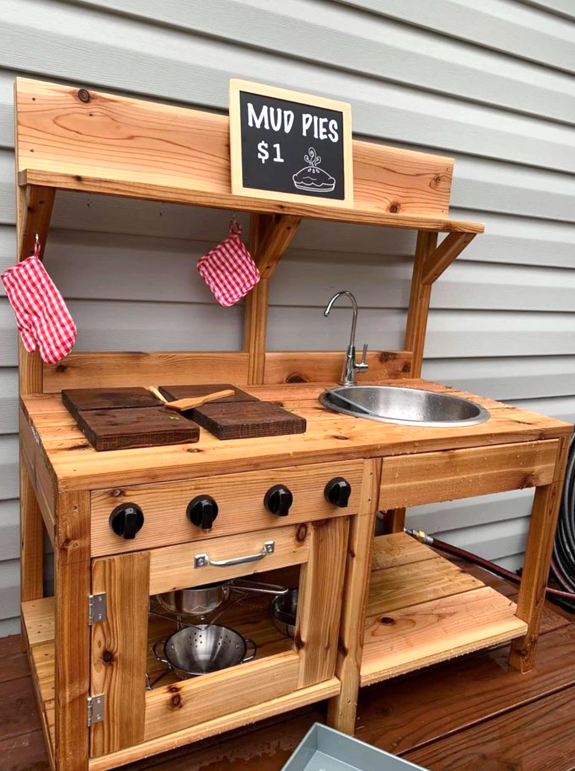
Thank you! My favorite & first is from your mud kitchen! I put in running water!😂 For the GrandLuvs!”
@penny.vanderlugt

Hidden door bookshelves hide a furnace closet. Built by Kraig Faulkner
Thu, 01/23/2020 - 07:05
Great idea! Do the bookshelves swing freely when weighed down with books? What type of hinges did you use?
Thu, 09/17/2020 - 08:01
I'm currently working on a basement renovation project. I'm probably going to incorporate a feature like this for my mechanicals, too.
One important safety note for anyone who wants to do this: It's recommended that your furnace be a minimum of 30" away from any combustible materials. That includes walls and partitions. The image of this project displayed is right next to the furnace, which is not a good idea.
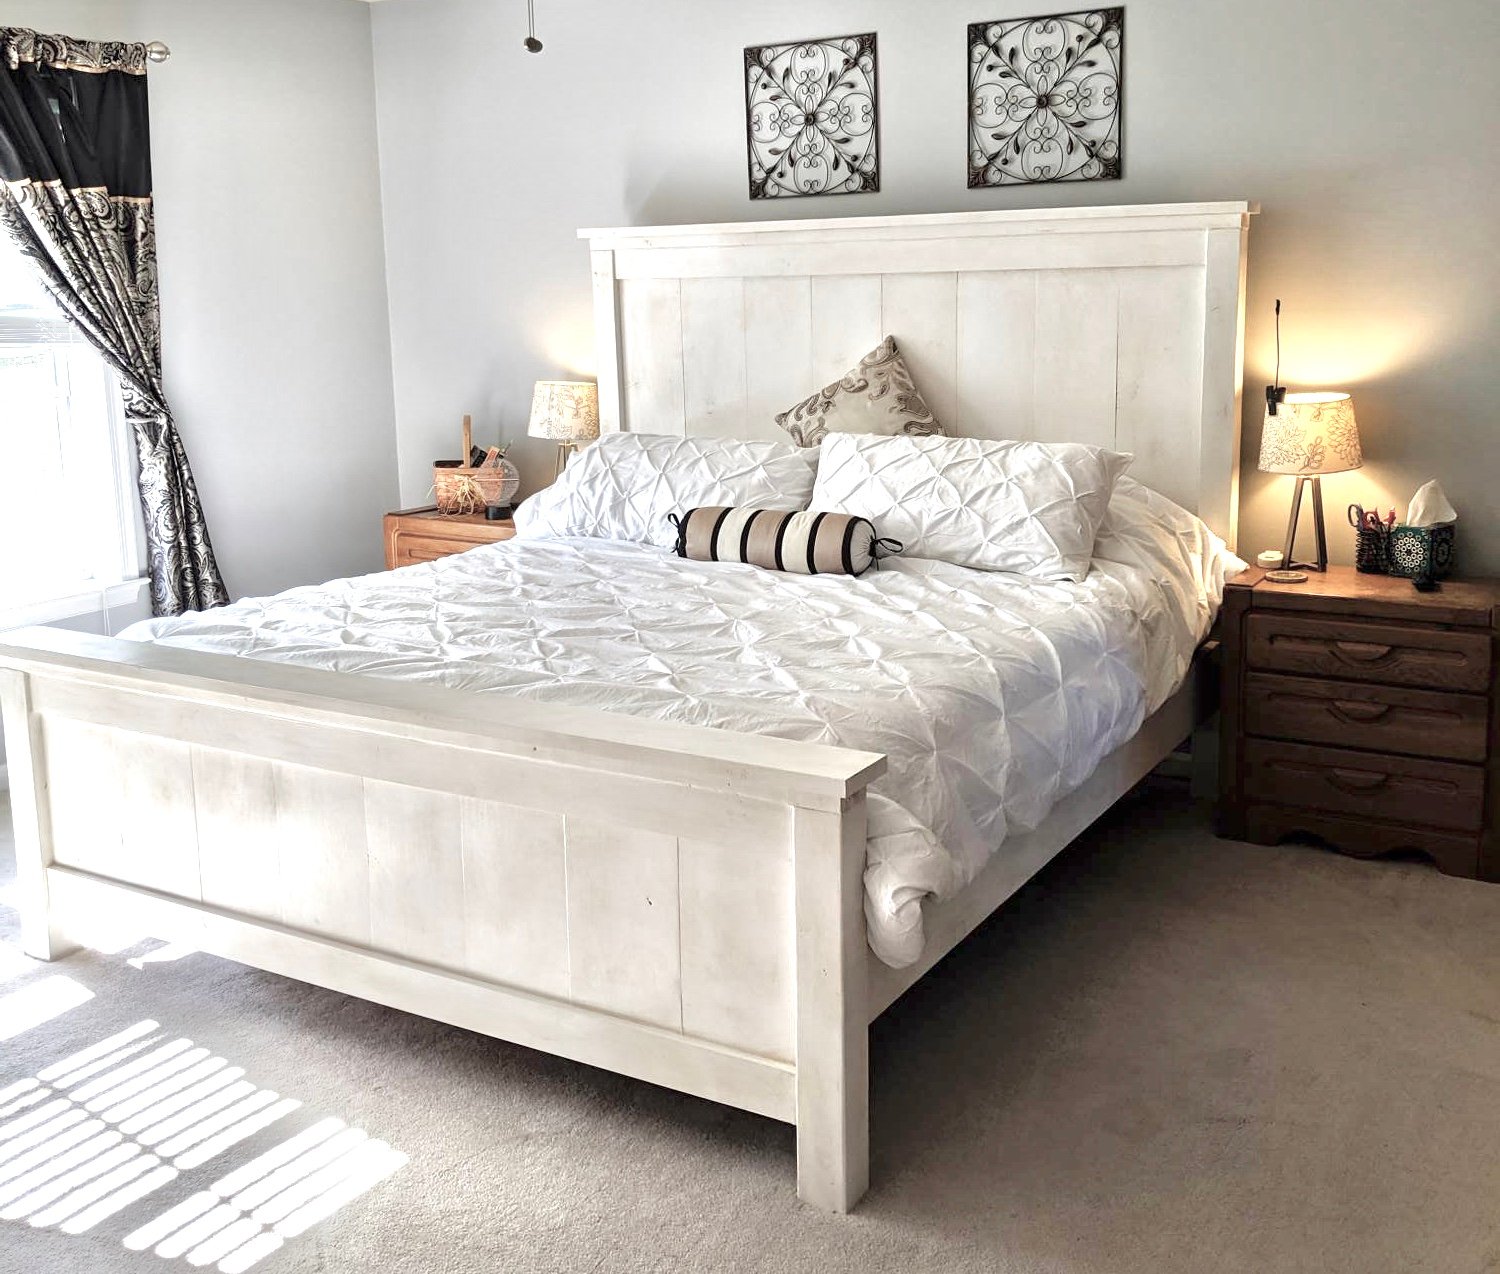
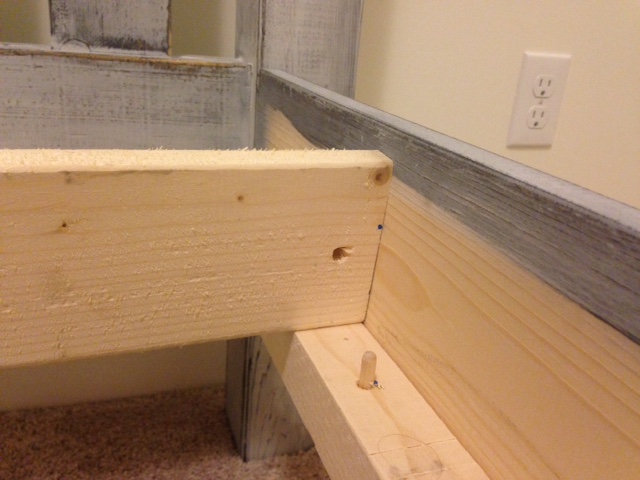
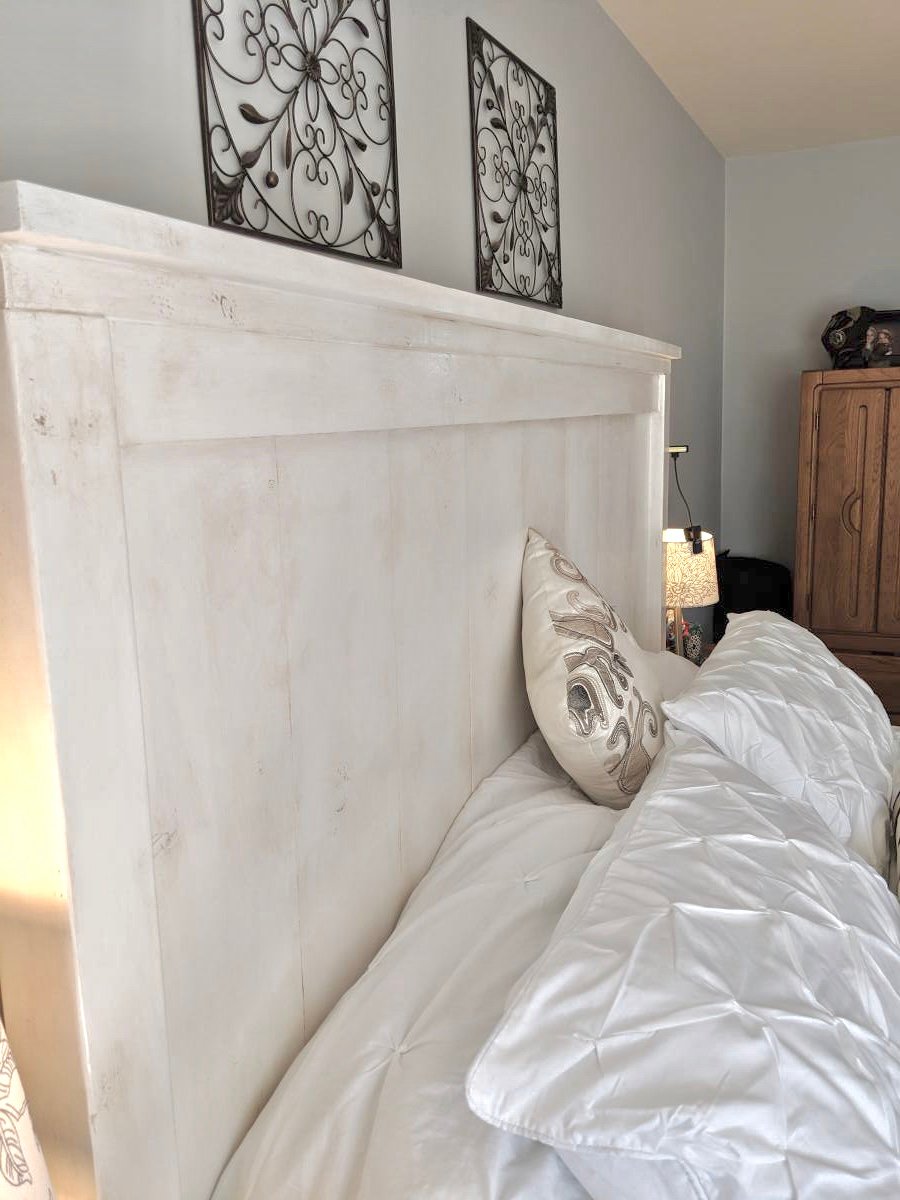
I could not find a frame which would accommodate my new adjustable king base. Modified Anna's plans by increasing the height of the headboard and footboard. Finished with chalk paint and antique finish for a rustic look. Side rails attached with mortises to allow for moving bed in 4 pieces if needed. Love my new bed
Sat, 11/30/2019 - 03:31
Hi! We are making this headboard this weekend. We want to increase the headboard height and footboard as well. Do you happen to know the cut measurements or how you adjusted the height of the 1x6 (or 1x8 as others used) to make it work? Yours looks perfect! Thank you in advance for any feedback!

Modified the design to allow me to roll lawnmower directly in the end. Fun project.
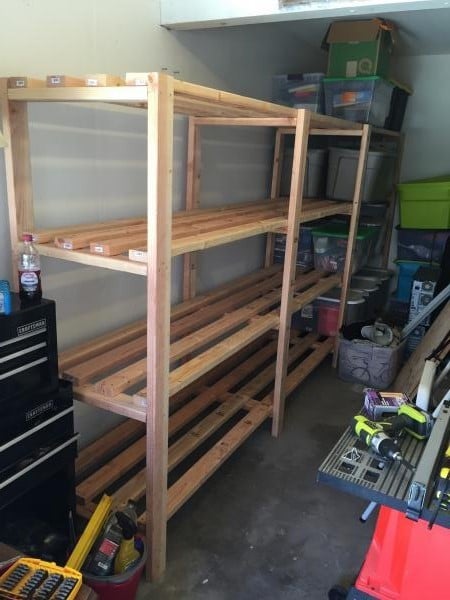
This was such an easy project to complete although it did take some time to measure and cut all the boards. I could only transport 2x4s at 8' so after cutting the height to 6' for the braces I used the extra 2' for the shelf width. The extra width really helped with some of my storage totes. I made the first section at 5' in length to handle the heavier totes, and the second section I used the full 8' board with a brace in the middle. I wish my garage was a little deeper to handle 16' of shelves as it would have saved me a good bit of time. I'm also glad I have an extra ryobi battery to charge while I assemble. Gotta love how fast those things charge. Can't wait to try another one of your plans.

I built this outdoor daybed to add a cozy and inviting space to my backyard. It was a fairly easy build, which I managed to tackle by myself. Head over to the blog for more details.


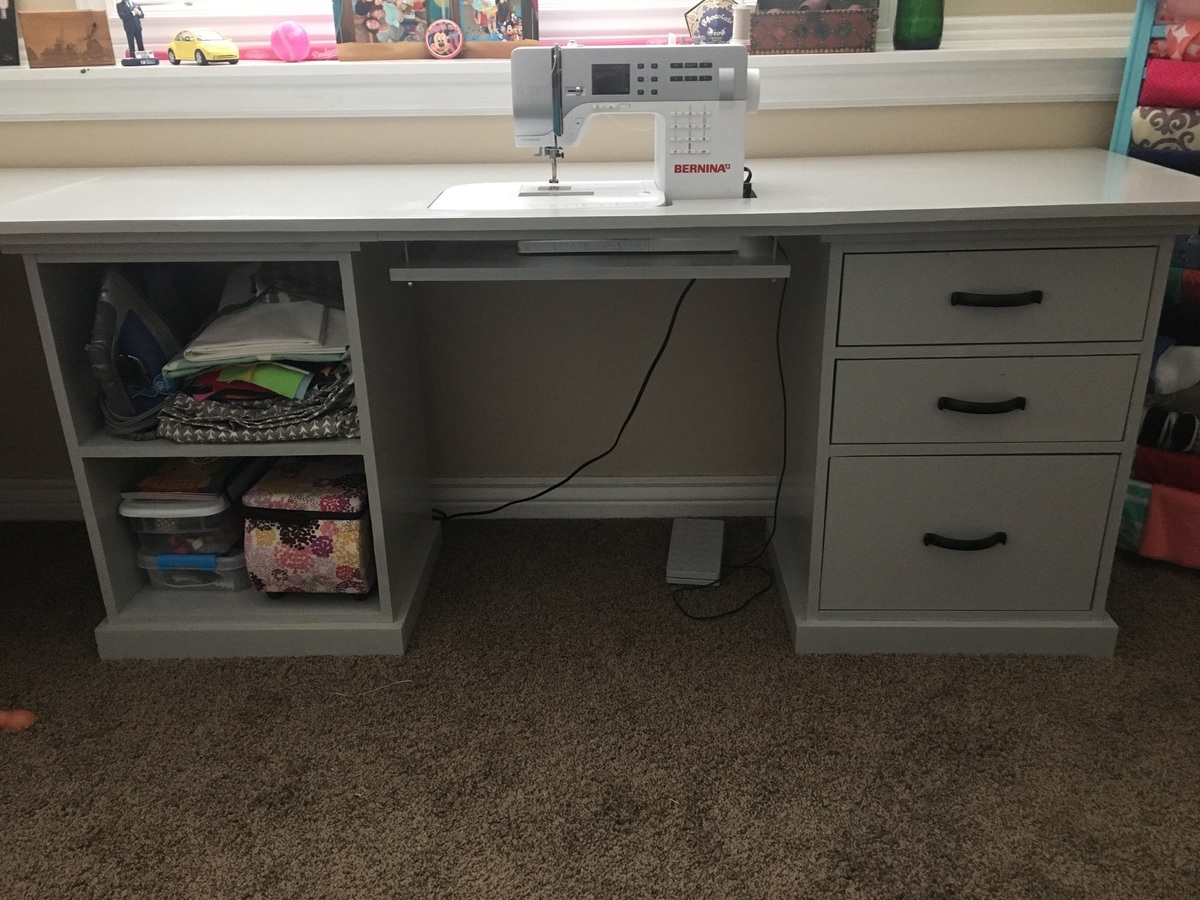
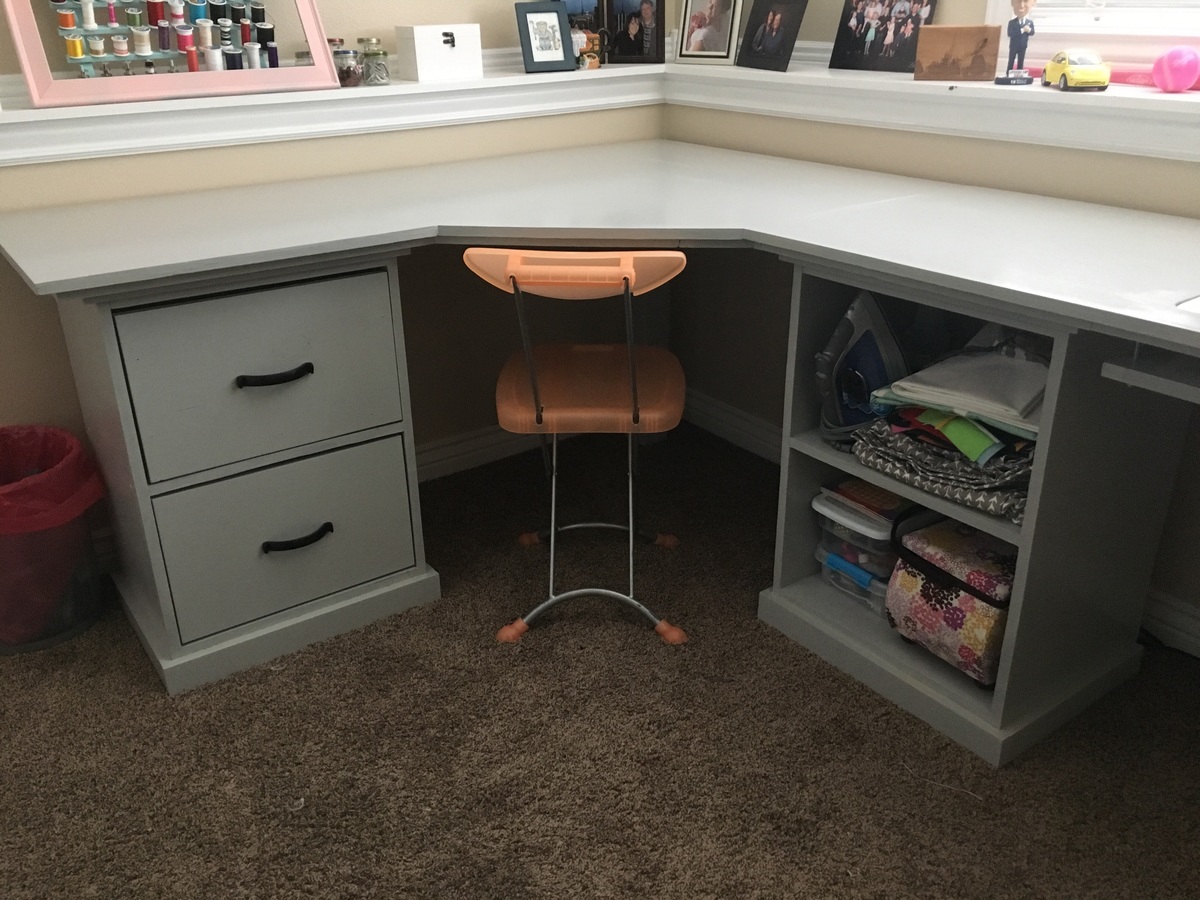
We built three base units-each with different storage options and used the corner desk plans. Then created our own long desk top using a 6ft long board and using a jigsaw to create an open space for the sewing machine.
Mon, 01/20/2020 - 07:49
It seems to me that this room is suitable for yoga or painting.
Mon, 12/27/2021 - 18:28
How did you go about cutting the hole for the sewing machine and what extra building did you do underneath?
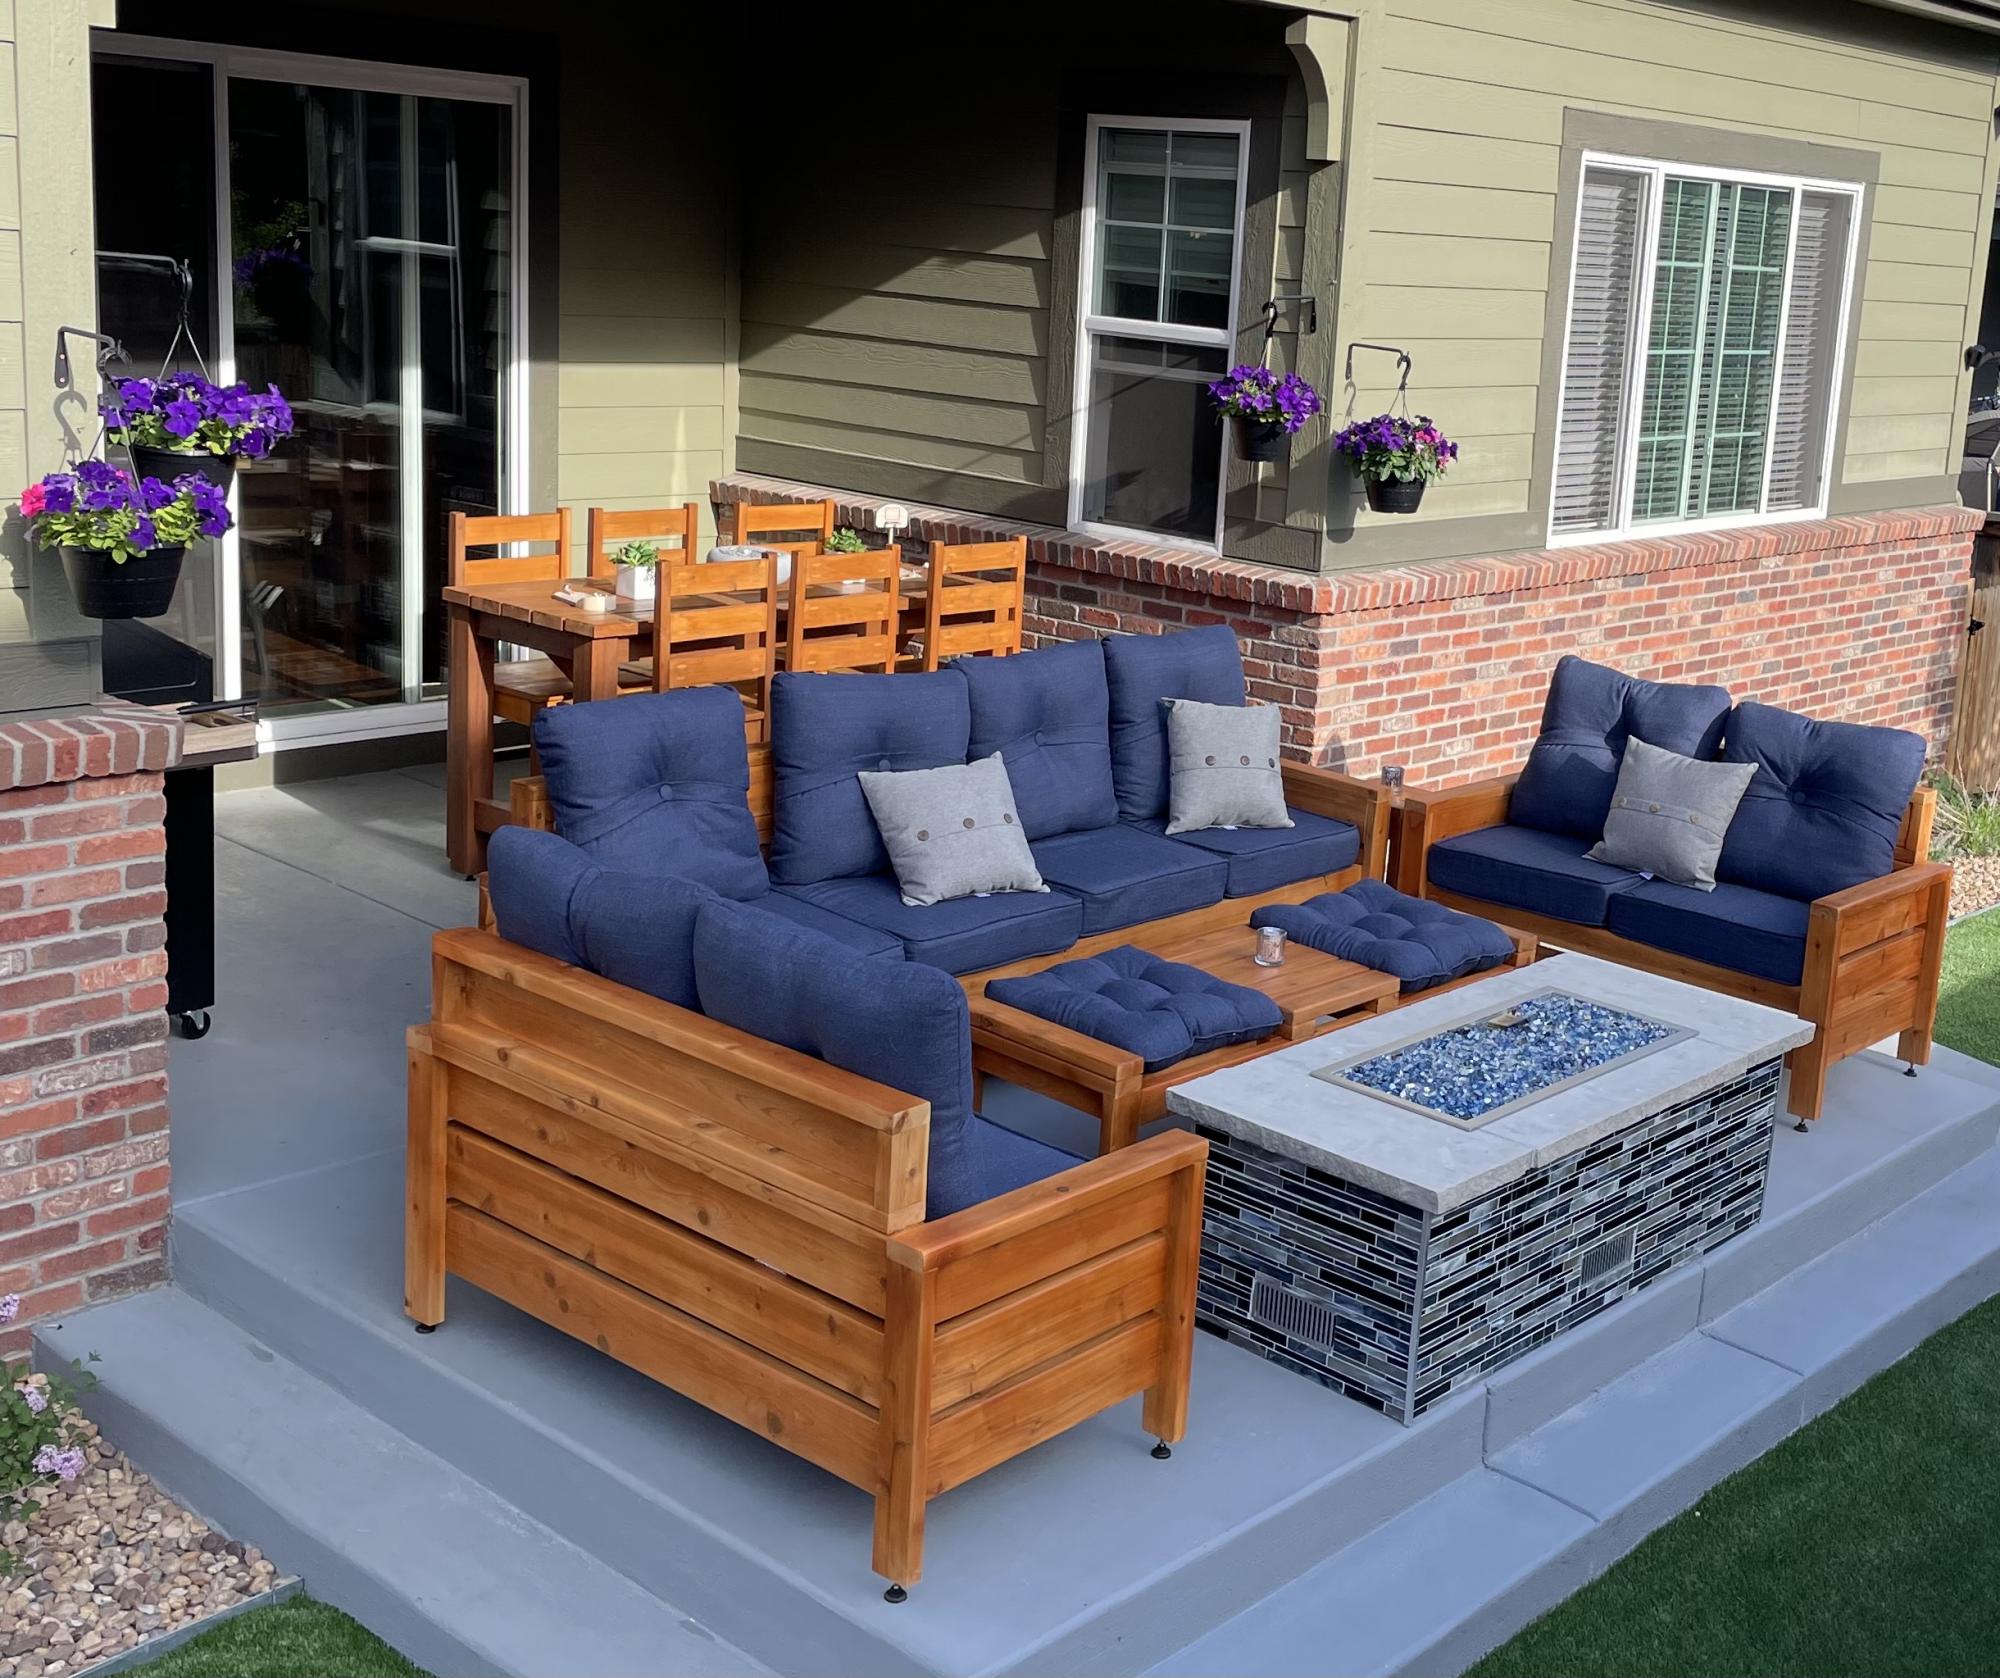
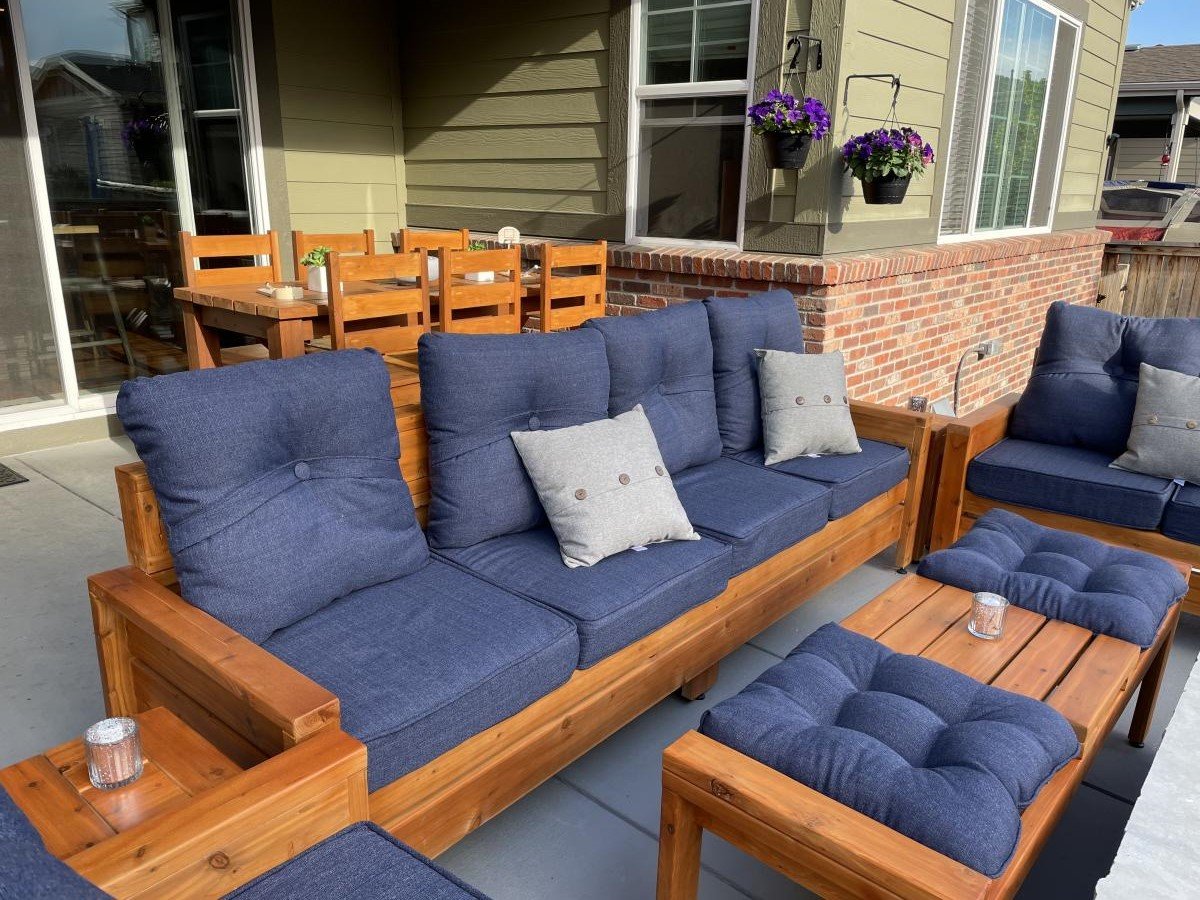
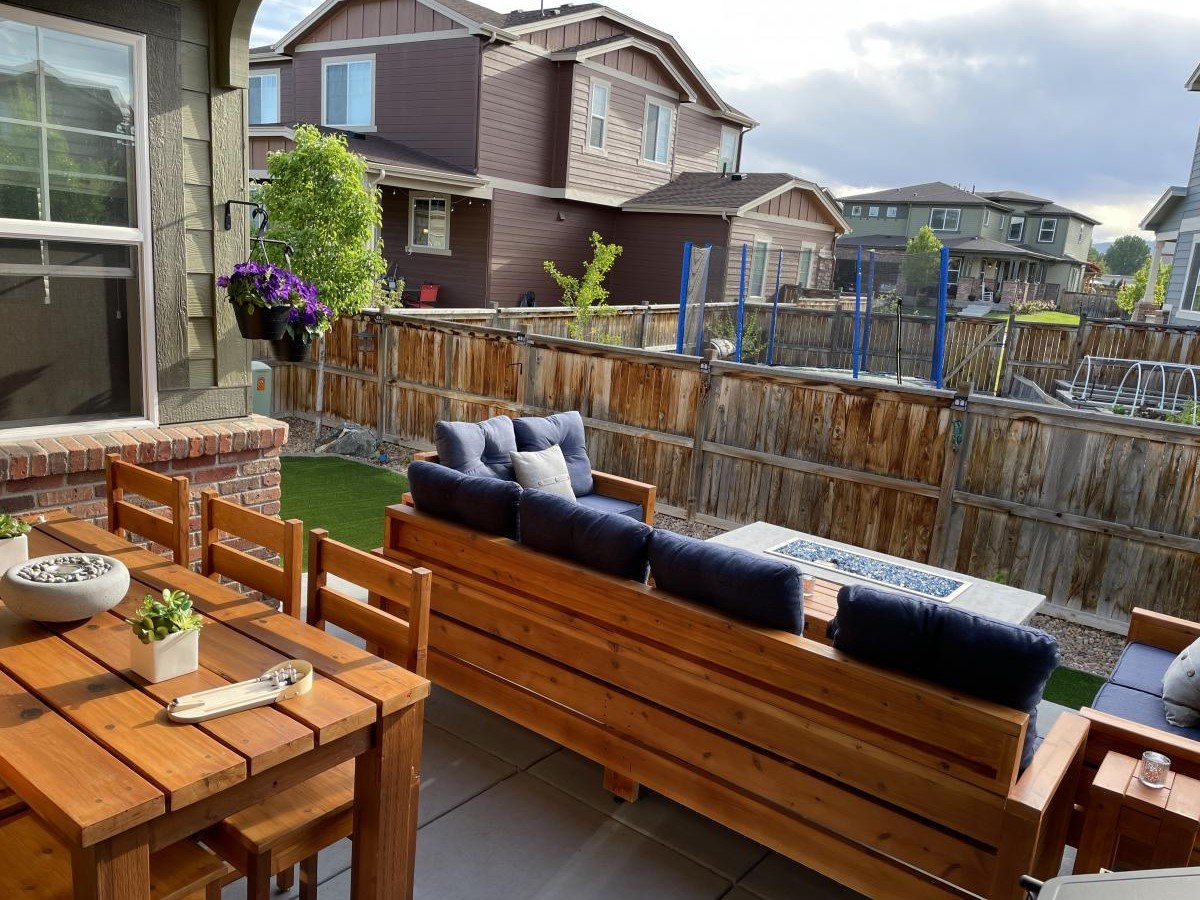
A 2-month long project to create an entertaining space in our small backyard. I started with a dining set for 6, then went on to seating around our firepit. I actually doubled the size of the Modern Outdoor Loveseat and built a 4-seat couch (added a center section for support. I also built 2 loveseats, 2 small side tables, and took some creative liberties to design a coffee table/foot rest combo. The major modification I made to the couch and loveseats was adding a back for some additional height. This really improved the comfort when leaning back. Had a great time completing this project! When lumber prices come down I'll continue the build. (2 pictures keep uploading and converting to an upside down image - no idea why, but sorry for the weird view)
Sun, 05/30/2021 - 09:58
Love the coffee table foot rest, would love to see more of the outdoor table as well! It all looks amazing and came together perfectly! Thank you for sharing, check out our Facebook page, just shared!

Comments
Ana White Admin
Wed, 10/06/2021 - 08:16
Sweet!
That looks amazing, great mods!