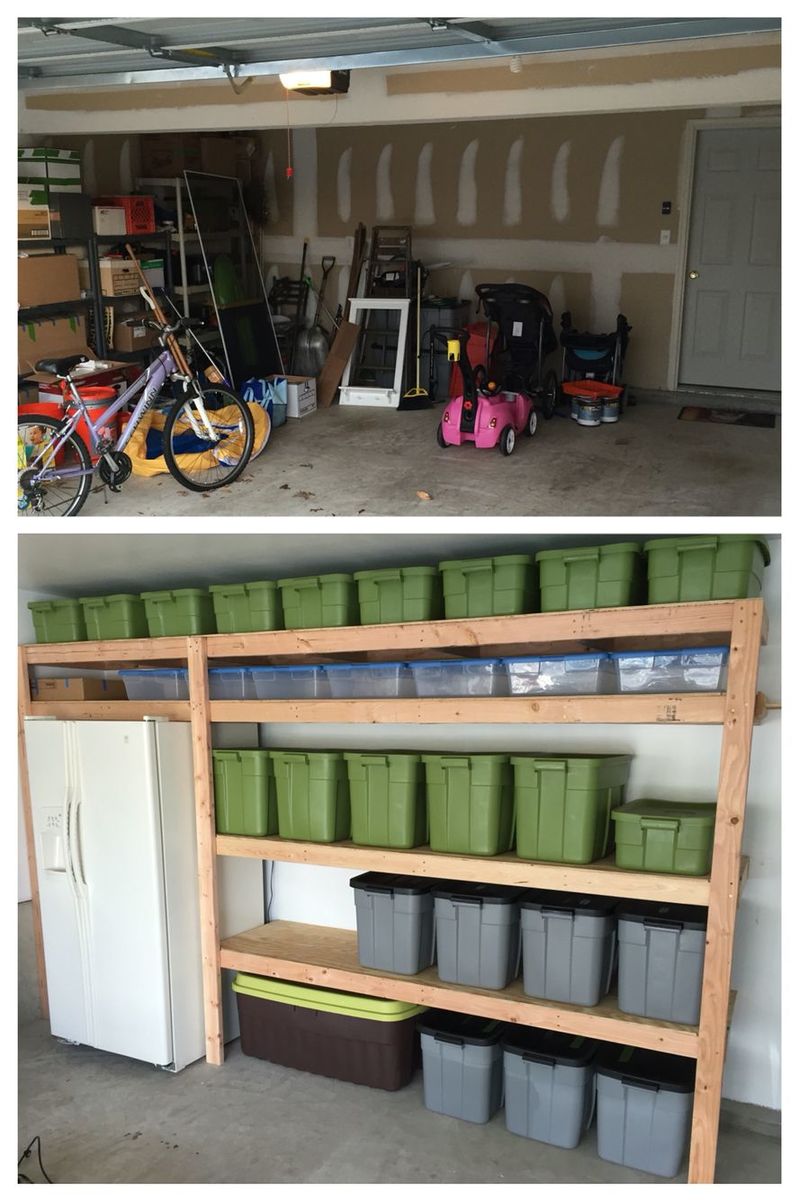
Easy DIY Garage Shelves

Easy to build, easy to customize, perfect for totes
Built from Plan(s)
Recommended Skill Level
Beginner
Easy to build, easy to customize, perfect for totes

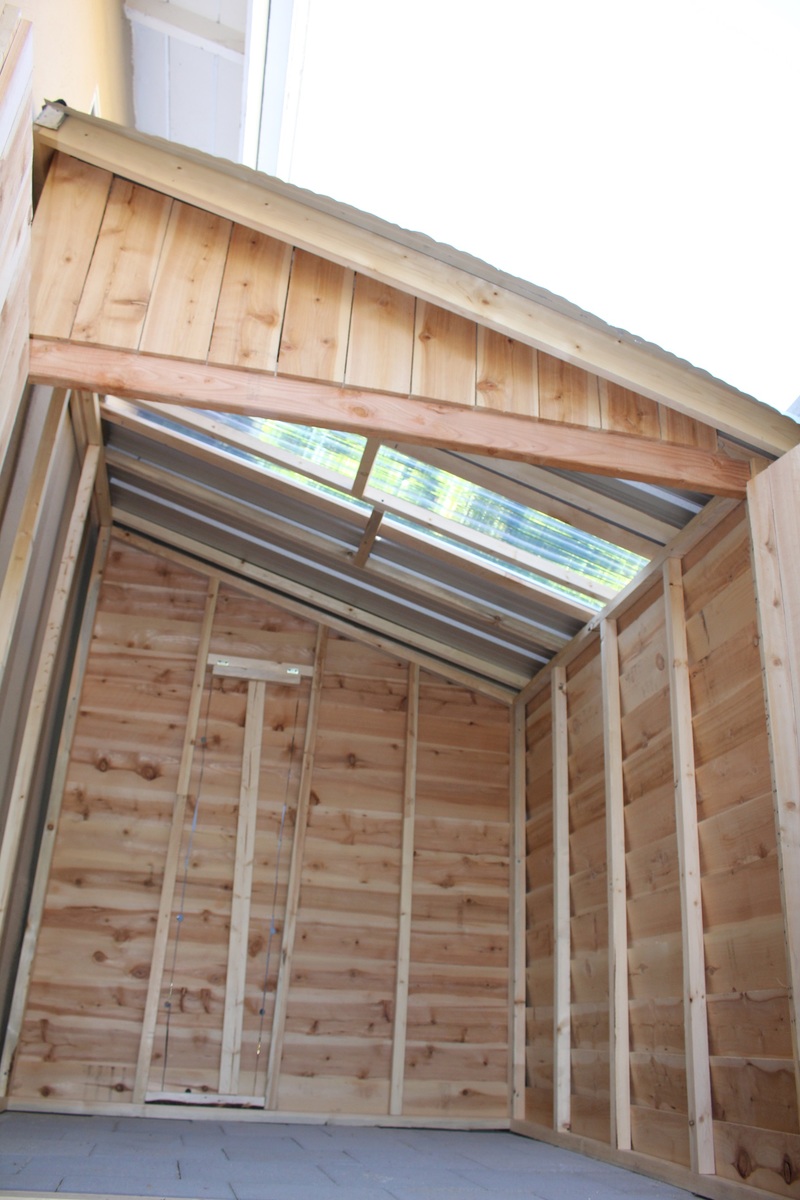
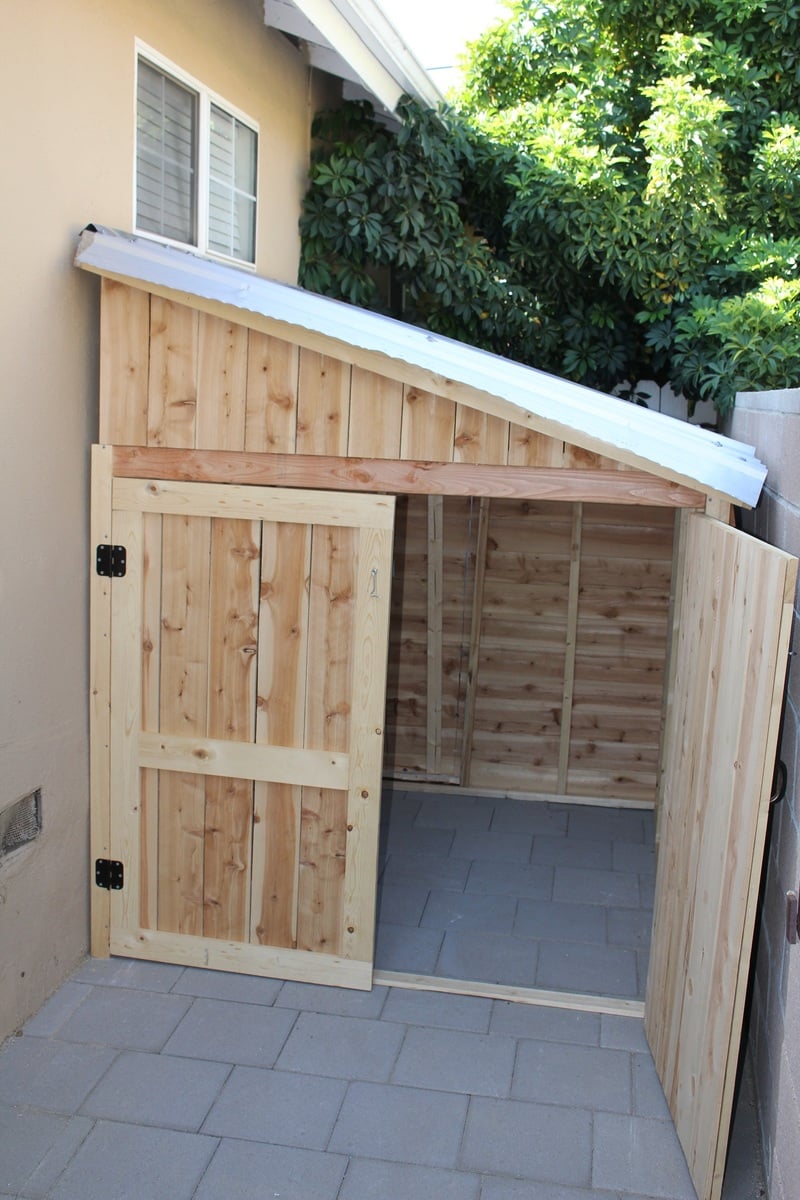
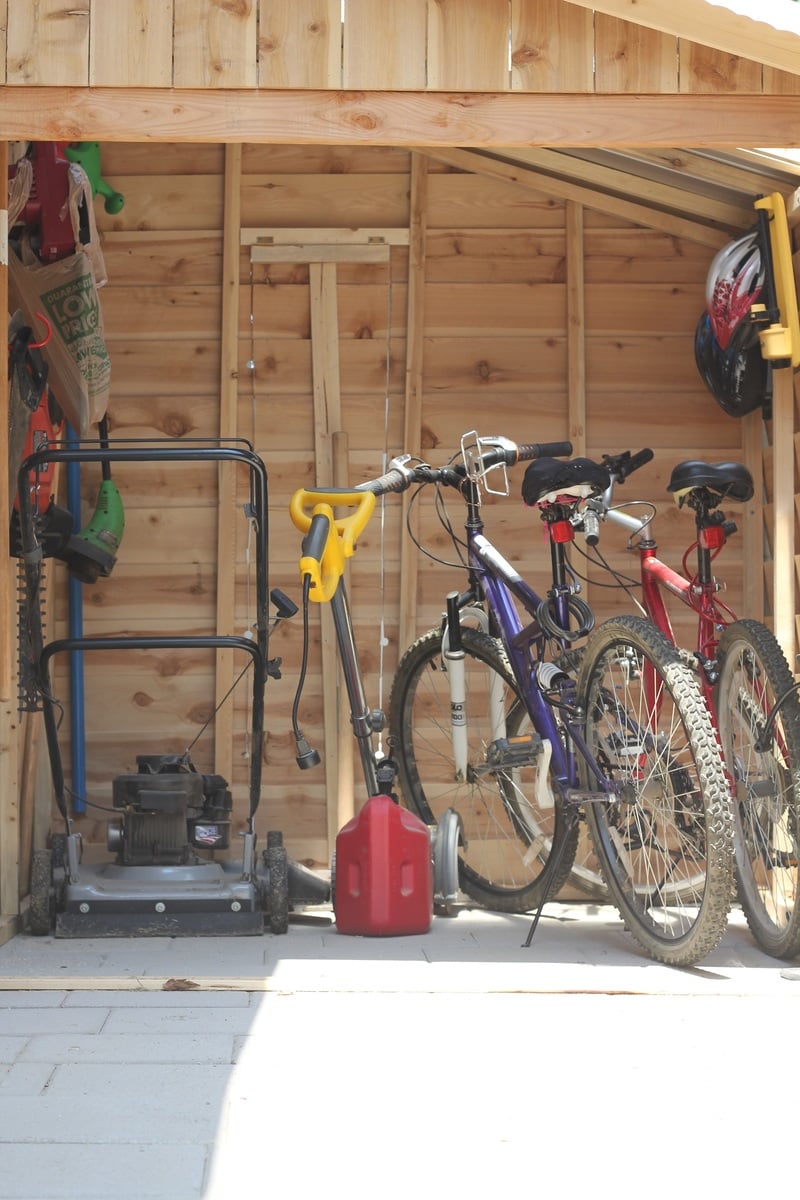
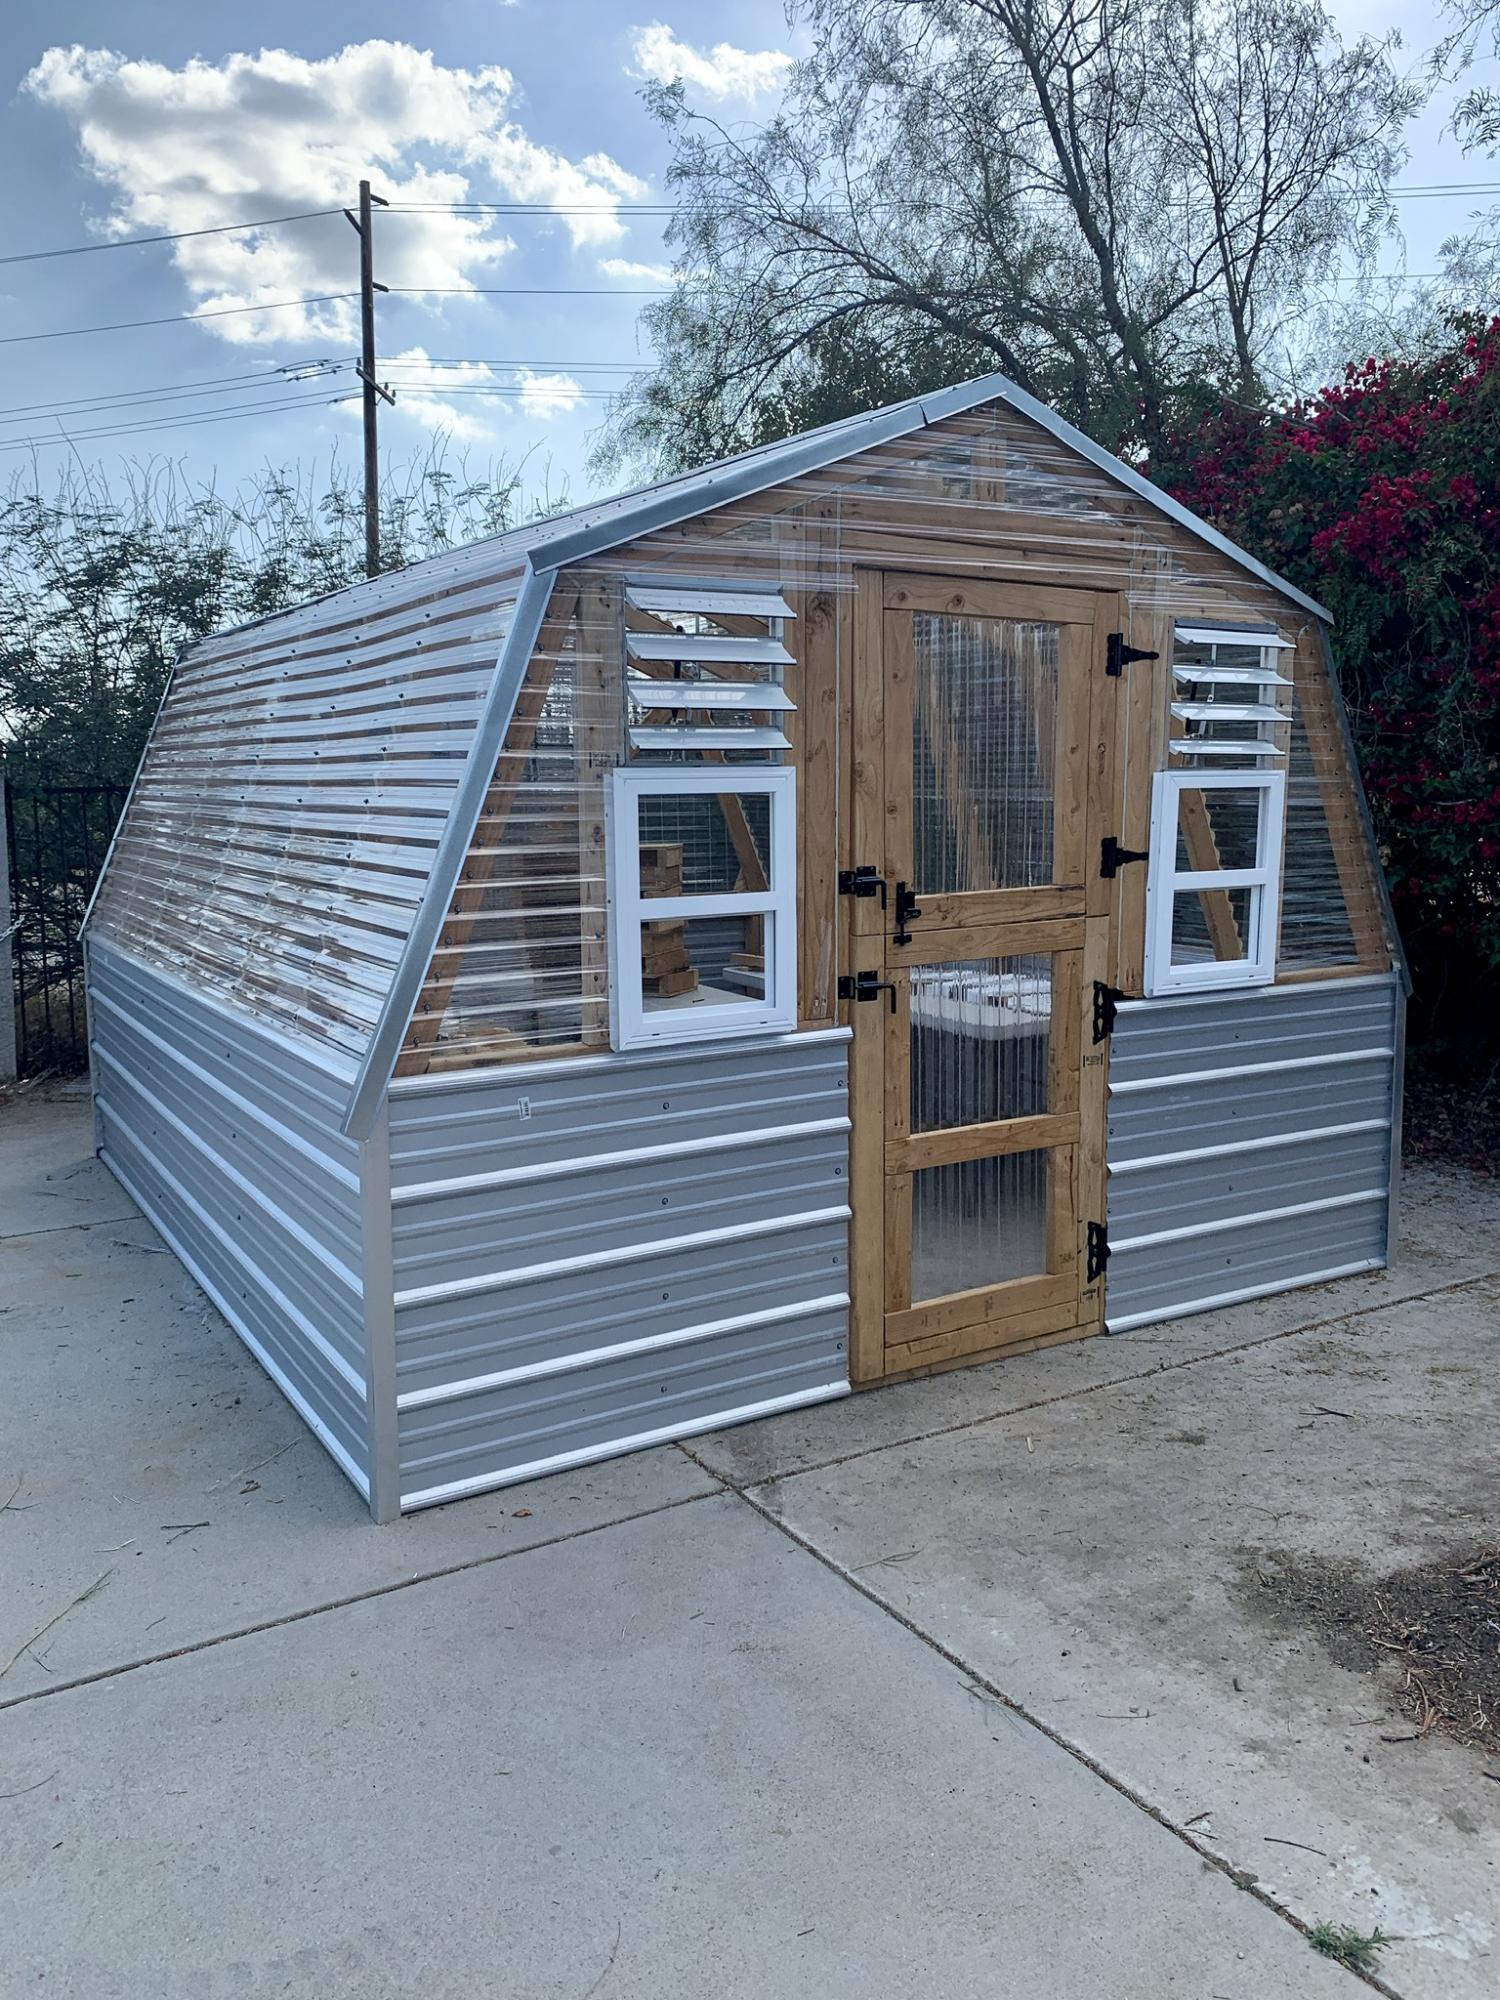
Needed a shed to store bikes and mowers, etc, so I'd have more room in the woodshop : ) I made a lot of modifications to the plan to fit my space and make it much larger. The completed size is 7 foot tall at the peak, 6 feet deep and 5.5 feet wide. I made it as a 3 sided shed, using the wall as the 4th to save on cost, increase air flow, and make the exterior house wall accessible. I also made an egress in the back of the shed in order to get behind the shed if needed.
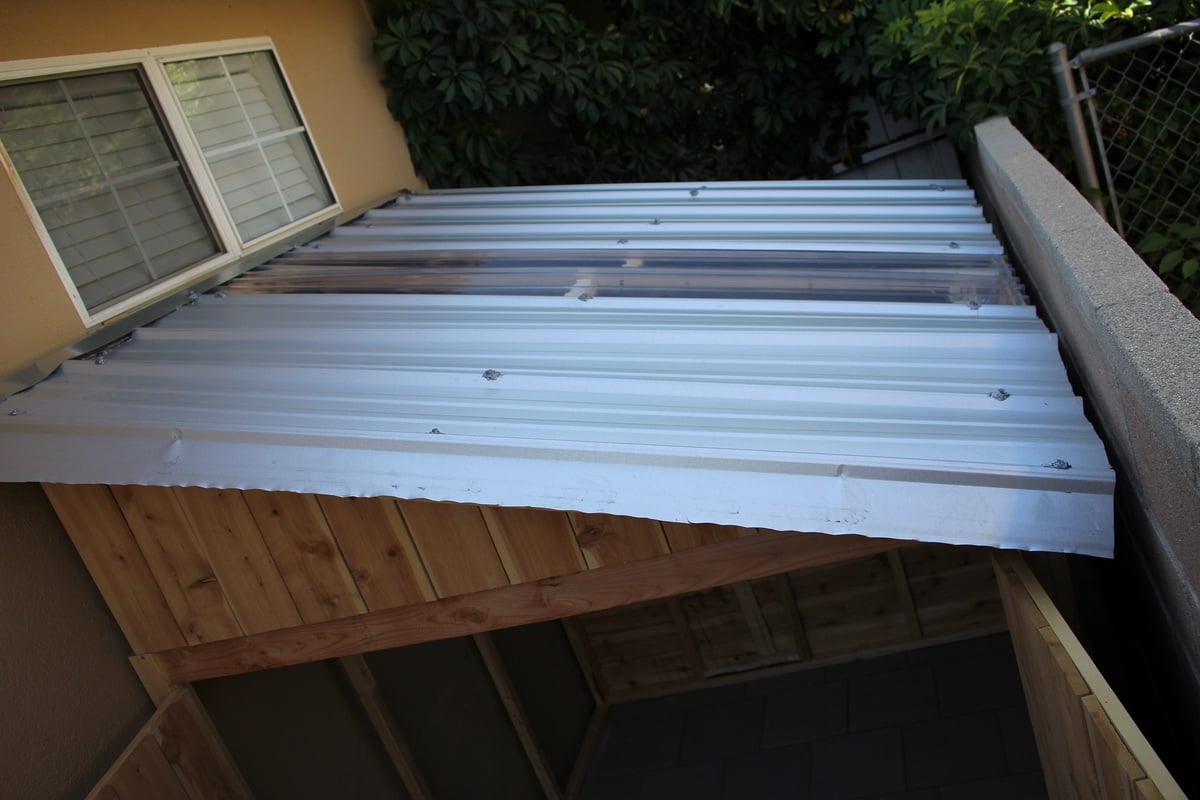
Instead of roofing shingles, I opted for ribbed metal sheets and one clear sheet in the middle to make a skylight, so there would be light in the shed. This is my favorite part of the project. It was a huge pain to attach the roofing from a ladder with very limited access, but it looks great and I love the light coming in. We have very little rain in CA, so I'll have to wait until winter/rainy season in order to test out its waterproofing.
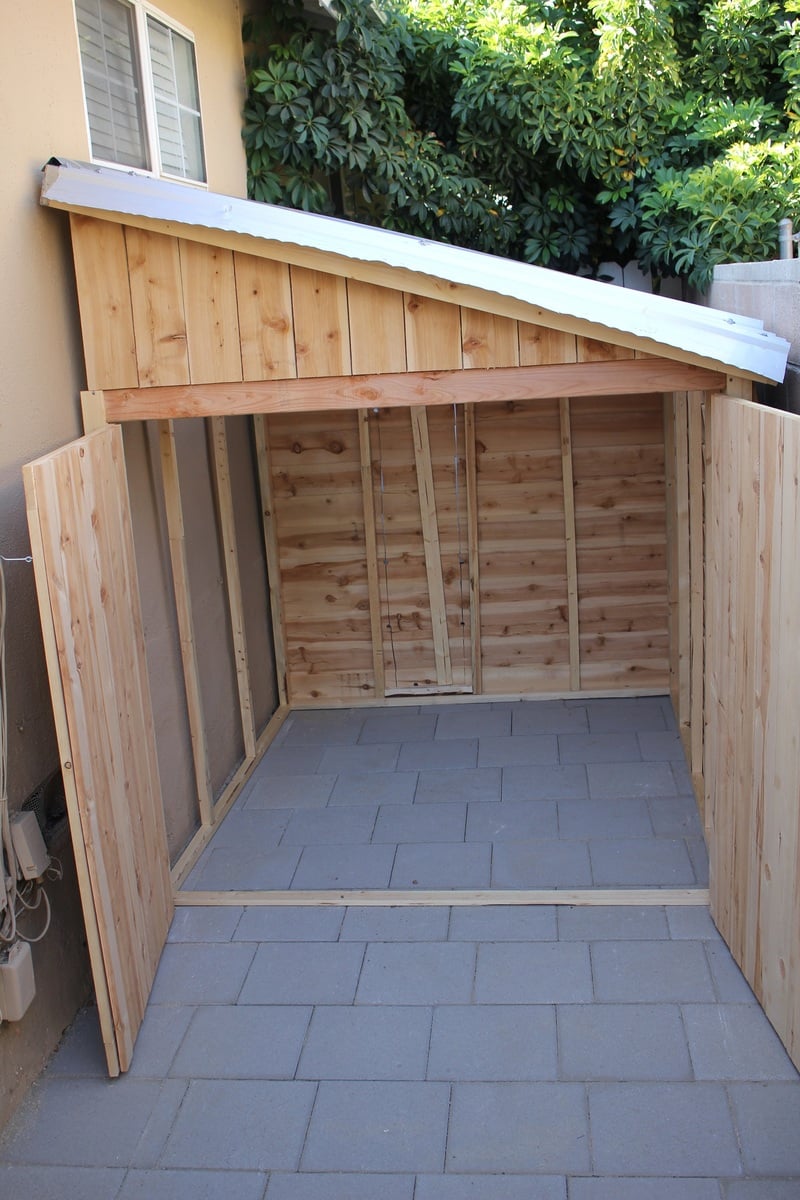
Since the shed sits between the house and the neighbors block wall fence, and I wanted to use as much of the space as I could, I decided to design the shed to have the side wall against the house rather than the back wall, as shown in the plan. This took a large amount of modifications, but with careful planning and measuring, it can be done. This also meant blocking off access to behind the shed, so I cut an egress in the back wall and added hinges so you can lift the back cut out panel, and rest it on a stop block attached to the fence behind it in order to have access. That's what woodworking is about- problem solving. Love it.
As you can see by the full shed picture, it fits a large amount of stuff- 2 adult bikes, mower, edger, trimmer, chainsaw, hedge trimmer, garden tools, shovels, etc, with plenty of room for more. I now have a free corner in my garage that I've already filled with a DIY rolling workbench and more pegboard space for tool hanging. Woodshop increased space= happy Brittany.
I should also mention that building the frame and adding the pickets was quite a quick and easy job. The hardest and most time consuming part was the roof (I didn't have metal cutting tools), rolling each very heavy wall to the site (I was alone) and the previous 2 weeks in which I built the paver patio the shed sits on. Hard work, but worth it. I love it!
Thu, 08/20/2015 - 05:56
And for under $300! Nice touch with the skylight also. Two thumbs up.

In reply to This is awesome! by Cross35
Thu, 08/20/2015 - 09:42
Thank you! I'm very pleased with how it turned out!
Mon, 04/27/2020 - 10:28
SWEET!!! What a great use of space! That skylight was a brilliant idea. No lights needed to see what you need to get at in there. Well done!
In reply to SWEET!!! What a great use… by carewarner
Mon, 01/25/2021 - 13:15
It has been incredibly useful for storing! One thing about the skylight- Over time the sun has warped it and there is now a hole and crack there. So I wouldn't plan on the clear roofing being a long term solution- I will be replacing it with either thicker clear roofing or 2 layers.
Wed, 05/06/2020 - 13:15
Love the design and space saver idea, brilliant! How can I get the dimensions? Tks
In reply to Love the design and space… by shed man
Mon, 01/25/2021 - 13:25
I just went out and measured- 6' wide and deep, 7' tall at its tallest point, tapering down to about 5' tall. Hope this helps!
In reply to Love this! by V2theicki
Mon, 01/25/2021 - 13:14
I based it off of this plan, but heavily modded it to fit our space. https://www.ana-white.com/woodworking-projects/small-cedar-shed
Hope that helps!
Tue, 06/23/2020 - 20:26
This is exactly what I want to do for the side of my home , I also would love to get the plans for this .
In reply to This is exactly what I want… by ajg1972
Mon, 01/25/2021 - 13:16
I used Ana's plans here, but heavily modded it to fit my space: https://www.ana-white.com/woodworking-projects/small-cedar-shed
Sun, 02/21/2021 - 09:39
Did you use cedar pickets?
And what did you use for the roofing material?

I love how this bed frame turned out! Everywhere that has stain is cedar and the rest is all scrap spruce. Thanks for another great plan Ana!

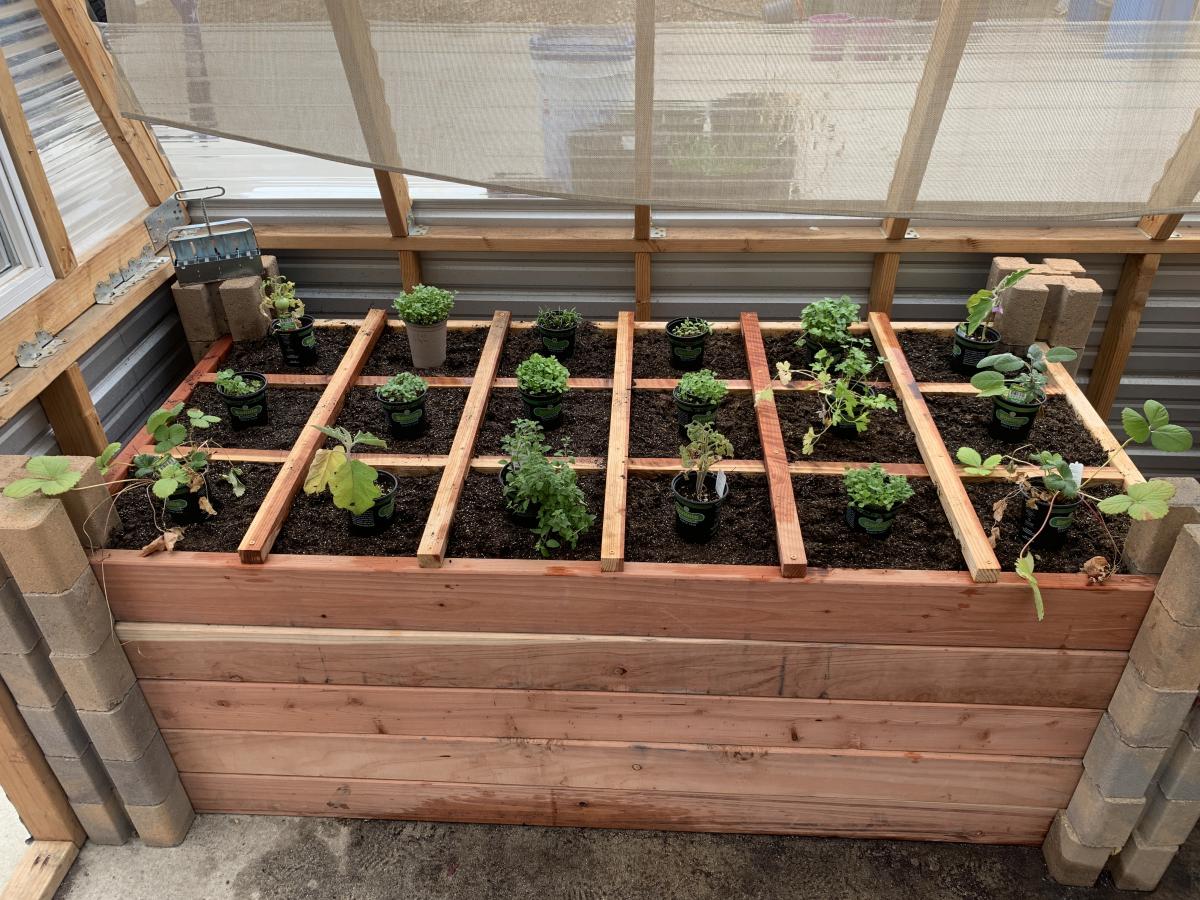
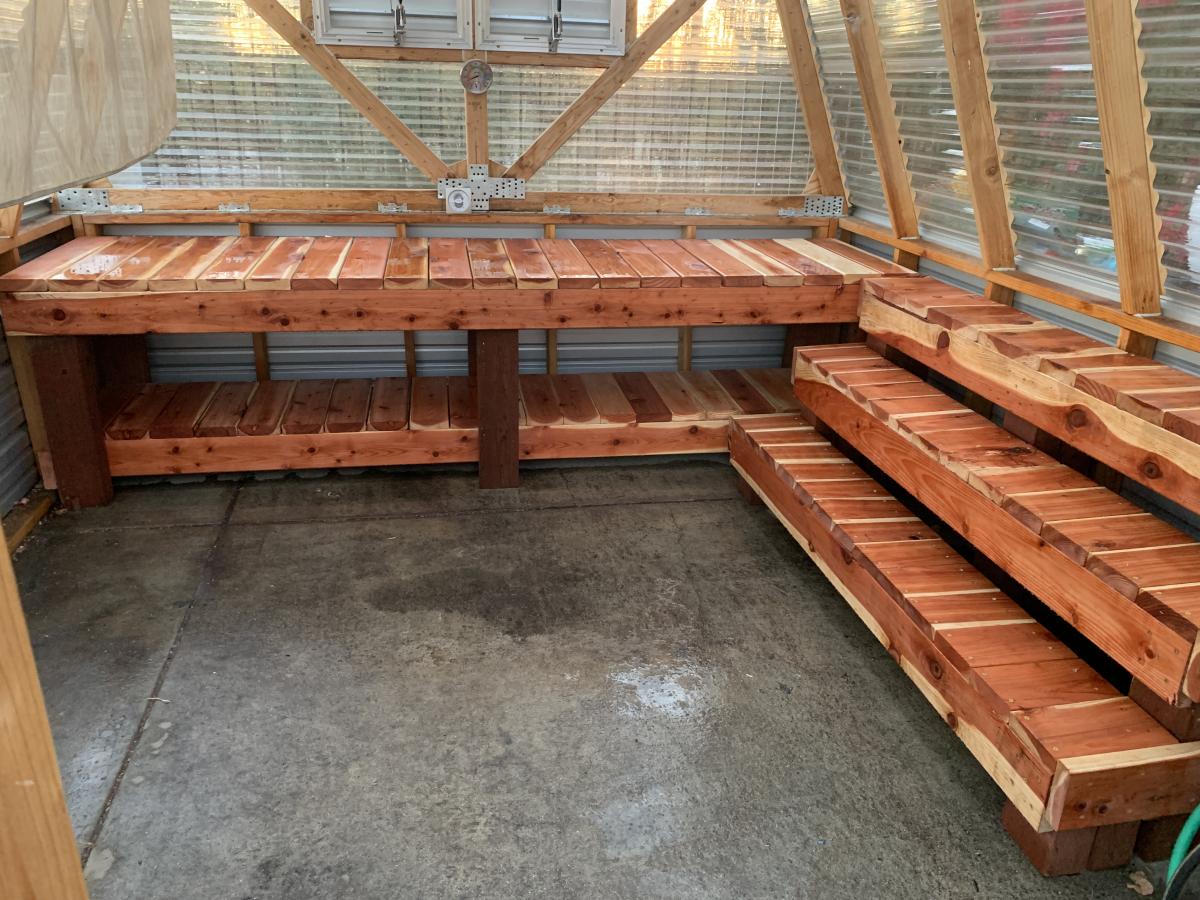
We made some modifications to the greenhouse to include a bench with three levels, a working bench and a square foot garden. We also put it on concrete to keep all the weeds out from the bottom as well.
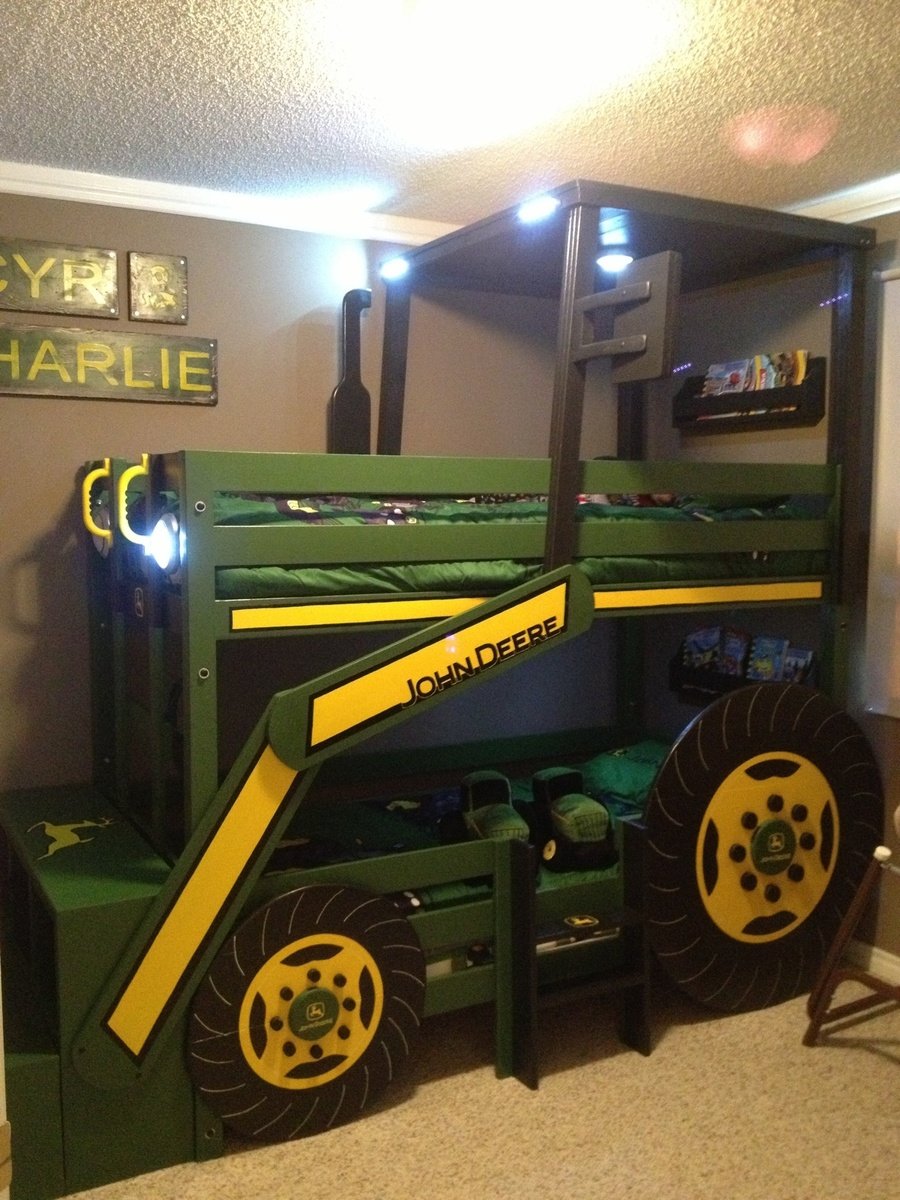
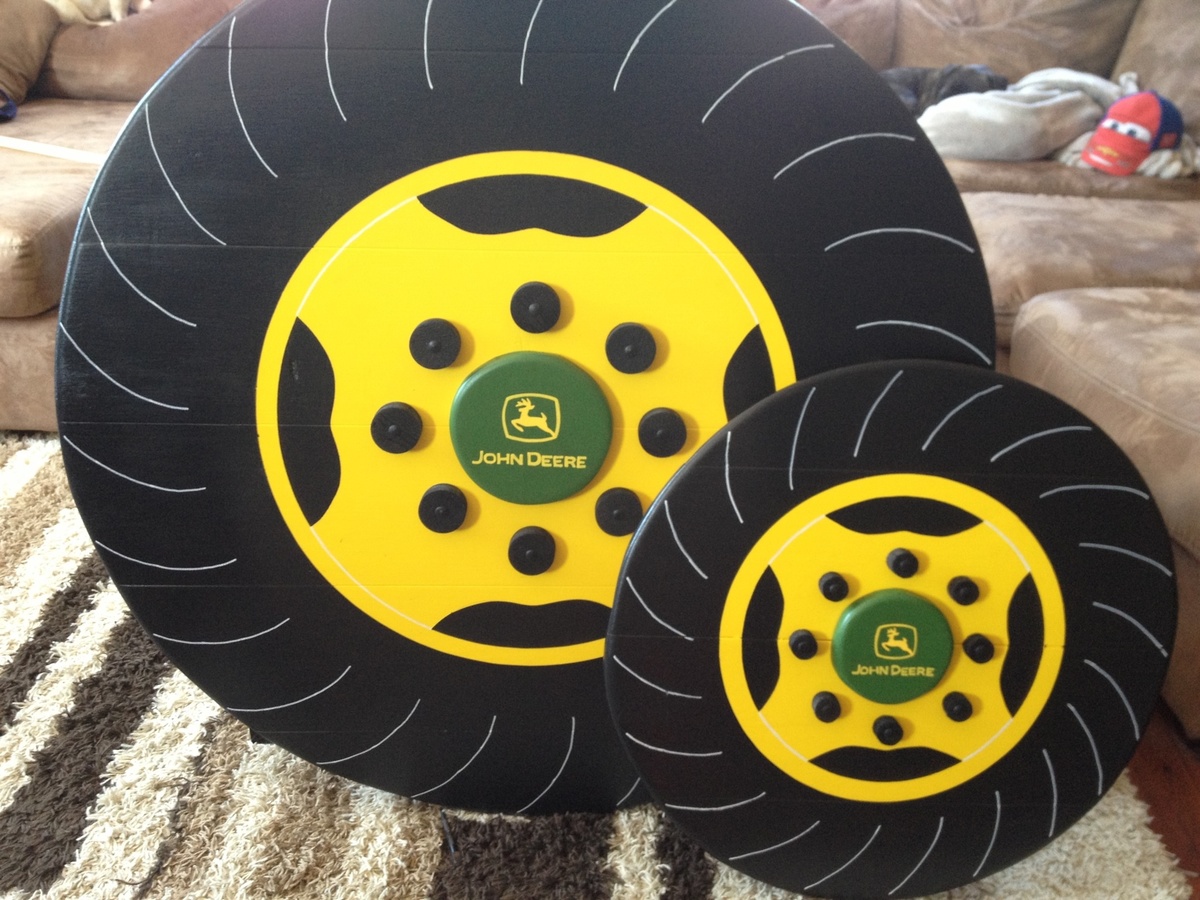
With another baby boy arriving in August, my one and three year olds are moving to a "big boy" room. My oldest decided he wanted a bunk bed and as they both are obsessed with tractors, when I saw the "John Deere Tractor Bunk Bed" plan, I was sold.
We would be needing a twin sized bunk bed though not a toddler. I used the classic bunk bed plans and simply modified them to suit our needs. I moved the ladder to the front, added a rail on the bottom bunk and added a small ladder to the side for my one year old to climb into the bottom bunk.
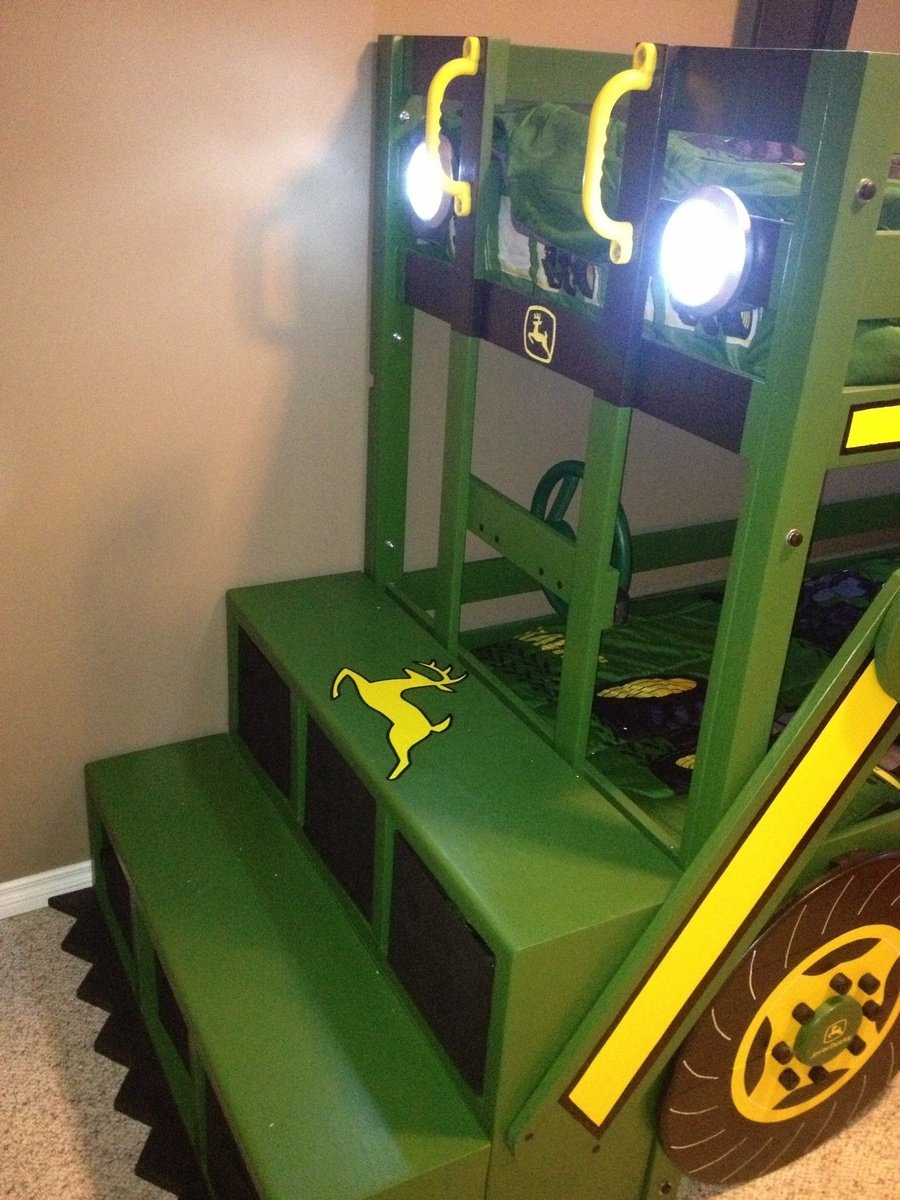
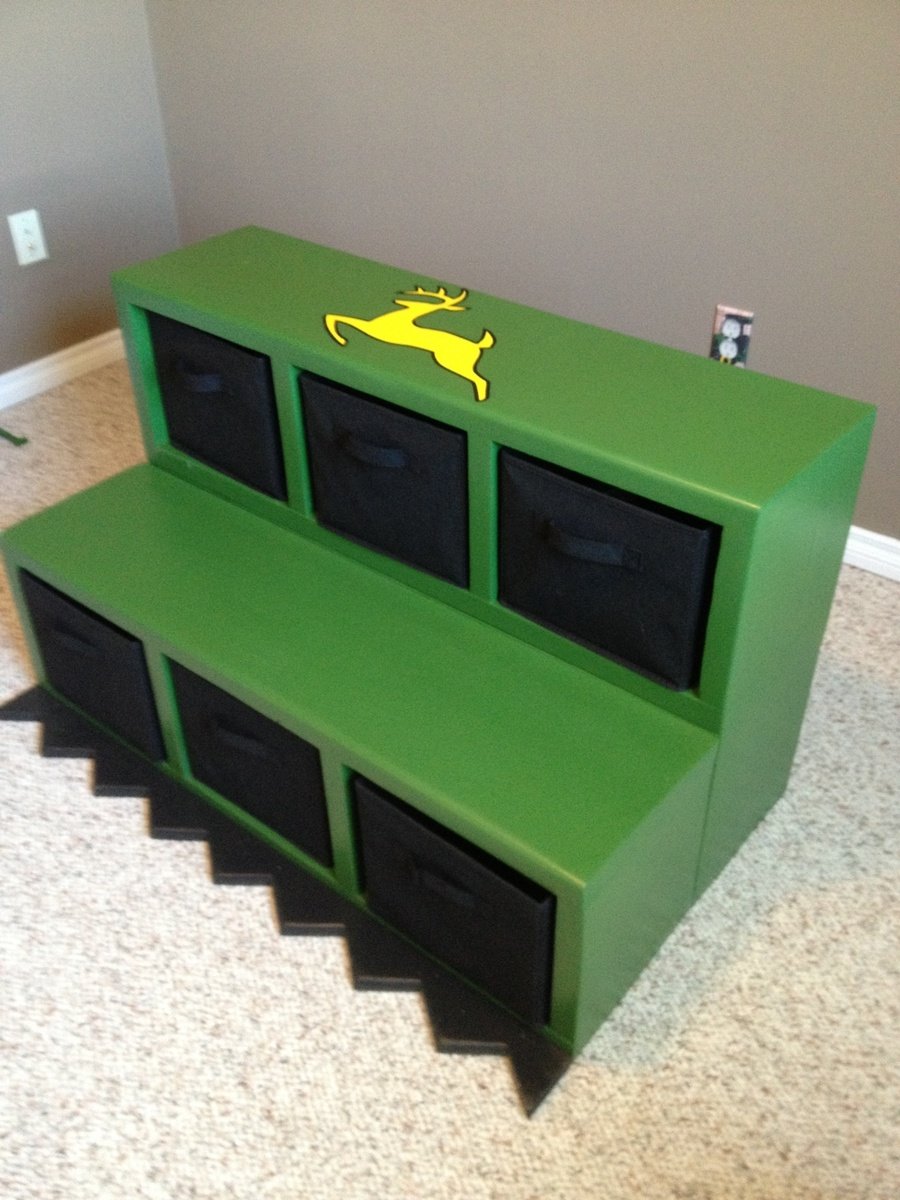
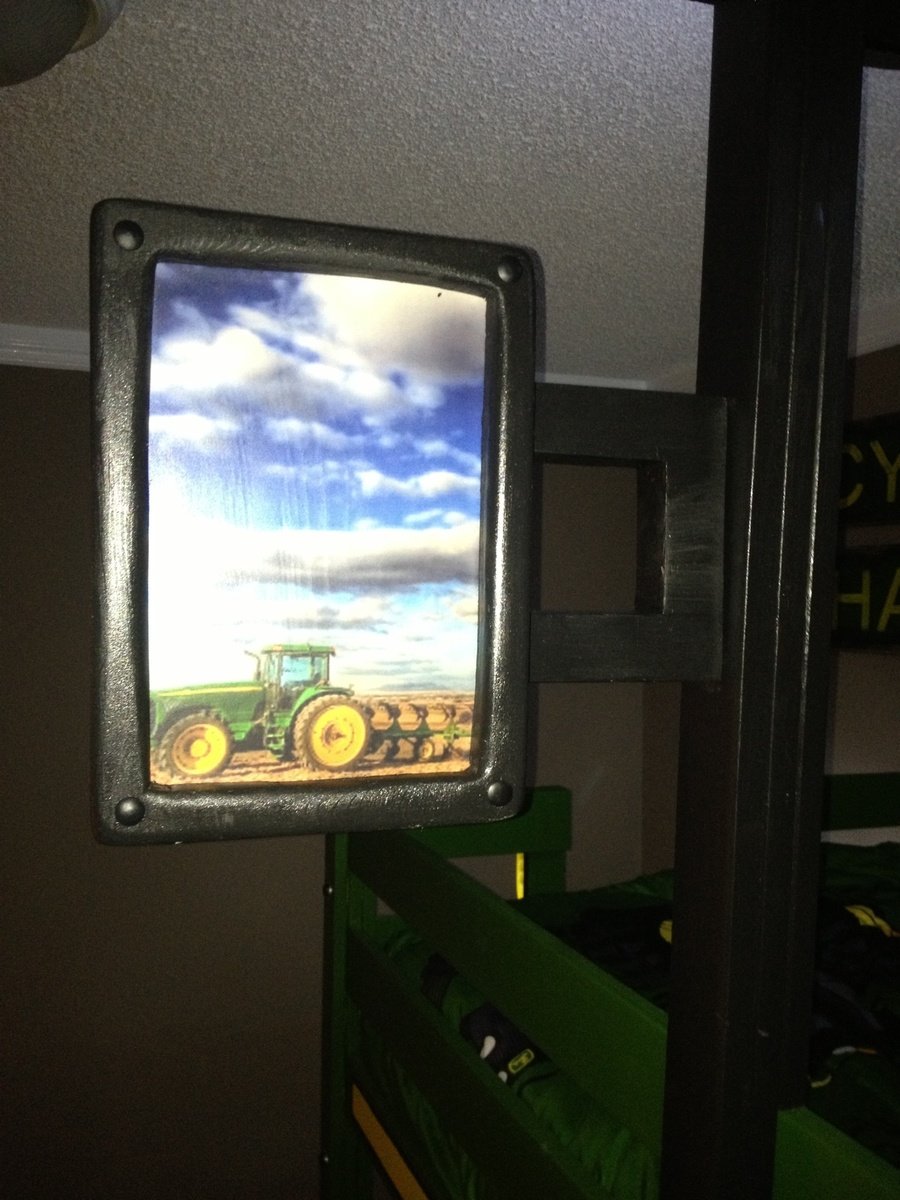
Once the the frame of the bed was complete, I added the tractor accessories. A couple of storage cubby shelves with fabric baskets for toy tractors which act as stairs up to the ladder and make the tractor bucket at the front. Also, the wheels which are made from joined 1x6s as I find plywood hard to sand and paint to the quality of finish I like. A cab & roof from 1x4s framed together. A side mirror that I decoupaged a picture of another tractor on. I used push lights for the headlights as well as a reading light above each bed (they're on timers so they'll turn themselves off). A steering wheel (play equipment access from toys r us). Also, I built and mounted by the head of both beds a "flat wall book holder" so they would have somewhere to store a few books.
My boys and I are fairly new to building so I spent a lot of time planning and measuring to ensure it would all come together in the end. It paid off because it all went smoothly (even with "help" from my boys). It's not perfect but they're very happy with the result. We also built a John Deere themed "Just my size closet" and even finished with over a month to spare before the new baby arrives! :)
Just want to say a quick thank you to Ana both for the amazing plans and also the inspiration to take on these projects. The time spent with my boys building as well as the resulting treasures are priceless and I would have never realized what we were capable of had I not stumbled upon your website and been so inspired by you and everything you've accomplished. Thank you!

Thu, 10/09/2014 - 14:12
I am new to this and I was wondering were to find the measurements for the twin size bed? I would love to make this for my boys!!
Mon, 10/20/2014 - 13:10
HI! You did an amazing job with this! Is there any way you can post the plans or send them to me? Thanks in advance.
Mon, 11/03/2014 - 07:48
Sorry for the slow response to those requesting plans. For main structure of the bunk bed, I used Ana's "Classic Bunk Bed" plans. For all of the add-ons, I made up my own plans. I'm pretty low tech so unfortunately they're just pencil & paper plans but I'd be happy to scan and email them to you if you're interested. Just message me and I'll send them your way. :)
Fri, 11/21/2014 - 13:26
Can you please email me your plans? [email protected]. Thanks!
Thu, 07/09/2015 - 19:48
I was just wondering if you by chance got three bunk bed plans?? If so would you be willing too send them my way??? [email protected] thanks so much
Thu, 05/26/2016 - 14:54
I know that it has been a while, but did you ever get plans for this bed? If so, will you please forward them to me at [email protected]? Thank you!

In reply to Plans please! by kerrihicken
Sun, 02/12/2017 - 07:36
if you recieved plans for this can you please forward them to me [email protected]
Fri, 01/02/2015 - 12:36
If you wouldn't mind sharing with me also I would love a copy. Email ... [email protected] This is by far the BEST tractor bed I have seen online! You did an awesome job!!!!! Hopefully I can recreate!!!!
Mon, 01/05/2015 - 08:44
I love this! You did an amazing job! Could you please send the plans to [email protected]
Thank you so much!!
Wed, 01/28/2015 - 14:08
Hi Veronica, Well done fantastic job! Two little men who want to move in together because of a new addition on the way. Their request though is a John Deere Bunk Bed! would be grateful if you could forward on your plans if you have time, Kindest regards.
In reply to Plan Request by Veronica P
Thu, 01/29/2015 - 07:18
Hi, I would love to get a copy of the plans used to make this bunk bed for my grand kids. Have two grandkids and a third one due the middle of February so got to get a bed made quickly for them to have a great bed to sleep in when staying with nana and pa. Plans can be emailed to me at [email protected] 731-415-9666. Thanks Diana
Mon, 02/02/2015 - 07:31
This looks so great. Could I get a copy of your plans? Thanks [email protected]
Mon, 02/09/2015 - 21:06
I would love to receive a copy of of the Plans for the John Deere bunk bed. My email is [email protected]
Tue, 03/03/2015 - 10:43
Can you please email me the plans. I have a 4yr old that is obsessed with John Deere. We would like to make this for his birthday. [email protected]
Thu, 03/05/2015 - 22:31
Just love the whole thing very beautiful & I was wondering if you could send me the plans for the whole set up. My email is [email protected] thanks
Mon, 04/06/2015 - 21:04
Hi Veronica, like everyone else i love your plans, could you possibly email them to me? Thanks in advance.
Thu, 05/28/2015 - 10:35
Please send me the plans for the John Deere Bunk Bed. I love it.
Fri, 05/29/2015 - 09:06
Please send me your plans for the John Deere Bunk Bed in the twin size. [email protected]
Sun, 05/31/2015 - 23:36
Will you please email me the plans for the John Deere tractor bunk bed? Thank you. You did awesome
Tue, 06/09/2015 - 08:06
Hi! Can you please forward me your plans for the john deere tractor bed to [email protected]?
Thank you so much and awesome idea!

In reply to Plan Request by Veronica P
Fri, 06/12/2015 - 19:31
Please, please email these plans to me! My son will love this!!!! Email is [email protected]. Thank you!!!
Thu, 06/18/2015 - 14:04
Thanks for being willing to share your plans. Your tractor bed is amazing. I have 2 boys who would LOVE a bed like this. Could you please send your plans to [email protected]?
Thank you so much
Sun, 09/06/2015 - 10:06
Dear Veronica,
Our grandson, 6 years old, will absolutely adore this bed. He loved riding on Grandpa's real JD tractor. Please send me your plans for the attachments. They are just darling and I could not do any better. Thanks for your generosity!
Fri, 01/15/2016 - 10:52
Can you please send me your plans? i am stumped on the arms of the tractor
Wed, 07/13/2016 - 12:12
Veronica P this bunk bed is amazing! Could you email me your low tech paper and pencil plans please? :) [email protected]
Fri, 09/13/2019 - 21:11
Hi Veronica. My 3 year old just loves the tractor bunk bed. I was wondering if you would mind sending me the plans you have. It would be greatly appreciated. My email is [email protected]
Thanks in advance
Wed, 10/16/2019 - 17:56
If you're still sharing, we would love a copy of your add-ons plans.
Thanks,
MyMaw and PawPaw
Sun, 08/23/2020 - 11:32
What an awesome build! We would love a copy of your plans if you could please share. Thanks!
[email protected]
Mon, 12/15/2014 - 20:19
Would you please email me these plans for your bunk bed? Thanks A lot!!! email to [email protected]
Thu, 05/26/2016 - 15:00
Hi! I know that it has been a while, but I see a message where Veronica says she emailed you the plans. If you still have them, will you please send them to [email protected]. Thank you!
Tue, 12/16/2014 - 19:22
Is there any way I could have email plans? [email protected] . Thank you.
Sun, 12/21/2014 - 00:35
Please email the plans for this to [email protected]
Thank you in advance!
Tue, 12/23/2014 - 07:33
Hi Veronica! I would love an email of the plans to make this bed. My sons thinks it is out of this world!!! Thanks for all you effort and wonderful job.
Sat, 12/27/2014 - 15:12
Would you please consider emailing the plans to me? We have started this for my son today and would love your insight on some measurements. Such a wonderful idea, thank you for sharing! [email protected]
Tue, 01/06/2015 - 08:21
Hello all. I've tried emailing plans to all those who've requested them. I had some trouble attaching the files as they were large so if you didn't receive them, please let me know and I can resend. Thanks
Tue, 01/06/2015 - 11:53
Hi Veronica. I did not receive an email. Woul you have time to try again? If you email me your address I can send you my fax number if that's easier too. Thank you so much! I can not tell you how much I appreciate your dedication to this! [email protected]
Sun, 11/01/2015 - 16:58
Hi
I didnt receive any plans. couldyou send methem please
Thanks
Jason
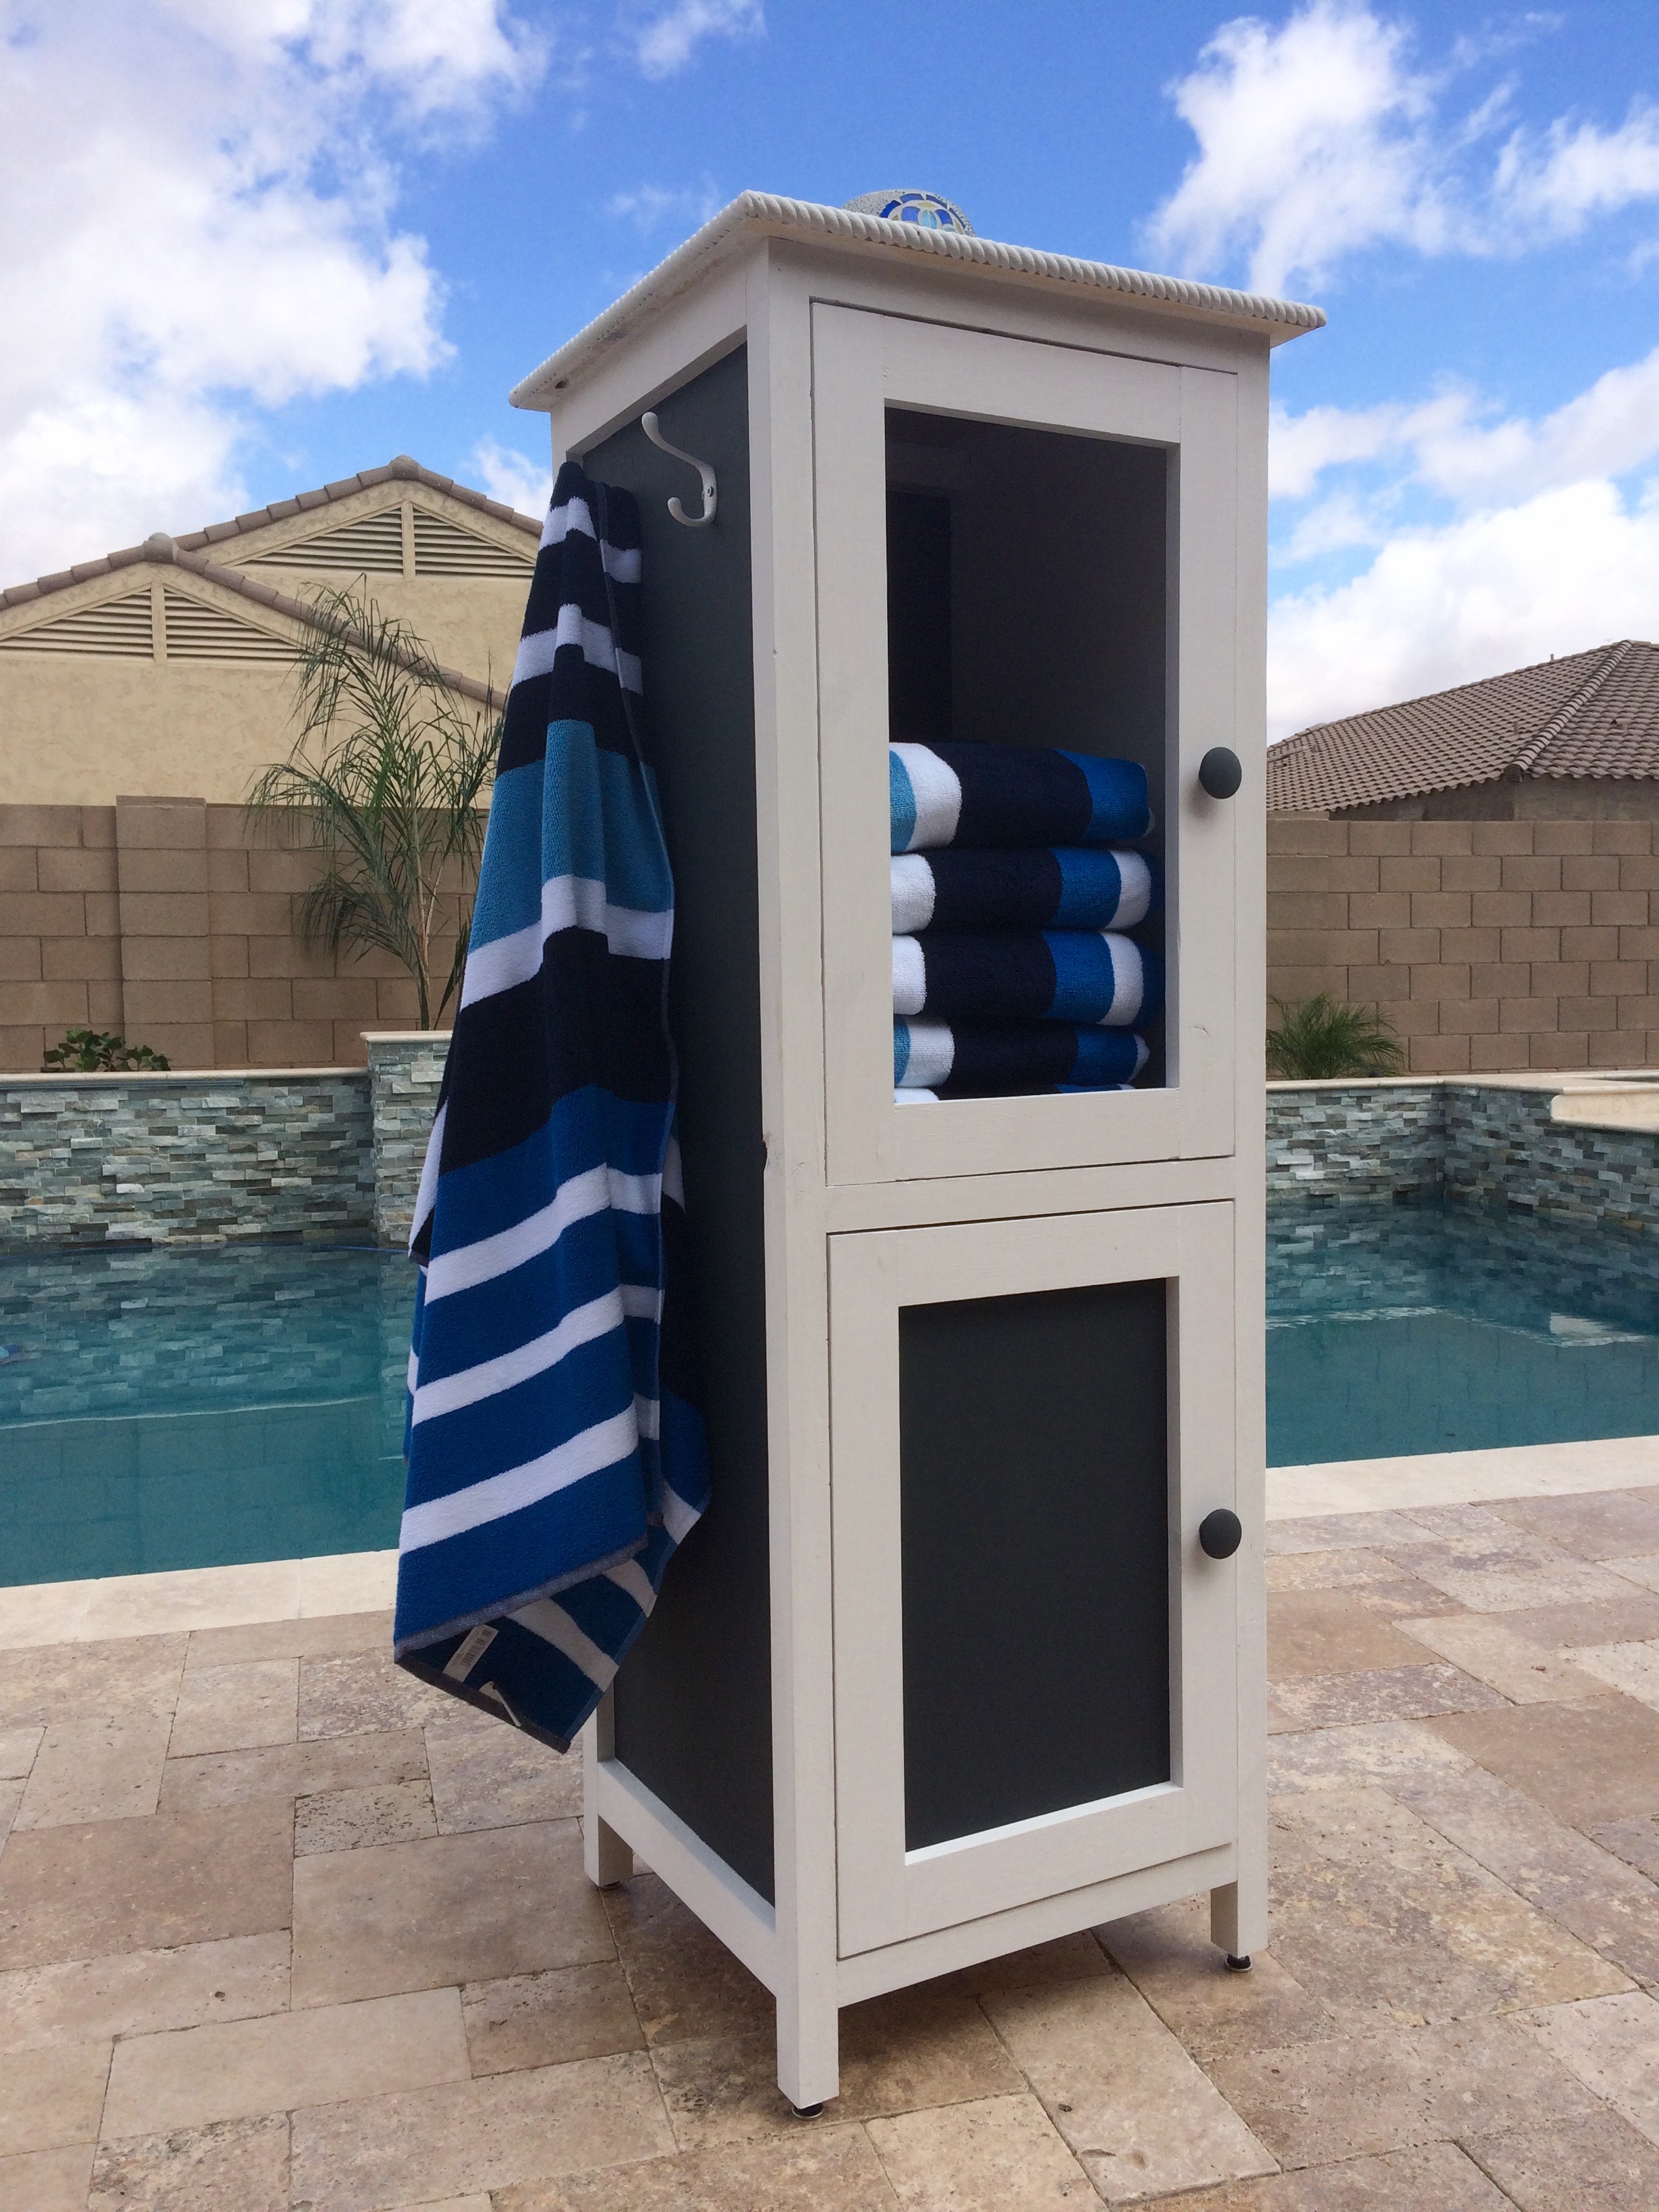
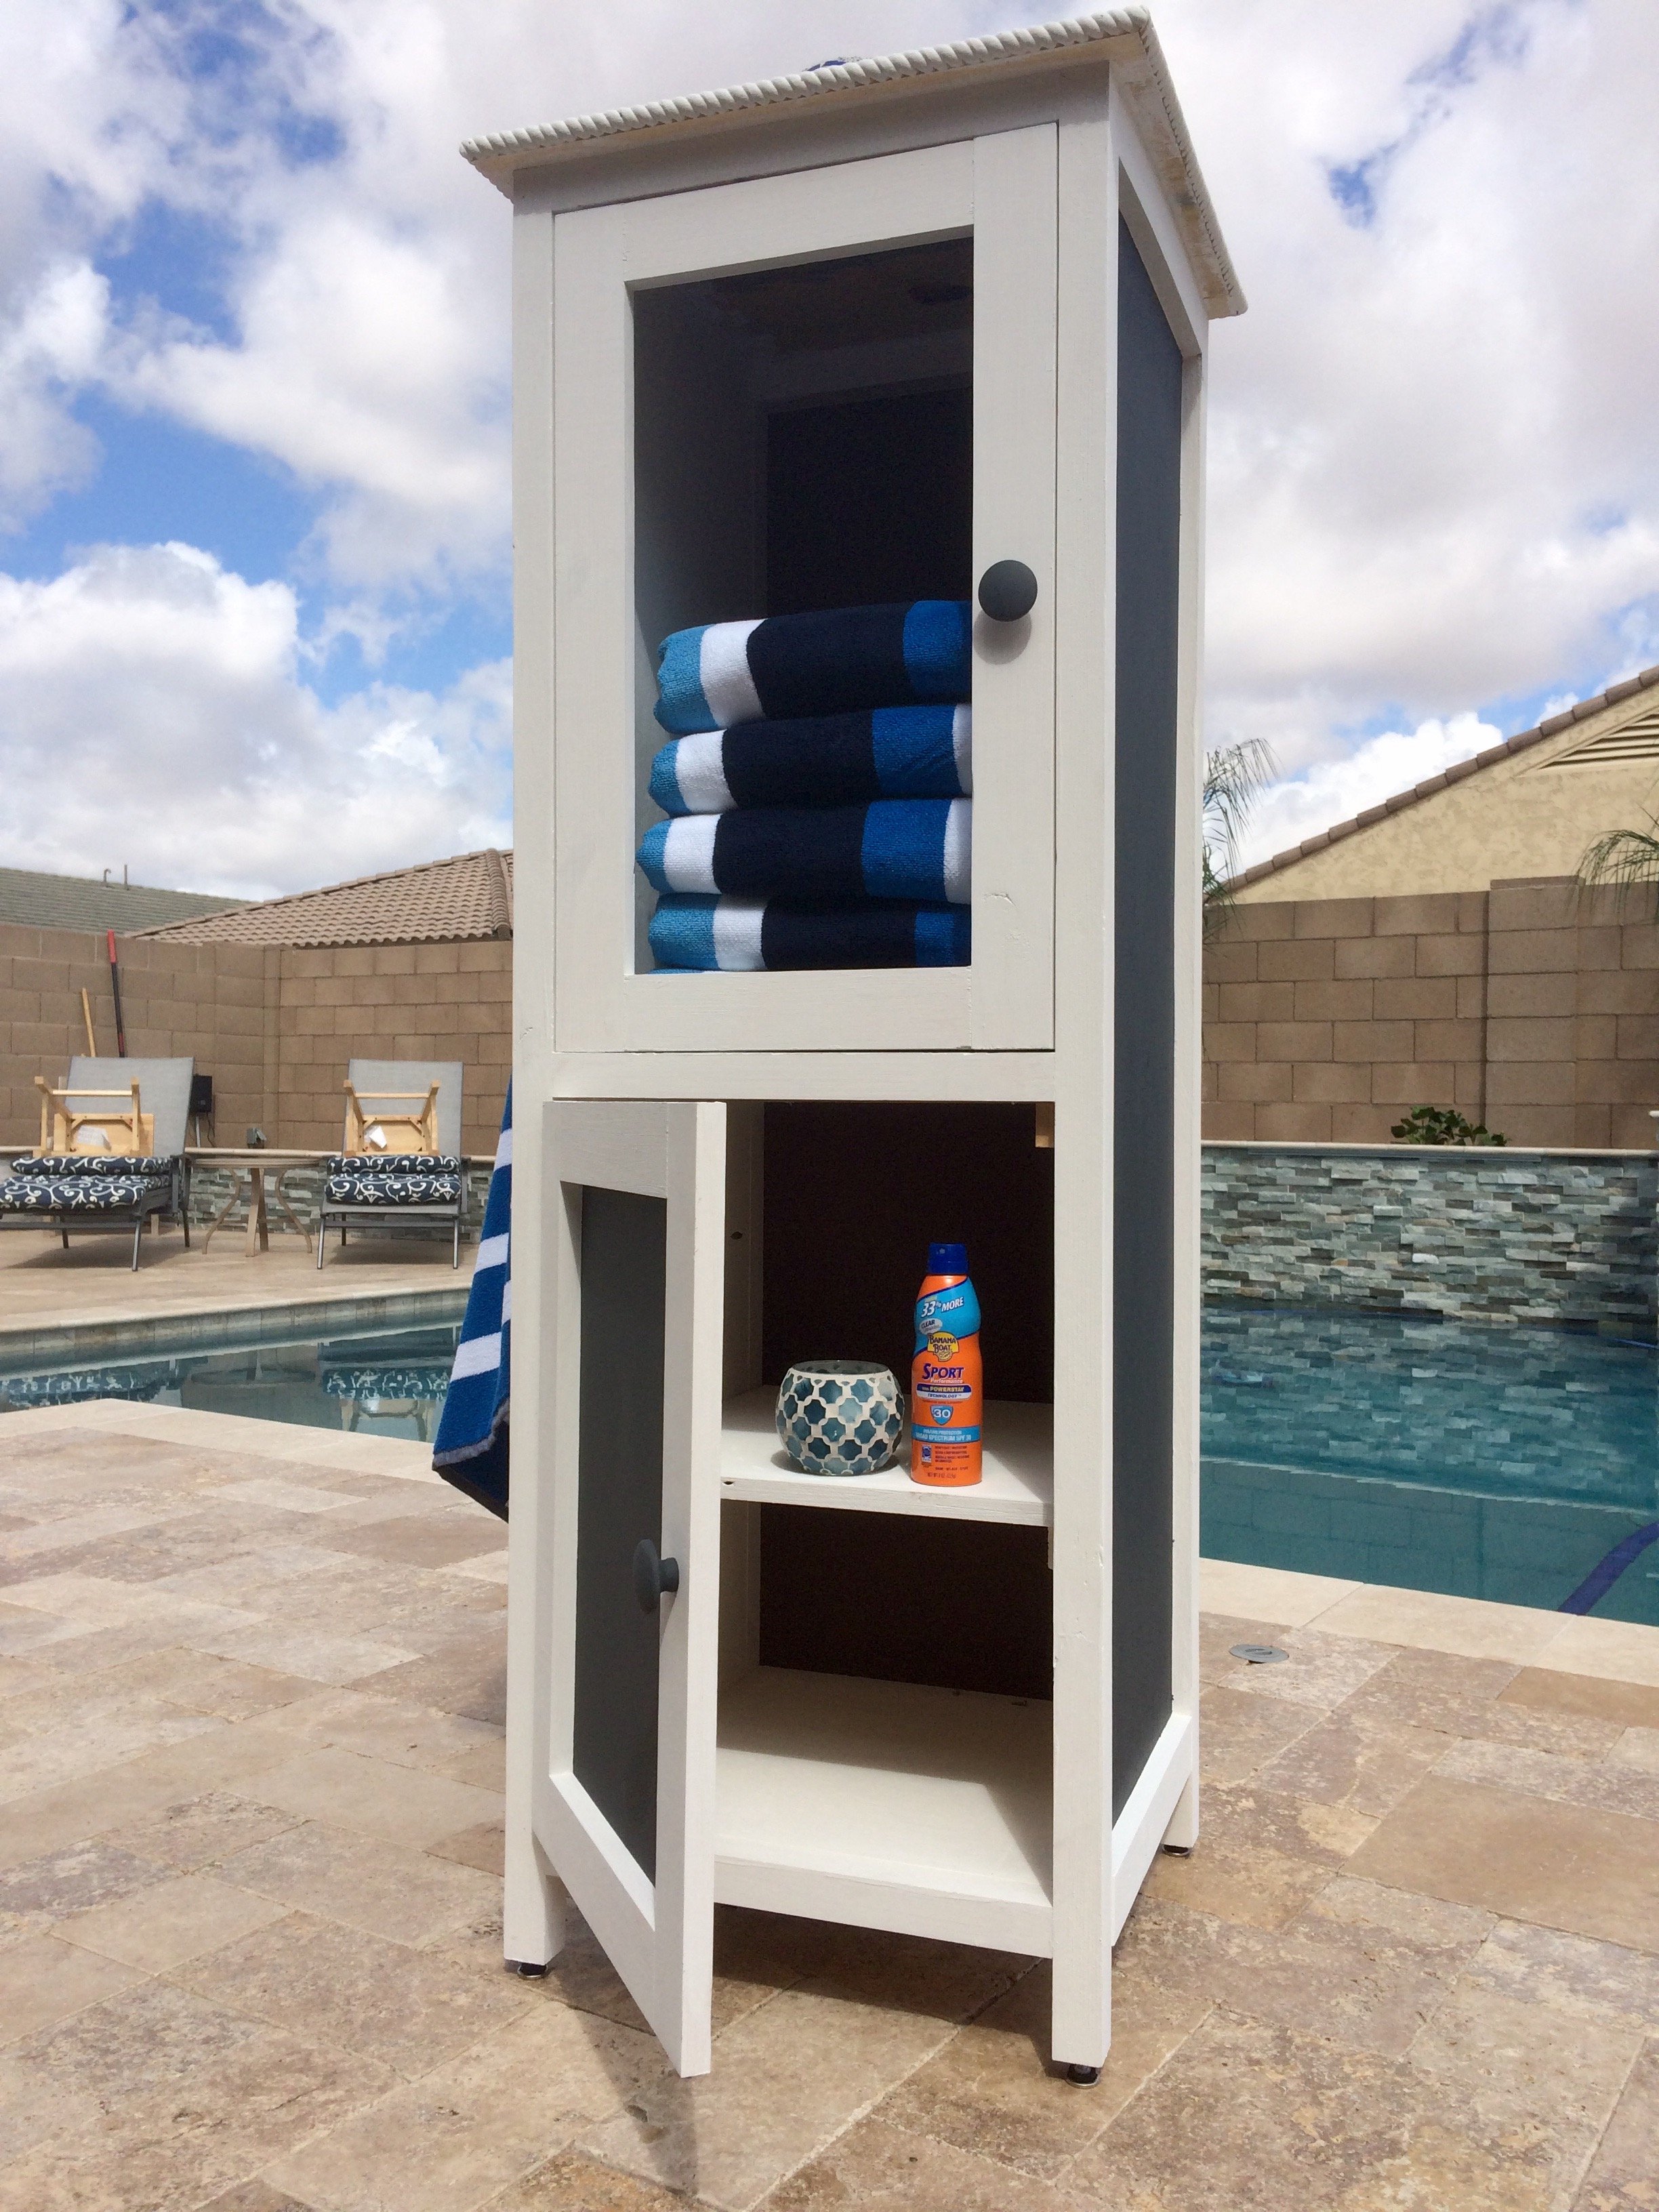
My father and I made this awesome poolside towel cabinet using the Benchmark Cabinet plans. A super easy 1 day build and it looks amazing on the patio. Bring on the pool weather!
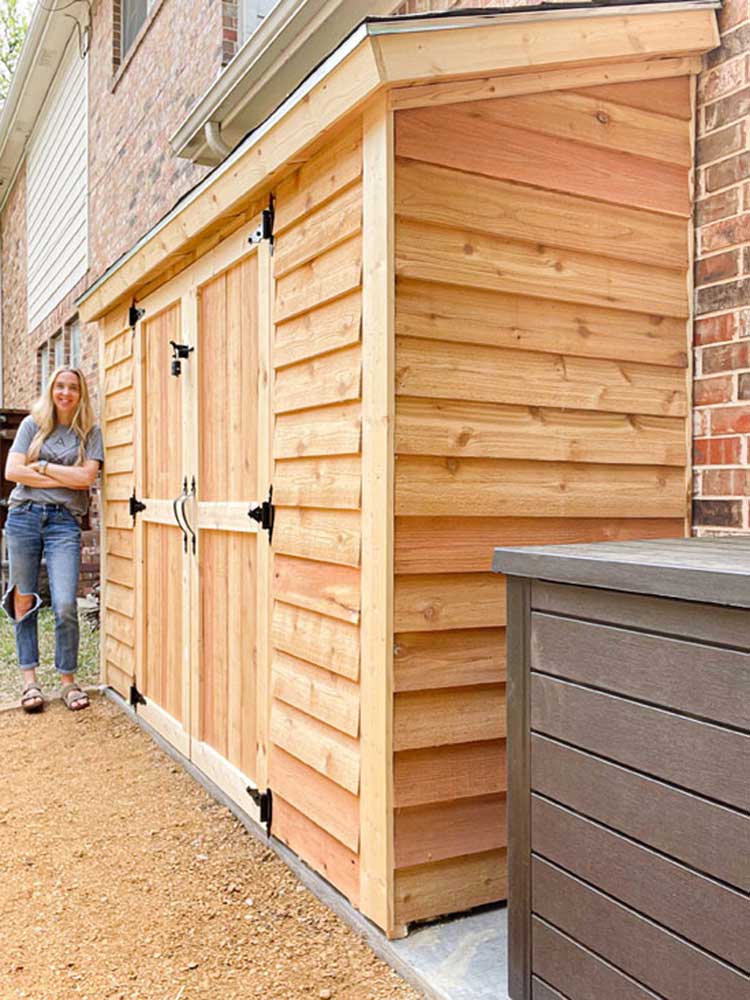
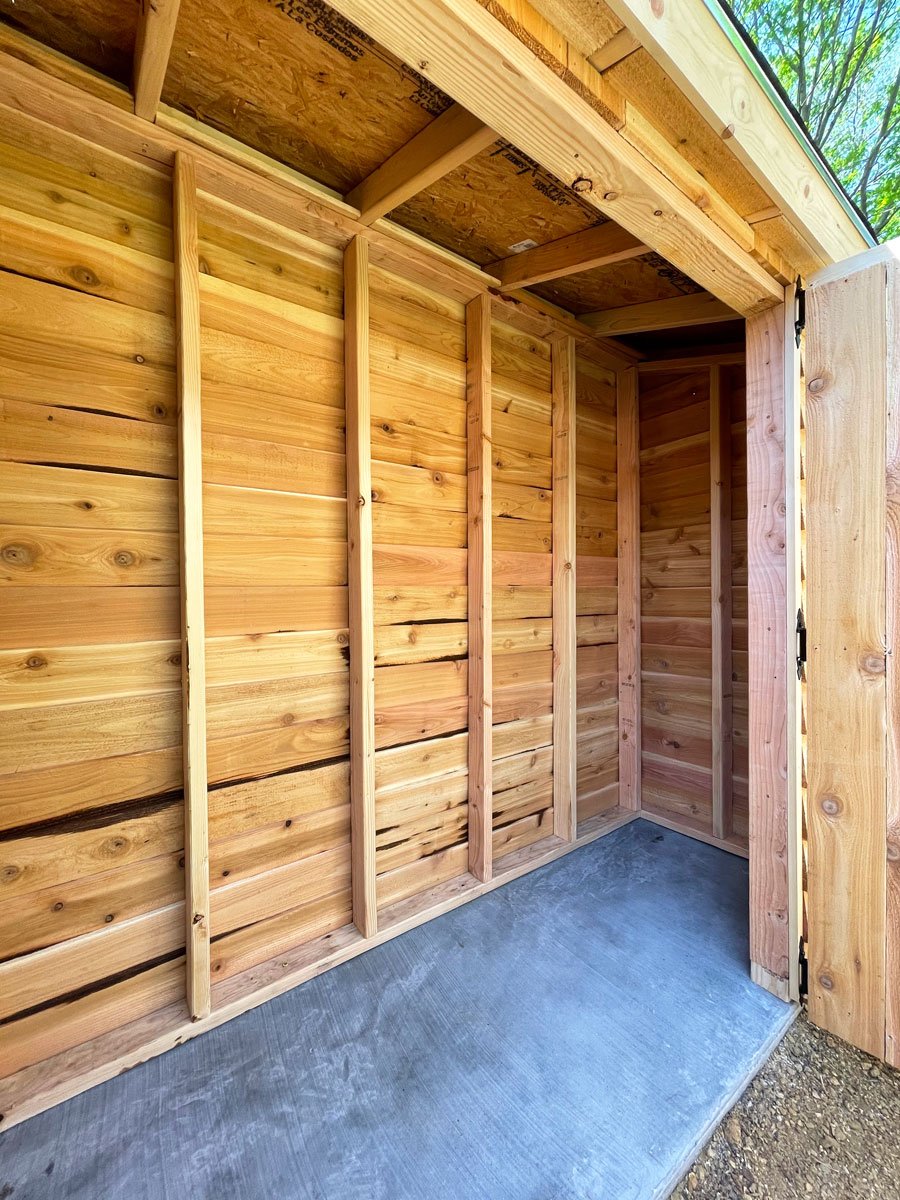
We needed a way to get all of the lawn & garden stuff out of our garage and organized. I found Ana's plans for the Small Cedar Shed & adjusted them to fit our space. We used 2x4s as our studs & added front walls on the sides. Our shed measures 9.5'x30". We had a concrete slab poured for our foundation. We are experienced DIYer's but had never taken on a project of this scale from scratch. This project was much easier than I was anticipating, and we were able to complete it in one weekend! Similar shed kits were way more expensive and not the size that we were looking for. Thank you so much for the inspiration!
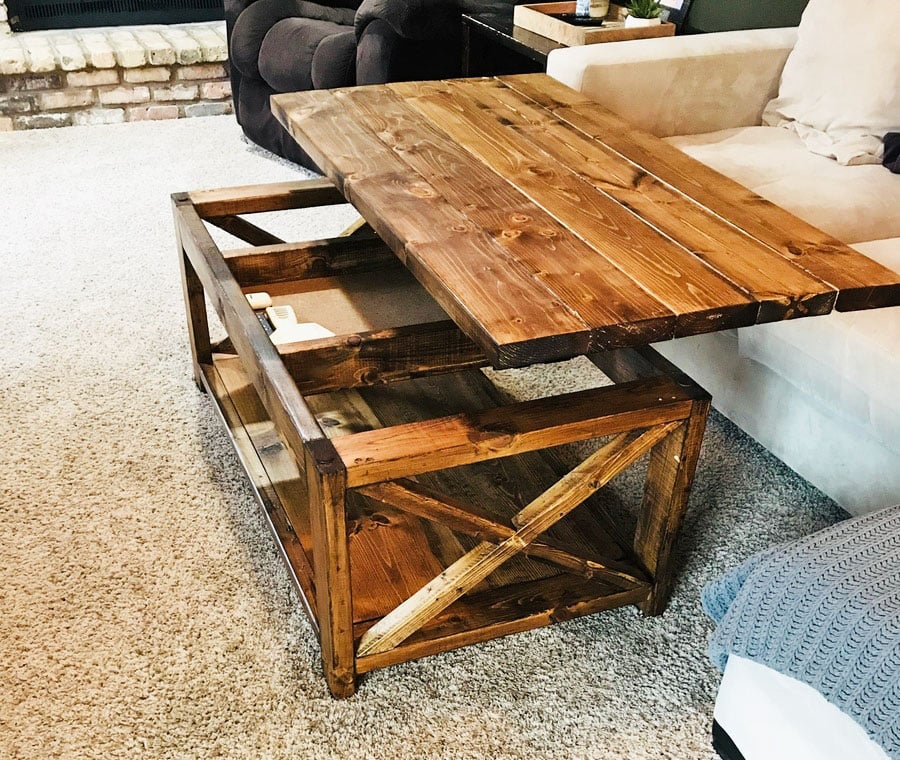
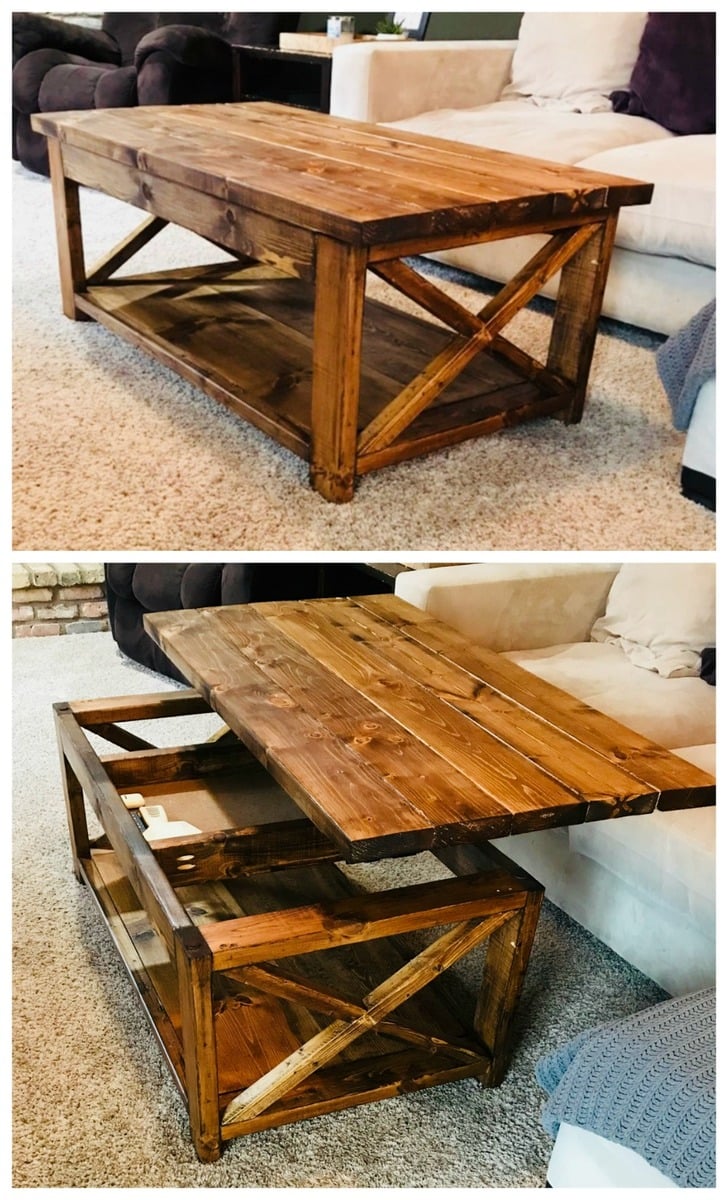
Instead of attaching the top to the coffee table base as done in the plans, the top is attached using a set of coffee table lift top hinges.
Fri, 08/21/2020 - 23:38
Looks wonderful, love the finish. What kind of stain did you use?
Wed, 09/30/2020 - 19:59
I love this table. It is just what l have been looking for. Is there any instructions. I would love to make this.
thanks
peggy

I made this coop twice as wide like Ana suggested since I have 4 chickens and wanted to make sure there was some extra wiggle room in case “chicken math” got the best of us. I made a nesting box to mount on the outside. I also used plywood for the sides like Ana did in the video. I installed a Run Chicken automatic door that opens at sunrise and closes at sunset. I added some hasps and clasps to make sure all my doors would close tightly. I put hardware cloth across the top before installing the roof panels. I stapled and buried hardware cloth around the perimeter for predator protection. I also spray painted the hardware cloth flat black so that it would be easier for us to see inside the coop. I stained the rest of the wood with Varathane Semi-Transparent stain, color “Carbon Gray.” I also added some roosts and cedar shingle siding for some extra protection during our New England winters at to match our house. Working 2-4 hours a day, off and on, with a bum shoulder and weak hands, this took me about a week! Thanks for the great plan, Ana!


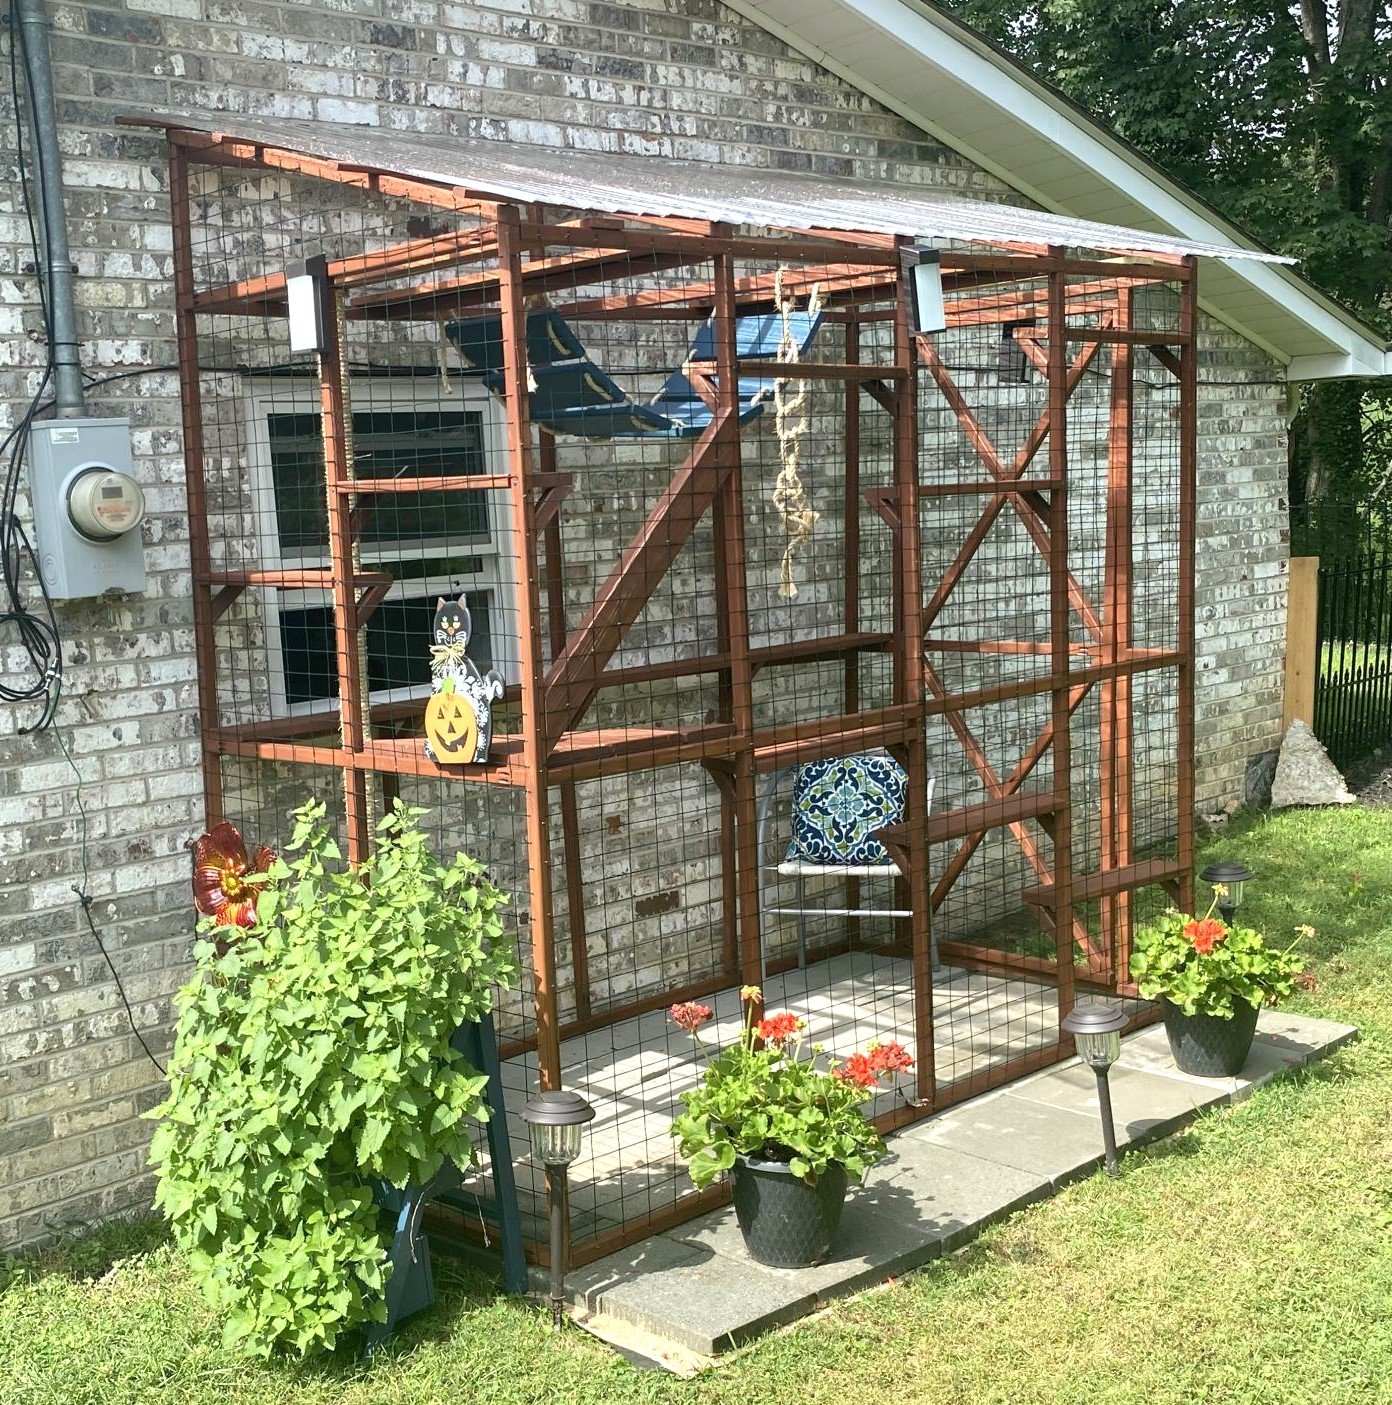
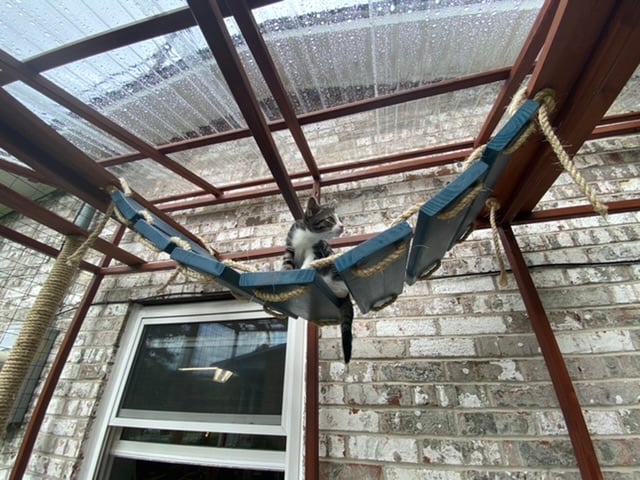
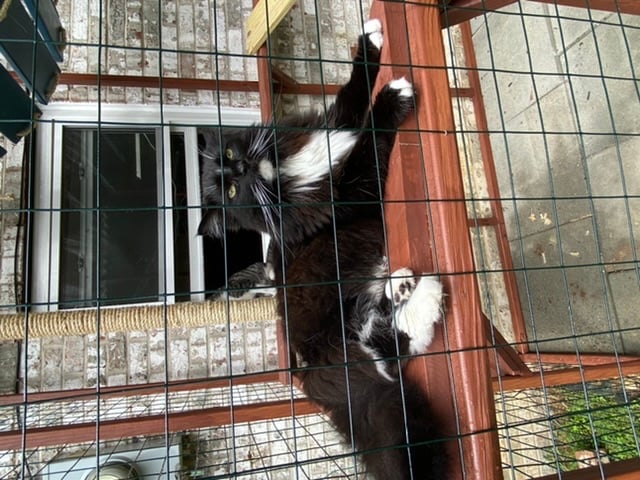
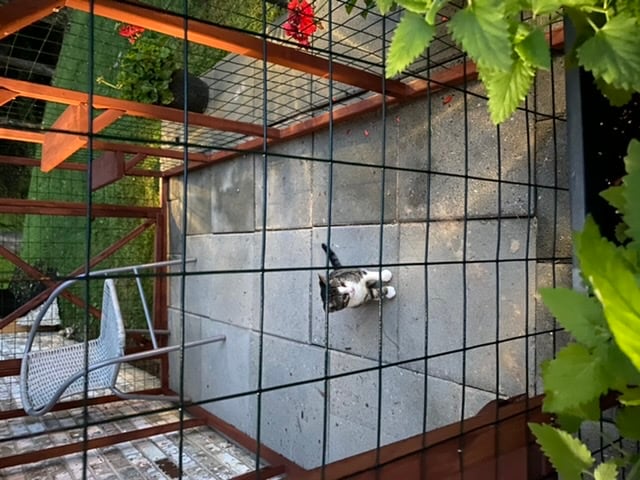
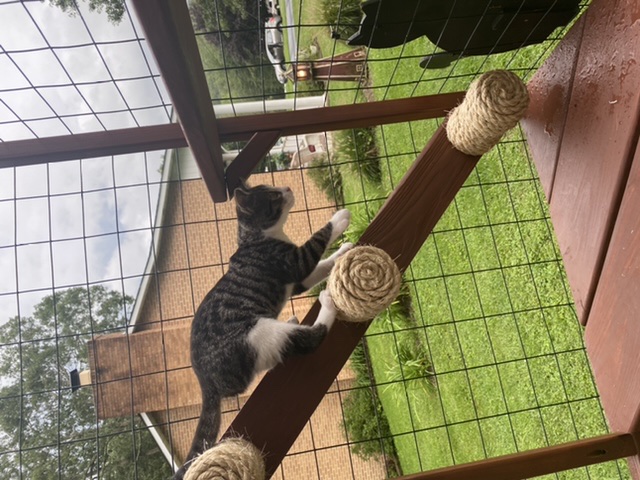
Ana doesn’t have a plan for a catio but she does for a playhouse and a cedar shed made from 2x2’s. I sort of combined my knowledge from making her plans over the last 10 years and came up with this for my cats. It was fun to make!! My baby kitten is loving it. I used garden fencing and stapled it to the outside and pocket holes for the walls. I made each wall individually like the playhouse then connected them once in place.

Wed, 06/09/2021 - 12:36
Thank you for sharing! My daughter wants a cat for her birthday but it can't be inside due to our son's allergies. Roaming outside isn't really an option because we have coyotes. We are going to use one of these in combination with an underground electric fence.
I modified this a tad from the original plans to suit my needs. I will eventually be adding a platform with attached slide and swing set.
Plans were easy to follow. My store didn't have 1x8's so I stacked 1x4's and used my Kreg jig to join them together and then I added extra bracing.
I had seen this on Pinterest a couple years ago and thought it was the coolest thing! Io excited I was able to build it myself!
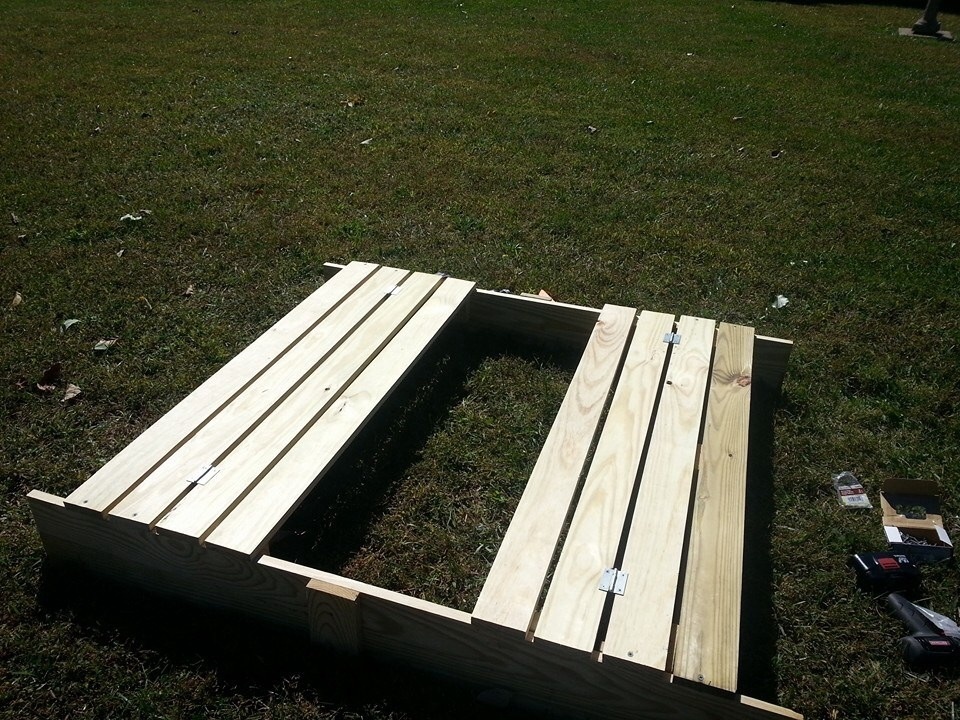
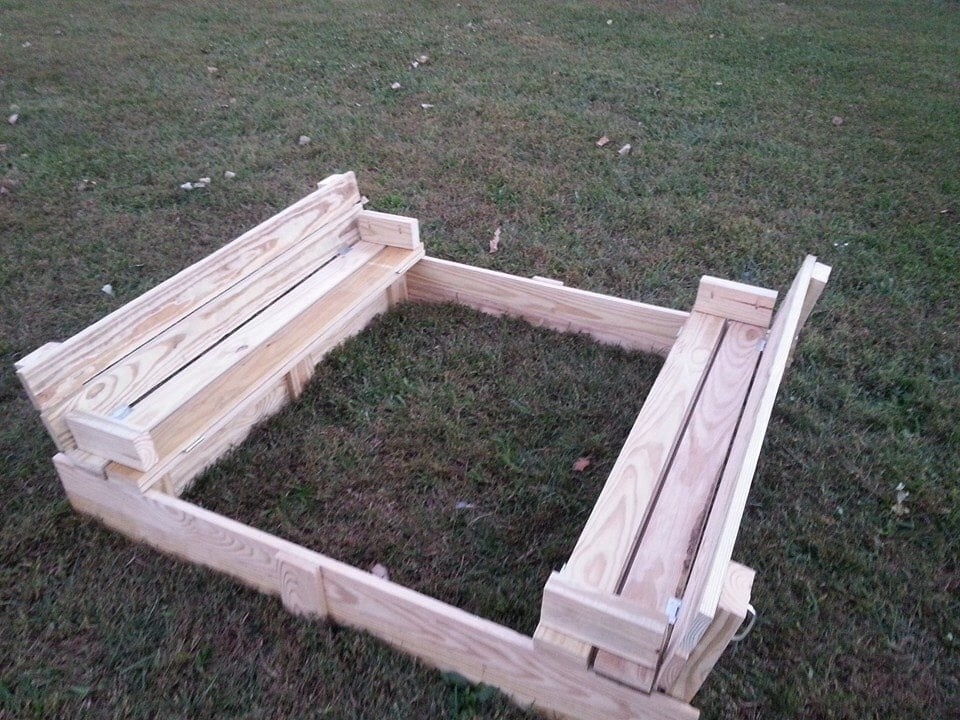
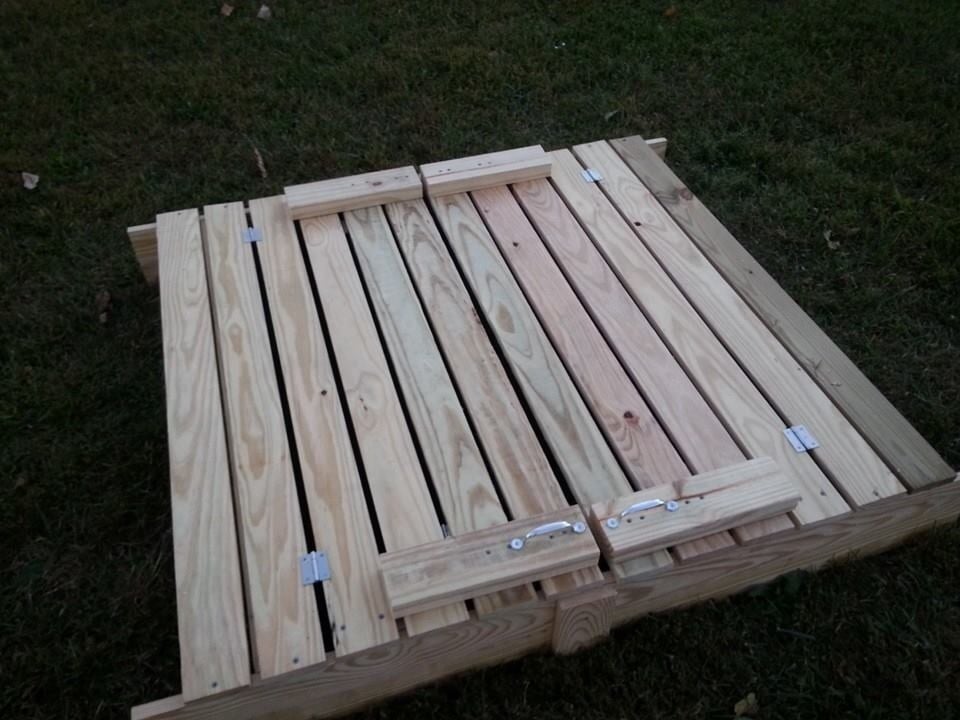
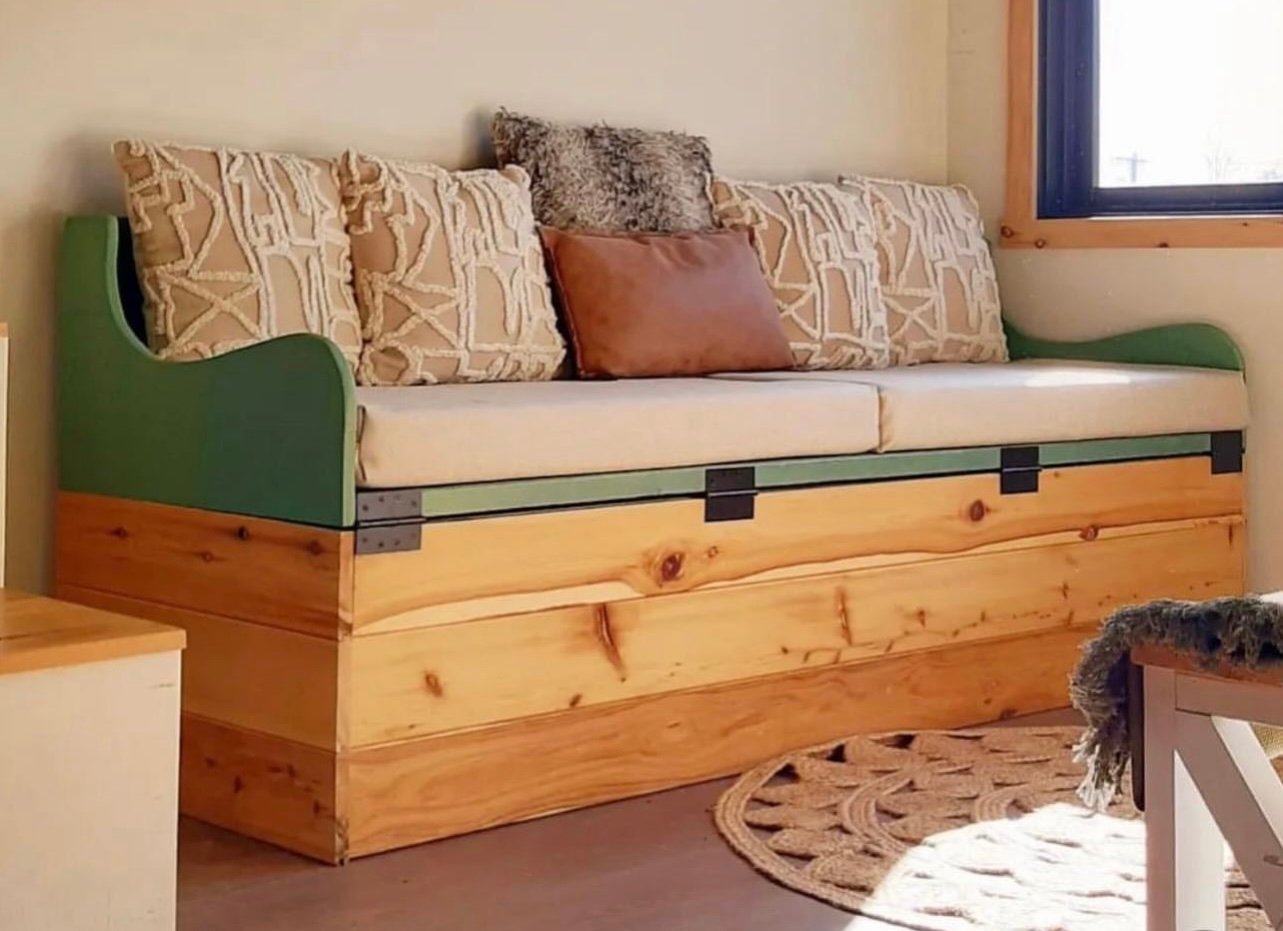
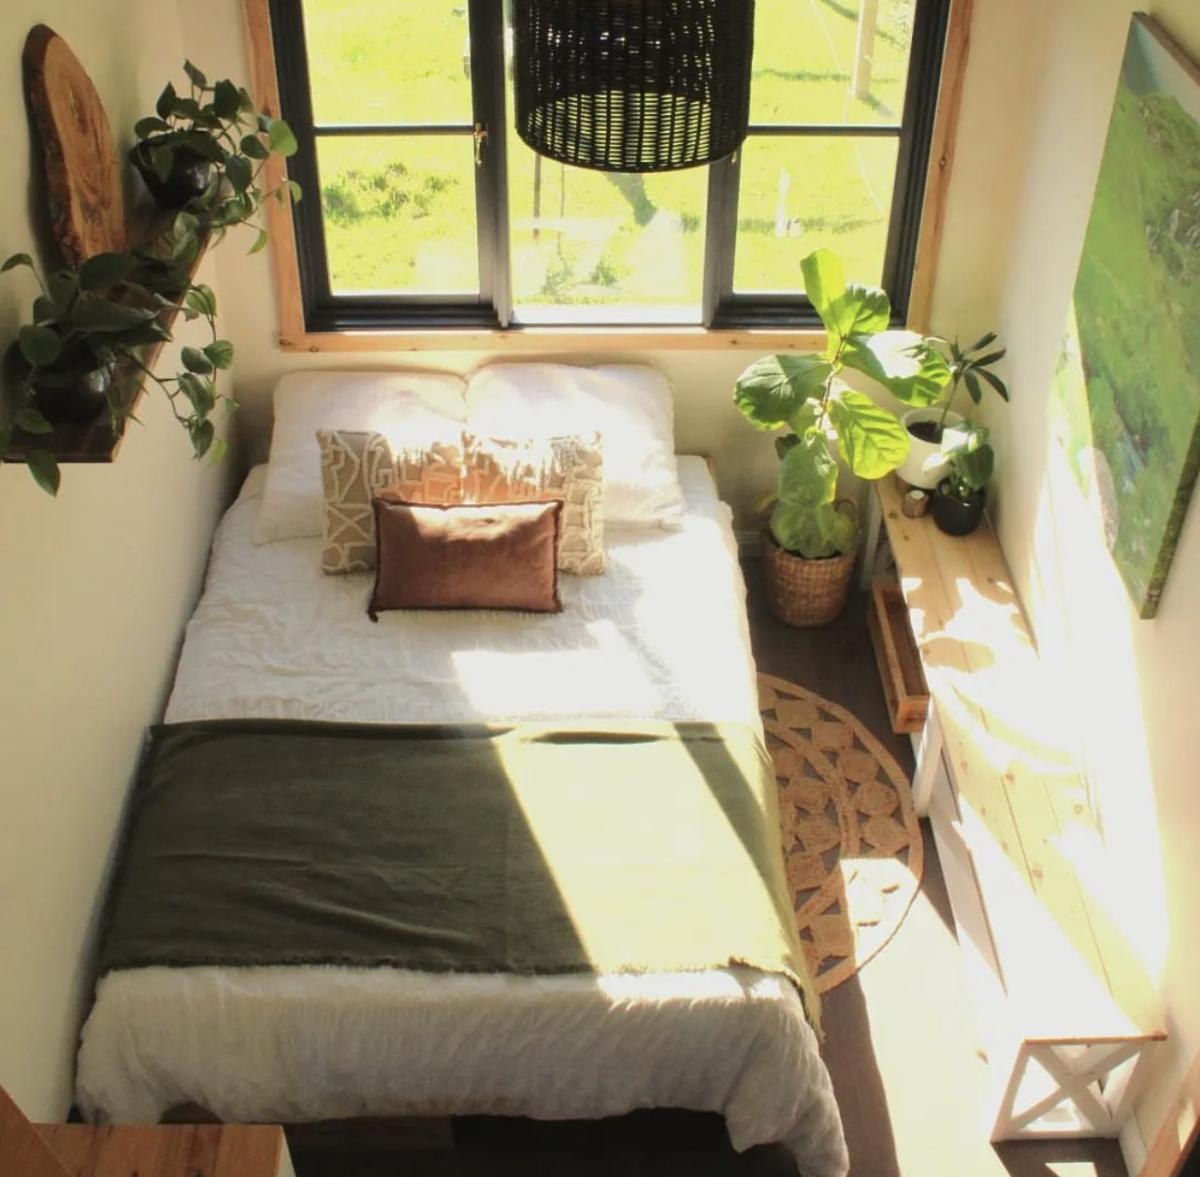
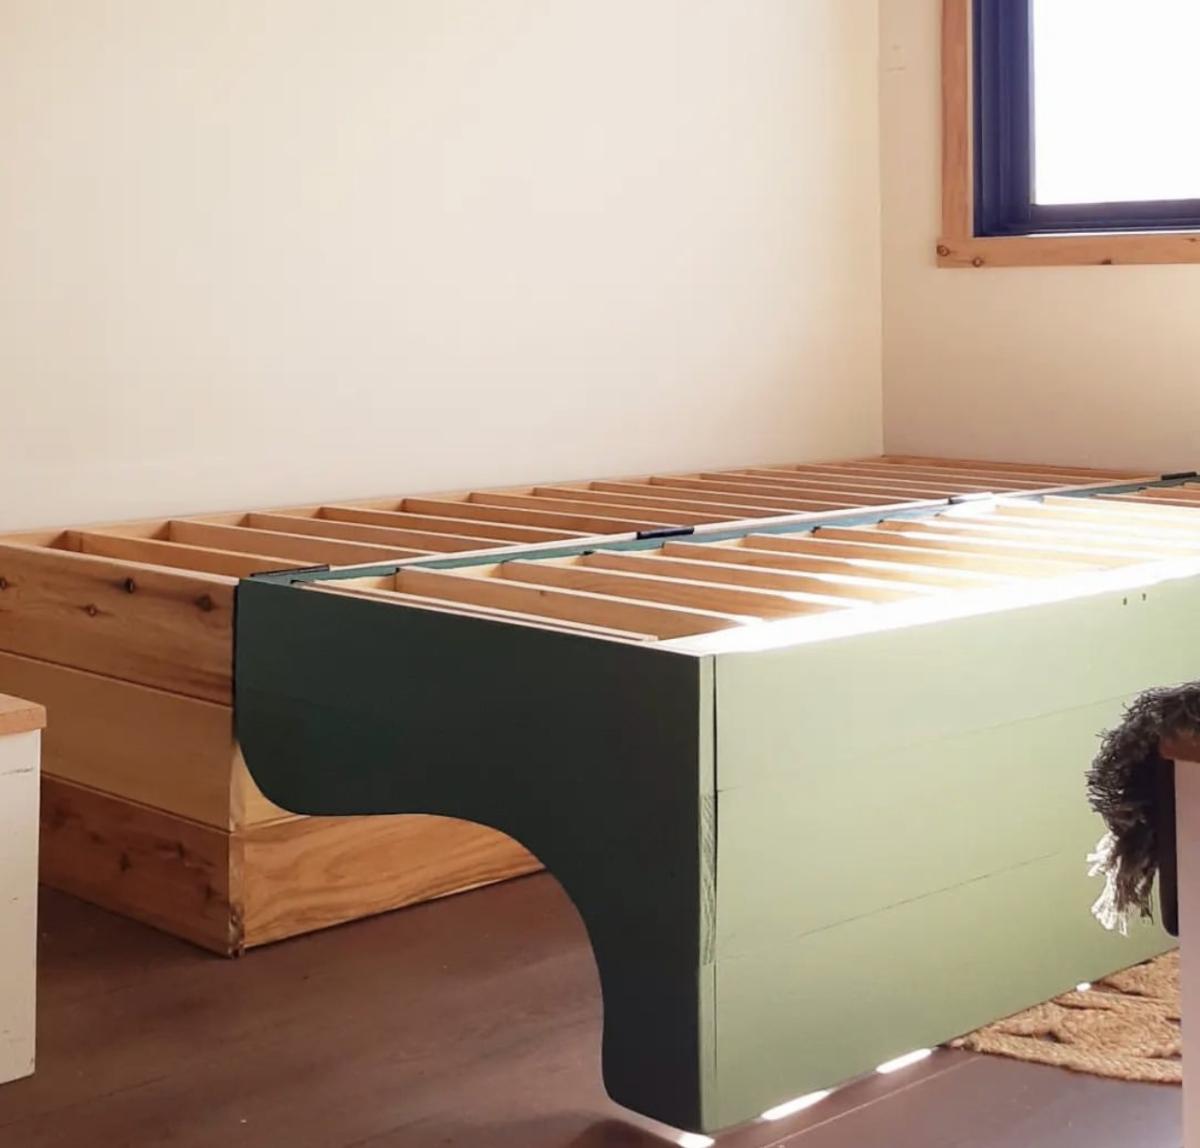
Modified from our twin sleeper chair plan, this amazing hinged sofa bed was built and shared by #tinybuilderau
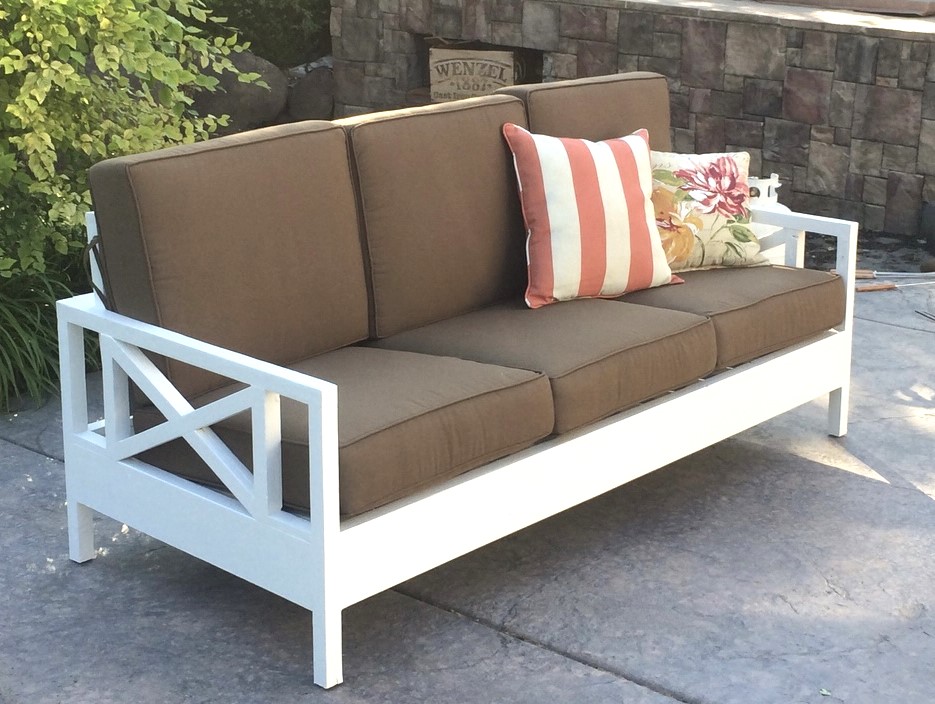
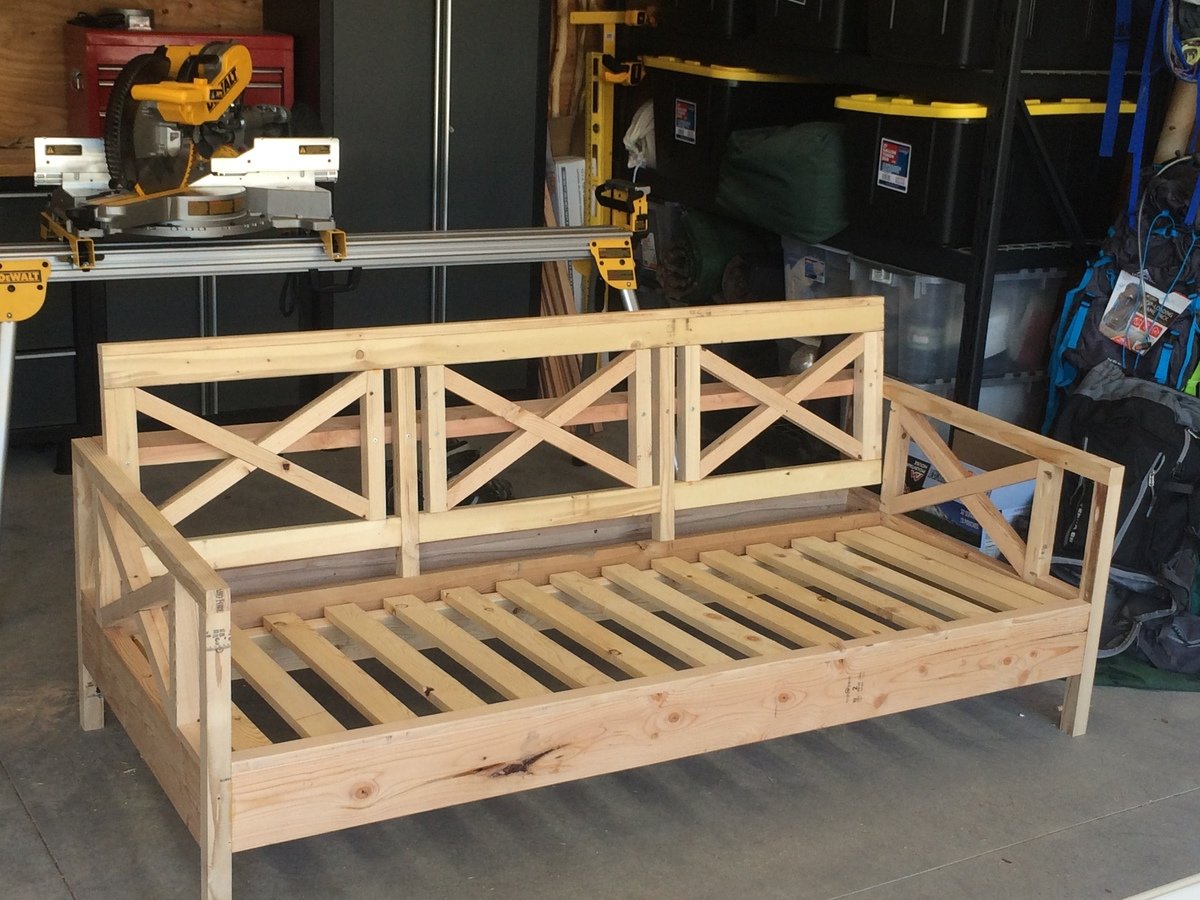
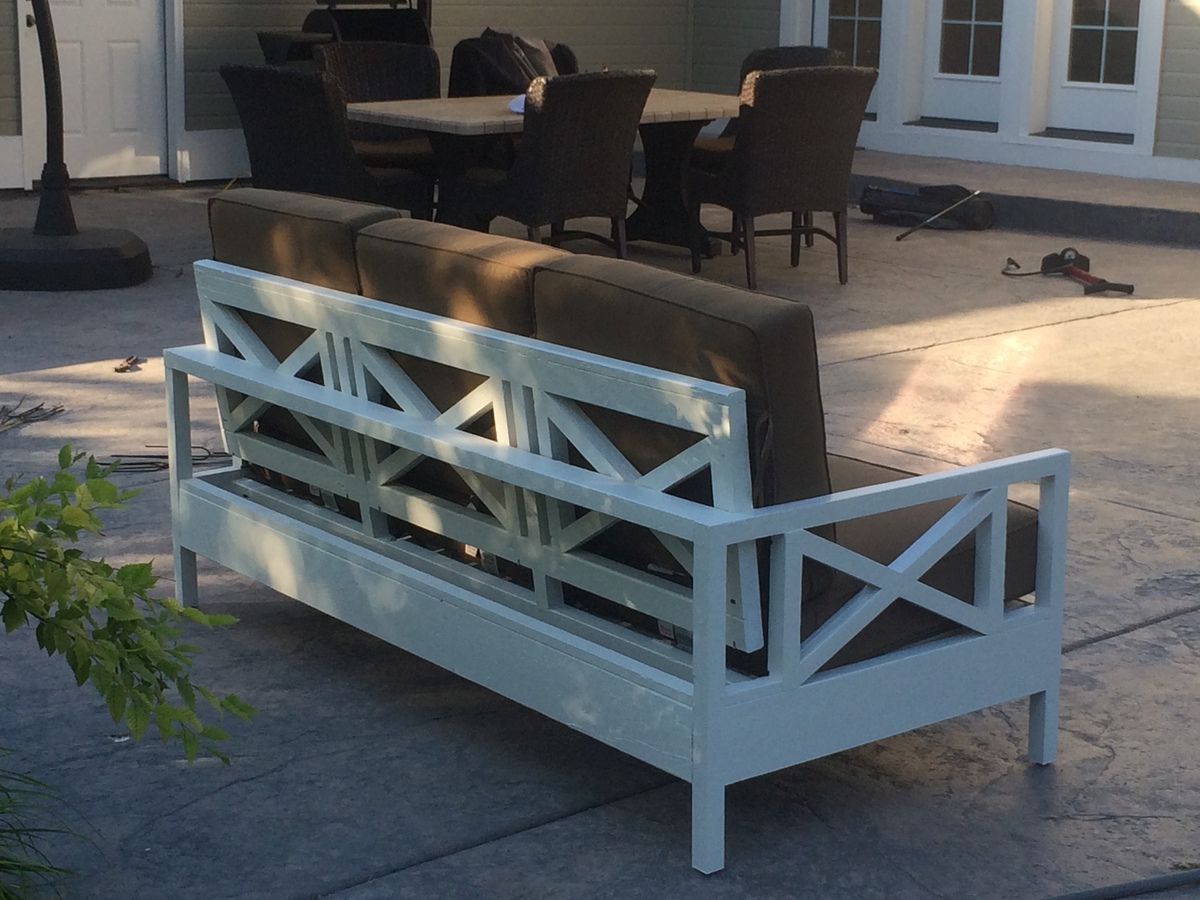
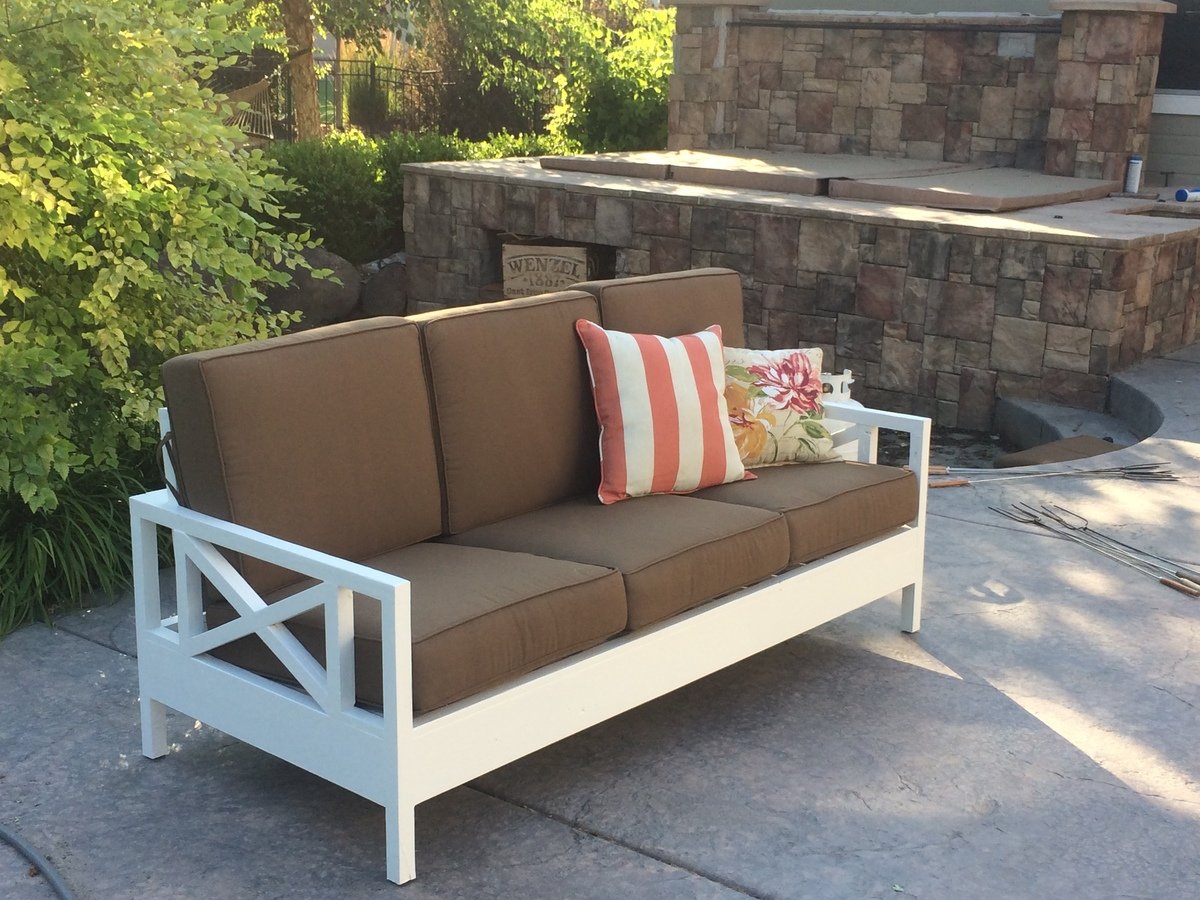
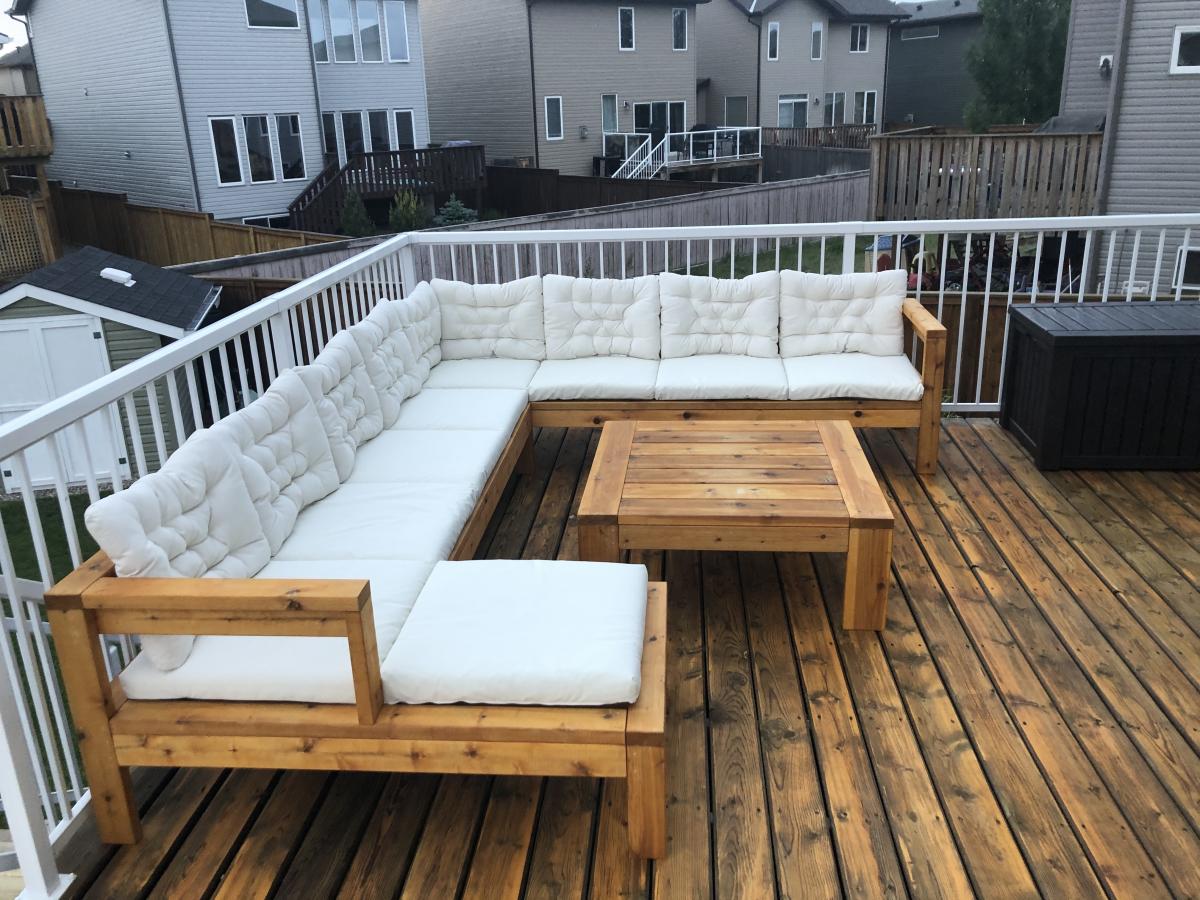
My wife loves the X pattern of the Weatherly Sofa, but wanted the tilted back from the Simple White Outdoor Sofa. This was our best of both worlds effort!
Tue, 06/11/2019 - 05:25
Can you share where you got your cushions please?

Made the outdoor sectional. The coffee table was made out of left over pieces!

Wed, 10/02/2019 - 09:54
So smart to make the coffee table out of the spare pieces.
Looks amazing!
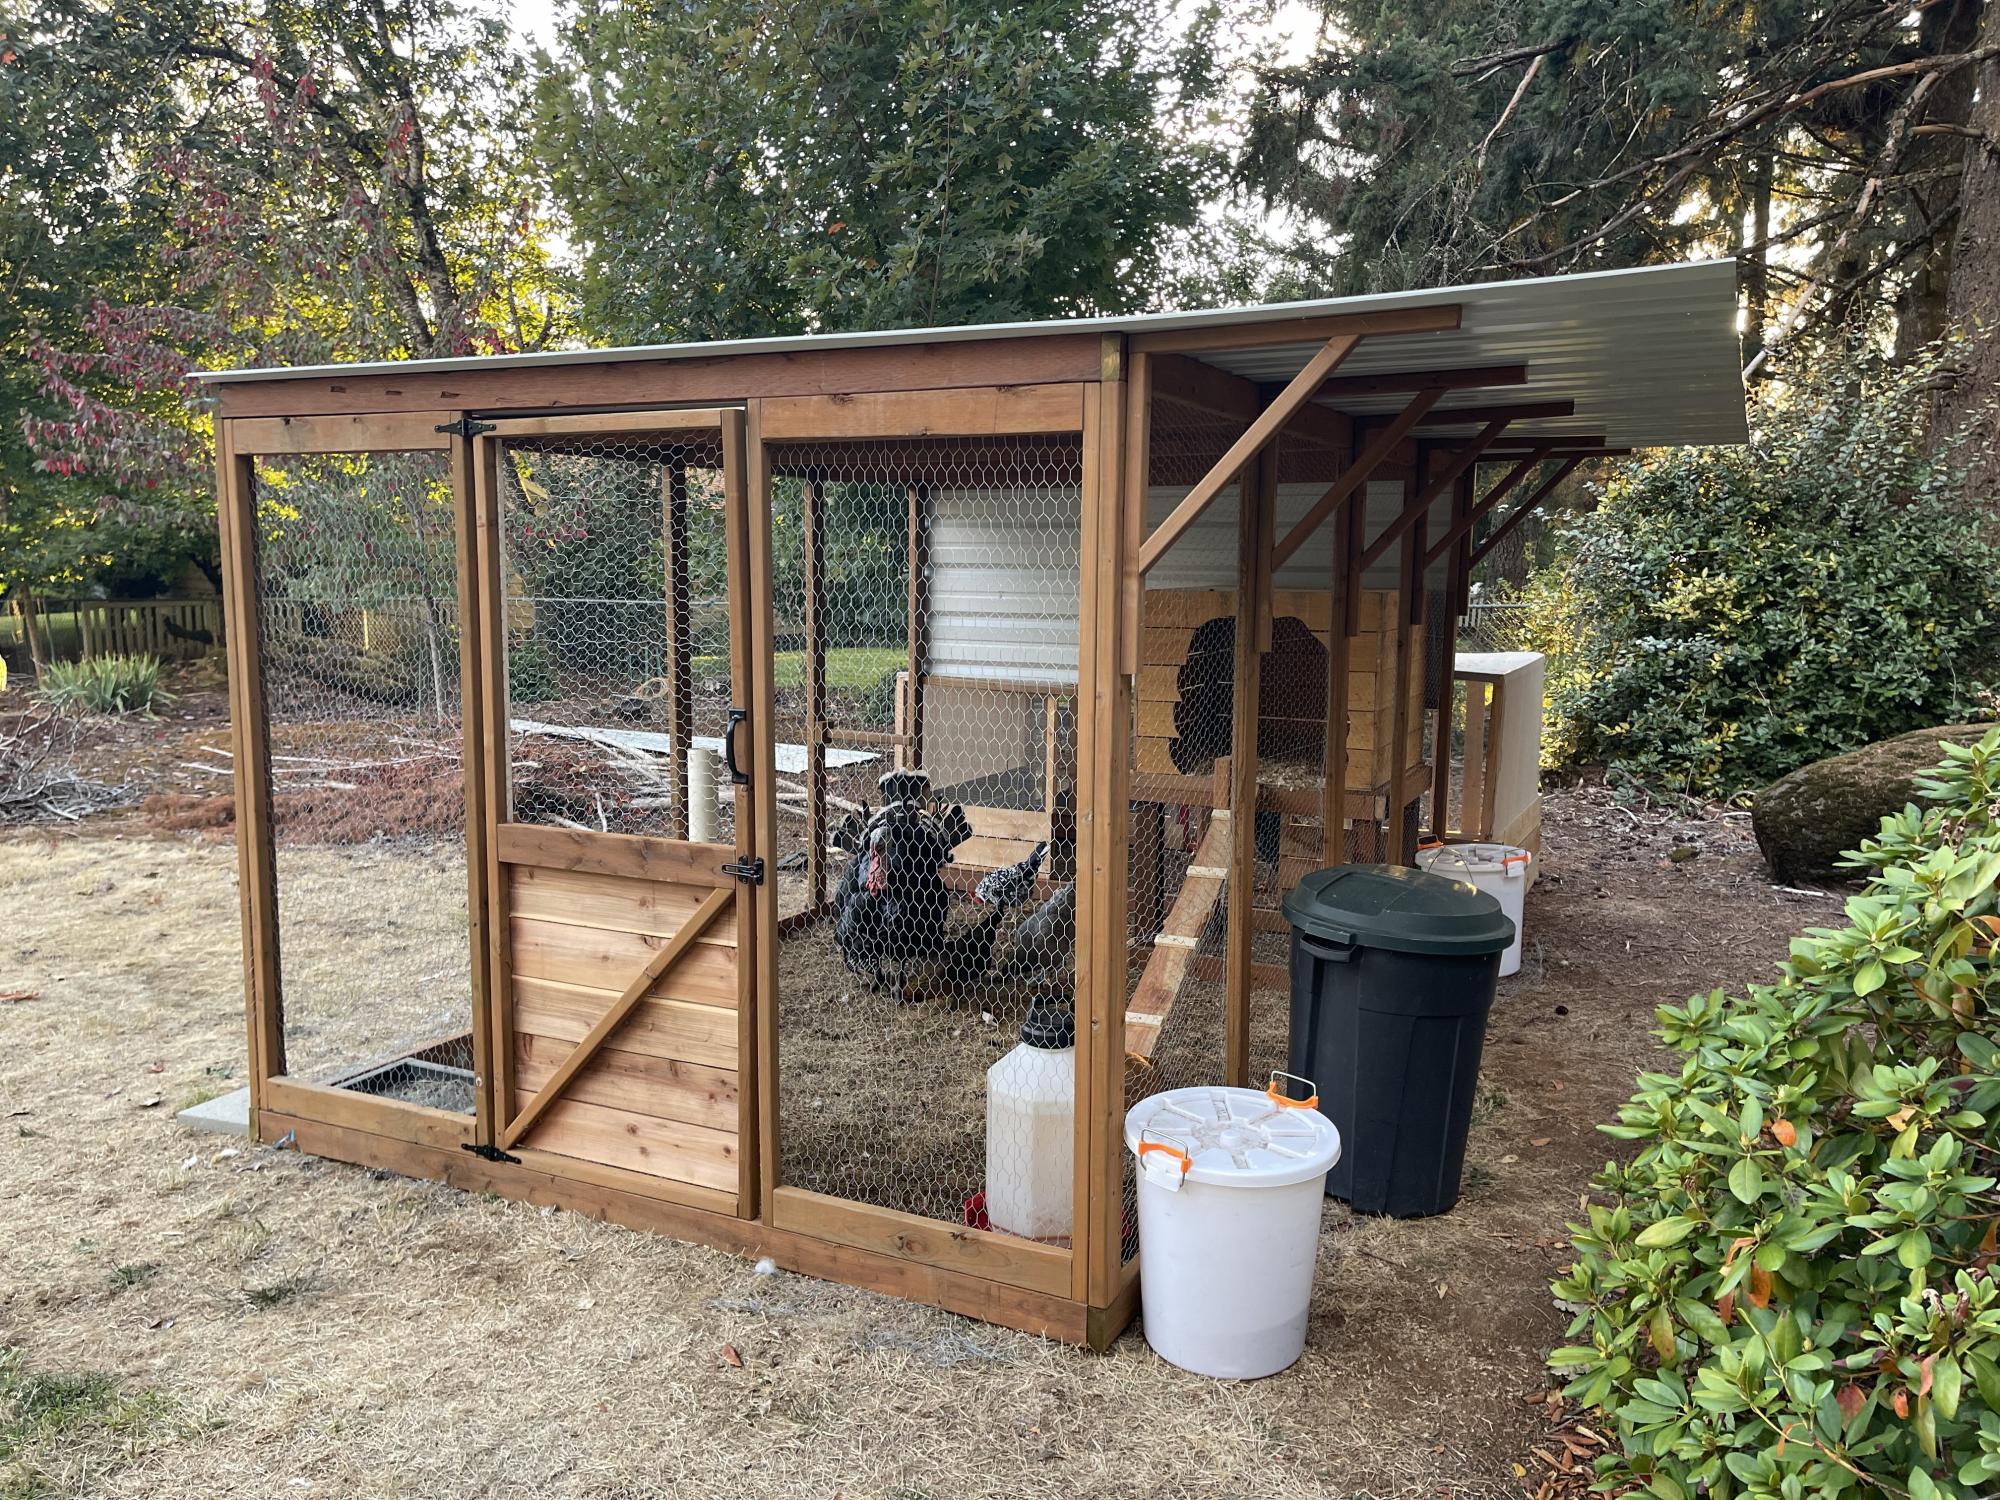
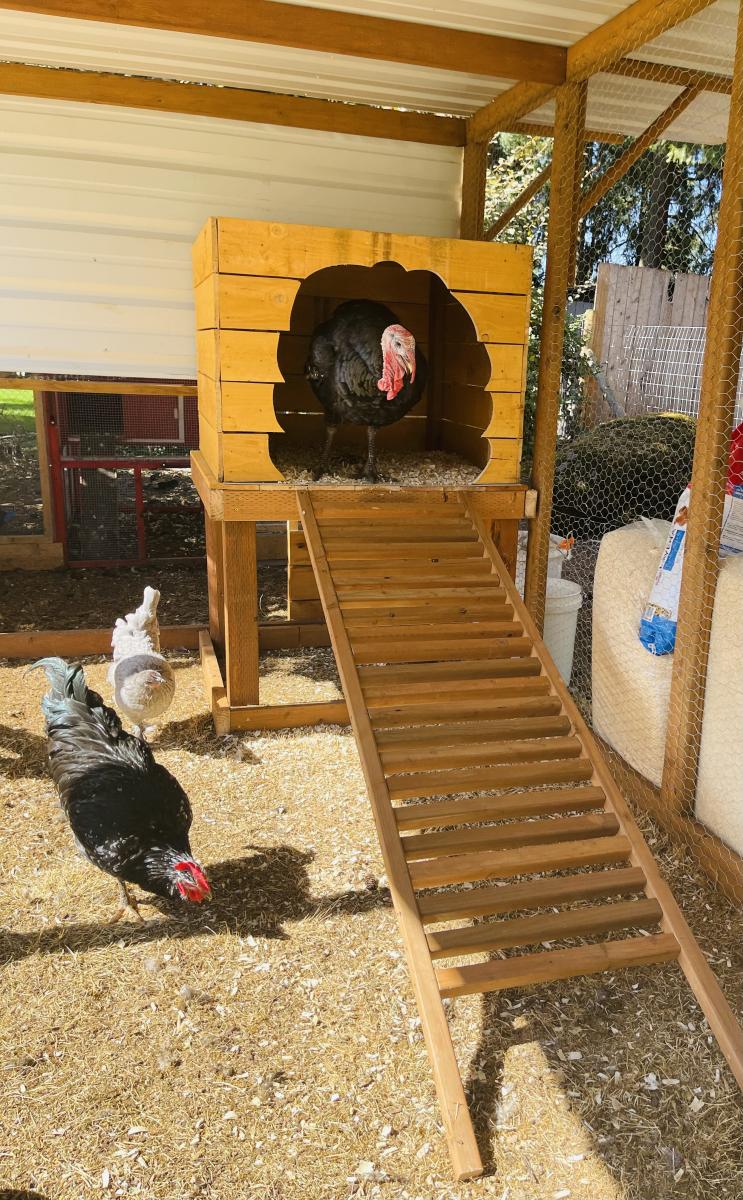
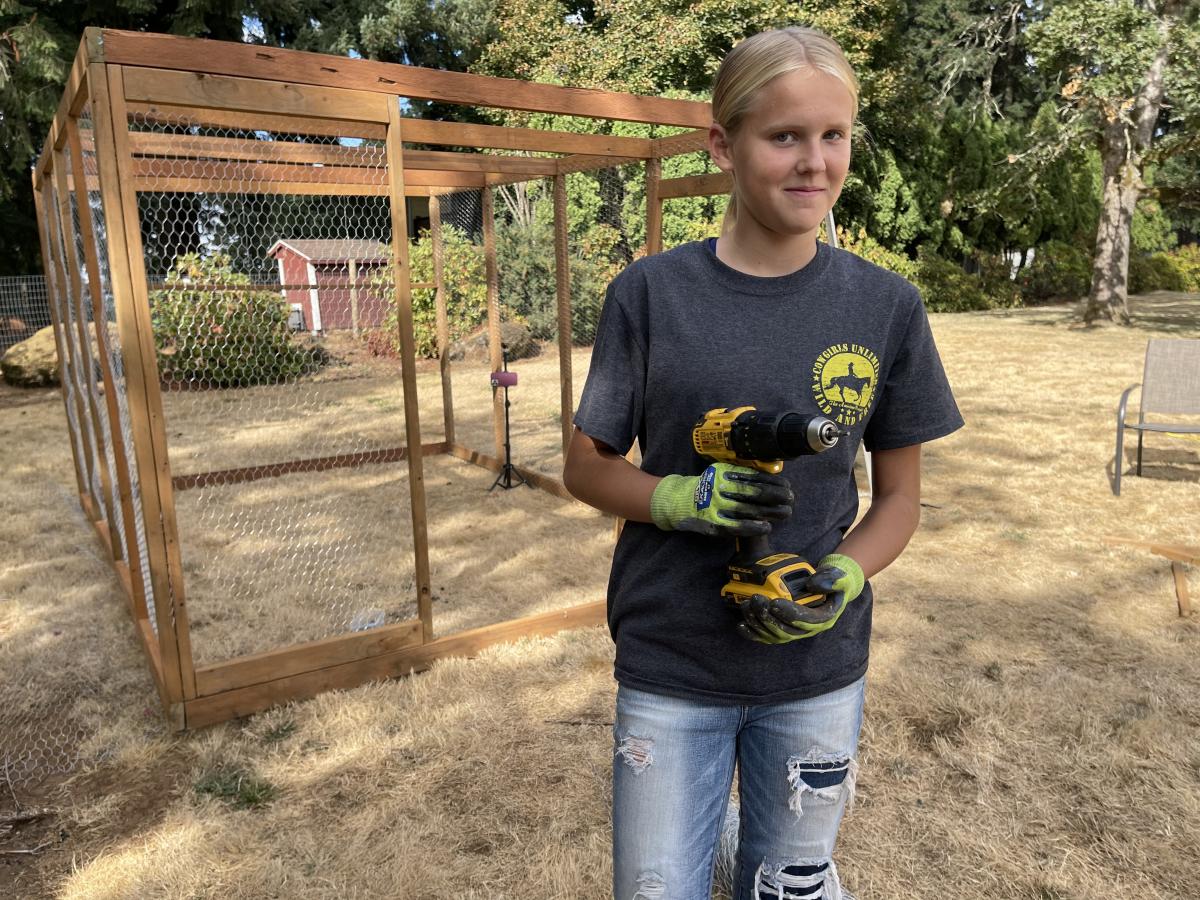
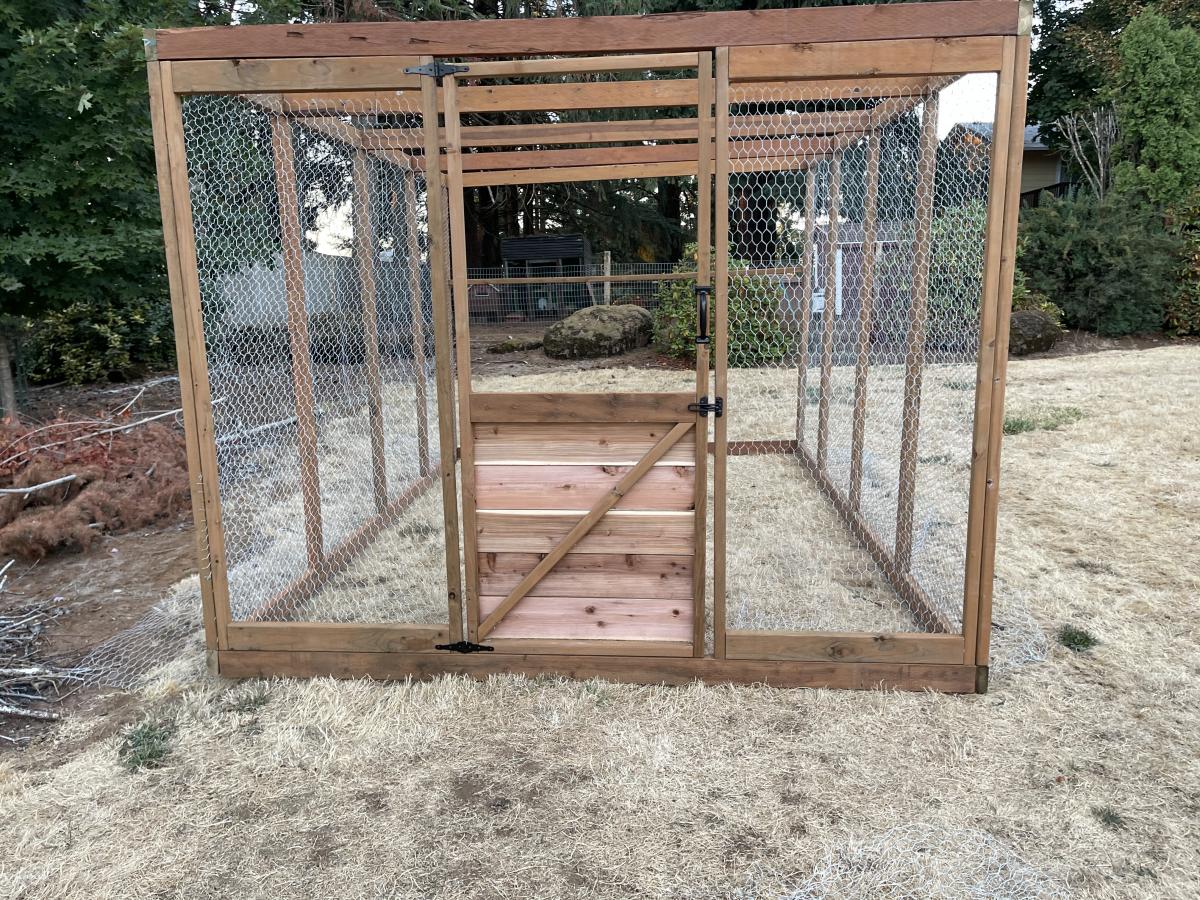
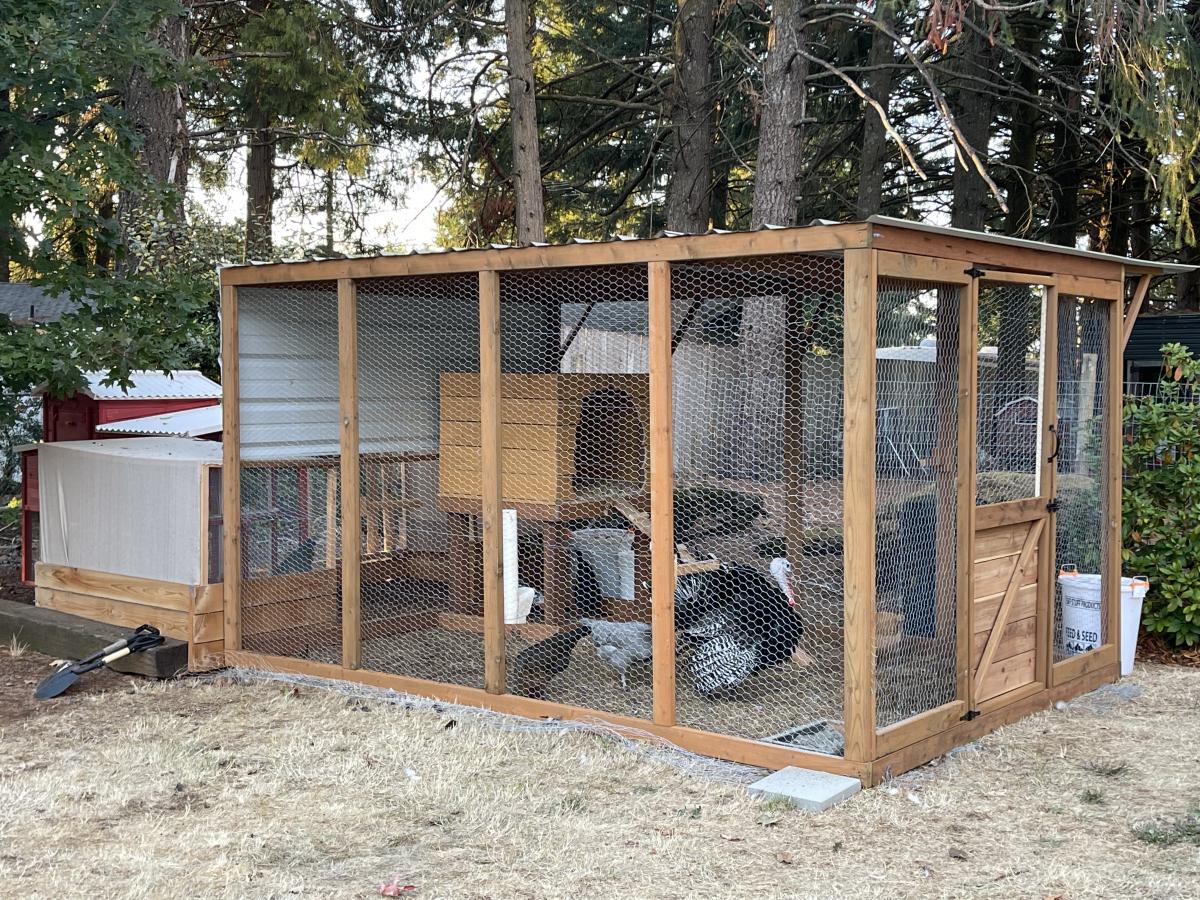
My daughter helped me build this enclosure. We used Ana's chicken run plan, but just made it taller so we could walk in easily. We added an overhang to store food and pellets under, for the supports we used Ana's easy shelves angle support plan, and finally we used the playhouse base plan for the base of turkeys house. All plans used are linked below. We ran the chicken wire out under the structure and still need to bring in some large rocks or pavers, but so far no issues with predators. Turkey was getting too big to fit in the smaller coop, so we decided to have fun with his house and used cedar fence pickets and some treated 2x4's, built a box and jig sawed the shape of a turkey. As you can see in the first photo the ladder for turkey wasn't big enough, all the other chickens were in his house, lol. So I beefed up the ladder and he happily can put himself up at night now:) Overall a super successful project, I wasn't sure what to do with the top and just at that point, the neighbor walked over and offered the metal, talk about a huge win and the perfect solution! We attached the run to the previous smaller structure and now they have so much more room and are laying like crazy:) Finally, I think this would make a great dog kennel as well...
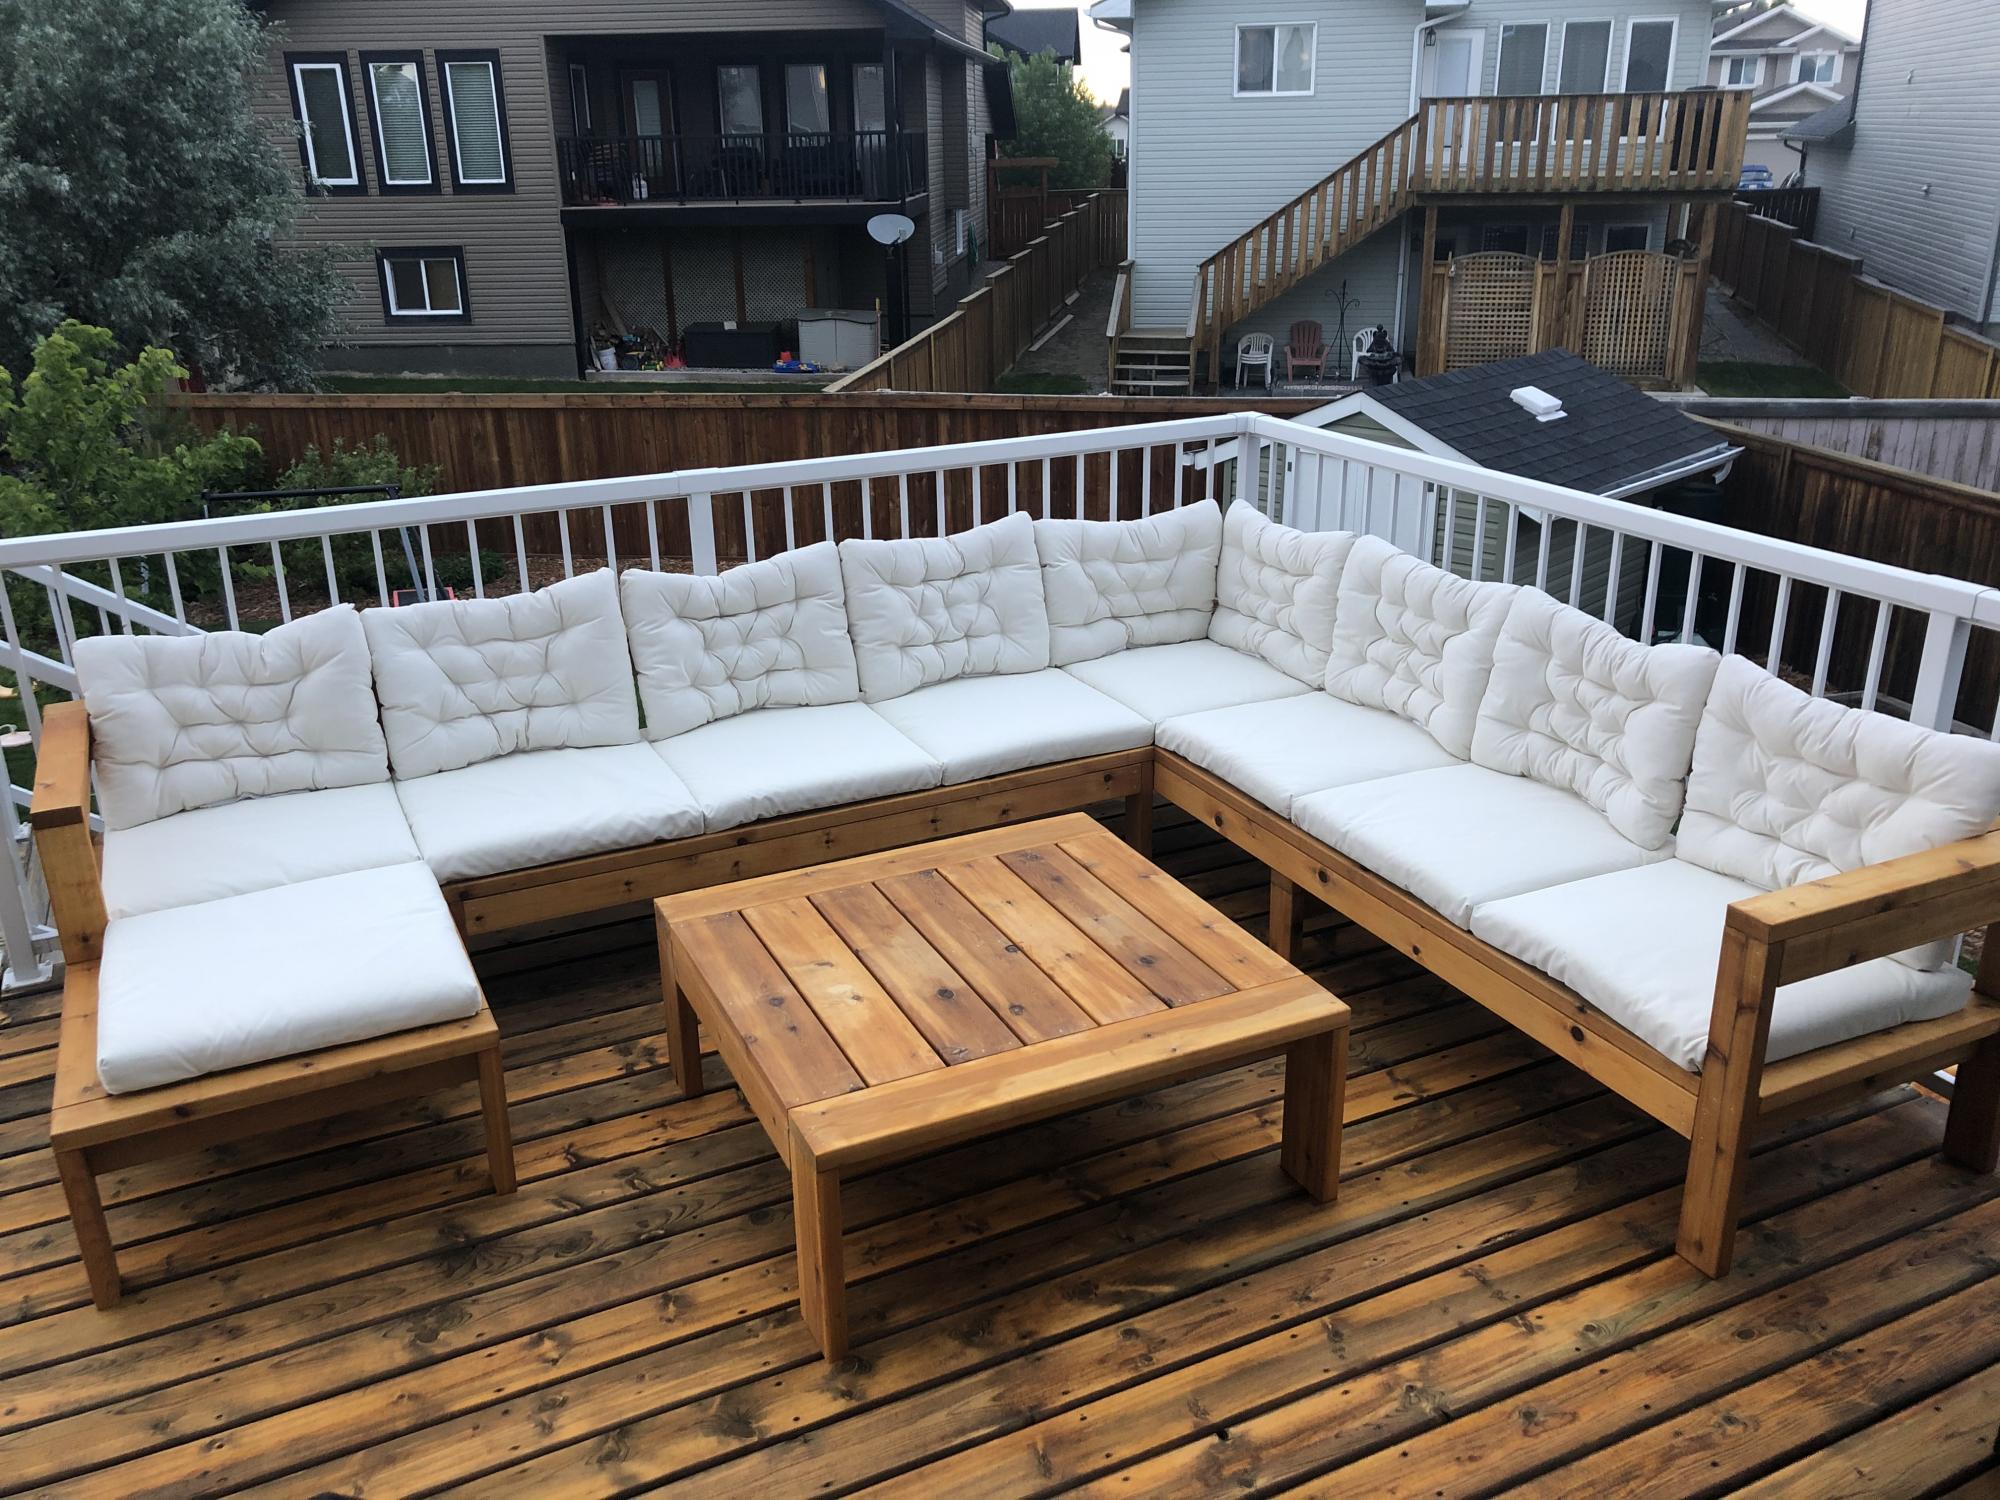
Modified the plans of the outdoor sofa and sectional piece to create this set, then added cushions from IKEA.
Wed, 02/21/2024 - 10:27
I'm building the sectional this weekend, and saw your addition to the end piece and am going to steal your idea. Very nice.
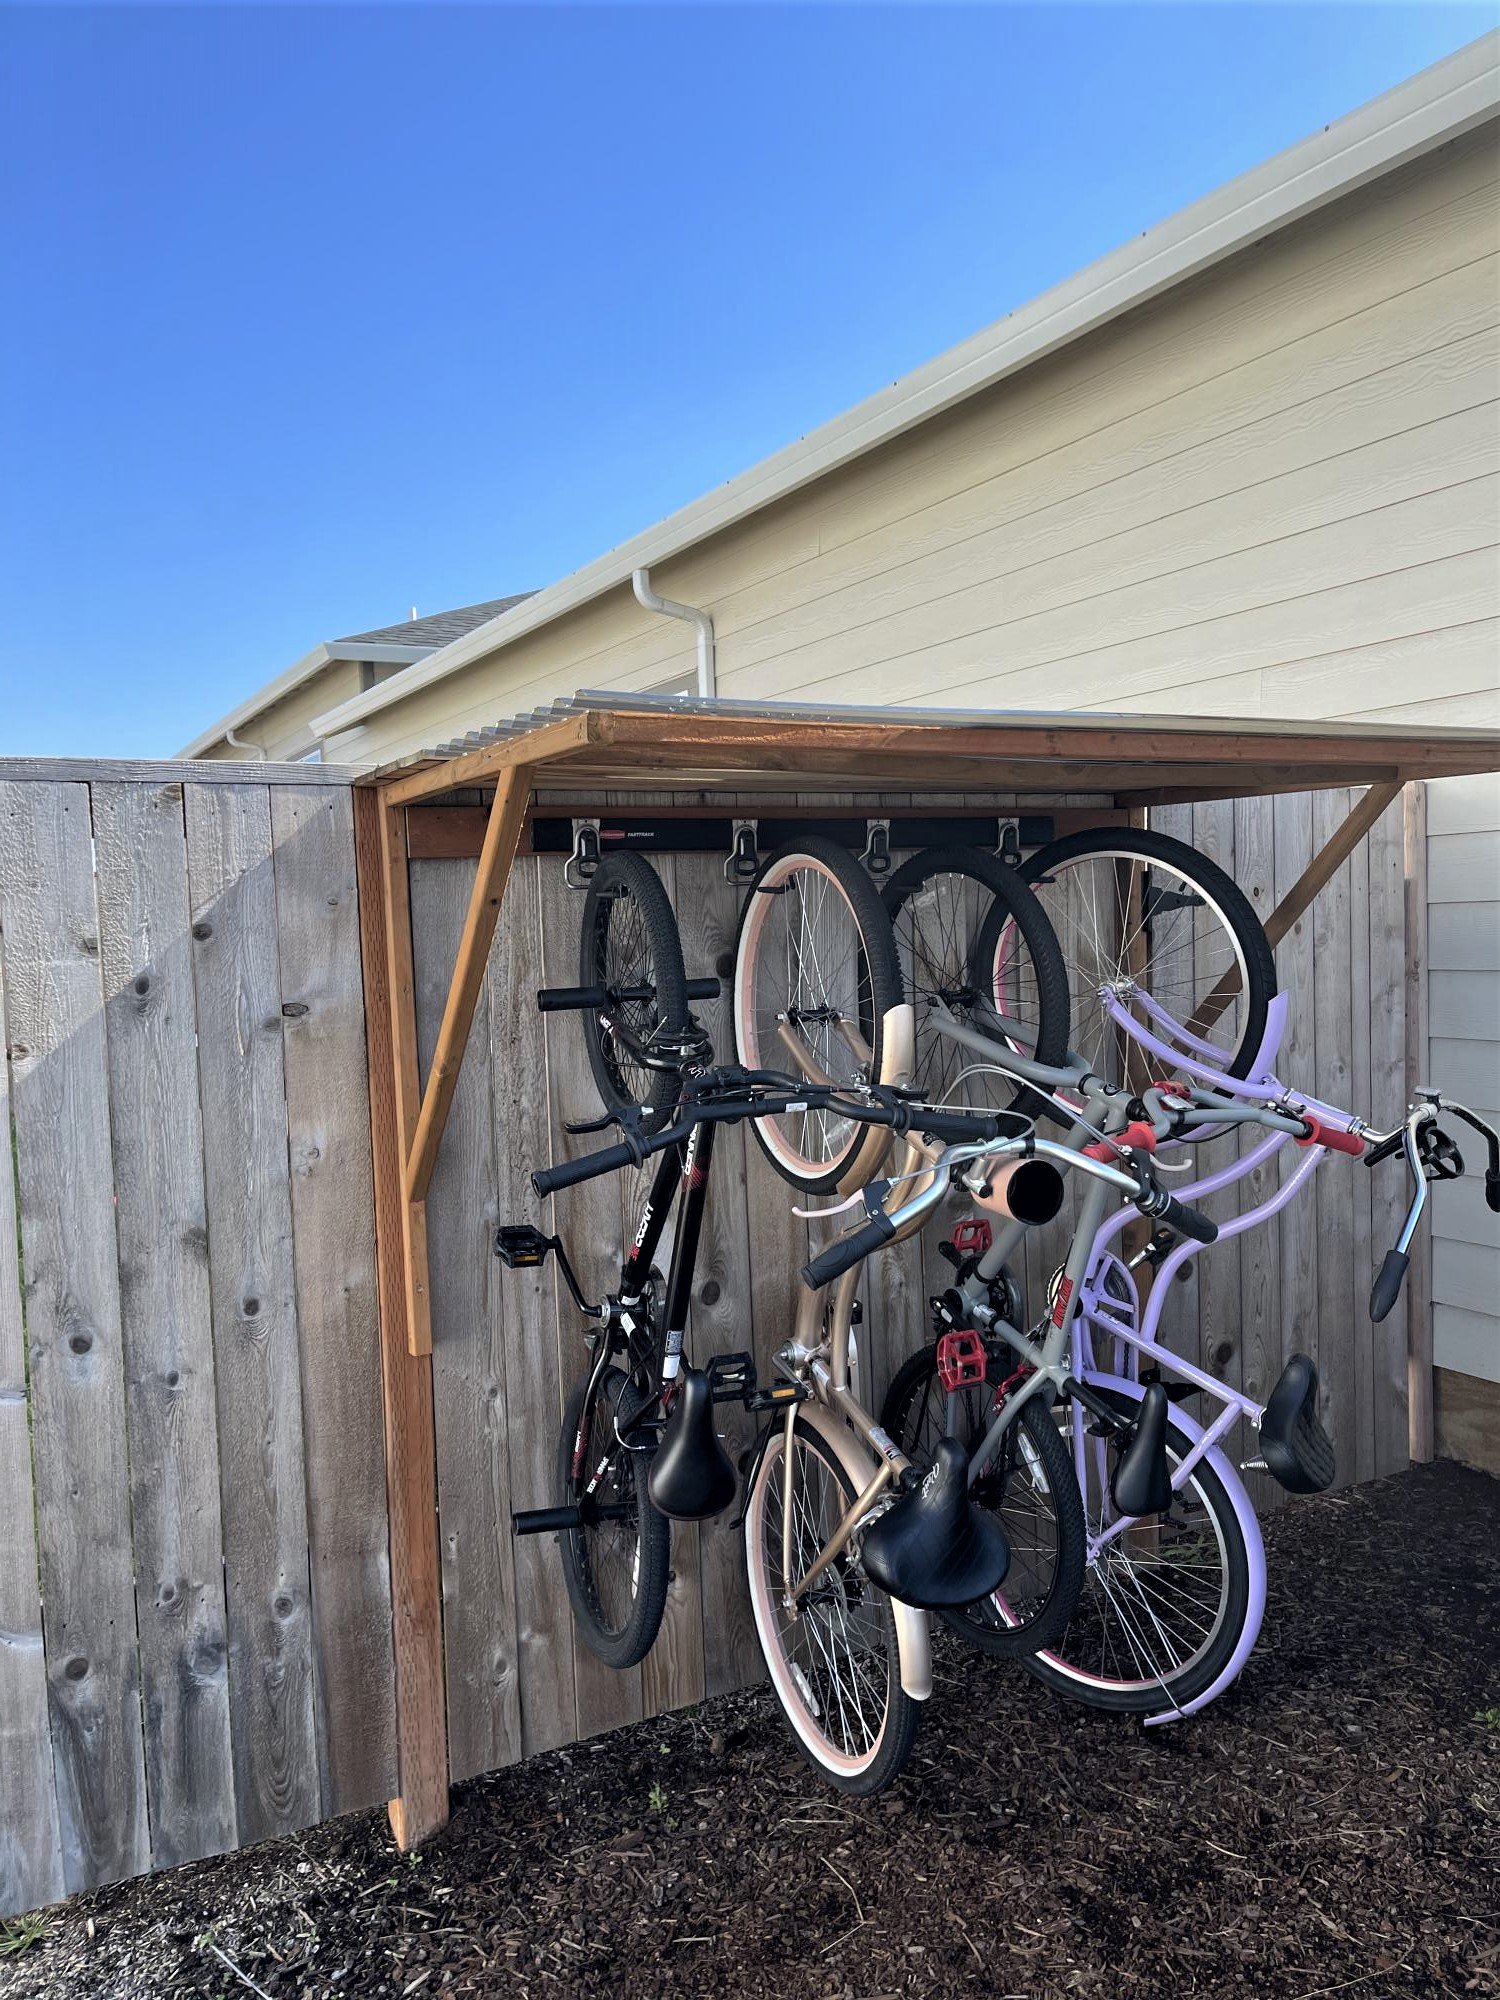
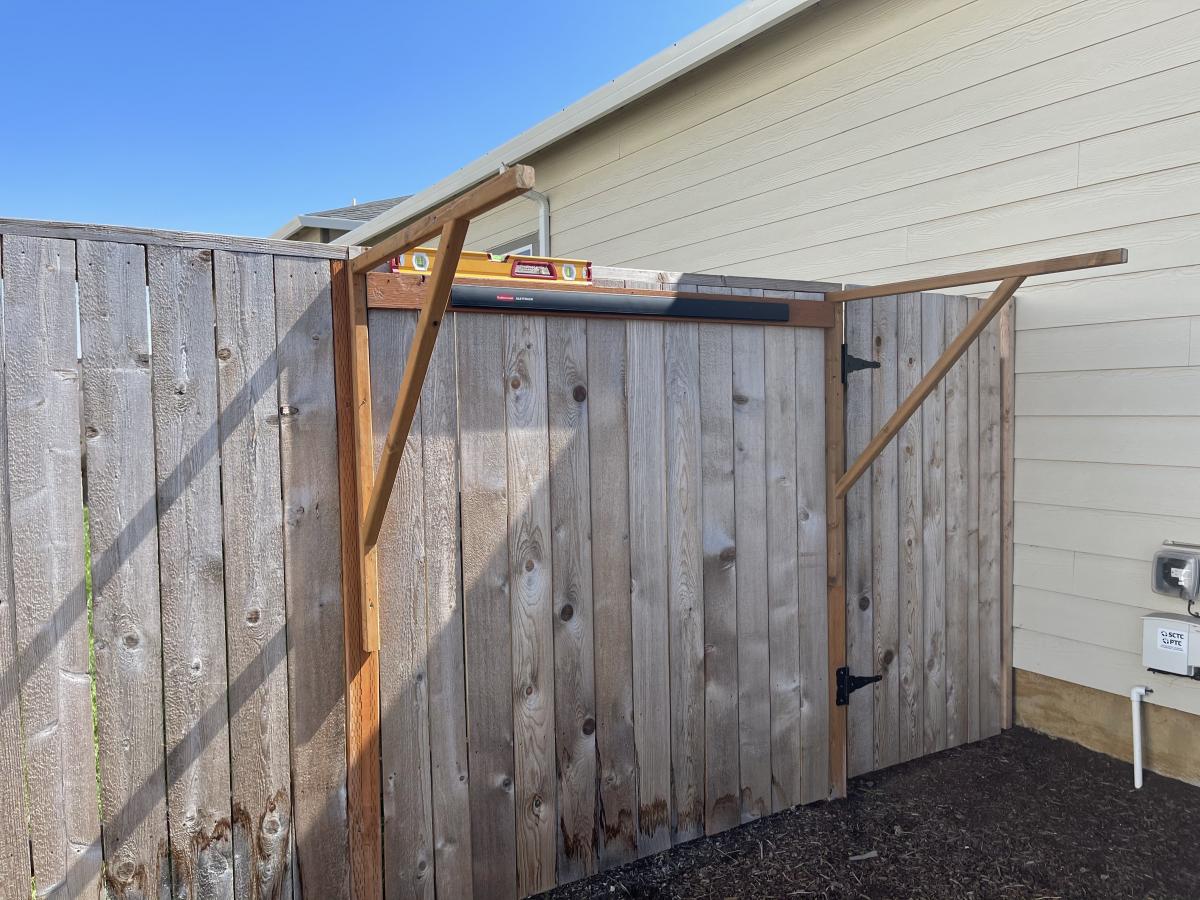
I live in a smaller rental with limited garage space, so I needed a place for my kids bikes. This is what I came up with. It required minimal screw holes in the treated fence posts and I attached a rail system(rubbermaid fasttrak) for the bikes to hang from. I used Ana's easy shelves plan for the upright supports and then just added some corrugated roofing and cedar fence pickets (which I had on hand) to finish off the top.
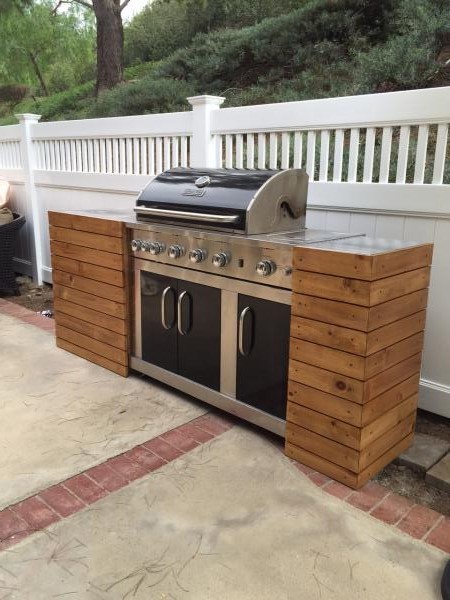
This was just a standard BBQ with an attached folding table. I used a combo of Ana's plans to add a little character and style to the BBQ and it made a huge difference in not only the BBQ, but also the backyard.

Mon, 05/23/2016 - 12:29
Hello: Very interested in which plans you used to build the BBQ Built In. Thank you.
Wed, 06/08/2016 - 09:22
Hello dbryant1977, please share the plans. Also, what's brand/model of BBQ? Very nice.
Thu, 04/09/2020 - 18:27
This is my guess on the plans used! https://www.ana-white.com/woodworking-projects/diy-grill-island-featuri…
Fri, 08/30/2019 - 09:50
Are there plans for this project or at least some pictures from while you were building it?
Thu, 04/09/2020 - 18:27
This is my guess on the plans used! https://www.ana-white.com/woodworking-projects/diy-grill-island-featuri…
Wed, 04/22/2020 - 15:52
Can you provide us with the plans for this? I would love to build one.

Mon, 03/04/2024 - 14:49
Hello: Very interested in which plans you used to build the BBQ Built In. Thank you.

Submitted on FB
DIY small shed for trash and recycling.
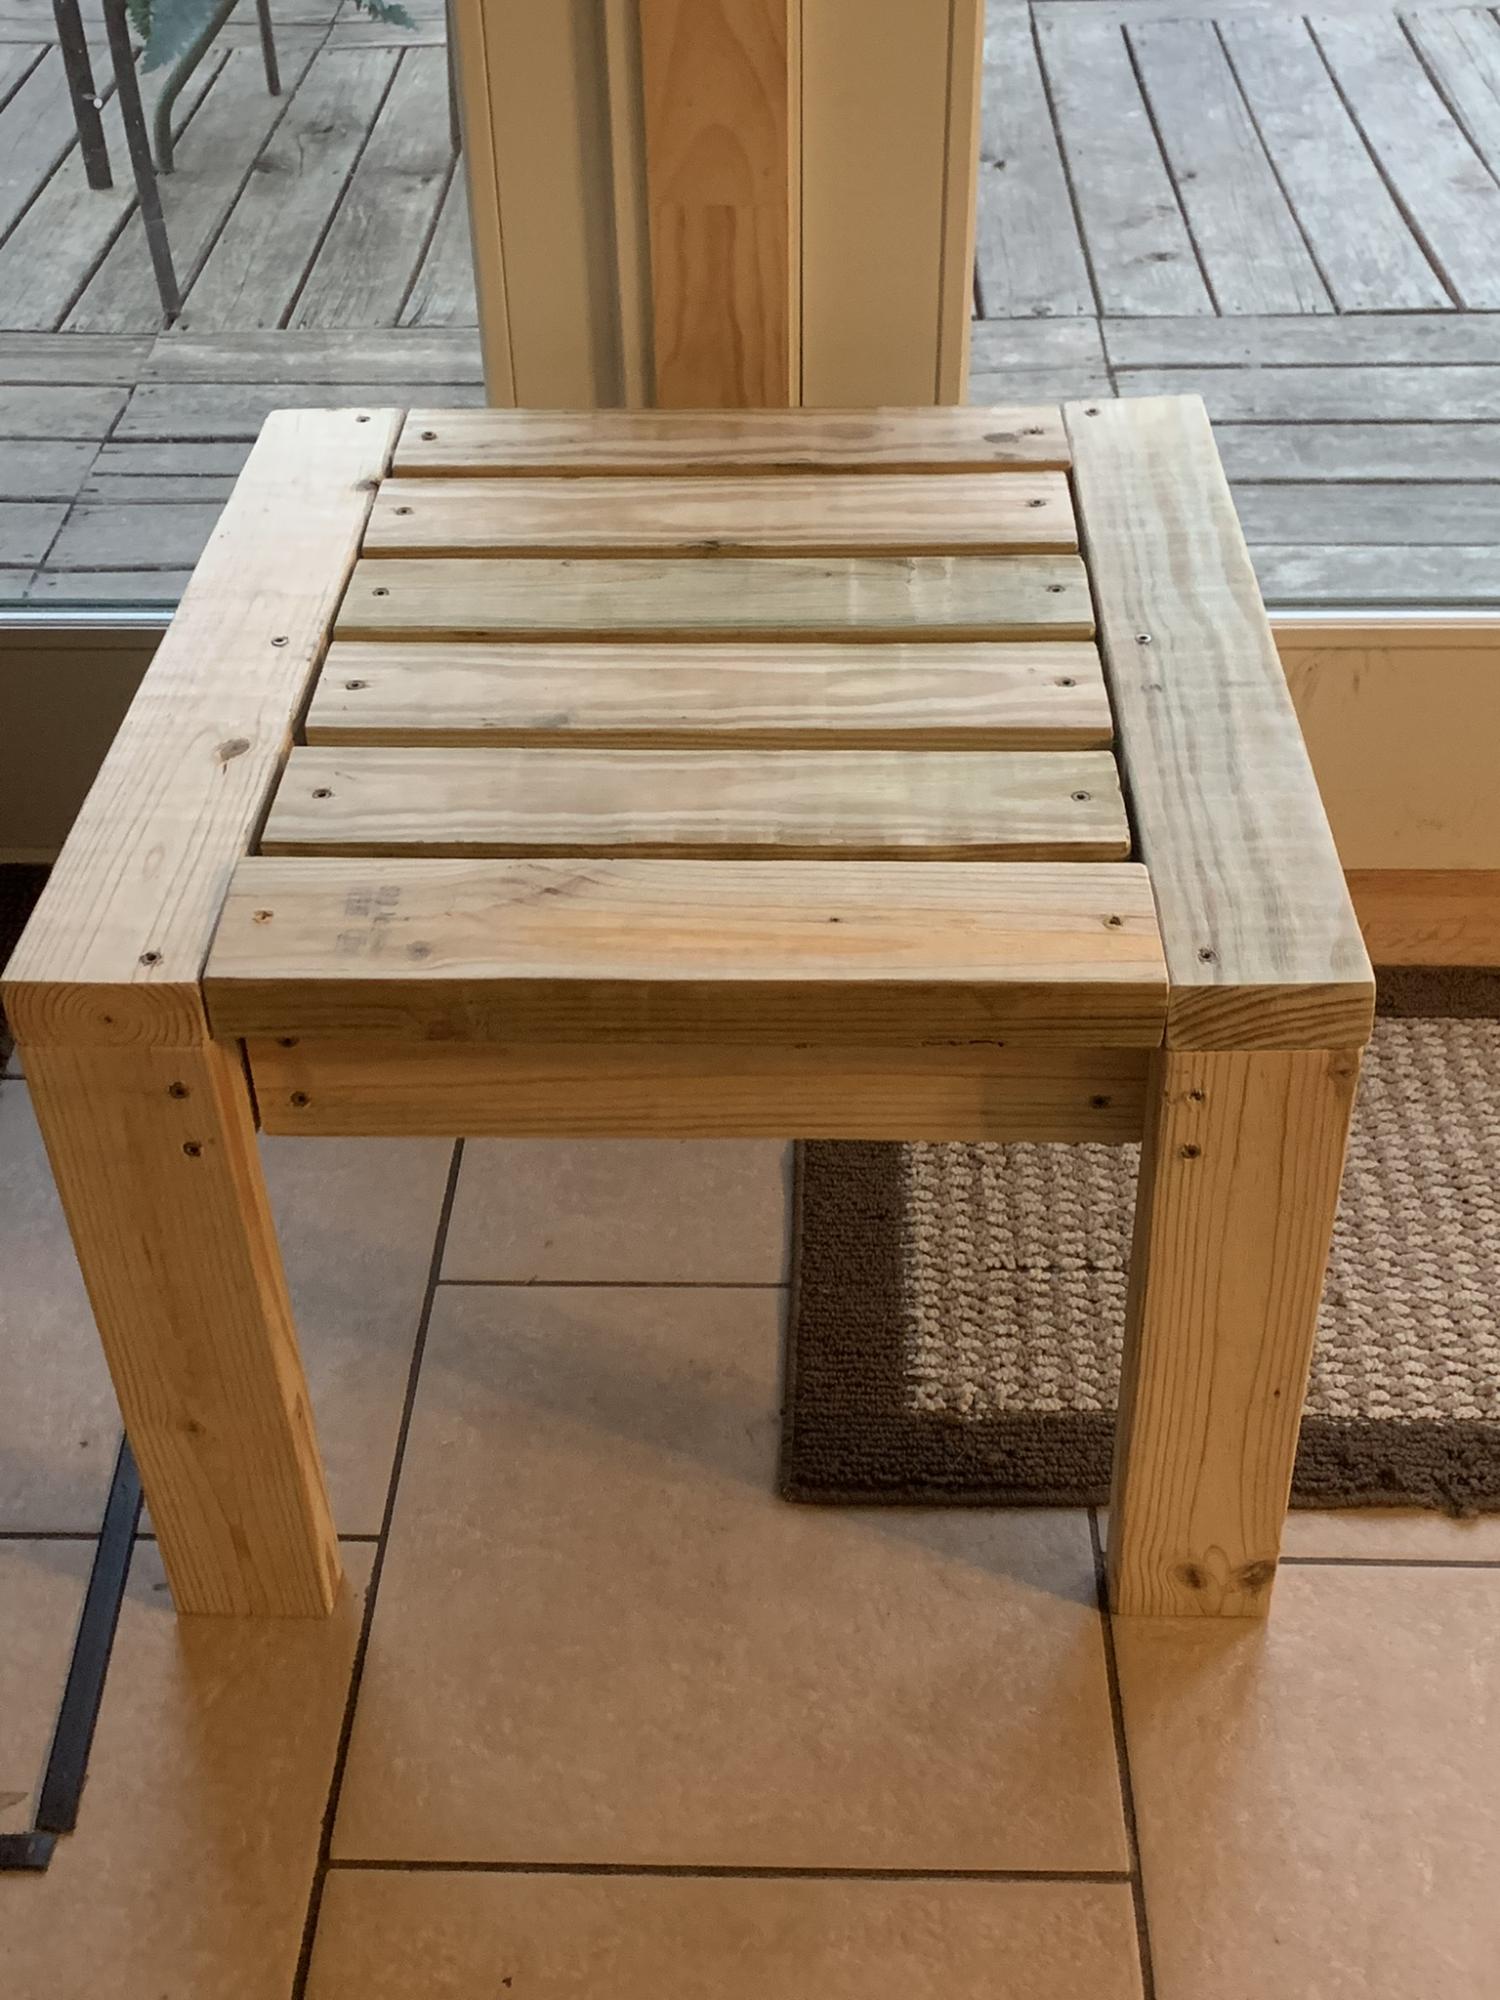
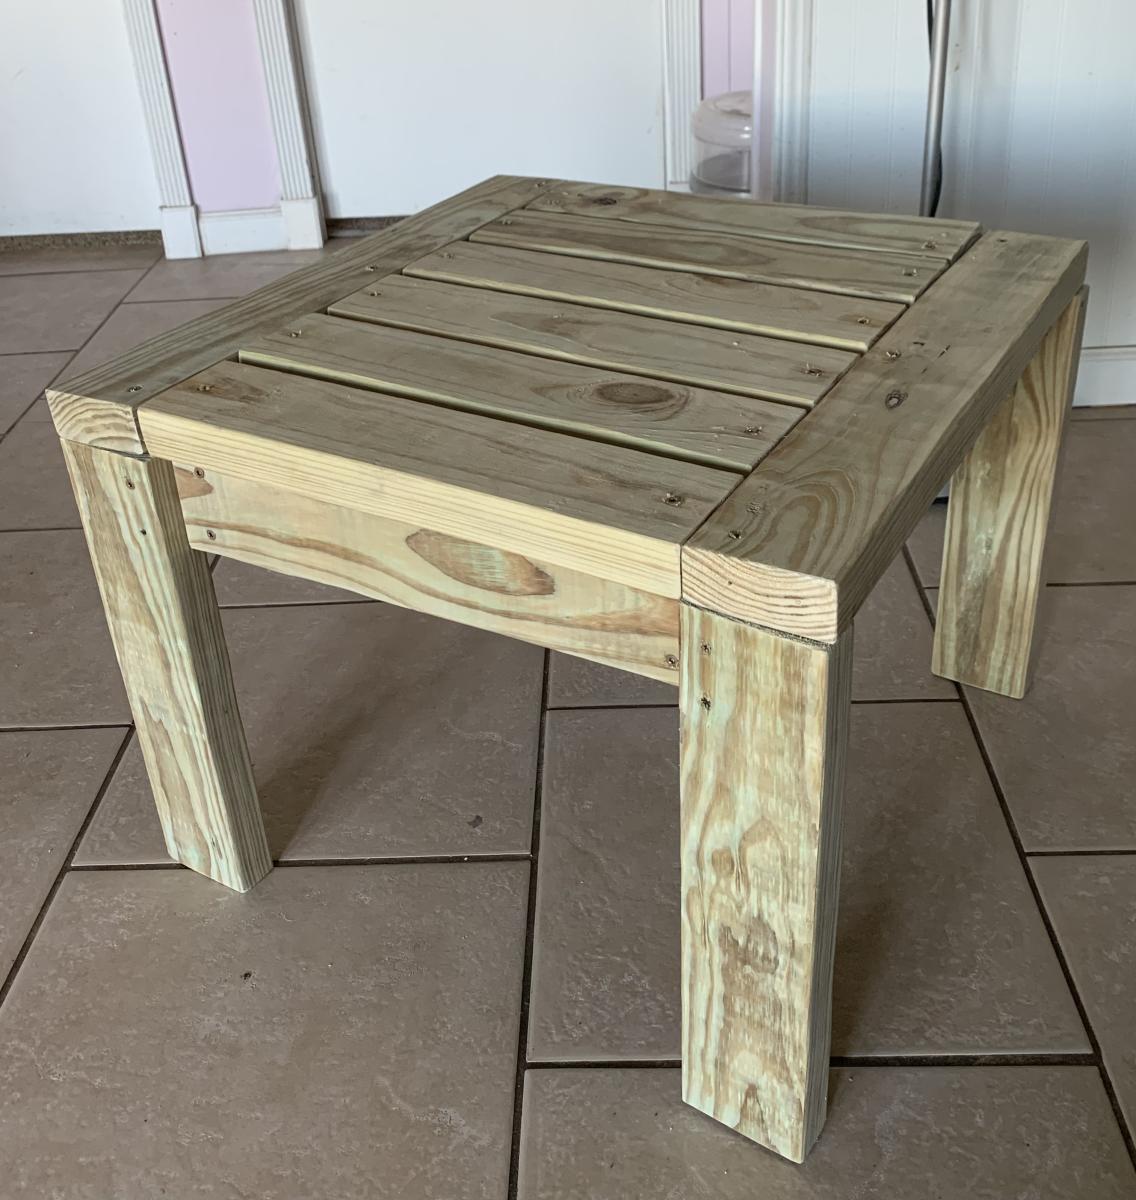
I made these two Ana White outdoor end tables for my patio. Next up will be the matching coffee table
Sun, 01/29/2023 - 16:04
Thanks for sharing, they will be a nice outdoor additon!
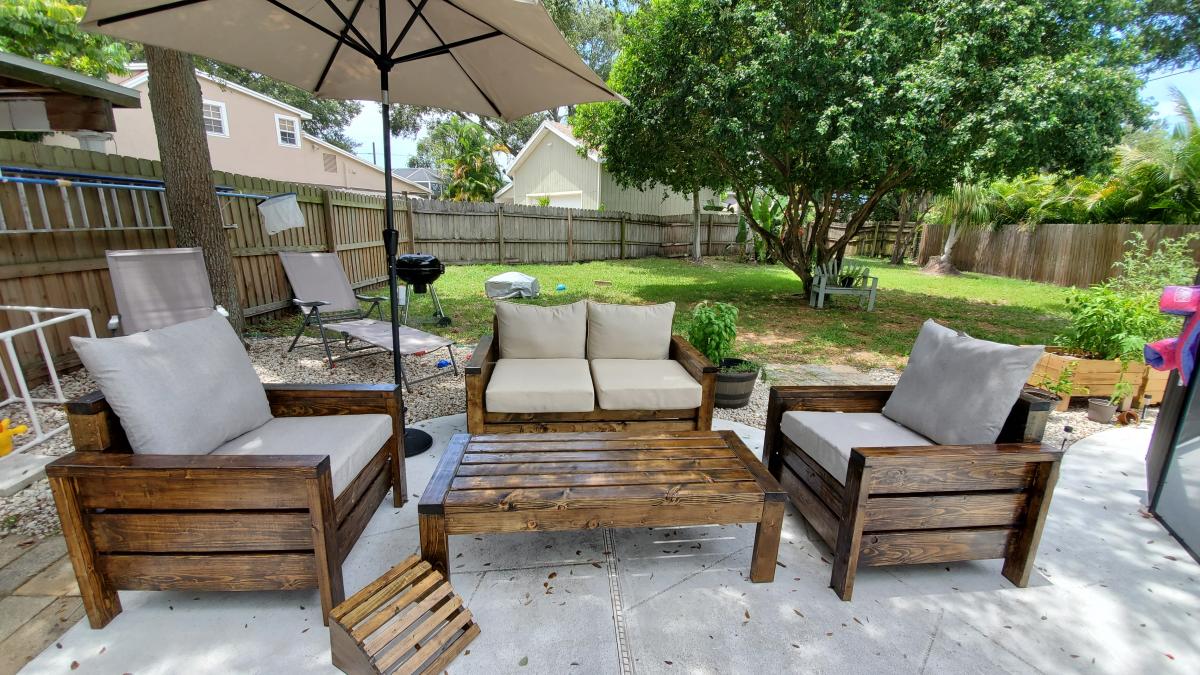
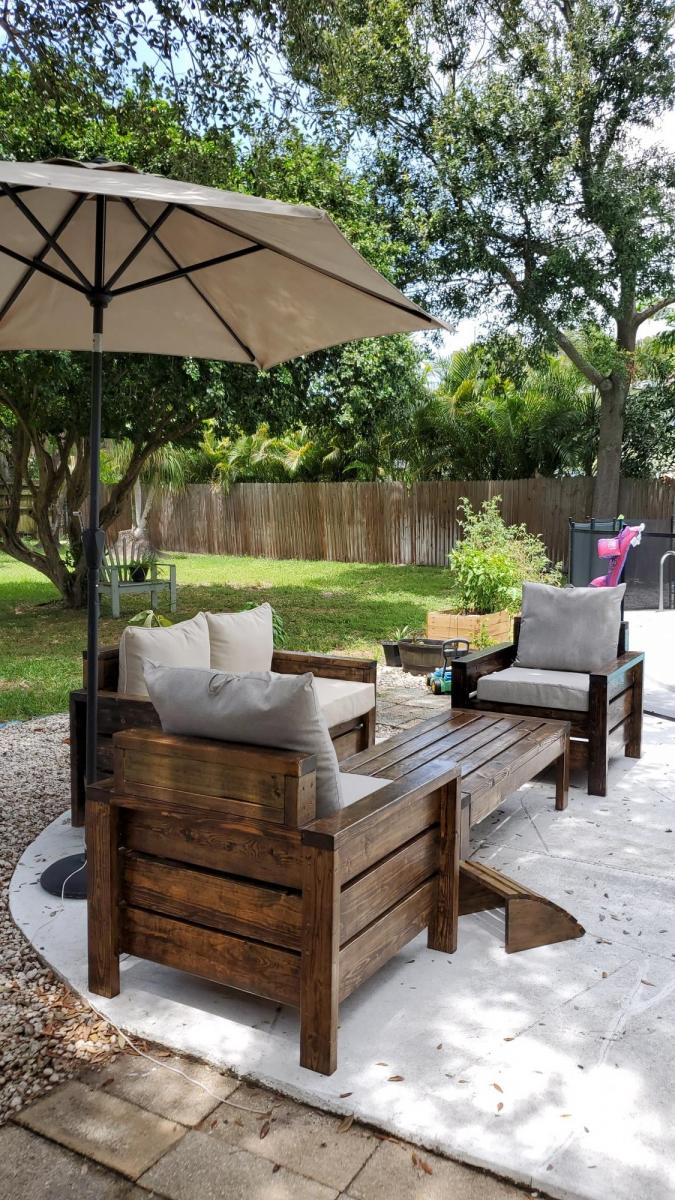
Well, I started with one chair and finished with a full set. Not bad for a first timer. Definitely room to improve. Little tip if you're going to make this amazing set... raise the backs as they are too low with thicker cushions. I built a casing to go on top after the fact. Pretty happy with how it all turned out. Thanks Ana for the plans... now onto the next project!


Fri, 04/28/2023 - 08:41
Very nice workmanship. I'm curious as to how comfortable they are with the straight 90* backs? Let me know please at [email protected]. Again nice workmanship.
Fri, 04/28/2023 - 08:41
Very nice workmanship. I'm curious as to how comfortable they are with the straight 90* backs? Let me know please at [email protected]. Again nice workmanship.