Community Brag Posts

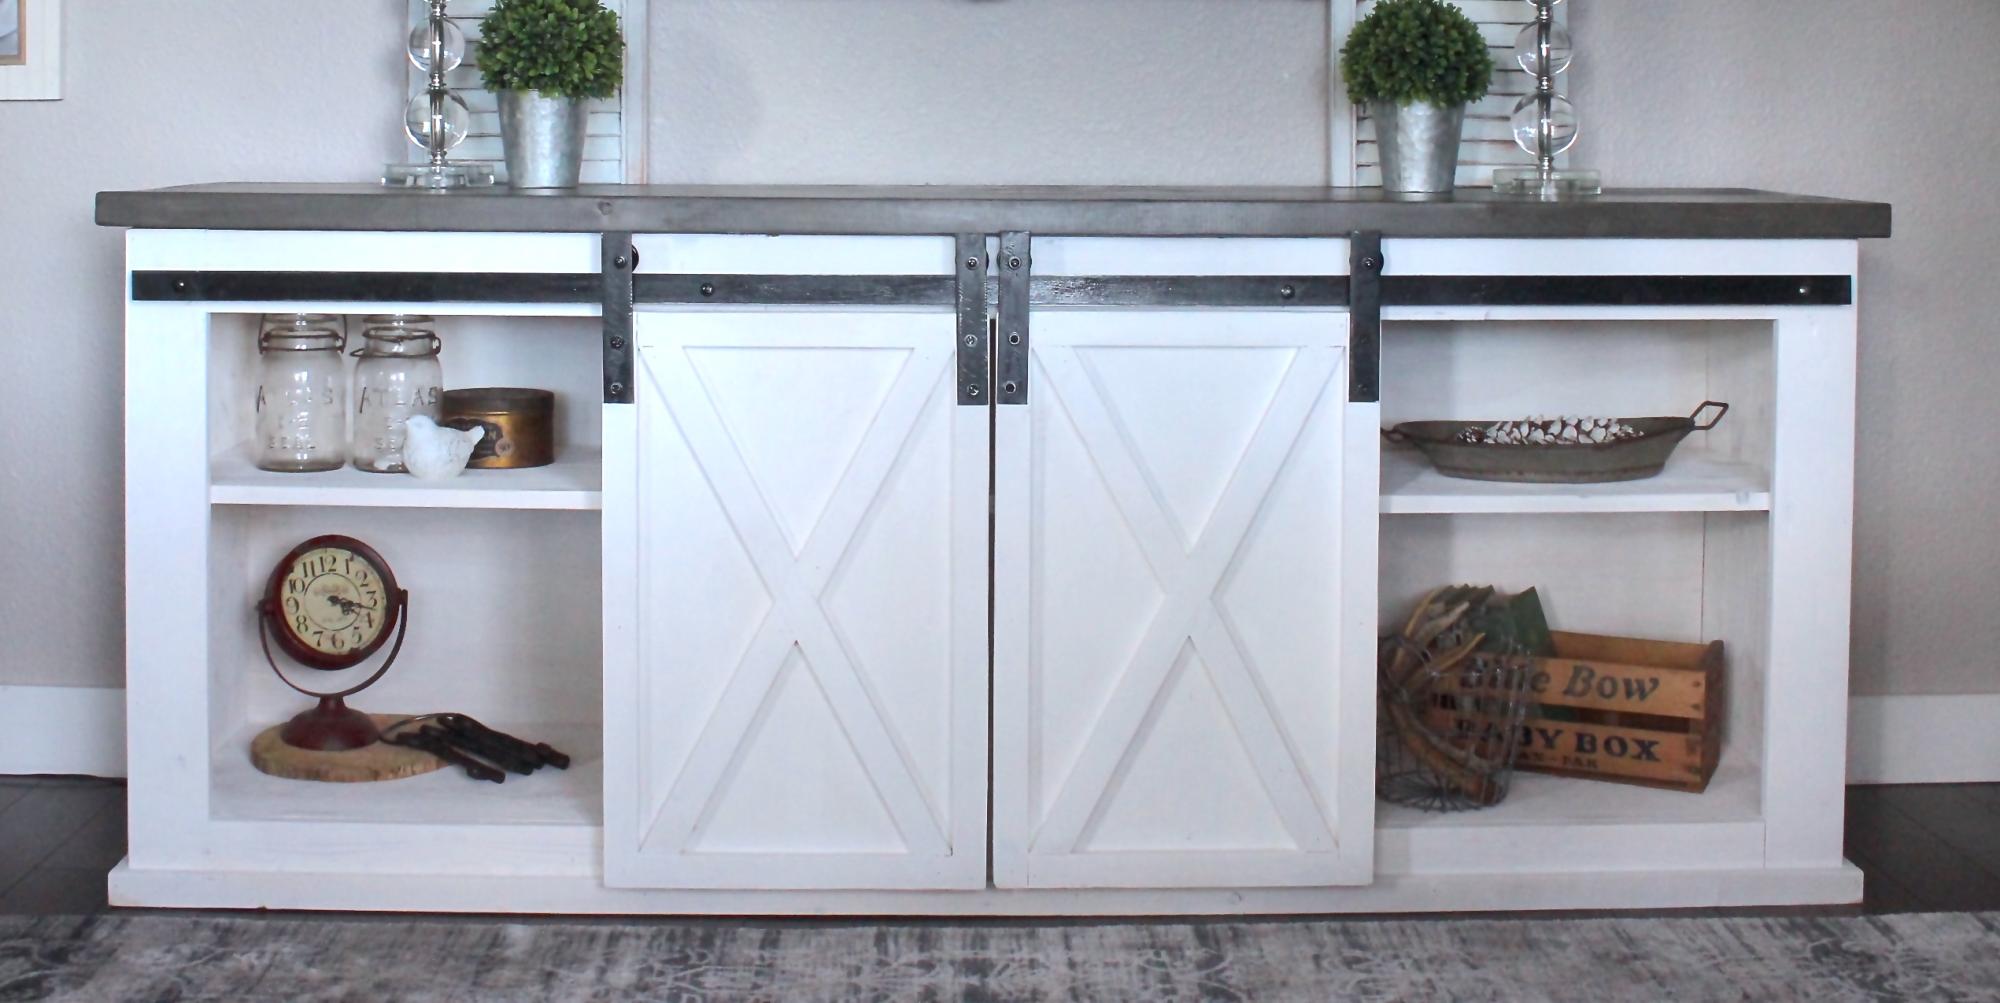
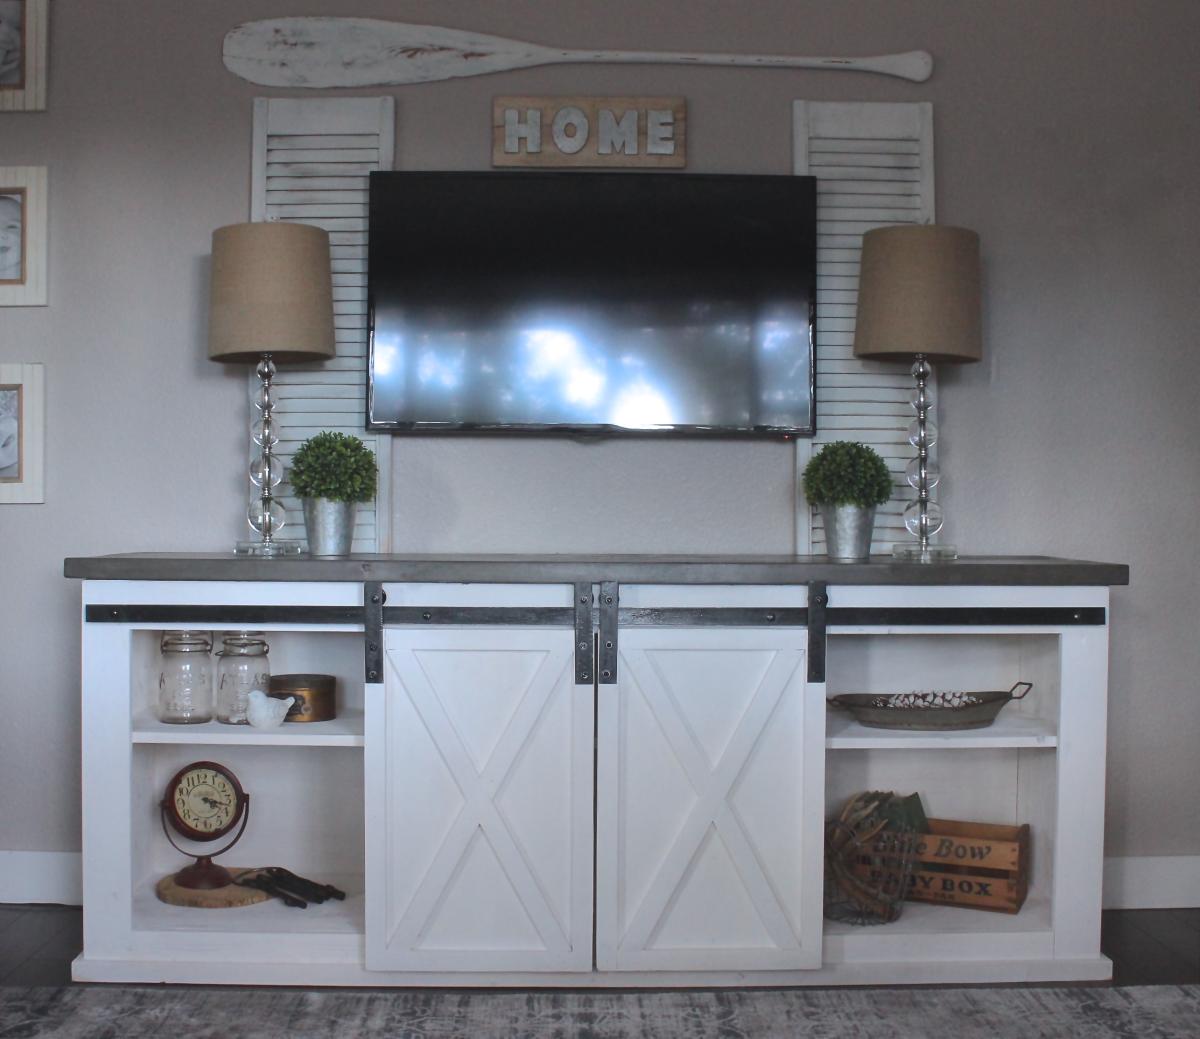
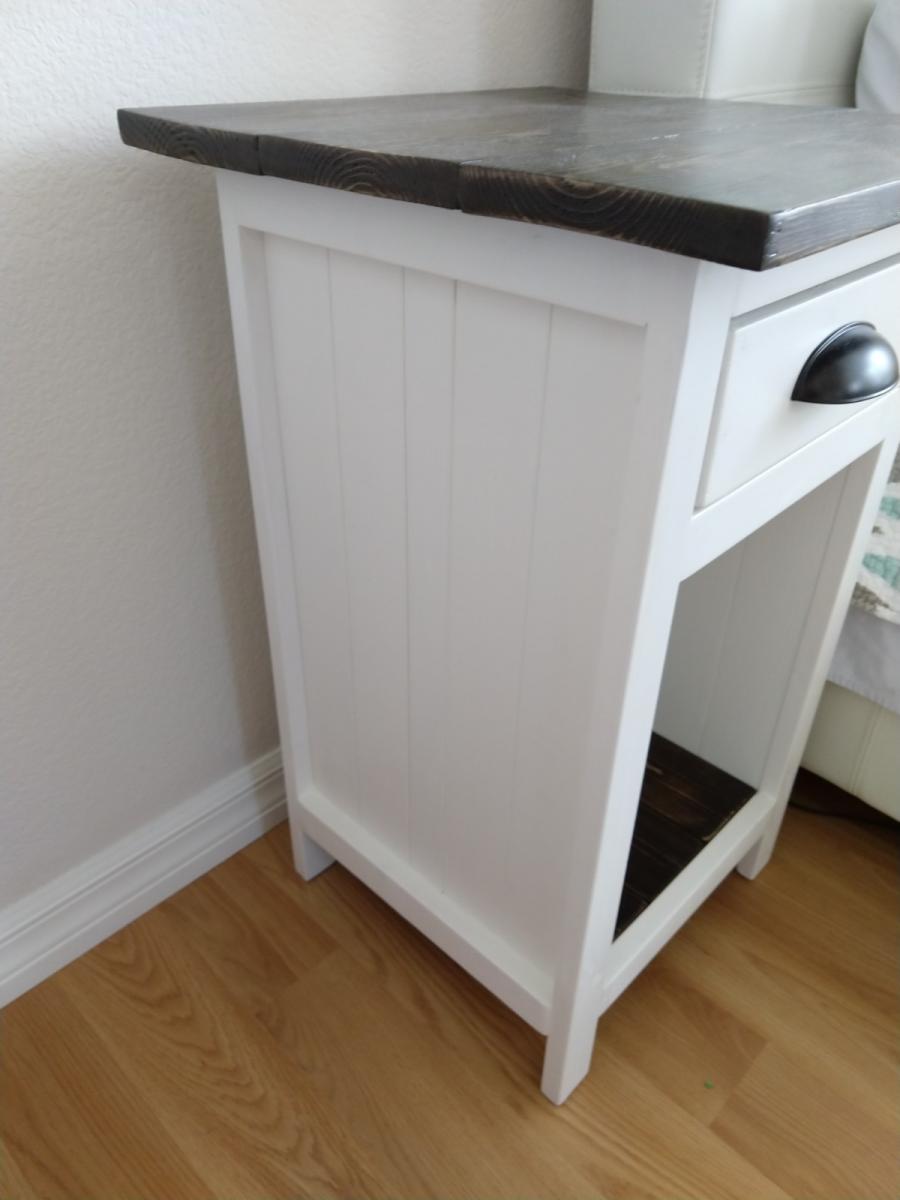
Rustic Console - my first project

Submitted by loulie on Thu, 05/15/2014 - 09:51

Rustic console -first project..plan on adding X to ends

Estimated Time Investment
Weekend Project (10-20 Hours)
Finish Used
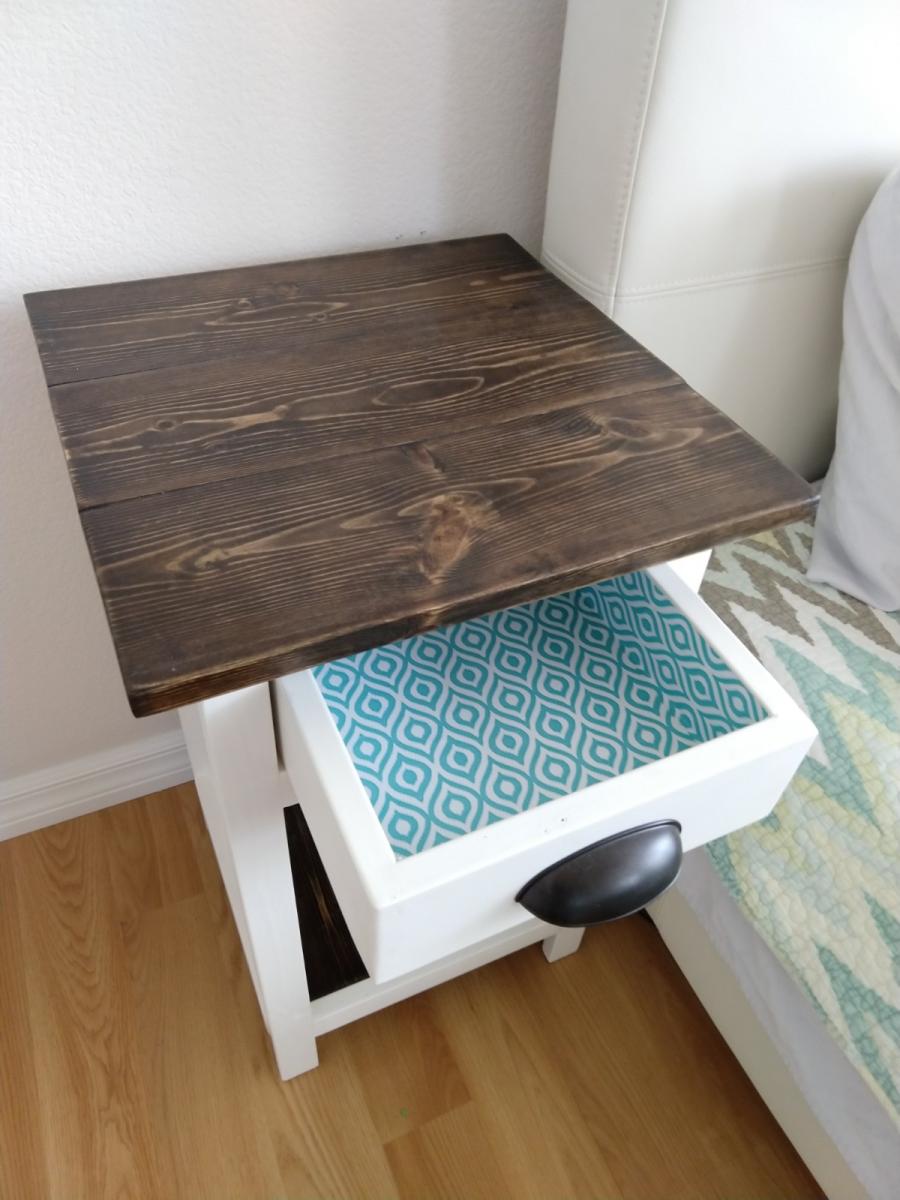
Top is the infamous steel wool vinegar solution with wipe on poly
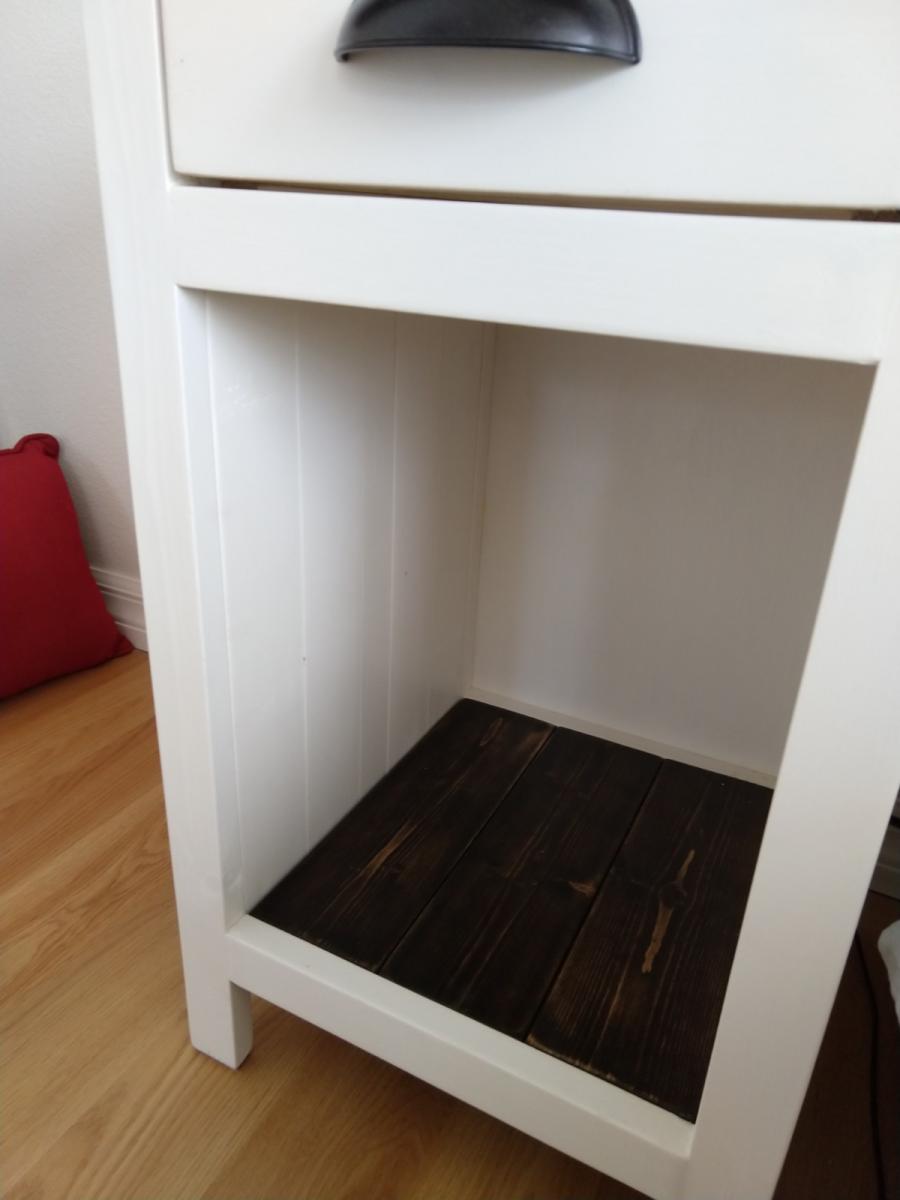
Left the shelves as is since the wood was so pretty
The rest is a combo of vinegar stain, then a custom mix of gray paint wash and emerald green...♥love it!.
Recommended Skill Level
Beginner

Comments

Front porch planters

Submitted by Anonymous (not verified) on Thu, 01/07/2021 - 20:21

Followed your plan but added extra 1 x 2 trim to the sides, feet made from 1 × 3 and 1x 3 trim around the top

Built from Plan(s)
Estimated Cost
$35 per planter
Estimated Time Investment
Afternoon Project (3-6 Hours)
Finish Used
Cedar Naturaltone Behr Waterproofing Wood Finish
Recommended Skill Level
Intermediate

Comments

Seasonal And Holiday

Pergola

Submitted by dekew on Fri, 06/07/2013 - 13:33

Built this great pergola from Anna's Weatherly Pergola Plan. I am very pleased on how it turned out. This was a fairly simple build and I added a few of my own touches to it. I used Red Cedar as my wood of choice. I also added a great Olympic Stain + Sealer to help keep it looking brandnew. I hope y'all enjoy the pictures.

Built from Plan(s)
Estimated Cost
$650
Estimated Time Investment
Weekend Project (10-20 Hours)
Finish Used
Olympic Stain+Sealer 704 Redwood

Pieces where first cut to size then sprayed with a Graco TrueCoat Plus. After drying the pergola was assempled.
Recommended Skill Level
Intermediate

Comments

dwm22

Thu, 06/27/2013 - 15:33

I like the red color and the added touches (lights, bird feeder, and "wall"). I finished mine in May and like the idea of adding small lights for the evenings. Well done!

jbayer80

Sun, 04/13/2014 - 11:17

I just wanted to say that 4th picture is so cool looking. Love the dark clouds and blue sky. Very nice pergola, by the way.

Dog Kennels

Submitted by Anonymous (not verified) on Sun, 04/24/2022 - 10:20

Here's some photos of customer products I have built, over the past 2 years.


by Bob

Cedar Planter

Submitted by bclute on Tue, 12/08/2015 - 10:28

I built these out of necessity to keep my tipsy Christmas decorations from blowing over. The last couple years I spent a lot of time picking these trees up off the ground. I like how they turned out and were relatively easy to build.

I was excited I got to use my Kreg Jig for the first time, which looked more difficult to use than it actually was. Although these are cedar planters I used all pine from big box orange. Some leftover from the farmhouse queen bed I built and the rest I purchased.

The finish didn't turn out as grey as I would have hoped using the steel wool and vinegar, but I still like the aged look. I added the "x" detail in the front afterward and instead of staining my wife thought it looked better natural. Either way I would have been happy. I will be able to use these year round in some capacity.

Built from Plan(s)
Estimated Cost
I used some scrap and some new, but these cost me about $15 each
Estimated Time Investment
Afternoon Project (3-6 Hours)
Finish Used
Steel Wool and Vinegar followed by Thompsons Water Seal
Recommended Skill Level
Beginner

Sliding Barn Door Console

Submitted by Anonymous (not verified) on Tue, 02/16/2016 - 12:14

We wanted to build this piece for so long, but couldn't find 1/2" metal anywhere. Mind you, we live in a pretty small town. We finally just decided to use 1/8" Metal, which works just fine in my opinion. We followed the rest of the tutorial, but I find that they don't go over how to install the metal at all. That needs a tutorial all on its own. We improvised with what we had here in our small town. We ideally wanted to find old metal, but that didn't happen. So we bought new steel, spray painted it & then beat it up so it looked more vintage. 

I'd say hanging the barn doors & the track is the longest part for sure. 

Built from Plan(s)
Estimated Cost
300 ( We live in Canada, so everything is much more expensive here )
Estimated Time Investment
Day Project (6-9 Hours)
Finish Used
Top is stained in our Beachwood ( colors mixed from the Minwax stains ) Bottom is painted in pure white. Hardware is black & beaten up
Matte Polyurethane finish.
Recommended Skill Level
Intermediate

Comments

Mini Planked Farmhouse Bedside Tables

By far my favorite project! It was challenging combining two sets of plans, changing dimensions, and learning new skills all at the same time yet so, so, rewarding.

I loved the look of the Mini Farmhouse Bedside Tables but wanted to create a bookshelf as well so, I used the planks idea from the Planked Wood Bedside table plans to create solid sides, and a plywood backing for support and to hide lamp and phone cables.

I have a very low bed, so I shortened the height and made the top proportionate in size.

I used 1x6s for the top, 1x4s for the bottom shelf, 1x3s and a 1x2 for the side panels, 1x4s for the drawer, and 1x2s for the trim and a piece of 1/4" plywood for the backing.

I found that the drawer fell out when you pulled it too far so I added piece of wood between the drawer and the top to keep it from dropping as you pulled it out. 

Estimated Cost
$120 for 2
Estimated Time Investment
Week Long Project (20 Hours or More)
Finish Used
Minwax Penetrating Stain and Minwax Polyurethane
White cabinet paint from Sherwin Williams
Drawer liner :)
Recommended Skill Level
Intermediate

Cedar Top Modification

Submitted by Anonymous (not verified) on Sun, 05/01/2016 - 16:45

We needed a compost bin to replace the pile forming in a corner of the yard. We referred to it as "The Buffet" to reflect how much our new puppy enjoyed digging through the scraps. 


I I substituted cedar fencing to top the bin instead of the plastic sheeting. I just liked the way it looked and it was more cost effective. The most difficult part of the project really is wrangling the chicken wire. It's sharp!

Estimated Cost
I spent about $75 on materials for the project. I spent about another $75 on things like screws, a new staple gun, some waterproofing stain, etc all of which I have left overs and can use again.

I used treated lumber and a waterproofing deck stain. This is not for an edibles garden. I'm just using the soil to fill in low spots around the yard. If I was building it for a veggie garden I would have used all cedar wood with no stain or a natural shellac.
Estimated Time Investment
Day Project (6-9 Hours)
Finish Used
Thompson waterproofing deck stain. Brushed on.
Recommended Skill Level
Intermediate

Sand box with benches

Submitted by Big Grizz on Sat, 04/28/2012 - 19:51

This sand box was very easy to build and it works great. The only thing I would change is cutting the "arm rests" at 7 1/2" instead of 6 1/2". I did that for the second set of arm rests (when I downloaded the plans many weeks ago the cut list was wrong). It made putting that section together a lot easier.

I easily spent more on the hinges (at $5 per hinge x 8 hinges) than I did on the wood itself.

My 1 and 1/2 year old loves playing in it and now I need to build a toy box for him to put all of his sand toys in!

Built from Plan(s)
Estimated Cost
$115
Estimated Time Investment
Afternoon Project (3-6 Hours)
Finish Used
Redwood colored stain
Recommended Skill Level
Starter Project

Comments

T. Holloway (not verified)

Mon, 09/17/2012 - 10:29

I just want to say that I asked for my husbands help, and his advice increased the price significantly.
He does not like to paint, and will spend the extra dollar to purchase pressure treated wood. So I sent him with my materials list and the wood he purchsed was $60.00, plus $22.00 for hinges and $10 for a box of deck screws. Actually, I am a artist and had wanted to paint the project to look like a big frog.

Playhouse castle

Submitted by vic b on Tue, 05/22/2012 - 17:44

visit us at www.madeatthisplace.blogspot.com, for details. We built a large platform off the ground and just put a house on top. Then gradually extended the design.

Estimated Cost
$5000
Estimated Time Investment
Week Long Project (20 Hours or More)
Recommended Skill Level
Intermediate

Comments

Aargh (not verified)

Wed, 05/23/2012 - 05:50

This is so bad ass!! One of my favorite memories of my own childhood was a huge cardboard box play house that my dad made. It has 3 or 4 rooms, I loved it. This takes it to a whole new level! Fantastic!!

birdsandsoap

Wed, 05/23/2012 - 15:12

...

^^^ There are no words up there because I am speechless. This is the coolest FORTRESS I've ever seen.

When are you installing the moat??

vicb (not verified)

Sat, 06/23/2012 - 07:46

Thanks guys, I'm lucky I have a husband who doesn't roll his eyes when I say, how about....... He loves building and so do I.

2x4 Outdoor Sectional with Matching Ottomans, Chairs & Table

Submitted by cqueiruga on Fri, 06/12/2020 - 21:01

We were looking for outdoor furniture for our deck, and for the size and amount we needed it would have cost us at least $2000. We really like the idea of having an outdoor sectional that we can also use for dining, and we had trouble finding a set we liked. We found Ana's plans for the 2x4 Outdoor Sectional, and i loved the look. After seeing what others have done with the plans, I thought I would be able to modify it to get everything we needed for much less cost than buying a set.

We ended up extending the size of the 2x4 outdoor sofa by one 24" section, for a total length of 96". I then used the same design to make two outdoor chairs, just reduced the length to 24". I modified the 2x4 outdoor coffee table plans to create two ottoman's that can be moved around to make the seating more lounge style Finally, I modified the coffee table plans to make a 5 foot outdoor dining table. All in all, it took about a week and I couldn't be happier with how it turned out!

Estimated Cost
$800 ($200 for wood, $600 for cushions)
Estimated Time Investment
Week Long Project (20 Hours or More)
Finish Used
Valspar Semi-Transparent Antique Oak Stain
Recommended Skill Level
Beginner

Comments

jwood4

Mon, 08/02/2021 - 09:44

Looks amazing! What method did you use (pocket holes, dowels, deck screws, etc) to join the visible portions like the arms?

DIY Sofa - Storage Sectional

Submitted by LittleG on Thu, 08/09/2012 - 15:38

Basically I took Ana's plan and tweaked it to create a diy sofa, a love seat, and a corner piece to make a sectional. All 3 pieces have the same basic design and function (they all have a storage compartment), although the corner piece, because of its placement and the thickness of the seating cushions, doesn't open unless the couch is opened first. We purchased custom cut, 6" thick foam cushions for the seats (we bought the XL-38 foam from https://www.buyfoam.com/, but if we had to do it again, we'd go with the XL-28 as the 38 is VERY firm). We also used upholstery fabric instead of a paint drop-cloth to cover the couches. The foam and upholstery fabric upped the overall cost significantly. Other changes from Ana's plan, I used 15/32" OSB because the 1/4" plywood just felt too flimsy (I'm a large guy). I also added I bolts to the underside of the seat before the foam and upholstery so I could add a stress relief rope to prevent the kids from opening the top and dropping it and ripping out the hinges. I used piano hinges as they seemed to me to provide the most support. Finally, I ended up using 1x2s for the base trim since I couldn't find any 2x2s that were straight and finish-ready, then I added router detailing to provide some visual interest. I used 3" pieces of 4x6 for the feet and added matching router detail. Additionally, I used T-Nuts and bolts to make the feet and base trim completely removable.


Built from Plan(s)
Estimated Cost
$1300
Estimated Time Investment
Week Long Project (20 Hours or More)
Finish Used
Minwax PolyShades Espresso
Recommended Skill Level
Intermediate

Comments

masmith38

Fri, 10/23/2015 - 11:11

Love this!  Totally want to think hard about doing this instead of buying when time for a new couch comes. Job well done, and the storage is a total plus.  

Chased

Sun, 05/15/2016 - 21:15

Where can I find the plans to this or the cut list

mikeyb

Mon, 10/03/2016 - 18:11

Awsome job!!! question? is that a typo on the cost to build??

mikeyb

Mon, 10/03/2016 - 18:12

Awsome job!!! question? is that a typo on the cost to build??

albertmick30

Mon, 08/17/2020 - 07:46

It is superb blog and i really appreciate your blog. It is because i always like the informative blogs. You did a great job and thanks for sharing.I am impressed by your post. It contains very informative data and i gain a lot information from it. It is very useful for me. Thanks for sharing and keep on sharing that type of posts.The Mobile App Developer Dubai provides good service you visit here site https://www.mistersaad.com/

Swinging Bench

Submitted by marchand on Sat, 09/13/2014 - 09:16

This bench is great! I was surprised how nicely it swings. I used rope with overhand loop knots to secure onto quick link hooks. Made it for my husband for his birthday but my whole family enjoys it daily!

This is my third project from Ana's website. I absolutely love to build and can't wait to do more! 


Estimated Cost
$100.00
Estimated Time Investment
Weekend Project (10-20 Hours)
Finish Used
Exterior semi-gloss white paint.
Recommended Skill Level
Beginner

Firewood Shed

When I decided to build a woodshed I was freaked out because I've never done anything even remotely like this.  I struggle with precision and patience, which made this project seem overwhelming as I knew I had to do a lot of prep work to properly level the ground, measure the wood, learn how to operate a saw, calculate angles to cut, etc...  I did a lot of research online and found this simple blueprint a great starting point.   I made some adjustments since i needed a much bigger shed, it's 11.5' x 7' x 7'.  Also, I already had the wood resting on pallets so I just build this shed around the wood with no built in floor.  Overall, I'm thrilled with how it turned out!

Built from Plan(s)
Estimated Cost
$500
Estimated Time Investment
Weekend Project (10-20 Hours)
Recommended Skill Level
Beginner

Comments

Basement Play Gym

Submitted by Anonymous (not verified) on Fri, 01/08/2021 - 05:51

With Christmas approaching and the realization that my three young boys had way too much “stuff”, I enrolled the help of my dad to build this amazing basement play area. When I found Ana’s plans for the play gym with monkey bars, I knew we were in business. I modified the design to fit our space and we were off. Such a fun build and my boys absolutely love spending time down there. Thanks so much for your continued inspiration and the confidence you give us mamas to build with the big boys, Ana!!

Estimated Cost
$1000
Estimated Time Investment
Week Long Project (20 Hours or More)
Recommended Skill Level
Intermediate

Comments

Backyard Bliss!

Submitted by kdins31 on Mon, 01/12/2015 - 09:26

I built this outdoor play area for my kids this past summer.  The area under that portion of the deck was always messy and muddy and so I wanted to make use of it.  I built the deck and anchored it with lag bolts to the deck supports.  On the one side I used rubber mulch and on the other there is play sand.  I dug holes in various locations and filled with gravel to allow for drainage under the sand and mulch.  For the awning I used plain cedar shingles.  I added a shower that is just regular 1/2" metal pipe with a hose adaptor.  The shower wall and fence are just old pallets that I had for a while, cut to size, which was pretty much random but they came out great.  I added a misting system under the awning that works great, the kids love the cool mist on the hot days. Overall, a heavy job ripping up the grass, moving the wood, gravel, stones, sand and mulch, but a fun deck build and even better experience doing this with my kids by my side!  

Estimated Time Investment
Week Long Project (20 Hours or More)
Recommended Skill Level
Intermediate

Comments

Einman10

Tue, 12/29/2015 - 17:10

I'm extremely interested in the plans for the bathroom vanity with the step stool that pulls out for kids to be able to reach the sink.  Is there a way I can get those plans?

Our Daughter's Playhouse

Submitted by jhedlund on Fri, 03/22/2013 - 06:17

We built this in early 2013. We ended up turning the house 90 degrees on the deck, because the slide worked best off the backside of the deck due to the various heights around the deck. The sloped back yard caused some challenges, but in the end it's a very sturdy deck with the cross beams attached. Thanks for posting these plans online for us, our 3 daughters are loving the playhouse and swingset! Here are some more pics of the project: http://www.flickr.com/photos/11031534@N00/sets/72157633009259873/

Estimated Time Investment
Week Long Project (20 Hours or More)
Recommended Skill Level
Intermediate

Comments

sgilly

Fri, 03/22/2013 - 15:07

Of course your girls love it - it's fantastic! Great job.

Robinwood

Fri, 03/22/2013 - 16:39

Love this - my grandson's back yard is too small to build something like this; which is why we had to settle for his loft bed airport/clubhouse.

slug

Thu, 06/27/2013 - 05:24

I'm planning on building two A-Frames and no playhouse, so my questions are focused there.

Did you do any modifications to swing portion of the plans?
Is it sturdy enough for an adult to swing on as well?
It looks like you put the posts in the ground, did you cement them in too?
How high off the ground is the bottom of the support beam for the swing?
Is there any issue side-to-side swaying?

Seasonal And Holiday
Back